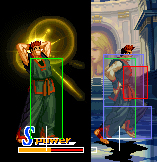
|
|
| (90 intermediate revisions by 12 users not shown) |
| Line 1: |
Line 1: |
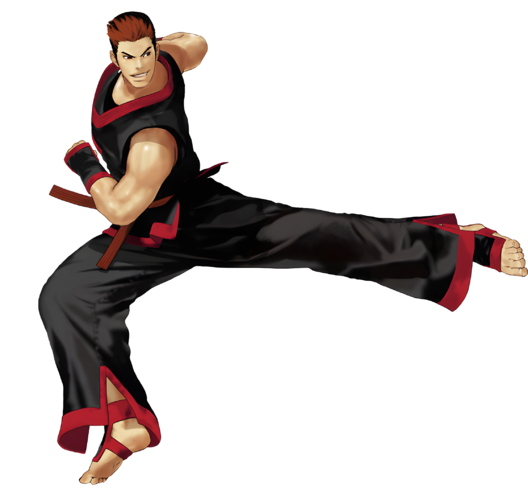
| [[File:KimDongHwan.PNG|right]]
| | {{MOTW Character Intro|char=Kim |content= |
|
| |
|
| {{GarouHeader}}
| | ==Introduction== |
| | |
| = Introduction = | |
| To come. | | To come. |
|
| |
|
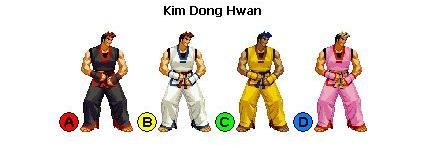
| == Character Colors ==<center>
| |
| [[File:Dongcolors.JPG]]
| |
| </center>
| |
|
| |
|
| =Gameplay Overview=
| |
| Coming soon.
| |
|
| |
|
| =Move List= | | == Gameplay == |
| | | {{Content Box|content= |
| == '''Normal Moves''' ==
| | To come. |
| | |
| == '''Command Normal Moves''' ==
| |
| '''Super Jump''': Press [[File:down.gif]], then [[File:upleft.gif]]/[[File:up.gif]]/[[File:upright.gif]]<BR>
| |
| '''Wall Jump''': Jump towards a wall and then press the opposite direction to it<br>
| |
| '''Ushiro-geri''' ('''BacKick'''): [[File:left.gif]]+[[File:Snkc.gif]] in the air<br>
| |
| | |
| == '''Special Command Moves''' ==
| |
| <center>
| |
| {| border="1em" cellspacing="0" width="50%" style="border: 1px solid #999; background: #F2F2F2;" | |
| |-
| |
| | '''Command''' || '''Move''' || '''Weak Damage'''|| '''Strong Damage'''
| |
| |-
| |
| | [[File:qcb.gif]] + [[File:kick.gif]] || '''Raimei Zan''' || 19 || 22
| |
| |-
| |
| | [[File:dp.gif]] + [[File:punch.gif]] || '''Kuusa-jin''' || 18 || 24
| |
| |-
| |
| | [[File:dp.gif]] + [[File:punch.gif]] (Break) || '''Kuusa-jin''' || 5 || 8
| |
| |-
| |
| | air [[File:down.gif]] + [[File:kick.gif]] || '''Hishou-kyaku''' || 10-22 || 10-22
| |
| |-
| |
| | [[File:qcf.gif]] + [[File:kick.gif]]|| '''Shiden-kyaku''' || 10 || 12
| |
| |-
| |
| | [[File:hcb.gif]] + [[File:snkc.gif]] || '''Ashi Binta''' || -- || 28
| |
| |-
| |
| | [[File:qcf.gif]], [[File:qcf.gif]] + [[File:punch.gif]] (in air) || '''Super Dong Hwan Kick''' || 33 || 55
| |
| |-
| |
| | [[File:qcf.gif]], [[File:qcf.gif]] + [[File:kick.gif]] || '''Raimei Dan''' || 35 || 37/41/48
| |
| |-
| |
| | [[File:qcf.gif]], [[File:qcf.gif]], [[File:qcf.gif]] + [[File:snkc.gif]] || '''Ore-sama Hou'ou Kyaku''' || -- || 53
| |
| |}
| |
| </center>
| |
|
| |
|
| =Frame Data=
| |
| Source : http://www13.atwiki.jp/garoumow/pages/21.html
| |
| <table border="1em" cellspacing="0" width="50%" style="border: 1px solid #999; background: #F2F2F2;" >
| |
| <tr>
| |
| <!--0-0--><td style=""><font><font>'''Move'''</font></font></td>
| |
| <!--0-1--><td style=""><font><font class="">'''Startup'''</font></font></td>
| |
| <!--0-2--><td style=""><font><font>'''Guard Adv.'''</font></font></td>
| |
| <!--0-3--><td style=""><font><font>'''Hit Adv.'''</font></font></td>
| |
| <!--0-4--><td style=""><font><font>'''GC Value'''</font></font></td>
| |
| <!--0-5--><td style=""><font><font>Cancellation</font></font></td>
| |
| <!--0-6--><td style=""><font><font>'''Remarks'''</font></font></td></tr>
| |
| <tr class="atwiki_tr_even atwiki_tr_2"> <!--1-0--><td style=""><font><font class="">Near Standing A</font></font></td>
| |
| <!--1-1--><td style=""><font><font>Three</font></font></td>
| |
| <!--1-2--><td style=""><font><font>+6</font></font></td>
| |
| <!--1-3--><td style=""><font><font>+6</font></font></td>
| |
| <!--1-4--><td style=""><font><font>Four</font></font></td>
| |
| <!--1-5--><td style=""><font><font>Chain / ◯</font></font></td>
| |
| <!--1-6--><td style=""></td></tr>
| |
| <tr class="atwiki_tr_odd atwiki_tr_3"> <!--2-0--><td style=""><font><font>Near Standing B</font></font></td>
| |
| <!--2-1--><td style=""><font><font>Four</font></font></td>
| |
| <!--2-2--><td style=""><font><font>+4</font></font></td>
| |
| <!--2-3--><td style=""><font><font>+4</font></font></td>
| |
| <!--2-4--><td style=""><font><font>Four</font></font></td>
| |
| <!--2-5--><td style=""><font><font>◯</font></font></td>
| |
| <!--2-6--><td style=""></td></tr>
| |
| <tr class="atwiki_tr_even atwiki_tr_4"> <!--3-0--><td style=""><font><font>Near Standing C</font></font></td>
| |
| <!--3-1--><td style=""><font><font>Five</font></font></td>
| |
| <!--3-2--><td style=""><font><font>-Five</font></font></td>
| |
| <!--3-3--><td style=""><font><font>-Five</font></font></td>
| |
| <!--3-4--><td style=""><font><font>3,3</font></font></td>
| |
| <!--3-5--><td style=""><font><font>※ ◯</font></font></td>
| |
| <!--3-6--><td style=""></td></tr>
| |
| <tr class="atwiki_tr_odd atwiki_tr_5"> <!--4-0--><td style=""><font><font>Near Standing D</font></font></td>
| |
| <!--4-1--><td style=""><font><font>Four</font></font></td>
| |
| <!--4-2--><td style=""><font><font>-6</font></font></td>
| |
| <!--4-3--><td style=""><font><font>-6</font></font></td>
| |
| <!--4-4--><td style=""><font><font>3,3</font></font></td>
| |
| <!--4-5--><td style=""><font><font>※ ◯</font></font></td>
| |
| <!--4-6--><td style=""></td></tr>
| |
| <tr class="atwiki_tr_even atwiki_tr_6"> <!--5-0--><td style=""><font><font>Far Standing A</font></font></td>
| |
| <!--5-1--><td style=""><font><font>Three</font></font></td>
| |
| <!--5-2--><td style=""><font><font>+6</font></font></td>
| |
| <!--5-3--><td style=""><font><font>+6</font></font></td>
| |
| <!--5-4--><td style=""><font><font>Four</font></font></td>
| |
| <!--5-5--><td style=""><font><font>◯</font></font></td>
| |
| <!--5-6--><td style=""></td></tr>
| |
| <tr class="atwiki_tr_odd atwiki_tr_7"> <!--6-0--><td style=""><font><font>Far Standing B</font></font></td>
| |
| <!--6-1--><td style=""><font><font>Four</font></font></td>
| |
| <!--6-2--><td style=""><font><font>0</font></font></td>
| |
| <!--6-3--><td style=""><font><font>0</font></font></td>
| |
| <!--6-4--><td style=""><font><font>Four</font></font></td>
| |
| <!--6-5--><td style=""><font><font>◯</font></font></td>
| |
| <!--6-6--><td style=""></td></tr>
| |
| <tr class="atwiki_tr_even atwiki_tr_8"> <!--7-0--><td style=""><font><font>Far Standing C</font></font></td>
| |
| <!--7-1--><td style=""><font><font>Twelve</font></font></td>
| |
| <!--7-2--><td style=""><font><font>-10</font></font></td>
| |
| <!--7-3--><td style=""><font><font>-10</font></font></td>
| |
| <!--7-4--><td style=""><font><font>Five</font></font></td>
| |
| <!--7-5--><td style=""><font><font>△</font></font></td>
| |
| <!--7-6--><td style=""></td></tr>
| |
| <tr class="atwiki_tr_odd atwiki_tr_9"> <!--8-0--><td style=""><font><font>Far Standing D</font></font></td>
| |
| <!--8-1--><td style=""><font><font>13</font></font></td>
| |
| <!--8-2--><td style=""><font><font>-1</font></font></td>
| |
| <!--8-3--><td style=""><font><font>-1</font></font></td>
| |
| <!--8-4--><td style=""><font><font>Five</font></font></td>
| |
| <!--8-5--><td style=""><font><font>× Note</font></font></td>
| |
| <!--8-6--><td style=""></td></tr>
| |
| <tr class="atwiki_tr_even atwiki_tr_10"> <!--9-0--><td style=""><font><font>Crouched A</font></font></td>
| |
| <!--9-1--><td style=""><font><font>Five</font></font></td>
| |
| <!--9-2--><td style=""><font><font>+2</font></font></td>
| |
| <!--9-3--><td style=""><font><font>+2</font></font></td>
| |
| <!--9-4--><td style=""><font><font>Four</font></font></td>
| |
| <!--9-5--><td style=""><font><font>Chain / ×</font></font></td>
| |
| <!--9-6--><td style=""></td></tr>
| |
| <tr class="atwiki_tr_odd atwiki_tr_11"> <!--10-0--><td style=""><font><font>Crouched B</font></font></td>
| |
| <!--10-1--><td style=""><font><font>Four</font></font></td>
| |
| <!--10-2--><td style=""><font><font>+6</font></font></td>
| |
| <!--10-3--><td style=""><font><font>+6</font></font></td>
| |
| <!--10-4--><td style=""><font><font>Four</font></font></td>
| |
| <!--10-5--><td style=""><font><font>Chain / ◯</font></font></td>
| |
| <!--10-6--><td style=""></td></tr>
| |
| <tr class="atwiki_tr_even atwiki_tr_12"> <!--11-0--><td style=""><font><font>Crouched C</font></font></td>
| |
| <!--11-1--><td style=""><font><font>Five</font></font></td>
| |
| <!--11-2--><td style=""><font><font>+4</font></font></td>
| |
| <!--11-3--><td style=""><font><font>+4</font></font></td>
| |
| <!--11-4--><td style=""><font><font>Five</font></font></td>
| |
| <!--11-5--><td style=""><font><font>◯</font></font></td>
| |
| <!--11-6--><td style=""></td></tr>
| |
| <tr class="atwiki_tr_odd atwiki_tr_13"> <!--12-0--><td style=""><font><font>Crouched D</font></font></td>
| |
| <!--12-1--><td style=""><font><font>Seven</font></font></td>
| |
| <!--12-2--><td style=""><font><font>-8</font></font></td>
| |
| <!--12-3--><td style=""><font><font>down</font></font></td>
| |
| <!--12-4--><td style=""><font><font>Five</font></font></td>
| |
| <!--12-5--><td style=""><font><font>×</font></font></td>
| |
| <!--12-6--><td style=""></td></tr>
| |
| <tr class="atwiki_tr_even atwiki_tr_14"> <!--13-0--><td style=""><font><font>Jump A</font></font></td>
| |
| <!--13-1--><td style=""><font><font>Five</font></font></td>
| |
| <!--13-2--><td style=""></td>
| |
| <!--13-3--><td style=""></td>
| |
| <!--13-4--><td style=""><font><font>Four</font></font></td>
| |
| <!--13-5--><td style=""><font><font>◯</font></font></td>
| |
| <!--13-6--><td style=""></td></tr>
| |
| <tr class="atwiki_tr_odd atwiki_tr_15"> <!--14-0--><td style=""><font><font>Jump B</font></font></td>
| |
| <!--14-1--><td style=""><font><font>Six</font></font></td>
| |
| <!--14-2--><td style=""></td>
| |
| <!--14-3--><td style=""></td>
| |
| <!--14-4--><td style=""><font><font>Four</font></font></td>
| |
| <!--14-5--><td style=""><font><font>◯</font></font></td>
| |
| <!--14-6--><td style=""></td></tr>
| |
| <tr class="atwiki_tr_even atwiki_tr_16"> <!--15-0--><td style=""><font><font>Jump C</font></font></td>
| |
| <!--15-1--><td style=""><font><font>Six</font></font></td>
| |
| <!--15-2--><td style=""></td>
| |
| <!--15-3--><td style=""></td>
| |
| <!--15-4--><td style=""><font><font>Five</font></font></td>
| |
| <!--15-5--><td style=""><font><font>◯</font></font></td>
| |
| <!--15-6--><td style=""></td></tr>
| |
| <tr class="atwiki_tr_odd atwiki_tr_17"> <!--16-0--><td style=""><font><font>Jump D</font></font></td>
| |
| <!--16-1--><td style=""><font><font>Eight</font></font></td>
| |
| <!--16-2--><td style=""></td>
| |
| <!--16-3--><td style=""></td>
| |
| <!--16-4--><td style=""><font><font>Five</font></font></td>
| |
| <!--16-5--><td style=""><font><font>◯</font></font></td>
| |
| <!--16-6--><td style=""></td></tr>
| |
| <tr class="atwiki_tr_even atwiki_tr_18"> <!--17-0--><td style=""><font><font>Upper avoid attack</font></font></td>
| |
| <!--17-1--><td style=""><font><font>Ten</font></font></td>
| |
| <!--17-2--><td style=""><font><font>+4</font></font></td>
| |
| <!--17-3--><td style=""><font><font>-2</font></font></td>
| |
| <!--17-4--><td style=""><font><font>Six</font></font></td>
| |
| <!--17-5--><td style=""><font><font>▽</font></font></td>
| |
| <!--17-6--><td style=""><font><font>1 ~ 5F upper body invincible</font></font></td></tr>
| |
| <tr class="atwiki_tr_odd atwiki_tr_19"> <!--18-0--><td style=""><font><font>Lower avoid attack</font></font></td>
| |
| <!--18-1--><td style=""><font><font>twenty five</font></font></td>
| |
| <!--18-2--><td style=""><font><font>+5</font></font></td>
| |
| <!--18-3--><td style=""><font><font>-1</font></font></td>
| |
| <!--18-4--><td style=""><font><font>Six</font></font></td>
| |
| <!--18-5--><td style=""><font><font>×</font></font></td>
| |
| <!--18-6--><td style=""></td></tr>
| |
| <tr class="atwiki_tr_even atwiki_tr_20"> <!--19-0--><td style=""><font><font>Kick back</font></font></td>
| |
| <!--19-1--><td style=""><font><font>Four</font></font></td>
| |
| <!--19-2--><td style=""></td>
| |
| <!--19-3--><td style=""></td>
| |
| <!--19-4--><td style=""><font><font>Nine</font></font></td>
| |
| <!--19-5--><td style=""><font><font>◯</font></font></td>
| |
| <!--19-6--><td style=""></td></tr>
| |
| </table>
| |
|
| |
|
| =Hit Boxes and Frame Data=
| |
|
| |
|
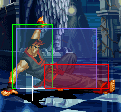
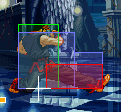
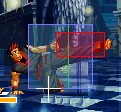
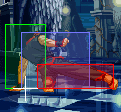
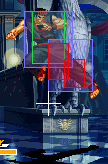
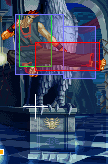
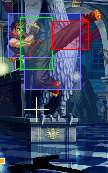
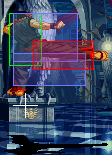
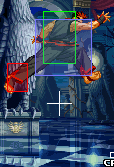
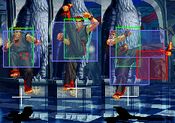
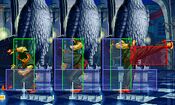
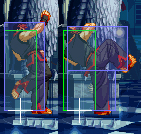
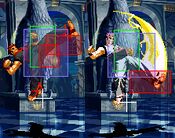
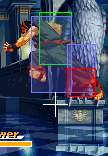
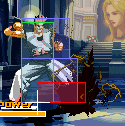
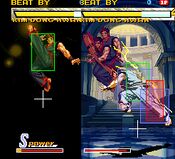
| Legend:<BR>
| | {{ProConTable |
| <FONT COLOR="#FF0000">Hit Box</FONT>: Area that will hit the opponent<BR>
| | |pros= |
| <FONT COLOR="#7777FF">Hurt Box</FONT>: Area where you can get hit. A move is invincible if the <FONT COLOR="7777FF">Hurt Box</FONT> is absent.<BR>
| | * '''Best character at hit & run play''' |
| <FONT COLOR="#FFAA00">Throw Box/Range</FONT>: Active throw frames and range. Your opponent will be thrown in this field if not in block or hit stun.<BR>
| | * '''Very versatile 0f air super move that can be used to punish from the air''' |
| <FONT COLOR="#FF66FF">Projectile Box</FONT>: Hit box on a projectile attack<BR>
| | * '''Has an air throw''' |
| <FONT COLOR="#CCCCFF">Guard/Counter Box</FONT>: The Guard Box or Counter Box. This appears when blocking or using a counter move.<BR>
| | * '''Has both a super jump and wall jump''' |
| <FONT COLOR="#00FF00">Push Box</FONT>: Has no bearing on hurt/hit boxes. Just allows characters to not pass through each other.<br>
| | |cons= |
| '''Command''' = the input for the attack.<BR> | | * '''Reliant on meter for more damaging combos and punish opportunities''' |
| '''Start Up''' = How many start up frames a move/attack has. <BR> | | * '''Break move is unsafe on block''' |
| '''Hit''' = When the attack hits. <BR> | |
| '''Block''' = When the attack is blocked. <BR> | |
| '''+''' signifies how many advantage frames the attacker has. <BR> | |
| '''-''' signifies how many disadvantage frames the attacker has. <BR> | |
| '''KD''' means the attack will knock the opponent down.
| |
| <br>
| |
|
| |
|
| <center>
| | }} |
| | }} |
| | }} |
|
| |
|
|
| |
|
| [[File:DongSCR.jpg]]
| | '''Character Colors''' |
|
| |
|
| '''Standing, Crouching and Running'''
| | [[File:Dongcolors.JPG]] |
|
| |
|
| <br>
| |
|
| |
|
| [[File:DongTaunt.jpg]]
| | ==Move List== |
|
| |
|
| '''Taunt'''
| | Frame Data Source : http://www13.atwiki.jp/garoumow/pages/21.html and https://w.atwiki.jp/garoumow/pages/72.html |
|
| |
|
| <br>
| | {{MOTW Legend}} |
|
| |
|
| [[File:DongWallJump.jpg]]
| |
|
| |
|
| '''Wall jump'''
| |
|
| |
|
| <br>
| | Notes: |
|
| |
|
| [[File:DongSuperJump.jpg]]
| | * Special/Super moves with <span style="color:#ff0000;">"Guard" data in red text</span> are impossible to just defend at 0-pixel health bar. |
|
| |
|
| '''Super Jump'''
| | * For P-Power Raimei Dan 236(x2)D, the last hit, for every level, is impossible to just defend at 0-pixel health bar. |
|
| |
|
| <br>
| |
|
| |
|
| [[File:DongJump.jpg]]
| |
|
| |
|
| {| border="1em" cellspacing="0" width="20%" style="border: 1px solid #999; background: #F2F2F2;" | | {| border="1em" cellspacing="0" style="border: 1px solid #999;" |
| | | align="center" | Standing, Crouching and Running || align="center" | Taunt || align="center" | Jumping |
| |- | | |- |
| | '''Command''' || '''Total Frames''' | | | align="center" | [[File:DongSCR.jpg]] || align="center" | [[File:DongTaunt.jpg]] || align="center" | [[File:DongJump.jpg]] |
| |- | | |- |
| | Normal [[file:up1.gif]] || '''35''' | | | align="center" | || align="center" | || align="center" | 35F. Can super jump and wall jump. |
| |} | | |} |
|
| |
|
| <br>
| |
|
| |
|
| [[File:DongThrow.jpg]] | | '''Super Jump''': Press [[File:d.png]], then [[File:u.png]]/[[File:u.png]]/[[File:uf.png]] Dong cannot JD during a superjump, allowing opponents to anti air<BR> |
|
| |
|
| {| border="1em" cellspacing="0" width="20%" style="border: 1px solid #999; background: #F2F2F2;"
| | '''Wall Jump''': Jump towards a wall and then press the opposite direction to it. Dong retains his air JD ability after wall jump. It is a good tool to escape the corner.<br> |
| |-
| |
| | '''Command''' || '''Total Frames'''
| |
| |-
| |
| | Close [[File:B.gif]]/[[File:f.gif]] + [[File:snkc.gif]] || '''9'''
| |
| |}
| |
|
| |
|
| <br>
| |
|
| |
|
| [[File:DongFwdFeint.jpg]]
| |
|
| |
|
| {| border="1em" cellspacing="0" width="20%" style="border: 1px solid #999; background: #F2F2F2;"
| | ===Close Standing Normals=== |
| |-
| |
| | '''Command''' || '''Total Frames'''
| |
| |-
| |
| | [[File:f.gif]] + [[File:snka.gif]] + [[File:snkc.gif]] || '''10'''
| |
| |}
| |
|
| |
|
| <br> | | ===== <span class="invisible-header">Close 5A</span> ===== |
| | <font style="visibility:hidden" size="0"></font> |
| | {{MoveData |
| | |image=DongCloseA.jpg |
| | |name=c.5A |
| | |subtitle= |
| | |caption= |
| | |data= |
| | {{AttackData-Garou |
| | |Damage=4 |
| | |Guard=Mid |
| | |Startup=3 |
| | |Active=4 |
| | |Recovery=5 |
| | |Total=12 |
| | |Hit Adv=+6 |
| | |Block Adv=+6 |
| | |Feint Cancel=◯ |
| | |Cancel on Hit=◯ / ∞ |
| | |Cancel on Block=◯ / ∞ |
| | |Guard Crush Value=4 |
| | |description=Standing jab. |
| | }} |
| | }} |
|
| |
|
| [[File:DongDwnFeint.jpg]]
| |
|
| |
|
| {| border="1em" cellspacing="0" width="20%" style="border: 1px solid #999; background: #F2F2F2;"
| |
| |-
| |
| | '''Command''' || '''Total Frames'''
| |
| |-
| |
| | [[File:down.gif]] + [[File:snka.gif]] + [[File:snkc.gif]] || '''10'''
| |
| |}
| |
|
| |
|
| <br> | | ===== <span class="invisible-header">Close 5B</span> ===== |
| | <font style="visibility:hidden" size="0"></font> |
| | {{MoveData |
| | |image=DongCloseB.jpg |
| | |name=c.5B |
| | |subtitle= |
| | |caption= |
| | |data= |
| | {{AttackData-Garou |
| | |Damage=6 |
| | |Guard=Mid |
| | |Startup=4 |
| | |Active=4 |
| | |Recovery=7 |
| | |Total=15 |
| | |Hit Adv=+4 |
| | |Block Adv=+4 |
| | |Feint Cancel=◯ |
| | |Cancel on Hit=◯ |
| | |Cancel on Block=◯ |
| | |Guard Crush Value=4 |
| | |description= |
| | }} |
| | }} |
|
| |
|
| [[File:DongCloseA.jpg]]
| |
|
| |
|
| {| border="1em" cellspacing="0" width="20%" style="border: 1px solid #999; background: #F2F2F2;"
| |
| |-
| |
| | '''Command''' || '''Start Up''' || '''Hit'''|| '''Guard'''
| |
| |-
| |
| | '''Close [[File:snka.gif]]''' || '''3''' || '''+6''' || '''+6'''
| |
| |}
| |
|
| |
|
| <br> | | ===== <span class="invisible-header">Close 5C</span> ===== |
| | <font style="visibility:hidden" size="0"></font> |
| | {{MoveData |
| | |image=DongCloseC.jpg |
| | |name=c.5C |
| | |subtitle= |
| | |caption= |
| | |data= |
| | {{AttackData-Garou |
| | |Damage=6, 6 |
| | |Guard=Mid |
| | |Startup=5 |
| | |Active=1, 4 |
| | |Recovery=22 |
| | |Total=32 |
| | |Hit Adv=-5 |
| | |Block Adv=-5 |
| | |Feint Cancel=※ |
| | |Cancel on Hit=※ |
| | |Cancel on Block=※ |
| | |Guard Crush Value=3, 3 |
| | |description=It can anti-air jump startups when trying to throw, is double hit and you can feint cancel it to get a combo. |
| | }} |
| | }} |
|
| |
|
| [[File:DongCloseB.jpg]]
| |
|
| |
|
| {| border="1em" cellspacing="0" width="20%" style="border: 1px solid #999; background: #F2F2F2;"
| |
| |-
| |
| | '''Command''' || '''Start Up''' || '''Hit'''|| '''Guard'''
| |
| |-
| |
| | '''Close [[File:snkb.gif]]''' || '''4''' || '''+4''' || '''+4'''
| |
| |}
| |
|
| |
|
| <br> | | ===== <span class="invisible-header">Close 5D</span> ===== |
| | <font style="visibility:hidden" size="0"></font> |
| | {{MoveData |
| | |image=DongCloseD.jpg |
| | |name=c.5D |
| | |subtitle= |
| | |caption= |
| | |data= |
| | {{AttackData-Garou |
| | |Damage=6, 6 |
| | |Guard=Mid |
| | |Startup=4 |
| | |Active=1, 《5》, 3 |
| | |Recovery=24 |
| | |Total=37 |
| | |Hit Adv=-6 |
| | |Block Adv=-6 |
| | |Feint Cancel=※ |
| | |Cancel on Hit=※ |
| | |Cancel on Block=※ |
| | |Guard Crush Value=3, 3 |
| | |description= |
| | }} |
| | }} |
|
| |
|
| [[File:DongCloseC.jpg]]
| |
|
| |
|
| {| border="1em" cellspacing="0" width="20%" style="border: 1px solid #999; background: #F2F2F2;"
| |
| |-
| |
| | '''Command''' || '''Start Up''' || '''Hit'''|| '''Guard'''
| |
| |-
| |
| | '''Close [[File:snkc.gif]]''' || '''5''' || '''-5''' || '''-5'''
| |
| |}
| |
|
| |
|
| <br>
| | ===Far Standing Normals=== |
|
| |
|
| [[File:DongCloseD.jpg]]
| | ===== <span class="invisible-header">Far 5A</span> ===== |
| | <font style="visibility:hidden" size="0"></font> |
| | {{MoveData |
| | |image=DongStandA.jpg |
| | |name=f.5A |
| | |subtitle= |
| | |caption= |
| | |data= |
| | {{AttackData-Garou |
| | |Damage=5 |
| | |Guard=Mid |
| | |Startup=3 |
| | |Active=4 |
| | |Recovery=5 |
| | |Total=12 |
| | |Hit Adv=+6 |
| | |Block Adv=+6 |
| | |Feint Cancel=◯ |
| | |Cancel on Hit=◯ / ∞ |
| | |Cancel on Block=◯ / ∞ |
| | |Guard Crush Value=4 |
| | |description= |
| | }} |
| | }} |
|
| |
|
| {| border="1em" cellspacing="0" width="30%" style="border: 1px solid #999; background: #F2F2F2;"
| |
| |-
| |
| | '''Command''' || '''Start Up''' || '''Hit'''|| '''Guard'''
| |
| |-
| |
| | '''Close [[File:snkd.gif]]''' || '''4''' || '''-6''' || '''-6'''
| |
| |}
| |
|
| |
|
| <br>
| |
|
| |
|
| [[File:DongStandA.jpg]]
| | ===== <span class="invisible-header">Far 5B</span> ===== |
| | <font style="visibility:hidden" size="0"></font> |
| | {{MoveData |
| | |image=DongStandB.jpg |
| | |name=f.5B |
| | |subtitle= |
| | |caption= |
| | |data= |
| | {{AttackData-Garou |
| | |Damage=7 |
| | |Guard=Mid |
| | |Startup=4 |
| | |Active=3 |
| | |Recovery=12 |
| | |Total=19 |
| | |Hit Adv=0 |
| | |Block Adv=0 |
| | |Feint Cancel=◯ |
| | |Cancel on Hit=◯ |
| | |Cancel on Block=◯ |
| | |Guard Crush Value=4 |
| | |description= |
| | }} |
| | }} |
|
| |
|
| {| border="1em" cellspacing="0" width="20%" style="border: 1px solid #999; background: #F2F2F2;"
| |
| |-
| |
| | '''Command''' || '''Start Up''' || '''Hit'''|| '''Guard'''
| |
| |-
| |
| | '''Far [[File:snka.gif]]''' || '''3''' || '''+6''' || '''+6'''
| |
| |}
| |
|
| |
|
| <br>
| |
|
| |
|
| [[File:DongStandB.jpg]]
| | ===== <span class="invisible-header">Far 5C</span> ===== |
| | <font style="visibility:hidden" size="0"></font> |
| | {{MoveData |
| | |image=DongStandC.jpg |
| | |name=f.5C |
| | |subtitle= |
| | |caption= |
| | |data= |
| | {{AttackData-Garou |
| | |Damage=14 |
| | |Guard=Mid |
| | |Startup=12 |
| | |Active=3 |
| | |Recovery=28 |
| | |Total=43 |
| | |Hit Adv=-10 |
| | |Block Adv=-10 |
| | |Feint Cancel=△ |
| | |Cancel on Hit=X |
| | |Cancel on Block=◯ |
| | |Guard Crush Value=5 |
| | |description= |
| | }} |
| | }} |
|
| |
|
| {| border="1em" cellspacing="0" width="20%" style="border: 1px solid #999; background: #F2F2F2;"
| |
| |-
| |
| | '''Command''' || '''Start Up''' || '''Hit'''|| '''Guard'''
| |
| |-
| |
| | '''Far [[File:snkb.gif]]''' || '''4''' || '''0''' || '''0'''
| |
| |}
| |
|
| |
|
| <br>
| |
|
| |
|
| [[File:DongStandC.jpg]]
| | ===== <span class="invisible-header">Far 5D</span> ===== |
| | <font style="visibility:hidden" size="0"></font> |
| | {{MoveData |
| | |image=DongStandD.jpg |
| | |name=f.5D |
| | |subtitle= |
| | |caption= |
| | |data= |
| | {{AttackData-Garou |
| | |Damage=14 |
| | |Guard=Mid |
| | |Startup=13 |
| | |Active=2 |
| | |Recovery=20 |
| | |Total=35 |
| | |Hit Adv=-1 |
| | |Block Adv=-1 |
| | |Feint Cancel=X |
| | |Cancel on Hit=X |
| | |Cancel on Block=X |
| | |Guard Crush Value=5 |
| | |description= |
|
| |
|
| {| border="1em" cellspacing="0" width="20%" style="border: 1px solid #999; background: #F2F2F2;"
| | Note: It's possible to reduce the move's overall recovery by canceling its landing recovery. |
| |-
| | }} |
| | '''Command''' || '''Start Up''' || '''Hit'''|| '''Guard'''
| | }} |
| |-
| |
| | '''Far [[File:snkc.gif]]''' || '''12''' || '''-10''' || '''-10'''
| |
| |}
| |
|
| |
|
| <br>
| |
|
| |
|
| [[File:DongStandD.jpg]]
| |
|
| |
|
| {| border="1em" cellspacing="0" width="20%" style="border: 1px solid #999; background: #F2F2F2;"
| | ===Crouching Normals=== |
| |-
| |
| | '''Command''' || '''Start Up''' || '''Hit'''|| '''Guard'''
| |
| |-
| |
| | '''Far [[File:snkd.gif]]''' || '''13''' || '''-1''' || '''-1'''
| |
| |}
| |
|
| |
|
| | ===== <span class="invisible-header">2A</span> ===== |
| | <font style="visibility:hidden" size="0"></font> |
| | {{MoveData |
| | |image=DongDownA.jpg |
| | |name=2A |
| | |subtitle= |
| | |caption= |
| | |data= |
| | {{AttackData-Garou |
| | |Damage=4 |
| | |Guard=Low |
| | |Startup=5 |
| | |Active=4 |
| | |Recovery=9 |
| | |Total=18 |
| | |Hit Adv=+2 |
| | |Block Adv=+2 |
| | |Feint Cancel=X |
| | |Cancel on Hit=X / ∞ |
| | |Cancel on Block=X / ∞ |
| | |Guard Crush Value=4 |
| | |description= |
| | }} |
| | }} |
|
| |
|
| <br>
| |
|
| |
|
| [[File:DongDownA.jpg]]
| |
|
| |
|
| {| border="1em" cellspacing="0" width="20%" style="border: 1px solid #999; background: #F2F2F2;"
| | ===== <span class="invisible-header">2B</span> ===== |
| |- | | <font style="visibility:hidden" size="0"></font> |
| | '''Command''' || '''Start Up''' || '''Hit'''|| '''Guard''' | | {{MoveData |
| |- | | |image=DongDownB.jpg |
| | '''[[File:down.gif]] + [[File:snka.gif]]''' || '''5''' || '''+2''' || '''+2''' | | |name=2B |
| |} | | |subtitle= |
| | |caption= |
| | |data= |
| | {{AttackData-Garou |
| | |Damage=6 |
| | |Guard=Low |
| | |Startup=4 |
| | |Active=4 |
| | |Recovery=5 |
| | |Total=13 |
| | |Hit Adv=+6 |
| | |Block Adv=+6 |
| | |Feint Cancel=◯ |
| | |Cancel on Hit=◯ / ∞ |
| | |Cancel on Block=◯ / ∞ |
| | |Guard Crush Value=4 |
| | |description= |
| | }} |
| | }} |
|
| |
|
| <br>
| |
|
| |
|
| [[File:DongDownB.jpg]]
| |
|
| |
|
| {| border="1em" cellspacing="0" width="20%" style="border: 1px solid #999; background: #F2F2F2;"
| | ===== <span class="invisible-header">2C</span> ===== |
| |- | | <font style="visibility:hidden" size="0"></font> |
| | '''Command''' || '''Start Up''' || '''Hit'''|| '''Guard''' | | {{MoveData |
| |- | | |image=DongDownC.jpg |
| | '''[[File:down.gif]] + [[File:snkb.gif]]''' || '''4''' || '''+6''' || '''+6''' | | |name=2C |
| |} | | |subtitle= |
| | |caption= |
| | |data= |
| | {{AttackData-Garou |
| | |Damage=10 |
| | |Guard=Mid |
| | |Startup=5 |
| | |Active=3 |
| | |Recovery=14 |
| | |Total=22 |
| | |Hit Adv=+4 |
| | |Block Adv=+4 |
| | |Feint Cancel=◯ |
| | |Cancel on Hit=◯ |
| | |Cancel on Block=◯ |
| | |Guard Crush Value=5 |
| | |description= |
| | }} |
| | }} |
|
| |
|
| <br>
| |
|
| |
|
| [[File:DongDownC.jpg]]
| |
|
| |
|
| {| border="1em" cellspacing="0" width="20%" style="border: 1px solid #999; background: #F2F2F2;"
| | ===== <span class="invisible-header">2D</span> ===== |
| |- | | <font style="visibility:hidden" size="0"></font> |
| | '''Command''' || '''Start Up''' || '''Hit'''|| '''Guard''' | | {{MoveData |
| |- | | |image=DongDownD.jpg |
| | '''[[File:down.gif]] + [[File:snkc.gif]]''' || '''5''' || '''-4''' || '''-4''' | | |name=2D |
| |} | | |subtitle= |
| | |caption= |
| | |data= |
| | {{AttackData-Garou |
| | |Damage=10 |
| | |Guard=Low |
| | |Startup=7 |
| | |Active=4 |
| | |Recovery=25 |
| | |Total=36 |
| | |Hit Adv=KD |
| | |Block Adv=-8 |
| | |Feint Cancel=X |
| | |Cancel on Hit=X |
| | |Cancel on Block=X |
| | |Guard Crush Value=5 |
| | |description=One of the best sweep in the game. Can be punished with supers or when not spaced properly. |
| | }} |
| | }} |
|
| |
|
| <br>
| |
|
| |
|
| [[File:DongDownD.jpg]]
| |
|
| |
|
| {| border="1em" cellspacing="0" width="20%" style="border: 1px solid #999; background: #F2F2F2;"
| | ===Jumping Normals=== |
| |-
| |
| | '''Command''' || '''Start Up''' || '''Hit'''|| '''Guard'''
| |
| |-
| |
| | '''[[File:down.gif]] + [[File:snkd.gif]]''' || '''7''' || '''KD''' || '''-8'''
| |
| |}
| |
|
| |
|
| <br> | | ===== <span class="invisible-header">jA</span> ===== |
| | <font style="visibility:hidden" size="0"></font> |
| | {{MoveData |
| | |image=DongJumpA.jpg |
| | |name=j.A |
| | |subtitle= |
| | |caption= |
| | |data= |
| | {{AttackData-Garou |
| | |Damage=5 |
| | |Guard=High |
| | |Startup=5 |
| | |Active=7 |
| | |Recovery= |
| | |Total= |
| | |Hit Adv= |
| | |Block Adv= |
| | |Feint Cancel= |
| | |Cancel on Hit=◯ |
| | |Cancel on Block=◯ |
| | |Guard Crush Value=4 |
| | |description= Can beat out upper-body evasion attacks, and can crossup |
| | }} |
| | }} |
|
| |
|
| [[File:DongJumpA.jpg]]
| | ===== <span class="invisible-header">jB</span> ===== |
| | <font style="visibility:hidden" size="0"></font> |
| | {{MoveData |
| | |image=DongJumpB.jpg |
| | |name=j.B |
| | |subtitle= |
| | |caption= |
| | |data= |
| | {{AttackData-Garou |
| | |Damage=6 |
| | |Guard=High |
| | |Startup=6 |
| | |Active=10 |
| | |Recovery= |
| | |Total= |
| | |Hit Adv= |
| | |Block Adv= |
| | |Feint Cancel= |
| | |Cancel on Hit=◯ |
| | |Cancel on Block=◯ |
| | |Guard Crush Value=4 |
| | |description= |
| | }} |
| | }} |
|
| |
|
| {| border="1em" cellspacing="0" width="10%" style="border: 1px solid #999; background: #F2F2F2;"
| |
| |-
| |
| | '''Command'''
| |
| |-
| |
| | [[File:up1.gif]] + [[File:snka.gif]]
| |
| |}
| |
|
| |
|
| <br>
| |
|
| |
|
| [[File:DongJumpB.jpg]]
| | ===== <span class="invisible-header">jC</span> ===== |
| | <font style="visibility:hidden" size="0"></font> |
| | {{MoveData |
| | |image=DongJumpC.jpg |
| | |name=j.C |
| | |subtitle= |
| | |caption= |
| | |data= |
| | {{AttackData-Garou |
| | |Damage=9 |
| | |Guard=High |
| | |Startup=6 |
| | |Active=5 |
| | |Recovery= |
| | |Total= |
| | |Hit Adv= |
| | |Block Adv= |
| | |Feint Cancel= |
| | |Cancel on Hit=◯ |
| | |Cancel on Block=◯ |
| | |Guard Crush Value=5 |
| | |description= |
| | }} |
| | }} |
|
| |
|
| {| border="1em" cellspacing="0" width="10%" style="border: 1px solid #999; background: #F2F2F2;"
| |
| |-
| |
| | '''Command'''
| |
| |-
| |
| | [[File:up1.gif]] + [[File:snkb.gif]]
| |
| |}
| |
|
| |
|
| <br>
| |
|
| |
|
| [[File:DongJumpC.jpg]]
| | ===== <span class="invisible-header">jD</span> ===== |
| | <font style="visibility:hidden" size="0"></font> |
| | {{MoveData |
| | |image=DongJumpD.jpg |
| | |name=j.D |
| | |subtitle= |
| | |caption= |
| | |data= |
| | {{AttackData-Garou |
| | |Damage=9 |
| | |Guard=High |
| | |Startup=8 |
| | |Active=6 |
| | |Recovery= |
| | |Total= |
| | |Hit Adv= |
| | |Block Adv= |
| | |Feint Cancel= |
| | |Cancel on Hit=◯ |
| | |Cancel on Block=◯ |
| | |Guard Crush Value=5 |
| | |description= |
| | }} |
| | }} |
|
| |
|
| {| border="1em" cellspacing="0" width="10%" style="border: 1px solid #999; background: #F2F2F2;"
| |
| |-
| |
| | '''Command'''
| |
| |-
| |
| | [[File:up1.gif]] + [[File:snkc.gif]]
| |
| |}
| |
|
| |
|
| <br>
| |
|
| |
|
| [[File:DongJumpD.jpg]]
| | ===Command Normals=== |
|
| |
|
| {| border="1em" cellspacing="0" width="10%" style="border: 1px solid #999; background: #F2F2F2;"
| | ===== <span class="invisible-header">j4C</span> ===== |
| |- | | <font style="visibility:hidden" size="0"></font> |
| | '''Command''' | | {{MoveData |
| |- | | |image=DongBackC.jpg |
| | [[File:up1.gif]] + [[File:snkd.gif]] | | |name=Ushiro-geri (Back Kick) |
| |}
| | |input=j.4C |
| | |subtitle= |
| | |caption= |
| | |data= |
| | {{AttackData-Garou |
| | |Damage=10 |
| | |Guard=High |
| | |Startup=4 |
| | |Active=6 |
| | |Recovery= |
| | |Total= |
| | |Hit Adv= |
| | |Block Adv= |
| | |Feint Cancel= |
| | |Cancel on Hit=◯ |
| | |Cancel on Block=◯ |
| | |Guard Crush Value=9 |
| | |description= Can beat out upper-body evasion attacks. |
| | }} |
| | }} |
|
| |
|
| <br>
| |
|
| |
|
| [[File:DongAB.jpg]]
| |
|
| |
|
| {| border="1em" cellspacing="0" width="20%" style="border: 1px solid #999; background: #F2F2F2;"
| | ===Universal Moves=== |
| |-
| |
| | '''Command''' || '''Start Up''' || '''Hit'''|| '''Guard'''
| |
| |-
| |
| | '''[[File:snka.gif]] + [[File:snkb.gif]]''' || '''25''' || '''-1''' || '''+5'''
| |
| |}
| |
|
| |
|
| <br> | | ===== <span class="invisible-header">Lower-body Evasion Attack (5AB)</span> ===== |
| | <font style="visibility:hidden" size="0"></font> |
| | {{MoveData |
| | |image=DongAB.jpg |
| | |name=5A+B |
| | |subtitle=Lower-body evasion attack |
| | |caption= |
| | |data= |
| | {{AttackData-Garou |
| | |Damage=10 |
| | |Guard=Overhead |
| | |Startup=25 |
| | |Active=1 |
| | |Recovery=19 |
| | |Total=45 |
| | |Hit Adv=-1 |
| | |Block Adv=+5 |
| | |Feint Cancel=X |
| | |Cancel on Hit=X |
| | |Cancel on Block=X |
| | |Guard Crush Value=6 |
| | |description= |
| | * airborne from the 1st frame. |
| | * on the ground at the last 16 frames. |
| | }} |
| | }} |
|
| |
|
| [[File:DongDwnAB.jpg]]
| |
|
| |
|
| {| border="1em" cellspacing="0" width="30%" style="border: 1px solid #999; background: #F2F2F2;"
| |
| |-
| |
| | '''Command''' || '''Start Up''' || '''Hit'''|| '''Guard'''
| |
| |-
| |
| | '''[[File:down.gif]] + [[File:snka.gif]] + [[File:snkb.gif]]''' || '''10''' || '''-2''' || '''+4'''
| |
| |}
| |
|
| |
| <br>
| |
|
| |
| [[File:DongBackC.jpg]]
| |
|
| |
| {| border="1em" cellspacing="0" width="20%" style="border: 1px solid #999; background: #F2F2F2;"
| |
| |-
| |
| | '''Command''' || '''Start Up''' || '''Hit'''|| '''Guard'''
| |
| |-
| |
| | ''' Air [[File:b.gif]] + [[File:snkc.gif]]''' || '''29''' || '''KD''' || '''-16'''
| |
| |}
| |
|
| |
| <br>
| |
|
| |
| [[File:DongTOP.jpg]]
| |
|
| |
| {| border="1em" cellspacing="0" width="20%" style="border: 1px solid #999; background: #F2F2F2;"
| |
| |-
| |
| | '''Command''' || '''Start Up''' || '''Hit'''|| '''Guard'''
| |
| |-
| |
| | '''[[File:snkc.gif]] + [[File:snkd.gif]]''' || '''8''' || '''KD''' || '''-9'''
| |
| |}
| |
|
| |
| <br>
| |
|
| |
| [[File:Dong214B.jpg]]
| |
|
| |
| {| border="1em" cellspacing="0" width="20%" style="border: 1px solid #999; background: #F2F2F2;"
| |
| |-
| |
| | '''Command''' || '''Start Up''' || '''Hit'''|| '''Guard'''
| |
| |-
| |
| | [[File:qcb.gif]] + [[File:snkb.gif]] || '''19''' || '''-1''' || '''-1'''
| |
| |}
| |
|
| |
| <br>
| |
|
| |
| [[File:Dong214D.jpg]]
| |
|
| |
| {| border="1em" cellspacing="0" width="20%" style="border: 1px solid #999; background: #F2F2F2;"
| |
| |-
| |
| | '''Command''' || '''Start Up''' || '''Hit'''|| '''Guard'''
| |
| |-
| |
| | [[File:qcb.gif]] + [[File:snkd.gif]] || '''27''' || '''-2''' || '''-2'''
| |
| |}
| |
|
| |
| <br>
| |
|
| |
| [[File:DongDPAandC.jpg]]
| |
|
| |
| {| border="1em" cellspacing="0" width="30%" style="border: 1px solid #999; background: #F2F2F2;"
| |
| |-
| |
| | '''Command''' || '''Start Up''' || '''Hit'''|| '''Guard'''
| |
| |-
| |
| | [[File:dp.gif]] + [[File:snka.gif]] || '''4''' || '''KD''' || '''-30'''
| |
| |-
| |
| | [[File:dp.gif]] + [[File:snka.gif]] (Break) || '''4''' || '''KD''' || '''-6'''
| |
| |-
| |
| | [[File:dp.gif]] + [[File:snkc.gif]] || '''4''' || '''KD''' || '''-29'''
| |
| |-
| |
| | [[File:dp.gif]] + [[File:snkc.gif]] (Break) || '''4''' || '''KD''' || '''-6'''
| |
| |}
| |
|
| |
| <br>
| |
|
| |
| [[File:Dong236B.jpg]]
| |
|
| |
| {| border="1em" cellspacing="0" width="20%" style="border: 1px solid #999; background: #F2F2F2;"
| |
| |-
| |
| | '''Command''' || '''Start Up''' || '''Hit'''|| '''Guard'''
| |
| |-
| |
| | [[File:qcf.gif]] + [[File:snkb.gif]] || '''22''' || '''+13''' || '''+13'''
| |
| |}
| |
|
| |
|
| <br> | | ===== <span class="invisible-header">Upper-body Evasion Attack (2AB)</span> ===== |
| | <font style="visibility:hidden" size="0"></font> |
| | {{MoveData |
| | |image=DongDwnAB.jpg |
| | |name=2A+B |
| | |subtitle=Upper-body evasion attack |
| | |caption= |
| | |data= |
| | {{AttackData-Garou |
| | |Damage=10 |
| | |Guard=Mid |
| | |Startup=10 |
| | |Active=2 |
| | |Recovery=19 |
| | |Total=31 |
| | |Hit Adv=-2 |
| | |Block Adv=+4 |
| | |Feint Cancel=▽ |
| | |Cancel on Hit=◯ |
| | |Cancel on Block=X |
| | |Guard Crush Value=6 |
| | |description=1~5F upper-body invincibility. |
| | }} |
| | }} |
|
| |
|
| [[File:Dong236D.jpg]]
| |
|
| |
|
| {| border="1em" cellspacing="0" width="20%" style="border: 1px solid #999; background: #F2F2F2;"
| |
| |-
| |
| | '''Command''' || '''Start Up''' || '''Hit'''|| '''Guard'''
| |
| |-
| |
| | [[File:qcf.gif]] + [[File:snkd.gif]] || '''25''' || '''KD''' || '''+9'''
| |
| |}
| |
|
| |
|
| <br> | | ===== <span class="invisible-header">T.O.P. Attack (CD)</span> ===== |
| | <font style="visibility:hidden" size="0"></font> |
| | {{MoveData |
| | |image=DongTOP.jpg |
| | |name=Kaiten Dong Hwan (T.O.P. Attack) |
| | |input=C+D (T.O.P. Only) |
| | |subtitle=Rotating Don Juan |
| | |caption= |
| | |data= |
| | {{AttackData-Garou |
| | |Damage=10, 3×4 (base damage) |
| | |Guard=Mid |
| | |Startup=8 |
| | |Active= |
| | |Recovery= |
| | |Total= |
| | |Hit Adv=KD |
| | |Block Adv=-9 |
| | |Feint Cancel= |
| | |Cancel on Hit= |
| | |Cancel on Block= |
| | |Guard Crush Value=2, 3×4 |
| | |description= |
| | }} |
| | }} |
|
| |
|
| [[File:DongDwnBandD.jpg]]
| | ===Throws=== |
|
| |
|
| {| border="1em" cellspacing="0" width="20%" style="border: 1px solid #999; background: #F2F2F2;"
| | ===== <span class="invisible-header">Ground Throw</span> ===== |
| |- | | <font style="visibility:hidden" size="0"></font> |
| | '''Command''' || '''Start Up''' || '''Hit'''|| '''Guard''' | | {{MoveData |
| |-
| | |image=DongThrow.jpg |
| | air [[File:down.gif]] + [[File:snkb.gif]] || '''6''' || '''0, -5''' || '''0, -5''' | | |name=Tai Otoshi |
| |- | | |input='''Close''' 4/6C |
| | air [[File:down.gif]] + [[File:snkd.gif]] || '''9''' || '''0, -5''' || '''0, -5''' | | |subtitle=Body Throw |
| |}
| | |caption= |
| | |data= |
| | {{AttackData-Garou |
| | |Damage=14 |
| | |Guard= |
| | |Startup=0 |
| | |Active= |
| | |Recovery= |
| | |Total= |
| | |Hit Adv=+34 |
| | |Block Adv= |
| | |Feint Cancel= |
| | |Cancel on Hit= |
| | |Cancel on Block= |
| | |Guard Crush Value= |
| | |description= Normal throw. |
| | }} |
| | }} |
|
| |
|
| <br>
| |
|
| |
|
| [[File:Dong63214C.jpg]]
| |
|
| |
|
| {| border="1em" cellspacing="0" width="30%" style="border: 1px solid #999; background: #F2F2F2;"
| | ===== <span class="invisible-header">Air Throw</span> ===== |
| |- | | <font style="visibility:hidden" size="0"></font> |
| | '''Command''' || '''Start Up''' || '''Hit'''|| '''Guard''' | | {{MoveData |
| |- | | |image= |
| | [[File:hcb.gif]] + [[File:snkc.gif]] || '''7''' || '''KD''' || '''-9''' | | |name=Tai Hineri |
| |}
| | |input='''Air Close''' 2C |
| | |subtitle=Body Twisting Throw |
| | |caption= |
| | |data= |
| | {{AttackData-Garou |
| | |Damage=16 |
| | |Guard= |
| | |Startup=0 |
| | |Active= |
| | |Recovery= |
| | |Total= |
| | |Hit Adv=+40 |
| | |Block Adv= |
| | |Feint Cancel= |
| | |Cancel on Hit= |
| | |Cancel on Block= |
| | |Guard Crush Value= |
| | |description= Air throw. |
| | }} |
| | }} |
|
| |
|
| <br>
| | ===Feints=== |
|
| |
|
| [[File:DongjAsuper.jpg]]
| | ===== <span class="invisible-header">Forward Feint (6AC)</span> ===== |
| | <font style="visibility:hidden" size="0"></font> |
| | {{MoveData |
| | |image=DongFwdFeint.jpg |
| | |name=6A+C |
| | |subtitle=Forward Feint |
| | |caption= |
| | |data= |
| | {{AttackData-Garou |
| | |Damage= |
| | |Guard= |
| | |Startup= |
| | |Active= |
| | |Recovery= |
| | |Total=10 |
| | |Hit Adv= |
| | |Block Adv= |
| | |Feint Cancel= |
| | |Cancel on Hit= |
| | |Cancel on Block= |
| | |Guard Crush Value= |
| | |description=Mimics the start of [[#Shiden Kyaku (236K) | B Shiden Kyaku]]. |
| | }} |
| | }} |
|
| |
|
| {| border="1em" cellspacing="0" width="30%" style="border: 1px solid #999; background: #F2F2F2;"
| |
| |-
| |
| | '''Command''' || '''Start Up''' || '''Hit'''|| '''Guard'''
| |
| |-
| |
| | air [[File:qcf.gif]], [[File:qcf.gif]] + [[File:snka.gif]] || '''0''' || '''KD''' || '''-39'''
| |
| |}
| |
|
| |
|
| <br>
| |
|
| |
|
| [[File:DongjCsuper.jpg]] | | ===== <span class="invisible-header">Down Feint (2AC)</span> ===== |
| | {{MoveData |
| | |image=DongDwnFeint.jpg |
| | |name=2A+C |
| | |subtitle=Down Feint |
| | |caption= |
| | |data= |
| | {{AttackData-Garou |
| | |Damage= |
| | |Guard= |
| | |Startup= |
| | |Active= |
| | |Recovery= |
| | |Total=10 |
| | |Hit Adv= |
| | |Block Adv= |
| | |Feint Cancel= |
| | |Cancel on Hit= |
| | |Cancel on Block= |
| | |Guard Crush Value= |
| | |description=Mimics the start of [[#Shiden Kyaku (236K) | D Shiden Kyaku]]. Try to use this feint for Dong, it has less pushback. |
| | }} |
| | }} |
|
| |
|
| {| border="1em" cellspacing="0" width="30%" style="border: 1px solid #999; background: #F2F2F2;"
| | ===Special Moves=== |
| |-
| |
| | '''Command''' || '''Start Up''' || '''Hit'''|| '''Guard'''
| |
| |-
| |
| | air [[File:qcf.gif]], [[File:qcf.gif]] + [[File:snkc.gif]] || '''0''' || '''KD''' || '''-69'''
| |
| |}
| |
|
| |
|
| <br> | | ===== <span class="invisible-header">Raimei Zan (214K)</span> ===== |
| | <font style="visibility:hidden" size="0"></font> |
| | {{MoveData |
| | |image=Dong214B.jpg |
| | |name=Raimei Zan |
| | |input= 214B/D |
| | |subtitle= |
| | |caption= |
| | |data= |
| | First hit whiffs on crouching opponents. <br><br> |
| | {{AttackData-Garou |
| | |version=B |
| | |Damage=10, 10 |
| | |Guard=<span style="color:#ff0000;">Overhead</span> |
| | |Startup=19 |
| | |Active= |
| | |Recovery= |
| | |Total= |
| | |Hit Adv=-1 |
| | |Block Adv=-1 |
| | |Feint Cancel= |
| | |Cancel on Hit= |
| | |Cancel on Block= |
| | |Guard Crush Value=3, 3 |
| | |description= |
| | }} |
| | {{AttackData-Garou |
| | |version=D |
| | |Damage=12, 12 |
| | |Guard=<span style="color:#ff0000;">Overhead</span> |
| | |Startup=25 |
| | |Active= |
| | |Recovery= |
| | |Total= |
| | |Hit Adv=-2 |
| | |Block Adv=-2 |
| | |Feint Cancel= |
| | |Cancel on Hit= |
| | |Cancel on Block= |
| | |Guard Crush Value=4, 4 |
| | |description= |
| | }} |
| | }} |
|
| |
|
| [[File:DongBsuper.jpg]]
| |
|
| |
|
| {| border="1em" cellspacing="0" width="30%" style="border: 1px solid #999; background: #F2F2F2;"
| |
| |-
| |
| | '''Command''' || '''Start Up''' || '''Hit'''|| '''Guard'''
| |
| |-
| |
| | [[File:qcf.gif]], [[File:qcf.gif]] + [[File:snkb.gif]] || '''19''' || '''KD''' || '''-5'''
| |
| |}
| |
|
| |
| <br>
| |
|
| |
| [[File:DongDsuper.jpg]]
| |
|
| |
| {| border="1em" cellspacing="0" width="30%" style="border: 1px solid #999; background: #F2F2F2;"
| |
| |-
| |
| | '''Command''' || '''Start Up''' || '''Hit'''|| '''Guard'''
| |
| |-
| |
| | [[File:qcf.gif]], [[File:qcf.gif]] + [[File:snkd.gif]] || '''17''' || '''KD''' || '''+5'''
| |
| |}
| |
|
| |
|
| <br> | | ===== <span class="invisible-header">Hishou Kyaku (j2K)</span> ===== |
| | <font style="visibility:hidden" size="0"></font> |
| | {{MoveData |
| | |image=DongDwnBandD.jpg |
| | |name=Hishou Kyaku |
| | |input=j.2B/D |
| | |subtitle= |
| | |caption= |
| | |data= |
| | Can beat out upper-body evasion attacks. <br><br> |
| | {{AttackData-Garou |
| | |version=B |
| | |Damage=10, 5×3 |
| | |Guard=<span style="color:#ff0000;">Mid</span> |
| | |Startup=7 |
| | |Active= |
| | |Recovery= |
| | |Total= |
| | |Hit Adv=0 or more (up to -4) |
| | |Block Adv=0 or more (up to -4) |
| | |Feint Cancel= |
| | |Cancel on Hit= |
| | |Cancel on Block= |
| | |Guard Crush Value=2×4 |
| | |description= B version travels slower. |
| | }} |
| | {{AttackData-Garou |
| | |version=D |
| | |Damage=10, 5×3 |
| | |Guard=<span style="color:#ff0000;">Mid</span> |
| | |Startup=9 |
| | |Active= |
| | |Recovery= |
| | |Total= |
| | |Hit Adv=0 or more (up to -4) |
| | |Block Adv=0 or more (up to -4) |
| | |Feint Cancel= |
| | |Cancel on Hit= |
| | |Cancel on Block= |
| | |Guard Crush Value=2×4 |
| | |description= D version travels faster, such that there are usually 3 hits, rather than 4 hits. |
| | }} |
| | }} |
|
| |
|
| [[File:DongHiddenSuper.jpg]]
| |
|
| |
|
| {| border="1em" cellspacing="0" width="30%" style="border: 1px solid #999; background: #F2F2F2;"
| |
| |-
| |
| | '''Command''' || '''Start Up''' || '''Hit'''|| '''Guard'''
| |
| |-
| |
| | [[File:qcf.gif]], [[File:qcf.gif]], [[File:qcf.gif]] + [[File:snkc.gif]] || '''0''' || '''KD''' || '''-10'''
| |
| |}
| |
| </center>
| |
|
| |
|
| =Attack Notes= | | ===== <span class="invisible-header">Shiden Kyaku (236K)</span> ===== |
| '''Ushiro-geri''' ('''BacKick'''): This move is best used when you're jumping and attempting to switch sides with your opponent, or to punish a cross-down attempt. When performed Dong will move his foot back in an attempt to kick his opponent. It is possible to combo from this move.<br>
| | <font style="visibility:hidden" size="0"></font> |
| <br> | | {{MoveData |
| '''Raimei Zan''' ('''Thunder Slice'''): Dong performs his own version of Kim's '''Crescent Moon Slice'''. This move is very slow & can be EASILY hit out of by a '''Standing A''', for example. This move is an overhead though. '''D''' version travels farther than the '''B''' and is slower. The player should try not to use this move a lot.<br>
| | |image=Dong236B.jpg |
| <br>
| | |name=Shiden Kyaku |
| '''Kuusa-jin''' ('''Sand Blaster'''): Dong's break-able shoryuken. Break this move to combo into his '''Dong Hwan Flattener''', or get a counter-hit combo. It is negative and punishable on block after break, but can be spaced to minimize the punition. This move can be used as an anti-air, but at times not all hits will connect.<br>
| | |input=236B/D |
| <br>
| | |subtitle= |
| '''Hishou-kyaku''' ('''Flying Kick'''): Dong does a dive kick at an angle. The '''D''' version has him dive farther than the '''B''' version. This move is very fast & can snuff a few attacks. However it is almost always negative on hit/block.<br>
| | |caption= |
| <br>
| | |data= |
| '''Shiden-kyaku''' ('''Thunder Stamp'''): One may consider this Dong's version of his father's ''''Spirit of Conquest' Kick''' from KoF 98+. Dong kicks the ground & will either stun the opponent for a short period of time ('''B''' version), or juggle them ('''D''' version). This move is GREAT for starting combos & must be blocked low. The only major downside to this move is that it's slow ('''D''' version being more slower than the '''B''' version). If cancelled from a normal, you can still anti-air a jump above the stomp (be ready to anti-air).<BR>
| | {{AttackData-Garou |
| <br>
| | |version=B |
| '''Ashi Binta''' ('''Scolding Kick'''): Dong does a flurry of kicks infront of him. This move lacks range & if it misses you'll be open for attack. This moves does a good deal of damage & is best used in close range combos/punitions.<br>
| | |Damage=10 |
| | |Guard=Low |
| | |Startup=22 |
| | |Active= |
| | |Recovery= |
| | |Total= |
| | |Hit Adv=+13 |
| | |Block Adv=+13 |
| | |Feint Cancel= |
| | |Cancel on Hit= |
| | |Cancel on Block= |
| | |Guard Crush Value=7 |
| | |description= |
| | }} |
| | {{AttackData-Garou |
| | |version=D |
| | |Damage=12 |
| | |Guard=Low |
| | |Startup=25 |
| | |Active= |
| | |Recovery= |
| | |Total= |
| | |Hit Adv=KD |
| | |Block Adv=+9 |
| | |Feint Cancel= |
| | |Cancel on Hit= |
| | |Cancel on Block= |
| | |Guard Crush Value=8 |
| | |description= |
| | }} |
| | }} |
|
| |
|
| =Combos=
| |
| The design of Dong Hwan makes him shy away from the run of the mill 'normal cancelled into special' combos. However he has some that could be called bread'n'butter but he needs at least one full meter to execute them. As this is a detailed breakdown, scroll down to the bottom of this section if you just want full fledged examples.
| |
| ==Bread'n'Butter==
| |
| *Close range :
| |
| [[File:snkd.gif]] xx [[File:hcb.gif]][[File:snkc.gif]]<br>
| |
| [[File:snkd.gif]] xx [[File:qcb.gif]][[File:snkb.gif]] (less damage but safer if unsure about hit or guard)<br>
| |
| * Far range :
| |
| Far [[File:snka.gif]] > [[File:down.gif]][[File:snka.gif]]<br>
| |
| * 1 meter :
| |
| [[File:snka.gif]]/[[File:down.gif]][[File:snkb.gif]] > [[File:down.gif]][[File:snkc.gif]] xx [[File:qcf.gif]][[File:qcf.gif]][[File:snkb.gif]]
| |
|
| |
|
| ==Other Combos==
| |
| Anywhere:<br>
| |
| 1) qcf + '''B''', hcb + '''C'''<br>
| |
| 2) qcf + '''B''', stand '''B''', '''TOP attack'''<br>
| |
| 3) qcf + '''K''', qcfx2 + '''A/C''' in the air/qcfx3 + '''C'''<br>
| |
| 4) qcf + '''D''', qcfx2 + '''B'''<br>
| |
| 5) Jump in '''D''', d + '''C''', qcfx2 + '''B'''/qcfx3 + '''C'''<br>
| |
|
| |
|
| Corner only:<BR>
| | ===== <span class="invisible-header">Ashi Binta (63214C)</span> ===== |
| 6) Jumping '''D'''/qcf + '''B''', d + '''B''', d + '''C''', qcfx2 + '''B'''<br>
| | <font style="visibility:hidden" size="0"></font> |
| 7) Jumping '''D'''/qcf + '''B''', stand '''B''', dp + '''C''', Break, qcfx3 + '''C''' <br>
| | {{MoveData |
| 8) qcf + '''D''',jump up, qcfx2 + '''A''' in the air, land, jump again qcfx2 + '''A''' in the air, land, dp + '''C''' only if you are already next to the corner.<br>
| | |image=Dong63214C.jpg |
| 9) Jump in '''D'''/qcf + '''B''', stand '''D'''(1st hit), qcb + '''B'''<br> | | |name=Ashi Binta |
| | |input=63214C |
| | |subtitle= |
| | |caption= |
| | |data= |
| | {{AttackData-Garou |
| | |version=C |
| | |Damage=5×6, 8 |
| | |Guard=Mid |
| | |Startup=7 |
| | |Active= |
| | |Recovery= |
| | |Total= |
| | |Hit Adv=KD |
| | |Block Adv=-9 |
| | |Feint Cancel= |
| | |Cancel on Hit= |
| | |Cancel on Block= |
| | |Guard Crush Value=1×7 |
| | |description= |
| | }} |
| | }} |
|
| |
|
| ==Chains and Links==
| |
| The following are Dong's links & chains which you can use for pressure and snuffing out attacks. (Note that ''Standing'' means performing the move close to your opponent).<br>
| |
| *Jumping '''A''' or '''B'''-->Jumping '''C''' ('''C''' links in the air)<br>
| |
| *Far '''A'''
| |
| **Far '''A''' or '''B'''
| |
| **Crouching '''A''' or '''B'''
| |
| *Close ''''A'''
| |
| **Standing '''P''' or '''K'''
| |
| **Crouching '''P''' or '''B'''
| |
| **Far '''A''' or '''B'''
| |
| *Standing '''B'''-->Far '''A'''
| |
| *Crouching '''B'''
| |
| **Standing/Crouching '''P''' or '''B'''
| |
| **Far '''A''' or '''B'''
| |
| *Crouching '''A'''-->Crouching '''A'''
| |
| *Crouching '''B'''-->Crouching '''C'''
| |
|
| |
|
| ==The Good Stuff==
| |
| Here's where the juicy combos lie.<br>
| |
| ===Main Jump Ins===
| |
| Best way to jump in and start a combo. All of his jump in can cancel into j.d+K or j.qcfx2+P and will combo if they hit.<br>
| |
| *'''j.B'''<br>
| |
| *'''j.D'''<br>
| |
| *'''j.AC air chain'''<br>
| |
| ===Normal Cancels===
| |
| Special cancelled normals that combo.
| |
| *'''A c.C qcfx2+B''' bread 'n' butter<br>
| |
| *'''close D qcb+B''' only way to combo qcb+B on normal hit<br>
| |
| *'''close D hcb+C''' good punisher<br>
| |
| *'''c.B hcb+C''' risky low combo<br>
| |
| *'''c.B c.B C+D''' easier to land low combo, no need for meter<br>
| |
| *'''close C dp+P''' obvious<br>
| |
| ===Others===
| |
| *'''qcf+B'''
| |
| **'''c.C'''
| |
| **'''close D'''
| |
| **'''qcfx3+C'''
| |
| *'''qcf+D'''
| |
| **'''dp+C''' if you dont have any meter
| |
| **'''hcb+C''' silly
| |
| **'''C+D''' more silliness
| |
| **'''qcfx2+B''' use the most, big damage
| |
| **'''j.qcfx2+P''' stylin' use it instead of qcfx2+B if you have two meters or are near a wall.
| |
| **'''Basically all supers and specials'''
| |
| *'''j.qcfx2+A'''
| |
| **'''j.qcfx2+A'''
| |
| **'''dp+C''' near a wall
| |
| **'''j.qcrx2+A dp+C''' Dong's Signature Combo
| |
|
| |
|
| ===Counterhit=== | | ===== <span class="invisible-header">Kuu Sa Jin (623P)</span> ===== |
| Combos and juggles that need to start with a counterhit.<br>
| | <font style="visibility:hidden" size="0"></font> |
| '''Grounded'''
| | {{MoveData |
| *'''CH c.A+B''' best way to land a grounded CH
| | |image=DongDPAandC.jpg |
| **'''canceled into qcf+D'''
| | |name=Kuu Sa Jin |
| **'''canceled into qcb+D'''
| | |input= 623A/C (Break OK) |
| | |subtitle= |
| | |caption= |
| | |data= |
| | {{AttackData-Garou |
| | |version=A |
| | |Damage=5, 6×3 |
| | |Guard=<span style="color:#ff0000;">Mid</span> |
| | |Startup=4 |
| | |Active= |
| | |Recovery= |
| | |Total= |
| | |Hit Adv=KD |
| | |Block Adv=-30 |
| | |Feint Cancel= |
| | |Cancel on Hit= |
| | |Cancel on Block= |
| | |Guard Crush Value=3, 2×3 |
| | |description=1~5F full-body invincibility <br><br> |
| | }} |
| | {{AttackData-Garou |
| | |version=A Break |
| | |Damage=5 |
| | |Guard=<span style="color:#ff0000;">Mid</span> |
| | |Startup=4 |
| | |Active= |
| | |Recovery= |
| | |Total= |
| | |Hit Adv=KD |
| | |Block Adv=-6 |
| | |Feint Cancel= |
| | |Cancel on Hit= |
| | |Cancel on Block= |
| | |Guard Crush Value=3 |
| | |description= |
| | }} |
| | {{AttackData-Garou |
| | |version=C |
| | |Damage=8, 4×4, 8 |
| | |Guard=<span style="color:#ff0000;">Mid</span> |
| | |Startup=4 |
| | |Active= |
| | |Recovery= |
| | |Total= |
| | |Hit Adv=KD |
| | |Block Adv=-29 |
| | |Feint Cancel= |
| | |Cancel on Hit= |
| | |Cancel on Block= |
| | |Guard Crush Value=3, 2×4, 5 |
| | |description=1~5F full-body invincibility <br><br> |
| | }} |
| | {{AttackData-Garou |
| | |version=C Break |
| | |Damage=8 |
| | |Guard=<span style="color:#ff0000;">Mid</span> |
| | |Startup=4 |
| | |Active= |
| | |Recovery= |
| | |Total= |
| | |Hit Adv=KD |
| | |Block Adv=-6 |
| | |Feint Cancel= |
| | |Cancel on Hit= |
| | |Cancel on Block= |
| | |Guard Crush Value=3 |
| | |description= |
| | }} |
| | }} |
|
| |
|
| '''Air'''
| | ===Super Moves=== |
| *'''CH dp+P (braked)''' launches even if it hits a grounded opponent
| |
| **'''dp+P'''
| |
| **'''qcfx3+C'''
| |
| **'''j.qcfx2+P'''
| |
| Other launchers on air counter hit. The above work for these starters too
| |
| *'''qcb+K''' one hit only
| |
| *'''j.d+K''' one hit only
| |
| *'''hcb+C''' last hit only
| |
| A Braked dp+P can be added after any will combo in to the above as well.Thus the famous...
| |
| *'''CH dp+P (braked) dp+P (braked) j.qcfx2+A j.qcfx2+A dp+C''
| |
| Basically if you land an air counter, if the move has time to hit, it will.
| |
|
| |
|
| ===Special=== | | ===== <span class="invisible-header">Super Dong Hwan Kyaku (j236236P)</span> ===== |
| qcf+D and j.A have some interesting combos.<br>
| | <font style="visibility:hidden" size="0"></font> |
| *'''CH qcf+D'''
| | {{MoveData |
| **'''Any low air CH combo'''
| | |image =DongjCsuper.jpg |
| **'''qcf+D''' Relaunch, baby!
| | |name =Super Dong Hwan Kyaku |
| | |input =j.236236A/C |
| | |caption= |
| | |data= |
|
| |
|
| *'''close D d+A+C c.C d+A+C j.A qcfx2+P''' Ground to air combo, semi famous. Very flashy.
| | Can beat out upper-body evasion attacks. <br><br> |
|
| |
|
| ===Examples=== | | {{AttackData-Garou |
| '''j.D c.B c.C qcfx2+B''' bread 'n' butter, yo <br>
| | |version =A |
| '''j.B c.B hcb+C''' good damge for no meter<br>
| | |Damage=15, 5×5 |
| '''j.A j.C close D d+A+C j.A j.d+K''' up and down
| | |Guard=Mid |
| '''c.B C+D''' great for cross ups<br>
| | |Startup=0 |
| '''close D d+A+C close D d+A+C c.C qcfx2+B'''<br>
| | |Active= |
| '''dp+P (braked) qcfx3+P''' no need for a ch!<br>
| | |Recovery= |
| '''CH c.A+B qcf+D dp+C'''<br>
| | |Total= |
| '''CH qcf+D qcf+D qcfx2+B''' QCF!<br>
| | |Hit Adv=KD |
| '''CH dp+P (braked) dp+P (braked) j.qcfx2+A j.qcfx2+A dp+C''' The For Real Deal<br>
| | |Block Adv=-39 |
| | |Feint Cancel= |
| | |Cancel on Hit= |
| | |Cancel on Block= |
| | |Guard Crush Value=5×6 |
| | |description= |
| | }} |
| | {{AttackData-Garou |
| | | header = |
| | |version =C |
| | |Damage=18, 6×6, 18 |
| | |Guard=Mid |
| | |Startup=0 |
| | |Active= |
| | |Recovery= |
| | |Total= |
| | |Hit Adv=KD |
| | |Block Adv=-69 |
| | |Feint Cancel= |
| | |Cancel on Hit= |
| | |Cancel on Block= |
| | |Guard Crush Value=10, 7×7 |
| | |description= |
| | }} |
| | }} |
|
| |
|
| ===Tips===
| |
| Help for executing these.
| |
| '''j.qcfx2+P'''
| |
| Sometimes referred to as 'tiger knee-ing' from the execution of Sagat's move. Instead of jumping then inputting, buffer the qcf with the jump. Thus-d,d/f,f,uf.<br>
| |
| Specifically d,d/f,f,uf,d,d/f,f+P. Or if you need to cancel off of j.A. Do-d,d/f,f,u/f+A,d,d/f,f+A.
| |
| Another method is to rotate 1 and 1/4 circle starting with down. This method is much slower, but may help. However it can be more quick if done on a joystick.
| |
| '''dp+P'''
| |
| The input to brake this move is immediate. So do dp+P A+B in quick succession. For using this in juggles, the first hit (his knee) needs to connect. Waiting until the last moment is key for combos like-CH dp+P (braked) dp+p (braked) j.qcfx2+A j.qcfx2+A dp+C. Especially if you want all the hits to connect and maximize damage.<br>
| |
| When feinting generally stick to d+A+C instead of f+A+C as the pushback is much less. However, as his super jump is inputed by presss d,N,u, it can be advantageous to use f+A+C if you intend on doing a jump or short jump after your feint. Often players will go for closeD d+A+C u/f, but a super jump will come out when they wanted a short jump.
| |
|
| |
|
| =T.O.P. Notes=
| |
| 8 frame startup. KDN on hit (last hit only i believe). -9 on block. 5 hits-21 damage total with TOP 1/3.<br>
| |
| Normally Dong needs meter to do any decent combo easily as hcb+C and qcb+B only combo when cancelled off of a close move or on CH. His TOP move lets him combo more easily as it has decent range and speed. It's not too safe, but it's easy to use when you know it'll hit.
| |
| Combos off all cancelable moves except far C (only cancels on block anyway).<br>
| |
| Example Combos...<br>
| |
| j.b+C C+D Easy combo for cross up kick<br>
| |
| j.D c.C C+D Big damage.<br>
| |
| c.A+B C+D Increase evade move damage.<br>
| |
| c.B c.B C+D Low and hit confirmable.<br>
| |
| short jump+C c.B C+D Quick mixups.<br>
| |
| You still have to be fairly close for these to land. Max range c.C and c.A+B canceled into C+D will not work.<br>
| |
| Its range allows you to catch back dashers and cross up techrollers. It's meatiness, input (C and D), and air properties help it beat throws.<br>
| |
| Example setups...<br>
| |
| c.D or Throw-run up, opponent techs, run past C+D. This works well as you can stay close while they tech to make in ambiguous plus it works nice against throws. Or you can run kinda far and make them think it's safe.<br>
| |
| uf+A C (air chain while ascending), then C+D as you land.
| |
| One of the most powerful TOP attacks in the game, but not on paper. One of it's strongest point's is that it's a deadly GCL.<br>
| |
|
| |
|
| =Overall Strategy= | | ===== <span class="invisible-header">Raimei Dan (236236K)</span> ===== |
| Kim Dong Hwan is a hit and run character. The advantage he has over other characters is his ability to easily attack his opponent no matter where he is or what he is doing. He has a special low and a special overhead allowing him to create some interesting mixups. Big damage comes when Dong has meter, but it is difficult for him to build meter. Be patient and find the time to throw in a safe special to build meter while playing keep away and run or super jump in when you create an opening. Dong has a lot of weaknesses but he can be the most unpredictable character in the game and can train his opponents many ways as well. Mix it up and kick your way to victory!
| | <font style="visibility:hidden" size="0"></font> |
| | {{MoveData |
| | |image = DongDsuper.jpg |
| | |name =Raimei Dan |
| | |input =236236B/D |
| | |caption= |
| | |data= |
| | {{AttackData-Garou |
| | |version =B |
| | |Damage=35 |
| | |Guard=<span style="color:#ff0000;">Mid</span> |
| | |Startup=19 |
| | |Active= |
| | |Recovery= |
| | |Total= |
| | |Hit Adv=KD |
| | |Block Adv=-5 |
| | |Feint Cancel= |
| | |Cancel on Hit= |
| | |Cancel on Block= |
| | |Guard Crush Value=20 |
| | |description= |
| | 1~13F full-body invincibility. Has a projectile hitbox/hurtbox. |
| | }} |
| | {{AttackData-Garou |
| | | header = |
| | |version =D Lvl.1 |
| | |Damage=6, 35 |
| | |Guard=Overhead, <span style="color:#ff0000;">Mid</span> |
| | |Startup=17 |
| | |Active= |
| | |Recovery= |
| | |Total= |
| | |Hit Adv=KD |
| | |Block Adv=+5 |
| | |Feint Cancel= |
| | |Cancel on Hit= |
| | |Cancel on Block= |
| | |Guard Crush Value=10, 30 |
| | |description= The level (the number of hits) of Raimei Dan D increases according to the charging time (holding D). |
| | * 1~15F full-body invincibility. The last hit, for every level, has a projectile hitbox/hurtbox. |
|
| |
|
| =Advanced Tactics=
| | Lv 1 done without holding D, or D let go within 1~13F after exiting blackout. |
| Specific strategies for methods of attack and defense.
| | }} |
| ==Dealing Damage==
| | {{AttackData-Garou |
| ==Rushdown==
| | | header = |
| ===Getting In===
| | |version =D Lvl.2 |
| An easy way to get in is obviously to jump in. Know that he can super jump as well to quickly get in from long distances. His dive kick (Air d+K) is another important tool. It allows him to attack any spot that is in front of his jumping arc.<br>
| | |Damage=6, 8, 35 |
| The other, slightly less obvious, way of getting in is to run in. It is imortant to use standing Low Punch often when doing this. It is safe, fast, and allows you to judge your distance from the opponent. Additionally you can cancel into a special or feint if need be.<br>
| | |Guard=Overhead, Overhead, <span style="color:#ff0000;">Mid</span> |
| Don't forget you can wait for your opponent to come to you. Stand, short jump, or crouching guard to stay in a generally area. Try not to walk back or you'll end up in a corner. Creating openings is explained in the Keep Away section.
| | |Startup= |
| ===Rushing===
| | |Active= |
| Once you're inside DP+lp is going to be your best friend, especially when you brake it (lp version is 1 frame faster than hp). This move has awesome speed and priority. Use it to make your opponent fear any interruptions. Remember that it is punishable on block even if braked. Once they start to guard go for bigger damage. Usually this will happen after any of his other specials (exluding hcb+C because it's unsafe on block and knocks down on hit). You will see dive kick into braked dp a lot.<br>
| | |Recovery= |
| Once they do start to get defensive force mixups. Use short jump a lot into a bread and butter combo. If short jump attack is guarded cancel a normal into his low or overhead special or a feint.<br>
| | |Total= |
| *'''QCB+K''' Whether this hits or is guarded, you're at -1 frame. The safest thing to do is backdash, but if they fear the DP continue attacking. This is also important if your opponent likes to jump out of your rushdown.
| | |Hit Adv=KD |
| *'''QCF+LK''' This is a strong rushdown tool, but you must be close for it to land. You have a massive +13 frames on hit or block. All of his close standing or crouching normals are uninterruptible if qcf+lk guarded or will land if it hit. This means all three of his supers are guaranteed afterward. If it's guarded, it is important to run up a bit because you have such a large opportunity to stay close which doesn't happen often for Dong.
| | |Block Adv=+5 |
| *'''QCF+HK''' This has more range than the lk version, is slower and only gives +9 frames on block. But that's still a giant frame advantage and on hit it launches the opponent. The range makes it way easier to land than the lk version. Know that when guarded the opponent cannot interrupt his crouching HP, crouching HK or crouch A+B. This is important because these three normals are the only way to reach the opponent when qcf+HK is guarded from afar. Crouching HK is good as it can be cancelled into another qcf+HK or a feint and is fast. Crouching A+B has great range, but you can only cancel on hit. Once they are defensive because of this run or short jump in to keep attacking. With either the LK or HK version, the opponent will have to guard low, jump, or backdash. Qcb+K covers ducking and jumping and if they're in the corner: backdashing as well.
| | |Feint Cancel= |
| *'''Feint''' Feinting will take away the recovery of your normal and allow you more options. Generally it's used to allow you to get in closer again. It also allows you to create new jumping mixups. Most characters have to stick to short jumping afterward, but Dong can attack in many directions allowing him to shine here.<br>
| | |Cancel on Hit= |
| So get in, feint, then try jumping backwards. If the opponent continues to be defensive run or short hop in and force another mixup. If the back jump is used when the opponent has been defensive for a while, they will likely used the opportunity to escape. If this happens try dive kicking (air d+k) this will catch the opponent. Even if they continue gaurding use Dp+lp to keep them pressured.<br>
| | |Cancel on Block= |
| Now try jumping upwards. You can dive kick, or use j.lp, j.hp, or j.lk to hit three different directions in front of you. Further you have j.b+hp. This will kick behind you use this if they run under you. Air throw (j.f+HP) if they jump as well.<br>
| | |Guard Crush Value=10, 10, 30 |
| You can also jump forward, then use j.b+hp. If they guard low you'll jump over them, if they guard mid, then you will land in front of them. Getting them to guard low is key, then jump over them and use j.b+hp.<br>
| | |description= Lv 2 done holding D for a moment, within 14~18F after exiting blackout. |
| After a feint it's a good idea to do LEM (lp+hp). On block it gives you a frame advantage and it's an overhead.<br>
| | }} |
| Because his braked Dp has so much priority you can use backdashing and jumping as well after any of his specials is guarded or hits. Create your own unique rush!
| | {{AttackData-Garou |
| *'''Corner''' Everyone has a great advantage when their opponent is in the corner. Dong has some nice strings for keeping them there for forcing a lock down and eventually a guard crush.<br>
| | | header = |
| Qcf+k will be used a lot here. When in the corner there is way less push back so you can stay close.<br>
| | |version =D Lvl.3 |
| *'''ff+close HK, f+A+C, ff+close HK f+A+C...''' This is the keystone of Dong's corner lockdown. It will lock down the opponent, but it can be difficult to guard crush with just this string. f+A+C has more push back than d+A+C, but f+A+C allows for the cancel into the run more quickly. This is important when several frames makes all the difference.<br>
| | |Damage=6, 8, 9, 35 |
| *'''ff+close HK, qcf+K, ff+close HK, qcf+K...''' This has openings due to the startup of qcf+k, but forces the opponent to crouch and gives giant frame advantages. It's also interesting to note that qcf+HK has zero pushback. This means, that if your opponent is afraid of a quick followup do several qcf+HK in succession.<br>
| | |Guard=Overhead, Overhead, Overhead, <span style="color:#ff0000;">Mid</span> |
| *'''j.A j.C string''' Number of hits is just as important as strength of the hits. When the opponent is defensive and you get pushed back, jump in and do this.<br>
| | |Startup= |
| *'''A+B''' This has evasive properties, closes distance, is an overhead, and provides nice guard damage.<br>
| | |Active= |
| *'''LP LP LP''' Three quick jabs when close. Does surprising guard damage, prevents backdashing, and is simple.<br>
| | |Recovery= |
| *'''c.LK, c.LK, c.LK or ff+c.LK, f+A+C, ff+c.LK, f+A+C...''' Multiple low kicks can work well to easily keep your opponent pinned and does surprising guard damage as well.<br>
| | |Total= |
| *'''Qcf, Qcf+K''' The HK version is obvious. When charged fully it almost guarantees a guard crush, and recovers faster than the LK version allowing you to continue attacking. The LK version does a great deal of guard damage itself and can be used to finish off guard crush strings.<br>
| | |Hit Adv=KD |
| *'''Lock Down Strings'''
| | |Block Adv=+5 |
| **j.LP j.HP c.HP qcf+HK j.LP j.HP c.CHP qcf+HK qcf,qcf+LK -Try to get close when you finish with the super so you have more options. Your frame advantage is kind of small when you guard crush them because of the lag on qcf,qcf+lk.
| | |Feint Cancel= |
| **j.A j.C c.HP f+A+C A+B j.A j.C c.HP f+A+C A+B qcf,qcf+LK -Similar to the above string and allows you to force a mixup with the two.
| | |Cancel on Hit= |
| **closeHK f+A+C closeHK f+A+C closeHK qcf+LK... -Serious lockdown, but is difficult to guard crush with.
| | |Cancel on Block= |
| **ff+closeHK qcf+K ff+closeHK qcf+K... -More openings, but can be easy to perform and has decent guard crush potential. Either HK or LK version works or change them up depending on your distance.
| | |Guard Crush Value=10, 10, 20, 30 |
| | | |description= Max Lv 3 done holding D even longer, from 19~23F after exiting blackout. |
| ==Keep Away== | | }} |
| Dong is notorious for his ability to run away. It is extra frustrating for the opponent as, at any moment, he can change his trajectory and attack. He has a backdash, short jump, regular jump, super jump, and wall jump. All of these help him in his hit and run tactics.
| | }} |
| | |
| ==Wake Up== | |
| ==Air==
| |
| ==Throwing== | |
| ==Resets== | |
| ==Weaknesses==
| |
| Dong has several weaknesses; places in gameplay where he does not perform well. Whether you're deciding on using Dong, going up against him, or need to improve your game, this is a vital part of his breakdown.
| |
| | |
| '''Comboability'''<br>
| |
| One of his largest, his lack of combos makes him use more poking than almost any other character. He requires meter for the ones that deal decent damage. Along these lines, one of the biggest asset for any character is his or her c.A+B. While his isn't bad in itself, his qcf,qcf+LK super will not combo out of it on regular hit, it requires a counter hit. However qcf,qcf+HK will combo on regular hit but is a lot of meter for nearly the same damage as the LK version and Dong cant afford meter. However you can also use c.A+B qcf,qcf,qcf+HP which will land on normal hit. Further, if you feint, j.LP, qcf,qcf+P you can combo on normal hit. This is very difficult however as the input is complex, a slight mistake can result in a dp+P, and is way more work than most of the other characters.
| |
| *'''VS'''
| |
| **Needs meter or TOP for easy damage
| |
| **Difficult for him to build meter
| |
| **Stay out of range of his c.HP
| |
| *'''Candidate'''
| |
| **If you're looking for fancy combos, you're actually in luck. He has some impressive ones, but actual match use is more difficult.
| |
| *'''Cover Up'''
| |
| **Find ways to sneak in meter building with qcf+lk, braked dp if you can do the whiff version, and low j.d+k.
| |
| **A benefit is that he maximizes damage with lower version (S power) supers. Qcf,qcf+HK is only slightly stronger than LK version and if you land j.qcf,qcf+lp anywhere on screen you can combo into another one. This means he need not risk more meter for higher damage as the second j.qcf,qcf+lk is confirmed by the previous one if it landed.
| |
| **Know that he lacks combo potential and learn to poke and mix up.
| |
| | |
| '''Backdashers'''<br>
| |
| Dong has no projectile and no long range meaty move. Catching backdashers can be a hassle for Dong and going up against a good backdasher can really limit his game. Another huge drawback is that because he has limited combo potential, resorting to mixups with qcf+K and qcb+K is often necessary. However, these have very slow startup and can be backdashed out of even if the cancelled normal hit.<br>
| |
| Two of his greatest assets against backdashing, however is his super jump (d,N,ub_u_uf) and his run. While characters with a short front dash can rush down better, characters with a run can maneuver about the stage more easily. Running means you will be able to meet the backdasher at the end of their backdash where they are vulnerable. Super jumping allows you to tag the backdasher no matter where they are. With j.b+C, any jumping normal (though J.C is the least useful), or the special (j.d+K) or super (j.qcf,qcf+p) version of his dive kick. His dive kick is the meatiest move he has especially j.d+lk as it is slower and stays on screen longer. Find when they like to back dash and run up or super jump in. Even if you don't catch them during the backdash, you have closed some distance nicely.
| |
| *'''VS'''
| |
| **Abuse this against him
| |
| **Be wary and don't put yourself in a spot where he creates an ambiguous jumping trajectory or you'll eat a cross up or false cross up
| |
| **Dont run too much from him or he'll get meter which you dont want
| |
| *'''Candidate'''
| |
| **If you hate backdash abusers, don't use Dong
| |
| **He has the tools, but know it can be a bit of work
| |
| *'''Cover Up'''
| |
| **Be patient
| |
| **Know that Dong is good at running away too so build meter if they run
| |
| **Use keep away strategies to corner them
| |
| **Know when it's safe to run up (ff)
| |
| **Super jump a lot and when they backdash wait for the moment to release j.qcf,qcf+p.
| |
| **Use Feinting in place of cancelling into qcb+k or qcf+k so that you can run up or jump in and continue attacking.
| |
| | |
| '''Unsafe Moves'''<br>
| |
| While Dong has his dp+p to discourage interruption, many of his moves are still punishable even on hit.
| |
| *'''Dp+p''' Even if you brake this, you are at -6 frames
| |
| *'''Qcb+k''' Whether it's on hit or block you're at -1 frame
| |
| *'''j.d+k''' Depending on where his last kick lands, you'll be at a greater or lesser disadvantage
| |
| *'''close j.f+C Air Throw''' Out of all the air throw characters, (Jenet, Hokutomaru, Hotaru) Dong's has the least priority. Partly because of his jump trajectories and partly because his is simply lacking in priority.
| |
| *'''Others''' His TOP, qcf,qcf+lk, j.qcf,qcf+p, and hcb+hp are all unsafe on block.
| |
| | |
| *'''VS'''
| |
| **If you have a zero frame super be ready to punish many of Dong's specials
| |
| **If you're close, you can often times simply throw him
| |
| **Braked dp+p is at -6 on block so punish with a c.lk or lp combo
| |
| | |
| *'''Cover Up'''
| |
| **The lp version of dp+p is faster and has more pushback than the hp version. This makes in almost always the version of choice. If your opponent tends to get really defensive, you may use the hp version.
| |
| **Don't worry about qcb+k unless they have meter. Then worry and stick to A+B.
| |
| **Use c.A+B specials so you know that they will hit.
| |
| **Try not to rely on your air throw against the other air throw characters unless you're positive it will land, else there's will likely land.
| |
| | |
| =Matchup Strategies=
| |
| To come.
| |
| <br>
| |
|
| |
|
| {{Template:Garou: Mark of the Wolves}} | | ===== <span class="invisible-header">Ore-sama Houou Kyaku (236236236C)</span> ===== |
| | <font style="visibility:hidden" size="0"></font> |
| | {{MoveData |
| | |image =DongHiddenSuper.jpg |
| | |name =Ore-sama Houou Kyaku |
| | |input =236236236C |
| | |caption= |
| | |data= |
| | {{AttackData-Garou |
| | |version =C |
| | |Damage= 9, 4×7, 3×3, 9×5 |
| | |Guard=Mid |
| | |Startup=0 |
| | |Active= |
| | |Recovery= |
| | |Total= |
| | |Hit Adv=KD |
| | |Block Adv=-10 |
| | |Feint Cancel= |
| | |Cancel on Hit= |
| | |Cancel on Block= |
| | |Guard Crush Value=20 |
| | |description= 1F full-body invincibility. |
| | }} |
| | }} |
|
| |
|
| | {{Navbox-MOTW}} |
| [[Category:Garou: Mark of the Wolves]] | | [[Category:Garou: Mark of the Wolves]] |
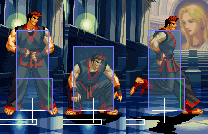


![]() , then
, then ![]() /
/![]() /
/![]() Dong cannot JD during a superjump, allowing opponents to anti air
Dong cannot JD during a superjump, allowing opponents to anti air