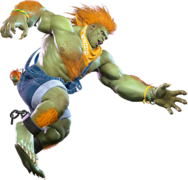
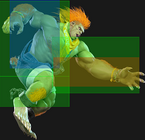
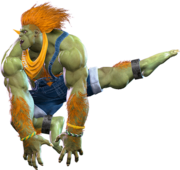
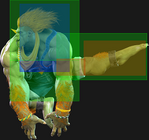
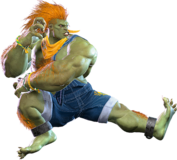
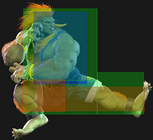
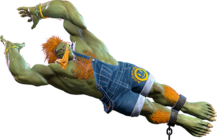
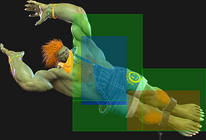
|
|
| (9 intermediate revisions by 2 users not shown) |
| Line 193: |
Line 193: |
| * 1f extra recovery on block | | * 1f extra recovery on block |
| * Forces stand | | * Forces stand |
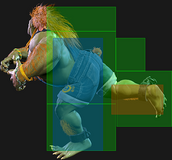
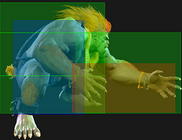
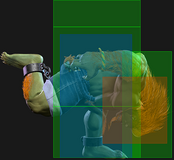
| | * Extends a hurtbox 1f before active that is vulnerable to projectiles |
| <br> | | <br> |
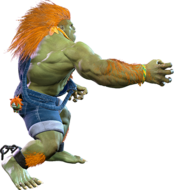
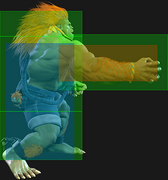
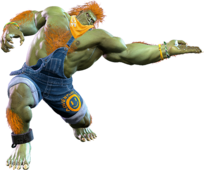
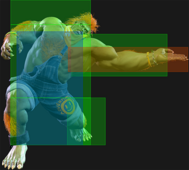
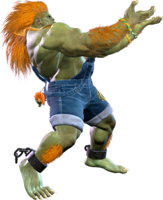
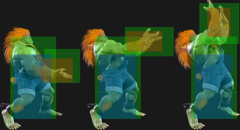
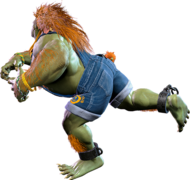
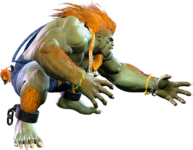
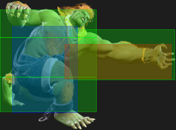
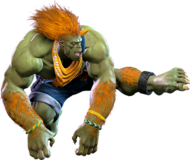
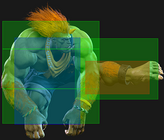
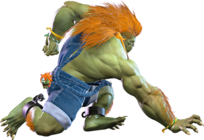
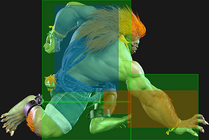
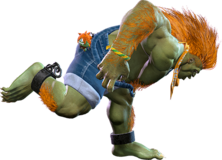
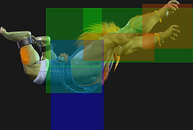
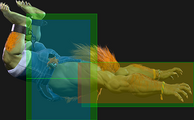
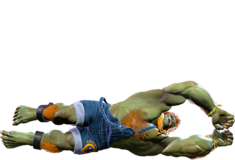
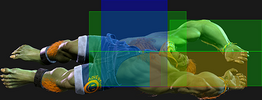
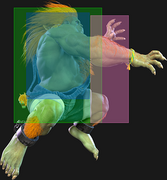
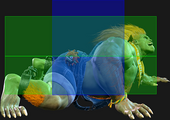
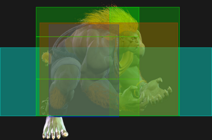
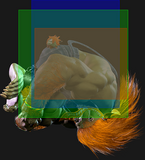
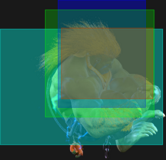
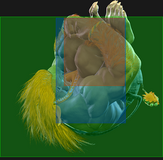
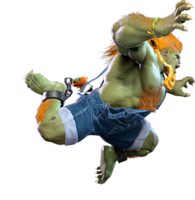
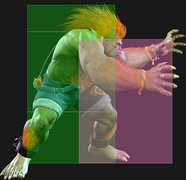
| Enormous reach for a normal attack, and one of Blanka's farthest-reaching neutral options. Great for harassing the opponent's Drive gauge, especially when they are on the lookout to Perfect Parry a Blanka Ball. Can be fairly easily counterpoked and whiff punished due to the slow startup and long recovery time, so it should be used sparingly. | | Enormous reach for a normal attack, and one of Blanka's farthest-reaching neutral options. Great for harassing the opponent's Drive gauge, especially when they are on the lookout to Perfect Parry a Blanka Ball. Can be fairly easily counterpoked and whiff punished due to the slow startup and long recovery time, so it should be used sparingly. |
| Line 215: |
Line 216: |
| * Applies 20% damage scaling to next hit when beginning a combo (100/80/70...) | | * Applies 20% damage scaling to next hit when beginning a combo (100/80/70...) |
| <br> | | <br> |
| Blanka's fastest low, typically making it good for pressure. Chaining into {{clr|L|2LP}} leaves a 5f blockstring gap, and a chain into another {{clr|L|2LK}} leaves a 4f gap, allowing the opponent to mash out of pressure or at least force a trade. Chaining from {{clr|L|2LK}} into {{clr|L|5LK}} will frame trap any of the opponent's buttons. | | Blanka's fastest low, typically making it good for pressure. Chaining into {{clr|L|2LP}} leaves a 4f blockstring gap, allowing the opponent to trade with their own mashed 4f button. Chaining into {{clr|L|5LK}} or another {{clr|L|2LK}} will frame trap any of the opponent's buttons. |
| }} | | }} |
|
| |
|
| Line 254: |
Line 255: |
| {{AttackDataCargo-SF6/Query|blanka_2hk}} | | {{AttackDataCargo-SF6/Query|blanka_2hk}} |
| * {{clr|PC|Counter-hit/Punish Counter}}: HKD +46 | | * {{clr|PC|Counter-hit/Punish Counter}}: HKD +46 |
| * Has juggle potential; not a Hard Knockdown when juggled into | | * Has juggle potential |
| <br> | | <br> |
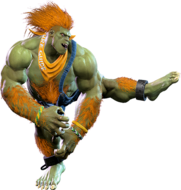
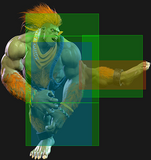
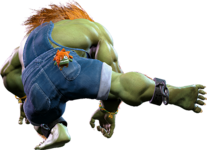
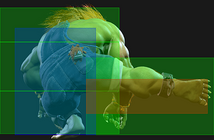
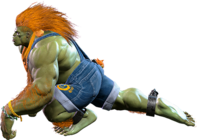
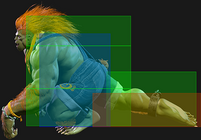
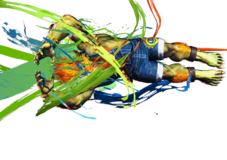
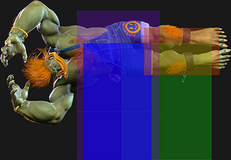
| Blanka's traditional sweep with fairly long range and a convenient Hard Knockdown on hit. Has a lot of recovery, above-average startup and is unsafe on block, so it should be used either as a whiff punish or against characters with poor ranged punish options. | | Blanka's traditional sweep with fairly long range and a convenient Hard Knockdown on hit. Has a lot of recovery, above-average startup and is unsafe on block, so it should be used either as a whiff punish or against characters with poor ranged punish options. |
| Line 280: |
Line 281: |
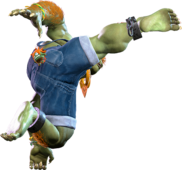
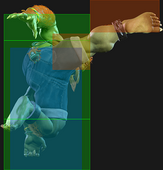
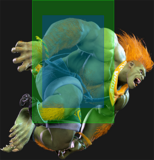
| | title = Jumping Medium Punch | | | title = Jumping Medium Punch |
| | subtitle = | | | subtitle = |
| | input = {{Classic_sf6}} j.MP<br>{{Modern_sf6}} -- | | | input = {{Classic_sf6}} j.MP<br>{{Modern_sf6}} j.M |
| | images = | | | images = |
| {{MoveDataCargoImage|imageHeight=140px|blanka_jmp|caption=}} | | {{MoveDataCargoImage|imageHeight=140px|blanka_jmp|caption=}} |
| Line 289: |
Line 290: |
| * Puts airborne opponents into a {{sf6-jug|limited juggle}} state | | * Puts airborne opponents into a {{sf6-jug|limited juggle}} state |
| * Cancelable into Aerial Rolling Attack (no charge required during SA2) | | * Cancelable into Aerial Rolling Attack (no charge required during SA2) |
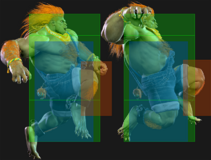
| | * '''Lower Body Projectile Invuln''' 7-22f (except around the attack hitbox) |
| | ** Cannot be used to avoid the 2nd hit of JP's {{clr|OD|OD Amnesia}} bombs |
| <br> | | <br> |
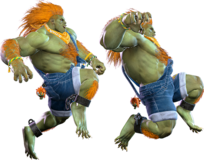
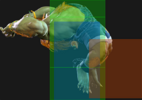
| Rewarding air-to-air if you have back charge, though the downward angle of the hitbox can make it harder to use in some scenarios. Allows a juggle route into Aerial Rolling Attack after {{clr|OD|OD Rolling Attack}}. | | Rewarding air-to-air if you have back charge, though the downward angle of the hitbox can make it harder to use in some scenarios. Allows a juggle route into Aerial Rolling Attack after {{clr|OD|OD Rolling Attack}}. |
| Line 297: |
Line 300: |
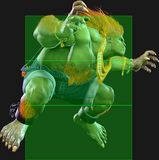
| | title = Jumping Heavy Punch | | | title = Jumping Heavy Punch |
| | subtitle = | | | subtitle = |
| | input = {{Classic_sf6}} j.HP<br>{{Modern_sf6}} -- | | | input = {{Classic_sf6}} j.HP<br>{{Modern_sf6}} j.A[H] |
| | images = | | | images = |
| {{MoveDataCargoImage|imageHeight=160px|blanka_jhp|caption=}} | | {{MoveDataCargoImage|imageHeight=160px|blanka_jhp|caption=}} |
| Line 305: |
Line 308: |
| {{AttackDataCargo-SF6/Query|blanka_jhp}} | | {{AttackDataCargo-SF6/Query|blanka_jhp}} |
| * Spike knockdown vs. airborne opponents | | * Spike knockdown vs. airborne opponents |
| | * '''Lower Body Projectile Invuln''' 9-23f (except around the attack hitbox) |
| | ** Cannot be used to avoid the 2nd hit of JP's {{clr|OD|OD Amnesia}} bombs |
| <br> | | <br> |
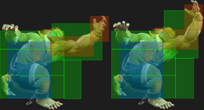
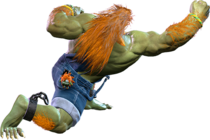
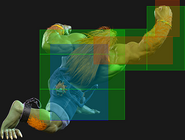
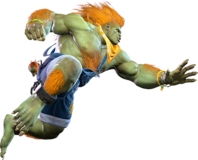
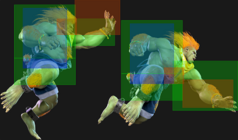
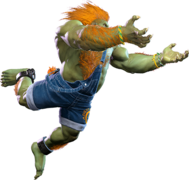
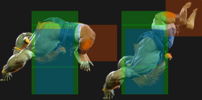
| Blanka hits slightly above himself before swinging his arms down. More vulnerable to anti-airs than {{clr|H|j.HK}} since the hurtbox extends well outside the attack hitbox. | | Blanka hits slightly above himself before swinging his arms down. More vulnerable to anti-airs than {{clr|H|j.HK}} since the hurtbox extends well outside the attack hitbox. |
| Line 313: |
Line 318: |
| | title = Neutral Jumping Heavy Punch | | | title = Neutral Jumping Heavy Punch |
| | subtitle = | | | subtitle = |
| | input = {{Classic_sf6}} 8j.HP<br>{{Modern_sf6}} -- | | | input = {{Classic_sf6}} 8j.HP<br>{{Modern_sf6}} 8j.A[H] |
| | images = | | | images = |
| {{MoveDataCargoImage|imageHeight=180px|blanka_8jhp|caption=}} | | {{MoveDataCargoImage|imageHeight=180px|blanka_8jhp|caption=}} |
| Line 321: |
Line 326: |
| {{AttackDataCargo-SF6/Query|blanka_8jhp}} | | {{AttackDataCargo-SF6/Query|blanka_8jhp}} |
| * Puts airborne opponents into a {{sf6-jug|limited juggle}} state | | * Puts airborne opponents into a {{sf6-jug|limited juggle}} state |
| | * '''Lower Body Projectile Invuln''' 7-23f (except around the attack hitbox) |
| | ** Cannot be used to avoid the 2nd hit of JP's {{clr|OD|OD Amnesia}} bombs |
| <br> | | <br> |
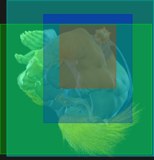
| Air-to-air with decent horizontal range. Does not cancel into Aerial Rolling Attack like {{clr|M|j.MP}}, but is more rewarding when Blanka does not have charge. | | Air-to-air with decent horizontal range. Does not cancel into Aerial Rolling Attack like {{clr|M|j.MP}}, but is more rewarding when Blanka does not have charge. |
| Line 329: |
Line 336: |
| | title = Jumping Light Kick | | | title = Jumping Light Kick |
| | subtitle = | | | subtitle = |
| | input = {{Classic_sf6}} j.LK<br>{{Modern_sf6}} -- | | | input = {{Classic_sf6}} j.LK<br>{{Modern_sf6}} j.A[L] |
| | images = | | | images = |
| {{MoveDataCargoImage|imageHeight=170px|blanka_jlk|caption=}} | | {{MoveDataCargoImage|imageHeight=170px|blanka_jlk|caption=}} |
| Line 344: |
Line 351: |
| | title = Jumping Medium Kick | | | title = Jumping Medium Kick |
| | subtitle = | | | subtitle = |
| | input = {{Classic_sf6}} j.MK<br>{{Modern_sf6}} j.M | | | input = {{Classic_sf6}} j.MK<br>{{Modern_sf6}} j.A[M] |
| | images = | | | images = |
| {{MoveDataCargoImage|imageHeight=160px|blanka_jmk|caption=}} | | {{MoveDataCargoImage|imageHeight=160px|blanka_jmk|caption=}} |
| Line 352: |
Line 359: |
| {{AttackDataCargo-SF6/Query|blanka_jmk}} | | {{AttackDataCargo-SF6/Query|blanka_jmk}} |
| * Can hit cross-up | | * Can hit cross-up |
| | * '''Lower Body Projectile Invuln''' 7-17f (except around the attack hitbox) |
| | ** Cannot be used to avoid the 2nd hit of JP's {{clr|OD|OD Amnesia}} bombs |
| <br> | | <br> |
| Fairly wide cross-up hitbox. Great option after Raid Jump (2PP~K) that can hit very ambiguously. | | Fairly wide cross-up hitbox. Great option after Raid Jump (2PP~K) that can hit very ambiguously. |
| Line 367: |
Line 376: |
| | info = | | | info = |
| {{AttackDataCargo-SF6/Query|blanka_jhk}} | | {{AttackDataCargo-SF6/Query|blanka_jhk}} |
| | * '''Lower Body Projectile Invuln''' 11-19f (except around the attack hitbox) |
| | ** Cannot be used to avoid the 2nd hit of JP's {{clr|OD|OD Amnesia}} bombs |
| <br> | | <br> |
| Blanka's main jump-in attack with solid horizontal and vertical range. The lower edge of the hitbox lines up with the hurtbox, allowing it to beat or trade with many anti-air moves. | | Blanka's main jump-in attack with solid horizontal and vertical range. The lower edge of the hitbox lines up with the hurtbox, allowing it to beat or trade with many anti-air moves. |
| Line 402: |
Line 413: |
| {{AttackDataCargo-SF6/Query|blanka_6mk}} | | {{AttackDataCargo-SF6/Query|blanka_6mk}} |
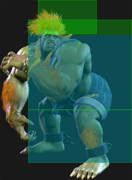
| * '''Low Crush:''' 9-23f (not airborne) | | * '''Low Crush:''' 9-23f (not airborne) |
| | * Forces stand |
| * 1st hit puts airborne opponents into {{sf6-jug|free juggle}} state (allows both hits to connect) | | * 1st hit puts airborne opponents into {{sf6-jug|free juggle}} state (allows both hits to connect) |
| * {{clr|PC|Counter-hit/Punish Counter}} bonus advantage carries through both hits | | * {{clr|PC|Counter-hit/Punish Counter}} bonus advantage carries through both hits |
| <br> | | <br> |
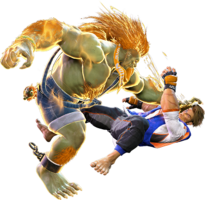
| A hopping 2-hit knee strike that advances forward. Can combo naturally into {{clr|L|5LP}} or {{clr|L|2LP}} with plenty of time to hitconfirm. Works well out of {{clr|DR|Drive Rush}}, giving it extra momentum, plus frames on block, and a combo route into {{clr|H|5HP}} for great damage. | | A hopping 2-hit knee strike that advances forward. Can combo naturally into {{clr|L|5LP}} or {{clr|L|2LP}} with plenty of time to hitconfirm, and always allows a combo into Vertical Roll since the opponent is put into standing hitstun. Works well out of {{clr|DR|Drive Rush}}, giving it extra momentum, plus frames on block, and a combo route into {{clr|H|5HP}} for great damage. |
| }} | | }} |
|
| |
|
| Line 502: |
Line 514: |
| * Applies 20% damage scaling to 3rd hit of combo after juggling into Blanka-chan (in addition to the doll's 2-hit combo scaling) | | * Applies 20% damage scaling to 3rd hit of combo after juggling into Blanka-chan (in addition to the doll's 2-hit combo scaling) |
| ** e.g. Throw (100), Blanka-chan (100), follow-up juggle (50) | | ** e.g. Throw (100), Blanka-chan (100), follow-up juggle (50) |
| | * Successful Throw Escape builds {{clr|DR|1 Drive Gauge}} and {{clr|SA|10% Super Gauge}} for defender |
| | ** Awarded to random player if Throws are input simultaneously |
| <br> | | <br> |
| Sets up an excellent corner throw loop with multiple options to alter the timing. Walking forward requires manual timing on the next strike/throw mixup, but allows for precise positioning and is the best option for baiting the opponent's throw tech. | | Sets up an excellent corner throw loop with multiple options to alter the timing. Walking forward requires manual timing on the next strike/throw mixup, but allows for precise positioning and is the best option for baiting the opponent's throw tech. |
| Line 526: |
Line 540: |
| * {{clr|PC|Punish Counter}}: HKD +27 | | * {{clr|PC|Punish Counter}}: HKD +27 |
| * Applies 20% immediate damage scaling when comboed into (e.g. after Crumple) | | * Applies 20% immediate damage scaling when comboed into (e.g. after Crumple) |
| | * Successful Throw Escape builds {{clr|DR|1 Drive Gauge}} and {{clr|SA|10% Super Gauge}} for defender |
| | ** Awarded to random player if Throws are input simultaneously |
| <br> | | <br> |
| After throwing the opponent back into the corner, Blanka is {{sf6-adv|VP|+8}} after a forward dash. This allows him to pressure with {{clr|M|4MK}}, but leaves him too far to throw the opponent's wakeup 4f buttons (except against Blanka, E. Honda, and Zangief). Spending 1 bar on {{clr|DR|Drive Rush}} allows stronger oki while allowing Blanka to bait a reversal if he doesn't commit to an attack. | | After throwing the opponent back into the corner, Blanka is {{sf6-adv|VP|+8}} after a forward dash. This allows him to pressure with {{clr|M|4MK}}, but leaves him too far to throw the opponent's wakeup 4f buttons (except against Blanka, E. Honda, and Zangief). Spending 1 bar on {{clr|DR|Drive Rush}} allows stronger oki while allowing Blanka to bait a reversal if he doesn't commit to an attack. |
| Line 538: |
Line 554: |
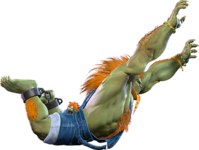
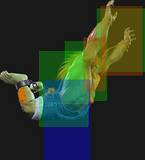
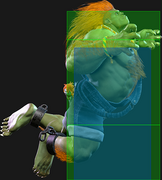
| | input = {{Classic_sf6}} LPLK (air)<br>{{Modern_sf6}} LM (air) | | | input = {{Classic_sf6}} LPLK (air)<br>{{Modern_sf6}} LM (air) |
| | images = | | | images = |
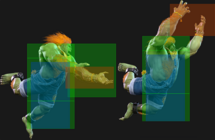
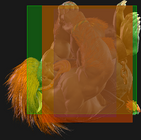
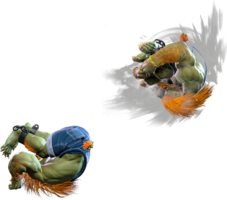
| {{MoveDataCargoImage|imageHeight=180px|blanka_jlplk|caption=}} | | {{MoveDataCargoImage|imageHeight=180px|blanka_jlplk|caption=''Wait, Blanka has an air throw?''}} |
| | hitboxes = | | | hitboxes = |
| {{MoveDataCargoImage|hitbox=yes|imageHeight=180px|blanka_jlplk|caption=}} | | {{MoveDataCargoImage|hitbox=yes|imageHeight=180px|blanka_jlplk|caption=}} |
| Line 1,120: |
Line 1,136: |
| * '''Airborne''' 9-28f ({{FKD}} state); Range: 2.68-3.58 | | * '''Airborne''' 9-28f ({{FKD}} state); Range: 2.68-3.58 |
| * Can hold forward/back to control the trajectory | | * Can hold forward/back to control the trajectory |
| | * Can be comboed into on grounded/airborne opponents |
| <br> | | <br> |
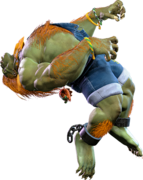
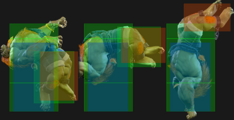
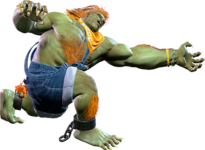
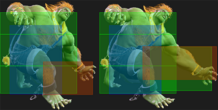
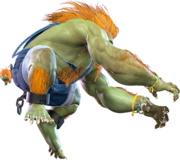
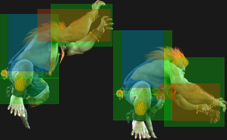
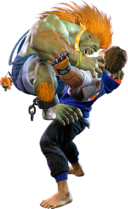
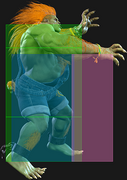
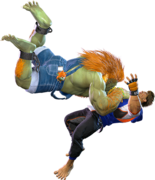
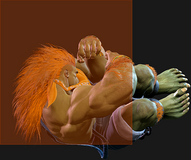
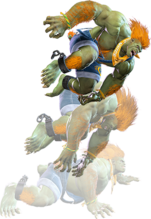
| A slow, hopping command grab that can open up overly-defensive opponents, draining a bar of Drive gauge if you manage to throw during their parry attempt. The startup is quite reactable, so it helps to make the opponent focus on other threats like {{clr|H|HP Roll}} or an activated Blanka-chan doll first. Blanka can be punished heavily if the opponent jumps or backdashes. In addition to its faster startup, the {{clr|OD|OD}} version is the best at avoiding the opponent's attacks by pulling up the hurtbox while hopping. | | A slow, hopping command grab that can open up overly-defensive opponents, draining a bar of Drive gauge if you manage to throw during their parry attempt. The startup is quite reactable, so it helps to make the opponent focus on other threats like {{clr|H|HP Roll}} or an activated Blanka-chan doll first. Blanka can be punished heavily if the opponent jumps or backdashes. |
| | |
| | The {{clr|OD|OD}} version is the fastest, and pulls its hurtbox up high enough to avoid many grounded attacks. Because it can be comboed into, Blanka can take advantage of its high knockdown advantage to set up a Blanka-chan doll for a strong mixup. |
| }} | | }} |
|
| |
|
| Line 1,270: |
Line 1,289: |
| * '''Full Invuln''': 1-12f; '''Airborne''' 2-12f; Armor Break | | * '''Full Invuln''': 1-12f; '''Airborne''' 2-12f; Armor Break |
| * '''Drive Gauge Depletion:''' 1.5 bars (hit) / 0.75 bars (block) | | * '''Drive Gauge Depletion:''' 1.5 bars (hit) / 0.75 bars (block) |
| ** Cinematic time regenerates ~1.6 Drive bars for Blanka | | ** Cinematic time regenerates ~1.8 Drive bars for Blanka |
| * 50% minimum damage scaling; applies 10% immediate damage scaling when canceled from special moves | | * 50% minimum damage scaling; applies 10% immediate damage scaling when canceled from special moves |
| {{AttackDataCargo-SF6/Query|blanka_236236k(ca)}} | | {{AttackDataCargo-SF6/Query|blanka_236236k(ca)}} |
| Line 1,276: |
Line 1,295: |
| * Available at 25% HP or below | | * Available at 25% HP or below |
| * '''Drive Gauge Depletion:''' 2 bars (hit) / 1 bar (block) | | * '''Drive Gauge Depletion:''' 2 bars (hit) / 1 bar (block) |
| ** Cinematic time regenerates ~1.3 Drive bars for Blanka | | ** Cinematic time regenerates ~2.3 Drive bars for Blanka |
| * 50% minimum damage scaling; applies 10% immediate damage scaling when canceled from special moves | | * 50% minimum damage scaling; applies 10% immediate damage scaling when canceled from special moves |
| <br> | | <br> |
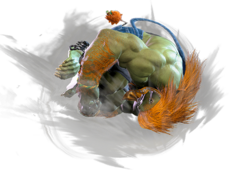
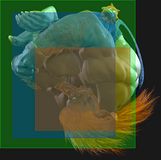
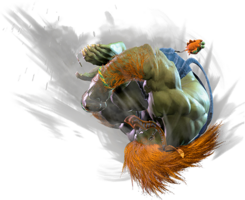
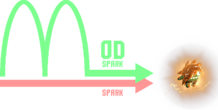
| An easy-to-use Super that reaches about 60% of the screen length, making it a decent projectile counter. While it works well in many combo and juggle route, the high utility of {{clr|SA|SA2}} makes it hard to justify saving 3 bars of meter. This is compounded by the fact that it regenerates less Drive gauge during the cinematic than most characters; this is because Blanka is technically considered airborne during most of the cinematic, which slows the rate of Drive regeneration. The {{clr|SA|CA}} version has a tiny bit less range than the {{clr|SA|SA3}} version, which generally only matters when attempting a max range fireball punish. | | An easy-to-use Super that reaches about 60% of the screen length, making it a decent projectile counter. While it works well in many combo and juggle route, the high utility of {{clr|SA|SA2}} makes it hard to justify saving 3 bars of meter. The {{clr|SA|CA}} version has a tiny bit less range than the {{clr|SA|SA3}} version, which generally only matters when attempting a max range fireball punish. |
| }} | | }} |
| <br> | | <br> |

