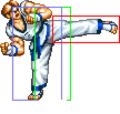
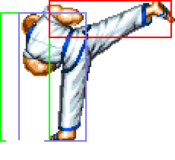
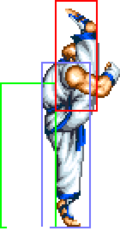
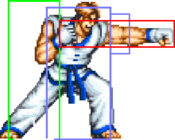
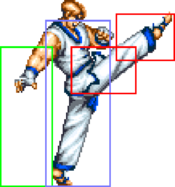
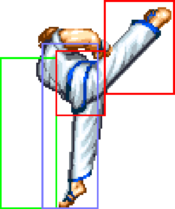
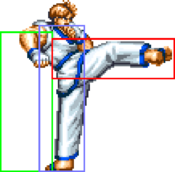
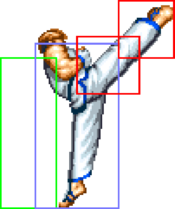
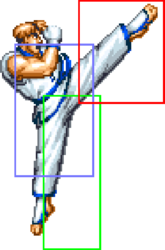
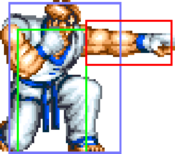
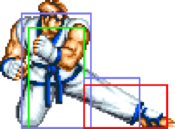
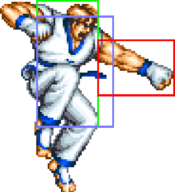
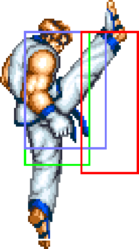
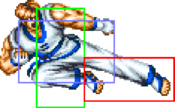
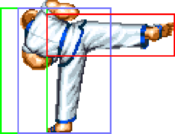
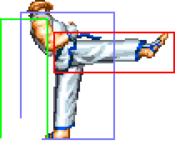
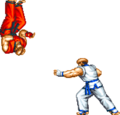
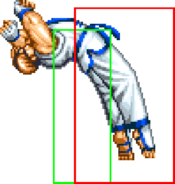
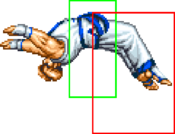
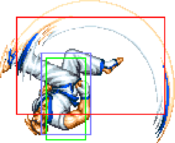
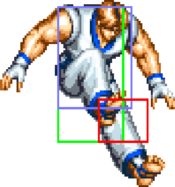
(→jD) |
|||
| (39 intermediate revisions by 2 users not shown) | |||
| Line 1: | Line 1: | ||
[[File:Ffspeckim.png|right]] | [[File:Ffspeckim.png|right|The Tai-Kwan-Do Genius]] | ||
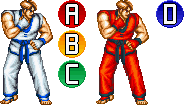
[[File:Ffspeckim_colors.png| | [[File:Ffspeckim_colors.png|right]] | ||
{{TOClimit|3}} | {{TOClimit|3}} | ||
| Line 25: | Line 25: | ||
|} | |} | ||
==Move List== | |||
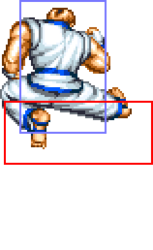
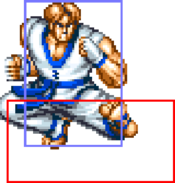
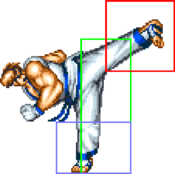
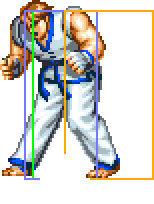
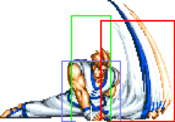
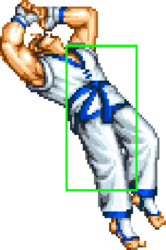
===General Hurtboxes=== | |||
{| border="1em" cellspacing="0" style="border: 1px solid #999;" | {| border="1em" cellspacing="0" style="border: 1px solid #999;" | ||
| align="center" | Standing || align="center" | Crouching || align="center" | Jumping | | align="center" | Standing || align="center" | Crouching || align="center" | Jumping || align="center" | Taunting | ||
|- | |- | ||
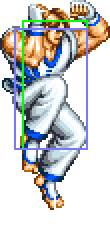
| align="center" | [[File: | | align="center"; valign="bottom" | [[File:FFS_Kim_Stand.png]] || align="center"; valign="bottom" | [[File:FFS_Kim_Crouch.png]] || align="center"; valign="bottom" | [[File:FFS_Kim_Jump.png]] || align="center"; valign="bottom" | [[File:FFS_Kim_Taunt.gif]] | ||
|- | |- | ||
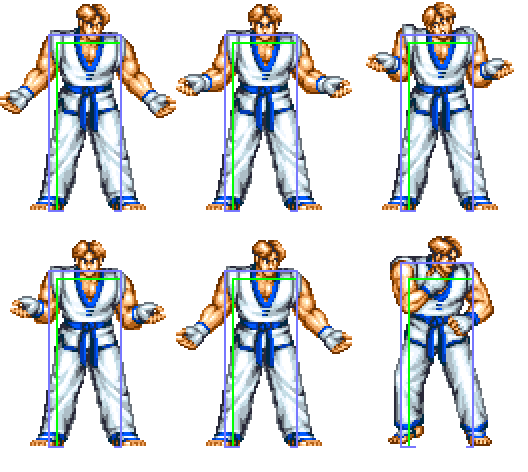
| align="center" | || align="center" | || align="center" | 54F (4+47+3) duration. | |||
|} | |} | ||
=== Close Standing Normals === | === Close Standing Normals === | ||
| Line 40: | Line 42: | ||
{{MoveData | {{MoveData | ||
|image=FFS_Kim_c5A.png | |image=FFS_Kim_c5A.png | ||
|subtitle= | |subtitle=Jab/ジャブ | ||
|caption= | |caption= | ||
|name=c5A | |name=c5A | ||
| Line 54: | Line 56: | ||
|Hit Adv=+9 | |Hit Adv=+9 | ||
|Block Adv=+10 | |Block Adv=+10 | ||
|Property= | |Property=Kara Cancel | ||
|description= | |description= The optimal combo starter. Links to itself a good number of times, especially when you hold forward while chaining them together. | ||
}} | }} | ||
}} | }} | ||
| Line 62: | Line 64: | ||
<font style="visibility:hidden" size="0"></font> | <font style="visibility:hidden" size="0"></font> | ||
{{MoveData | {{MoveData | ||
|image=FFS_Kim_c5B.png | |image=FFS_Kim_c5B 1.png | ||
|subtitle= | |subtitle= Knee Strike/膝蹴り | ||
|caption= | |caption= | ||
|name=c5B | |name=c5B | ||
|data= | |data= | ||
| Line 77: | Line 79: | ||
|Hit Adv=+6 | |Hit Adv=+6 | ||
|Block Adv=+7 | |Block Adv=+7 | ||
|Property=Cancel | |Property=Kara Cancel | ||
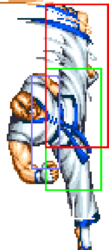
|description= | |description=Has a random upper-body invincible startup frame (most likely a bug), though it doesn't last long enough to have any meaningful use. Close 5A is generally better. | ||
<gallery class="mw-collapsible"> | |||
FFS Kim c5B.png|Upper-Body Invincible Frame | |||
FFS Kim c5B 1.png| | |||
</gallery> | |||
}} | }} | ||
}} | }} | ||
| Line 86: | Line 92: | ||
{{MoveData | {{MoveData | ||
|image=FFS_Kim_c5C.png | |image=FFS_Kim_c5C.png | ||
|subtitle= | |subtitle= Dwit Chagi/ディチャギ | ||
|caption= | |caption= | ||
|name=c5C | |name=c5C | ||
| Line 100: | Line 106: | ||
|Hit Adv=-10 | |Hit Adv=-10 | ||
|Block Adv=-11 | |Block Adv=-11 | ||
|Property=Cancel | |Property=Kara Cancel | ||
|description= | |description=Links from close 5A, can combo into 214B. 2C does the same job and is easier to use, though. | ||
}} | }} | ||
}} | }} | ||
| Line 109: | Line 115: | ||
{{MoveData | {{MoveData | ||
|image=FFS_Kim_c5D.png | |image=FFS_Kim_c5D.png | ||
|subtitle= | |subtitle= Neri Chagi/ネリチャギ | ||
|caption= | |caption= | ||
|name=c5D | |name=c5D | ||
| Line 123: | Line 129: | ||
|Hit Adv=+7 | |Hit Adv=+7 | ||
|Block Adv=+8 | |Block Adv=+8 | ||
|Property=Cancel | |Property=Kara Cancel | ||
|description= | |description=Hits twice dealing good damage when both hits connect. Can easily combo into 214B or super. | ||
<gallery class="mw-collapsible"> | |||
FFS Kim c5D.png| | |||
FFS Kim c5D 1.png| | |||
</gallery> | |||
}} | }} | ||
}} | }} | ||
| Line 134: | Line 144: | ||
{{MoveData | {{MoveData | ||
|image=FFS_Kim_5A_1.png | |image=FFS_Kim_5A_1.png | ||
|subtitle= | |subtitle=Jireugi/チルギ | ||
|caption= | |caption= | ||
|name=f5A | |name=f5A | ||
| Line 148: | Line 158: | ||
|Hit Adv=+5 | |Hit Adv=+5 | ||
|Block Adv=+6 | |Block Adv=+6 | ||
|Property=Cancel | |Property=Kara Cancel | ||
|description=Surprisingly long hitbox, and has more reach than 2A. Not necessary for his combo game, but not a bad poke regardless. Comes out fast and is pretty active for a jab. | |description=Surprisingly long hitbox, and has more reach than 2A. Not necessary for his combo game, but not a bad poke regardless. Comes out fast and is pretty active for a jab. | ||
}} | }} | ||
| Line 157: | Line 167: | ||
{{MoveData | {{MoveData | ||
|image=FFS_Kim_5B.png | |image=FFS_Kim_5B.png | ||
|subtitle= | |subtitle=Ap Chagi/アプチャギ | ||
|caption= | |caption= | ||
|name=f5B | |name=f5B | ||
| Line 171: | Line 181: | ||
|Hit Adv=-1 | |Hit Adv=-1 | ||
|Block Adv=0 | |Block Adv=0 | ||
|Property=Cancel | |Property=Kara Cancel | ||
|description=Decently fast anti-air poke for catching opponents out of the air if Kim is unable to charge Hienzan or do an air-to-air jD. Decent ground poke as well, but it's possible to whiff against small/crouching characters. Very slightly more range than f5A | |description=Decently fast anti-air poke for catching opponents out of the air if Kim is unable to charge Hienzan or do an air-to-air jD. Decent ground poke as well, but it's possible to whiff against small/crouching characters. Very slightly more range than f5A. | ||
}} | }} | ||
}} | }} | ||
| Line 181: | Line 191: | ||
|image=FFS_Kim_5C_1.png | |image=FFS_Kim_5C_1.png | ||
|image2=FFS_Kim_5C_2.png | |image2=FFS_Kim_5C_2.png | ||
|subtitle= | |subtitle=Dollyeo Chagi/ドリャチャギ | ||
|caption= | |caption= | ||
|name=f5C | |name=f5C | ||
| Line 196: | Line 206: | ||
|Block Adv=+2 | |Block Adv=+2 | ||
|Property= | |Property= | ||
|description=Solid anti-air poke that hits twice. | |description=Solid anti-air poke that hits twice. Links from c5A and can be used as an alternate combo ender instead of 2C -> 214B, doing less damage but more stun. | ||
}} | }} | ||
}} | }} | ||
| Line 205: | Line 215: | ||
|image=FFS_Kim_5D_1.png | |image=FFS_Kim_5D_1.png | ||
|image2=FFS_Kim_5D_4.png | |image2=FFS_Kim_5D_4.png | ||
|subtitle= | |subtitle=Bandae Dollyeo Chagi/パンデ・ドリャチャギ | ||
|caption= | |caption= | ||
|name=f5D | |name=f5D | ||
| Line 220: | Line 230: | ||
|Block Adv=-4 | |Block Adv=-4 | ||
|Property= | |Property= | ||
|description=Hits twice | |description=Hits twice. Can be used as an anti-air, but f5C serves the same purpose and is much safer on whiff. | ||
}} | }} | ||
}} | }} | ||
| Line 230: | Line 240: | ||
{{MoveData | {{MoveData | ||
|image=FFS_Kim_2A.png | |image=FFS_Kim_2A.png | ||
|subtitle= | |subtitle=Crouching Jab/しゃがみジャブ | ||
|caption= | |caption= | ||
|name=2A | |name=2A | ||
| Line 244: | Line 254: | ||
|Hit Adv=+8 | |Hit Adv=+8 | ||
|Block Adv=+9 | |Block Adv=+9 | ||
|Property= | |Property=Kara Cancel | ||
|description= | |description= * Similar to c5A but hits crouching opponents in exchange for slightly worse damage and frame data. Just like c5A, it easily links to itself and 2C and provides time for microwalking. Also ridiculously advantageous on block, allowing for extended pressure and true blockstrings to 2C 214B/DM. | ||
}} | }} | ||
}} | }} | ||
| Line 253: | Line 263: | ||
{{MoveData | {{MoveData | ||
|image=FFS_Kim_2B.png | |image=FFS_Kim_2B.png | ||
|subtitle= | |subtitle=Crouching Kick/しゃがみ蹴り | ||
|caption= | |caption= | ||
|name=2B | |name=2B | ||
| Line 267: | Line 277: | ||
|Hit Adv=+5 | |Hit Adv=+5 | ||
|Block Adv=+6 | |Block Adv=+6 | ||
|Property=Cancel | |Property=Kara Cancel | ||
|description= | |description= * Inferior to 2A as a poke, but hits low and can combo into c5A/2A. | ||
}} | }} | ||
}} | }} | ||
| Line 276: | Line 286: | ||
{{MoveData | {{MoveData | ||
|image=FFS_Kim_2C-D.png | |image=FFS_Kim_2C-D.png | ||
|subtitle= | |subtitle=Crouching Kick/しゃがみ蹴り | ||
|caption= | |caption= | ||
|name=2C | |name=2C | ||
| Line 290: | Line 300: | ||
|Hit Adv=-4 | |Hit Adv=-4 | ||
|Block Adv=-5 | |Block Adv=-5 | ||
|Property=Cancel | |Property=Kara Cancel | ||
|description= | |description= * Excellent poke that can always be cancelled into 214B or DM for a combo on hit or free chip on block. Great reward for little risk. | ||
* Easily comboed into from c5A or 2A. | |||
}} | }} | ||
}} | }} | ||
| Line 299: | Line 310: | ||
{{MoveData | {{MoveData | ||
|image=FFS_Kim_2C-D.png | |image=FFS_Kim_2C-D.png | ||
|subtitle= | |subtitle=Scoop Kick/すくい蹴り | ||
|caption= | |caption= | ||
|name=2D | |name=2D | ||
| Line 313: | Line 324: | ||
|Hit Adv=KD | |Hit Adv=KD | ||
|Block Adv=+1 | |Block Adv=+1 | ||
|Property=Cancel | |Property=Kara Cancel | ||
|description= | |description=Slower version of 2C that knocks down. | ||
}} | }} | ||
}} | }} | ||
| Line 398: | Line 409: | ||
|data= | |data= | ||
{{AttackData-FFS | {{AttackData-FFS | ||
|version=Diagonal Jump | |||
|Damage=20 | |||
|Stun=4 | |||
|Guard=Overhead | |||
|Startup=8 | |||
|Active=17 | |||
|Recovery= | |||
|Total= | |||
|Hit Adv= | |||
|Block Adv= | |||
|Property= | |||
|description= * Excellent jump-in and air-to-air. | |||
}} | |||
{{AttackData-FFS | |||
|header=no | |||
|version=Neutral Jump | |||
|Damage=20 | |Damage=20 | ||
|Stun=4 | |Stun=4 | ||
| Line 408: | Line 435: | ||
|Block Adv= | |Block Adv= | ||
|Property= | |Property= | ||
|description= | |description= | ||
}} | }} | ||
}} | }} | ||
=== | === Universal Mechanics === | ||
===== <span class="invisible-header">Lane Blast</span> ===== | ===== <span class="invisible-header">Lane Blast (CD)</span> ===== | ||
<font style="visibility:hidden" size="0"></font> | <font style="visibility:hidden" size="0"></font> | ||
{{MoveData | {{MoveData | ||
| Line 479: | Line 506: | ||
|Block Adv= | |Block Adv= | ||
|Property= | |Property= | ||
|description= | |description= * Straight and fast lane attack. | ||
}} | }} | ||
{{AttackData-FFS | {{AttackData-FFS | ||
| Line 494: | Line 521: | ||
|Block Adv= | |Block Adv= | ||
|Property= | |Property= | ||
|description= | |description= * Slower high angle lane attack. | ||
}} | }} | ||
}} | }} | ||
| Line 517: | Line 544: | ||
|Hit Adv=Air reset | |Hit Adv=Air reset | ||
|Block Adv=-8 | |Block Adv=-8 | ||
|Property=Cancel, Upper-Body Invuln 1-23F, 32-39F | |Property=Kara Cancel, Upper-Body Invuln 1-23F, 32-39F | ||
|description=Pretty weak attack overall. You will likely forget Kim even has it, given it's bad range, albeit he has upper body invincibility. Hienzan and Hangetsuzan, or any of his exceptional normals, would be better than using his Dodge Attack. | |description=Pretty weak attack overall. You will likely forget Kim even has it, given it's bad range, albeit he has upper body invincibility. Hienzan and Hangetsuzan, or any of his exceptional normals, would be better than using his Dodge Attack. | ||
}} | }} | ||
| Line 524: | Line 551: | ||
=== Throws === | === Throws === | ||
===== <span class="invisible-header"> | ===== <span class="invisible-header">Sakkyaku Nage (4/6C)</span> ===== | ||
<font style="visibility:hidden" size="0"></font> | <font style="visibility:hidden" size="0"></font> | ||
{{MoveData | {{MoveData | ||
|image= | |image=FFS Kim C Throw.png | ||
|caption= | |caption= | ||
|name=Sakkyaku Nage | |name=Sakkyaku Nage | ||
|input= | |input=close 4/6C | ||
|data= | |data= | ||
{{AttackData-FFS | {{AttackData-FFS | ||
|Damage=26 | |Damage=26 | ||
|Stun=3 | |Stun=3 | ||
|Guard=Throw | |||
|Startup=1 | |Startup=1 | ||
|Active=1 | |Active=1 | ||
|Recovery=/ | |Recovery=/ | ||
|Hit Adv= | |Hit Adv=KD | ||
|Block Adv=/ | |Block Adv=/ | ||
|description=Kim | |description= * Switches sides. | ||
<gallery class="mw-collapsible"> | |||
FFS Kim C Throw 1.png| | |||
</gallery> | |||
}} | }} | ||
}} | }} | ||
| Line 643: | Line 674: | ||
| data = | | data = | ||
{{AttackData-FFS | {{AttackData-FFS | ||
| version = B | |||
| subtitle = | | subtitle = | ||
| Damage = 15 (3) | | Damage = 15 (3) | ||
| Line 654: | Line 686: | ||
| Block Adv = | | Block Adv = | ||
| Property = | | Property = | ||
| description = The crux of Kim's gameplan | | description = The crux of Kim's gameplan. Divekick gives Kim several uses: | ||
* Forward momentum no one else has instant access to | * Forward momentum no one else has instant access to | ||
* An easy punish tool that can punish pretty much anything on reaction | * An easy punish tool that can punish pretty much anything on reaction | ||
* A free pressure tool | * A free pressure tool | ||
* A corner escape | * A corner escape | ||
Since this is quintessential to Kim's gameplan, he will have to jump quite a lot and as such, you want to learn how to best utilize his divekick effectively, both as mobility and as a punish tool | Since this is quintessential to Kim's gameplan, he will have to jump quite a lot and as such, you want to learn how to best utilize his divekick effectively, both as mobility and as a punish tool. Kim loses the hitbox for divekick if he's about to land, so although the move can hit the opponent's lower body, it is possible to whiff and have Kim go through a few recovery frames. Albeit rare, the move can cross up the opponent and hit them behind, but they will still fall back the direction Kim is facing. | ||
}} | }} | ||
{{AttackData-FFS | {{AttackData-FFS | ||
| Line 691: | Line 723: | ||
| Block Adv = | | Block Adv = | ||
| Property = | | Property = | ||
| description = | | description = * If this is blocked, Kim can do a followup that is similar to jD that if timed well can stop an opponent trying to punish. Even with this followup and the distance created on block, it's still a dangerous situation for Kim and a potential corner escape for the opponent. | ||
}} | }} | ||
}} | }} | ||
=== | ===Desperation Move=== | ||
===== <span class="invisible-header"></span> ===== | ===== <span class="invisible-header">Ho'oukyaku (21416BD)</span> ===== | ||
<font style="visibility:hidden" size="0"></font> | <font style="visibility:hidden" size="0"></font> | ||
{{MoveData | {{MoveData | ||
| Line 722: | Line 754: | ||
==Combos== | ==Combos== | ||
{| border="1em" cellpadding="3" cellMPacing="0" | {| border="1em" cellpadding="3" cellMPacing="0" | ||
| align="center"|'''Combo''' | | align="center"; width=15%|'''Combo''' | ||
| align="center"|'''Damage''' | | align="center"|'''Damage''' | ||
| align="center"|'''Stun''' | | align="center"|'''Stun''' | ||
| align="center"|'''Notes''' | | align="center"|'''Notes''' | ||
|- | |- | ||
| | | c5AxN, 2C > 214B/21416BD | ||
| | | 55/73 | ||
| | | 19/20 | ||
| Kim's standard | | Kim's standard punish combo, which even on block is fully safe. c5A whiffs on some crouching characters! It will deal high damage regardless of how many c5As are used, but if enough are linked then this will stun most characters and let Kim end the round with another combo. Damage/Stun values are with 6 c5As. | ||
|- | |- | ||
| | | 2AxN, 2C > 214B/21416BD | ||
| | | 36/58 | ||
| | | 13/14 | ||
| | | Pretty much the same as using c5A, but will work on all crouchers. 2A does less damage than c5A and cannot be linked as many times due to inferior range, but if the opponent is standing or a tall croucher 2A can link to c5A just fine. Damage/Stun values are with 3 2As. | ||
|- | |- | ||
| | | c5D(2) > 214B/21416BD | ||
| | | 51/73 | ||
| | | 11/12 | ||
| Easy super confirm, especially since | | Easy super confirm, especially since c5D's duration gives you a ton of leg room to buffer his super input. Just like all of his other combos, it is safe on block. | ||
|- | |- | ||
|} | |} | ||
==Strategy== | ==Strategy== | ||
===The Basics=== | ===The Basics=== | ||
===Advanced Strategy=== | ===Advanced Strategy=== | ||
==Match-ups== | |||
===Vs. Andy Bogard=== | |||
===Vs. Axel Hawk=== | |||
===Vs. Big Bear=== | |||
===Vs. Billy Kane=== | |||
===Vs. Cheng Sinzan=== | |||
===Vs. Duck King=== | |||
===Vs. Geese Howard=== | |||
===Vs. Joe Higashi=== | |||
===Vs. Jubei Yamada=== | |||
===Vs. Kim Kaphwan=== | |||
===Vs. Laurence Blood=== | |||
===Vs. Mai Shiranui=== | |||
===Vs. Ryo Sakazaki=== | |||
===Vs. Terry Bogard=== | |||
===Vs. Tung Fu Rue=== | |||
===Vs. Wolfgang Krauser=== | |||
{{Navbox-FFS}} | {{Navbox-FFS}} | ||
[[Category:Fatal Fury Special]] | [[Category:Fatal Fury Special]] | ||
[[Category:Kim Kaphwan]] | [[Category:Kim Kaphwan]] | ||
Revision as of 23:46, 19 April 2025
Introduction
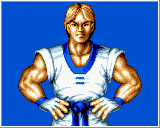
The Taekwondo master returns from Fatal Fury 2 to clash with the fighters of Fatal Fury Special, and he means business. In a game about reading and punishing your opponent, Kim's punish game is exceptional to the point he doesn't even have to play by the game's rules. An incredibly powerful anti-air reversal, a dive kick that can punish practically anything, and a simple but devastating combo game gives Kim precisely the tools he needs to force the rest of the cast to play at his own pace, or potentially risk the entire round. That is not to say he is perfect, as his strongest combos require getting pretty close, which in turn means he needs to rely on dive kick to gain momentum. However, as long as the Kim player isn't careless, getting in against anyone is a breeze.
| Pros | Cons |
|---|---|
|
|
Move List
General Hurtboxes
| Standing | Crouching | Jumping | Taunting |
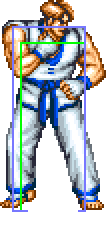 |
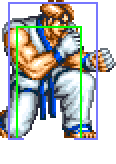 |
 |
|
| 54F (4+47+3) duration. |
Close Standing Normals
c5A
| Damage | Stun | Guard | Startup | Active | Recovery | Total | Hit Adv | Block Adv | Property | |
|---|---|---|---|---|---|---|---|---|---|---|
| 6 | 2 | Mid | 3 | 3 | 4 | 9 | +9 | +10 | Kara Cancel | |
|
The optimal combo starter. Links to itself a good number of times, especially when you hold forward while chaining them together. | ||||||||||
c5B
| Damage | Stun | Guard | Startup | Active | Recovery | Total | Hit Adv | Block Adv | Property | |
|---|---|---|---|---|---|---|---|---|---|---|
| 12 | 2 | Mid | 7 | 6 | 4 | 17 | +6 | +7 | Kara Cancel | |
c5C
| Damage | Stun | Guard | Startup | Active | Recovery | Total | Hit Adv | Block Adv | Property | |
|---|---|---|---|---|---|---|---|---|---|---|
| 18 | 4 | Mid | 8 | 6 | 28 | 41 | -10 | -11 | Kara Cancel | |
|
Links from close 5A, can combo into 214B. 2C does the same job and is easier to use, though. | ||||||||||
c5D
Far Standing Normals
f5A
| Damage | Stun | Guard | Startup | Active | Recovery | Total | Hit Adv | Block Adv | Property | |
|---|---|---|---|---|---|---|---|---|---|---|
| 4 | 2 | Mid | 7 | 7 | 4 | 17 | +5 | +6 | Kara Cancel | |
|
Surprisingly long hitbox, and has more reach than 2A. Not necessary for his combo game, but not a bad poke regardless. Comes out fast and is pretty active for a jab. | ||||||||||
f5B
| Damage | Stun | Guard | Startup | Active | Recovery | Total | Hit Adv | Block Adv | Property | |
|---|---|---|---|---|---|---|---|---|---|---|
| 10 | 2 | Mid | 12 | 8 | 9 | 28 | -1 | 0 | Kara Cancel | |
|
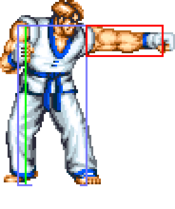
Decently fast anti-air poke for catching opponents out of the air if Kim is unable to charge Hienzan or do an air-to-air jD. Decent ground poke as well, but it's possible to whiff against small/crouching characters. Very slightly more range than f5A. | ||||||||||
f5C
| Damage | Stun | Guard | Startup | Active | Recovery | Total | Hit Adv | Block Adv | Property | |
|---|---|---|---|---|---|---|---|---|---|---|
| 16x2 | 4x2 | Mid | 7 | 4+7 | 15 | 32 | +1 | +2 | - | |
|
Solid anti-air poke that hits twice. Links from c5A and can be used as an alternate combo ender instead of 2C -> 214B, doing less damage but more stun. | ||||||||||
f5D
| Damage | Stun | Guard | Startup | Active | Recovery | Total | Hit Adv | Block Adv | Property | |
|---|---|---|---|---|---|---|---|---|---|---|
| 18x2 | 4x2 | Mid | 8 | 7 (11) 9 | 17 | 51 | -3 | -4 | - | |
|
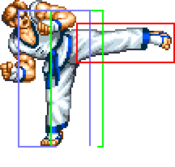
Hits twice. Can be used as an anti-air, but f5C serves the same purpose and is much safer on whiff. | ||||||||||
Crouching Normals
2A
| Damage | Stun | Guard | Startup | Active | Recovery | Total | Hit Adv | Block Adv | Property | |
|---|---|---|---|---|---|---|---|---|---|---|
| 4 | 2 | Mid | 4 | 3 | 5 | 11 | +8 | +9 | Kara Cancel | |
| ||||||||||
2B
| Damage | Stun | Guard | Startup | Active | Recovery | Total | Hit Adv | Block Adv | Property | |
|---|---|---|---|---|---|---|---|---|---|---|
| 4 | 2 | Low | 5 | 5 | 6 | 15 | +5 | +6 | Kara Cancel | |
| ||||||||||
2C
| Damage | Stun | Guard | Startup | Active | Recovery | Total | Hit Adv | Block Adv | Property | |
|---|---|---|---|---|---|---|---|---|---|---|
| 16 | 4 | Mid | 6 | 7 | 21 | 33 | -4 | -5 | Kara Cancel | |
| ||||||||||
2D
| Damage | Stun | Guard | Startup | Active | Recovery | Total | Hit Adv | Block Adv | Property | |
|---|---|---|---|---|---|---|---|---|---|---|
| 16 | 4 | Low | 10 | 10 | 12 | 31 | KD | +1 | Kara Cancel | |
|
Slower version of 2C that knocks down. | ||||||||||
Jumping Normals
jA
| Damage | Stun | Guard | Startup | Active | Recovery | Total | Hit Adv | Block Adv | Property | |
|---|---|---|---|---|---|---|---|---|---|---|
| 6 | 2 | Overhead | 6 | ∞ | - | - | - | - | - | |
|
Has a smaller hitbox than jB/C, but reaches very slightly farther horizontally. Maybe there's some use for it, but jB/C is better to strike opponents above Kim regardless. Nothing special as a jump in unless you need the pinch of extra reach. | ||||||||||
jB
| Damage | Stun | Guard | Startup | Active | Recovery | Total | Hit Adv | Block Adv | Property | |
|---|---|---|---|---|---|---|---|---|---|---|
| 12 | 2 | Overhead | 6 | ∞ | - | - | - | - | - | |
|
Good air-to-air for opponents above Kim. Not all that great as a jump in going down, but is safer compared to Kim's jA as it has a larger hitbox below his body, which extends past his hurtbox. jD is still the superior air-to-air move, but this move has its uses as a vertical attack. | ||||||||||
jC
| Damage | Stun | Guard | Startup | Active | Recovery | Total | Hit Adv | Block Adv | Property | |
|---|---|---|---|---|---|---|---|---|---|---|
| 18 | 4 | Overhead | 7 | 21 | - | - | - | - | - | |
|
Similar to jB. | ||||||||||
jD
| Version | Damage | Stun | Guard | Startup | Active | Recovery | Total | Hit Adv | Block Adv | Property | |
|---|---|---|---|---|---|---|---|---|---|---|---|
| Diagonal Jump | 20 | 4 | Overhead | 8 | 17 | - | - | - | - | - | |
| |||||||||||
| Neutral Jump | 20 | 4 | Overhead | 6 | 17 | - | - | - | - | - | |
Universal Mechanics
Lane Blast (CD)
| Version | Damage | Stun | Guard | Startup | Active | Recovery | Total | Hit Adv | Block Adv | Property | |
|---|---|---|---|---|---|---|---|---|---|---|---|
| Front Lane | 22 | 5 | Mid | 14 | 13 | 10 | 36 | KD | -4 | Cancel | |
|
One of Kim's best tools that is safe on block thanks to being cancellable. Like 2C, cancelling into Hangetsuzan B makes free pressure while remaining safe, as well as an easy combo. | |||||||||||
| Back Lane | 22 | 5 | Mid | 16 | 16 | 10 | 41 | KD | -7 | Cancel | |
Lane Attack
| Version | Damage | Stun | Guard | Startup | Active | Recovery | Total | Hit Adv | Block Adv | Property | |
|---|---|---|---|---|---|---|---|---|---|---|---|
| A/B | 20 | 2 | Overhead | 9 | - | 4 | - | - | - | - | |
| |||||||||||
| C/D | 20 | 4 | Overhead | 9 | - | 4 | - | - | - | - | |
| |||||||||||
Dodge Attack
| Damage | Stun | Guard | Startup | Active | Recovery | Total | Hit Adv | Block Adv | Property | |
|---|---|---|---|---|---|---|---|---|---|---|
| 11 | 5 | Mid | 13 | 11 | 16 | 39 | Air reset | -8 | Kara Cancel, Upper-Body Invuln 1-23F, 32-39F | |
|
Pretty weak attack overall. You will likely forget Kim even has it, given it's bad range, albeit he has upper body invincibility. Hienzan and Hangetsuzan, or any of his exceptional normals, would be better than using his Dodge Attack. | ||||||||||
Throws
Sakkyaku Nage (4/6C)
Special Moves
Hangetsuzan (214K)
| Version | Damage | Stun | Guard | Startup | Active | Recovery | Total | Hit Adv | Block Adv | Property | |
|---|---|---|---|---|---|---|---|---|---|---|---|
| B | 19 (4x2) | 3 | Mid | 17 | 2+5 | 22 | 45 | Air reset | -1 | Airborne 7-16F | |
|
Kim's main combo ender. Fully safe on block. Reaches about halfway across the screen and comes out fast enough that it's a must in Kim's toolkit. The reward Kim receives makes his block pressure shine above the rest of the cast, and it deals great damage. Can be comboed from 2C as well as a simple punish or blockstring if the opponent gets caught by it.
| |||||||||||
| D | 24 (6x2) | 6 | Mid | 26 | 3+6 | 27 | 61 | - | -12 | Airborne 11-27F | |
|
Reaches the full stage, but is punishable on block, making it much more risky compared to Hangetsuzan B. Has slightly longer startup as well, so unless you have a clear read and need the approach, it's best not to use this version of the move at all.
| |||||||||||
Hienzan ([2]8K)
| Version | Damage | Stun | Guard | Startup | Active | Recovery | Total | Hit Adv | Block Adv | Property | |
|---|---|---|---|---|---|---|---|---|---|---|---|
| B | 14 (4x3) | 3 | Mid | 7 | 3+4+4 | 31 | 48 | KD | -19 | Invincible 1-12F | |
|
Kim has to charge Hienzan, but if the opponent jumps at him and it's been long enough, Hienzan gives Kim a free anti-air that knocks down. It even has some horizontal range to it that makes it effective for attacking big targets like Cheng or Big Bear. Comes out fairly fast with invincibility frames mixed in, so the only way to punish it is to trade, or if Kim picks the wrong version for the height he needs. That, or the opponent baits him into releasing it and they can punish Kim on the ground.
| |||||||||||
| D | 22 (5x2) | 6 | Mid | 9 | 3+4+4 | 37 | 56 | KD | -27 | Invincible 1-14F | |
|
Reaches the full screen vertically, but is also more punishable. Has slightly more horizontal range due to Kim travelling farther, but not by much.
| |||||||||||
Hishou Kyaku (j2K)
| Version | Damage | Stun | Guard | Startup | Active | Recovery | Total | Hit Adv | Block Adv | Property | |
|---|---|---|---|---|---|---|---|---|---|---|---|
| B | 15 (3) | 3 | Mid | 10 | 18 | 3 | - | KD | - | - | |
|
The crux of Kim's gameplan. Divekick gives Kim several uses:
Since this is quintessential to Kim's gameplan, he will have to jump quite a lot and as such, you want to learn how to best utilize his divekick effectively, both as mobility and as a punish tool. Kim loses the hitbox for divekick if he's about to land, so although the move can hit the opponent's lower body, it is possible to whiff and have Kim go through a few recovery frames. Albeit rare, the move can cross up the opponent and hit them behind, but they will still fall back the direction Kim is facing. | |||||||||||
| D | 22 (5) | 6 | Mid | 10 | 12 | 3 | - | KD | - | - | |
| |||||||||||
| Follow Up (after blocked) | 19 | 4 | Overhead | 5 | 6 | 3 | - | - | - | - | |
| |||||||||||
Desperation Move
Ho'oukyaku (21416BD)
| Damage | Stun | Guard | Startup | Active | Recovery | Total | Hit Adv | Block Adv | Property | |
|---|---|---|---|---|---|---|---|---|---|---|
| 48 (12) | 4 | Mid | 10 | 25 | 17 | 51 | KD | +9 | Invincible 1-1F, Lower-Body Invincible 3-34F | |
|
Plus on block super that also pushes the opponent pretty far back. One of the only supers you can combo into in the game, does great damage, travels fast and has fast startup. The ridiculous frame advantage, chip damage and speed allow Kim to mercilessly bully opponents in the corner. He can still be shutout by projectiles, but the only other options the opponent have are to either do a jump attack, block or escape. The input is also not obnoxious, so it's easy to get a grasp of. | ||||||||||
Combos
| Combo | Damage | Stun | Notes |
| c5AxN, 2C > 214B/21416BD | 55/73 | 19/20 | Kim's standard punish combo, which even on block is fully safe. c5A whiffs on some crouching characters! It will deal high damage regardless of how many c5As are used, but if enough are linked then this will stun most characters and let Kim end the round with another combo. Damage/Stun values are with 6 c5As. |
| 2AxN, 2C > 214B/21416BD | 36/58 | 13/14 | Pretty much the same as using c5A, but will work on all crouchers. 2A does less damage than c5A and cannot be linked as many times due to inferior range, but if the opponent is standing or a tall croucher 2A can link to c5A just fine. Damage/Stun values are with 3 2As. |
| c5D(2) > 214B/21416BD | 51/73 | 11/12 | Easy super confirm, especially since c5D's duration gives you a ton of leg room to buffer his super input. Just like all of his other combos, it is safe on block. |
