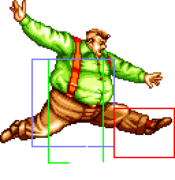
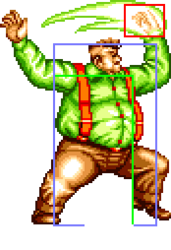
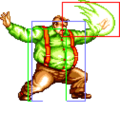
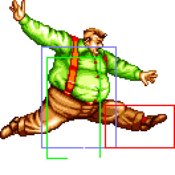
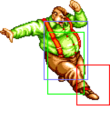
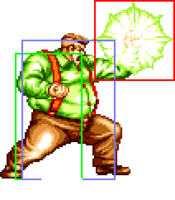
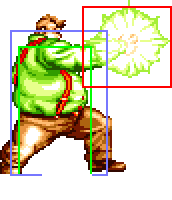
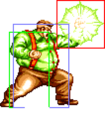
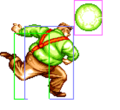
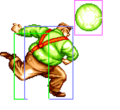
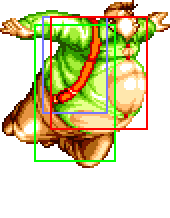
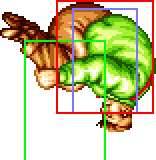
(→f5A) |
(→Strategy: cutting down, WIP) |
||
| (24 intermediate revisions by 2 users not shown) | |||
| Line 4: | Line 4: | ||
==Introduction== | ==Introduction== | ||
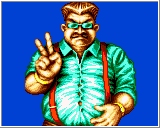
An unorthodox zoner with tricky special moves. He can lob his fireball over enemy projectiles or have it curve to hit low profiles, and he has a great CD anti-air to punish jumps with. After scoring a knockdown, he can lock down the opponent with his fireball's lasting explosion after it touches the ground, and he is great at punishing from a distance with his instant rolling attack. However, his basic movement is very sluggish and he lacks damaging combos, making it difficult for him to deal with higher tier zoners. | |||
{| | {| | ||
|-style="text-align:left;" | |-style="text-align:left;" | ||
| Line 20: | Line 22: | ||
==Move List== | ==Move List== | ||
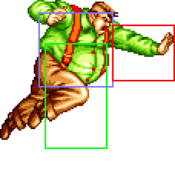
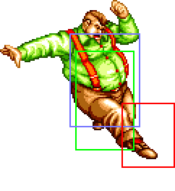
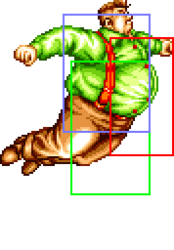
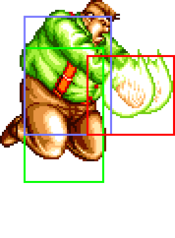
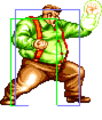
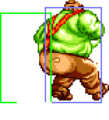
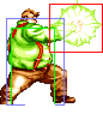
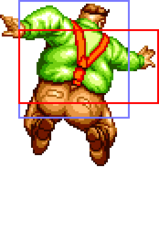
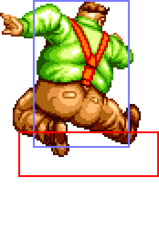
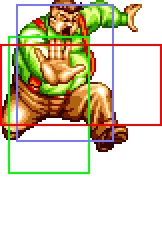
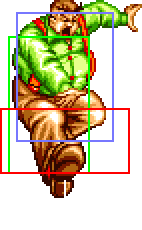
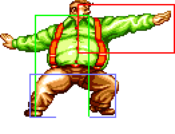
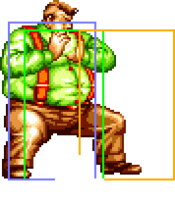
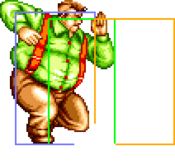
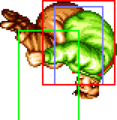
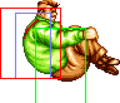
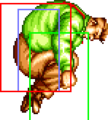
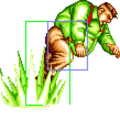
===General Hurtboxes=== | |||
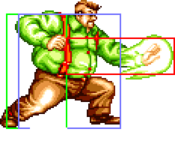
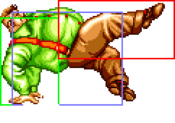
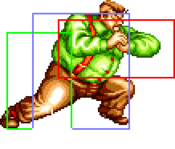
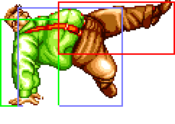
{| border="1em" cellspacing="0" style="border: 1px solid #999;" | {| border="1em" cellspacing="0" style="border: 1px solid #999;" | ||
| align="center" | Standing || align="center" | Crouching || align="center" | Jumping || align="center" | Taunting | | align="center" | Standing || align="center" | Crouching || align="center" | Jumping || align="center" | Taunting | ||
| Line 25: | Line 29: | ||
| align="center"; valign="bottom" | [[File:FFS Cheng Stand.png|bottom]] || align="center"; valign="bottom" | [[File:FFS Cheng Crouch.png|bottom]] || align="center"; valign="bottom" | [[File:FFS Cheng Jump.png|bottom]] || align="center"; valign="bottom" | [[File:FFS Cheng Taunt.gif|bottom]] | | align="center"; valign="bottom" | [[File:FFS Cheng Stand.png|bottom]] || align="center"; valign="bottom" | [[File:FFS Cheng Crouch.png|bottom]] || align="center"; valign="bottom" | [[File:FFS Cheng Jump.png|bottom]] || align="center"; valign="bottom" | [[File:FFS Cheng Taunt.gif|bottom]] | ||
|- | |- | ||
| align="center" | || align="center" | || align="center" | 58F (4+51+3) duration. || align="center" | | | align="center" | || align="center" | || align="center" | 58F (4+51+3) duration, tied for the slowest jump in the game. || align="center" | | ||
|} | |} | ||
| Line 50: | Line 54: | ||
|Property=Kara Cancel | |Property=Kara Cancel | ||
|description=Essential move in Cheng's combos. Very fast startup and links to itself multiple times. | |description=Essential move in Cheng's combos. Very fast startup and links to itself multiple times. | ||
* Links unscaled to f5D. | |||
}} | }} | ||
}} | }} | ||
| Line 162: | Line 167: | ||
{{MoveData | {{MoveData | ||
|image=FFS_Cheng_f5B.png | |image=FFS_Cheng_f5B.png | ||
|subtitle=跳脚 | |subtitle=Hanekyaku/跳脚 | ||
|caption= | |caption= | ||
|name=f5B | |name=f5B | ||
| Line 178: | Line 183: | ||
|Property=Airborne 6-13F | |Property=Airborne 6-13F | ||
|description= * Moves Cheng forward. | |description= * Moves Cheng forward. | ||
*One of the rare non-cancelable light normals. | |||
}} | }} | ||
}} | }} | ||
| Line 185: | Line 191: | ||
{{MoveData | {{MoveData | ||
|image=FFS_Cheng_f5C.png | |image=FFS_Cheng_f5C.png | ||
|subtitle=発勁掌 | |subtitle=Hakkeishou/発勁掌 | ||
|caption= | |caption= | ||
|name=f5C | |name=f5C | ||
| Line 213: | Line 219: | ||
{{MoveData | {{MoveData | ||
|image=FFS_Cheng_f5D.png | |image=FFS_Cheng_f5D.png | ||
|subtitle=跳脚 | |subtitle=Hanekyaku/跳脚 | ||
|caption= | |caption= | ||
|name=f5D | |name=f5D | ||
| Line 229: | Line 235: | ||
|Property=Airborne 8-19F | |Property=Airborne 8-19F | ||
|description= * Moves Cheng forward. | |description= * Moves Cheng forward. | ||
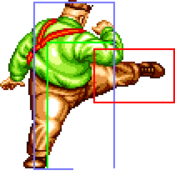
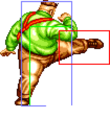
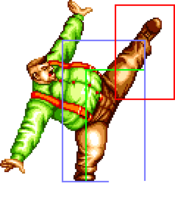
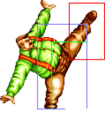
*Beefier version of 5B with an even better hitbox. Great especially against low profile moves like slide kicks. One of the essential Cheng normals. | |||
}} | }} | ||
}} | }} | ||
| Line 238: | Line 245: | ||
{{MoveData | {{MoveData | ||
|image=FFS_Cheng_2A.png | |image=FFS_Cheng_2A.png | ||
|subtitle=下勢掌打 | |subtitle=Kasei Shouda/下勢掌打 | ||
|caption= | |caption= | ||
|name=2A | |name=2A | ||
| Line 253: | Line 260: | ||
|Block Adv=0 | |Block Adv=0 | ||
|Property=Kara Cancel | |Property=Kara Cancel | ||
|description= | |description=*Good poke in close range. Links from close A and combos into B Hagan Geki. | ||
}} | }} | ||
}} | }} | ||
| Line 261: | Line 268: | ||
{{MoveData | {{MoveData | ||
|image=FFS_Cheng_2B.png | |image=FFS_Cheng_2B.png | ||
|subtitle=下勢脚 | |subtitle=Kaseikyaku/下勢脚 | ||
|caption= | |caption= | ||
|name=2B | |name=2B | ||
| Line 276: | Line 283: | ||
|Block Adv=-2 | |Block Adv=-2 | ||
|Property=Kara Cancel | |Property=Kara Cancel | ||
|description= | |description= *Pretty much the same move as 2D, just without the second hit. Safer on whiff but inferior otherwise. | ||
}} | }} | ||
}} | }} | ||
| Line 284: | Line 291: | ||
{{MoveData | {{MoveData | ||
|image=FFS Cheng 2C.png | |image=FFS Cheng 2C.png | ||
|subtitle=下勢肘打 | |subtitle=Kasei Hiji-uchi/下勢肘打 | ||
|caption= | |caption= | ||
|name=2C | |name=2C | ||
| Line 299: | Line 306: | ||
|Block Adv=-1 | |Block Adv=-1 | ||
|Property=Kara Cancel | |Property=Kara Cancel | ||
|description= | |description=*Slower but more damaging alternative for 2A. Doesn't have a lot of reach which limits its usability. | ||
}} | }} | ||
}} | }} | ||
| Line 307: | Line 314: | ||
{{MoveData | {{MoveData | ||
|image=FFS_Cheng_2D.png | |image=FFS_Cheng_2D.png | ||
|subtitle=下勢二段脚 | |subtitle=Kasei Nidankyaku/下勢二段脚 | ||
|caption= | |caption= | ||
|name=2D | |name=2D | ||
| Line 322: | Line 329: | ||
|Block Adv=-3 | |Block Adv=-3 | ||
|Property=Kara Cancel | |Property=Kara Cancel | ||
|description= | |description= *A low that hits twice. Reaches far and makes for a good okizeme tool in the corner as it'll beat backstep attempts due to its large amount of active frames. Powerful when cancelled into 236A. | ||
<gallery class="mw-collapsible"> | <gallery class="mw-collapsible"> | ||
FFS_Cheng_2D.png| | FFS_Cheng_2D.png| | ||
| Line 336: | Line 343: | ||
{{MoveData | {{MoveData | ||
|image=FFS_Cheng_jA.png | |image=FFS_Cheng_jA.png | ||
|subtitle=飛掌打 | |subtitle=Hishouda/飛掌打 | ||
|caption= | |caption= | ||
|name=jA | |name=jA | ||
| Line 352: | Line 359: | ||
|Property= | |Property= | ||
|description= * Diagonal and neutral jump versions are identical. | |description= * Diagonal and neutral jump versions are identical. | ||
*Very good air-to-air move. | |||
}} | }} | ||
}} | }} | ||
| Line 359: | Line 367: | ||
{{MoveData | {{MoveData | ||
|image=FFS_Cheng_jB.png | |image=FFS_Cheng_jB.png | ||
|subtitle=落脚足刀 | |subtitle=Rakkyaku Sokutou/落脚足刀 | ||
|caption= | |caption= | ||
|name=jB | |name=jB | ||
| Line 375: | Line 383: | ||
|Block Adv= | |Block Adv= | ||
|Property= | |Property= | ||
|description= | |description=*Ideal for beating low profile anti-airs. | ||
}} | }} | ||
{{AttackData-FFS | {{AttackData-FFS | ||
| Line 406: | Line 414: | ||
{{AttackData-FFS | {{AttackData-FFS | ||
|version=Diagonal Jump | |version=Diagonal Jump | ||
|subtitle=太鼓腹打ち | |subtitle=Taikobara-uchi/太鼓腹打ち | ||
|Damage=20 | |Damage=20 | ||
|Stun=4 | |Stun=4 | ||
| Line 417: | Line 425: | ||
|Block Adv= | |Block Adv= | ||
|Property= | |Property= | ||
|description= | |description=*Very poor range, making it the least useful Cheng jump-in. Stays active for a very long time, at least. | ||
}} | }} | ||
{{AttackData-FFS | {{AttackData-FFS | ||
|header=no | |header=no | ||
|version=Neutral Jump | |version=Neutral Jump | ||
|subtitle=落掌双打 | |subtitle=Rakushousouda/落掌双打 | ||
|Damage=20 | |Damage=20 | ||
|Stun=4 | |Stun=4 | ||
| Line 433: | Line 441: | ||
|Block Adv= | |Block Adv= | ||
|Property= | |Property= | ||
|description= | |description=*More damaging alternative for neutral jump A. Hitbox is slightly worse, though. | ||
}} | }} | ||
}} | }} | ||
| Line 441: | Line 449: | ||
{{MoveData | {{MoveData | ||
|image=FFS_Cheng_jB.png | |image=FFS_Cheng_jB.png | ||
|subtitle=二起脚 | |subtitle=Nikikyaku/二起脚 | ||
|caption=Diagonal Jump | |caption=Diagonal Jump | ||
|caption2=Neutral Jump | |caption2=Neutral Jump | ||
| Line 462: | Line 470: | ||
|Block Adv= | |Block Adv= | ||
|Property= | |Property= | ||
|description= | |description=*Hits twice. Very good damage if both hits land, often leading to stun combos. | ||
}} | }} | ||
{{AttackData-FFS | {{AttackData-FFS | ||
| Line 477: | Line 485: | ||
|Block Adv= | |Block Adv= | ||
|Property= | |Property= | ||
|description= | |description=*Slightly faster startup but otherwise identical to the diagonal version. | ||
}} | }} | ||
}} | }} | ||
| Line 488: | Line 496: | ||
|image=FFS_Cheng_CD_Front.png | |image=FFS_Cheng_CD_Front.png | ||
|image2=FFS_Cheng_CD_Back 1.png | |image2=FFS_Cheng_CD_Back 1.png | ||
|subtitle=発勁裏拳 | |subtitle=Hakkei Uraken/発勁裏拳 | ||
|caption=Front Lane | |caption=Front Lane | ||
|caption2=Back Lane | |caption2=Back Lane | ||
| Line 525: | Line 533: | ||
|Block Adv=-15 | |Block Adv=-15 | ||
|Property=Cancel, Lane Shift | |Property=Cancel, Lane Shift | ||
|description= | |description=*Worse startup and hitbox, but still usable. | ||
<gallery class="mw-collapsible"> | <gallery class="mw-collapsible"> | ||
FFS_Cheng_CD_Back.png|Startup | FFS_Cheng_CD_Back.png|Startup | ||
| Line 904: | Line 912: | ||
==Combos== | ==Combos== | ||
* | ''Note: c5A will whiff against crouching Tung and crouching/dizzy Duck King, Jubei, and Mai'' | ||
* | * '''c5AxN, f5D''' - 43 damage, 12 stun (N = 4) | ||
* 2C > [4]6B | Requires that D be pressed from far enough that c5D won't come out, but also close enough that the first active frame of f5D will reach (which may not work depending on opponent's hitstun hurtbox) | ||
* ( | * '''c5AxN, 2A > [4]6B''' - 43 damage, 13 stun (N = 4) | ||
Knocks down and is more consistent but requires charge and is harder to use with microwalking. | |||
* '''2C > [4]6B''' - 32 damage, 10 stun | |||
2C is a good poke and this combo works from a much farther distance than c5A and has no issues against crouching characters. | |||
* '''(meaty) 236P, [4]6B''' - 30 damage, 6 stun with 236A, 36 damage and 9 stun with 236C | |||
Done from a 2D > 236A meaty or when a jumping opponent lands on top of an exploding fireball. | |||
== | == Strategy == | ||
===The Basics=== | ===The Basics=== | ||
Cheng's main gameplan is to throw 236A and 236C and use front lane CD as an anti-air. The arc of 236* allows it to go over the opponent's projectiles and hit them, and it cannot be evaded by a Dodge Attack. The explosion after the fireball lands can also punish a jump's landing recovery and allow Cheng to follow up with a [4]6B. Cheng's Dodge Attack is usually too slow to be useful, but his jA is a great air to air and can be used instead of CD in the back lane. | |||
When up close: | |||
* f5D is very disjointed and fast, stuffing most other buttons | |||
* 2A is quick and can combo into [4]6B | |||
* 2D is his farthest range cancellable normal and sets up a meaty 236A but is very slow to whiff | |||
[4]6B is an incredible move that is great for punishes, combos, and movement. | |||
===Advanced Strategy=== | ===Advanced Strategy=== | ||
==Matchups== | |||
===Vs. Andy Bogard=== | |||
4 - 6 | |||
Andy's fireball has a long startup, making it one of the easiest projectiles to counter with [2]8C. 5B and 5D are your best moves against Zaneiken, while CD beats Kuuha Dan. | |||
===Vs. Axel Hawk=== | |||
6 - 4 | |||
[2]8C makes for a very good counter against Tornado Upper. | |||
===Vs. Big Bear=== | |||
7 - 3 | |||
Kirai Hou is excellent in this matchup as it's pretty much impossible for Bear to avoid with his tackle, and it can beat Super Drop Kick as well. You can also use 5D to beat tackle attempts. | |||
===Vs. Billy Kane=== | |||
3.5 - 6.5 | |||
===Vs. Cheng Sinzan=== | |||
5 - 5 | |||
===Vs. Duck King=== | |||
6.5 - 3.5 | |||
Keep your distance as Duck is deadly up close and can easily stun you in one combo. Zone him with Kirai Hou and anti-air jumps with CD or close D. 5D counters his slide kick. Light Hagan Geki is great for breaking out of blockstring pressure. | |||
===Vs. Geese Howard=== | |||
5 - 5 | |||
===Vs. Joe Higashi=== | |||
3.5 - 6.5 | |||
' | Hurricane Upper has fast recovery, so countering it with [2]8C requires a good read on your part. Jump B and D beat Joe's slide anti-air, but you still need to watch out for his 5D and Tiger Kick. | ||
=== | ===Vs. Jubei Yamada=== | ||
3.5 - 6.5 | |||
Jump B/D can beat Jubei's low profile anti-airs, while 5D is great against slide kicks on ground. | |||
===Vs. Kim Kaphwan=== | |||
4 - 6 | |||
CD and neutral jump A are good divekick counters. | |||
===Vs. Laurence Blood=== | |||
5 - 5 | |||
===Vs. Mai Shiranui=== | |||
4 - 6 | |||
===Vs. Ryo Sakazaki=== | |||
===Vs. Terry Bogard=== | |||
4.5 - 5.5 | |||
===Vs. Tung Fu Rue=== | |||
6 - 4 | |||
===Vs. Wolfgang Krauser=== | |||
4 - 6 | |||
{{Navbox-FFS}} | {{Navbox-FFS}} | ||
[[Category:Fatal Fury Special]] | [[Category:Fatal Fury Special]] | ||
[[Category:Cheng Sinzan]] | [[Category:Cheng Sinzan]] | ||
Latest revision as of 22:19, 18 April 2025
Introduction
An unorthodox zoner with tricky special moves. He can lob his fireball over enemy projectiles or have it curve to hit low profiles, and he has a great CD anti-air to punish jumps with. After scoring a knockdown, he can lock down the opponent with his fireball's lasting explosion after it touches the ground, and he is great at punishing from a distance with his instant rolling attack. However, his basic movement is very sluggish and he lacks damaging combos, making it difficult for him to deal with higher tier zoners.
| Pros | Cons |
|---|---|
|
|
Move List
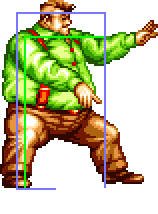
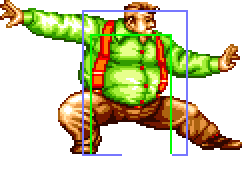
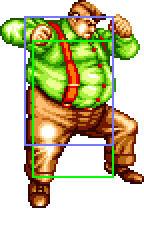
General Hurtboxes
| Standing | Crouching | Jumping | Taunting |
 |
 |
 |
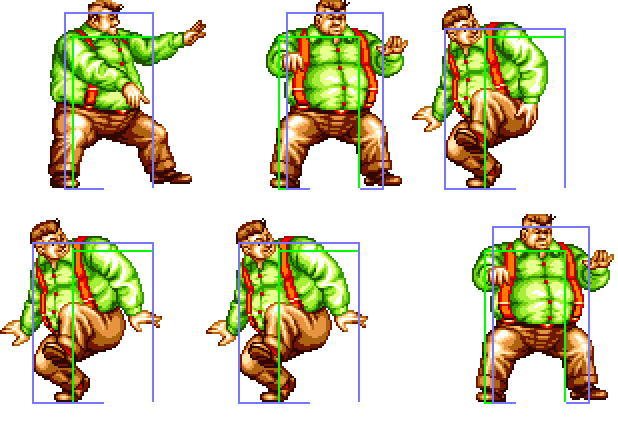
|
| 58F (4+51+3) duration, tied for the slowest jump in the game. |
Close Standing Normals
c5A
| Damage | Stun | Guard | Startup | Active | Recovery | Total | Hit Adv | Block Adv | Property | |
|---|---|---|---|---|---|---|---|---|---|---|
| 8 | 2 | Mid | 3 | 4 | 4 | 10 | +8 | +9 | Kara Cancel | |
|
Essential move in Cheng's combos. Very fast startup and links to itself multiple times.
| ||||||||||
c5B
c5C
| Damage | Stun | Guard | Startup | Active | Recovery | Total | Hit Adv | Block Adv | Property | |
|---|---|---|---|---|---|---|---|---|---|---|
| 20 | 4 | Mid | 11 | 7 | 14 | 31 | +3 | +2 | Kara Cancel | |
|
Works as an anti-air, but close D and C+D are much better options. | ||||||||||
c5D
Far Standing Normals
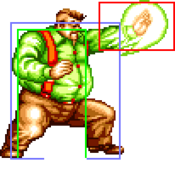
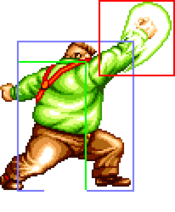
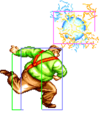
f5A
| Damage | Stun | Guard | Startup | Active | Recovery | Total | Hit Adv | Block Adv | Property | |
|---|---|---|---|---|---|---|---|---|---|---|
| 6 | 2 | Mid | 10 | 5 | 12 | 26 | -1 | 0 | Kara Cancel | |
|
Very slow startup for a light normal. Even though the hitbox is decent, you're better off using 2A instead. | ||||||||||
f5B
| Damage | Stun | Guard | Startup | Active | Recovery | Total | Hit Adv | Block Adv | Property | |
|---|---|---|---|---|---|---|---|---|---|---|
| 4 | 2 | Low | 5 | 9 | 7 | 20 | -1 | +6 | Airborne 6-13F | |
| ||||||||||
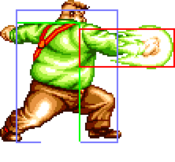
f5C
f5D
| Damage | Stun | Guard | Startup | Active | Recovery | Total | Hit Adv | Block Adv | Property | |
|---|---|---|---|---|---|---|---|---|---|---|
| 16 | 4 | Low | 7 | 14 | 10 | 33 | -1 | -2 | Airborne 8-19F | |
| ||||||||||
Crouching Normals
2A
| Damage | Stun | Guard | Startup | Active | Recovery | Total | Hit Adv | Block Adv | Property | |
|---|---|---|---|---|---|---|---|---|---|---|
| 6 | 2 | Mid | 5 | 6 | 11 | 21 | -1 | 0 | Kara Cancel | |
| ||||||||||
2B
| Damage | Stun | Guard | Startup | Active | Recovery | Total | Hit Adv | Block Adv | Property | |
|---|---|---|---|---|---|---|---|---|---|---|
| 6 | 2 | Low | 10 | 7 | 12 | 28 | -3 | -2 | Kara Cancel | |
| ||||||||||
2C
| Damage | Stun | Guard | Startup | Active | Recovery | Total | Hit Adv | Block Adv | Property | |
|---|---|---|---|---|---|---|---|---|---|---|
| 18 | 4 | Mid | 8 | 7 | 17 | 31 | 0 | -1 | Kara Cancel | |
| ||||||||||
2D
| Damage | Stun | Guard | Startup | Active | Recovery | Total | Hit Adv | Block Adv | Property | |
|---|---|---|---|---|---|---|---|---|---|---|
| 13 | 4 | Low, Low | 10 | 8 (4) 11 | 14 | 46 | KD | -3 | Kara Cancel | |
Jumping Normals
jA
| Damage | Stun | Guard | Startup | Active | Recovery | Total | Hit Adv | Block Adv | Property | |
|---|---|---|---|---|---|---|---|---|---|---|
| 8 | 2 | Overhead | 6 | ∞ | / | / | - | - | - | |
| ||||||||||
jB
| Version | Damage | Stun | Guard | Startup | Active | Recovery | Total | Hit Adv | Block Adv | Property | |
|---|---|---|---|---|---|---|---|---|---|---|---|
| Diagonal Jump | 6 | 2 | Overhead | 6 | ∞ | / | / | - | - | - | |
| |||||||||||
| Neutral Jump | 6 | 2 | Overhead | 7 | ∞ | / | / | - | - | - | |
jC
| Version | Damage | Stun | Guard | Startup | Active | Recovery | Total | Hit Adv | Block Adv | Property | |
|---|---|---|---|---|---|---|---|---|---|---|---|
| Diagonal Jump Taikobara-uchi/太鼓腹打ち |
20 | 4 | Overhead | 6 | 31 | / | / | - | - | - | |
| |||||||||||
| Neutral Jump Rakushousouda/落掌双打 |
20 | 4 | Overhead | 6 | 22 | / | / | - | - | - | |
| |||||||||||
jD
| Version | Damage | Stun | Guard | Startup | Active | Recovery | Total | Hit Adv | Block Adv | Property | |
|---|---|---|---|---|---|---|---|---|---|---|---|
| Diagonal Jump | 13x2 | 4x2 | Overhead, Overhead | 8 | 7 (4) 17 | / | / | - | - | - | |
| |||||||||||
| Neutral Jump | 13x2 | 4x2 | Overhead, Overhead | 6 | 8 (3) 14 | / | / | - | - | - | |
| |||||||||||
Universal Mechanics
Lane Blast (CD)
| Version | Damage | Stun | Guard | Startup | Active | Recovery | Total | Hit Adv | Block Adv | Property | |
|---|---|---|---|---|---|---|---|---|---|---|---|
| Front Lane | 22 | 5 | Mid | 14 | 9 (3) 3 (3) 3 (3) 3 | 10 | 50 | KD | -18 | Cancel, Lane Shift | |
| Back Lane | 22 | 5 | Mid | 17 | 9 (3) 3 (3) 3 | 13 | 50 | KD | -15 | Cancel, Lane Shift | |
Lane Attack
| Version | Damage | Stun | Guard | Startup | Active | Recovery | Total | Hit Adv | Block Adv | Property | |
|---|---|---|---|---|---|---|---|---|---|---|---|
| A 飛掌打 |
22 | 2 | Overhead | 9 | - | 4 | - | - | - | / | |
| |||||||||||
| B 飛刀脚 |
22 | 2 | Overhead | 9 | - | 4 | - | - | - | / | |
| |||||||||||
| C 飛掌打 |
22 | 4 | Overhead | 9 | - | 4 | - | - | - | / | |
| |||||||||||
| D 飛刀脚 |
22 | 4 | Overhead | 9 | - | 4 | - | - | - | / | |
| |||||||||||
Dodge Attack
Throws
Aiki Nage (4/6C)
Zutsuki Satsu (4/6D)
Special Moves
Ki Rai Hou (236P)
| Version | Damage | Stun | Guard | Startup | Active | Recovery | Total | Hit Adv | Block Adv | Property | |
|---|---|---|---|---|---|---|---|---|---|---|---|
| A | 16 (4) | 3 | Mid, Low | 21 | 22+20 | 33 | - | -1 | -4 | / | |
| C | 22 (5) | 6 | Mid, Low | 25 | 27+20 | 36 | - | +4 | -2 | / | |
Dai Taiko-bara Uchi ([2]8P)
| Version | Damage | Stun | Guard | Startup | Active | Recovery | Total | Hit Adv | Block Adv | Property | |
|---|---|---|---|---|---|---|---|---|---|---|---|
| A | 18 (4) | 3 | Mid | 10 | 51 | 10+26 | - | -16 | -16 | Invincible 1-6F | |
| |||||||||||
| C | 26 (6) | 6 | Mid | 13 | 28 | 10+26 | - | KD | -19 | Invincible 1-8F | |
| |||||||||||
Ha Gan Geki ([4]6K)
| Version | Damage | Stun | Guard | Startup | Active | Recovery | Total | Hit Adv | Block Adv | Property | |
|---|---|---|---|---|---|---|---|---|---|---|---|
| B | 16 (4) | 3 | Low | 1 | 18 | 16 | 34 | KD (+31) | -8 | - | |
| D | 22 (5) | 6 | Low | 34 | 20 | 21 | 74 | KD (+61) | -17 | Invincible 1-16F | |
Desperation Move
Bakurai Hou ([1]26BC)
| Damage | Stun | Guard | Startup | Active | Recovery | Total | Hit Adv | Block Adv | Property | |
|---|---|---|---|---|---|---|---|---|---|---|
| 48 (12) | 4 | Mid, Low | 32 | 23+20 | 36 | - | KD | +6 | - | |
| ||||||||||
Combos
Note: c5A will whiff against crouching Tung and crouching/dizzy Duck King, Jubei, and Mai
- c5AxN, f5D - 43 damage, 12 stun (N = 4)
Requires that D be pressed from far enough that c5D won't come out, but also close enough that the first active frame of f5D will reach (which may not work depending on opponent's hitstun hurtbox)
- c5AxN, 2A > [4]6B - 43 damage, 13 stun (N = 4)
Knocks down and is more consistent but requires charge and is harder to use with microwalking.
- 2C > [4]6B - 32 damage, 10 stun
2C is a good poke and this combo works from a much farther distance than c5A and has no issues against crouching characters.
- (meaty) 236P, [4]6B - 30 damage, 6 stun with 236A, 36 damage and 9 stun with 236C
Done from a 2D > 236A meaty or when a jumping opponent lands on top of an exploding fireball.
Strategy
The Basics
Cheng's main gameplan is to throw 236A and 236C and use front lane CD as an anti-air. The arc of 236* allows it to go over the opponent's projectiles and hit them, and it cannot be evaded by a Dodge Attack. The explosion after the fireball lands can also punish a jump's landing recovery and allow Cheng to follow up with a [4]6B. Cheng's Dodge Attack is usually too slow to be useful, but his jA is a great air to air and can be used instead of CD in the back lane.
When up close:
- f5D is very disjointed and fast, stuffing most other buttons
- 2A is quick and can combo into [4]6B
- 2D is his farthest range cancellable normal and sets up a meaty 236A but is very slow to whiff
[4]6B is an incredible move that is great for punishes, combos, and movement.
Advanced Strategy
Matchups
Vs. Andy Bogard
4 - 6
Andy's fireball has a long startup, making it one of the easiest projectiles to counter with [2]8C. 5B and 5D are your best moves against Zaneiken, while CD beats Kuuha Dan.
Vs. Axel Hawk
6 - 4
[2]8C makes for a very good counter against Tornado Upper.
Vs. Big Bear
7 - 3
Kirai Hou is excellent in this matchup as it's pretty much impossible for Bear to avoid with his tackle, and it can beat Super Drop Kick as well. You can also use 5D to beat tackle attempts.
Vs. Billy Kane
3.5 - 6.5
Vs. Cheng Sinzan
5 - 5
Vs. Duck King
6.5 - 3.5
Keep your distance as Duck is deadly up close and can easily stun you in one combo. Zone him with Kirai Hou and anti-air jumps with CD or close D. 5D counters his slide kick. Light Hagan Geki is great for breaking out of blockstring pressure.
Vs. Geese Howard
5 - 5
Vs. Joe Higashi
3.5 - 6.5
Hurricane Upper has fast recovery, so countering it with [2]8C requires a good read on your part. Jump B and D beat Joe's slide anti-air, but you still need to watch out for his 5D and Tiger Kick.
Vs. Jubei Yamada
3.5 - 6.5
Jump B/D can beat Jubei's low profile anti-airs, while 5D is great against slide kicks on ground.
Vs. Kim Kaphwan
4 - 6
CD and neutral jump A are good divekick counters.
Vs. Laurence Blood
5 - 5
Vs. Mai Shiranui
4 - 6
Vs. Ryo Sakazaki
Vs. Terry Bogard
4.5 - 5.5
Vs. Tung Fu Rue
6 - 4
Vs. Wolfgang Krauser
4 - 6
