(→f5D) |
|||
| (55 intermediate revisions by 2 users not shown) | |||
| Line 4: | Line 4: | ||
==Introduction== | ==Introduction== | ||
Billy is a top tier character who can harass from far distances while still being strong up close. He can easily dominate grounded neutral with his 5A and 2C and has many specialized moves to cover the opponent's responses. His Desperation Move is incredibly versatile and strong, starting up almost instantly and being safe on block and even hard to whiff punish. He is relatively difficult to play as the aforementioned specialized moves take getting used to for anti-air or anti-fireball, and he is among the easiest characters to dizzy. | |||
{| | {| | ||
| Line 21: | Line 22: | ||
==Move List== | ==Move List== | ||
===General Hurtboxes=== | |||
{| border="1em" cellspacing="0" style="border: 1px solid #999;" | {| border="1em" cellspacing="0" style="border: 1px solid #999;" | ||
| align="center" | Standing/Walking || align="center" | Crouching || align="center" | Jumping || align="center" | Taunting | | align="center" | Standing/Walking || align="center" | Crouching || align="center" | Jumping || align="center" | Taunting | ||
|- | |- | ||
| align="center"; valign="bottom" | [[File:FFS Billy Stand.gif|bottom]] || align="center"; valign="bottom" | [[File:FFS Billy Crouch.png|bottom]] || align="center"; valign="bottom" | [[File:FFS Billy Jump.gif|bottom]] || [[File:FFS Billy Taunt.gif|bottom]] | | align="center"; valign="bottom" | [[File:FFS Billy Stand.gif|bottom]] || align="center"; valign="bottom" | [[File:FFS Billy Crouch.png|bottom]] || align="center"; valign="bottom" | [[File:FFS Billy Jump.gif|bottom]] || [[File:FFS Billy Taunt.gif|bottom|Hey hey hey!]] | ||
|- | |- | ||
| align="center" | Hurtbox does not shift | | align="center" | Hurtbox does not shift up while walking. || align="center" | || align="center" | 52F (4+45+3) duration. || Billy has brief invincibility when lifting and lowering his Kane. | ||
|} | |} | ||
| Line 49: | Line 52: | ||
|Hit Adv=+5 | |Hit Adv=+5 | ||
|Block Adv=+6 | |Block Adv=+6 | ||
|Property=Kara | |Property=Kara Cancel | ||
|description= * Similar to | |description= * Similar to far 5A but will whiff on some crouching characters. | ||
*Links to itself and | *Links to itself and f5A for unscaled damage. | ||
}} | }} | ||
}} | }} | ||
| Line 98: | Line 101: | ||
|Property=Kara Cancel | |Property=Kara Cancel | ||
|description=*Godly move. Fast startup, good reach, combos into Sansetsukon or Senpuukon. | |description=*Godly move. Fast startup, good reach, combos into Sansetsukon or Senpuukon. | ||
*Can even link to itself if | *Can even link to itself if it hits meaty. | ||
}} | }} | ||
}} | }} | ||
| Line 145: | Line 148: | ||
|Hit Adv=+5 | |Hit Adv=+5 | ||
|Block Adv=+6 | |Block Adv=+6 | ||
|Property=Kara | |Property=Kara Cancel | ||
|description= * Insanely powerful poke. | |description= * Insanely powerful poke. Can only be crouched under by Mai. | ||
* Links into itself for unscaled damage. | |||
}} | }} | ||
}} | }} | ||
===== <span class="invisible-header"> | ===== <span class="invisible-header">f4/5/6B</span> ===== | ||
<font style="visibility:hidden" size="0"></font> | <font style="visibility:hidden" size="0"></font> | ||
{{MoveData | {{MoveData | ||
| Line 208: | Line 212: | ||
<font style="visibility:hidden" size="0"></font> | <font style="visibility:hidden" size="0"></font> | ||
{{MoveData | {{MoveData | ||
|image= | |image=FFS_Billy_c5B.png | ||
|subtitle=Ushiro Kaiten Chuudan Uchi/後ろ回転中段打ち | |subtitle=Ushiro Kaiten Chuudan Uchi/後ろ回転中段打ち | ||
|caption= | |caption= | ||
| Line 226: | Line 230: | ||
|description=*Not something you want to use often, but the animation can be deceiving as it hits twice and has more reach on the second hit, kind of like a Guile sweep. | |description=*Not something you want to use often, but the animation can be deceiving as it hits twice and has more reach on the second hit, kind of like a Guile sweep. | ||
<gallery class="mw-collapsible"> | <gallery class="mw-collapsible"> | ||
FFS Billy | FFS Billy c5B.png| | ||
FFS Billy f5D 1.png| | FFS Billy f5D 1.png| | ||
</gallery> | </gallery> | ||
| Line 238: | Line 242: | ||
{{MoveData | {{MoveData | ||
|image=FFS_Billy_2A.png | |image=FFS_Billy_2A.png | ||
|subtitle= | |subtitle=Gedan Uchi/下段打ち | ||
|caption= | |caption= | ||
|name=2A | |name=2A | ||
| Line 261: | Line 265: | ||
{{MoveData | {{MoveData | ||
|image=FFS_Billy_2B.png | |image=FFS_Billy_2B.png | ||
|subtitle= | |subtitle=Crouching Kick/しゃがみキック | ||
|caption= | |caption= | ||
|name=2B | |name=2B | ||
| Line 276: | Line 280: | ||
|Block Adv=+2 | |Block Adv=+2 | ||
|Property=Kara Cancel | |Property=Kara Cancel | ||
|description= | |description=*Billy's fastest crouching normal. Can combo into his super. | ||
}} | }} | ||
}} | }} | ||
| Line 284: | Line 288: | ||
{{MoveData | {{MoveData | ||
|image=FFS Billy 2C.png | |image=FFS Billy 2C.png | ||
|subtitle= | |subtitle=Gedan Uchi/下段打ち | ||
|caption= | |caption= | ||
|name=2C | |name=2C | ||
| Line 299: | Line 303: | ||
|Block Adv=-7 | |Block Adv=-7 | ||
|Property=Kara Cancel | |Property=Kara Cancel | ||
|description= * Insanely powerful poke. | |description= * Insanely powerful poke. Can combo into light Sansetsukon, giving Billy pretty good damage even off long distance pokes. | ||
}} | }} | ||
}} | }} | ||
| Line 307: | Line 311: | ||
{{MoveData | {{MoveData | ||
|image=FFS_Billy_2B.png | |image=FFS_Billy_2B.png | ||
|subtitle= | |subtitle=Crouching Kick/しゃがみキック | ||
|caption= | |caption= | ||
|name=2D | |name=2D | ||
| Line 322: | Line 326: | ||
|Block Adv=-9 | |Block Adv=-9 | ||
|Property=/ | |Property=/ | ||
|description= | |description=*Same as his 2B, just one frame slower and gives a knockdown on hit. | ||
*Good against characters trying to low profile or otherwise counter your mid pokes. | |||
}} | }} | ||
}} | }} | ||
| Line 333: | Line 338: | ||
|image=FFS_Billy_jA.png | |image=FFS_Billy_jA.png | ||
|image2=FFS Billy j8A.png | |image2=FFS Billy j8A.png | ||
|subtitle= | |subtitle=Jump Mangetsu-Uchi/ジャンプ満月打ち | ||
|caption=Diagonal Jump | |caption=Diagonal Jump | ||
|caption2=Neutral Jump | |caption2=Neutral Jump | ||
| Line 350: | Line 355: | ||
|Block Adv= | |Block Adv= | ||
|Property= | |Property= | ||
|description= | |description=*Jump C is generally better as it has the same hitboxes but deals more damage. This one stays active for the entire duration of the jump, however. | ||
<gallery class="mw-collapsible"> | <gallery class="mw-collapsible"> | ||
FFS Billy jA.png| | FFS Billy jA.png| | ||
| Line 413: | Line 418: | ||
|image=FFS_Billy_jA.png | |image=FFS_Billy_jA.png | ||
|image2=FFS Billy j8A.png | |image2=FFS Billy j8A.png | ||
|subtitle= | |subtitle=Jump Mangetsu-Uchi/ジャンプ満月打ち | ||
|caption=Diagonal Jump | |caption=Diagonal Jump | ||
|caption2=Neutral Jump | |caption2=Neutral Jump | ||
| Line 430: | Line 435: | ||
|Block Adv= | |Block Adv= | ||
|Property= | |Property= | ||
|description= | |description=*Extremely powerful air-to-air. | ||
<gallery class="mw-collapsible"> | <gallery class="mw-collapsible"> | ||
FFS Billy jA.png| | FFS Billy jA.png| | ||
| Line 509: | Line 514: | ||
===Universal Mechanics=== | ===Universal Mechanics=== | ||
===== <span class="invisible-header">Lane Blast</span> ===== | ===== <span class="invisible-header">Lane Blast (CD)</span> ===== | ||
<font style="visibility:hidden" size="0"></font> | <font style="visibility:hidden" size="0"></font> | ||
{{MoveData | {{MoveData | ||
| Line 525: | Line 530: | ||
|Stun=5 | |Stun=5 | ||
|Guard=Mid | |Guard=Mid | ||
|Startup=5 | |Startup=5, 27 | ||
|Active=6 (16) 19 | |Active=6 (16) 19 | ||
|Recovery=7 | |Recovery=7 | ||
|Total= | |Total=52 | ||
|Hit Adv=KD | |Hit Adv=KD | ||
|Block Adv=-20 | |Block Adv=-20 | ||
|Property=Cancel, Lane Shift | |Property=Cancel, Lane Shift | ||
|description= | |description=*First hitbox can function as an anti-air. Great on Billy's own stage as it'll deal extra damage and twice the amount of stun. | ||
<gallery class="mw-collapsible"> | <gallery class="mw-collapsible"> | ||
FFS Billy CD Front.png| | FFS Billy CD Front.png|5-10F | ||
FFS Billy CD Front 1.png| | FFS Billy CD Front 1.png|27-45F | ||
</gallery> | </gallery> | ||
}} | }} | ||
| Line 551: | Line 556: | ||
|Block Adv=-2 | |Block Adv=-2 | ||
|Property=Cancel, Lane Shift | |Property=Cancel, Lane Shift | ||
|description= | |description=*Way worse than the front lane version. | ||
}} | }} | ||
}} | }} | ||
| Line 663: | Line 668: | ||
===Throws=== | ===Throws=== | ||
===== <span class="invisible-header"> | ===== <span class="invisible-header">Ippon Zuri Nage (4/6C)</span> ===== | ||
<font style="visibility:hidden" size="0"></font> | <font style="visibility:hidden" size="0"></font> | ||
{{MoveData | {{MoveData | ||
| Line 688: | Line 693: | ||
}} | }} | ||
===== <span class="invisible-header"> | ===== <span class="invisible-header">Jigoku Otoshi (4/6D)</span> ===== | ||
<font style="visibility:hidden" size="0"></font> | <font style="visibility:hidden" size="0"></font> | ||
{{MoveData | {{MoveData | ||
| Line 697: | Line 702: | ||
|data= | |data= | ||
{{AttackData-FFS | {{AttackData-FFS | ||
|Damage= | |Damage=16~32 (4 x 4~8) | ||
|Stun=0 | |Stun=0 | ||
|Guard=Throw | |Guard=Throw | ||
| Line 706: | Line 711: | ||
|Block Adv=/ | |Block Adv=/ | ||
|Property=/ | |Property=/ | ||
|description= | |description= * Hold throw, opponent can mash to reduce hits. | ||
* If all hits connect on a one-lane stage, the opponent will be thrown into the background for an additional 8 damage. Unlike background damage from a Lane Blast, though, no stun will be inflicted. | |||
<gallery class="mw-collapsible"> | <gallery class="mw-collapsible"> | ||
FFS Billy D Throw 1.png| | FFS Billy D Throw 1.png| | ||
| Line 798: | Line 804: | ||
| version = C | | version = C | ||
| subtitle = | | subtitle = | ||
| Damage = 22 ( | | Damage = 22 (5) | ||
| Stun = 6 | | Stun = 6 | ||
| Guard = Mid | | Guard = Mid | ||
| Line 807: | Line 813: | ||
| Hit Adv = -3 | | Hit Adv = -3 | ||
| Block Adv = -10 | | Block Adv = -10 | ||
| Property = Throw Invuln 2- | | Property = Throw Invuln 2-53F | ||
| description = * Charge time: 60F. | | description = * Charge time: 60F. | ||
* Has farther range than the A version. | * Has farther range than the A version. | ||
| Line 846: | Line 852: | ||
| Property = Throw Invuln 2-59F | | Property = Throw Invuln 2-59F | ||
| description = * Charge time: 30F. | | description = * Charge time: 30F. | ||
* | * Great anti-air, but only against jumps from a rather specific angle, making it somewhat situational. | ||
}} | }} | ||
{{AttackData-FFS | {{AttackData-FFS | ||
| Line 863: | Line 869: | ||
| Property = Throw Invuln 2-74F | | Property = Throw Invuln 2-74F | ||
| description = * Charge time: 45F. | | description = * Charge time: 45F. | ||
* | * Longer charge time and startup, thus more difficult to use. | ||
}} | }} | ||
}} | }} | ||
| Line 933: | Line 939: | ||
| Block Adv = -2 | | Block Adv = -2 | ||
| Property = Upper-Body Invuln 1-4F, 72-79F | | Property = Upper-Body Invuln 1-4F, 72-79F | ||
| description = Billy spins his stick around creating a ring of fire, then throws the ring forward as a projectile | | description = Billy spins his stick around creating a ring of fire, then throws the ring forward as a projectile. Can be comboed into, can anti-air, can quickly nullify fireballs, and is difficult to punish. | ||
* Transitions to the moving projectile on the 41st frame. | |||
* The stationary projectile hits twice, and Billy will immediately transition to recovery after it connects. | |||
* Avoid accidental jumps by pressing A+C slightly before 7 (2363214AC7). | * Avoid accidental jumps by pressing A+C slightly before 7 (2363214AC7). | ||
<gallery class="mw-collapsible"> | <gallery class="mw-collapsible"> | ||
| Line 949: | Line 957: | ||
==Combos== | ==Combos== | ||
* c5A x N, f5A x N | * c5A x N, f5A x N | ||
c5A will whiff on crouching opponents. | |||
* 2C > [4]6A | * 2C > [4]6A | ||
* c5C > [4]6A or 23632147AC | * c5C > [4]6A or 23632147AC | ||
* 2B > 23632147AC | * 2B > 23632147AC | ||
* jC > c5C > Mash C | |||
One button combo that's actually somewhat tricky to pull off, as you'll need a good mashing technique for it to work. | |||
* (Corner) f5C > c5C > [4]6A | * (Corner) f5C > c5C > [4]6A | ||
Far 5C gives you some forward momentum, making this rather unusual far normal -> close normal link possible. | |||
== | == Strategy == | ||
===The Basics=== | ===The Basics=== | ||
Billy's playstyle most closely resembles the Dhalsim-esque limb zoner archetype, although instead of stretchy limbs he fights with an extendable staff. He's generally agreed to be one of the best, if not the best, characters in the game and even has a favorable matchup against fellow top spot contender Kim. On the flipside, properly utilizing all of his moves will take some practice, making him harder to learn than most other characters in the game. If you stick with him, though, you'll definitely start to see results as he has an advantage in the vast majority of his matchups. | |||
Needless to say, Billy's biggest strength is the massive reach of his moves; he's able to safely poke his opponents from half a screen away with his normals, and even hit you from almost full screen with his Sansetsukon special. Combine that with his great anti-air options, and you've got a character that's very hard for any character to approach. While Billy works best as a defensive keep-away character, he's versatile enough to be played aggressively if the situation calls for it, thanks to his great jump-ins, mobility boosting moves and blockstring pressure that's hard to break out of. | |||
Your key normals are: | |||
*5A: The ultimate poke. Incredibly safe and fast with good reach. Simply spamming this move in neutral makes it very difficult for rushdown characters to approach you. | |||
*2C: Very fast long range poke that works great especially when cancelled into light Sansetsukon both on hit and block. Gives Billy good damage even off long range hits. | |||
*5C: Solid anti-air that can also hit grounded opponents. Moves Billy forward while allowing him to keep charge for Sansetsukon. | |||
*2B/2D: While they obviously have less range than his staff normals, Billy's low kicks are still great in situations where your mid pokes can be countered. | |||
Billy's movement speed is below average, but his pole vault kick (far 5B) largely makes up for it as the move doubles as a dash of sorts that you can even steer by holding 4 or 6. It also goes over certain projectiles when timed right, and can be cancelled into specials on whiff and block. Learning to utilize this move for quick movement is essential for any Billy player. Like 5C, you can keep charge for Sansetsukon while using the move, so you'll be often utilizing your buttons for movement. | |||
While Billy doesn't have a traditional projectile per se, his Sansetsukon and Senpuukon specials both have a projectile hitbox and can thus be used to destroy enemy projectiles. Light Sansetsukon is great for blockstrings, chip damage and combos while the heavy version is slower but has almost full screen range. Senpuukon is mostly used as a combo ender or close range chip damage dealer. | |||
With correct spacing, Billy's Suzume Otoshi ([1]9A/C) is a very reliable anti-air, but it's far from being foolproof and requires a charge, so you'll be using your normals more often to anti-air. Far C and front lane CD are your best ground moves for that purpose, although both have their quirks; far C can't be used in close range as you'll get the close version instead, and CD has two different hitboxes, the first of them being the one you want to hit your opponent with. Often the best solution against jumps is an air-to-air jA or jC, so try to keep that option in mind. | |||
Kyoushuu Hishoukon (1236B/D) is Billy's most gimmicky special. It can serve as a decent "neutral skip" option if timed correctly, but unfortunately it gives your opponent plenty of time to react and step out of the way or punish the move. It's safe on block and may occasionally catch people off guard, though, so using it every now and then doesn't carry a huge amount of risk. | |||
===Advanced Strategy=== | ===Advanced Strategy=== | ||
=== | Billy's dodge attack is on the slow side, and while it's still good for dodging projectiles, it can be difficult to land against moves with fast recovery. If your dodge attack gets blocked, though, you can still cancel it into Senpuukon and deal a decent chunk of chip damage. | ||
The fastest move Billy can dish out in close range is his Senpuukon, so if you're caught in seemingly endless blockstring pressure it can be a good move to use to get the opponent off your back. | |||
==Matchups== | |||
===Vs. Andy Bogard=== | |||
5 - 5 | |||
Your standard ground pokes (5A, 2C) do a good job at stopping Andy from approaching with his Zaneiken, as long as your timing is on point and you don't get hit during the startup of your moves. If Andy goes for Kuuha Dan, you can counter it with a front lane CD. Don't let him get too close as Andy outspeeds you in close range with his 3F jabs. | |||
===Vs. Axel Hawk=== | |||
6.5 - 3.5 | |||
Axel doesn't pose a huge threat unless he gets close enough to hit you with his 2D, so try to keep him away with your 5A, 2C and Sansetsukon. Fortunately for you, his walk speed is the slowest in the game, so it's very hard for him to catch you off guard. Watch out for his CD, though; it's a huge advantage for Axel even if it trades, and always deals a whopping 10 points of stun against Billy since this matchup is guaranteed to be 1 lane only. | |||
===Vs. Big Bear=== | |||
6.5 - 3.5 | |||
Bear can choose to ignore your mid pokes and charge in with his upper body invulnerable tackle, but fortunately you have very solid lows in your arsenal as well - just hit him with 2B or 2D whenever Bear tries to go for a tackle. Bear's jumps are fast, but this matchup still shouldn't be too much trouble as long as you can react to everything he does in time. | |||
===Vs. Billy Kane=== | |||
5 - 5 | |||
===Vs. Cheng Sinzan=== | |||
6.5 - 3.5 | |||
===Vs. Duck King=== | |||
7.5 - 2.5 | |||
Duck can rather easily TOD Billy due to his low stun threshold if he manages to get in, but the good news is that he's not very likely going to get in unless you mess up badly. Billy's standard 5A and 2C pokes are almost like an impenetrable wall when used against Duck, so abuse them as much as you can. Duck is going to need either a successful jump-in or a knockdown from his slide kick to start his close range pressure, so as long as you keep an eye out for those Duck won't be able to touch you. | |||
===Vs. Geese Howard=== | |||
5.5 - 4.5 | |||
Try to stay in close or mid range as Geese's Reppuken gives him the upper hand if you're too far away. 5B is very useful here as it goes over projectiles when spaced correctly. Using mid pokes is slightly riskier than usual against Geese due to his counter moves, so you might want to go for low kicks instead in close range combat. Sansetsukon fortunately has a projectile hitbox and thus can't be countered with Geese's Atemi Nage. | |||
===Vs. Joe Higashi=== | |||
4 - 6 | |||
Billy has disadvantageous matchups too, if you can believe it. Joe has the upper hand both up close and at a distance due to his fast jabs and projectiles, so staying somewhere in between, within the range of your 5A and 2C, is ideal for Billy. You can use your projectile destroying specials and neutral jumps to avoid taking chip damage from Hurricanes, but sooner or later you'll have to your work your way in, so time your jumps carefully. 5B and dodge attack won't help you against projectiles here due to the huge hitbox on Hurricane Upper. Billy's jump kick buttons beat the usual Joe slide anti-air, but he still has 5D and Tiger Kick to work with. | |||
===Vs. Jubei Yamada=== | |||
4 - 6 | |||
You need to be able to get past Senbei spam do deal damage, so knowing how to properly utilize your dodge attack and Senpuukon is very useful. Use jD as your jump-in button as it beats Jubei's low profile anti-airs. Just like in the Joe matchup, you don't want to get ''too'' close as Jubei's normals outspeed yours - try to stay in mid range where his moves can't reach you, but you can still hit him with your far reaching normals. | |||
===Vs. Kim Kaphwan=== | |||
6 - 4 | |||
Rejoice as you're the only character in the game to have an advantageous matchup against this beast. Use your long range moves to your advantage and don't let Kim get too close. Front lane CD and far C are great for stopping divekicks. Don't take unnecessary risks as Kim can still easily melt your lifebar away with a stun combo - it's often better to simply backstep away from danger if Kim is close enough to threaten you with his fast normals. | |||
===Vs. Laurence Blood=== | |||
7 - 3 | |||
Another matchup that's always 1 lane only. Like Billy, Laurence excels in long range pokes, but his farthest reaching moves recover slower and aren't cancellable, so the odds are in your favor. His jumps are very floaty as well, giving ample time to react with one of your anti-airs. | |||
===Vs. Mai Shiranui=== | |||
5.5 - 4.5 | |||
Dodge attack works well against Mai's projectiles. Make good use of your reach and stay in mid-range where you can hit her with 5A/2C without having to worry about getting countered by a heavy Ryuuenbu. | |||
===Vs. Ryo Sakazaki=== | |||
===Vs. Terry Bogard=== | |||
6.5 - 3.5 | |||
===Vs. Tung Fu Rue=== | |||
8 - 2 | |||
Total domination. Tung has no hope of approaching you on ground as long as you keep throwing out 5As and 2Cs, so he either has to jump in or try to punish the startup or recovery of your pokes with a heavy Senshippo, both of which are risky to do. If Tung gets close enough to harass you with his normals, you can always backstep away to safety. As long as you stay vigilant and don't mess up your anti-airs, you'll have this in the bag. | |||
===Vs. Wolfgang Krauser=== | |||
5 - 5 | |||
Krauser's Blitzballs can be annoying to deal with, but all your standard anti-projectile tactics are viable here. Like Geese, Krauser can counter mid pokes with his Atemi Nage, so it's safer to use lows against him if you're in close range. Sansetsukon is also safe to use thanks to its projectile hitbox. | |||
{{Navbox-FFS}} | {{Navbox-FFS}} | ||
[[Category:Fatal Fury Special]] | [[Category:Fatal Fury Special]] | ||
[[Category:Billy Kane]] | [[Category:Billy Kane]] | ||
Latest revision as of 18:20, 18 April 2025


Introduction
Billy is a top tier character who can harass from far distances while still being strong up close. He can easily dominate grounded neutral with his 5A and 2C and has many specialized moves to cover the opponent's responses. His Desperation Move is incredibly versatile and strong, starting up almost instantly and being safe on block and even hard to whiff punish. He is relatively difficult to play as the aforementioned specialized moves take getting used to for anti-air or anti-fireball, and he is among the easiest characters to dizzy.
| Pros | Cons |
|---|---|
|
|
Move List
General Hurtboxes
| Standing/Walking | Crouching | Jumping | Taunting |
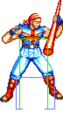
 |
 |
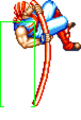
 |

|
| Hurtbox does not shift up while walking. | 52F (4+45+3) duration. | Billy has brief invincibility when lifting and lowering his Kane. |
Close Standing Normals
c5A
Joudan Uchi/上段打ち

| Damage | Stun | Guard | Startup | Active | Recovery | Total | Hit Adv | Block Adv | Property | |
|---|---|---|---|---|---|---|---|---|---|---|
| 6 | 2 | Mid | 4 | 6 | 5 | 14 | +5 | +6 | Kara Cancel | |
| ||||||||||
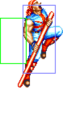
c5B
Ushirogeri/後ろ蹴り

| Damage | Stun | Guard | Startup | Active | Recovery | Total | Hit Adv | Block Adv | Property | |
|---|---|---|---|---|---|---|---|---|---|---|
| 5 | 2 | Mid | 10 | 7 | 10 | 26 | -1 | 0 | Kara Cancel | |
| ||||||||||
c5C
Chuudan Uchi/中段打ち

| Damage | Stun | Guard | Startup | Active | Recovery | Total | Hit Adv | Block Adv | Property | |
|---|---|---|---|---|---|---|---|---|---|---|
| 16 | 4 | Mid | 5 | 10 | 12 | 26 | +2 | +1 | Kara Cancel | |
| ||||||||||
c5D
Ushiro Kaitengeri/後ろ回転蹴り
| Damage | Stun | Guard | Startup | Active | Recovery | Total | Hit Adv | Block Adv | Property | |
|---|---|---|---|---|---|---|---|---|---|---|
| 12 | 4 | Mid | 11 | 11 | 16 | 37 | -3 | -4 | Kara Cancel | |
| ||||||||||
Far Standing Normals
f5A
Kyoufu Daichuudan Uchi/恐怖大中段打ち

| Damage | Stun | Guard | Startup | Active | Recovery | Total | Hit Adv | Block Adv | Property | |
|---|---|---|---|---|---|---|---|---|---|---|
| 6 | 2 | Mid | 4 | 6 | 5 | 14 | +5 | +6 | Kara Cancel | |
| ||||||||||
f4/5/6B
Shin Boutakatobigeri/新棒高跳び蹴り

| Damage | Stun | Guard | Startup | Active | Recovery | Total | Hit Adv | Block Adv | Property | |
|---|---|---|---|---|---|---|---|---|---|---|
| 5 | 2 | Mid | 23 | 7 | 10 | 39 | -1 | 0 | Kara Cancel | |
| ||||||||||
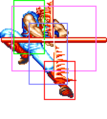
f5C
Mangetsu-uchi/満月打ち

| Damage | Stun | Guard | Startup | Active | Recovery | Total | Hit Adv | Block Adv | Property | |
|---|---|---|---|---|---|---|---|---|---|---|
| 16x4 | 4x4 | Mid | 10 | 4x4 | 4 | 29 | +16 | +15 | Cancel | |
| ||||||||||


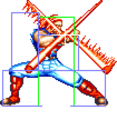
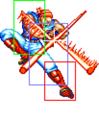
f5D
Ushiro Kaiten Chuudan Uchi/後ろ回転中段打ち
| Damage | Stun | Guard | Startup | Active | Recovery | Total | Hit Adv | Block Adv | Property | |
|---|---|---|---|---|---|---|---|---|---|---|
| 12x2 | 4x2 | Mid | 10 | 6 (7) 8 | 22 | 52 | -7 | -8 | / | |
| ||||||||||

Crouching Normals
2A
Gedan Uchi/下段打ち

| Damage | Stun | Guard | Startup | Active | Recovery | Total | Hit Adv | Block Adv | Property | |
|---|---|---|---|---|---|---|---|---|---|---|
| 5 | 2 | Mid | 7 | 7 | 10 | 23 | -1 | 0 | Kara Cancel | |
| ||||||||||
2B
Crouching Kick/しゃがみキック

| Damage | Stun | Guard | Startup | Active | Recovery | Total | Hit Adv | Block Adv | Property | |
|---|---|---|---|---|---|---|---|---|---|---|
| 8 | 2 | Low | 6 | 7 | 8 | 20 | +1 | +2 | Kara Cancel | |
| ||||||||||
2C
Gedan Uchi/下段打ち

| Damage | Stun | Guard | Startup | Active | Recovery | Total | Hit Adv | Block Adv | Property | |
|---|---|---|---|---|---|---|---|---|---|---|
| 12 | 4 | Mid | 7 | 8 | 22 | 36 | -6 | -7 | Kara Cancel | |
| ||||||||||
2D
Crouching Kick/しゃがみキック
| Damage | Stun | Guard | Startup | Active | Recovery | Total | Hit Adv | Block Adv | Property | |
|---|---|---|---|---|---|---|---|---|---|---|
| 14 | 4 | Low | 7 | 10 | 22 | 38 | KD | -9 | / | |
| ||||||||||
Jumping Normals
jA
Jump Mangetsu-Uchi/ジャンプ満月打ち


| Version | Damage | Stun | Guard | Startup | Active | Recovery | Total | Hit Adv | Block Adv | Property | |
|---|---|---|---|---|---|---|---|---|---|---|---|
| Diagonal Jump | 8 | 2 | Overhead | 3 | 2+2+5+∞ | / | / | - | - | - | |
| |||||||||||
| Neutral Jump | 8 | 2 | Overhead | 12 | 7+∞ | / | / | - | - | - | |
|
| |||||||||||


jB
| Version | Damage | Stun | Guard | Startup | Active | Recovery | Total | Hit Adv | Block Adv | Property | |
|---|---|---|---|---|---|---|---|---|---|---|---|
| Diagonal & Neutral Jump | 8 | 2 | Overhead | 12 | 7+∞ | / | / | - | - | - | |
| |||||||||||
jC
Jump Mangetsu-Uchi/ジャンプ満月打ち
| Version | Damage | Stun | Guard | Startup | Active | Recovery | Total | Hit Adv | Block Adv | Property | |
|---|---|---|---|---|---|---|---|---|---|---|---|
| Diagonal Jump | 16 | 4 | Overhead | 3 | 2+4+5+12 | / | / | - | - | - | |
| |||||||||||
| Neutral Jump | 16 | 4 | Overhead | 10 | 5+12 | / | / | - | - | - | |
|
| |||||||||||
jD
| Version | Damage | Stun | Guard | Startup | Active | Recovery | Total | Hit Adv | Block Adv | Property | |
|---|---|---|---|---|---|---|---|---|---|---|---|
| Diagonal Jump | 16 | 4 | Overhead | 11 | 5+12 | / | / | - | - | - | |
| |||||||||||
| Neutral Jump | 16 | 4 | Overhead | 10 | 5+12 | / | / | - | - | - | |
|
Identical to neutral jump C. | |||||||||||
Universal Mechanics
Lane Blast (CD)
C+D


| Version | Damage | Stun | Guard | Startup | Active | Recovery | Total | Hit Adv | Block Adv | Property | |
|---|---|---|---|---|---|---|---|---|---|---|---|
| Front Lane | 22 | 5 | Mid | 5, 27 | 6 (16) 19 | 7 | 52 | KD | -20 | Cancel, Lane Shift | |
| |||||||||||
| Back Lane | 22 | 5 | Mid | 16 | 6 | 14 | 35 | KD | -2 | Cancel, Lane Shift | |
| |||||||||||

Lane Attack
A/B/C/D from opposite lane


| Version | Damage | Stun | Guard | Startup | Active | Recovery | Total | Hit Adv | Block Adv | Property | |
|---|---|---|---|---|---|---|---|---|---|---|---|
| A | 20 | 2 | Overhead | 13 | 17 | 4 | 33 | - | - | / | |
| |||||||||||
| B | 20 | 2 | Overhead | 9 | 21 | 4 | 33 | - | - | / | |
| |||||||||||
| C | 20 | 4 | Overhead | 13 | 36 | 4 | 52 | - | - | / | |
| |||||||||||
| D | 20 | 4 | Overhead | 9 | 40 | 4 | 52 | - | - | / | |
| |||||||||||
Dodge Attack
6A during proximity guard

| Damage | Stun | Guard | Startup | Active | Recovery | Total | Hit Adv | Block Adv | Property | |
|---|---|---|---|---|---|---|---|---|---|---|
| 11 | 5 | Mid | 18 | 13 | 12 | 42 | Air Reset | -5 | Kara Cancel, Upper-Body Invuln 1-29F | |
| ||||||||||


Throws
Ippon Zuri Nage (4/6C)
close 4/6C

| Damage | Stun | Guard | Startup | Active | Recovery | Total | Hit Adv | Block Adv | Property | |
|---|---|---|---|---|---|---|---|---|---|---|
| 26 | 3 | Throw | 1 | 1 | / | - | - | / | / | |
|
| ||||||||||

Jigoku Otoshi (4/6D)
close 4/6D

| Damage | Stun | Guard | Startup | Active | Recovery | Total | Hit Adv | Block Adv | Property | |
|---|---|---|---|---|---|---|---|---|---|---|
| 16~32 (4 x 4~8) | 0 | Throw | 1 | 1 | / | - | - | / | / | |
| ||||||||||

Special Moves
Senpuu Kon (Mash P)
Mash P

Startup & Recovery
Between hits


| Version | Damage | Stun | Guard | Startup | Active | Recovery | Total | Hit Adv | Block Adv | Property |
|---|---|---|---|---|---|---|---|---|---|---|
| A | 13 (4xN) | 3 | Mid | 4 | 5 (5) 5 (5) 5 (5) 1 ... | 6 | 40 | KD | +14 | Upper-Body Invuln 1-3F, 35-40F |
| C | 19 (5xN) | 6 | Mid | 4 | 3 (3) 3 (3) 3 (3) 3 (3) 3 (3) 1 | 10 | 44 | KD | -4 | Upper-Body Invuln 1-3F, 35-44F |
Sansetsu Kon ([4]6P)
[4]6A/C


| Version | Damage | Stun | Guard | Startup | Active | Recovery | Total | Hit Adv | Block Adv | Property | |
|---|---|---|---|---|---|---|---|---|---|---|---|
| A | 16 (4) | 3 | Mid | 19 | 7 | 21 | 46 | -7 | -10 | Throw Invuln 2-46F | |
| |||||||||||
| C | 22 (5) | 6 | Mid | 23 | 9 | 22 | 53 | -3 | -10 | Throw Invuln 2-53F | |
| |||||||||||


Suzume Otoshi ([1]9P)
[1]9A/C

| Version | Damage | Stun | Guard | Startup | Active | Recovery | Total | Hit Adv | Block Adv | Property | |
|---|---|---|---|---|---|---|---|---|---|---|---|
| A | 16 (4) | 3 | Mid | 14 | 11 | 35 | 59 | KD | - | Throw Invuln 2-59F | |
| |||||||||||
| C | 22 (6) | 6 | Mid | 19 | 16 | 40 | 74 | KD | - | Throw Invuln 2-74F | |
| |||||||||||
Kyoushuu Hishou Kon (1236K)
1236B/D

Startup Invuln
Vulnerable Startup
No projectile hitbox
Projectile hitbox


| Version | Damage | Stun | Guard | Startup | Active | Recovery | Total | Hit Adv | Block Adv | Property |
|---|---|---|---|---|---|---|---|---|---|---|
| B | 18 (5) | 3 | Mid | 72 | 13 | 8 | 92 | KD | - | Invuln 1-27F, Throw Invuln 28-92F |
| D | 18 (5) | 6 | Mid | 96 | 13 | 8 | 116 | KD | - | Invuln 1-31F, Throw Invuln 32-116F |
Desperation Move
Chou Kaen Senpuu Kon (23632147AC)
When health is flashing
23632147A+C

| Damage | Stun | Guard | Startup | Active | Recovery | Total | Hit Adv | Block Adv | Property | |
|---|---|---|---|---|---|---|---|---|---|---|
| 38 (9x2) | 4 | Mid | 5 | 56 | 19 | 79 | KD | -2 | Upper-Body Invuln 1-4F, 72-79F | |
|
Billy spins his stick around creating a ring of fire, then throws the ring forward as a projectile. Can be comboed into, can anti-air, can quickly nullify fireballs, and is difficult to punish.
| ||||||||||


Combos
- c5A x N, f5A x N
c5A will whiff on crouching opponents.
- 2C > [4]6A
- c5C > [4]6A or 23632147AC
- 2B > 23632147AC
- jC > c5C > Mash C
One button combo that's actually somewhat tricky to pull off, as you'll need a good mashing technique for it to work.
- (Corner) f5C > c5C > [4]6A
Far 5C gives you some forward momentum, making this rather unusual far normal -> close normal link possible.
Strategy
The Basics
Billy's playstyle most closely resembles the Dhalsim-esque limb zoner archetype, although instead of stretchy limbs he fights with an extendable staff. He's generally agreed to be one of the best, if not the best, characters in the game and even has a favorable matchup against fellow top spot contender Kim. On the flipside, properly utilizing all of his moves will take some practice, making him harder to learn than most other characters in the game. If you stick with him, though, you'll definitely start to see results as he has an advantage in the vast majority of his matchups.
Needless to say, Billy's biggest strength is the massive reach of his moves; he's able to safely poke his opponents from half a screen away with his normals, and even hit you from almost full screen with his Sansetsukon special. Combine that with his great anti-air options, and you've got a character that's very hard for any character to approach. While Billy works best as a defensive keep-away character, he's versatile enough to be played aggressively if the situation calls for it, thanks to his great jump-ins, mobility boosting moves and blockstring pressure that's hard to break out of.
Your key normals are:
- 5A: The ultimate poke. Incredibly safe and fast with good reach. Simply spamming this move in neutral makes it very difficult for rushdown characters to approach you.
- 2C: Very fast long range poke that works great especially when cancelled into light Sansetsukon both on hit and block. Gives Billy good damage even off long range hits.
- 5C: Solid anti-air that can also hit grounded opponents. Moves Billy forward while allowing him to keep charge for Sansetsukon.
- 2B/2D: While they obviously have less range than his staff normals, Billy's low kicks are still great in situations where your mid pokes can be countered.
Billy's movement speed is below average, but his pole vault kick (far 5B) largely makes up for it as the move doubles as a dash of sorts that you can even steer by holding 4 or 6. It also goes over certain projectiles when timed right, and can be cancelled into specials on whiff and block. Learning to utilize this move for quick movement is essential for any Billy player. Like 5C, you can keep charge for Sansetsukon while using the move, so you'll be often utilizing your buttons for movement.
While Billy doesn't have a traditional projectile per se, his Sansetsukon and Senpuukon specials both have a projectile hitbox and can thus be used to destroy enemy projectiles. Light Sansetsukon is great for blockstrings, chip damage and combos while the heavy version is slower but has almost full screen range. Senpuukon is mostly used as a combo ender or close range chip damage dealer.
With correct spacing, Billy's Suzume Otoshi ([1]9A/C) is a very reliable anti-air, but it's far from being foolproof and requires a charge, so you'll be using your normals more often to anti-air. Far C and front lane CD are your best ground moves for that purpose, although both have their quirks; far C can't be used in close range as you'll get the close version instead, and CD has two different hitboxes, the first of them being the one you want to hit your opponent with. Often the best solution against jumps is an air-to-air jA or jC, so try to keep that option in mind.
Kyoushuu Hishoukon (1236B/D) is Billy's most gimmicky special. It can serve as a decent "neutral skip" option if timed correctly, but unfortunately it gives your opponent plenty of time to react and step out of the way or punish the move. It's safe on block and may occasionally catch people off guard, though, so using it every now and then doesn't carry a huge amount of risk.
Advanced Strategy
Billy's dodge attack is on the slow side, and while it's still good for dodging projectiles, it can be difficult to land against moves with fast recovery. If your dodge attack gets blocked, though, you can still cancel it into Senpuukon and deal a decent chunk of chip damage.
The fastest move Billy can dish out in close range is his Senpuukon, so if you're caught in seemingly endless blockstring pressure it can be a good move to use to get the opponent off your back.
Matchups
Vs. Andy Bogard
5 - 5
Your standard ground pokes (5A, 2C) do a good job at stopping Andy from approaching with his Zaneiken, as long as your timing is on point and you don't get hit during the startup of your moves. If Andy goes for Kuuha Dan, you can counter it with a front lane CD. Don't let him get too close as Andy outspeeds you in close range with his 3F jabs.
Vs. Axel Hawk
6.5 - 3.5
Axel doesn't pose a huge threat unless he gets close enough to hit you with his 2D, so try to keep him away with your 5A, 2C and Sansetsukon. Fortunately for you, his walk speed is the slowest in the game, so it's very hard for him to catch you off guard. Watch out for his CD, though; it's a huge advantage for Axel even if it trades, and always deals a whopping 10 points of stun against Billy since this matchup is guaranteed to be 1 lane only.
Vs. Big Bear
6.5 - 3.5
Bear can choose to ignore your mid pokes and charge in with his upper body invulnerable tackle, but fortunately you have very solid lows in your arsenal as well - just hit him with 2B or 2D whenever Bear tries to go for a tackle. Bear's jumps are fast, but this matchup still shouldn't be too much trouble as long as you can react to everything he does in time.
Vs. Billy Kane
5 - 5
Vs. Cheng Sinzan
6.5 - 3.5
Vs. Duck King
7.5 - 2.5
Duck can rather easily TOD Billy due to his low stun threshold if he manages to get in, but the good news is that he's not very likely going to get in unless you mess up badly. Billy's standard 5A and 2C pokes are almost like an impenetrable wall when used against Duck, so abuse them as much as you can. Duck is going to need either a successful jump-in or a knockdown from his slide kick to start his close range pressure, so as long as you keep an eye out for those Duck won't be able to touch you.
Vs. Geese Howard
5.5 - 4.5
Try to stay in close or mid range as Geese's Reppuken gives him the upper hand if you're too far away. 5B is very useful here as it goes over projectiles when spaced correctly. Using mid pokes is slightly riskier than usual against Geese due to his counter moves, so you might want to go for low kicks instead in close range combat. Sansetsukon fortunately has a projectile hitbox and thus can't be countered with Geese's Atemi Nage.
Vs. Joe Higashi
4 - 6
Billy has disadvantageous matchups too, if you can believe it. Joe has the upper hand both up close and at a distance due to his fast jabs and projectiles, so staying somewhere in between, within the range of your 5A and 2C, is ideal for Billy. You can use your projectile destroying specials and neutral jumps to avoid taking chip damage from Hurricanes, but sooner or later you'll have to your work your way in, so time your jumps carefully. 5B and dodge attack won't help you against projectiles here due to the huge hitbox on Hurricane Upper. Billy's jump kick buttons beat the usual Joe slide anti-air, but he still has 5D and Tiger Kick to work with.
Vs. Jubei Yamada
4 - 6
You need to be able to get past Senbei spam do deal damage, so knowing how to properly utilize your dodge attack and Senpuukon is very useful. Use jD as your jump-in button as it beats Jubei's low profile anti-airs. Just like in the Joe matchup, you don't want to get too close as Jubei's normals outspeed yours - try to stay in mid range where his moves can't reach you, but you can still hit him with your far reaching normals.
Vs. Kim Kaphwan
6 - 4
Rejoice as you're the only character in the game to have an advantageous matchup against this beast. Use your long range moves to your advantage and don't let Kim get too close. Front lane CD and far C are great for stopping divekicks. Don't take unnecessary risks as Kim can still easily melt your lifebar away with a stun combo - it's often better to simply backstep away from danger if Kim is close enough to threaten you with his fast normals.
Vs. Laurence Blood
7 - 3
Another matchup that's always 1 lane only. Like Billy, Laurence excels in long range pokes, but his farthest reaching moves recover slower and aren't cancellable, so the odds are in your favor. His jumps are very floaty as well, giving ample time to react with one of your anti-airs.
Vs. Mai Shiranui
5.5 - 4.5
Dodge attack works well against Mai's projectiles. Make good use of your reach and stay in mid-range where you can hit her with 5A/2C without having to worry about getting countered by a heavy Ryuuenbu.
Vs. Ryo Sakazaki
Vs. Terry Bogard
6.5 - 3.5
Vs. Tung Fu Rue
8 - 2
Total domination. Tung has no hope of approaching you on ground as long as you keep throwing out 5As and 2Cs, so he either has to jump in or try to punish the startup or recovery of your pokes with a heavy Senshippo, both of which are risky to do. If Tung gets close enough to harass you with his normals, you can always backstep away to safety. As long as you stay vigilant and don't mess up your anti-airs, you'll have this in the bag.
Vs. Wolfgang Krauser
5 - 5
Krauser's Blitzballs can be annoying to deal with, but all your standard anti-projectile tactics are viable here. Like Geese, Krauser can counter mid pokes with his Atemi Nage, so it's safer to use lows against him if you're in close range. Sansetsukon is also safe to use thanks to its projectile hitbox.


