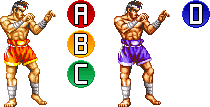
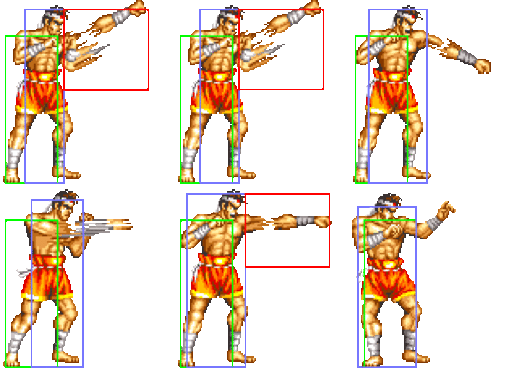
(→Combos) |
|||
| (22 intermediate revisions by 2 users not shown) | |||
| Line 5: | Line 5: | ||
==Introduction== | ==Introduction== | ||
{| | {| | ||
Blessed with some of the best zoning tools in the game and highly damaging close range combos, Joe in FFS is here to rock you like a hurricane. As long as you can do half-circle inputs and jab chains consistently, he's an easy character to pick up and start winning games with right away. | |||
|-style="text-align:left;" | |-style="text-align:left;" | ||
! Pros !! Cons | ! Pros !! Cons | ||
| Line 20: | Line 21: | ||
==Move List== | ==Move List== | ||
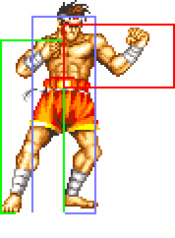
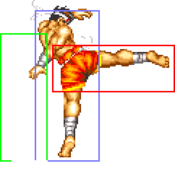
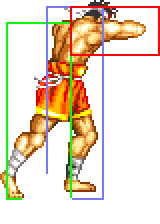
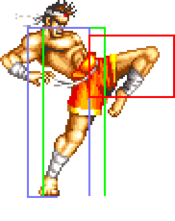
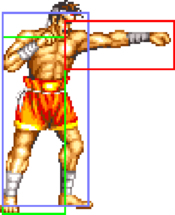
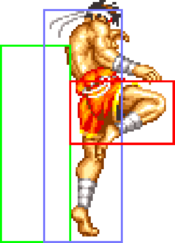
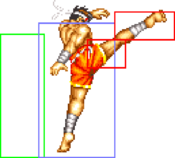
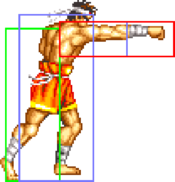
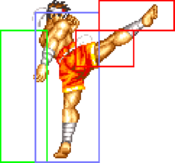
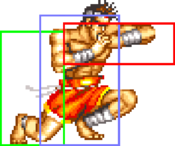
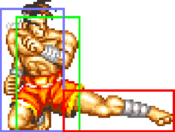
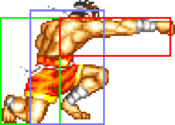
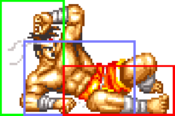
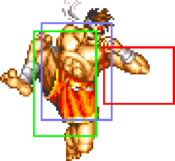
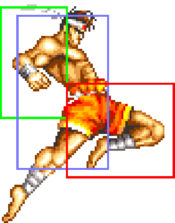
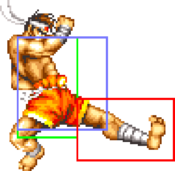
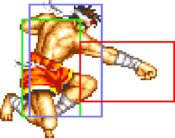
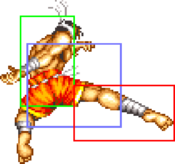
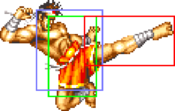
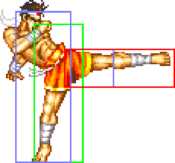
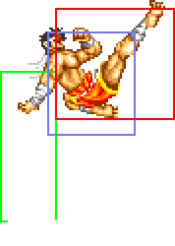
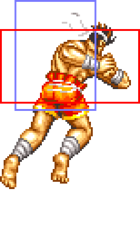
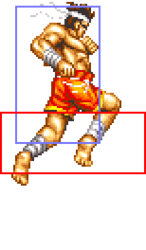
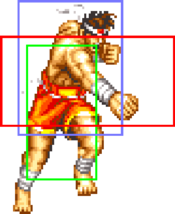
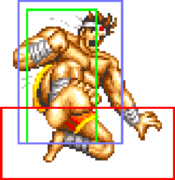
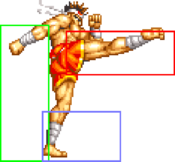
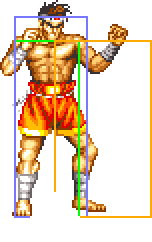
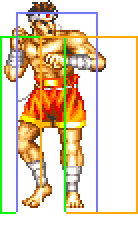
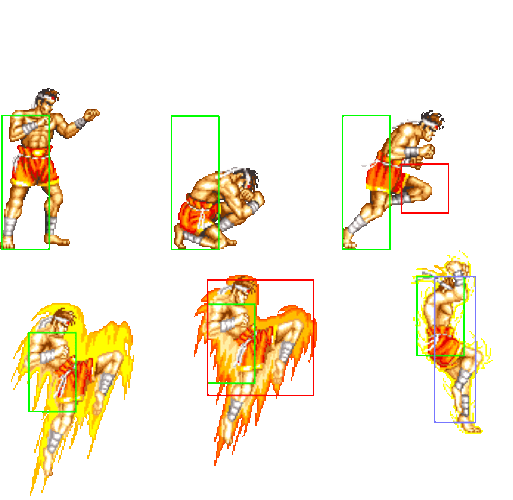
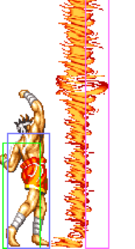
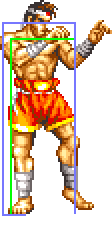
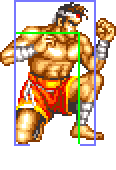
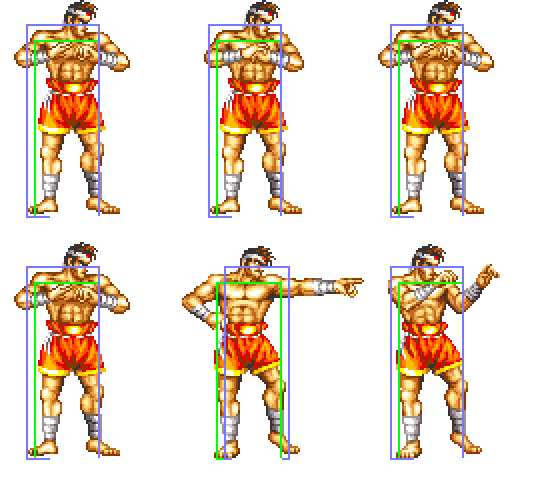
===General Hurtboxes=== | |||
{| border="1em" cellspacing="0" style="border: 1px solid #999;" | |||
| align="center" | Standing/Walking || align="center" | Crouching/Crawling || align="center" | Jumping || align="center" | Taunting | |||
|- | |||
| align="center"; valign="bottom" | [[File:FFS Joe Stand.png|bottom]] || align="center"; valign="bottom" | [[File:FFS Joe Crouch.png|bottom]] || align="center"; valign="bottom" | [[File:FFS Joe Jump.png|bottom]] || [[File:FFS Joe Taunt.gif|bottom|Orrra!]] | |||
|- | |||
| align="center" | || align="center" | || align="center" | 54F (4+47+3) duration. || | |||
|} | |||
===Close Standing Normals=== | ===Close Standing Normals=== | ||
| Line 27: | Line 38: | ||
{{MoveData | {{MoveData | ||
|image=FFS Joe c5A.png | |image=FFS Joe c5A.png | ||
|subtitle= | |subtitle=Body Hook/ボディフック | ||
|caption= | |caption= | ||
|name=c5A | |name=c5A | ||
| Line 41: | Line 52: | ||
|Hit Adv=+9 | |Hit Adv=+9 | ||
|Block Adv=+10 | |Block Adv=+10 | ||
|Property=Kara | |Property=Kara Cancel | ||
|description= | |description=*Links into itself and far 5A. Joe's most damaging combos start with this move. | ||
}} | }} | ||
}} | }} | ||
| Line 50: | Line 61: | ||
{{MoveData | {{MoveData | ||
|image=FFS Joe c5B.png | |image=FFS Joe c5B.png | ||
|subtitle= | |subtitle=Middle Kick/ミドルキック | ||
|caption= | |caption= | ||
|name=c5B | |name=c5B | ||
| Line 65: | Line 76: | ||
|Block Adv=+3 | |Block Adv=+3 | ||
|Property=Kara Cancel | |Property=Kara Cancel | ||
|description= | |description=*Would probably be a decent poke, but being a close normal you can't make use of its reach. Unremarkable. | ||
}} | }} | ||
}} | }} | ||
| Line 73: | Line 84: | ||
{{MoveData | {{MoveData | ||
|image=FFS Joe c5C.png | |image=FFS Joe c5C.png | ||
|subtitle= | |subtitle=Elbow Strike/肘打ち | ||
|caption= | |caption= | ||
|name=c5C | |name=c5C | ||
| Line 88: | Line 99: | ||
|Block Adv=+4 | |Block Adv=+4 | ||
|Property=Kara Cancel | |Property=Kara Cancel | ||
|description= | |description=*Hits so high, it whiffs against most crouching characters. Just awful. | ||
}} | }} | ||
}} | }} | ||
| Line 96: | Line 107: | ||
{{MoveData | {{MoveData | ||
|image=FFS Joe c5D.png | |image=FFS Joe c5D.png | ||
|subtitle= | |subtitle=Knee Strike/膝蹴り | ||
|caption= | |caption= | ||
|name=c5D | |name=c5D | ||
| Line 111: | Line 122: | ||
|Block Adv=+1 | |Block Adv=+1 | ||
|Property=Kara Cancel | |Property=Kara Cancel | ||
|description= | |description=*Much better than close C, but still doesn't lead to much damage on hit. | ||
}} | }} | ||
}} | }} | ||
| Line 135: | Line 146: | ||
|Hit Adv=+9 | |Hit Adv=+9 | ||
|Block Adv=+10 | |Block Adv=+10 | ||
|Property=Kara | |Property=Kara Cancel | ||
|description=*Mostly used in combos. | |description=*Mostly used in combos. Links into itself, 2D, 5D and 5C. | ||
}} | }} | ||
}} | }} | ||
| Line 231: | Line 242: | ||
|Hit Adv=+8 | |Hit Adv=+8 | ||
|Block Adv=+9 | |Block Adv=+9 | ||
|Property=Kara | |Property=Kara Cancel | ||
|description=*Extremely fast and safe. Ideal for close range pressure. | |description=*Extremely fast and safe. Ideal for close range pressure. | ||
*Functions as a combo starter, great against smaller characters like Jubei. | *Functions as a combo starter, great against smaller characters like Jubei. | ||
| Line 255: | Line 266: | ||
|Hit Adv=+5 | |Hit Adv=+5 | ||
|Block Adv=+6 | |Block Adv=+6 | ||
|Property=Kara | |Property=Kara Cancel | ||
|description=*Very hard to beat due to the tiny hurtbox. Use this often. | |description=*Very hard to beat due to the tiny hurtbox. Use this often. | ||
}} | }} | ||
| Line 358: | Line 369: | ||
|Block Adv= | |Block Adv= | ||
|Property= | |Property= | ||
|description=*Diagonal: Solid jump-in. Instant overhead against tall characters. | |description=*Diagonal: Solid jump-in that can beat low profile anti-airs. Instant overhead against tall characters. | ||
*Neutral: Good against Kim divekicks. | *Neutral: Good against Kim divekicks or rushing special moves, as long as it hits on the way down. | ||
}} | }} | ||
}} | }} | ||
| Line 445: | Line 456: | ||
=== Universal Mechanics === | === Universal Mechanics === | ||
===== <span class="invisible-header">Lane Blast</span> ===== | ===== <span class="invisible-header">Lane Blast (CD)</span> ===== | ||
<font style="visibility:hidden" size="0"></font> | <font style="visibility:hidden" size="0"></font> | ||
{{MoveData | {{MoveData | ||
| Line 452: | Line 463: | ||
|subtitle= | |subtitle= | ||
|caption=Front Lane | |caption=Front Lane | ||
|caption2=Back Lane | |||
|name=Lane Blast | |name=Lane Blast | ||
|input=C+D | |input=C+D | ||
| Line 483: | Line 495: | ||
|Property=Cancel, Lower-Body Invuln 12-26F | |Property=Cancel, Lower-Body Invuln 12-26F | ||
|description=*Much worse range. Can anti-air, but Joe already has more than enough moves to AA with, so try to stick to using the front lane as Joe. | |description=*Much worse range. Can anti-air, but Joe already has more than enough moves to AA with, so try to stick to using the front lane as Joe. | ||
<gallery class="mw-collapsible"> | |||
FFS Joe CD Back.png| | |||
FFS Joe CD Back 1.png|Recovery | |||
</gallery> | |||
}} | }} | ||
}} | }} | ||
| Line 536: | Line 552: | ||
{{MoveData | {{MoveData | ||
|image=FFS Joe Dodge Attack.png | |image=FFS Joe Dodge Attack.png | ||
|subtitle= | |subtitle=Sway Kick/スウェーキック | ||
|caption= | |caption= | ||
|name=Dodge Attack | |name=Dodge Attack | ||
| Line 552: | Line 568: | ||
|Block Adv=-7 | |Block Adv=-7 | ||
|Property=Kara Cancel, Upper-Body Invuln 1-22F | |Property=Kara Cancel, Upper-Body Invuln 1-22F | ||
|description= | |description=*Above average dodge attack. Very good range. | ||
}} | }} | ||
}} | }} | ||
| Line 558: | Line 574: | ||
===Throws=== | ===Throws=== | ||
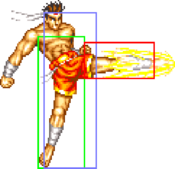
===== <span class="invisible-header"> | ===== <span class="invisible-header">Leg Throw (4/6C)</span> ===== | ||
<font style="visibility:hidden" size="0"></font> | <font style="visibility:hidden" size="0"></font> | ||
{{MoveData | {{MoveData | ||
| Line 564: | Line 580: | ||
|caption= | |caption= | ||
|name=Leg Throw | |name=Leg Throw | ||
| | |input=close 4/6C | ||
|data= | |data= | ||
{{AttackData-FFS | {{AttackData-FFS | ||
| Line 572: | Line 588: | ||
|Active=1 | |Active=1 | ||
|Recovery=/ | |Recovery=/ | ||
|Hit Adv=KD (+ | |Hit Adv=KD (+81) | ||
|Block Adv=/ | |Block Adv=/ | ||
|Property= | |Property= | ||
|description= | |description=*Swaps sides. | ||
<gallery class="mw-collapsible"> | |||
FFS Joe C Throw 1.png| | |||
</gallery> | |||
}} | }} | ||
}} | }} | ||
===== <span class="invisible-header"> | ===== <span class="invisible-header">Hiza Jigoku (4/6D)</span> ===== | ||
<font style="visibility:hidden" size="0"></font> | <font style="visibility:hidden" size="0"></font> | ||
{{MoveData | {{MoveData | ||
| Line 585: | Line 604: | ||
|caption= | |caption= | ||
|name=Hiza Jigoku | |name=Hiza Jigoku | ||
| | |input=close 4/6D | ||
|data= | |data= | ||
{{AttackData-FFS | {{AttackData-FFS | ||
| Line 598: | Line 617: | ||
|description= * Hold throw. Opponent can mash to reduce hits. | |description= * Hold throw. Opponent can mash to reduce hits. | ||
* Hit advantage is when the opponent mashes out. | * Hit advantage is when the opponent mashes out. | ||
<gallery class="mw-collapsible"> | |||
FFS Joe D Throw 1.png| | |||
</gallery> | |||
}} | }} | ||
}} | }} | ||
| Line 733: | Line 755: | ||
| subtitle = | | subtitle = | ||
| image = FFS Joe Bakuretsuken.gif | | image = FFS Joe Bakuretsuken.gif | ||
| caption = | | caption = A version | ||
| data = | | data = A series of punches that don't combo together and leave Joe punishable on hit. Does OK chip damage, but this move is generally impractical. | ||
{{AttackData-FFS | {{AttackData-FFS | ||
| version = A | | version = A | ||
| Line 771: | Line 793: | ||
===Super Move=== | ===Super Move=== | ||
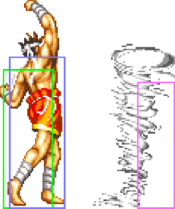
===== <span class="invisible-header"></span> ===== | ===== <span class="invisible-header">Screw Upper (64123BC)</span> ===== | ||
<font style="visibility:hidden" size="0"></font> | <font style="visibility:hidden" size="0"></font> | ||
{{MoveData | {{MoveData | ||
| Line 796: | Line 818: | ||
==Combos== | ==Combos== | ||
* (2B) | * (2B), c5A x 3~6, f5A x 1~3, 2D - 64 damage | ||
Hold 6 to microwalk between 5A's for more hits. | |||
* 2A x 1~4 | * 2A x 1~4, 2D - 33 damage | ||
Hold 3 between 2A's. | |||
* 41236A (from a distance) > 19D - 35 damage | * 41236A (from a distance) > 19D - 35 damage | ||
* (back turned, in corner) Hurricane Upper (C) | * (back turned, in corner) Hurricane Upper (C), 2C > 19B | ||
Extremely situational trick combo you can use if you feel like showing off. | Extremely situational trick combo you can use if you feel like showing off. | ||
== | == Strategy == | ||
===The Basics=== | ===The Basics=== | ||
| Line 810: | Line 832: | ||
===Advanced Strategy=== | ===Advanced Strategy=== | ||
== | ==Matchups== | ||
===Vs. Andy Bogard=== | |||
===Vs. Axel Hawk=== | |||
===Vs. Big Bear=== | |||
===Vs. Billy Kane=== | |||
===Vs. Cheng Sinzan=== | |||
===Vs. Duck King=== | |||
===Vs. Geese Howard=== | |||
===Vs. Joe Higashi=== | |||
===Vs. Jubei Yamada=== | |||
===Vs. Kim Kaphwan=== | |||
===Vs. Laurence Blood=== | |||
===Vs. Mai Shiranui=== | |||
===Vs. Ryo Sakazaki=== | |||
===Vs. Terry Bogard=== | |||
===Vs. Tung Fu Rue=== | |||
===Vs. Wolfgang Krauser=== | |||
{{Navbox-FFS}} | {{Navbox-FFS}} | ||
[[Category:Fatal Fury Special]] | [[Category:Fatal Fury Special]] | ||
[[Category:Joe Higashi]] | [[Category:Joe Higashi]] | ||
Latest revision as of 13:11, 11 April 2025
Introduction
| Pros | Cons |
|---|---|
|
|
Move List
General Hurtboxes
| Standing/Walking | Crouching/Crawling | Jumping | Taunting |
 |
 |
 |
|
| 54F (4+47+3) duration. |
Close Standing Normals
c5A
| Damage | Stun | Guard | Startup | Active | Recovery | Total | Hit Adv | Block Adv | Property | |
|---|---|---|---|---|---|---|---|---|---|---|
| 8 | 2 | Mid | 3 | 3 | 4 | 9 | +9 | +10 | Kara Cancel | |
| ||||||||||
c5B
| Damage | Stun | Guard | Startup | Active | Recovery | Total | Hit Adv | Block Adv | Property | |
|---|---|---|---|---|---|---|---|---|---|---|
| 10 | 2 | Mid | 8 | 6 | 8 | 21 | +2 | +3 | Kara Cancel | |
| ||||||||||
c5C
| Damage | Stun | Guard | Startup | Active | Recovery | Total | Hit Adv | Block Adv | Property | |
|---|---|---|---|---|---|---|---|---|---|---|
| 18 | 4 | Mid | 10 | 9 | 10 | 28 | +5 | +4 | Kara Cancel | |
| ||||||||||
c5D
| Damage | Stun | Guard | Startup | Active | Recovery | Total | Hit Adv | Block Adv | Property | |
|---|---|---|---|---|---|---|---|---|---|---|
| 20 | 4 | Mid | 6 | 13 | 9 | 27 | +2 | +1 | Kara Cancel | |
| ||||||||||
Far Standing Normals
f5A
| Damage | Stun | Guard | Startup | Active | Recovery | Total | Hit Adv | Block Adv | Property | |
|---|---|---|---|---|---|---|---|---|---|---|
| 6 | 2 | Mid | 3 | 3 | 4 | 9 | +9 | +10 | Kara Cancel | |
| ||||||||||
f5B
| Damage | Stun | Guard | Startup | Active | Recovery | Total | Hit Adv | Block Adv | Property | |
|---|---|---|---|---|---|---|---|---|---|---|
| 8 | 2 | Mid | 7 | 5+7 | 12 | 30 | -8 | -7 | Kara Cancel | |
|
OK anti-air, but 5D is generally better. This one is cancelable, though. | ||||||||||
f5C
| Damage | Stun | Guard | Startup | Active | Recovery | Total | Hit Adv | Block Adv | Property | |
|---|---|---|---|---|---|---|---|---|---|---|
| 16 | 4 | Mid | 8 | 9 | 12 | 28 | +2 | +1 | / | |
| ||||||||||
f5D
| Damage | Stun | Guard | Startup | Active | Recovery | Total | Hit Adv | Block Adv | Property | |
|---|---|---|---|---|---|---|---|---|---|---|
| 18 | 4 | Mid | 8 | 11 | 18 | 36 | -6 | -7 | / | |
| ||||||||||
Crouching Normals
2A
| Damage | Stun | Guard | Startup | Active | Recovery | Total | Hit Adv | Block Adv | Property | |
|---|---|---|---|---|---|---|---|---|---|---|
| 6 | 2 | Mid | 3 | 4 | 4 | 10 | +8 | +9 | Kara Cancel | |
| ||||||||||
2B
| Damage | Stun | Guard | Startup | Active | Recovery | Total | Hit Adv | Block Adv | Property | |
|---|---|---|---|---|---|---|---|---|---|---|
| 8 | 2 | Low | 4 | 5 | 6 | 12 | +5 | +6 | Kara Cancel | |
| ||||||||||
2C
| Damage | Stun | Guard | Startup | Active | Recovery | Total | Hit Adv | Block Adv | Property | |
|---|---|---|---|---|---|---|---|---|---|---|
| 16 | 4 | Mid | 8 | 8 | 8 | 23 | +8 | +7 | Kara Cancel | |
|
Has more reach than 2A. Great poke, especially when cancelled into Hurricane Upper. | ||||||||||
2D
| Damage | Stun | Guard | Startup | Active | Recovery | Total | Hit Adv | Block Adv | Property | |
|---|---|---|---|---|---|---|---|---|---|---|
| 14 | 4 | Low | 7 | 16 | 24 | 46 | +21 | -17 | Upper-Body Invuln 7-22F, Head Invuln 1-6F, 23-29F | |
|
A veritable swiss army knife of a move that does just about everything:
| ||||||||||
Jumping Normals
jA
| Damage | Stun | Guard | Startup | Active | Recovery | Total | Hit Adv | Block Adv | Property | |
|---|---|---|---|---|---|---|---|---|---|---|
| 8 | 2 | Overhead | 5 | ∞ | - | - | - | - | - | |
| ||||||||||
jB
| Version | Damage | Stun | Guard | Startup | Active | Recovery | Total | Hit Adv | Block Adv | Property | |
|---|---|---|---|---|---|---|---|---|---|---|---|
| Diagonal & Neutral Jump | 10 | 2 | Overhead | 5 | ∞ | - | - | - | - | - | |
| |||||||||||
jC
| Version | Damage | Stun | Guard | Startup | Active | Recovery | Total | Hit Adv | Block Adv | Property | |
|---|---|---|---|---|---|---|---|---|---|---|---|
| Diagonal Jump | 18 | 4 | Overhead | 6 | 26 | - | - | - | - | - | |
| |||||||||||
| Neutral Jump | 18 | 4 | Overhead | 6 | 17 | - | - | - | - | - | |
| |||||||||||
jD
| Version | Damage | Stun | Guard | Startup | Active | Recovery | Total | Hit Adv | Block Adv | Property | |
|---|---|---|---|---|---|---|---|---|---|---|---|
| Diagonal Jump | 20 | 4 | Overhead | 13 | 22 | - | - | - | - | - | |
| |||||||||||
| Neutral Jump | 20 | 4 | Overhead | 5 | 17 | - | - | - | - | - | |
| |||||||||||
Universal Mechanics
Lane Blast (CD)
| Version | Damage | Stun | Guard | Startup | Active | Recovery | Total | Hit Adv | Block Adv | Property | |
|---|---|---|---|---|---|---|---|---|---|---|---|
| Front Lane | 22 | 5 | Mid | 18 | 6 | 10 | 35 | KD (+87) | +3 | Cancel | |
| |||||||||||
| Back Lane | 22 | 5 | Mid | 12 | 7 | 18 | 36 | KD (+80) | -6 | Cancel, Lower-Body Invuln 12-26F | |
Lane Attack
Joe's punch and kick lane attacks have the same frame data but different hitboxes.
| Version | Damage | Stun | Guard | Startup | Active | Recovery | Total | Hit Adv | Block Adv | Property |
|---|---|---|---|---|---|---|---|---|---|---|
| A/B | 20 | 2 | Overhead | 9 | - | 4 | - | - | - | - |
| C/D | 20 | 4 | Overhead | 9 | - | 4 | - | - | - | - |
Dodge Attack
| Damage | Stun | Guard | Startup | Active | Recovery | Total | Hit Adv | Block Adv | Property | |
|---|---|---|---|---|---|---|---|---|---|---|
| 11 | 5 | Mid | 15 | 8 | 18 | 40 | Air Reset (+14) | -7 | Kara Cancel, Upper-Body Invuln 1-22F | |
| ||||||||||
Throws
Leg Throw (4/6C)
Hiza Jigoku (4/6D)
Special Moves
Hurricane Upper (41236P)
| Version | Damage | Stun | Guard | Startup | Active | Recovery | Total | Hit Adv | Block Adv | Property | |
|---|---|---|---|---|---|---|---|---|---|---|---|
| A | 16 (4) | 3 | Mid | 20 | - | 29 | 48 | +4 | +5 | - | |
| |||||||||||
| C | 22 (5) | 6 | Mid | 23 | - | 31 | 53 | +10 | -1 | - | |
| |||||||||||
Slash Kick (19K)
| Version | Damage | Stun | Guard | Startup | Active | Recovery | Total | Hit Adv | Block Adv | Property | |
|---|---|---|---|---|---|---|---|---|---|---|---|
| B | 16 (4) | 3 | Mid | 22 | 16 | 17 | 54 | Air Reset | -15 | - | |
| |||||||||||
| D | 22 (5) | 6 | Mid | 25 | 17 | 19 | 60 | KD | -15 | - | |
| |||||||||||
Tiger Kick (2369K)
Block advantage is from the second hit.
| Version | Damage | Stun | Guard | Startup | Active | Recovery | Total | Hit Adv | Block Adv | Property | |
|---|---|---|---|---|---|---|---|---|---|---|---|
| B | 14 (3) | 3 | Mid | 15 | 7 (4) 8 (3) | 30 | 66 | KD | -28 | - | |
| |||||||||||
| D | 20 (5) | 6 | Mid | 21 | 11 (3) 6 (3) 3 | 32 | 78 | KD | -29 | - | |
| |||||||||||
Bakuretsuken (Mash P)
A series of punches that don't combo together and leave Joe punishable on hit. Does OK chip damage, but this move is generally impractical.
| Version | Damage | Stun | Guard | Startup | Active | Recovery | Total | Hit Adv | Block Adv | Property | |
|---|---|---|---|---|---|---|---|---|---|---|---|
| A | 8xN (2xN) | 3 | Mid | 7 | 6+5+5 (5) 5 (5) 5+1... | 0 | 43+ | -1 | +6 | - | |
| |||||||||||
| C | 12xN + 14 (3xN + 3x3) | 6 | Mid | 6 | 5+4+4 (4) 4 (4) 4+4 (2+6) 3+8+4 | 29 | 90 | KD (uppercut) | -26 | - | |
| |||||||||||
Super Move
Screw Upper (64123BC)
| Damage | Stun | Guard | Startup | Active | Recovery | Total | Hit Adv | Block Adv | Property | |
|---|---|---|---|---|---|---|---|---|---|---|
| 48 (12) | 4 | Mid | 29 | 34 | 13 | 75 | KD | -5 | - | |
| ||||||||||
Combos
- (2B), c5A x 3~6, f5A x 1~3, 2D - 64 damage
Hold 6 to microwalk between 5A's for more hits.
- 2A x 1~4, 2D - 33 damage
Hold 3 between 2A's.
- 41236A (from a distance) > 19D - 35 damage
- (back turned, in corner) Hurricane Upper (C), 2C > 19B
Extremely situational trick combo you can use if you feel like showing off.

