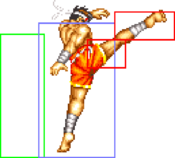
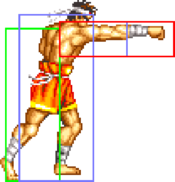
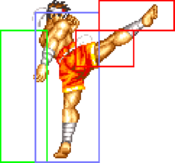
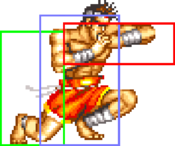
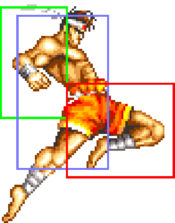
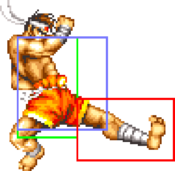
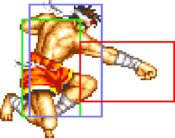
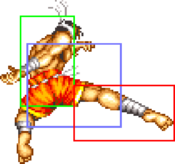
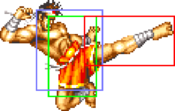
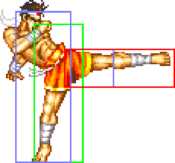
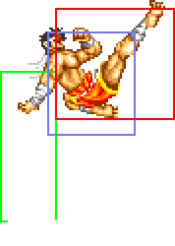
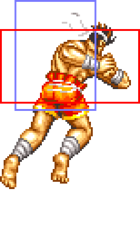
(→jD) |
|||
| (28 intermediate revisions by 2 users not shown) | |||
| Line 5: | Line 5: | ||
==Introduction== | ==Introduction== | ||
{| | {| | ||
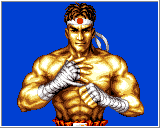
Blessed with some of the best zoning tools in the game and highly damaging close range combos, Joe in FFS is here to rock you like a hurricane. As long as you can do half-circle inputs and jab chains consistently, he's an easy character to pick up and start winning games with right away. | |||
|-style="text-align:left;" | |-style="text-align:left;" | ||
! Pros !! Cons | ! Pros !! Cons | ||
| Line 20: | Line 21: | ||
==Move List== | ==Move List== | ||
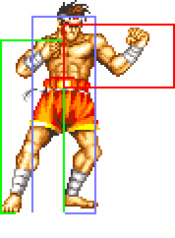
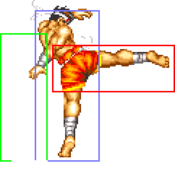
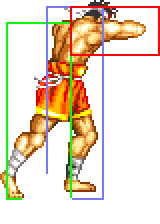
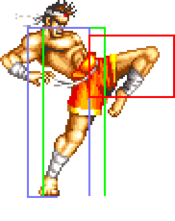
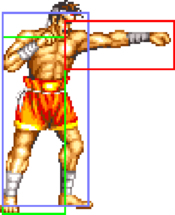
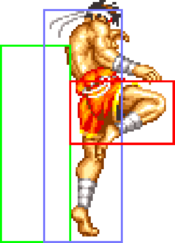
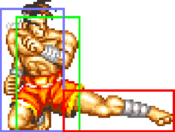
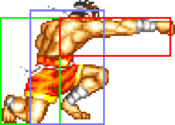
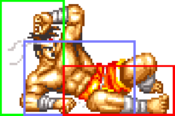
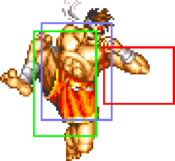
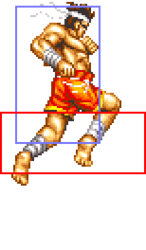
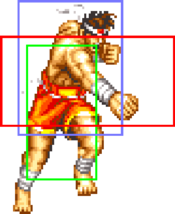
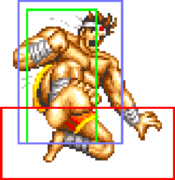
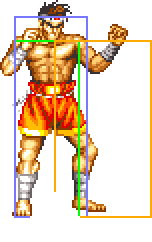
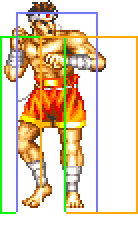
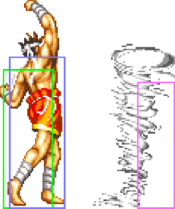
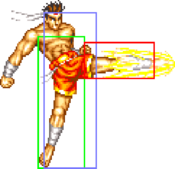
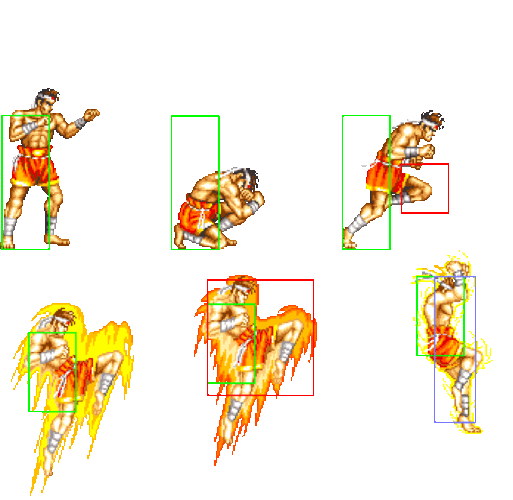
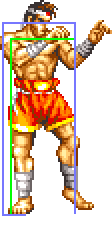
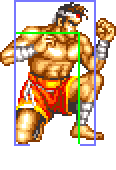
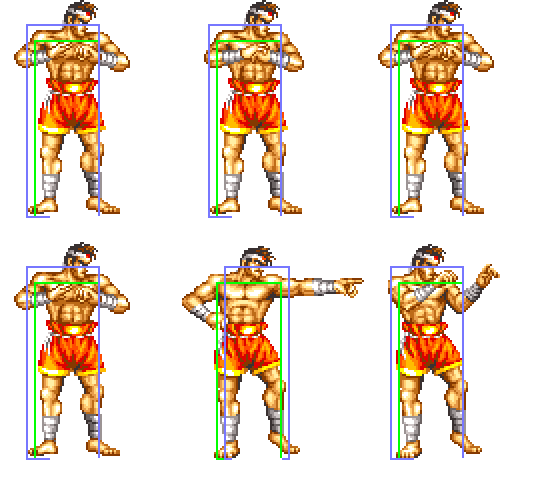
===General Hurtboxes=== | |||
{| border="1em" cellspacing="0" style="border: 1px solid #999;" | |||
| align="center" | Standing/Walking || align="center" | Crouching/Crawling || align="center" | Jumping || align="center" | Taunting | |||
|- | |||
| align="center"; valign="bottom" | [[File:FFS Joe Stand.png|bottom]] || align="center"; valign="bottom" | [[File:FFS Joe Crouch.png|bottom]] || align="center"; valign="bottom" | [[File:FFS Joe Jump.png|bottom]] || [[File:FFS Joe Taunt.gif|bottom|Orrra!]] | |||
|- | |||
| align="center" | || align="center" | || align="center" | 54F (4+47+3) duration. || | |||
|} | |||
===Close Standing Normals=== | ===Close Standing Normals=== | ||
| Line 27: | Line 38: | ||
{{MoveData | {{MoveData | ||
|image=FFS Joe c5A.png | |image=FFS Joe c5A.png | ||
|subtitle= | |subtitle=Body Hook/ボディフック | ||
|caption= | |caption= | ||
|name=c5A | |name=c5A | ||
| Line 41: | Line 52: | ||
|Hit Adv=+9 | |Hit Adv=+9 | ||
|Block Adv=+10 | |Block Adv=+10 | ||
|Property=Kara | |Property=Kara Cancel | ||
|description= | |description=*Links into itself and far 5A. Joe's most damaging combos start with this move. | ||
}} | }} | ||
}} | }} | ||
| Line 50: | Line 61: | ||
{{MoveData | {{MoveData | ||
|image=FFS Joe c5B.png | |image=FFS Joe c5B.png | ||
|subtitle= | |subtitle=Middle Kick/ミドルキック | ||
|caption= | |caption= | ||
|name=c5B | |name=c5B | ||
| Line 65: | Line 76: | ||
|Block Adv=+3 | |Block Adv=+3 | ||
|Property=Kara Cancel | |Property=Kara Cancel | ||
|description= | |description=*Would probably be a decent poke, but being a close normal you can't make use of its reach. Unremarkable. | ||
}} | }} | ||
}} | }} | ||
| Line 73: | Line 84: | ||
{{MoveData | {{MoveData | ||
|image=FFS Joe c5C.png | |image=FFS Joe c5C.png | ||
|subtitle= | |subtitle=Elbow Strike/肘打ち | ||
|caption= | |caption= | ||
|name=c5C | |name=c5C | ||
| Line 88: | Line 99: | ||
|Block Adv=+4 | |Block Adv=+4 | ||
|Property=Kara Cancel | |Property=Kara Cancel | ||
|description= | |description=*Hits so high, it whiffs against most crouching characters. Just awful. | ||
}} | }} | ||
}} | }} | ||
| Line 96: | Line 107: | ||
{{MoveData | {{MoveData | ||
|image=FFS Joe c5D.png | |image=FFS Joe c5D.png | ||
|subtitle= | |subtitle=Knee Strike/膝蹴り | ||
|caption= | |caption= | ||
|name=c5D | |name=c5D | ||
| Line 111: | Line 122: | ||
|Block Adv=+1 | |Block Adv=+1 | ||
|Property=Kara Cancel | |Property=Kara Cancel | ||
|description= | |description=*Much better than close C, but still doesn't lead to much damage on hit. | ||
}} | }} | ||
}} | }} | ||
| Line 135: | Line 146: | ||
|Hit Adv=+9 | |Hit Adv=+9 | ||
|Block Adv=+10 | |Block Adv=+10 | ||
|Property=Kara | |Property=Kara Cancel | ||
|description=*Mostly used in combos. | |description=*Mostly used in combos. Links into itself, 2D, 5D and 5C. | ||
}} | }} | ||
}} | }} | ||
| Line 231: | Line 242: | ||
|Hit Adv=+8 | |Hit Adv=+8 | ||
|Block Adv=+9 | |Block Adv=+9 | ||
|Property=Kara | |Property=Kara Cancel | ||
|description=*Extremely fast and safe. Ideal for close range pressure. | |description=*Extremely fast and safe. Ideal for close range pressure. | ||
*Functions as a combo starter, great against smaller characters like Jubei. | *Functions as a combo starter, great against smaller characters like Jubei. | ||
| Line 255: | Line 266: | ||
|Hit Adv=+5 | |Hit Adv=+5 | ||
|Block Adv=+6 | |Block Adv=+6 | ||
|Property=Kara | |Property=Kara Cancel | ||
|description=*Very hard to beat due to the tiny hurtbox. Use this often. | |description=*Very hard to beat due to the tiny hurtbox. Use this often. | ||
}} | }} | ||
| Line 358: | Line 369: | ||
|Block Adv= | |Block Adv= | ||
|Property= | |Property= | ||
|description=*Diagonal: Solid jump-in. Instant overhead against tall characters. | |description=*Diagonal: Solid jump-in that can beat low profile anti-airs. Instant overhead against tall characters. | ||
*Neutral: Good against Kim divekicks. | *Neutral: Good against Kim divekicks or rushing special moves, as long as it hits on the way down. | ||
}} | }} | ||
}} | }} | ||
| Line 445: | Line 456: | ||
=== Universal Mechanics === | === Universal Mechanics === | ||
===== <span class="invisible-header">Lane Blast</span> ===== | ===== <span class="invisible-header">Lane Blast (CD)</span> ===== | ||
<font style="visibility:hidden" size="0"></font> | <font style="visibility:hidden" size="0"></font> | ||
{{MoveData | {{MoveData | ||
| Line 452: | Line 463: | ||
|subtitle= | |subtitle= | ||
|caption=Front Lane | |caption=Front Lane | ||
|caption2=Back Lane | |||
|name=Lane Blast | |name=Lane Blast | ||
|input=C+D | |input=C+D | ||
| Line 467: | Line 479: | ||
|Block Adv=+3 | |Block Adv=+3 | ||
|Property=Cancel | |Property=Cancel | ||
|description= | |description=*Joe's best long range poke. Works great especially when cancelled into Hurricane Upper on block. | ||
}} | }} | ||
{{AttackData-FFS | {{AttackData-FFS | ||
| Line 482: | Line 494: | ||
|Block Adv=-6 | |Block Adv=-6 | ||
|Property=Cancel, Lower-Body Invuln 12-26F | |Property=Cancel, Lower-Body Invuln 12-26F | ||
|description= | |description=*Much worse range. Can anti-air, but Joe already has more than enough moves to AA with, so try to stick to using the front lane as Joe. | ||
<gallery class="mw-collapsible"> | |||
FFS Joe CD Back.png| | |||
FFS Joe CD Back 1.png|Recovery | |||
</gallery> | |||
}} | }} | ||
}} | }} | ||
| Line 536: | Line 552: | ||
{{MoveData | {{MoveData | ||
|image=FFS Joe Dodge Attack.png | |image=FFS Joe Dodge Attack.png | ||
|subtitle= | |subtitle=Sway Kick/スウェーキック | ||
|caption= | |caption= | ||
|name=Dodge Attack | |name=Dodge Attack | ||
| Line 552: | Line 568: | ||
|Block Adv=-7 | |Block Adv=-7 | ||
|Property=Kara Cancel, Upper-Body Invuln 1-22F | |Property=Kara Cancel, Upper-Body Invuln 1-22F | ||
|description= | |description=*Above average dodge attack. Very good range. | ||
}} | }} | ||
}} | }} | ||
| Line 558: | Line 574: | ||
===Throws=== | ===Throws=== | ||
===== <span class="invisible-header"> | ===== <span class="invisible-header">Leg Throw (4/6C)</span> ===== | ||
<font style="visibility:hidden" size="0"></font> | <font style="visibility:hidden" size="0"></font> | ||
{{MoveData | {{MoveData | ||
| Line 564: | Line 580: | ||
|caption= | |caption= | ||
|name=Leg Throw | |name=Leg Throw | ||
| | |input=close 4/6C | ||
|data= | |data= | ||
{{AttackData-FFS | {{AttackData-FFS | ||
| Line 572: | Line 588: | ||
|Active=1 | |Active=1 | ||
|Recovery=/ | |Recovery=/ | ||
|Hit Adv=KD (+ | |Hit Adv=KD (+81) | ||
|Block Adv=/ | |Block Adv=/ | ||
|Property= | |Property= | ||
|description= | |description=*Swaps sides. | ||
<gallery class="mw-collapsible"> | |||
FFS Joe C Throw 1.png| | |||
</gallery> | |||
}} | }} | ||
}} | }} | ||
===== <span class="invisible-header"> | ===== <span class="invisible-header">Hiza Jigoku (4/6D)</span> ===== | ||
<font style="visibility:hidden" size="0"></font> | <font style="visibility:hidden" size="0"></font> | ||
{{MoveData | {{MoveData | ||
| Line 585: | Line 604: | ||
|caption= | |caption= | ||
|name=Hiza Jigoku | |name=Hiza Jigoku | ||
| | |input=close 4/6D | ||
|data= | |data= | ||
{{AttackData-FFS | {{AttackData-FFS | ||
| Line 598: | Line 617: | ||
|description= * Hold throw. Opponent can mash to reduce hits. | |description= * Hold throw. Opponent can mash to reduce hits. | ||
* Hit advantage is when the opponent mashes out. | * Hit advantage is when the opponent mashes out. | ||
<gallery class="mw-collapsible"> | |||
FFS Joe D Throw 1.png| | |||
</gallery> | |||
}} | }} | ||
}} | }} | ||
| Line 624: | Line 646: | ||
| Block Adv = +5 | | Block Adv = +5 | ||
| Property = | | Property = | ||
| description = | | description = *The best projectile in the game, bar none. Hard to avoid thanks to its huge size, and beats Dodge Attack attempts as the hitbox reaches all the way to the ground. | ||
*Very spammable thanks to its compact frame data. | |||
}} | }} | ||
{{AttackData-FFS | {{AttackData-FFS | ||
| Line 640: | Line 663: | ||
| Block Adv = -1 | | Block Adv = -1 | ||
| Property = | | Property = | ||
| description = | | description = *Travels faster than the light version, but has worse frame data and less knockback on block making it less safe to use up close. | ||
}} | }} | ||
}} | }} | ||
| Line 665: | Line 688: | ||
| Block Adv = -15 | | Block Adv = -15 | ||
| Property = | | Property = | ||
| description = | | description = *Range is about 3/4 of the screen. Rather difficult to use due to the slow startup. Can combo from heavy buttons if you happen to land a back hit, but there are much better options available. | ||
}} | }} | ||
{{AttackData-FFS | {{AttackData-FFS | ||
| Line 681: | Line 704: | ||
| Block Adv = -15 | | Block Adv = -15 | ||
| Property = | | Property = | ||
| description = | | description = *Travels the entire screen. Not too great on its own, but can be a decent tool for pressure and chip damage when used in combination with light Hurricane Upper. | ||
}} | }} | ||
}} | }} | ||
| Line 706: | Line 729: | ||
| Block Adv = -28 | | Block Adv = -28 | ||
| Property = | | Property = | ||
| description = | | description = *Joe's invulnerable anti-air/reversal. Less useful than you'd think due to its slow startup, so most of the time you'll be using either 5D or 2D to anti-air instead of this. Still, having an invulnerable move can often come in handy. | ||
}} | }} | ||
{{AttackData-FFS | {{AttackData-FFS | ||
| Line 722: | Line 745: | ||
| Block Adv = -29 | | Block Adv = -29 | ||
| Property = | | Property = | ||
| description = | | description = *Even slower startup. Don't use unless you're absolutely certain it'll hit. | ||
}} | }} | ||
}} | }} | ||
| Line 732: | Line 755: | ||
| subtitle = | | subtitle = | ||
| image = FFS Joe Bakuretsuken.gif | | image = FFS Joe Bakuretsuken.gif | ||
| caption = | | caption = A version | ||
| data = | | data = A series of punches that don't combo together and leave Joe punishable on hit. Does OK chip damage, but this move is generally impractical. | ||
{{AttackData-FFS | {{AttackData-FFS | ||
| version = A | | version = A | ||
| Line 770: | Line 793: | ||
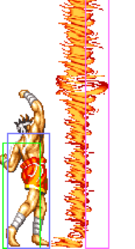
===Super Move=== | ===Super Move=== | ||
===== <span class="invisible-header"></span> ===== | ===== <span class="invisible-header">Screw Upper (64123BC)</span> ===== | ||
<font style="visibility:hidden" size="0"></font> | <font style="visibility:hidden" size="0"></font> | ||
{{MoveData | {{MoveData | ||
| Line 790: | Line 813: | ||
|Block Adv=-5 | |Block Adv=-5 | ||
|Property= | |Property= | ||
|description= | |description=*Big stationary projectile wall. The startup looks like a regular Hurricane Upper, so you can use it to trick and punish an opponent trying to jump over your projectiles. | ||
}} | }} | ||
}} | }} | ||
==Combos== | ==Combos== | ||
* (2B) | * (2B), c5A x 3~6, f5A x 1~3, 2D - 64 damage | ||
Hold 6 to microwalk between 5A's for more hits. | |||
* 2A x 1~4 | * 2A x 1~4, 2D - 33 damage | ||
Hold 3 between 2A's. | |||
* 41236A (from a distance) > 19D - 35 damage | * 41236A (from a distance) > 19D - 35 damage | ||
* (back turned, in corner) Hurricane Upper (C), 2C > 19B | |||
Extremely situational trick combo you can use if you feel like showing off. | |||
== | == Strategy == | ||
===The Basics=== | ===The Basics=== | ||
| Line 808: | Line 832: | ||
===Advanced Strategy=== | ===Advanced Strategy=== | ||
== | ==Matchups== | ||
===Vs. Andy Bogard=== | |||
===Vs. Axel Hawk=== | |||
===Vs. Big Bear=== | |||
===Vs. Billy Kane=== | |||
===Vs. Cheng Sinzan=== | |||
===Vs. Duck King=== | |||
===Vs. Geese Howard=== | |||
===Vs. Joe Higashi=== | |||
===Vs. Jubei Yamada=== | |||
===Vs. Kim Kaphwan=== | |||
===Vs. Laurence Blood=== | |||
===Vs. Mai Shiranui=== | |||
===Vs. Ryo Sakazaki=== | |||
===Vs. Terry Bogard=== | |||
===Vs. Tung Fu Rue=== | |||
===Vs. Wolfgang Krauser=== | |||
{{Navbox-FFS}} | {{Navbox-FFS}} | ||
[[Category:Fatal Fury Special]] | [[Category:Fatal Fury Special]] | ||
[[Category:Joe Higashi]] | [[Category:Joe Higashi]] | ||
Latest revision as of 13:11, 11 April 2025
Introduction
| Pros | Cons |
|---|---|
|
|
Move List
General Hurtboxes
| Standing/Walking | Crouching/Crawling | Jumping | Taunting |
 |
 |
 |
|
| 54F (4+47+3) duration. |
Close Standing Normals
c5A
| Damage | Stun | Guard | Startup | Active | Recovery | Total | Hit Adv | Block Adv | Property | |
|---|---|---|---|---|---|---|---|---|---|---|
| 8 | 2 | Mid | 3 | 3 | 4 | 9 | +9 | +10 | Kara Cancel | |
| ||||||||||
c5B
| Damage | Stun | Guard | Startup | Active | Recovery | Total | Hit Adv | Block Adv | Property | |
|---|---|---|---|---|---|---|---|---|---|---|
| 10 | 2 | Mid | 8 | 6 | 8 | 21 | +2 | +3 | Kara Cancel | |
| ||||||||||
c5C
| Damage | Stun | Guard | Startup | Active | Recovery | Total | Hit Adv | Block Adv | Property | |
|---|---|---|---|---|---|---|---|---|---|---|
| 18 | 4 | Mid | 10 | 9 | 10 | 28 | +5 | +4 | Kara Cancel | |
| ||||||||||
c5D
| Damage | Stun | Guard | Startup | Active | Recovery | Total | Hit Adv | Block Adv | Property | |
|---|---|---|---|---|---|---|---|---|---|---|
| 20 | 4 | Mid | 6 | 13 | 9 | 27 | +2 | +1 | Kara Cancel | |
| ||||||||||
Far Standing Normals
f5A
| Damage | Stun | Guard | Startup | Active | Recovery | Total | Hit Adv | Block Adv | Property | |
|---|---|---|---|---|---|---|---|---|---|---|
| 6 | 2 | Mid | 3 | 3 | 4 | 9 | +9 | +10 | Kara Cancel | |
| ||||||||||
f5B
| Damage | Stun | Guard | Startup | Active | Recovery | Total | Hit Adv | Block Adv | Property | |
|---|---|---|---|---|---|---|---|---|---|---|
| 8 | 2 | Mid | 7 | 5+7 | 12 | 30 | -8 | -7 | Kara Cancel | |
|
OK anti-air, but 5D is generally better. This one is cancelable, though. | ||||||||||
f5C
| Damage | Stun | Guard | Startup | Active | Recovery | Total | Hit Adv | Block Adv | Property | |
|---|---|---|---|---|---|---|---|---|---|---|
| 16 | 4 | Mid | 8 | 9 | 12 | 28 | +2 | +1 | / | |
| ||||||||||
f5D
| Damage | Stun | Guard | Startup | Active | Recovery | Total | Hit Adv | Block Adv | Property | |
|---|---|---|---|---|---|---|---|---|---|---|
| 18 | 4 | Mid | 8 | 11 | 18 | 36 | -6 | -7 | / | |
| ||||||||||
Crouching Normals
2A
| Damage | Stun | Guard | Startup | Active | Recovery | Total | Hit Adv | Block Adv | Property | |
|---|---|---|---|---|---|---|---|---|---|---|
| 6 | 2 | Mid | 3 | 4 | 4 | 10 | +8 | +9 | Kara Cancel | |
| ||||||||||
2B
| Damage | Stun | Guard | Startup | Active | Recovery | Total | Hit Adv | Block Adv | Property | |
|---|---|---|---|---|---|---|---|---|---|---|
| 8 | 2 | Low | 4 | 5 | 6 | 12 | +5 | +6 | Kara Cancel | |
| ||||||||||
2C
| Damage | Stun | Guard | Startup | Active | Recovery | Total | Hit Adv | Block Adv | Property | |
|---|---|---|---|---|---|---|---|---|---|---|
| 16 | 4 | Mid | 8 | 8 | 8 | 23 | +8 | +7 | Kara Cancel | |
|
Has more reach than 2A. Great poke, especially when cancelled into Hurricane Upper. | ||||||||||
2D
| Damage | Stun | Guard | Startup | Active | Recovery | Total | Hit Adv | Block Adv | Property | |
|---|---|---|---|---|---|---|---|---|---|---|
| 14 | 4 | Low | 7 | 16 | 24 | 46 | +21 | -17 | Upper-Body Invuln 7-22F, Head Invuln 1-6F, 23-29F | |
|
A veritable swiss army knife of a move that does just about everything:
| ||||||||||
Jumping Normals
jA
| Damage | Stun | Guard | Startup | Active | Recovery | Total | Hit Adv | Block Adv | Property | |
|---|---|---|---|---|---|---|---|---|---|---|
| 8 | 2 | Overhead | 5 | ∞ | - | - | - | - | - | |
| ||||||||||
jB
| Version | Damage | Stun | Guard | Startup | Active | Recovery | Total | Hit Adv | Block Adv | Property | |
|---|---|---|---|---|---|---|---|---|---|---|---|
| Diagonal & Neutral Jump | 10 | 2 | Overhead | 5 | ∞ | - | - | - | - | - | |
| |||||||||||
jC
| Version | Damage | Stun | Guard | Startup | Active | Recovery | Total | Hit Adv | Block Adv | Property | |
|---|---|---|---|---|---|---|---|---|---|---|---|
| Diagonal Jump | 18 | 4 | Overhead | 6 | 26 | - | - | - | - | - | |
| |||||||||||
| Neutral Jump | 18 | 4 | Overhead | 6 | 17 | - | - | - | - | - | |
| |||||||||||
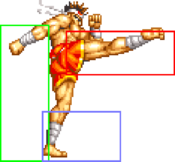
jD
| Version | Damage | Stun | Guard | Startup | Active | Recovery | Total | Hit Adv | Block Adv | Property | |
|---|---|---|---|---|---|---|---|---|---|---|---|
| Diagonal Jump | 20 | 4 | Overhead | 13 | 22 | - | - | - | - | - | |
| |||||||||||
| Neutral Jump | 20 | 4 | Overhead | 5 | 17 | - | - | - | - | - | |
| |||||||||||
Universal Mechanics
Lane Blast (CD)
| Version | Damage | Stun | Guard | Startup | Active | Recovery | Total | Hit Adv | Block Adv | Property | |
|---|---|---|---|---|---|---|---|---|---|---|---|
| Front Lane | 22 | 5 | Mid | 18 | 6 | 10 | 35 | KD (+87) | +3 | Cancel | |
| |||||||||||
| Back Lane | 22 | 5 | Mid | 12 | 7 | 18 | 36 | KD (+80) | -6 | Cancel, Lower-Body Invuln 12-26F | |
Lane Attack
Joe's punch and kick lane attacks have the same frame data but different hitboxes.
| Version | Damage | Stun | Guard | Startup | Active | Recovery | Total | Hit Adv | Block Adv | Property |
|---|---|---|---|---|---|---|---|---|---|---|
| A/B | 20 | 2 | Overhead | 9 | - | 4 | - | - | - | - |
| C/D | 20 | 4 | Overhead | 9 | - | 4 | - | - | - | - |
Dodge Attack
| Damage | Stun | Guard | Startup | Active | Recovery | Total | Hit Adv | Block Adv | Property | |
|---|---|---|---|---|---|---|---|---|---|---|
| 11 | 5 | Mid | 15 | 8 | 18 | 40 | Air Reset (+14) | -7 | Kara Cancel, Upper-Body Invuln 1-22F | |
| ||||||||||
Throws
Leg Throw (4/6C)
Hiza Jigoku (4/6D)
Special Moves
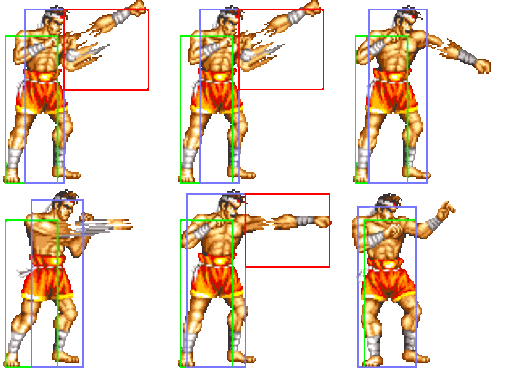
Hurricane Upper (41236P)
| Version | Damage | Stun | Guard | Startup | Active | Recovery | Total | Hit Adv | Block Adv | Property | |
|---|---|---|---|---|---|---|---|---|---|---|---|
| A | 16 (4) | 3 | Mid | 20 | - | 29 | 48 | +4 | +5 | - | |
| |||||||||||
| C | 22 (5) | 6 | Mid | 23 | - | 31 | 53 | +10 | -1 | - | |
| |||||||||||
Slash Kick (19K)
| Version | Damage | Stun | Guard | Startup | Active | Recovery | Total | Hit Adv | Block Adv | Property | |
|---|---|---|---|---|---|---|---|---|---|---|---|
| B | 16 (4) | 3 | Mid | 22 | 16 | 17 | 54 | Air Reset | -15 | - | |
| |||||||||||
| D | 22 (5) | 6 | Mid | 25 | 17 | 19 | 60 | KD | -15 | - | |
| |||||||||||
Tiger Kick (2369K)
Block advantage is from the second hit.
| Version | Damage | Stun | Guard | Startup | Active | Recovery | Total | Hit Adv | Block Adv | Property | |
|---|---|---|---|---|---|---|---|---|---|---|---|
| B | 14 (3) | 3 | Mid | 15 | 7 (4) 8 (3) | 30 | 66 | KD | -28 | - | |
| |||||||||||
| D | 20 (5) | 6 | Mid | 21 | 11 (3) 6 (3) 3 | 32 | 78 | KD | -29 | - | |
| |||||||||||
Bakuretsuken (Mash P)
A series of punches that don't combo together and leave Joe punishable on hit. Does OK chip damage, but this move is generally impractical.
| Version | Damage | Stun | Guard | Startup | Active | Recovery | Total | Hit Adv | Block Adv | Property | |
|---|---|---|---|---|---|---|---|---|---|---|---|
| A | 8xN (2xN) | 3 | Mid | 7 | 6+5+5 (5) 5 (5) 5+1... | 0 | 43+ | -1 | +6 | - | |
| |||||||||||
| C | 12xN + 14 (3xN + 3x3) | 6 | Mid | 6 | 5+4+4 (4) 4 (4) 4+4 (2+6) 3+8+4 | 29 | 90 | KD (uppercut) | -26 | - | |
| |||||||||||
Super Move
Screw Upper (64123BC)
| Damage | Stun | Guard | Startup | Active | Recovery | Total | Hit Adv | Block Adv | Property | |
|---|---|---|---|---|---|---|---|---|---|---|
| 48 (12) | 4 | Mid | 29 | 34 | 13 | 75 | KD | -5 | - | |
| ||||||||||
Combos
- (2B), c5A x 3~6, f5A x 1~3, 2D - 64 damage
Hold 6 to microwalk between 5A's for more hits.
- 2A x 1~4, 2D - 33 damage
Hold 3 between 2A's.
- 41236A (from a distance) > 19D - 35 damage
- (back turned, in corner) Hurricane Upper (C), 2C > 19B
Extremely situational trick combo you can use if you feel like showing off.
