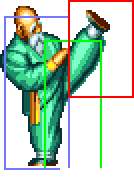
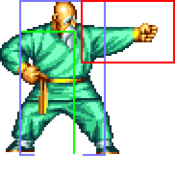
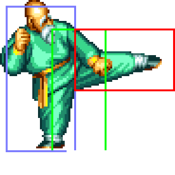
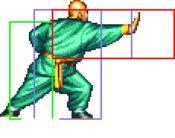
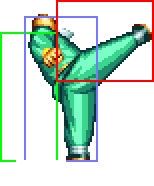
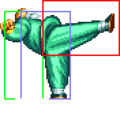
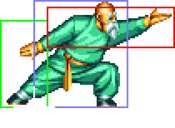
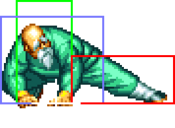
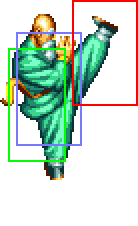
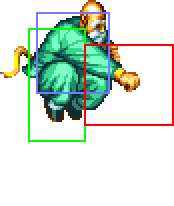
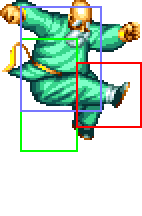
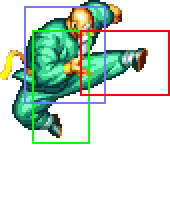
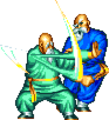
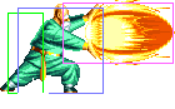
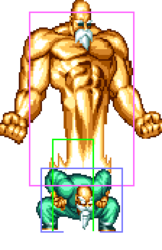
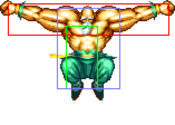
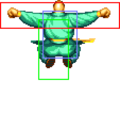
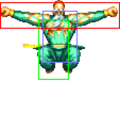
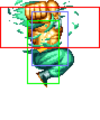
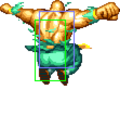
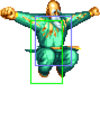
(→jD) |
(→Combos) |
||
| (26 intermediate revisions by 2 users not shown) | |||
| Line 4: | Line 4: | ||
{| | {| | ||
|-style="text-align:left;" | |-style="text-align:left;" | ||
A glass cannon combo machine with short reach but explosive damage - Tung is a high-risk, high-reward character that requires plenty of practice to be played effectively, but has the potential to win a round with just a couple of good reads. | |||
! Pros !! Cons | ! Pros !! Cons | ||
|- style="vertical-align:top;text-align:left" | |- style="vertical-align:top;text-align:left" | ||
| Line 18: | Line 19: | ||
==Move List== | ==Move List== | ||
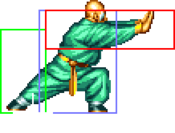
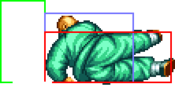
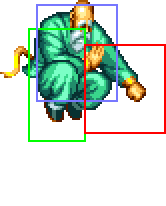
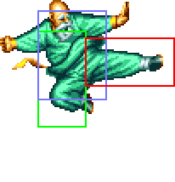
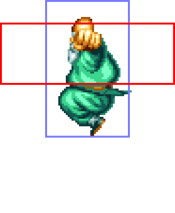
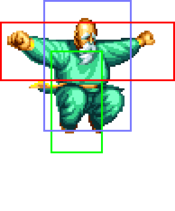
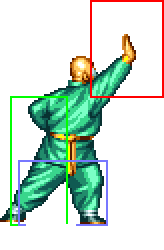
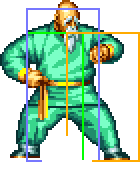
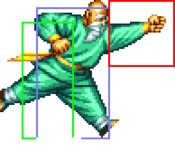
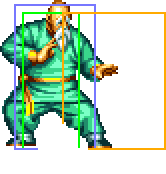
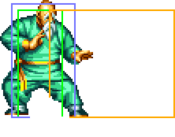
===General Hurtboxes=== | |||
{| border="1em" cellspacing="0" style="border: 1px solid #999;" | {| border="1em" cellspacing="0" style="border: 1px solid #999;" | ||
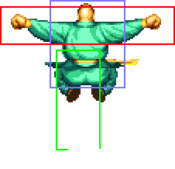
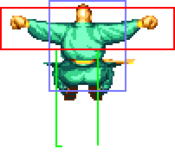
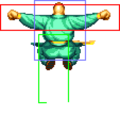
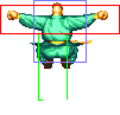
| align="center" | Standing || align="center" | Walking/Taunting || align="center" | Crouching || align="center" | Jumping | | align="center" | Standing || align="center" | Walking/Taunting || align="center" | Crouching || align="center" | Jumping | ||
| Line 23: | Line 26: | ||
| align="center"; valign="bottom" | [[File:FFS Tung Stand.png|bottom]] || align="center"; valign="bottom" | [[File:FFS Tung Walk.png|bottom]] || align="center"; valign="bottom" | [[File:FFS Tung Crouch.png|bottom]] || align="center"; valign="bottom" | [[File:FFS Tung Jump.gif|bottom]] | | align="center"; valign="bottom" | [[File:FFS Tung Stand.png|bottom]] || align="center"; valign="bottom" | [[File:FFS Tung Walk.png|bottom]] || align="center"; valign="bottom" | [[File:FFS Tung Crouch.png|bottom]] || align="center"; valign="bottom" | [[File:FFS Tung Jump.gif|bottom]] | ||
|- | |- | ||
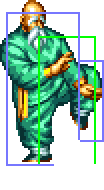
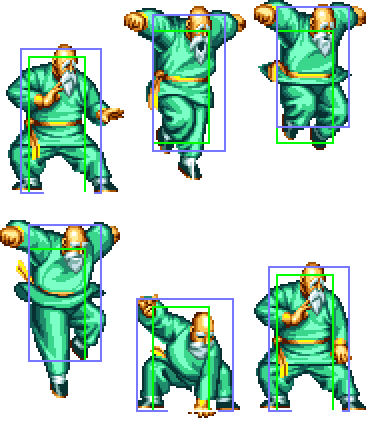
| align="center" | | | align="center" | Tung's axis is farther forward than other characters, making him easy to throw. || align="center" | || align="center" | || align="center" | 56F (4+47+5) duration. | ||
|} | |} | ||
| Line 46: | Line 49: | ||
|Hit Adv=+10 | |Hit Adv=+10 | ||
|Block Adv=+11 | |Block Adv=+11 | ||
|Property=Kara | |Property=Kara Cancel | ||
|description=*Used for close range pressure and combos. | |description=*Used for close range pressure and combos. | ||
}} | }} | ||
| Line 69: | Line 72: | ||
|Hit Adv=+7 | |Hit Adv=+7 | ||
|Block Adv=+8 | |Block Adv=+8 | ||
|Property=Kara | |Property=Kara Cancel | ||
|description=*Close A is better. | |description=*Close A is better. | ||
}} | }} | ||
| Line 145: | Line 148: | ||
|Hit Adv=+10 | |Hit Adv=+10 | ||
|Block Adv=+11 | |Block Adv=+11 | ||
|Property=Kara | |Property=Kara Cancel | ||
|description=*Good close range poke. Can link into 2C or 2D. | |description=*Good close range poke. Can link into 2C or 2D. | ||
}} | }} | ||
| Line 168: | Line 171: | ||
|Hit Adv=+7 | |Hit Adv=+7 | ||
|Block Adv=+8 | |Block Adv=+8 | ||
|Property=Kara | |Property=Kara Cancel | ||
|description=*Doesn't reach too far, but the hitbox is amazing and beats pretty much all rushing special attacks like Burn Knuckle, Zaneiken etc. An essential tool in neutral. You can even combo off this. | |description=*Doesn't reach too far, but the hitbox is amazing and beats pretty much all rushing special attacks like Burn Knuckle, Zaneiken etc. An essential tool in neutral. You can even combo off this. | ||
}} | }} | ||
| Line 290: | Line 293: | ||
|Block Adv=+9 | |Block Adv=+9 | ||
|Property=Kara Cancel | |Property=Kara Cancel | ||
|description=*Less range | |description=*Less range than 5C, but cancelable which makes it invaluable in combos. | ||
}} | }} | ||
}} | }} | ||
| Line 440: | Line 443: | ||
===Universal Mechanics=== | ===Universal Mechanics=== | ||
===== <span class="invisible-header">Lane Blast</span> ===== | ===== <span class="invisible-header">Lane Blast (CD)</span> ===== | ||
<font style="visibility:hidden" size="0"></font> | <font style="visibility:hidden" size="0"></font> | ||
{{MoveData | {{MoveData | ||
|image=FFS_Tung_CD_Front 1.png | |image=FFS_Tung_CD_Front 1.png | ||
|image2=FFS_Tung_CD_Back 1.png | |image2=FFS_Tung_CD_Back 1.png | ||
|subtitle= | |subtitle=Senpuuken/旋風拳 | ||
|caption=Front Lane | |caption=Front Lane | ||
|caption2=Back Lane | |caption2=Back Lane | ||
| Line 463: | Line 466: | ||
|Property=Cancel, Lane Shift, Lower-Body Invuln 10-33F | |Property=Cancel, Lane Shift, Lower-Body Invuln 10-33F | ||
|description= * Same frame data for front and back lane versions. | |description= * Same frame data for front and back lane versions. | ||
*Not that great, but may counter some lows thanks to its lower body invulnerability. | |||
<gallery class="mw-collapsible"> | <gallery class="mw-collapsible"> | ||
FFS Tung CD Front.png|Startup (Front) | FFS Tung CD Front.png|Startup (Front) | ||
| Line 482: | Line 486: | ||
|name=Lane Attack | |name=Lane Attack | ||
|input=A/B/C/D from opposite lane | |input=A/B/C/D from opposite lane | ||
|data= | |data=Tung has the same lane attack for punch and kick buttons. Unfortunately whiffs against crouching Jubei and Mai. | ||
{{AttackData-FFS | {{AttackData-FFS | ||
|version=A/B | |version=A/B | ||
| Line 518: | Line 522: | ||
{{MoveData | {{MoveData | ||
|image=FFS_Tung_Dodge_Attack 1.png | |image=FFS_Tung_Dodge_Attack 1.png | ||
|subtitle= | |subtitle=Hisuiha/避水波 | ||
|caption= | |caption= | ||
|name=Dodge Attack | |name=Dodge Attack | ||
| Line 534: | Line 538: | ||
|Block Adv=-13 | |Block Adv=-13 | ||
|Property=Kara Cancel, Upper-Body Invuln 1-24F | |Property=Kara Cancel, Upper-Body Invuln 1-24F | ||
|description= | |description=The upwards pointing hitbox makes this most suitable for anti-airing. | ||
<gallery class="mw-collapsible"> | <gallery class="mw-collapsible"> | ||
FFS Tung Dodge Attack.png|Startup | FFS Tung Dodge Attack.png|Startup | ||
| Line 545: | Line 549: | ||
===Throws=== | ===Throws=== | ||
===== <span class="invisible-header"> | ===== <span class="invisible-header">Ressen Shou (4/6C)</span> ===== | ||
<font style="visibility:hidden" size="0"></font> | <font style="visibility:hidden" size="0"></font> | ||
{{MoveData | {{MoveData | ||
| Line 593: | Line 597: | ||
| Block Adv = -11 | | Block Adv = -11 | ||
| Property = | | Property = | ||
| description = | | description = *Safe on block when spaced correctly, making it a good move for dealing chip damage. | ||
}} | }} | ||
{{AttackData-FFS | {{AttackData-FFS | ||
| Line 609: | Line 613: | ||
| Block Adv = -22 | | Block Adv = -22 | ||
| Property = | | Property = | ||
| description = | | description = *Tung's main combo ender. Travels much farther and is very unsafe on block. | ||
}} | }} | ||
}} | }} | ||
| Line 623: | Line 627: | ||
| caption2 = D | | caption2 = D | ||
| data = A command grab. Input the button slightly before the 9 direction to avoid accidental jumps. | | data = A command grab. Input the button slightly before the 9 direction to avoid accidental jumps. | ||
*Having a charge motion limits its usability, but it makes for an excellent "get off me" move when being pressured up close as it has only 1 frame of startup. | |||
<gallery class="mw-collapsible"> | <gallery class="mw-collapsible"> | ||
FFS Tung 19K_1.png| | FFS Tung 19K_1.png| | ||
| Line 662: | Line 667: | ||
}} | }} | ||
===== <span class="invisible-header"> | ===== <span class="invisible-header">Shouha ([1]6P)</span> ===== | ||
{{MoveData | {{MoveData | ||
| name = | | name = Shouha | ||
| input = [1]6P | | input = [1]6P | ||
| subtitle = | | subtitle = | ||
| Line 671: | Line 676: | ||
| caption = A | | caption = A | ||
| caption2 = C | | caption2 = C | ||
| data = | | data = Has a projectile hitbox, and will destroy enemy projectiles upon collision. | ||
{{AttackData-FFS | {{AttackData-FFS | ||
| version = A | | version = A | ||
| Line 706: | Line 711: | ||
| Property = | | Property = | ||
| description = * Charge time: 50F. | | description = * Charge time: 50F. | ||
*Slower than A, but has more range. | |||
<gallery class="mw-collapsible"> | <gallery class="mw-collapsible"> | ||
FFS Tung 16A 1.png| | FFS Tung 16A 1.png| | ||
| Line 724: | Line 730: | ||
{{AttackData-FFS | {{AttackData-FFS | ||
| Damage = 20xN (5xN) | | Damage = 20xN (5xN) | ||
| Stun = | | Stun = 3xN | ||
| Guard = Mid | | Guard = Mid | ||
| Startup = 2 | | Startup = 2 | ||
| Line 733: | Line 739: | ||
| Block Adv = -58 | | Block Adv = -58 | ||
| Property = Invincible 1-31F | | Property = Invincible 1-31F | ||
| description = | | description = *Would be a great anti-air, but the mash input makes it impractical. Potentially unsafe on hit as well. Mostly used as a chip kill/trick combo move. | ||
<gallery class="mw-collapsible mw-collapsed" data-expandtext="show detailed hitboxes" data-collapsetext="hide detailed hitboxes"> | <gallery class="mw-collapsible mw-collapsed" data-expandtext="show detailed hitboxes" data-collapsetext="hide detailed hitboxes"> | ||
FFS Tung MashC.png| | FFS Tung MashC.png| | ||
| Line 769: | Line 775: | ||
| Block Adv = -12 | | Block Adv = -12 | ||
| Property = Throw Invuln, Lower-Body Invuln | | Property = Throw Invuln, Lower-Body Invuln | ||
| description = * Advances and does good chip, but there is a punishable gap between the 2nd and 3rd hit on block. | | description = * Advances and does good chip, but unless it hits meaty there is a punishable gap between the 2nd and 3rd hit on block. | ||
* To avoid accidental jumps, press BC slightly before 8. | * To avoid accidental jumps, press BC slightly before 8. | ||
<gallery class="mw-collapsible mw-collapsed" data-expandtext="show detailed hitboxes" data-collapsetext="hide detailed hitboxes"> | <gallery class="mw-collapsible mw-collapsed" data-expandtext="show detailed hitboxes" data-collapsetext="hide detailed hitboxes"> | ||
| Line 792: | Line 798: | ||
==Combos== | ==Combos== | ||
* c5AxN | ''Note: c5A whiffs on crouching/dizzy Mai'' | ||
* c5AxN, f5A, 2C > 214C | * c5AxN, f5A, 2D - 35 damage (N=3). | ||
Reliable combo. If near the corner and the opponent has no reversal, 2D can be cancelled into 6328BC for +20 damage in meaty chip. | |||
* c5AxN, f5A, 2C > 214C - 54 damage (N=3). | |||
214C may whiff against short crouching characters if done from too far. | |||
* 2C > [1]6C | * 2C > [1]6C | ||
* c5D(2) > 214C | * c5D(2) > 214C | ||
* Meaty 2B | * Meaty 2B, c5A, 2C > 214C | ||
* (Corner) Lane attack, c5C > Mash C | * (Corner) Lane attack, c5C > Mash C | ||
== | == Strategy == | ||
=== | === The Basics === | ||
=== | === Advanced Strategy === | ||
== | ==Matchups== | ||
===Vs. Andy Bogard=== | |||
===Vs. Axel Hawk=== | |||
===Vs. Big Bear=== | |||
===Vs. Billy Kane=== | |||
===Vs. Cheng Sinzan=== | |||
===Vs. Duck King=== | |||
===Vs. Geese Howard=== | |||
===Vs. Joe Higashi=== | |||
===Vs. Jubei Yamada=== | |||
===Vs. Kim Kaphwan=== | |||
===Vs. Laurence Blood=== | |||
===Vs. Mai Shiranui=== | |||
===Vs. Ryo Sakazaki=== | |||
===Vs. Terry Bogard=== | |||
===Vs. Tung Fu Rue=== | |||
===Vs. Wolfgang Krauser=== | |||
{{Navbox-FFS}} | {{Navbox-FFS}} | ||
[[Category:Fatal Fury Special]] | [[Category:Fatal Fury Special]] | ||
[[Category:Tung Fu Rue]] | [[Category:Tung Fu Rue]] | ||
Latest revision as of 04:47, 6 April 2025
Introduction
| Pros | Cons |
|---|---|
|
|
Move List
General Hurtboxes
| Standing | Walking/Taunting | Crouching | Jumping |
 |
 |
 |
|
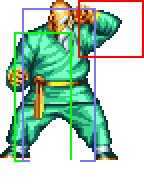
| Tung's axis is farther forward than other characters, making him easy to throw. | 56F (4+47+5) duration. |
Close Standing Normals
c5A
| Damage | Stun | Guard | Startup | Active | Recovery | Total | Hit Adv | Block Adv | Property | |
|---|---|---|---|---|---|---|---|---|---|---|
| 9 | 2 | Mid | 5 | 3 | 3 | 10 | +10 | +11 | Kara Cancel | |
| ||||||||||
c5B
| Damage | Stun | Guard | Startup | Active | Recovery | Total | Hit Adv | Block Adv | Property | |
|---|---|---|---|---|---|---|---|---|---|---|
| 11 | 2 | Mid | 6 | 5 | 4 | 14 | +7 | +8 | Kara Cancel | |
| ||||||||||
c5C
| Damage | Stun | Guard | Startup | Active | Recovery | Total | Hit Adv | Block Adv | Property | |
|---|---|---|---|---|---|---|---|---|---|---|
| 17 | 4 | Mid | 6 | 6 | 9 | 20 | +9 | +8 | Kara Cancel | |
|
Can anti-air, although tricky to use due to it being a close range normal. | ||||||||||
c5D
Far Standing Normals
f5A
| Damage | Stun | Guard | Startup | Active | Recovery | Total | Hit Adv | Block Adv | Property | |
|---|---|---|---|---|---|---|---|---|---|---|
| 7 | 2 | Mid | 5 | 3 | 3 | 10 | +10 | +11 | Kara Cancel | |
| ||||||||||
f5B
| Damage | Stun | Guard | Startup | Active | Recovery | Total | Hit Adv | Block Adv | Property | |
|---|---|---|---|---|---|---|---|---|---|---|
| 9 | 2 | Mid | 6 | 5 | 4 | 14 | +7 | +8 | Kara Cancel | |
| ||||||||||
f5C
| Damage | Stun | Guard | Startup | Active | Recovery | Total | Hit Adv | Block Adv | Property | |
|---|---|---|---|---|---|---|---|---|---|---|
| 17 | 4 | Mid | 8 | 5 | 8 | 20 | +10 | +9 | / | |
|
Excellent range as far as Tung normals go, and not too risky to use either. | ||||||||||
f5D
Crouching Normals
2A
| Damage | Stun | Guard | Startup | Active | Recovery | Total | Hit Adv | Block Adv | Property | |
|---|---|---|---|---|---|---|---|---|---|---|
| 5 | 2 | Mid | 5 | 5 | 6 | 15 | +5 | +6 | Kara Cancel | |
|
5A is generally better, although you can use this without dropping charge. | ||||||||||
2B
| Damage | Stun | Guard | Startup | Active | Recovery | Total | Hit Adv | Block Adv | Property | |
|---|---|---|---|---|---|---|---|---|---|---|
| 7 | 2 | Low | 5 | 5 | 7 | 16 | +4 | +5 | Kara Cancel, Low Profile | |
| ||||||||||
2C
| Damage | Stun | Guard | Startup | Active | Recovery | Total | Hit Adv | Block Adv | Property | |
|---|---|---|---|---|---|---|---|---|---|---|
| 15 | 4 | Mid | 9 | 6 | 8 | 22 | +10 | +9 | Kara Cancel | |
| ||||||||||
2D
| Damage | Stun | Guard | Startup | Active | Recovery | Total | Hit Adv | Block Adv | Property | |
|---|---|---|---|---|---|---|---|---|---|---|
| 17 | 4 | Low | 8 | 5 | 24 | 36 | KD | -6 | Kara Cancel, Low Profile | |
| ||||||||||
Jumping Normals
jA
| Damage | Stun | Guard | Startup | Active | Recovery | Total | Hit Adv | Block Adv | Property | |
|---|---|---|---|---|---|---|---|---|---|---|
| 7 | 2 | Overhead | 5 | ∞ | / | / | - | - | - | |
| ||||||||||
jB
| Damage | Stun | Guard | Startup | Active | Recovery | Total | Hit Adv | Block Adv | Property | |
|---|---|---|---|---|---|---|---|---|---|---|
| 9 | 2 | Overhead | 5 | ∞ | / | / | - | - | - | |
| ||||||||||
jC
| Damage | Stun | Guard | Startup | Active | Recovery | Total | Hit Adv | Block Adv | Property | |
|---|---|---|---|---|---|---|---|---|---|---|
| 17 | 4 | Overhead | 5 | 15 | / | / | - | - | - | |
| ||||||||||
jD
Universal Mechanics
Lane Blast (CD)
| Damage | Stun | Guard | Startup | Active | Recovery | Total | Hit Adv | Block Adv | Property | |
|---|---|---|---|---|---|---|---|---|---|---|
| 22 | 5 | Mid | 19 | 3 | 21 | 42 | KD | 0 | Cancel, Lane Shift, Lower-Body Invuln 10-33F | |
Lane Attack
Tung has the same lane attack for punch and kick buttons. Unfortunately whiffs against crouching Jubei and Mai.
| Version | Damage | Stun | Guard | Startup | Active | Recovery | Total | Hit Adv | Block Adv | Property | |
|---|---|---|---|---|---|---|---|---|---|---|---|
| A/B | 20 | 2 | Overhead | 9 | - | 4 | - | - | - | / | |
| |||||||||||
| C/D | 20 | 4 | Overhead | 9 | - | 4 | - | - | - | / | |
| |||||||||||
Dodge Attack
Throws
Ressen Shou (4/6C)
Special Moves
Sen Shippo (214P)
| Version | Damage | Stun | Guard | Startup | Active | Recovery | Total | Hit Adv | Block Adv | Property | |
|---|---|---|---|---|---|---|---|---|---|---|---|
| A | 14 (3) | 3 | Mid | 11 | 14 | 15 | 39 | -8 | -11 | - | |
| |||||||||||
| C | 22 (5) | 6 | Mid | 15 | 24 | 20 | 58 | KD | -22 | - | |
| |||||||||||
Ressen Kyaku ([1]9K)
A command grab. Input the button slightly before the 9 direction to avoid accidental jumps.
- Having a charge motion limits its usability, but it makes for an excellent "get off me" move when being pressured up close as it has only 1 frame of startup.
| Version | Damage | Stun | Guard | Startup | Active | Recovery | Total | Hit Adv | Block Adv | Property | |
|---|---|---|---|---|---|---|---|---|---|---|---|
| B | 16 | 3 | Throw | 1 | 1 | / | / | KD | / | - | |
|
Made irrelevant by the D version.
| |||||||||||
| D | 26 | 6 | Throw | 1 | 1 | / | / | KD | / | - | |
| |||||||||||
Shouha ([1]6P)
Geki Hou (Mash C)
| Damage | Stun | Guard | Startup | Active | Recovery | Total | Hit Adv | Block Adv | Property | |
|---|---|---|---|---|---|---|---|---|---|---|
| 20xN (5xN) | 3xN | Mid | 2 | 2 (2) 2 (2) 2 (2) 2 (2) 2 (2) 2 (2) 2 (2) 5 (4) 2 (4) 2 (4) 2 (4) 2 (4) 10 | 20 | 92 | -59 | -58 | Invincible 1-31F | |
Desperation Move
Senpuu Gou Ken (6328BC)
| Damage | Stun | Guard | Startup | Active | Recovery | Total | Hit Adv | Block Adv | Property | |
|---|---|---|---|---|---|---|---|---|---|---|
| 40 (10x4) | 4 | Mid | 16 | 4 (3) 3 (3) 3 (2) 2 (2) 2 (2) 2 (2) 2 (2) 2 (2) 2 (2) 2 (2) 2 (2) 2 (2) 2 (2) 2 (3) 3 (3) 3 (3) 3 (3) 3 | 20 | 125 | KD | -12 | Throw Invuln, Lower-Body Invuln | |
Combos
Note: c5A whiffs on crouching/dizzy Mai
- c5AxN, f5A, 2D - 35 damage (N=3).
Reliable combo. If near the corner and the opponent has no reversal, 2D can be cancelled into 6328BC for +20 damage in meaty chip.
- c5AxN, f5A, 2C > 214C - 54 damage (N=3).
214C may whiff against short crouching characters if done from too far.
- 2C > [1]6C
- c5D(2) > 214C
- Meaty 2B, c5A, 2C > 214C
- (Corner) Lane attack, c5C > Mash C
