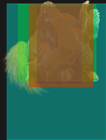
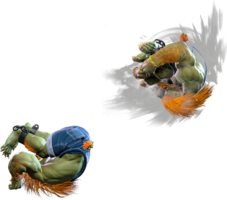
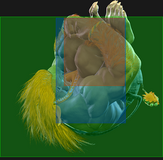
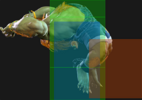
|
|
| (27 intermediate revisions by 2 users not shown) |
| Line 8: |
Line 8: |
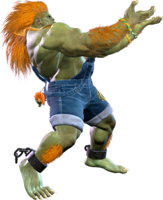
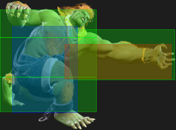
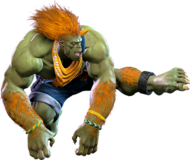
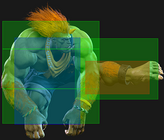
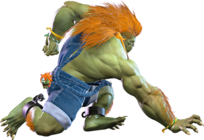
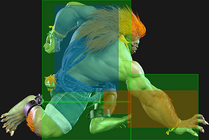
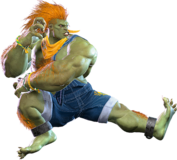
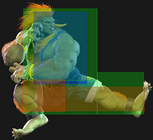
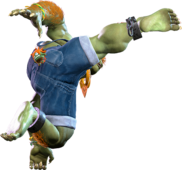
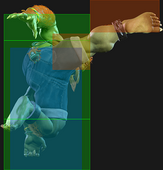
| | title = Standing Light Punch | | | title = Standing Light Punch |
| | subtitle = | | | subtitle = |
| | input = 5LP | | | input = {{Classic_sf6}} 5LP<br>{{Modern_sf6}} 5L |
| | images = | | | images = |
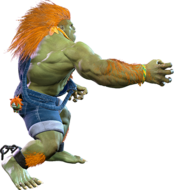
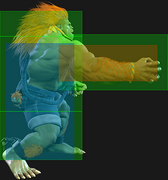
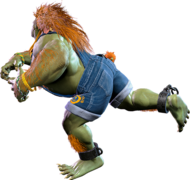
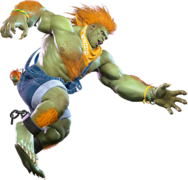
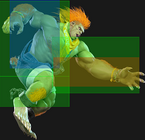
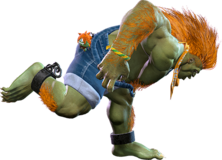
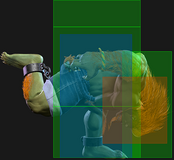
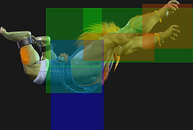
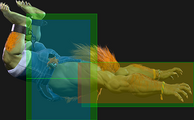
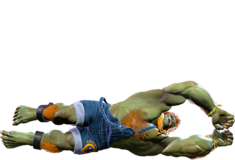
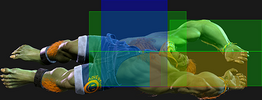
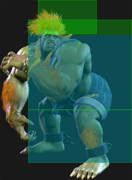
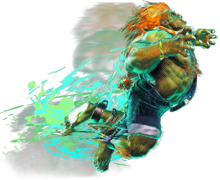
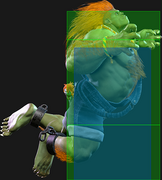
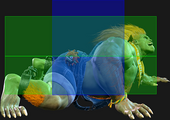
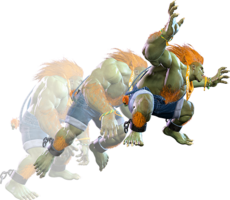
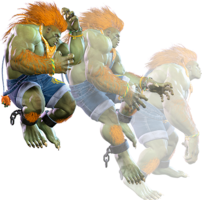
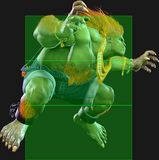
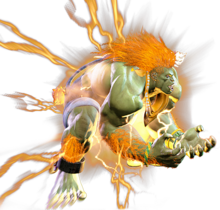
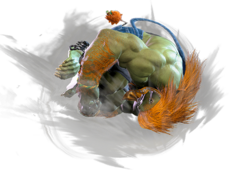
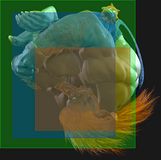
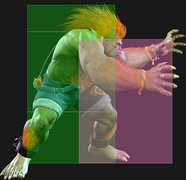
| {{MoveDataCargoImage|imageHeight=190px|blanka_5lp|caption=}} | | {{MoveDataCargoImage|imageHeight=190px|blanka_5lp|caption=}} |
| Line 16: |
Line 16: |
| {{AttackDataCargo-SF6/Query|blanka_5lp}} | | {{AttackDataCargo-SF6/Query|blanka_5lp}} |
| * '''Cancel Hitconfirm Window:''' 13f | | * '''Cancel Hitconfirm Window:''' 13f |
| * '''{{clr|4|Drive Rush}} cancel advantage:''' {{sf6-adv|VP|+6}} oH / {{sf6-adv|E|0}} oB | | * '''{{clr|DR|Drive Rush}} cancel advantage:''' {{sf6-adv|VP|+6}} oH / {{sf6-adv|E|0}} oB |
| * '''{{clr|10|SA2}} cancel advantage:''' {{sf6-adv|VP|+5}} oH / {{sf6-adv|M|-1}} oB | | * '''{{clr|SA|SA2}} cancel advantage:''' {{sf6-adv|VP|+5}} oH / {{sf6-adv|M|-1}} oB |
| * '''Coward Crouch cancel advantage:''' {{sf6-adv|M|-3}} oH / {{sf6-adv|VM|-9}} oB | | * '''Coward Crouch cancel advantage:''' {{sf6-adv|M|-3}} oH / {{sf6-adv|VM|-9}} oB |
| * '''Forward Hop cancel advantage:''' {{sf6-adv|VM|-12}} oH / {{sf6-adv|VM|-18}} oB | | * '''Forward Hop cancel advantage:''' {{sf6-adv|VM|-12}} oH / {{sf6-adv|VM|-18}} oB |
| * Applies 20% damage scaling to next hit when beginning a combo (100/80/70...) | | * Applies 20% damage scaling to next hit when beginning a combo (100/80/70...) |
| <br> | | <br> |
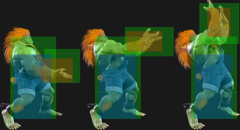
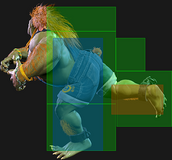
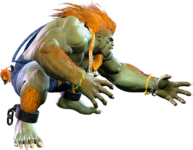
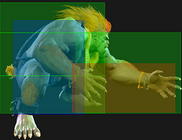
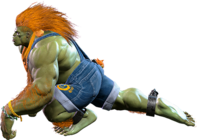
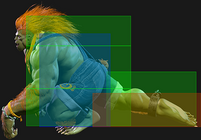
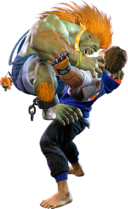
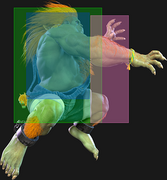
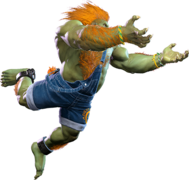
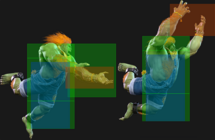
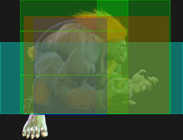
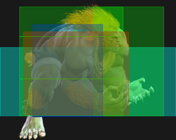
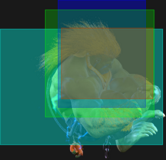
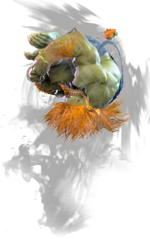
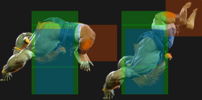
| Excellent reach for a 5-frame light attack. Cannot be chained into, and has no follow-up links without counter-hit or Punish Counter. Canceling into {{clr|M|MP Rolling Attack}} is a consistent buffer option, and Electricity also combos at closer ranges. Can be used to frame trap after a blocked {{clr|M|4MK}} if Blanka is too far for {{clr|L|5LK}} to reach. | | Excellent reach for a 5-frame light attack. Cannot be chained into, and has no follow-up links without {{clr|PC|Counter-hit}} or {{clr|PC|Punish Counter}}. Canceling into {{clr|M|MP Rolling Attack}} is a consistent buffer option, and Electricity also combos at closer ranges. Can be used to frame trap after a blocked {{clr|M|4MK}} if Blanka is too far for {{clr|L|5LK}} to reach. |
| }} | | }} |
|
| |
|
| Line 29: |
Line 29: |
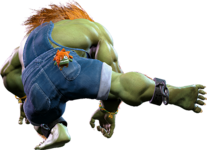
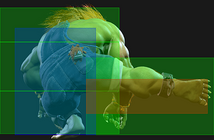
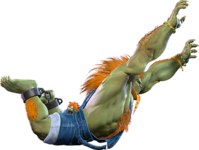
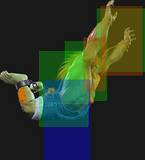
| | title = Standing Medium Punch | | | title = Standing Medium Punch |
| | subtitle = | | | subtitle = |
| | input = 5MP | | | input = {{Classic_sf6}} 5MP<br>{{Modern_sf6}} -- |
| | images = | | | images = |
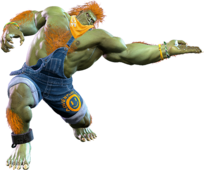
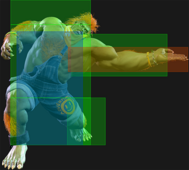
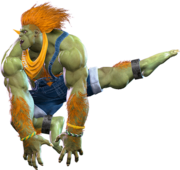
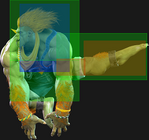
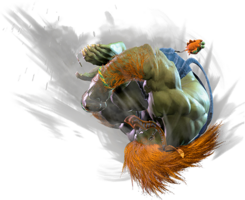
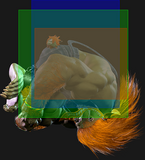
| {{MoveDataCargoImage|imageHeight=170px|blanka_5mp|caption=}} | | {{MoveDataCargoImage|imageHeight=170px|blanka_5mp|caption=}} |
| Line 37: |
Line 37: |
| {{AttackDataCargo-SF6/Query|blanka_5mp}} | | {{AttackDataCargo-SF6/Query|blanka_5mp}} |
| * '''Cancel Hitconfirm Window:''' 15f (Super) | | * '''Cancel Hitconfirm Window:''' 15f (Super) |
| * '''{{clr|10|SA2}} cancel advantage:''' {{sf6-adv|VP|+10}} oH / {{sf6-adv|P|+3}} oB | | * '''{{clr|SA|SA2}} cancel advantage:''' {{sf6-adv|VP|+10}} oH / {{sf6-adv|P|+3}} oB |
| <br> | | <br> |
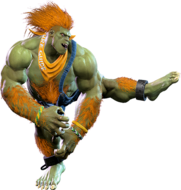
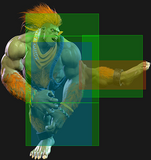
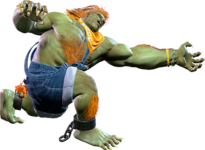
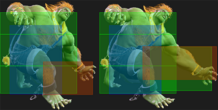
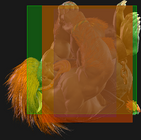
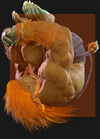
| One of Blanka's longest-reaching pokes. Does not special cancel, limiting its utility and increasing its risk against {{clr|4|Drive Impact}}, but can be super canceled. | | One of Blanka's longest-reaching pokes. Does not special cancel, limiting its utility and increasing its risk against {{clr|DR|Drive Impact}}, but can be super canceled. |
| }} | | }} |
|
| |
|
| Line 46: |
Line 46: |
| | title = Standing Heavy Punch | | | title = Standing Heavy Punch |
| | subtitle = | | | subtitle = |
| | input = 5HP | | | input = {{Classic_sf6}} 5HP<br>{{Modern_sf6}} A[H] |
| | images = | | | images = |
| {{MoveDataCargoImage|imageHeight=200px|blanka_5hp|caption=}} | | {{MoveDataCargoImage|imageHeight=200px|blanka_5hp|caption=}} |
| Line 56: |
Line 56: |
| * Forces stand; active frames 6-7 only hit airborne opponents | | * Forces stand; active frames 6-7 only hit airborne opponents |
| * '''Cancel Hitconfirm Window:''' 16f | | * '''Cancel Hitconfirm Window:''' 16f |
| * '''{{clr|4|Drive Rush}} cancel advantage:''' {{sf6-adv|VP|+17}} oH / {{sf6-adv|VP|+11}} oB | | * '''{{clr|DR|Drive Rush}} cancel advantage:''' {{sf6-adv|VP|+17}} oH / {{sf6-adv|VP|+11}} oB |
| * '''{{clr|10|SA2}} cancel advantage:''' {{sf6-adv|VP|+16}} oH / {{sf6-adv|VP|+10}} oB | | * '''{{clr|SA|SA2}} cancel advantage:''' {{sf6-adv|VP|+16}} oH / {{sf6-adv|VP|+10}} oB |
| * '''Coward Crouch cancel advantage:''' {{sf6-adv|VP|+8}} oH / {{sf6-adv|P|+2}} oB | | * '''Coward Crouch cancel advantage:''' {{sf6-adv|VP|+8}} oH / {{sf6-adv|P|+2}} oB |
| * '''Forward Hop cancel advantage:''' {{sf6-adv|M|-1}} oH / {{sf6-adv|VM|-7}} oB | | * '''Forward Hop cancel advantage:''' {{sf6-adv|M|-1}} oH / {{sf6-adv|VM|-7}} oB |
| <br> | | <br> |
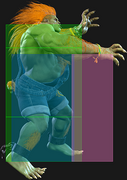
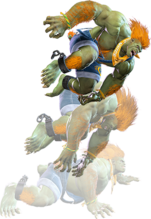
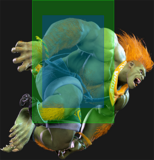
| Essential combo tool up close, primarily used as a link after {{clr|4|DR~}}{{clr|H|5HK}}. The high hitstun allows a combo into a 2PP~P launch for optimal punishes. Canceling into {{clr|10|SA2}} or {{clr|4|Drive Rush}} also give powerful extensions. In neutral, it is too slow and stubby to use consistently as a poke. Although Blanka swings his arms upward, the large hurtbox makes it weak as an anti-air against most jump-in attacks. | | Essential combo tool up close, primarily used as a link after {{clr|DR|DR~}}{{clr|H|5HK}}. The high hitstun allows a combo into a 2PP~P launch for optimal punishes. Canceling into {{clr|SA|SA2}} or {{clr|DR|Drive Rush}} also give powerful extensions. In neutral, it is too slow and stubby to use consistently as a poke. Although Blanka swings his arms upward, the large hurtbox makes it weak as an anti-air against most jump-in attacks. |
| }} | | }} |
|
| |
|
| Line 68: |
Line 68: |
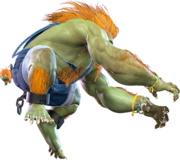
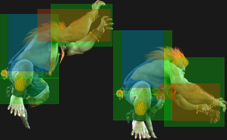
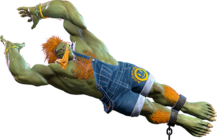
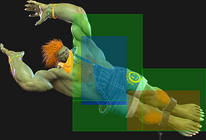
| | title = Standing Light Kick | | | title = Standing Light Kick |
| | subtitle = | | | subtitle = |
| | input = 5LK | | | input = {{Classic_sf6}} 5LK<br>{{Modern_sf6}} A[L] |
| | images = | | | images = |
| {{MoveDataCargoImage|imageHeight=190px|blanka_5lk|caption=}} | | {{MoveDataCargoImage|imageHeight=190px|blanka_5lk|caption=}} |
| Line 77: |
Line 77: |
| * Chains into {{clr|L|5LK}}/{{clr|L|2LP}}/{{clr|L|2LK}} | | * Chains into {{clr|L|5LK}}/{{clr|L|2LP}}/{{clr|L|2LK}} |
| * '''Cancel Hitconfirm Window:''' 14f | | * '''Cancel Hitconfirm Window:''' 14f |
| * '''{{clr|4|Drive Rush}} cancel advantage:''' {{sf6-adv|VP|+6}} oH / {{sf6-adv|M|-1}} oB | | * '''{{clr|DR|Drive Rush}} cancel advantage:''' {{sf6-adv|VP|+6}} oH / {{sf6-adv|M|-1}} oB |
| * '''{{clr|10|SA2}} cancel advantage:''' {{sf6-adv|VP|+5}} oH / {{sf6-adv|M|-2}} oB | | * '''{{clr|SA|SA2}} cancel advantage:''' {{sf6-adv|VP|+5}} oH / {{sf6-adv|M|-2}} oB |
| * '''Coward Crouch cancel advantage:''' {{sf6-adv|M|-3}} oH / {{sf6-adv|VM|-10}} oB | | * '''Coward Crouch cancel advantage:''' {{sf6-adv|M|-3}} oH / {{sf6-adv|VM|-10}} oB |
| * '''Forward Hop cancel advantage:''' {{sf6-adv|VM|-12}} oH / {{sf6-adv|VM|-19}} oB | | * '''Forward Hop cancel advantage:''' {{sf6-adv|VM|-12}} oH / {{sf6-adv|VM|-19}} oB |
| Line 90: |
Line 90: |
| | title = Standing Medium Kick | | | title = Standing Medium Kick |
| | subtitle = | | | subtitle = |
| | input = 5MK | | | input = {{Classic_sf6}} 5MK<br>{{Modern_sf6}} 5M |
| | images = | | | images = |
| {{MoveDataCargoImage|imageHeight=180px|blanka_5mk|caption=}} | | {{MoveDataCargoImage|imageHeight=180px|blanka_5mk|caption=}} |
| Line 99: |
Line 99: |
| * 3f extra recovery on whiff | | * 3f extra recovery on whiff |
| * '''Cancel Hitconfirm Window:''' 15f | | * '''Cancel Hitconfirm Window:''' 15f |
| * '''{{clr|4|Drive Rush}} cancel advantage:''' {{sf6-adv|VP|+14}} oH / {{sf6-adv|VP|+8}} oB | | * '''{{clr|DR|Drive Rush}} cancel advantage:''' {{sf6-adv|VP|+14}} oH / {{sf6-adv|VP|+8}} oB |
| * '''{{clr|10|SA2}} cancel advantage:''' {{sf6-adv|VP|+13}} oH / {{sf6-adv|VP|+7}} oB | | * '''{{clr|SA|SA2}} cancel advantage:''' {{sf6-adv|VP|+13}} oH / {{sf6-adv|VP|+7}} oB |
| * '''Coward Crouch cancel advantage:''' {{sf6-adv|VP|+5}} oH / {{sf6-adv|M|-1}} oB | | * '''Coward Crouch cancel advantage:''' {{sf6-adv|VP|+5}} oH / {{sf6-adv|M|-1}} oB |
| * '''Forward Hop cancel advantage:''' {{sf6-adv|VM|-4}} oH / {{sf6-adv|VM|-10}} oB | | * '''Forward Hop cancel advantage:''' {{sf6-adv|VM|-4}} oH / {{sf6-adv|VM|-10}} oB |
| Line 111: |
Line 111: |
| | title = Standing Heavy Kick | | | title = Standing Heavy Kick |
| | subtitle = | | | subtitle = |
| | input = 5HK | | | input = {{Classic_sf6}} 5HK<br>{{Modern_sf6}} 5H |
| | images = | | | images = |
| {{MoveDataCargoImage|imageHeight=180px|blanka_5hk|caption=}} | | {{MoveDataCargoImage|imageHeight=180px|blanka_5hk|caption=}} |
| Line 121: |
Line 121: |
| * Forces stand | | * Forces stand |
| * Frames 13-15 (active frames 7-9) can anti-air cross-ups unlike most AAs | | * Frames 13-15 (active frames 7-9) can anti-air cross-ups unlike most AAs |
| * Counter-hit/Punish Counter puts airborne opponents into {{sf6-jug|limited juggle}} state (high float) | | * {{clr|PC|Counter-hit/Punish Counter}} puts airborne opponents into {{sf6-jug|limited juggle}} state (high float) |
| <br> | | <br> |
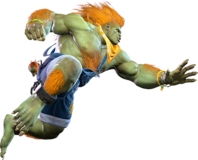
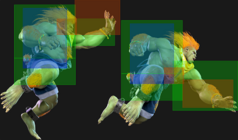
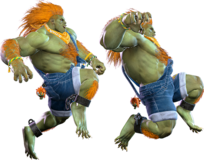
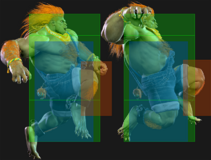
| Highly rewarding anti-air tool, especially if it lands as a counter-hit or punish counter (even after an anti-air trade). The high juggle state gives Blanka numerous options for follow-up damage. While the vertical hitbox is excellent, it can be slightly tricky to time against opponents that can alter their air trajectory, leaving Blanka open for a punish as the move recovers. | | Highly rewarding anti-air tool, especially if it lands as a {{clr|PC|Counter-hit}} or {{clr|PC|Punish Counter}} (even after an anti-air trade). The high juggle state gives Blanka numerous options for follow-up damage. While the vertical hitbox is excellent, it can be slightly tricky to time against opponents that can alter their air trajectory, leaving Blanka open for a punish as the move recovers. |
|
| |
|
| The high active frame count makes {{clr|H|5HK}} an excellent meaty option if well-timed. In Punish or {{clr|4|Drive Rush}} routes, it can link directly to {{clr|H|5HP}} for optimal damage and oki. | | The high active frame count makes {{clr|H|5HK}} an excellent meaty option if well-timed. In Punish or {{clr|DR|Drive Rush}} routes, it can link directly to {{clr|H|5HP}} for optimal damage and oki. |
| }} | | }} |
| <br> | | <br> |
| Line 134: |
Line 134: |
| | title = Crouching Light Punch | | | title = Crouching Light Punch |
| | subtitle = | | | subtitle = |
| | input = 2LP | | | input = {{Classic_sf6}} 2LP<br>{{Modern_sf6}} 2L~2L or A[L~L] |
| | images = | | | images = |
| {{MoveDataCargoImage|imageHeight=150px|blanka_2lp|caption=}} | | {{MoveDataCargoImage|imageHeight=150px|blanka_2lp|caption=}} |
| Line 143: |
Line 143: |
| * Chains into {{clr|L|5LK}}/{{clr|L|2LP}}/{{clr|L|2LK}} | | * Chains into {{clr|L|5LK}}/{{clr|L|2LP}}/{{clr|L|2LK}} |
| * '''Cancel Hitconfirm Window:''' 13f | | * '''Cancel Hitconfirm Window:''' 13f |
| * '''{{clr|4|Drive Rush}} cancel advantage:''' {{sf6-adv|VP|+6}} oH / {{sf6-adv|M|-1}} oB | | * '''{{clr|DR|Drive Rush}} cancel advantage:''' {{sf6-adv|VP|+6}} oH / {{sf6-adv|M|-1}} oB |
| * '''{{clr|10|SA2}} cancel advantage:''' {{sf6-adv|VP|+5}} oH / {{sf6-adv|M|-2}} oB | | * '''{{clr|SA|SA2}} cancel advantage:''' {{sf6-adv|VP|+5}} oH / {{sf6-adv|M|-2}} oB |
| * '''Coward Crouch cancel advantage:''' {{sf6-adv|M|-3}} oH / {{sf6-adv|VM|-10}} oB | | * '''Coward Crouch cancel advantage:''' {{sf6-adv|M|-3}} oH / {{sf6-adv|VM|-10}} oB |
| * '''Forward Hop cancel advantage:''' {{sf6-adv|VM|-12}} oH / {{sf6-adv|VM|-19}} oB | | * '''Forward Hop cancel advantage:''' {{sf6-adv|VM|-12}} oH / {{sf6-adv|VM|-19}} oB |
| Line 156: |
Line 156: |
| | title = Crouching Medium Punch | | | title = Crouching Medium Punch |
| | subtitle = | | | subtitle = |
| | input = 2MP | | | input = {{Classic_sf6}} 2MP<br>{{Modern_sf6}} -- |
| | images = | | | images = |
| {{MoveDataCargoImage|imageHeight=150px|blanka_2mp|caption=}} | | {{MoveDataCargoImage|imageHeight=150px|blanka_2mp|caption=}} |
| Line 169: |
Line 169: |
| * Can anti-air on active frames 4-5 but cannot hit cross-up | | * Can anti-air on active frames 4-5 but cannot hit cross-up |
| * '''Cancel Hitconfirm Window:''' 19f | | * '''Cancel Hitconfirm Window:''' 19f |
| * '''{{clr|4|Drive Rush}} cancel advantage:''' {{sf6-adv|VP|+10}} oH / {{sf6-adv|VP|+6}} oB | | * '''{{clr|DR|Drive Rush}} cancel advantage:''' {{sf6-adv|VP|+10}} oH / {{sf6-adv|VP|+6}} oB |
| * '''{{clr|10|SA2}} cancel advantage:''' {{sf6-adv|VP|+9}} oH / {{sf6-adv|VP|+5}} oB | | * '''{{clr|SA|SA2}} cancel advantage:''' {{sf6-adv|VP|+9}} oH / {{sf6-adv|VP|+5}} oB |
| * '''Coward Crouch cancel advantage:''' {{sf6-adv|P|+1}} oH / {{sf6-adv|M|-3}} oB | | * '''Coward Crouch cancel advantage:''' {{sf6-adv|P|+1}} oH / {{sf6-adv|M|-3}} oB |
| * '''Forward Hop cancel advantage:''' {{sf6-adv|VM|-8}} oH / {{sf6-adv|VM|-12}} oB | | * '''Forward Hop cancel advantage:''' {{sf6-adv|VM|-8}} oH / {{sf6-adv|VM|-12}} oB |
| Line 183: |
Line 183: |
| | title = Crouching Heavy Punch | | | title = Crouching Heavy Punch |
| | subtitle = | | | subtitle = |
| | input = 2HP | | | input = {{Classic_sf6}} 2HP<br>{{Modern_sf6}} 2H |
| | images = | | | images = |
| {{MoveDataCargoImage|imageHeight=140px|blanka_2hp|caption=}} | | {{MoveDataCargoImage|imageHeight=140px|blanka_2hp|caption=}} |
| Line 190: |
Line 190: |
| | info = | | | info = |
| {{AttackDataCargo-SF6/Query|blanka_2hp}} | | {{AttackDataCargo-SF6/Query|blanka_2hp}} |
| * Punish Counter: HKD +80 (puts airborne opponents into {{sf6-jug|limited juggle}} state) | | * {{clr|PC|Punish Counter}}: HKD +80 (puts airborne opponents into {{sf6-jug|limited juggle}} state) |
| * 1f extra recovery on block | | * 1f extra recovery on block |
| * Forces stand | | * Forces stand |
| Line 196: |
Line 196: |
| Enormous reach for a normal attack, and one of Blanka's farthest-reaching neutral options. Great for harassing the opponent's Drive gauge, especially when they are on the lookout to Perfect Parry a Blanka Ball. Can be fairly easily counterpoked and whiff punished due to the slow startup and long recovery time, so it should be used sparingly. | | Enormous reach for a normal attack, and one of Blanka's farthest-reaching neutral options. Great for harassing the opponent's Drive gauge, especially when they are on the lookout to Perfect Parry a Blanka Ball. Can be fairly easily counterpoked and whiff punished due to the slow startup and long recovery time, so it should be used sparingly. |
|
| |
|
| On Punish Counter, it knocks the opponent to the other end of the screen; this doesn't allow a follow-up juggle, but gives Blanka great screen position. After a whiff punish, closet the gap with {{clr|M|MP Rolling Attack}} for follow-up oki, or set up a Blanka-chan doll. | | On {{clr|PC|Punish Counter}}, it knocks the opponent to the other end of the screen; this doesn't allow a follow-up juggle, but gives Blanka great screen position. After a whiff punish, closet the gap with {{clr|M|MP Rolling Attack}} for follow-up oki, or set up a Blanka-chan doll. |
|
| |
|
| {{clr|H|2HP}} can anti-air near its max range, but is liable to lose or trade with stronger jump-ins. | | {{clr|H|2HP}} can anti-air near its max range, but is liable to lose or trade with stronger jump-ins. |
| Line 205: |
Line 205: |
| | title = Crouching Light Kick | | | title = Crouching Light Kick |
| | subtitle = | | | subtitle = |
| | input = 2LK | | | input = {{Classic_sf6}} 2LK<br>{{Modern_sf6}} 2L |
| | images = | | | images = |
| {{MoveDataCargoImage|imageHeight=160px|blanka_2lk|caption=}} | | {{MoveDataCargoImage|imageHeight=160px|blanka_2lk|caption=}} |
| Line 222: |
Line 222: |
| | title = Crouching Medium Kick | | | title = Crouching Medium Kick |
| | subtitle = | | | subtitle = |
| | input = 2MK | | | input = {{Classic_sf6}} 2MK<br>{{Modern_sf6}} 2M |
| | images = | | | images = |
| {{MoveDataCargoImage|imageHeight=150px|blanka_2mk|caption=}} | | {{MoveDataCargoImage|imageHeight=150px|blanka_2mk|caption=}} |
| Line 229: |
Line 229: |
| | info = | | | info = |
| {{AttackDataCargo-SF6/Query|blanka_2mk}} | | {{AttackDataCargo-SF6/Query|blanka_2mk}} |
| * 2f extra recovery on whiff | | * 2f extra recovery on block/whiff |
| * '''Cancel Hitconfirm Window:''' 13f | | * '''Cancel Hitconfirm Window:''' 13f |
| * '''{{clr|4|Drive Rush}} cancel advantage:''' {{sf6-adv|VP|+14}} oH / {{sf6-adv|VP|+4}} oB | | * '''{{clr|DR|Drive Rush}} cancel advantage:''' {{sf6-adv|VP|+14}} oH / {{sf6-adv|VP|+6}} oB |
| * '''{{clr|10|SA2}} cancel advantage:''' {{sf6-adv|VP|+13}} oH / {{sf6-adv|P|+3}} oB | | * '''{{clr|SA|SA2}} cancel advantage:''' {{sf6-adv|VP|+13}} oH / {{sf6-adv|VP|+5}} oB |
| * '''Coward Crouch cancel advantage:''' {{sf6-adv|VP|+5}} oH / {{sf6-adv|VM|-5}} oB | | * '''Coward Crouch cancel advantage:''' {{sf6-adv|VP|+5}} oH / {{sf6-adv|M|-3}} oB |
| * '''Forward Hop cancel advantage:''' {{sf6-adv|VM|-4}} oH / {{sf6-adv|VM|-14}} oB | | * '''Forward Hop cancel advantage:''' {{sf6-adv|VM|-4}} oH / {{sf6-adv|VM|-12}} oB |
| * Applies 20% damage scaling to next hit when beginning a combo (100/80/70...) | | * Applies 20% damage scaling to next hit when beginning a combo (100/80/70...) |
| <br> | | <br> |
| One of Blanka's primary midrange pokes along with {{clr|M|2MP}}, {{clr|M|5MP}}, and his light attacks. It's a bit stubby compared to his other medium buttons, and has a wider recovery hurtbox to make it easier to whiff punish. It has similar range to other {{clr|M|2MKs}} like Ryu or Chun-Li, but because Blanka naturally has a wider hurtbox he can easily get outpoked near its max range. | | One of Blanka's primary midrange pokes along with {{clr|M|2MP}}, {{clr|M|5MP}}, and his light attacks. It's a bit stubby compared to his other medium buttons, and has a wider recovery hurtbox to make it easier to whiff punish. It has similar range to other {{clr|M|2MKs}} like Ryu or Chun-Li, but because Blanka naturally has a wider hurtbox he can easily get outpoked near its max range. |
|
| |
|
| Up close, it has enough frame advantage to link directly into {{clr|L|5LP}}, allowing for meterless combo conversions. When used out of {{clr|4|Drive Rush}}, the {{sf6-adv|VP|+4}} frame advantage boost keeps {{clr|M|2MK}} safe on block while allowing a link to {{clr|M|2MP}} even at longer ranges. It can also just cancel into specials directly, particularly Blanka Ball or Electric Thunder. | | Up close, it has enough frame advantage to link directly into {{clr|L|5LP}}, allowing for meterless combo conversions. When used out of {{clr|DR|Drive Rush}}, the extra frame advantage keeps {{clr|M|2MK}} safe on block while allowing a link to {{clr|M|2MP}} even at longer ranges. It can also just cancel into specials directly, particularly Blanka Ball or Electric Thunder. |
| }} | | }} |
|
| |
|
| Line 246: |
Line 246: |
| | title = Crouching Heavy Kick | | | title = Crouching Heavy Kick |
| | subtitle = | | | subtitle = |
| | input = 2HK | | | input = {{Classic_sf6}} 2HK<br>{{Modern_sf6}} -- |
| | images = | | | images = |
| {{MoveDataCargoImage|imageHeight=140px|blanka_2hk|caption=}} | | {{MoveDataCargoImage|imageHeight=140px|blanka_2hk|caption=}} |
| Line 253: |
Line 253: |
| | info = | | | info = |
| {{AttackDataCargo-SF6/Query|blanka_2hk}} | | {{AttackDataCargo-SF6/Query|blanka_2hk}} |
| * Counter-hit/Punish Counter: HKD +46 | | * {{clr|PC|Counter-hit/Punish Counter}}: HKD +46 |
| * Has juggle potential; not a Hard Knockdown when juggled into | | * Has juggle potential; not a Hard Knockdown when juggled into |
| <br> | | <br> |
| Line 265: |
Line 265: |
| | title = Jumping Light Punch | | | title = Jumping Light Punch |
| | subtitle = | | | subtitle = |
| | input = j.LP | | | input = {{Classic_sf6}} j.LP<br>{{Modern_sf6}} j.L |
| | images = | | | images = |
| {{MoveDataCargoImage|imageHeight=160px|blanka_jlp|caption=}} | | {{MoveDataCargoImage|imageHeight=160px|blanka_jlp|caption=}} |
| Line 280: |
Line 280: |
| | title = Jumping Medium Punch | | | title = Jumping Medium Punch |
| | subtitle = | | | subtitle = |
| | input = j.MP | | | input = {{Classic_sf6}} j.MP<br>{{Modern_sf6}} -- |
| | images = | | | images = |
| {{MoveDataCargoImage|imageHeight=140px|blanka_jmp|caption=}} | | {{MoveDataCargoImage|imageHeight=140px|blanka_jmp|caption=}} |
| Line 290: |
Line 290: |
| * Cancelable into Aerial Rolling Attack (no charge required during SA2) | | * Cancelable into Aerial Rolling Attack (no charge required during SA2) |
| <br> | | <br> |
| Rewarding air-to-air if you have back charge, though the downward angle of the hitbox can make it harder to use in some scenarios. Allows a juggle route into Aerial Rolling Attack after {{clr|10|OD Rolling Attack}}. | | Rewarding air-to-air if you have back charge, though the downward angle of the hitbox can make it harder to use in some scenarios. Allows a juggle route into Aerial Rolling Attack after {{clr|OD|OD Rolling Attack}}. |
| }} | | }} |
|
| |
|
| Line 297: |
Line 297: |
| | title = Jumping Heavy Punch | | | title = Jumping Heavy Punch |
| | subtitle = | | | subtitle = |
| | input = j.HP | | | input = {{Classic_sf6}} j.HP<br>{{Modern_sf6}} -- |
| | images = | | | images = |
| {{MoveDataCargoImage|imageHeight=160px|blanka_jhp|caption=}} | | {{MoveDataCargoImage|imageHeight=160px|blanka_jhp|caption=}} |
| Line 313: |
Line 313: |
| | title = Neutral Jumping Heavy Punch | | | title = Neutral Jumping Heavy Punch |
| | subtitle = | | | subtitle = |
| | input = 8j.HP | | | input = {{Classic_sf6}} 8j.HP<br>{{Modern_sf6}} -- |
| | images = | | | images = |
| {{MoveDataCargoImage|imageHeight=180px|blanka_8jhp|caption=}} | | {{MoveDataCargoImage|imageHeight=180px|blanka_8jhp|caption=}} |
| Line 329: |
Line 329: |
| | title = Jumping Light Kick | | | title = Jumping Light Kick |
| | subtitle = | | | subtitle = |
| | input = j.LK | | | input = {{Classic_sf6}} j.LK<br>{{Modern_sf6}} -- |
| | images = | | | images = |
| {{MoveDataCargoImage|imageHeight=170px|blanka_jlk|caption=}} | | {{MoveDataCargoImage|imageHeight=170px|blanka_jlk|caption=}} |
| Line 344: |
Line 344: |
| | title = Jumping Medium Kick | | | title = Jumping Medium Kick |
| | subtitle = | | | subtitle = |
| | input = j.MK | | | input = {{Classic_sf6}} j.MK<br>{{Modern_sf6}} j.M |
| | images = | | | images = |
| {{MoveDataCargoImage|imageHeight=160px|blanka_jmk|caption=}} | | {{MoveDataCargoImage|imageHeight=160px|blanka_jmk|caption=}} |
| Line 360: |
Line 360: |
| | title = Jumping Heavy Kick | | | title = Jumping Heavy Kick |
| | subtitle = | | | subtitle = |
| | input = j.HK | | | input = {{Classic_sf6}} j.HK<br>{{Modern_sf6}} j.H |
| | images = | | | images = |
| {{MoveDataCargoImage|imageHeight=140px|blanka_jhk|caption=}} | | {{MoveDataCargoImage|imageHeight=140px|blanka_jhk|caption=}} |
| Line 377: |
Line 377: |
| | title = Rock Crusher | | | title = Rock Crusher |
| | subtitle = | | | subtitle = |
| | input = 6MP | | | input = {{Classic_sf6}} 6MP<br>{{Modern_sf6}} -- |
| | images = | | | images = |
| {{MoveDataCargoImage|imageHeight=160px|blanka_6mp|caption=}} | | {{MoveDataCargoImage|imageHeight=160px|blanka_6mp|caption=}} |
| Line 385: |
Line 385: |
| {{AttackDataCargo-SF6/Query|blanka_6mp}} | | {{AttackDataCargo-SF6/Query|blanka_6mp}} |
| * If 1st hit is blocked, 2nd hit no longer hits overhead | | * If 1st hit is blocked, 2nd hit no longer hits overhead |
| * Counter-hit/Punish Counter bonus advantage carries through both hits | | * {{clr|PC|Counter-hit/Punish Counter}} bonus advantage carries through both hits |
| <br> | | <br> |
| A short range 2-hit overhead that is safe on block and can lead to combos on Counter-hit/Punish Counter or when used out of {{clr|4|Drive Rush}}. Because the 2nd hit has only 1 active frame, there are no meaty setups that allow a natural follow-up link. Pairs well with Blanka-chan bomb to crack the opponent's defenses. | | A short range 2-hit overhead that is safe on block and can lead to combos on {{clr|PC|Counter-hit/Punish Counter}} or when used out of {{clr|DR|Drive Rush}}. Because the 2nd hit has only 1 active frame, there are no meaty setups that allow a natural follow-up link. Pairs well with Blanka-chan bomb to crack the opponent's defenses. |
| }} | | }} |
|
| |
|
| Line 394: |
Line 394: |
| | title = Double Knee Bombs | | | title = Double Knee Bombs |
| | subtitle = | | | subtitle = |
| | input = 6MK | | | input = {{Classic_sf6}} 6MK<br>{{Modern_sf6}} 6M |
| | images = | | | images = |
| {{MoveDataCargoImage|imageHeight=160px|blanka_6mk|caption=}} | | {{MoveDataCargoImage|imageHeight=160px|blanka_6mk|caption=}} |
| Line 402: |
Line 402: |
| {{AttackDataCargo-SF6/Query|blanka_6mk}} | | {{AttackDataCargo-SF6/Query|blanka_6mk}} |
| * '''Low Crush:''' 9-23f (not airborne) | | * '''Low Crush:''' 9-23f (not airborne) |
| * Counter-hit/Punish Counter bonus advantage carries through both hits | | * 1st hit puts airborne opponents into {{sf6-jug|free juggle}} state (allows both hits to connect) |
| | * {{clr|PC|Counter-hit/Punish Counter}} bonus advantage carries through both hits |
| <br> | | <br> |
| A hopping 2-hit knee strike that advances forward. Can combo naturally into {{clr|L|5LP}} or {{clr|L|2LP}} with plenty of time to hitconfirm. Works well out of {{clr|4|Drive Rush}}, giving it extra momentum, plus frames on block, and a combo route into {{clr|H|5HP}} for great damage. | | A hopping 2-hit knee strike that advances forward. Can combo naturally into {{clr|L|5LP}} or {{clr|L|2LP}} with plenty of time to hitconfirm. Works well out of {{clr|DR|Drive Rush}}, giving it extra momentum, plus frames on block, and a combo route into {{clr|H|5HP}} for great damage. |
| }} | | }} |
|
| |
|
| Line 411: |
Line 412: |
| | title = Wild Edge | | | title = Wild Edge |
| | subtitle = | | | subtitle = |
| | input = 4MK | | | input = {{Classic_sf6}} 4MK<br>{{Modern_sf6}} 4M or A[M] |
| | images = | | | images = |
| {{MoveDataCargoImage|imageHeight=170px|blanka_4mk|caption=}} | | {{MoveDataCargoImage|imageHeight=170px|blanka_4mk|caption=}} |
| Line 419: |
Line 420: |
| {{AttackDataCargo-SF6/Query|blanka_4mk}} | | {{AttackDataCargo-SF6/Query|blanka_4mk}} |
| * Head hurtbox disappears 1-3f and is '''anti-air invuln''' 4-14f | | * Head hurtbox disappears 1-3f and is '''anti-air invuln''' 4-14f |
| * Whiffs on crouching opponents from longer ranges | | * Most of leg hitbox whiffs on crouching opponents unless they extend a vertical hurtbox |
| | ** Only connects on crouchers at point blank range |
| * '''Cancel Hitconfirm Window:''' 20f | | * '''Cancel Hitconfirm Window:''' 20f |
| * '''{{clr|4|Drive Rush}} cancel advantage:''' {{sf6-adv|VP|+16}} oH / {{sf6-adv|VP|+10}} oB | | * '''{{clr|DR|Drive Rush}} cancel advantage:''' {{sf6-adv|VP|+16}} oH / {{sf6-adv|VP|+10}} oB |
| * '''{{clr|10|SA2}} cancel advantage:''' {{sf6-adv|VP|+15}} oH / {{sf6-adv|VP|+9}} oB | | * '''{{clr|SA|SA2}} cancel advantage:''' {{sf6-adv|VP|+15}} oH / {{sf6-adv|VP|+9}} oB |
| * '''Coward Crouch cancel advantage:''' {{sf6-adv|VP|+7}} oH / {{sf6-adv|P|+1}} oB | | * '''Coward Crouch cancel advantage:''' {{sf6-adv|VP|+7}} oH / {{sf6-adv|P|+1}} oB |
| * '''Forward Hop cancel advantage:''' {{sf6-adv|M|-2}} oH / {{sf6-adv|VM|-8}} oB | | * '''Forward Hop cancel advantage:''' {{sf6-adv|M|-2}} oH / {{sf6-adv|VM|-8}} oB |
| Line 428: |
Line 430: |
| One of Blanka's best normals with multiple uses. | | One of Blanka's best normals with multiple uses. |
|
| |
|
| {{clr|M|4MK}} gives Blanka frame advantage on block, and can even frame trap into itself when used out of {{clr|4|Drive Rush}}. The high active frame count makes it easy to time as a meaty, giving even better frame advantage. It combos naturally into {{clr|L|lights}} or {{clr|M|2MK}}, and can get much stronger combo routes on Counter-hit or with {{clr|4|Drive Rush}}. The hitconfirm window is extremely lenient, allowing for special/super follow-ups even at a range where links won't work. Its hitbox is completely disjointed, making it a useful anti-air at mid range. The only downside is that Blanka must be relatively close to enact his pressure, since it can whiff against crouchers at when farther away. | | {{clr|M|4MK}} gives Blanka frame advantage on block, and can even frame trap into itself when used out of {{clr|DR|Drive Rush}}. The high active frame count makes it easy to time as a meaty, giving even better frame advantage. It combos naturally into {{clr|L|lights}} or {{clr|M|2MK}}, and can get much stronger combo routes on {{clr|PC|Counter-hit}} or with {{clr|DR|Drive Rush}}. The hitconfirm window is extremely lenient, allowing for special/super follow-ups even at a range where links won't work. Its hitbox is completely disjointed, making it a useful anti-air at mid range. The only downside is that Blanka must be relatively close to enact his pressure, since it can whiff against crouchers at when farther away. |
| }} | | }} |
|
| |
|
| Line 435: |
Line 437: |
| | title = Wild Nail | | | title = Wild Nail |
| | subtitle = | | | subtitle = |
| | input = 6HP | | | input = {{Classic_sf6}} 6HP<br>{{Modern_sf6}} 6H |
| | images = | | | images = |
| {{MoveDataCargoImage|imageHeight=150px|blanka_6hp|caption=}} | | {{MoveDataCargoImage|imageHeight=150px|blanka_6hp|caption=}} |
| Line 447: |
Line 449: |
| * 3f extra recovery on whiff/block | | * 3f extra recovery on whiff/block |
| * Spike knockdown vs. airborne opponents | | * Spike knockdown vs. airborne opponents |
| * Punish Counter: Crumple state (HKD +76~79); OTG bounce vs. airborne | | * {{clr|PC|Punish Counter}}: Crumple state (HKD +76~79); OTG bounce vs. airborne |
| * '''Cancel Hitconfirm Window:''' 31f (into 2PP only, up to frame 34 on hit/block) | | * '''Cancel Hitconfirm Window:''' 31f (into 2PP only, up to frame 34 on hit/block) |
| * '''Coward Crouch cancel advantage:''' KD +23(Crumple +81) oH / {{sf6-adv|VM|-7}} oB | | * '''Coward Crouch cancel advantage:''' KD +23(Crumple +81) oH / {{sf6-adv|VM|-7}} oB |
| Line 453: |
Line 455: |
| * Blanka is in a crouching state during recovery on frames 21-43 | | * Blanka is in a crouching state during recovery on frames 21-43 |
| <br> | | <br> |
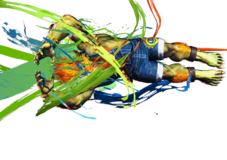
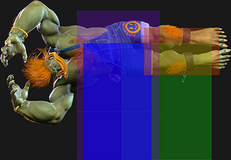
| A body splash with good horizontal and vertical reach. Quite unsafe on block, but if well-spaced it can be difficult for most characters to punish. A regular hit gives a fairly unremarkable knockdown, but the Punish Counter crumple state makes it useful as a DP punish and as a predictive tool against low pokes. | | A body splash with good horizontal and vertical reach. Quite unsafe on block, but if well-spaced it can be difficult for most characters to punish. A regular hit gives a fairly unremarkable knockdown, but the {{clr|PC|Punish Counter}} crumple state makes it useful as a DP punish and as a predictive tool against low pokes. |
|
| |
|
| Canceling into Coward Crouch will not keep Blanka safe on block, but it does allow a juggle into Wild Lift on Punish Counter. By holding up to cancel the Coward Crouch immediately, it's also possible to score a free juggle into any attack 6f or faster. | | Canceling into Coward Crouch will not keep Blanka safe on block, but it does allow a juggle into Wild Lift on {{clr|PC|Punish Counter}}. By holding up to cancel the Coward Crouch immediately, it's also possible to score a free juggle into any attack 6f or faster. |
| }} | | }} |
|
| |
|
| Line 462: |
Line 464: |
| | title = Amazon River Run | | | title = Amazon River Run |
| | subtitle = | | | subtitle = |
| | input = 3HP | | | input = {{Classic_sf6}} 3HP<br>{{Modern_sf6}} 3H |
| | images = | | | images = |
| {{MoveDataCargoImage|imageHeight=160px|blanka_3hp|caption=}} | | {{MoveDataCargoImage|imageHeight=160px|blanka_3hp|caption=}} |
| Line 470: |
Line 472: |
| {{AttackDataCargo-SF6/Query|blanka_3hp}} | | {{AttackDataCargo-SF6/Query|blanka_3hp}} |
| * '''Low Profile:''' 10-29f (avoids most projectiles) | | * '''Low Profile:''' 10-29f (avoids most projectiles) |
| * Punish Counter: HKD +29~38 | | * {{clr|PC|Punish Counter}}: HKD +29~38 |
| <br> | | <br> |
| A very long range low-hitting slide that knocks down. Excellent tool against fireballs if Blanka is spaced out far enough to reach his low-profile frames without running into the projectile. The slow startup can make it hard to react to faster projectiles like Sonic Boom in this way, so it must be used a bit pre-emptively. It is very unsafe on block and can usually be punished even at max range. | | A very long range low-hitting slide that knocks down. Excellent tool against fireballs if Blanka is spaced out far enough to reach his low-profile frames without running into the projectile. The slow startup can make it hard to react to faster projectiles like Sonic Boom in this way, so it must be used a bit pre-emptively. It is very unsafe on block and can usually be punished even at max range. |
|
| |
|
| When combined with {{clr|4|Drive Rush}}, {{clr|H|3HP}} becomes a powerful approach tool. It can be made much safer on block (often unpunishable due to pushback), and the screen freeze can give time to react to a projectile's startup to initiate the slide. The forward momentum of {{clr|4|Drive Rush}} will allow it to reach from a much greater distance than usual. | | When combined with {{clr|DR|Drive Rush}}, {{clr|H|3HP}} becomes a powerful approach tool. It can be made much safer on block (often unpunishable due to pushback), and the screen freeze can give time to react to a projectile's startup to initiate the slide. The forward momentum of {{clr|DR|Drive Rush}} will allow it to reach from a much greater distance than usual. |
|
| |
|
| Has naturally high juggle potential, making it useful as a situational combo ender that leaves Blanka close to the opponent. | | Has naturally high juggle potential, making it useful as a situational combo ender that leaves Blanka close to the opponent. |
| Line 489: |
Line 491: |
| | title = Forward Throw | | | title = Forward Throw |
| | subtitle = | | | subtitle = |
| | input = LPLK | | | input = {{Classic_sf6}} LPLK<br>{{Modern_sf6}} LM |
| | images = | | | images = |
| {{MoveDataCargoImage|imageHeight=210px|blanka_lplk|caption=}} | | {{MoveDataCargoImage|imageHeight=210px|blanka_lplk|caption=}} |
| Line 496: |
Line 498: |
| | info = | | | info = |
| {{AttackDataCargo-SF6/Query|blanka_lplk}} | | {{AttackDataCargo-SF6/Query|blanka_lplk}} |
| * Punish Counter: HKD +30 | | * {{clr|PC|Punish Counter}}: HKD +30 |
| * Applies 20% immediate damage scaling when comboed into (e.g. after Crumple) | | * Applies 20% immediate damage scaling when comboed into (e.g. after Crumple) |
| * Applies 20% damage scaling to 3rd hit of combo after juggling into Blanka-chan (in addition to the doll's 2-hit combo scaling) | | * Applies 20% damage scaling to 3rd hit of combo after juggling into Blanka-chan (in addition to the doll's 2-hit combo scaling) |
| Line 507: |
Line 509: |
| Throw into Forward Hop (6KKK) is {{sf6-adv|P|+3}} for an auto-timed setup, but does not allow Blanka to walk back to bait the opponent's throw tech. Forward Hop also allows for a meaty strike after a midscreen Back Rise, but requires walking an additional ~6f to get back into throw range. | | Throw into Forward Hop (6KKK) is {{sf6-adv|P|+3}} for an auto-timed setup, but does not allow Blanka to walk back to bait the opponent's throw tech. Forward Hop also allows for a meaty strike after a midscreen Back Rise, but requires walking an additional ~6f to get back into throw range. |
|
| |
|
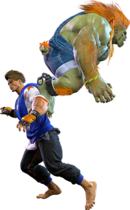
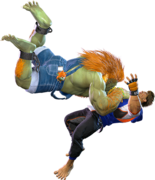
| Juggling into a Blanka-chan doll after a forward throw is possible, but requires a fairly precise setup due to the long throw animation. The most common method is to throw a {{clr|L|LP Blanka-chan}} from long range, dash forward into {{clr|10|214PP}} to activate it, then quickly advance forward and throw the opponent. The opponent can only be juggled if they make contact with Blanka-chan right before they hit the ground. The follow-up juggle will be a bit weaker due to the extra damage scaling from a throw starter, but can still lead to great damage when spending resources. | | Juggling into a Blanka-chan doll after a forward throw is possible, but requires a fairly precise setup due to the long throw animation. The most common method is to throw a {{clr|L|LP Blanka-chan}} from long range, dash forward into {{clr|OD|214PP}} to activate it, then quickly advance forward and throw the opponent. The opponent can only be juggled if they make contact with Blanka-chan right before they hit the ground. The follow-up juggle will be a bit weaker due to the extra damage scaling from a throw starter, but can still lead to great damage when spending resources. |
| }} | | }} |
|
| |
|
| Line 514: |
Line 516: |
| | title = Back Throw | | | title = Back Throw |
| | subtitle = | | | subtitle = |
| | input = 4LPLK | | | input = {{Classic_sf6}} 4LPLK<br>{{Modern_sf6}} 4LM |
| | images = | | | images = |
| {{MoveDataCargoImage|imageHeight=210px|blanka_4lplk|caption=}} | | {{MoveDataCargoImage|imageHeight=210px|blanka_4lplk|caption=}} |
| Line 522: |
Line 524: |
| {{AttackDataCargo-SF6/Query|blanka_4lplk}} | | {{AttackDataCargo-SF6/Query|blanka_4lplk}} |
| * Side switch | | * Side switch |
| * Punish Counter: HKD +27 | | * {{clr|PC|Punish Counter}}: HKD +27 |
| * Applies 20% immediate damage scaling when comboed into (e.g. after Crumple) | | * Applies 20% immediate damage scaling when comboed into (e.g. after Crumple) |
| <br> | | <br> |
| After throwing the opponent back into the corner, Blanka is {{sf6-adv|VP|+8}} after a forward dash. This allows him to pressure with {{clr|M|4MK}}, but leaves him too far to throw the opponent's wakeup 4f buttons (except against Blanka, E. Honda, and Zangief). Spending 1 bar on {{clr|4|Drive Rush}} allows stronger oki while allowing Blanka to bait a reversal if he doesn't commit to an attack. | | After throwing the opponent back into the corner, Blanka is {{sf6-adv|VP|+8}} after a forward dash. This allows him to pressure with {{clr|M|4MK}}, but leaves him too far to throw the opponent's wakeup 4f buttons (except against Blanka, E. Honda, and Zangief). Spending 1 bar on {{clr|DR|Drive Rush}} allows stronger oki while allowing Blanka to bait a reversal if he doesn't commit to an attack. |
|
| |
|
| Midscreen, his {{clr|4|Drive Rush}} momentum doesn't carry him far enough to get any follow-up pressure. | | Midscreen, his {{clr|DR|Drive Rush}} momentum doesn't carry him far enough to get any follow-up pressure. |
| }} | | }} |
|
| |
|
| Line 534: |
Line 536: |
| | title = Air Throw | | | title = Air Throw |
| | subtitle = | | | subtitle = |
| | input = LPLK (air) | | | input = {{Classic_sf6}} LPLK (air)<br>{{Modern_sf6}} LM (air) |
| | images = | | | images = |
| {{MoveDataCargoImage|imageHeight=180px|blanka_jlplk|caption=}} | | {{MoveDataCargoImage|imageHeight=180px|blanka_jlplk|caption=}} |
| Line 541: |
Line 543: |
| | info = | | | info = |
| {{AttackDataCargo-SF6/Query|blanka_jlplk}} | | {{AttackDataCargo-SF6/Query|blanka_jlplk}} |
| * Punish Counter: HKD +22 | | * {{clr|PC|Punish Counter}}: HKD +22 |
| <br> | | <br> |
| Solid air-to-air option against close jumps. Can also be used out of Coward Crouch ~ Raid Jump if you read the opponent's jump. Does not allow for throw oki, but Blanka can {{clr|4|Drive Rush}} into a meaty strike to set up a tick throw scenario. | | Solid air-to-air option against close jumps. Can also be used out of Coward Crouch ~ Raid Jump if you read the opponent's jump. Does not allow for throw oki, but Blanka can {{clr|DR|Drive Rush}} into a meaty strike to set up a tick throw scenario. |
| }} | | }} |
| <br> | | <br> |
| Line 562: |
Line 564: |
| * On Hit/PC: Applies 20% damage scaling to next hit when beginning a combo | | * On Hit/PC: Applies 20% damage scaling to next hit when beginning a combo |
| * On Block: Applies 20% scaling multiplier to all follow-up hits after Wall Splat; the next attack can incur additional Starter Scaling | | * On Block: Applies 20% scaling multiplier to all follow-up hits after Wall Splat; the next attack can incur additional Starter Scaling |
| * Combos when canceled from {{clr|H|5HP}} or Punish Counter {{clr|M|4MK}}/{{clr|M|5MK}}/{{clr|M|2MK}} (no corner wallsplat; useful for depleting Drive gauge, especially after Perfect Parry) | | * Combos when canceled from {{clr|H|5HP}} or {{clr|PC|Punish Counter}} {{clr|M|4MK}}/{{clr|M|5MK}}/{{clr|M|2MK}} (no corner wallsplat; useful for depleting Drive gauge, especially after Perfect Parry) |
| * A blocked {{clr|4|DI}} can combo into another {{clr|4|DI}} if opponent is not fully cornered (Stuns if opponent has less than 1.5 Drive bars) | | * A blocked {{clr|DR|DI}} can combo into another {{clr|DR|DI}} if opponent is not fully cornered (Stuns if opponent has less than 1.5 Drive bars) |
| ** This happens because a blocked {{clr|4|DI}} is not considered a "hit" for combo purposes | | ** This happens because a blocked {{clr|DR|DI}} is not considered a "hit" for combo purposes |
| ** Causes both the 20% Starter and 20% Multiplier scaling to apply to the follow-up combo | | ** Causes both the 20% Starter and 20% Multiplier scaling to apply to the follow-up combo |
| See [[Street_Fighter_6/Gauges#Drive_Impact|Drive Impact]] on the Gauges page for more details. | | See [[Street_Fighter_6/Gauges#Drive_Impact|Drive Impact]] on the Gauges page for more details. |
| Line 579: |
Line 581: |
| * '''Marisa (214K)''', frame 3 armor | | * '''Marisa (214K)''', frame 3 armor |
| * '''Zangief ({{clr|H|5[HP]}})''', frame 4 armor | | * '''Zangief ({{clr|H|5[HP]}})''', frame 4 armor |
| It's important to use a blockstring that cannot be absorbed by their armor/counter moves. Ideally, the string should also not be a true combo, or it will cause a Lock and prevent Stun.<br>{{clr|10|*}} Denotes a move that causes Lock on Counter-hit, allowing the opponent to escape a Stun by mashing on wakeup. | | |
| * {{clr|H|5HP}}{{clr|10|*}} > {{clr|4|DI}}: 2f blockstring gap prevents opponent from absorbing the hit | | It's important to use a blockstring that cannot be absorbed by their armor/counter moves. Ideally, the string should also not be a true combo, or it will cause a Lock and prevent Stun.<br>{{clr|OD|*}} Denotes a move that causes Lock on {{clr|PC|Counter-hit}}, allowing the opponent to escape a Stun by mashing on wakeup. |
| * {{clr|M|4MK}}{{clr|10|*}} > {{clr|4|DI}}: 3f blockstring gap will work vs. Zangief {{clr|H|5[HP]}} | | * {{clr|H|5HP}}{{clr|OD|*}} > {{clr|DR|DI}}: 2f blockstring gap prevents opponent from absorbing the hit |
| * {{clr|4|DR~}}{{clr|M|5MK}}{{clr|10|*}} > {{clr|4|DI}}: 1f blockstring gap prevents opponent from absorbing the hit | | * {{clr|M|4MK}}{{clr|OD|*}} > {{clr|DR|DI}}: 3f blockstring gap will work vs. Zangief {{clr|H|5[HP]}} |
| * {{clr|4|DR~}}{{clr|M|2MK}}{{clr|10|*}} > {{clr|4|DI}}: 3f blockstring gap will work vs. Zangief {{clr|H|5[HP]}} | | * {{clr|DR|DR~}}{{clr|M|5MK}}{{clr|OD|*}} > {{clr|DR|DI}}: 1f blockstring gap prevents opponent from absorbing the hit |
| * {{clr|4|DR~}}{{clr|M|2MP}} > {{clr|4|DI}}: 3f blockstring gap will work vs. Zangief {{clr|H|5[HP]}} | | * {{clr|DR|DR~}}{{clr|M|2MK}}{{clr|OD|*}} > {{clr|DR|DI}}: 3f blockstring gap will work vs. Zangief {{clr|H|5[HP]}} |
| | * {{clr|DR|DR~}}{{clr|M|2MP}} > {{clr|DR|DI}}: 3f blockstring gap will work vs. Zangief {{clr|H|5[HP]}} |
| }} | | }} |
|
| |
|
| Line 598: |
Line 601: |
| | info = | | | info = |
| {{AttackDataCargo-SF6/Query|blanka_6hphk}} | | {{AttackDataCargo-SF6/Query|blanka_6hphk}} |
| * '''Full Invuln:''' 1-22f; Armor Break | | * '''Full Invuln:''' 1-22f; '''Range:''' 1.91; Armor Break |
| * 5f extra recovery on hit; 4f screen freeze during startup | | * 5f extra recovery on hit; 4f screen freeze during startup |
| {{AttackDataCargo-SF6/Query|blanka_6hphk_recovery}} | | {{AttackDataCargo-SF6/Query|blanka_6hphk_recovery}} |
| * '''Full Invuln:''' 1-20f; Armor Break | | * '''Full Invuln:''' 1-20f; '''Range:''' 1.91; Armor Break |
| * 5f extra recovery on hit; no screen freeze | | * 5f extra recovery on hit; no screen freeze |
| See [[Street_Fighter_6/Gauges#Drive_Reversal|Drive Reversal]] on the Gauges page for more details. | | See [[Street_Fighter_6/Gauges#Drive_Reversal|Drive Reversal]] on the Gauges page for more details. |
| Line 610: |
Line 613: |
| | title = Drive Parry | | | title = Drive Parry |
| | subtitle = | | | subtitle = |
| | input = MPMK | | | input = {{Classic_sf6}} MPMK<br>{{Modern_sf6}} DP |
| | images = | | | images = |
| {{MoveDataCargoImage|imageHeight=180px|blanka_mpmk|caption=}} | | {{MoveDataCargoImage|imageHeight=180px|blanka_mpmk|caption=}} |
| Line 640: |
Line 643: |
| * 3-bar version performed on hit/block from a cancelable normal | | * 3-bar version performed on hit/block from a cancelable normal |
| ** Can also be performed from whiffed cancelable light normals | | ** Can also be performed from whiffed cancelable light normals |
| | |
| See [[Street_Fighter_6/Gauges#Drive_Rush|Drive Rush]] on the Gauges page for more details. See Strategy page for [[Street_Fighter_6/Blanka/Strategy#Drive_Rush|Blockstring Gaps and Combo Routes]] | | See [[Street_Fighter_6/Gauges#Drive_Rush|Drive Rush]] on the Gauges page for more details. See Strategy page for [[Street_Fighter_6/Blanka/Strategy#Drive_Rush|Blockstring Gaps and Combo Routes]] |
| * Startup refers to minimum time before an attack can cancel the {{clr|4|Drive Rush}} animation | | * Startup refers to minimum time before an attack can cancel the {{clr|DR|Drive Rush}} animation |
| * The first 15 recovery frames are cancelable into any attack | | * The first 15 recovery frames are cancelable into any attack |
| * The final 22 recovery frames are cancelable into any attack or movement option or blocking (except Parry) | | * The final 22 recovery frames are cancelable into any attack or movement option or blocking (except Parry) |
| * Only Normal and Command Normal attacks are enhanced with '''+4''' frame advantage and improved juggle properties | | * Only Normal and Command Normal attacks are enhanced with '''+4''' frame advantage and improved juggle properties |
| * Applies 15% damage scaling multiplier to any follow-up hits when used mid-combo | | * Applies 15% damage scaling multiplier to any follow-up hits when used mid-combo |
| ** Only applies scaling once per combo; does not apply when a {{clr|4|Drive Rush}} enhanced attack starts the combo | | ** Only applies scaling once per combo; does not apply when a {{clr|DR|Drive Rush}} enhanced attack starts the combo |
|
| |
|
| Distance: | | Distance: |
| * 0.476 (min, cancel into immediate Throw) | | * 0.476 (min, cancel into immediate Throw) |
| * 2.082 (min, earliest blocking/movement frame) | | * 2.082 (min, earliest blocking/movement frame) |
| * 2.867 (max, final {{clr|4|DR}} frame) | | * 2.867 (max, final {{clr|DR|DR}} frame) |
| }} | | }} |
| <br> | | <br> |
| Line 661: |
Line 665: |
| | title = Coward Crouch | | | title = Coward Crouch |
| | subtitle = | | | subtitle = |
| | input = 2PP | | | input = {{Classic_sf6}} 2PP<br>{{Modern_sf6}} 2MH |
| | images = | | | images = |
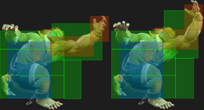
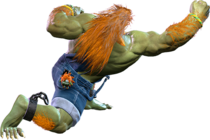
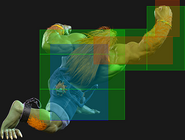
| {{MoveDataCargoImage|imageHeight=120px|blanka_2pp|caption=}} | | {{MoveDataCargoImage|imageHeight=120px|blanka_2pp|caption=}} |
| ----
| |
| {{MoveDataCargoImage|imageHeight=180px|blanka_2pp_p|caption='' Wild Lift ''}}
| |
| ----
| |
| {{MoveDataCargoImage|imageHeight=220px|blanka_2pp_k|caption='' Raid Jump ''}}
| |
| | hitboxes = | | | hitboxes = |
| {{MoveDataCargoImage|hitbox=yes|imageHeight=120px|blanka_2pp|caption=}} | | {{MoveDataCargoImage|hitbox=yes|imageHeight=120px|blanka_2pp|caption=}} |
| ----
| |
| {{MoveDataCargoImage|hitbox=yes|imageHeight=140px|blanka_2pp_p|caption='' Wild Lift ''}}
| |
| ----
| |
| {{MoveDataCargoImage|hitbox=yes|imageHeight=160px|blanka_2pp_k|caption='' Raid Jump ''}}
| |
| | info = | | | info = |
| {{AttackDataCargo-SF6/Query|blanka_2pp}} | | {{AttackDataCargo-SF6/Query|blanka_2pp}} |
| Line 682: |
Line 678: |
| ** Surprise Hop has 3f extra recovery when performed out of Coward Crouch | | ** Surprise Hop has 3f extra recovery when performed out of Coward Crouch |
| * Can tap Up to exit stance from frame 20~ | | * Can tap Up to exit stance from frame 20~ |
| * Counter-hit state for entire move duration | | * {{clr|PC|Counter-hit}} state for entire move duration |
|
| |
|
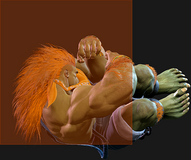
| A crouching stance that can be canceled into from normals, most notably 5HP. Blanka can follow this up with a launching attack, a shallow jump, a forward or back hop, or by simply exiting the stance. The low profile frames are good at ducking under projectiles and {{clr|4|Drive Impact}}, and the variable follow-up timing allows Blanka to act unpredictably, making it a bit harder for the opponent to punish the stance recovery. | | A crouching stance that can be canceled into from normals, most notably {{clr|H|5HP}}. Blanka can follow this up with a launching attack, a shallow jump, a forward or back hop, or by simply exiting the stance. The low profile frames are good at ducking under projectiles and {{clr|DR|Drive Impact}}, and the variable follow-up timing allows Blanka to act unpredictably, making it a bit harder for the opponent to punish the stance recovery. |
| | }} |
| | |
| | ======<font style="visibility:hidden; float:right">Wild Lift (2PP~P)</font>====== |
| | {{MoveDataCargo |
| | | title = Wild Lift |
| | | subtitle = |
| | | input = {{Classic_sf6}} 2PP~P<br>{{Modern_sf6}} 2MH~L |
| | | images = |
| | {{MoveDataCargoImage|imageHeight=180px|blanka_2pp_p|caption=}} |
| | | hitboxes = |
| | {{MoveDataCargoImage|hitbox=yes|imageHeight=140px|blanka_2pp_p|caption=}} |
| | | info = |
| {{AttackDataCargo-SF6/Query|blanka_2pp_p}} | | {{AttackDataCargo-SF6/Query|blanka_2pp_p}} |
| * Puts opponents into {{sf6-jug|limited juggle}} state | | * Puts opponents into {{sf6-jug|limited juggle}} state |
|
| |
|
| An upward swipe that launches the opponent on hit, but is very unsafe on block. The final 3 active frames have a very disjointed vertical hitbox, allowing it to anti-air at some ranges if the opponent jumps in response to the crouch animation. Combos naturally from 5HP, but can also work after Counter-hit 4MK or Punish Counter/{{clr|4|Drive Rush}} 5MK and 2MK. Blanka can maintain charge while inputting Wild Lift, allowing for easy juggles like Vertical Roll. | | An upward swipe that launches the opponent on hit, but is very unsafe on block. The final 3 active frames have a very disjointed vertical hitbox, allowing it to anti-air at some ranges if the opponent jumps in response to the crouch animation. Combos naturally from {{clr|H|5HP}}, but can also work after {{clr|PC|Counter-hit}} {{clr|M|4MK}} or {{clr|PC|Punish Counter}}/{{clr|DR|Drive Rush}} {{clr|M|5MK}} and {{clr|M|2MK}}. Blanka can maintain charge while inputting Wild Lift, allowing for easy juggles like Vertical Roll. |
| | }} |
| | |
| | ======<font style="visibility:hidden; float:right">Raid Jump (2PP~K)</font>====== |
| | {{MoveDataCargo |
| | | title = Raid Jump |
| | | subtitle = |
| | | input = {{Classic_sf6}} 2PP~K<br>{{Modern_sf6}} 2MH~M/H |
| | | images = |
| | {{MoveDataCargoImage|imageHeight=220px|blanka_2pp_k|caption=}} |
| | | hitboxes = |
| | {{MoveDataCargoImage|hitbox=yes|imageHeight=160px|blanka_2pp_k|caption=}} |
| | | info = |
| {{AttackDataCargo-SF6/Query|blanka_2pp_k}} | | {{AttackDataCargo-SF6/Query|blanka_2pp_k}} |
| * '''Upper Body Projectile Invuln:''' 1-9f | | * '''Upper Body Projectile Invuln:''' 1-9f |
| * '''Airborne''' 9-43f; Counter-hit state for entire duration (but no Forced Knockdown) | | * '''Airborne''' 9-43f; {{clr|PC|Counter-hit}} state for entire duration (but no Forced Knockdown) |
| * 12f landing recovery if no air attack is used | | * 12f landing recovery if no air attack is used |
|
| |
|
| Line 699: |
Line 719: |
| }} | | }} |
|
| |
|
| =====<font style="visibility:hidden; float:right">Surprise Hop (6KKK/4KKK)</font>===== | | =====<font style="visibility:hidden; float:right">Surprise Hop (6KKK or 4KKK)</font>===== |
| {{MoveDataCargo | | {{MoveDataCargo |
| | title = Surprise Hop | | | title = Surprise Hop |
| | subtitle = | | | subtitle = |
| | input = 6KKK/4KKK | | | input = {{Classic_sf6}} 6KKK or 4KKK<br>{{Modern_sf6}} 6LMH or 4LMH |
| | images = | | | images = |
| {{MoveDataCargoImage|imageHeight=200px|blanka_6kkk|caption=}} | | {{MoveDataCargoImage|imageHeight=200px|blanka_6kkk|caption=}} |
| Line 724: |
Line 744: |
| A hop that can be input in either direction. Can be canceled into like a special move, allowing Blanka to mix up with Blanka-chan dolls or keep himself safe. He can also hop to exit Coward Crouch, making it harder to punish reliably. The hop can be input while crouching with 3KKK or 1KKK, allowing Blanka to maintain down charge for an immediate Vertical Roll. | | A hop that can be input in either direction. Can be canceled into like a special move, allowing Blanka to mix up with Blanka-chan dolls or keep himself safe. He can also hop to exit Coward Crouch, making it harder to punish reliably. The hop can be input while crouching with 3KKK or 1KKK, allowing Blanka to maintain down charge for an immediate Vertical Roll. |
|
| |
|
| Forward Hop is useful in Blanka's throw loops, setting up an auto-timed +3 situation in the corner while keeping him in range for a meaty normal midscreen. The brief throw invincible period allows Blanka to punish an attempted throw tech when canceled from a light normal (unless significantly delayed); afterwards, Blanka has enough time to punish with 5HK, 5HP > 2PP~P for big damage. This is a decent option to mix with standard tick throws, but should be used sparingly as it is very unsafe. | | Forward Hop is useful in Blanka's throw loops, setting up an auto-timed {{sf6-adv|P|+3}} situation in the corner while keeping him in range for a meaty normal midscreen. The brief throw invincible period allows Blanka to punish an attempted throw tech when canceled from a light normal (unless significantly delayed); afterwards, Blanka has enough time to punish with {{clr|H|5HK}}, {{clr|H|5HP}} > Wild Lift for big damage. This is a decent option to mix with standard tick throws, but should be used sparingly as it is very unsafe. |
| }} | | }} |
|
| |
|
| Line 730: |
Line 750: |
| {{MoveDataCargo | | {{MoveDataCargo |
| | title = Electric Thunder | | | title = Electric Thunder |
| | subtitle = | | | subtitle = Electricity |
| | input = 214P | | | input = {{Classic_sf6}} 214P<br>{{Modern_sf6}} 214X or 5S |
| | images = | | | images = |
| {{MoveDataCargoImage|imageHeight=210px|blanka_214p|caption=}} | | {{MoveDataCargoImage|imageHeight=210px|blanka_214p|caption=}} |
| Line 749: |
Line 769: |
| * Strike hitbox with forward movement during startup; 2f extra recovery on whiff | | * Strike hitbox with forward movement during startup; 2f extra recovery on whiff |
| * Can hold button to extend active frames on whiff only | | * Can hold button to extend active frames on whiff only |
| * Activates Blanka-chan doll (OD 3-hit version) | | * Activates Blanka-chan doll ({{clr|OD|OD}} 3-hit version) |
| * '''Cancel Hitconfirm Window:''' 50f hit / 22f block (Super) | | * '''Cancel Hitconfirm Window:''' 50f hit / 22f block (Super) |
| * '''{{clr|10|SA2}} cancel advantage:''' KD +54(60) hit / {{sf6-adv|VP|+9}} block | | * '''{{clr|SA|SA2}} cancel advantage:''' KD +54(60) hit / {{sf6-adv|VP|+9}} block |
| <br> | | <br> |
| Electric Thunder is Blanka's primary hitconfirm ender when charge is not available, leaving him safe on block with moderate pushback. The range is quite short, causing the meterless version to whiff in longer range cancels; holding the button down to extend the active frames can mess with the opponent's punish attempt, but this is a risky habit to get into as it opens the door for even stronger punishes against Blanka like a {{clr|4|Drive Impact}}. On hit, a [[#Surprise_Hop_(6KKK/4KKK)|Forward Hop]] will close the gap for oki. | | Electric Thunder is Blanka's primary hitconfirm ender when charge is not available, leaving him safe on block with moderate pushback. The range is quite short, causing the meterless version to whiff in longer range cancels; holding the button down to extend the active frames can mess with the opponent's punish attempt, but this is a risky habit to get into as it opens the door for even stronger punishes against Blanka like a {{clr|DR|Drive Impact}}. On hit, a [[#Surprise Hop (6KKK or 4KKK)|Forward Hop]] will close the gap for oki. |
|
| |
|
| The OD version is much more reliable in combos and blockstrings due to its forward movement. It gives excellent frame advantage on block for extended pressure, though the opponent is left slightly out of throw range. On hit, it transitions to a launching follow-up attack that can lead to further juggles. Canceling into [[#Level_2_Super_(214214P)|SA2]] leads to powerful combos and setups on hit while granting enormous block advantage to begin mounting his offense. Activating a Blanka-chan doll with OD Electricity is one of Blanka's most powerful offensive tools, leading to extended mixups and juggles that are difficult to escape. | | The {{clr|OD|OD}} version is much more reliable in combos and blockstrings due to its forward movement. It gives excellent frame advantage on block for extended pressure, though the opponent is left slightly out of throw range. On hit, it transitions to a launching follow-up attack that can lead to further juggles. Canceling into [[#Level_2_Super_(214214P)|{{clr|SA|SA2}}]] leads to powerful combos and setups on hit while granting enormous block advantage to begin mounting his offense. Activating a Blanka-chan doll with {{clr|OD|OD Electricity}} is one of Blanka's most powerful offensive tools, leading to extended mixups and juggles that are difficult to escape. |
|
| |
|
| Both versions of Electricity receive a slight damage/chip boost during [[#Level_2_Super_(214214P)|SA2 (Lightning Beast)]], but no other changes are applied during the install. | | Both versions of Electricity receive a slight damage/chip boost during [[#Level_2_Super_(214214P)|{{clr|SA|SA2 (Lightning Beast)}}]], but no other changes are applied during the install. |
| }} | | }} |
|
| |
|
| Line 764: |
Line 784: |
| {{MoveDataCargo | | {{MoveDataCargo |
| | title = Rolling Attack | | | title = Rolling Attack |
| | subtitle = | | | subtitle = Blanka Ball |
| | input = [4]6P | | | input = {{Classic_sf6}} [4]6P<br>{{Modern_sf6}} [4]6X or [4]S (M) |
| | images = | | | images = |
| {{MoveDataCargoImage|imageHeight=170px|blanka_46lp|caption=}} | | {{MoveDataCargoImage|imageHeight=170px|blanka_46lp|caption=}} |
| Line 776: |
Line 796: |
| {{AttackDataCargo-SF6/Query|blanka_46mp}} | | {{AttackDataCargo-SF6/Query|blanka_46mp}} |
| * 40f charge time; '''Airborne''' 12-33f ({{FKD}} state) | | * 40f charge time; '''Airborne''' 12-33f ({{FKD}} state) |
| * Punish Counter: KD +66 Tumble / {{sf6-jug|limited juggle}} OTG state | | * {{clr|PC|Punish Counter}}: KD +66 Tumble / {{sf6-jug|limited juggle}} OTG state |
| * '''Cancel Hitconfirm Window:''' 22f (Super); only the first 11 active frames are cancelable | | * '''Cancel Hitconfirm Window:''' 22f (Super); only the first 11 active frames are cancelable |
| {{AttackDataCargo-SF6/Query|blanka_46hp}} | | {{AttackDataCargo-SF6/Query|blanka_46hp}} |
| * 40f charge time; '''Airborne''' 20-43f ({{FKD}} state) | | * 40f charge time; '''Airborne''' 20-43f ({{FKD}} state) |
| * Punish Counter: KD +86 Tumble / {{sf6-jug|limited juggle}} OTG state | | * {{clr|PC|Punish Counter}}: KD +86 Tumble / {{sf6-jug|limited juggle}} OTG state |
| * '''Cancel Hitconfirm Window:''' 22f (Super); only the first 6 active frames are cancelable | | * '''Cancel Hitconfirm Window:''' 22f (Super); only the first 6 active frames are cancelable |
| * Applies 20% damage scaling to next hit when beginning a combo (100/80/70...) | | * Applies 20% damage scaling to next hit when beginning a combo (100/80/70...) |
| Line 787: |
Line 807: |
| * Side switches on hit unless opponent is near the corner | | * Side switches on hit unless opponent is near the corner |
| * '''Cancel Hitconfirm Window:''' 19f (Super); only the first 2 active frames are cancelable | | * '''Cancel Hitconfirm Window:''' 19f (Super); only the first 2 active frames are cancelable |
| * '''{{clr|10|SA2}} cancel advantage:''' KD +74 hit / {{sf6-adv|VP|+9}} block | | * '''{{clr|SA|SA2}} cancel advantage:''' KD +74 hit / {{sf6-adv|VP|+9}} block |
| * Applies 20% damage scaling to next hit when beginning a combo (100/80/70...) | | * Applies 20% damage scaling to next hit when beginning a combo (100/80/70...) |
| <br> | | <br> |
| The infamous "Blanka Ball" that lets him control much of the horizontal space, especially against characters without strong projectiles. Heavier versions have slower startup but travel farther across the screen. Each version has a particular use that is essential to Blanka's overall gameplan. | | The infamous "Blanka Ball" that lets him control much of the horizontal space, especially against characters without strong projectiles. Heavier versions have slower startup but travel farther across the screen. Each version has a particular use that is essential to Blanka's overall gameplan. |
|
| |
|
| LP Blanka Ball is primarily used to intentionally stop short of the opponent, whiffing with quick landing recovery. Many opponents will try to parry frequently in neutral against Blanka to avoid losing Drive gauge on block or to punish the safer versions of Blanka Ball with a Perfect Parry; mixing in the occasional LP Ball lets him land and immediately throw to punish this. It's important not to accidentally use this version at a range where it can be blocked, as it's horribly unsafe. If the opponent expects a whiffed LP Ball, they can stuff it with a quick jab punish on reaction. | | {{clr|L|LP Roll}} is primarily used to intentionally stop short of the opponent, whiffing with quick landing recovery. Many opponents will try to parry frequently in neutral against Blanka to avoid losing Drive gauge on block or to punish the safer versions of Blanka Ball with a Perfect Parry; mixing in the occasional {{clr|L|LP Roll}} lets him land and immediately throw to punish this. It's important not to accidentally use this version at a range where it can be blocked, as it's horribly unsafe. If the opponent expects a whiffed {{clr|L|LP Roll}}, they can stuff it with a quick jab punish on reaction. |
|
| |
|
| MP Blanka Ball is the most common version in combos with its good combination of speed and distance, hitting much more consistently than [[#Electric_Thunder_(214P)|Electric Thunder]] from ranged pokes. In some matchups it can also be used as a decent whiff punish tool if Blanka already has charge, though it's quite risky to throw out if the opponent might block it. A successful Punish Counter can lead to a juggled {{clr|10|SA1}} in the corner, but in most cases the reward is just better oki and corner carry. | | {{clr|M|MP Roll}} is the most common version in combos with its good combination of speed and distance, hitting much more consistently than [[#Electric_Thunder_(214P)|Electric Thunder]] from ranged pokes. In some matchups it can also be used as a decent whiff punish tool if Blanka already has charge, though it's quite risky to throw out if the opponent might block it. A successful {{clr|PC|Punish Counter}} can lead to a juggled {{clr|SA|SA1}} in the corner, but in most cases the reward is just better oki and corner carry. |
|
| |
|
| HP Blanka Ball has much slower startup than the other versions, but travels full screen and is much safer on block due to the high pushback. In almost all cases, a Perfect Parry is required to punish it effectively. This version is great for harassing the opponent's Drive gauge, chipping away a full bar every time they block. The threat of HP Blanka Ball is what makes whiffed LP Ball so strong. The slow startup does make it a little easier to Perfect Parry or to interrupt with an anti-air invincible move, and makes it more likely for Blanka to run into a projectile before it can connect with the opponent. If it manages to land as a Punish Counter, the tumble state allows Blanka to combo into {{clr|4|DR~}}{{clr|H|3HP}} from anywhere on the screen. | | {{clr|H|HP Roll}} has much slower startup than the other versions, but travels full screen and is much safer on block due to the high pushback. In almost all cases, a Perfect Parry is required to punish it effectively. This version is great for harassing the opponent's Drive gauge, chipping away a full bar every time they block. The threat of {{clr|H|HP Roll}} is what makes whiffed {{clr|L|LP Roll}} so strong. The slow startup does make it a little easier to Perfect Parry or to interrupt with an anti-air invincible move, and makes it more likely for Blanka to run into a projectile before it can connect with the opponent. If it manages to land as a {{clr|PC|Punish Counter}}, the tumble state allows Blanka to combo into {{clr|DR|DR~}}{{clr|H|3HP}} from anywhere on the screen. |
|
| |
|
| Notable punishes for HP Blanka Ball without Perfect Parry include: | | Notable punishes for {{clr|H|HP Roll}} without Perfect Parry include: |
| * Cammy {{clr|10|SA3}} | | * Cammy {{clr|SA|SA3}} |
| * Blanka {{clr|10|SA1}} (during {{clr|10|SA2}} install only) | | * Blanka {{clr|SA|SA1}} (during {{clr|SA|SA2}} install only) |
| * Guile {{clr|10|SA1}} (only if blocked from close range) | | * Guile {{clr|SA|SA1}} (only if blocked from close range) |
|
| |
|
| OD Blanka Ball has the same full screen presence of the HP version, while being faster and even safer on block. Blanka can be punished if the opponent Perfect Parries, with {{clr|4|Drive Rush}} making it much easier to chase him down as he lands. On hit, Blanka switches sides and launches the opponent upward for a follow-up juggle like [2]8K or j.MP > j.[4]6P. | | {{clr|OD|OD Roll}} has the same full screen presence of the {{clr|H|HP}} version, while being faster and even safer on block. Blanka can be punished if the opponent Perfect Parries, with {{clr|DR|Drive Rush}} making it much easier to chase him down as he lands. On hit, Blanka switches sides and launches the opponent upward for a follow-up juggle like Vertical Roll or {{clr|M|j.MP}} > Air Ball. |
| }} | | }} |
| |-| | | |-| |
| Line 809: |
Line 829: |
| {{MoveDataCargo | | {{MoveDataCargo |
| | title = Rolling Attack | | | title = Rolling Attack |
| | subtitle = SA2 Install | | | subtitle = Blanka Ball (SA2) |
| | input = [4]6P | | | input = {{Classic_sf6}} [4]6P<br>{{Modern_sf6}} [4]6X or [4]S (M) |
| | images = | | | images = |
| {{MoveDataCargoImage|imageHeight=170px|blanka_46lp|caption=}} | | {{MoveDataCargoImage|imageHeight=170px|blanka_46lp|caption=}} |
| Line 820: |
Line 840: |
| * '''Airborne''' 10-23f ({{FKD}} state) | | * '''Airborne''' 10-23f ({{FKD}} state) |
| * Activates Blanka-chan doll (meterless 1-hit version) | | * Activates Blanka-chan doll (meterless 1-hit version) |
| * '''Cancel Hitconfirm Window:''' 58f hit / 56f block (Rolling Cannon) | | * '''Cancel Hitconfirm Window:''' 58f hit / 56f block ({{clr|SA|Rolling Cannon}}) |
| * Applies 10% damage scaling to next hit when beginning a combo, or 10% immediate scaling when comboed into | | * Applies 10% damage scaling to next hit when beginning a combo, or 10% immediate scaling when comboed into |
| {{AttackDataCargo-SF6/Query|blanka_46mp_sa2}} | | {{AttackDataCargo-SF6/Query|blanka_46mp_sa2}} |
| * 40f charge time (no charge required if canceled into) | | * 40f charge time (no charge required if canceled into) |
| * '''Airborne''' 12-33f ({{FKD}} state) | | * '''Airborne''' 12-33f ({{FKD}} state) |
| * Punish Counter: KD +66 Tumble / {{sf6-jug|limited juggle}} OTG state | | * {{clr|PC|Punish Counter}}: KD +66 Tumble / {{sf6-jug|limited juggle}} OTG state |
| * Activates Blanka-chan doll (meterless 1-hit version) | | * Activates Blanka-chan doll (meterless 1-hit version) |
| * '''Cancel Hitconfirm Window:''' 58f hit / 56f block (Rolling Cannon) | | * '''Cancel Hitconfirm Window:''' 58f hit / 56f block ({{clr|SA|Rolling Cannon}}) |
| * Applies 10% damage scaling to next hit when beginning a combo, or 10% immediate scaling when comboed into | | * Applies 10% damage scaling to next hit when beginning a combo, or 10% immediate scaling when comboed into |
| {{AttackDataCargo-SF6/Query|blanka_46hp_sa2}} | | {{AttackDataCargo-SF6/Query|blanka_46hp_sa2}} |
| * 40f charge time (no charge required if canceled into) | | * 40f charge time (no charge required if canceled into) |
| * '''Airborne''' 18-43f ({{FKD}} state) | | * '''Airborne''' 18-43f ({{FKD}} state) |
| * Punish Counter: KD +81 Tumble / {{sf6-jug|limited juggle}} OTG state | | * {{clr|PC|Punish Counter}}: KD +81 Tumble / {{sf6-jug|limited juggle}} OTG state |
| * Activates Blanka-chan doll (meterless 1-hit version) | | * Activates Blanka-chan doll (meterless 1-hit version) |
| * '''Cancel Hitconfirm Window:''' 58f hit / 56f block (Rolling Cannon) | | * '''Cancel Hitconfirm Window:''' 58f hit / 56f block ({{clr|SA|Rolling Cannon}}) |
| * Applies 20% damage scaling to next hit when beginning a combo, or 10% immediate scaling when comboed into | | * Applies 20% damage scaling to next hit when beginning a combo, or 10% immediate scaling when comboed into |
| {{AttackDataCargo-SF6/Query|blanka_46pp_sa2}} | | {{AttackDataCargo-SF6/Query|blanka_46pp_sa2}} |
| * 40f charge time (no charge required if canceled into) | | * 40f charge time (no charge required if canceled into) |
| * '''Airborne''' 18-46f ({{FKD}} state) | | * '''Airborne''' 18-46f ({{FKD}} state) |
| * Activates Blanka-chan doll (OD 3-hit version) | | * Activates Blanka-chan doll ({{clr|OD|OD}} 3-hit version) |
| * '''Cancel Hitconfirm Window:''' 42f block (Rolling Cannon) | | * '''Cancel Hitconfirm Window:''' 42f block ({{clr|SA|Rolling Cannon}}) |
| * Applies 20% damage scaling to next hit when beginning a combo (100/80/70...) | | * Applies 20% damage scaling to next hit when beginning a combo (100/80/70...) |
| <br> | | <br> |
| The general usage of Rolling Attack during the {{clr|10|SA2}} install is the same, but there are some key changes. Charge is no longer required when canceling into the move, making combos much more consistent. Each usage of Blanka Ball drains 100f from the 1500f install timer, or about 6.7% of the total time. Electricity is applied during the attack, allowing for the activation of Blanka-chan dolls that can lead to powerful juggles on hit or mixups on block. | | The general usage of Rolling Attack during the {{clr|SA|SA2}} install is the same, but there are some key changes. Charge is no longer required when canceling into the move, making combos much more consistent. Each usage of Blanka Ball drains 100f from the 1500f install timer, or about 6.7% of the total time. Electricity is applied during the attack, allowing for the activation of Blanka-chan dolls that can lead to powerful juggles on hit or mixups on block. |
|
| |
|
| After bouncing off the opponent on hit/block, Blanka can cancel into a Rolling Cannon follow-up (except for the OD version on hit). This allows for extended combos and juggles with plenty of time to confirm on hit. On block, Blanka can use the 3P Rolling Cannon to get frame advantage, or fly backwards to make punishes more difficult. If the opponent crouch blocks after a meterless Blanka Ball, the 3P Rolling Cannon will not form a true blockstring, allowing the opponent to Perfect Parry or interrupt it with an anti-air invincible attack. | | After bouncing off the opponent on hit/block, Blanka can cancel into a {{clr|SA|Rolling Cannon}} follow-up (except for the {{clr|OD|OD}} version on hit). This allows for extended combos and juggles with plenty of time to confirm on hit. On block, Blanka can use the {{clr|SA|3P Rolling Cannon}} to get frame advantage, or fly backwards to make punishes more difficult. If the opponent crouch blocks after a meterless Blanka Ball, the {{clr|SA|3P Rolling Cannon}} will not form a true blockstring, allowing the opponent to Perfect Parry or interrupt it with an anti-air invincible attack. |
|
| |
|
| All versions on block have only 5 frames of landing recovery, much like the standard OD version. This makes the proper punish timing a bit more precise, as an early punish will put Blanka into a juggle state. The LP and MP versions are slightly safer on block and bounce much farther away, limiting the punish options of most characters. The HP version, meanwhile, recovers closer and is 6f worse on block; this makes it much more punishable if not canceled into Rolling Cannon. OD Blanka Ball also recovers closer, but at -7 it is still generally safe. | | All versions on block have only 5 frames of landing recovery, much like the standard {{clr|OD|OD}} version. This makes the proper punish timing a bit more precise, as an early punish will put Blanka into a juggle state. The {{clr|L|LP}} and {{clr|M|MP}} versions are slightly safer on block and bounce much farther away, limiting the punish options of most characters. The {{clr|H|HP}} version, meanwhile, recovers closer and is 6f worse on block; this makes it much more punishable if not canceled into {{clr|SA|Rolling Cannon}}. {{clr|OD|OD Roll}} also recovers closer, but at {{sf6-adv|VM|-7}} it is still generally safe. |
|
| |
|
| After a Punish Counter MP or HP version, the opponent's tumbling OTG state can be followed up anywhere on the screen with a 3P Rolling Cannon or an enhanced {{clr|10|SA1}}. This dramatically increases the damage output on a successful punish starter compared to the non-{{clr|10|SA2}} versions. | | After a {{clr|PC|Punish Counter}} {{clr|M|MP}} or {{clr|H|HP}} version, the opponent's tumbling OTG state can be followed up anywhere on the screen with a {{clr|SA|3P Rolling Cannon}} or an enhanced {{clr|SA|SA1}}. This dramatically increases the damage output on a successful punish starter compared to the non-{{clr|SA|SA2}} versions. |
| }} | | }} |
| </tabber> | | </tabber> |
| Line 857: |
Line 877: |
| {{MoveDataCargo | | {{MoveDataCargo |
| | title = Aerial Rolling Attack | | | title = Aerial Rolling Attack |
| | subtitle = | | | subtitle = Air Ball |
| | input = j.[4]6P | | | input = {{Classic_sf6}} j.[4]6P<br>{{Modern_sf6}} j.[4]6X or j.[4]S (M) |
| | images = | | | images = |
| {{MoveDataCargoImage|imageHeight=200px|blanka_j46p|caption=}} | | {{MoveDataCargoImage|imageHeight=200px|blanka_j46p|caption=}} |
| Line 866: |
Line 886: |
| {{AttackDataCargo-SF6/Query|blanka_j46p}} | | {{AttackDataCargo-SF6/Query|blanka_j46p}} |
| * 40f charge time | | * 40f charge time |
| * Can hit cross-up; button strength determines trajectory (LP close, MP mid, HP far) | | * Can hit cross-up; button strength determines trajectory ({{clr|L|LP}} close, {{clr|M|MP}} mid, {{clr|H|HP}} far) |
| * {{FKD}} state until landing | | * {{FKD}} state until landing |
| * Puts grounded opponents into {{sf6-jug|limited juggle}} state; spike knockdown vs. airborne opponents | | * Puts grounded opponents into {{sf6-jug|limited juggle}} state; spike knockdown vs. airborne opponents |
| Line 874: |
Line 894: |
| * {{FKD}} state until landing | | * {{FKD}} state until landing |
| <br> | | <br> |
| A unique "divekick" that requires charge, notable for its ability to be performed from a backwards jump. The meterless version is usually unsafe, but with accurate spacing it can avoid punishment. The OD version is always safe on block, and can often be plus depending on the spacing. While the execution is difficult, Aerial Ball can be done from a forward jump; an easier (but more reactable) option is to charge while inputting Coward Crouch > Raid Jump, then using Aerial Ball to change your jump trajectory. | | A unique "divekick" that requires charge, notable for its ability to be performed from a backwards jump. The meterless version is usually unsafe, but with accurate spacing it can avoid punishment. The {{clr|OD|OD}} version is always safe on block, and can often be plus depending on the spacing. While the execution is difficult, Aerial Ball can be done from a forward jump; an easier (but more reactable) option is to charge while inputting Coward Crouch > Raid Jump, then using Aerial Ball to change your jump trajectory. |
|
| |
|
| Being usable from a backwards jump allows Blanka to hold up-back on wakeup to avoid a throw, then punish the whiff on reaction. The OD version is excellent for this purpose, since it's safe on block and leads to massive corner carry on hit to escape the corner. This makes Blanka the most dangerous character in the game to attempt a corner throw loop against, allowing him to get away with more risky options on defense. | | Being usable from a backwards jump allows Blanka to hold up-back on wakeup to avoid a throw, then punish the whiff on reaction. The {{clr|OD|OD}} version is excellent for this purpose, since it's safe on block and leads to massive corner carry on hit to escape the corner. This makes Blanka one of the most dangerous charactes in the game to attempt a corner throw loop against, allowing him to get away with more risky options on defense. |
|
| |
|
| Aerial Ball can be used in combos when canceled from j.MP, most notably after an OD Blanka Ball launch. This gives more damage and better oki than a Vertical Roll juggle ender. This can also be useful in air-to-air situations, allowing a backwards j.MP to deal extra damage without giving up screen position. It can also be used in spacing traps with moves like Electric Thunder; if the opponent tries to take back their turn on block with a slow enough normal, Blanka may be able to avoid it with the jump and come back down to whiff punish the recovery (though the effectiveness of this technique varies heavily based on the matchup). | | Aerial Ball can be used in combos when canceled from {{clr|M|j.MP}}, most notably after an {{clr|OD|OD Roll}} launch. This gives more damage and better oki than a Vertical Roll juggle ender. This can also be useful in air-to-air situations, allowing a backwards {{clr|M|j.MP}} to deal extra damage without giving up screen position. It can also be used in spacing traps with moves like Electric Thunder; if the opponent tries to take back their turn on block with a slow enough normal, Blanka may be able to avoid it with the jump and come back down to whiff punish the recovery (though the effectiveness of this technique varies heavily based on the matchup). |
| }} | | }} |
| |-| | | |-| |
| Line 884: |
Line 904: |
| {{MoveDataCargo | | {{MoveDataCargo |
| | title = Aerial Rolling Attack | | | title = Aerial Rolling Attack |
| | subtitle = SA2 Install | | | subtitle = Air Ball (SA2) |
| | input = j.[4]6P | | | input = {{Classic_sf6}} j.[4]6P<br>{{Modern_sf6}} j.[4]6X or j.[4]S (M) |
| | images = | | | images = |
| {{MoveDataCargoImage|imageHeight=200px|blanka_j46p|caption=}} | | {{MoveDataCargoImage|imageHeight=200px|blanka_j46p|caption=}} |
| Line 893: |
Line 913: |
| {{AttackDataCargo-SF6/Query|blanka_j46p_sa2}} | | {{AttackDataCargo-SF6/Query|blanka_j46p_sa2}} |
| * 40f charge time (no charge required if canceled into) | | * 40f charge time (no charge required if canceled into) |
| * Can hit cross-up; button strength determines trajectory (LP close, MP mid, HP far) | | * Can hit cross-up; button strength determines trajectory ({{clr|L|LP}} close, {{clr|M|MP}} mid, {{clr|H|HP}} far) |
| * {{FKD}} state until landing | | * {{FKD}} state until landing |
| * Puts grounded opponents into {{sf6-jug|limited juggle}} state; spike knockdown vs. airborne opponents | | * Puts grounded opponents into {{sf6-jug|limited juggle}} state; spike knockdown vs. airborne opponents |
| * Activates Blanka-chan doll (meterless 1-hit version) | | * Activates Blanka-chan doll (meterless 1-hit version) |
| * '''Cancel Hitconfirm Window:''' 22(17)f (Rolling Cannon, height-dependent) | | * '''Cancel Hitconfirm Window:''' 22(17)f ({{clr|SA|Rolling Cannon}}, height-dependent) |
| * Applies 10% damage scaling to next hit when beginning a combo, or 10% immediate scaling when comboed into | | * Applies 10% damage scaling to next hit when beginning a combo, or 10% immediate scaling when comboed into |
| {{AttackDataCargo-SF6/Query|blanka_j46pp_sa2}} | | {{AttackDataCargo-SF6/Query|blanka_j46pp_sa2}} |
| Line 903: |
Line 923: |
| * Can hit cross-up (2nd attack whiffs midscreen) | | * Can hit cross-up (2nd attack whiffs midscreen) |
| * {{FKD}} state until landing | | * {{FKD}} state until landing |
| * Activates Blanka-chan doll (OD 3-hit version) | | * Activates Blanka-chan doll ({{clr|OD|OD}} 3-hit version) |
| * '''Cancel Hitconfirm Window:''' 72(66)f hit / 17f block (Rolling Cannon, height-dependent) | | * '''Cancel Hitconfirm Window:''' 72(66)f hit / 17f block ({{clr|SA|Rolling Cannon}}, height-dependent) |
| * Applies 10% damage scaling to next hit when beginning a combo, or 10% immediate scaling when comboed into | | * Applies 10% damage scaling to next hit when beginning a combo, or 10% immediate scaling when comboed into |
| <br> | | <br> |
| The {{clr|10|SA2}} install version of Aerial Ball is mostly identical, but has a few key changes compared to the original. It deals slightly more damage, and can be canceled into from j.MP with no charge; this can even be done late from a forward j.MP, leaving a small gap in the blockstring that can catch opponents who expect an immediate tick throw after landing. It also gains the ability to cancel into Rolling Cannon before landing (unless it connects at the minimum possible height, in which case a cancel is no longer possible). This can be used to make the meterless versions safe, or set up a tricky cross-up sequence like j.MP > Aerial Ball > Rolling Cannon, which can hit in many different ways depending on the spacing and timing. | | The {{clr|SA|SA2}} install version of Aerial Ball is mostly identical, but has a few key changes compared to the original. It deals slightly more damage, and can be canceled into from {{clr|M|j.MP}} with no charge; this can even be done late from a forward {{clr|M|j.MP}}, leaving a small gap in the blockstring that can catch opponents who expect an immediate tick throw after landing. It also gains the ability to cancel into {{clr|SA|Rolling Cannon}} before landing (unless it connects at the minimum possible height, in which case a cancel is no longer possible). This can be used to make the meterless versions safe, or set up a tricky cross-up sequence like {{clr|M|j.MP}} > Aerial Ball > {{clr|SA|Rolling Cannon}}, which can hit in many different ways depending on the spacing and timing. |
|
| |
|
| Like all ball-type {{clr|10|SA2}} specials, the install timer is drained by 100f (6.7% of the total time) per use, even when not canceled into. It also can be used to activate a Blanka-chan doll, which is especially great for corner mixups. | | Like all ball-type {{clr|SA|SA2}} specials, the install timer is drained by 100f (6.7% of the total time) per use, even when not canceled into. It also can be used to activate a Blanka-chan doll, which is especially great for corner mixups. |
|
| |
|
| If {{clr|10|SA2}} Aerial Ball connects very low to the ground and is canceled into the downward Rolling Cannon (2P), it reduces Blanka's landing recovery and grants significant frame advantage on block without deducting Rolling Cannon's usual 200f from the install timer. While this is likely a bug, it is an effective technique for confusing the opponent who expects Blanka to be at frame disadvantage after a blocked meterless Aerial Ball. | | If {{clr|SA|SA2}} Aerial Ball connects very low to the ground and is canceled into the downward {{clr|SA|Rolling Cannon (2P)}}, it reduces Blanka's landing recovery and grants significant frame advantage on block without deducting {{clr|SA|Rolling Cannon's}} usual 200f from the install timer. While this is likely a bug, it is an effective technique for confusing the opponent who expects Blanka to be at frame disadvantage after a blocked meterless Aerial Ball. |
| }} | | }} |
| </tabber> | | </tabber> |
| Line 919: |
Line 939: |
| {{MoveDataCargo | | {{MoveDataCargo |
| | title = Vertical Rolling Attack | | | title = Vertical Rolling Attack |
| | subtitle = | | | subtitle = Upball |
| | input = [2]8K | | | input = {{Classic_sf6}} [2]8K<br>{{Modern_sf6}} [2]8X or [2]S (L) |
| | images = | | | images = |
| {{MoveDataCargoImage|imageHeight=240px|blanka_28lk|caption=}} | | {{MoveDataCargoImage|imageHeight=240px|blanka_28lk|caption=}} |
| Line 941: |
Line 961: |
| {{AttackDataCargo-SF6/Query|blanka_28kk}} | | {{AttackDataCargo-SF6/Query|blanka_28kk}} |
| * '''Full Invuln:''' 1-10f; '''Airborne''' 4-53f ({{FKD}} state) | | * '''Full Invuln:''' 1-10f; '''Airborne''' 4-53f ({{FKD}} state) |
| * 40f charge time; travels up, in between the trajectory of MK and HK versions | | * 40f charge time; travels up, in between the trajectory of {{clr|M|MK}} and {{clr|H|HK}} versions |
| <br> | | <br> |
| An upward angled attack used as an anti-air, reversal, and combo/juggle ender. Each strength has its own trajectory, with LK traveling the farthest and HK traveling straight up. The LK version can be used in grounded combos for better damage and oki than Rolling Attack, but anything more than 2 light attacks will cause it to whiff on standard-height crouching opponents. It is massively unsafe on whiff and block; Blanka comes back down with an unusual backward trajectory that can make may require the opponent to walk or {{clr|4|Drive Rush}} forward to begin their optimal punish route. | | An upward angled attack used as an anti-air, reversal, and combo/juggle ender. Each strength has its own trajectory, with {{clr|L|LK}} traveling the farthest and {{clr|H|HK}} traveling straight up. The {{clr|L|LK}} version can be used in grounded combos for better damage and oki than Rolling Attack, but anything more than 2 light attacks will cause it to whiff on standard-height crouching opponents. It is massively unsafe on whiff and block; Blanka comes back down with an unusual backward trajectory that can make may require the opponent to walk or {{clr|DR|Drive Rush}} forward to begin their optimal punish route. |
|
| |
|
| The anti-air invincibility frames on the meterless versions do not occur until the active frames, so it must be used a bit pre-emptively. The OD version is Blanka's main reversal option, but is liable to whiff against close jumps. All versions cannot hit anti-air against cross-ups, so Blanka's best option is to delay OD Vertical Roll as long as possible to allow the opponent to fully swap sides, or to anti-air early before the opponent has a chance to cross over. | | The anti-air invincibility frames on the meterless versions do not occur until the active frames, so it must be used a bit pre-emptively. The {{clr|OD|OD}} version is Blanka's main reversal option, but is liable to whiff against close jumps. All versions cannot hit anti-air against cross-ups, so Blanka's best option is to delay {{clr|OD|OD Vertical Roll}} as long as possible to allow the opponent to fully swap sides, or to anti-air early before the opponent has a chance to cross over. |
| }} | | }} |
| |-| | | |-| |
| Line 951: |
Line 971: |
| {{MoveDataCargo | | {{MoveDataCargo |
| | title = Vertical Rolling Attack | | | title = Vertical Rolling Attack |
| | subtitle = SA2 Install | | | subtitle = Upball (SA2) |
| | input = [2]8K | | | input = {{Classic_sf6}} [2]8K<br>{{Modern_sf6}} [2]8X or [2]S (L) |
| | images = | | | images = |
| {{MoveDataCargoImage|imageHeight=240px|blanka_28lk|caption=}} | | {{MoveDataCargoImage|imageHeight=240px|blanka_28lk|caption=}} |
| Line 967: |
Line 987: |
| * Farthest horizontal range (most useful in grounded combos) | | * Farthest horizontal range (most useful in grounded combos) |
| * Activates Blanka-chan doll (meterless 1-hit version) | | * Activates Blanka-chan doll (meterless 1-hit version) |
| * '''Cancel Hitconfirm Window:''' 60f hit / 51f block (Rolling Cannon) | | * '''Cancel Hitconfirm Window:''' 60f hit / 51f block ({{clr|SA|Rolling Cannon}}) |
| * Applies 10% damage scaling to next hit when beginning a combo, or 10% immediate scaling when comboed into | | * Applies 10% damage scaling to next hit when beginning a combo, or 10% immediate scaling when comboed into |
| {{AttackDataCargo-SF6/Query|blanka_28mk_sa2}} | | {{AttackDataCargo-SF6/Query|blanka_28mk_sa2}} |
| Line 974: |
Line 994: |
| * Travels up and slightly forward for standard anti-air purposes | | * Travels up and slightly forward for standard anti-air purposes |
| * Activates Blanka-chan doll (meterless 1-hit version) | | * Activates Blanka-chan doll (meterless 1-hit version) |
| * '''Cancel Hitconfirm Window:''' 60f hit / 52f block (Rolling Cannon) | | * '''Cancel Hitconfirm Window:''' 60f hit / 52f block ({{clr|SA|Rolling Cannon}}) |
| * Applies 10% damage scaling to next hit when beginning a combo, or 10% immediate scaling when comboed into | | * Applies 10% damage scaling to next hit when beginning a combo, or 10% immediate scaling when comboed into |
| {{AttackDataCargo-SF6/Query|blanka_28hk_sa2}} | | {{AttackDataCargo-SF6/Query|blanka_28hk_sa2}} |
| Line 981: |
Line 1,001: |
| * Travels straight up for deep anti-airs and juggles | | * Travels straight up for deep anti-airs and juggles |
| * Activates Blanka-chan doll (meterless 1-hit version) | | * Activates Blanka-chan doll (meterless 1-hit version) |
| * '''Cancel Hitconfirm Window:''' 60f hit / 52f block (Rolling Cannon) | | * '''Cancel Hitconfirm Window:''' 60f hit / 52f block ({{clr|SA|Rolling Cannon}}) |
| * Applies 10% damage scaling to next hit when beginning a combo, or 10% immediate scaling when comboed into | | * Applies 10% damage scaling to next hit when beginning a combo, or 10% immediate scaling when comboed into |
| {{AttackDataCargo-SF6/Query|blanka_28kk_sa2}} | | {{AttackDataCargo-SF6/Query|blanka_28kk_sa2}} |
| * '''Full Invuln:''' 1-10f; '''Airborne''' 4-53f ({{FKD}} state) | | * '''Full Invuln:''' 1-10f; '''Airborne''' 4-53f ({{FKD}} state) |
| * 40f charge time (no charge required if canceled into) | | * 40f charge time (no charge required if canceled into) |
| * Travels up, in between the trajectory of MK and HK versions | | * Travels up, in between the trajectory of {{clr|M|MK}} and {{clr|H|HK}} versions |
| * Activates Blanka-chan doll (OD 3-hit version) | | * Activates Blanka-chan doll ({{clr|OD|OD}} 3-hit version) |
| * '''Cancel Hitconfirm Window:''' 82f hit (Rolling Cannon) | | * '''Cancel Hitconfirm Window:''' 82f hit ({{clr|SA|Rolling Cannon}}) |
| * Applies 40% damage scaling to next hit when beginning a combo, or 10% immediate scaling when comboed into | | * Applies 40% damage scaling to next hit when beginning a combo, or 10% immediate scaling when comboed into |
| <br> | | <br> |
| The {{clr|10|SA2}} install version of Vertical Roll is a great juggle starter when canceled into a Rolling Cannon follow-up; while there is additional damage scaling applied, it massively increases Blanka's damage potential overall. The lack of charge requirement when canceled into also makes the attack more versatile, making Blanka free to move around and combo in situations that would normally be impossible. | | The {{clr|SA|SA2}} install version of Vertical Roll is a great juggle starter when canceled into a {{clr|SA|Rolling Cannon}} follow-up; while there is additional damage scaling applied, it massively increases Blanka's damage potential overall. The lack of charge requirement when canceled into also makes the attack more versatile, making Blanka free to move around and combo in situations that would normally be impossible. |
|
| |
|
| Other properties like attack angle, no cross-up hitbox, and invincibility frames are identical to the regular version. Blanka loses 100f (6.7%) of the install timer when activating Vertical Roll, and it can be used to activate a Blanka-chan doll with either the meterless or OD electricity. | | Other properties like attack angle, no cross-up hitbox, and invincibility frames are identical to the regular version. Blanka loses 100f (6.7%) of the install timer when activating Vertical Roll, and it can be used to activate a Blanka-chan doll with either the meterless or {{clr|OD|OD}} electricity. |
|
| |
|
| On block, Vertical Roll is a safer and bounces farther away compared to the regular version; it also has only 1 frame of landing recovery, making a grounded punish much more difficult. While the opponent could simply {{clr|4|Drive Rush}} into a juggle starter, the ability to cancel into Rolling Cannon makes this a risky proposition. It's important to note that against crouch blocking opponents, Vertical Roll into Rolling Cannon cannot create a true blockstring; this means that an anti-air invincible special can punish Blanka for attempting to use the 3P follow-up as a divekick. This creates a sort of rock-paper-scissors mind game for both players that is generally weighted in Blanka's favor. | | On block, Vertical Roll is a safer and bounces farther away compared to the regular version; it also has only 1 frame of landing recovery, making a grounded punish much more difficult. While the opponent could simply {{clr|DR|Drive Rush}} into a juggle starter, the ability to cancel into {{clr|SA|Rolling Cannon}} makes this a risky proposition. It's important to note that against crouch blocking opponents, Vertical Roll into {{clr|SA|Rolling Cannon}} cannot create a true blockstring; this means that an anti-air invincible special can punish Blanka for attempting to use the {{clr|SA|3P}} follow-up as a divekick. This creates a sort of rock-paper-scissors mind game for both players that is generally weighted in Blanka's favor. |
|
| |
|
| After OD Vertical Roll on block, Blanka cannot follow up with Rolling Cannon to keep himself safe. It does have more juggle potential than the meterless versions, making it a bit more useful in certain juggle routes. | | After {{clr|OD|OD Vertical Roll}} on block, Blanka cannot follow up with {{clr|SA|Rolling Cannon}} to keep himself safe. It does have more juggle potential than the meterless versions, making it a bit more useful in certain juggle routes. |
| }} | | }} |
| </tabber> | | </tabber> |
| Line 1,006: |
Line 1,026: |
| | title = Backstep Rolling Attack | | | title = Backstep Rolling Attack |
| | subtitle = Rainbow Ball | | | subtitle = Rainbow Ball |
| | input = 63214K | | | input = {{Classic_sf6}} 63214K<br>{{Modern_sf6}} 6S (M) |
| | images = | | | images = |
| {{MoveDataCargoImage|imageHeight=200px|blanka_63214lk|caption=}} | | {{MoveDataCargoImage|imageHeight=200px|blanka_63214lk|caption=}} |
| Line 1,029: |
Line 1,049: |
| * Medium trajectory (can steer forward/backward) | | * Medium trajectory (can steer forward/backward) |
| * '''Cancel Hitconfirm Window:''' 16f (Super, 1st hit only) | | * '''Cancel Hitconfirm Window:''' 16f (Super, 1st hit only) |
| * '''{{clr|10|SA2}} cancel advantage:''' KD +68 hit / {{sf6-adv|VP|+6}} block | | * '''{{clr|SA|SA2}} cancel advantage:''' KD +68 hit / {{sf6-adv|VP|+6}} block |
| <br> | | <br> |
| Backstep Roll (or "Rainbow Ball") causes Blanka to take a step back and jump, coming down with an arc trajectory that can be controlled to some extent. Steering forward can significantly increase the total distance, while holding back only mildly slows the forward movement; it requires some precision to not entirely whiff over a midscreen opponent. Backstep Roll leads to great frame advantage on hit or block, and can be spaced for an ambiguous cross-up. The exact frame advantage depends on the opponent's height and whether they were standing or crouching, which must be taken into account when deciding on a combo or frame trap route after landing. | | Backstep Roll (or "Rainbow Ball") causes Blanka to take a step back and jump, coming down with an arc trajectory that can be controlled to some extent. Steering forward can significantly increase the total distance, while holding back only mildly slows the forward movement; it requires some precision to not entirely whiff over a midscreen opponent. Backstep Roll leads to great frame advantage on hit or block, and can be spaced for an ambiguous cross-up. The exact frame advantage depends on the opponent's height and whether they were standing or crouching, which must be taken into account when deciding on a combo or frame trap route after landing. |
| Line 1,035: |
Line 1,055: |
| While the move has slow startup and a large vulnerable hurtbox, it can be challenging for the opponent to anti-air when the spacing is unpredictable. Opponents can try to jump back and air-to-air, or catch the landing recovery with some long-range Supers on a short version. | | While the move has slow startup and a large vulnerable hurtbox, it can be challenging for the opponent to anti-air when the spacing is unpredictable. Opponents can try to jump back and air-to-air, or catch the landing recovery with some long-range Supers on a short version. |
|
| |
|
| The OD version has an initial hit with very short range; it has some utility in juggles, especially in corner Blanka-chan setups where it can allow extended juggle routes with multiple Blanka-chan dolls. The downward hit of the OD version connects twice vs. standing opponents and only once vs. crouching opponents. | | The {{clr|OD|OD}} version has an initial hit with very short range; it has some utility in juggles, especially in corner Blanka-chan setups where it can allow extended juggle routes with multiple Blanka-chan dolls. The downward hit of the {{clr|OD|OD}} version connects twice vs. standing opponents and only once vs. crouching opponents. |
| }} | | }} |
| |-| | | |-| |
| Line 1,041: |
Line 1,061: |
| {{MoveDataCargo | | {{MoveDataCargo |
| | title = Backstep Rolling Attack | | | title = Backstep Rolling Attack |
| | subtitle = SA2 Install | | | subtitle = Rainbow Ball (SA2) |
| | input = 63214K | | | input = {{Classic_sf6}} 63214K<br>{{Modern_sf6}} 6S (M) |
| | images = | | | images = |
| {{MoveDataCargoImage|imageHeight=200px|blanka_63214lk|caption=}} | | {{MoveDataCargoImage|imageHeight=200px|blanka_63214lk|caption=}} |
| Line 1,054: |
Line 1,074: |
| * Shortest trajectory (can steer forward/backward) | | * Shortest trajectory (can steer forward/backward) |
| * Activates Blanka-chan doll (meterless 1-hit version) | | * Activates Blanka-chan doll (meterless 1-hit version) |
| * '''Cancel Hitconfirm Window:''' 22(18)f (Rolling Cannon, height-dependent) | | * '''Cancel Hitconfirm Window:''' 22(18)f ({{clr|SA|Rolling Cannon}}, height-dependent) |
| * Applies 10% damage scaling to next hit when beginning a combo, or 10% immediate scaling when comboed into | | * Applies 10% damage scaling to next hit when beginning a combo, or 10% immediate scaling when comboed into |
| {{AttackDataCargo-SF6/Query|blanka_63214mk_sa2}} | | {{AttackDataCargo-SF6/Query|blanka_63214mk_sa2}} |
| Line 1,060: |
Line 1,080: |
| * Medium trajectory (can steer forward/backward) | | * Medium trajectory (can steer forward/backward) |
| * Activates Blanka-chan doll (meterless 1-hit version) | | * Activates Blanka-chan doll (meterless 1-hit version) |
| * '''Cancel Hitconfirm Window:''' 23(19)f (Rolling Cannon, height-dependent) | | * '''Cancel Hitconfirm Window:''' 23(19)f ({{clr|SA|Rolling Cannon}}, height-dependent) |
| * Applies 10% damage scaling to next hit when beginning a combo, or 10% immediate scaling when comboed into | | * Applies 10% damage scaling to next hit when beginning a combo, or 10% immediate scaling when comboed into |
| {{AttackDataCargo-SF6/Query|blanka_63214hk_sa2}} | | {{AttackDataCargo-SF6/Query|blanka_63214hk_sa2}} |
| Line 1,066: |
Line 1,086: |
| * Farthest trajectory (can steer forward/backward) | | * Farthest trajectory (can steer forward/backward) |
| * Activates Blanka-chan doll (meterless 1-hit version) | | * Activates Blanka-chan doll (meterless 1-hit version) |
| * '''Cancel Hitconfirm Window:''' 22(18)f (Rolling Cannon, height-dependent) | | * '''Cancel Hitconfirm Window:''' 22(18)f ({{clr|SA|Rolling Cannon}}, height-dependent) |
| * Applies 10% damage scaling to next hit when beginning a combo, or 10% immediate scaling when comboed into | | * Applies 10% damage scaling to next hit when beginning a combo, or 10% immediate scaling when comboed into |
| {{AttackDataCargo-SF6/Query|blanka_63214kk_sa2}} | | {{AttackDataCargo-SF6/Query|blanka_63214kk_sa2}} |
| * '''Airborne''' 8-12f, 27-66f ({{FKD}} state); can hit cross-up on downward hit | | * '''Airborne''' 8-12f, 27-66f ({{FKD}} state); can hit cross-up on downward hit |
| * Medium trajectory (can steer forward/backward) | | * Medium trajectory (can steer forward/backward) |
| * Activates Blanka-chan doll (OD 3-hit version) | | * Activates Blanka-chan doll ({{clr|OD|OD}} 3-hit version) |
| * '''Cancel Hitconfirm Window:''' 36(19)f (Rolling Cannon, height-dependent) | | * '''Cancel Hitconfirm Window:''' 36(19)f ({{clr|SA|Rolling Cannon}}, height-dependent) |
| * Applies 10% damage scaling to next hit when beginning a combo, or 10% immediate scaling when comboed into | | * Applies 10% damage scaling to next hit when beginning a combo, or 10% immediate scaling when comboed into |
| <br> | | <br> |
| The {{clr|10|SA2}} install version of Backstep Roll does slightly more damage, though this is somewhat mitigated by the additional damage scaling. It can also cancel into Rolling Cannon like all other ball-type special moves. Since it already leads to strong combos on hit and pressure on block, this doesn't change very much overall, although it's possible to set up some Rolling Cannon cross-ups midscreen. Activating this move drains 100f (6.7%) from the install timer, and importantly it gains electricity to activate Blanka-chan; this makes it harder for the opponent to defend against in neutral, especially on the OD version. Corner juggles with OD Backstep Roll and Blanka-chan dolls can deal massive damage, especially if Blanka has an extra bar for {{clr|10|SA1}} juggles. | | The {{clr|SA|SA2}} install version of Backstep Roll does slightly more damage, though this is somewhat mitigated by the additional damage scaling. It can also cancel into {{clr|SA|Rolling Cannon}} like all other ball-type special moves. Since it already leads to strong combos on hit and pressure on block, this doesn't change very much overall, although it's possible to set up some {{clr|SA|Rolling Cannon}} cross-ups midscreen. Activating this move drains 100f (6.7%) from the install timer, and importantly it gains electricity to activate Blanka-chan; this makes it harder for the opponent to defend against in neutral, especially on the {{clr|OD|OD}} version. Corner juggles with {{clr|OD|OD Backstep Roll}} and Blanka-chan dolls can deal massive damage, especially if Blanka has an extra bar for {{clr|SA|SA1}} juggles. |
| }} | | }} |
| </tabber> | | </tabber> |
| Line 1,082: |
Line 1,102: |
| {{MoveDataCargo | | {{MoveDataCargo |
| | title = Wild Hunt | | | title = Wild Hunt |
| | subtitle = | | | subtitle = Hop Grab |
| | input = 236K | | | input = {{Classic_sf6}} 236K<br>{{Modern_sf6}} 236X |
| | images = | | | images = |
| {{MoveDataCargoImage|imageHeight=200px|blanka_236lk|caption=}} | | {{MoveDataCargoImage|imageHeight=200px|blanka_236lk|caption=}} |
| Line 1,092: |
Line 1,112: |
| | info = | | | info = |
| {{AttackDataCargo-SF6/Query|blanka_236lk}} | | {{AttackDataCargo-SF6/Query|blanka_236lk}} |
| * '''Airborne''' 9-26f ({{FKD}} state); Range: 2.50 | | * '''Airborne''' 9-26f ({{FKD}} state); Range: 2.49 |
| {{AttackDataCargo-SF6/Query|blanka_236mk}} | | {{AttackDataCargo-SF6/Query|blanka_236mk}} |
| * '''Airborne''' 14-33f ({{FKD}} state); Range: 3.41 | | * '''Airborne''' 14-33f ({{FKD}} state); Range: 3.41 |
| {{AttackDataCargo-SF6/Query|blanka_236hk}} | | {{AttackDataCargo-SF6/Query|blanka_236hk}} |
| * '''Airborne''' 19-36f ({{FKD}} state); Range: 4.25 | | * '''Airborne''' 19-36f ({{FKD}} state); Range: 4.24 |
| {{AttackDataCargo-SF6/Query|blanka_236kk}} | | {{AttackDataCargo-SF6/Query|blanka_236kk}} |
| * '''Airborne''' 9-28f ({{FKD}} state); Range: 2.70-3.59 | | * '''Airborne''' 9-28f ({{FKD}} state); Range: 2.68-3.58 |
| * Can hold forward/back to control the trajectory | | * Can hold forward/back to control the trajectory |
| <br> | | <br> |
| A slow, hopping command grab that can open up overly-defensive opponents, draining a bar of Drive gauge if you manage to throw during their parry attempt. The startup is quite reactable, so it helps to make the opponent focus on other threats like HP Blanka Ball or an activated Blanka-chan doll first. Blanka can be punished heavily if the opponent jumps or backdashes. In addition to its faster startup, the OD version is the best at avoiding the opponent's attacks by pulling up the hurtbox while hopping. | | A slow, hopping command grab that can open up overly-defensive opponents, draining a bar of Drive gauge if you manage to throw during their parry attempt. The startup is quite reactable, so it helps to make the opponent focus on other threats like {{clr|H|HP Roll}} or an activated Blanka-chan doll first. Blanka can be punished heavily if the opponent jumps or backdashes. In addition to its faster startup, the {{clr|OD|OD}} version is the best at avoiding the opponent's attacks by pulling up the hurtbox while hopping. |
| }} | | }} |
|
| |
|
| Line 1,107: |
Line 1,127: |
| {{MoveDataCargo | | {{MoveDataCargo |
| | title = Blanka-chan Bomb | | | title = Blanka-chan Bomb |
| | subtitle = | | | subtitle = Doll |
| | input = 22P | | | input = {{Classic_sf6}} 22P<br>{{Modern_sf6}} 22X |
| | images = | | | images = |
| {{MoveDataCargoImage|imageHeight=85px|blanka_22p|caption=}} | | {{MoveDataCargoImage|imageHeight=85px|blanka_22p|caption=}} |
| Line 1,120: |
Line 1,140: |
| {{AttackDataCargo-SF6/Query|blanka_22p}} | | {{AttackDataCargo-SF6/Query|blanka_22p}} |
| * Starts each round with 3 dolls; can only replenish mid-round with Back Taunt | | * Starts each round with 3 dolls; can only replenish mid-round with Back Taunt |
| * Button strength determines doll placement (LP close, MP mid, HP far) | | * Button strength determines doll placement ({{clr|L|LP}} close, {{clr|M|MP}} mid, {{clr|H|HP}} far) |
| * Blanka can only place 1 doll on-screen at a time | | * Blanka can only place 1 doll on-screen at a time |
| * Blanka is in a counter-hit state for entire throwing animation | | * Blanka is in a {{clr|PC|Counter-hit}} state for entire throwing animation |
| * The doll stock is consumed on frame 25, and spawns on frame 39 | | * The doll stock is consumed on frame 25, and spawns on frame 39 |
| ** If counter-hit between these frames, loses the doll completely | | ** If {{clr|PC|Counter-hit}} between these frames, loses the doll completely |
| * After spawning, the doll takes 35 more frames to reach the ground and become interactable | | * After spawning, the doll takes 35 more frames to reach the ground and become interactable |
| * Doll disappears if completely off-screen or after 1000 frames | | * Doll disappears if completely off-screen or after 1000 frames |
| * Doll can be activated with any electricity source (different effects depending on meterless/OD/Super type) | | * Doll can be activated with any electricity source (different effects depending on meterless/{{clr|OD|OD}}/{{clr|SA|Super}} type) |
| {{AttackDataCargo-SF6/Query|blanka_22p_214p}} | | {{AttackDataCargo-SF6/Query|blanka_22p_214p}} |
| * Activated with meterless electricity source (214LP or {{clr|10|SA2}} Ball-type special) | | * Activated with meterless electricity source (214P or {{clr|SA|SA2}} Ball-type special) |
| * Doll disappears if Blanka is hit during the first 34f after electricity activation | | * Doll disappears if Blanka is hit during the first 34f after electricity activation |
| * Puts opponent into {{sf6-jug|free juggle}} state or maintains existing juggle state | | * Puts opponent into {{sf6-jug|free juggle}} state or maintains existing juggle state |
| Line 1,135: |
Line 1,155: |
| * 1-hit projectile; walks slowly forward ('''Projectile Speed:''' 0.04) | | * 1-hit projectile; walks slowly forward ('''Projectile Speed:''' 0.04) |
| {{AttackDataCargo-SF6/Query|blanka_22p_214pp}} | | {{AttackDataCargo-SF6/Query|blanka_22p_214pp}} |
| * Activated with OD electricity source (214PP or {{clr|10|SA2}} OD Ball-type special) | | * Activated with {{clr|OD|OD}} electricity source ({{clr|OD|214PP}} or {{clr|SA|SA2}}/{{clr|OD|OD}} Ball-type special) |
| * Doll disappears if Blanka is hit during the first 23f after electricity activation | | * Doll disappears if Blanka is hit during the first 23f after electricity activation |
| * Puts opponent into {{sf6-jug|free juggle}} state or maintains existing juggle state | | * Puts opponent into {{sf6-jug|free juggle}} state or maintains existing juggle state |
| Line 1,142: |
Line 1,162: |
| ** Doll can change direction if opponent switches sides while it bounces | | ** Doll can change direction if opponent switches sides while it bounces |
| {{AttackDataCargo-SF6/Query|blanka_22p_236236p}} | | {{AttackDataCargo-SF6/Query|blanka_22p_236236p}} |
| * Activated with {{clr|10|SA1}} electricity | | * Activated with {{clr|SA|SA1}} electricity |
| * Doll disappears if Blanka is hit during the first 24f after electricity activation | | * Doll disappears if Blanka is hit during the first 24f after electricity activation |
| * Puts opponent into {{sf6-jug|free juggle}} state or maintains existing juggle state | | * Puts opponent into {{sf6-jug|free juggle}} state or maintains existing juggle state |
| Line 1,148: |
Line 1,168: |
| * 5-hit projectile; shoot forward at slight upward angle ('''Projectile Speed:''' 0.1) | | * 5-hit projectile; shoot forward at slight upward angle ('''Projectile Speed:''' 0.1) |
| <br> | | <br> |
| Blanka's ultimate setplay tool, comparable to Kimberly's spraycans. The LP version of the doll is most commonly used, as it allows Blanka to activate it more easily at close range. | | Blanka's ultimate setplay tool, comparable to Kimberly's spraycans. The {{clr|L|LP}} version of the doll is most commonly used, as it allows Blanka to activate it more easily at close range. |
|
| |
|
| The meterless doll activation causes it to march slowly along the ground, allowing Blanka to follow behind it for better screen position. It's easy to anti-air if the opponent tries to avoid the doll with a jump, and Blanka can more safely attempt gimmicks like Button > Surprise Hop or Button > Raid Jump while the opponent is afraid to attack. | | The meterless doll activation causes it to march slowly along the ground, allowing Blanka to follow behind it for better screen position. It's easy to anti-air if the opponent tries to avoid the doll with a jump, and Blanka can more safely attempt gimmicks like Button > Surprise Hop or Button > Raid Jump while the opponent is afraid to attack. |
|
| |
|
| Activating the doll with OD electricity generally leads to the strongest juggles and mixups, especially in the corner. The OD doll hits do not increase the opponent's juggle count even when juggling multiple times, and the damage scaling only applies once regardless of how many times it connects. It's even possible to juggle into OD Blanka-chan after a throw under some very specific circumstances. | | Activating the doll with {{clr|OD|OD}} electricity generally leads to the strongest juggles and mixups, especially in the corner. The {{clr|OD|OD}} doll hits do not increase the opponent's juggle count even when juggling multiple times, and the damage scaling only applies once regardless of how many times it connects. It's even possible to juggle into {{clr|OD|OD Blanka-chan}} after a throw under some very specific circumstances. |
|
| |
|
| If you happen to have a doll nearby, {{clr|10|SA1}} becomes a safe reversal option (+8 on block at worst). You generally want to use dolls when you have momentum near the opponent's corner, so this isn't the most practical scenario, but it's worth remembering if you throw a doll and then get back thrown into the corner. | | If you happen to have a doll nearby, {{clr|SA|SA1}} becomes a safe reversal option ({{sf6-adv|VP|+8}} on block at worst). You generally want to use dolls when you have momentum near the opponent's corner, so this isn't the most practical scenario, but it's worth remembering if you throw a doll and then get back thrown into the corner. |
| }} | | }} |
| <br> | | <br> |
| Line 1,163: |
Line 1,183: |
| | title = Shout of Earth | | | title = Shout of Earth |
| | subtitle = Level 1 Super Art | | | subtitle = Level 1 Super Art |
| | input = 236236P | | | input = {{classic_sf6}} 236236P<br>{{Modern_sf6}} 236236L or 5HS or 6HS |
| | images = | | | images = |
| {{MoveDataCargoImage|imageHeight=150px|blanka_236236p|caption=}} | | {{MoveDataCargoImage|imageHeight=150px|blanka_236236p|caption=}} |
| Line 1,180: |
Line 1,200: |
| * 30% minimum damage scaling | | * 30% minimum damage scaling |
| * Significantly higher KD Advantage when juggled into | | * Significantly higher KD Advantage when juggled into |
| * During SA2: deals 200 more damage and reaches full screen | | * During {{clr|SA|SA2}}: deals 200 more damage and reaches full screen |
| <br> | | <br> |
| Blanka sends out a projectile hitbox in both directions that hits low to the ground. Works well as a reversal, but can only anti-air if the opponent uses an air attack that incurs landing recovery. {{clr|10|SA1}} can also activate a Blanka-chan doll, which has a unique 5-hit version that makes the super safe (minimum of {{sf6-adv|VP|+8}} on block). | | Blanka sends out a projectile hitbox in both directions that hits low to the ground. Works well as a reversal, but can only anti-air if the opponent uses an air attack that incurs landing recovery. {{clr|SA|SA1}} can also activate a Blanka-chan doll, which has a unique 5-hit version that makes the super safe (minimum of {{sf6-adv|VP|+8}} on block). |
|
| |
|
| The full screen range during {{clr|10|SA2}} install makes it a great option for punishing things that are normally safe based on distance. A useful tactic against low-health projectile characters is to stand at long range and activate {{clr|10|SA2}} on reaction to a projectile, then immediately {{clr|10|SA1}} for the punish. It's an expensive option to bait projectiles, so ideally this should be used to secure a game win. | | The full screen range during {{clr|SA|SA2}} install makes it a great option for punishing things that are normally safe based on distance. A useful tactic against low-health projectile characters is to stand at long range and activate {{clr|SA|SA2}} on reaction to a projectile, then immediately {{clr|SA|SA1}} for the punish. It's an expensive option to bait projectiles, so ideally this should be used to secure a game win. |
| }} | | }} |
|
| |
|
| Line 1,191: |
Line 1,211: |
| | title = Lightning Beast | | | title = Lightning Beast |
| | subtitle = Level 2 Super Art | | | subtitle = Level 2 Super Art |
| | input = 214214P | | | input = {{classic_sf6}} 214214P<br>{{Modern_sf6}} 214214M or 4HS |
| | images = | | | images = |
| {{MoveDataCargoImage|imageHeight=135px|blanka_214214p|caption=}} | | {{MoveDataCargoImage|imageHeight=135px|blanka_214214p|caption=}} |
| Line 1,198: |
Line 1,218: |
| * Install lasts 1500f (25 seconds); gives access to [[#Rolling_Cannon_(Direction+P)|Rolling Cannon]] after any "Ball-type" special move | | * Install lasts 1500f (25 seconds); gives access to [[#Rolling_Cannon_(Direction+P)|Rolling Cannon]] after any "Ball-type" special move |
| * Install timer is depleted by 100f (6.7%) when using Ball-type special, or 200f (13.3%) when using Rolling Cannon | | * Install timer is depleted by 100f (6.7%) when using Ball-type special, or 200f (13.3%) when using Rolling Cannon |
| * Improves the damage and properties of Ball-type specials and {{clr|10|SA1}}, including: | | * Improves the damage and properties of Ball-type specials and {{clr|SA|SA1}}, including: |
| ** Can cancel into [4]6P, j.[4]6P, and [2]8K without charge | | ** Can cancel into [4]6P, j.[4]6P, and [2]8K without charge |
| ** Electrical property is applied, allowing for Blanka-chan doll activation | | ** Electrical property is applied, allowing for Blanka-chan doll activation |
| ** {{clr|10|SA1}} reaches full screen in both directions | | ** {{clr|SA|SA1}} reaches full screen in both directions |
| <br> | | <br> |
| One of the best install supers in the game, and one of the few {{clr|10|Level 2 Supers}} that sees more competitive use than a {{clr|10|Level 3}}. Nearly every aspect of Blanka's game is greatly improved while the install is active. Combo routes all deal more damage and corner carry, anti-airs become much more deadly, and ambiguous cross-up blockstrings are abundant. Even punishing unsafe specials on block becomes a chore for the opponent, as Blanka remains airborne during the recovery of many of his specials. Learning to fully utilize this Super will elevate your Blanka from annoying to horrifying. | | One of the best install supers in the game, and one of the few {{clr|SA|Level 2 Supers}} that sees more competitive use than a {{clr|SA|Level 3}}. Nearly every aspect of Blanka's game is greatly improved while the install is active. Combo routes all deal more damage and corner carry, anti-airs become much more deadly, and ambiguous cross-up blockstrings are abundant. Even punishing unsafe specials on block becomes a chore for the opponent, as Blanka remains airborne during the recovery of many of his specials. Learning to fully utilize this Super will elevate your Blanka from annoying to horrifying. |
| }} | | }} |
|
| |
|
| Line 1,210: |
Line 1,230: |
| | title = Rolling Cannon | | | title = Rolling Cannon |
| | subtitle = (During [[#Rolling Cannon (Direction+P)|Lightning Beast]]) | | | subtitle = (During [[#Rolling Cannon (Direction+P)|Lightning Beast]]) |
| | input = Any Direction + P | | | input = {{classic_sf6}} Any Direction + P<br>{{Modern_sf6}} Any Direction + X |
| | images = | | | images = |
| {{MoveDataCargoImage|imageHeight=140px|blanka_xp|caption=}} | | {{MoveDataCargoImage|imageHeight=140px|blanka_xp|caption=}} |
| Line 1,217: |
Line 1,237: |
| | info = | | | info = |
| {{AttackDataCargo-SF6/Query|blanka_xp}} | | {{AttackDataCargo-SF6/Query|blanka_xp}} |
| * Available during {{clr|10|SA2}} only; drains 200f (13.3%) of total install timer | | * Available during {{clr|SA|SA2}} only; drains 200f (13.3%) of total install timer |
| * Can be input in any direction after [4]6P, j.[4]6P, [2]8K, or 63214K | | * Can be input in any direction after [4]6P, j.[4]6P, [2]8K, or 63214K |
| ** Cannot use after {{clr|10|[4]6PP}} on hit, or {{clr|10|[2]8KK}} on block | | ** Cannot use after {{clr|OD|[4]6PP}} on hit, or {{clr|OD|[2]8KK}} on block |
| * Has electricity to activate Blanka-chan (1-hit meterless version) | | * Has electricity to activate Blanka-chan (1-hit meterless version) |
| * Can chain into itself on hit/block (up to 3 per sequence; this limit resets after landing mid-combo) | | * Can chain into itself on hit/block (up to 3 per sequence; this limit resets after landing mid-combo) |
| Line 1,226: |
Line 1,246: |
| * Total recovery varies; 7f landing recovery on 8P/7P/4P/1P, 9f landing recovery on 2P/3P/6P/9P | | * Total recovery varies; 7f landing recovery on 8P/7P/4P/1P, 9f landing recovery on 2P/3P/6P/9P |
| * '''Drive Gauge Depletion:''' 0.2 bars (per hit) / 0.1 bars (per block) | | * '''Drive Gauge Depletion:''' 0.2 bars (per hit) / 0.1 bars (per block) |
| * Does NOT have 40% minimum damage scaling like a standard {{clr|10|SA2}} | | * Does NOT have 40% minimum damage scaling like a standard {{clr|SA|SA2}} |
| <br> | | <br> |
| Rolling Cannon lets you extend combos and create tricky pressure sequences for as long as the install is active. It can also make it difficult or impossible to punish some moves that are usually unsafe (though it cannot save you after a blocked {{clr|10|OD Vertical Roll}}). The exact frame advantage of any hit varies tremendously based on the angle and height, but in general Blanka can get massive block advantage on any downward-angled ball. It's important to note that Rolling Cannon cannot chain into itself on whiff, so choosing the wrong timing or angle can lead to big punishment. | | Rolling Cannon lets you extend combos and create tricky pressure sequences for as long as the install is active. It can also make it difficult or impossible to punish some moves that are usually unsafe (though it cannot save you after a blocked {{clr|OD|OD Vertical Roll}}). The exact frame advantage of any hit varies tremendously based on the angle and height, but in general Blanka can get massive block advantage on any downward-angled ball. It's important to note that Rolling Cannon cannot chain into itself on whiff, so choosing the wrong timing or angle can lead to big punishment. |
|
| |
|
| The window to input each successive Rolling Cannon is extremely long, allowing for delays to create gaps in the blockstring. This is important for setting up ambiguous cross-ups, as a true blockstring will not require the opponent to change their block direction. If the opponent tries to hold Parry to avoid all mixups, landing with a downward 2P version allows Blanka to walk up for a throw punish instead. | | The window to input each successive Rolling Cannon is extremely long, allowing for delays to create gaps in the blockstring. This is important for setting up ambiguous cross-ups, as a true blockstring will not require the opponent to change their block direction. If the opponent tries to hold Parry to avoid all mixups, landing with a downward 2P version allows Blanka to walk up for a throw punish instead. |
|
| |
|
| After Aerial Rolling Attack connects at the lowest possible height, inputting the 2P version gives Blanka great frame advantage without spending any of his install timer; this may be an unintended bug, as he usually has to spend time to take advantage of any {{clr|10|SA2}} benefits. | | After Aerial Rolling Attack connects at the lowest possible height, inputting the 2P version gives Blanka great frame advantage without spending any of his install timer; this may be an unintended bug, as he usually has to spend time to take advantage of any {{clr|SA|SA2}} benefits. |
| }} | | }} |
|
| |
|
| Line 1,239: |
Line 1,259: |
| | title = Ground Shave Cannonball | | | title = Ground Shave Cannonball |
| | subtitle = Level 3 Super Art | | | subtitle = Level 3 Super Art |
| | input = 236236K | | | input = {{classic_sf6}} 236236K<br>{{Modern_sf6}} 236236H or 2HS |
| | images = | | | images = |
| {{MoveDataCargoImage|imageHeight=140px|blanka_236236k|caption=}} | | {{MoveDataCargoImage|imageHeight=140px|blanka_236236k|caption=}} |
| Line 1,259: |
Line 1,279: |
| * 50% minimum damage scaling; applies 10% immediate damage scaling when canceled from special moves | | * 50% minimum damage scaling; applies 10% immediate damage scaling when canceled from special moves |
| <br> | | <br> |
| An easy-to-use Super that reaches about 60% of the screen length, making it a decent projectile counter. While it works well in many combo and juggle route, the high utility of {{clr|10|SA2}} makes it hard to justify saving 3 bars of meter. This is compounded by the fact that it regenerates less Drive gauge during the cinematic than most characters; this is because Blanka is technically considered airborne during most of the cinematic, which slows the rate of Drive regeneration. | | An easy-to-use Super that reaches about 60% of the screen length, making it a decent projectile counter. While it works well in many combo and juggle route, the high utility of {{clr|SA|SA2}} makes it hard to justify saving 3 bars of meter. This is compounded by the fact that it regenerates less Drive gauge during the cinematic than most characters; this is because Blanka is technically considered airborne during most of the cinematic, which slows the rate of Drive regeneration. The {{clr|SA|CA}} version has a tiny bit less range than the {{clr|SA|SA3}} version, which generally only matters when attempting a max range fireball punish. |
| }} | | }} |
| <br> | | <br> |
| Line 1,268: |
Line 1,288: |
| | title = Neutral Taunt | | | title = Neutral Taunt |
| | subtitle = | | | subtitle = |
| | input = 5PPPKKK | | | input = {{classic_sf6}} 5PPPKKK<br>{{Modern_sf6}} 5LMHS+DP+A |
| | images = | | | images = |
| {{MoveDataCargoImage|imageHeight=160px|blanka_5pppkkk|caption='' "Peekaboo!" ''}} | | {{MoveDataCargoImage|imageHeight=160px|blanka_5pppkkk|caption='' "Peekaboo!" ''}} |
| Line 1,279: |
Line 1,299: |
| | title = Forward Taunt | | | title = Forward Taunt |
| | subtitle = | | | subtitle = |
| | input = 6PPPKKK | | | input = {{classic_sf6}} 6PPPKKK<br>{{Modern_sf6}} 6LMHS+DP+A |
| | images = | | | images = |
| {{MoveDataCargoImage|imageHeight=160px|blanka_6pppkkk|caption='' "Ha ha... uhuhuhuhuh" ''}} | | {{MoveDataCargoImage|imageHeight=160px|blanka_6pppkkk|caption='' "Ha ha... uhuhuhuhuh" ''}} |
| Line 1,290: |
Line 1,310: |
| | title = Back Taunt | | | title = Back Taunt |
| | subtitle = | | | subtitle = |
| | input = 4PPPKKK | | | input = {{classic_sf6}} 4PPPKKK<br>{{Modern_sf6}} 4LMHS+DP+A |
| | images = | | | images = |
| {{MoveDataCargoImage|imageHeight=220px|blanka_4pppkkk|caption='' *Starts juggling* ''}} | | {{MoveDataCargoImage|imageHeight=220px|blanka_4pppkkk|caption='' *Starts juggling* ''}} |

