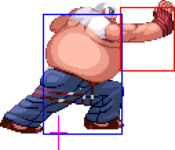
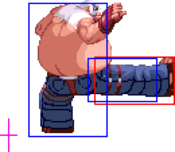
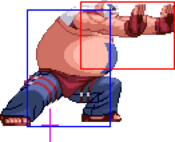
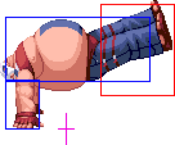
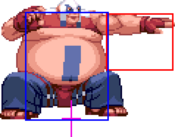
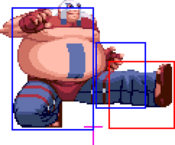
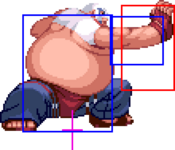
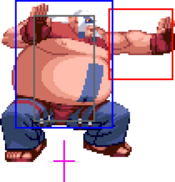
No edit summary |
mNo edit summary |
||
| (6 intermediate revisions by 2 users not shown) | |||
| Line 1: | Line 1: | ||
{{Character Subnav ROTD|name=Kang}} | {{Character Subnav ROTD|name=Kang}} | ||
<center>'''Move List Showcase''' <br> | |||
<youtube>Mb1zSd3CQPY</youtube></center> | |||
== | ==Movelist== | ||
'''Fire Bomb | ====Impact==== | ||
: | [[File:Snka.gif]][[File:Snka.gif]][[File:Snka.gif]][[File:Snka.gif]][[File:Snkc.gif]] | ||
''(Air)'' [[File:Snka.gif]][[File:Snka.gif]][[File:Snka.gif]][[File:Snka.gif]][[File:Snkc.gif]] | |||
====Command Normals==== | |||
{{df}}[[File:Snka.gif]] | |||
{{f}}[[File:Snkb.gif]] | |||
{{df}}[[File:Snkc.gif]] | |||
====Special Moves==== | |||
{{qcf}}[[File:Snka.gif]]/[[File:Snkc.gif]] - Fire Bomb | |||
{{hcf}}[[File:Snkb.gif]]/[[File:Snkd.gif]] - Kang Attack | |||
{{qcb}}[[File:Snka.gif]]/[[File:Snkc.gif]] - Rolling Fire | |||
{{dp}}[[File:Snka.gif]]/[[File:Snkc.gif]] - Kang Screw | |||
====Super Moves==== | |||
{{hcb}}{{hcb}}[[File:Snka.gif]]/[[File:Snkc.gif]] - Body Press Special | |||
==Close Normals== | |||
{{MoveData | |||
|image=ROTD_Kang_clA.png | |||
|caption= | |||
|name=cl.A | |||
|data= | |||
{{AttackData-ROTD | |||
|Damage=6 | |||
|Guard=Mid | |||
|Stun=2 | |||
|Cancel=Chain, Command, Special | |||
|Startup=4 | |||
|Active=5 | |||
|Recovery=5 | |||
|Adv. Hit=+1 | |||
|Adv. Guard=0 | |||
|description= | |||
}} | |||
}} | |||
{{MoveData | |||
|image=ROTD_Kang_clB.png | |||
|caption= | |||
|name=cl.B | |||
|data= | |||
{{AttackData-ROTD | |||
|Damage=8 | |||
|Guard=Mid | |||
|Stun=4 | |||
|Cancel=Command, Special | |||
|Startup=3 | |||
|Active=6 | |||
|Recovery=8 | |||
|Adv. Hit=-3 | |||
|Adv. Guard=-4 | |||
|description= | |||
}} | |||
}} | |||
{{MoveData | |||
|image=ROTD_Kang_clC.png | |||
|caption= | |||
|name=cl.C | |||
|data= | |||
{{AttackData-ROTD | |||
|Damage=16 | |||
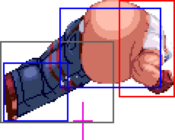
|Guard=Mid | |||
|Stun=8 | |||
|Cancel=Command, Special | |||
|Startup=6 | |||
|Active=2 | |||
|Recovery=13 | |||
|Adv. Hit=+1/+4 | |||
|Adv. Guard=-2 | |||
|description= | |||
}} | |||
}} | |||
{{MoveData | |||
|image=ROTD_Kang_clD.png | |||
|caption= | |||
|name=cl.D | |||
|data= | |||
{{AttackData-ROTD | |||
|Damage=18 | |||
|Guard=Mid | |||
|Stun=10 | |||
|Cancel=Command, Special | |||
|Startup=6 | |||
|Active=8 | |||
|Recovery=9 | |||
|Adv. Hit=-1/+2 | |||
|Adv. Guard=-4 | |||
|description= | |||
}} | |||
}} | |||
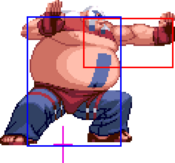
==Standing Normals== | |||
{{MoveData | |||
|image=ROTD_Kang_stA.png | |||
|caption= | |||
|name=st.A | |||
|data= | |||
{{AttackData-ROTD | |||
|Damage=8 | |||
|Guard=Mid | |||
|Stun=2 | |||
|Cancel=Chain, Command, Special | |||
|Startup=4 | |||
|Active=5 | |||
|Recovery=7 | |||
|Adv. Hit=-1 | |||
|Adv. Guard=-2 | |||
|description= | |||
}} | |||
}} | |||
{{MoveData | |||
|image=ROTD_Kang_stB.png | |||
|caption= | |||
|name=st.B | |||
|data= | |||
{{AttackData-ROTD | |||
|Damage=10 | |||
|Guard=Mid | |||
|Stun=5 | |||
|Cancel= | |||
|Startup=6 | |||
|Active=6 | |||
|Recovery=9 | |||
|Adv. Hit=-4 | |||
|Adv. Guard=-5 | |||
|description= | |||
}} | |||
}} | |||
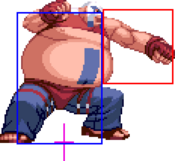
{{MoveData | |||
|image=ROTD_Kang_stC.png | |||
|caption= | |||
|name=st.C | |||
|data= | |||
{{AttackData-ROTD | |||
|Damage=18 | |||
|Guard=Mid | |||
|Stun=10 | |||
|Cancel= | |||
|Startup=9 | |||
|Active=2 | |||
|Recovery=19 | |||
|Adv. Hit=-5/-2 | |||
|Adv. Guard=-8 | |||
|description= | |||
}} | |||
}} | |||
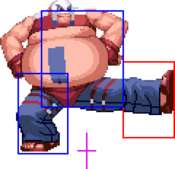
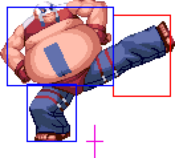
{{MoveData | |||
|image=ROTD_Kang_stD.png | |||
|caption= | |||
|name=st.D | |||
|data= | |||
{{AttackData-ROTD | |||
|Damage=20 | |||
|Guard=Mid | |||
|Stun=12 | |||
|Cancel= | |||
|Startup=11 | |||
|Active=2 | |||
|Recovery=21 | |||
|Adv. Hit=-7/-4 | |||
|Adv. Guard=-10 | |||
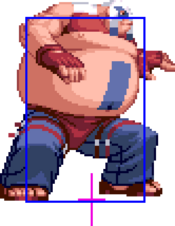
|description=Kang goes airborne just a bit… which is actually a big deal, at least for the Kang float bug. Refer to its writeup in the System section, but the gist is it makes him semi-airborne and immune to pushback, which then makes 5A mash an infinite. Outside of this glitch, the move is a poke which helps Kang close the gap, and it can go over lows. | |||
}} | |||
}} | |||
==Crouching Normals== | |||
{{MoveData | |||
|image=ROTD_Kang_crA.png | |||
|caption= | |||
|name=cr.A | |||
|data= | |||
{{AttackData-ROTD | |||
|Damage=6 | |||
|Guard=Mid | |||
|Stun=2 | |||
|Cancel=Chain, Command, Special | |||
|Startup=5 | |||
|Active=6 | |||
|Recovery=5 | |||
|Adv. Hit=0 | |||
|Adv. Guard=-1 | |||
|description= | |||
}} | |||
}} | |||
{{MoveData | |||
|image=ROTD_Kang_crB.png | |||
|caption= | |||
|name=cr.B | |||
|data= | |||
{{AttackData-ROTD | |||
|Damage=8 | |||
|Guard=Low | |||
|Stun=4 | |||
|Cancel=Command, Special | |||
|Startup=4 | |||
|Active=3 | |||
|Recovery=5 | |||
|Adv. Hit=+3 | |||
|Adv. Guard=+2 | |||
|description= | |||
}} | |||
}} | |||
{{MoveData | |||
|image=ROTD_Kang_crC.png | |||
|caption= | |||
|name=cr.C | |||
|data= | |||
{{AttackData-ROTD | |||
|Damage=16 | |||
|Guard=Mid | |||
|Stun=8 | |||
|Cancel=Command, Special | |||
|Startup=5 | |||
|Active=6 | |||
|Recovery=11 | |||
|Adv. Hit=+2 | |||
|Adv. Guard=-4 | |||
|description= | |||
}} | |||
}} | |||
{{MoveData | |||
|image=ROTD_Kang_stD.png | |||
|caption= | |||
|name=cr.D | |||
|data= | |||
{{AttackData-ROTD | |||
|Damage=20 | |||
|Guard=Low | |||
|Stun=15 | |||
|Cancel= | |||
|Startup=6 | |||
|Active=2 | |||
|Recovery=17 | |||
|Adv. Hit=KD | |||
|Adv. Guard=-2 | |||
|description=Same hitbox as stand D but Kang doesn't jump forward. | |||
}} | |||
}} | |||
==Jumping Normals== | |||
{{MoveData | |||
|image=ROTD_Kang_jA.png | |||
|caption= | |||
|name=j.A | |||
|data= | |||
{{AttackData-ROTD | |||
|Damage=8 | |||
|Guard=High/Air | |||
|Stun=6 | |||
|Cancel=Special | |||
|Startup=3 | |||
|Active=10 | |||
|Recovery= | |||
|Adv. Hit= | |||
|Adv. Guard= | |||
|description= | |||
}} | |||
}} | |||
{{MoveData | |||
|image=ROTD_Kang_jB.png | |||
|caption= | |||
|name=j.B | |||
|data= | |||
{{AttackData-ROTD | |||
|Damage=10 | |||
|Guard=High/Air | |||
|Stun=8 | |||
|Cancel=Special | |||
|Startup=5 | |||
|Active=10 | |||
|Recovery= | |||
|Adv. Hit= | |||
|Adv. Guard= | |||
|description= | |||
}} | |||
}} | |||
{{MoveData | |||
|image=ROTD_Kang_njC.png | |||
|caption= | |||
|name=nj.C | |||
|data= | |||
{{AttackData-ROTD | |||
|Damage=14 | |||
|Guard=High/Air | |||
|Stun=12 | |||
|Cancel=Special | |||
|Startup=8 | |||
|Active=2 | |||
|Recovery= | |||
|Adv. Hit= | |||
|Adv. Guard= | |||
|description= | |||
}} | |||
}} | |||
{{MoveData | |||
|image=ROTD_Kang_jC.png | |||
|caption= | |||
|name=j.C | |||
|data= | |||
{{AttackData-ROTD | |||
|Damage=14 | |||
|Guard=High/Air | |||
|Stun=12 | |||
|Cancel=Special | |||
|Startup=5 | |||
|Active=1 | |||
|Recovery= | |||
|Adv. Hit= | |||
|Adv. Guard= | |||
|description= | |||
}} | |||
}} | |||
{{MoveData | |||
|image=ROTD_Kang_jD.png | |||
|caption= | |||
|name=j.D | |||
|data= | |||
{{AttackData-ROTD | |||
|Damage=16 | |||
|Guard=High/Air | |||
|Stun=12 | |||
|Cancel=Special | |||
|Startup=5 | |||
|Active=2+6 | |||
|Recovery= | |||
|Adv. Hit= | |||
|Adv. Guard= | |||
|description=One of Kang's key moves as an approach tool and a crossup. Coupled with his low jump, this helps him to bulldog very well. | |||
}} | |||
}} | |||
==Command Normals== | |||
{{MoveData | |||
|image=ROTD_Kang_6B.png | |||
|caption= | |||
|name=6B | |||
|data= | |||
{{AttackData-ROTD | |||
|Damage=12 | |||
|Guard=High | |||
|Stun=14 | |||
|Cancel=Special | |||
|Startup=5 | |||
|Active=6+(12)+2 | |||
|Recovery=16 | |||
|Adv. Hit=+1 | |||
|Adv. Guard=-5 | |||
|description=Doskoi! Kang does a delayed upward then downward kick. At the peak of the upward kick, there is a brief hitbox that can juggle airborne opponents; on some characters, you can juggle with this multiple times. Downward overhead kick can be canceled into any special or super. | |||
}} | |||
}} | |||
{{MoveData | |||
|image=ROTD_Kang_3A.png | |||
|caption= | |||
|name=3A | |||
|data= | |||
{{AttackData-ROTD | |||
|Damage=16 (4×4) | |||
|Guard=Mid | |||
|Stun=12 (3×4) | |||
|Cancel=Special | |||
|Startup=13 | |||
|Active=6+(5)+6+(1)+6+(11)+2 | |||
|Recovery=29 | |||
|Adv. Hit=KD | |||
|Adv. Guard=-14 | |||
|description=A 4 hit sumo palm attack. The 4th attack sends the opponent to the wall. You can cancel this command move at any point of the move. | |||
}} | |||
}} | |||
{{MoveData | |||
|image=ROTD_Kang_3C.png | |||
|image2=ROTD_Kang_3C_hit.png | |||
|caption= | |||
|name=3C | |||
|data= | |||
{{AttackData-ROTD | |||
|Damage= | |||
|Guard= | |||
|Stun= | |||
|Cancel= | |||
|Startup=7 | |||
|Active=7-31 | |||
|Recovery=9 | |||
|Adv. Hit= | |||
|Adv. Guard= | |||
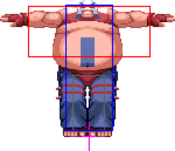
|description=Kang sucks in his belly to prepare a counter. This move is a high/mid counter which, on activation, can be cancelled into a special. Doesn't come out unless it catches anything. | |||
}} | |||
{{AttackData-ROTD | |||
|Damage=10 | |||
|Guard=Mid | |||
|Stun=14 | |||
|Cancel=Special | |||
|Startup=3 | |||
|Active=38 | |||
|Recovery=7 | |||
|Adv. Hit=KD | |||
|Adv. Guard=-25 | |||
|description=Data for the counterattack. | |||
}} | |||
}} | |||
==Throws== | |||
{{MoveData | |||
|image=ROTD_Kang_throw.png | |||
|caption= | |||
|name=4/6C | |||
|data= | |||
{{AttackData-ROTD | |||
|Damage=20 | |||
|Guard= | |||
|Stun=0 | |||
|Cancel= | |||
|Startup=1 | |||
|Active=1 | |||
|Recovery= | |||
|Adv. Hit=KD | |||
|Adv. Guard= | |||
|description=Kang throws the opponent over his head three quarters of the screen away. | |||
}} | |||
}} | |||
==System== | |||
: | {{MoveData | ||
|image=ROTD_Kang_BC.png | |||
|caption=BC | |||
|name=Tag-In | |||
|data= | |||
{{AttackData-ROTD | |||
|Damage=16 | |||
|Guard=Mid | |||
|Stun=0 | |||
|Cancel=Command, Special | |||
|Startup=6 (1-19 invuln) | |||
|Active=14 | |||
|Recovery=13 | |||
|Adv. Hit=KD | |||
|Adv. Guard=-10 | |||
|description= | |||
}} | |||
}} | |||
{{MoveData | |||
|image=ROTD_Kang_GC.png | |||
|caption=gcCD | |||
|name=Guard Cancel | |||
|data= | |||
{{AttackData-ROTD | |||
|Damage=10 | |||
|Guard=Mid | |||
|Stun=10 | |||
|Cancel= | |||
|Startup=13 (1-16 invuln) | |||
|Active=10 | |||
|Recovery=15 | |||
|Adv. Hit=KD | |||
|Adv. Guard=-8 | |||
|description= | |||
}} | |||
}} | |||
{{MoveData | |||
|image=ROTD_Kang_CD.png | |||
|caption=CD | |||
|name=First Impact | |||
|data= | |||
{{AttackData-ROTD | |||
|Damage=5+5×5 | |||
|Guard=Mid | |||
|Stun=0 | |||
|Cancel=Hit: Command, Special | |||
|Startup=14 | |||
|Active=10 | |||
|Recovery=25 | |||
|Adv. Hit=KD | |||
|Adv. Guard=-18 | |||
|description= | |||
}} | |||
}} | |||
{{MoveData | |||
|image=ROTD_Kang_run.png | |||
|image2=ROTD_Kang_236BC.png | |||
|caption=236CD | |||
|caption2=236CD~236CD | |||
|name=Duplex Attack | |||
|data= | |||
{{AttackData-ROTD | |||
|Damage=30 | |||
|Guard=Mid | |||
|Stun=0 | |||
|Cancel= | |||
|Startup=4 | |||
|Active=60 | |||
|Recovery=29 | |||
|Adv. Hit=KD | |||
|Adv. Guard=-13 | |||
|description=Your partner must be alive and able to tag in. | |||
}} | |||
{{AttackData-ROTD | |||
|Damage=30 (32 with Jones) | |||
|Guard= | |||
|Stun=0 | |||
|Cancel= | |||
|Startup= | |||
|Active= | |||
|Recovery= | |||
|Adv. Hit=KD | |||
|Adv. Guard= | |||
|description=Follow up with another 236BC for more damage. Costs an extra bar. Jones's Funky Impact at the end causes a wall splat, which can break a wall. Kang cannot tech from his knockdown, so no combo. For generic teams, Kang will add three more points of damage to this move (30 from the usual 27), whether he is tagging in or out. | |||
}} | |||
}} | |||
'' | ==Special Moves== | ||
{{MoveData | |||
|image=ROTD_Kang_236P.png | |||
|caption=236A/C | |||
|name=Fire Breath | |||
|data= | |||
{{AttackData-ROTD | |||
|Damage=18 | |||
|Guard=Mid/Air | |||
|Stun=8 | |||
|Cancel= | |||
|Startup=14 | |||
|Active=? | |||
|Recovery=46-? | |||
|Adv. Hit=KD | |||
|Adv. Guard=-10 | |||
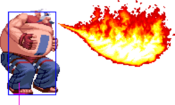
|description=Kang breathes fire! This is a short-ranged projectile, but it hits at round start and can even cause a wall hit there. Tag-ins beat this, in a case of broken-checks-broken, but Kang can still play with the threat to help him in. Great for spacing, since bigbodies cannot deal with this move well. | |||
}} | |||
{{AttackData-ROTD | |||
|Damage=18 | |||
|Guard=Mid/Air | |||
|Stun=8 | |||
|Cancel= | |||
|Startup=31 | |||
|Active=? | |||
|Recovery=40-? | |||
|Adv. Hit=KD | |||
|Adv. Guard=-4 | |||
|description=Just like the light version but has an extra hit, more startup and slightly more damage. | |||
}} | |||
}} | |||
{{MoveData | |||
|image=ROTD_Kang_41236K.png | |||
|caption=41236B/D | |||
|name=Kang Attack | |||
|data= | |||
{{AttackData-ROTD | |||
|Damage=20 | |||
|Guard=Mid | |||
|Stun=15 | |||
|Cancel= | |||
|Startup=29 (29-47 guard) | |||
|Active=34 | |||
|Recovery=10 | |||
|Adv. Hit=KD | |||
|Adv. Guard=-9 | |||
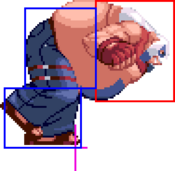
|description=Kang charges halfscreen. Very slow start-up but when it becomes active, it is invulnerable to any physical attack. It's also slow and really bad on block, and Kang has other ways to get in. Causes a wall splat on hit. | |||
}} | |||
{{AttackData-ROTD | |||
|Damage=20 | |||
|Guard=Mid | |||
|Stun=15 | |||
|Cancel= | |||
|Startup=29 (29-65 guard) | |||
|Active=51 | |||
|Recovery=8 | |||
|Adv. Hit=KD | |||
|Adv. Guard=-6 | |||
|description=Kang charges fullscreen. | |||
}} | |||
}} | |||
{{MoveData | |||
|image=ROTD_Kang_214P.png | |||
|caption=214A/C | |||
|name=Rolling Fire | |||
|data= | |||
{{AttackData-ROTD | |||
|Damage=20 | |||
|Guard=Mid/Air | |||
|Stun=15 | |||
|Cancel= | |||
|Startup=14 | |||
|Active=3+4+4 | |||
|Recovery=42 | |||
|Adv. Hit=KD | |||
|Adv. Guard=-33 | |||
|description=A somersault propelled by his flame breath. Very sub-par anti-air and combo ender. This one is not a projectile, so it won't stop any fireballs. | |||
}} | |||
{{AttackData-ROTD | |||
|Damage=20 | |||
|Guard=Mid/Air | |||
|Stun=15 | |||
|Cancel= | |||
|Startup=22 | |||
|Active=3+4+4 | |||
|Recovery=42 | |||
|Adv. Hit=KD | |||
|Adv. Guard=-33 | |||
|description=Kang leaps higher and further. Combos from a few less things. | |||
}} | |||
}} | |||
{{MoveData | |||
|image=ROTD_Kang_623P.png | |||
|caption=623A/C | |||
|name=Kang Screw | |||
|data= | |||
{{AttackData-ROTD | |||
|Damage=29 (2+3+2+3+5+5+15) | |||
|Guard=Mid/Air | |||
|Stun=14 (2×7) | |||
|Cancel= | |||
|Startup=5 (1-6 invuln) | |||
|Active=36 | |||
|Recovery=35 | |||
|Adv. Hit=KD | |||
|Adv. Guard=-41 | |||
|description=Spin to win! Kang jumps up vertically while spinning like a top. This move is Kang's best move since it builds so much meter, deals so much stun, and sends the opponent flying to the wall on hit. | |||
}} | |||
{{AttackData-ROTD | |||
|Damage=29 (2×12+15) | |||
|Guard=Mid/Air | |||
|Stun=26 (2×13) | |||
|Cancel= | |||
|Startup=9 (1-8 invuln) | |||
|Active=48 | |||
|Recovery=39 | |||
|Adv. Hit=KD | |||
|Adv. Guard=-57 | |||
|description=The heavy version gains additional height and hits, and it stuns even more. It's great for juggles, but it pushes back more, so the light version is better at midscreen. | |||
}} | |||
}} | |||
==Super Moves== | ==Super Moves== | ||
{{MoveData | |||
|image=ROTD_Kang_6321463214P.png | |||
|caption=6321463214A/C | |||
|name=Body Press Special | |||
|data= | |||
{{AttackData-ROTD | |||
|Damage=38 (15+1×12+20) | |||
|Guard= | |||
|Stun=26 (2×13) | |||
|Cancel= | |||
|Startup=1 | |||
|Active=1 | |||
|Recovery=55 | |||
|Adv. Hit=KD | |||
|Adv. Guard= | |||
|description=Command grab. Kang grabs you and does his signature Kang Screw. The throw resets the damage scaling, although given the amount of hits it doesn't matter much. | |||
}} | |||
{{AttackData-ROTD | |||
|Damage=49 (1×14+56) | |||
|Guard= | |||
|Stun=0 | |||
|Cancel= | |||
|Startup=1 | |||
|Active=1 | |||
|Recovery=55 | |||
|Adv. Hit=KD | |||
|Adv. Guard= | |||
|description=Kang follows up the Kang Screw at its peak with a butt slam. Deals more damage, but unlike the light version, it doesn't deal any stun. | |||
}} | |||
}} | |||
[[Category:Rage of the Dragons]] | [[Category:Rage of the Dragons]] | ||
{{Rage Of The Dragons}} | {{Rage Of The Dragons}} | ||
Latest revision as of 19:13, 12 November 2024
Movelist
Impact
Command Normals
Special Moves
Super Moves
Close Normals
| Damage | Guard | Stun | Cancel | |
|---|---|---|---|---|
| 6 | Mid | 2 | Chain, Command, Special | |
| Startup | Active | Recovery | Adv. Hit | Adv. Guard |
| 4 | 5 | 5 | +1 | 0 |
| Damage | Guard | Stun | Cancel | |
|---|---|---|---|---|
| 8 | Mid | 4 | Command, Special | |
| Startup | Active | Recovery | Adv. Hit | Adv. Guard |
| 3 | 6 | 8 | -3 | -4 |
| Damage | Guard | Stun | Cancel | |
|---|---|---|---|---|
| 16 | Mid | 8 | Command, Special | |
| Startup | Active | Recovery | Adv. Hit | Adv. Guard |
| 6 | 2 | 13 | +1/+4 | -2 |
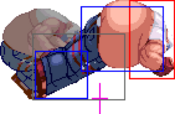
| Damage | Guard | Stun | Cancel | |
|---|---|---|---|---|
| 18 | Mid | 10 | Command, Special | |
| Startup | Active | Recovery | Adv. Hit | Adv. Guard |
| 6 | 8 | 9 | -1/+2 | -4 |
Standing Normals
| Damage | Guard | Stun | Cancel | |
|---|---|---|---|---|
| 8 | Mid | 2 | Chain, Command, Special | |
| Startup | Active | Recovery | Adv. Hit | Adv. Guard |
| 4 | 5 | 7 | -1 | -2 |
| Damage | Guard | Stun | Cancel | |
|---|---|---|---|---|
| 10 | Mid | 5 | - | |
| Startup | Active | Recovery | Adv. Hit | Adv. Guard |
| 6 | 6 | 9 | -4 | -5 |
| Damage | Guard | Stun | Cancel | |
|---|---|---|---|---|
| 18 | Mid | 10 | - | |
| Startup | Active | Recovery | Adv. Hit | Adv. Guard |
| 9 | 2 | 19 | -5/-2 | -8 |
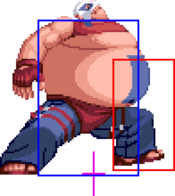
| Damage | Guard | Stun | Cancel | ||
|---|---|---|---|---|---|
| 20 | Mid | 12 | - | ||
| Startup | Active | Recovery | Adv. Hit | Adv. Guard | |
| 11 | 2 | 21 | -7/-4 | -10 | |
|
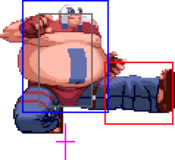
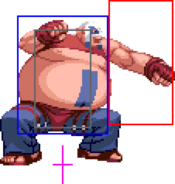
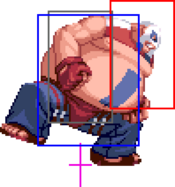
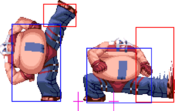
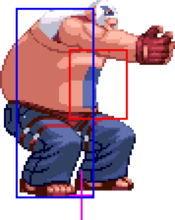
Kang goes airborne just a bit… which is actually a big deal, at least for the Kang float bug. Refer to its writeup in the System section, but the gist is it makes him semi-airborne and immune to pushback, which then makes 5A mash an infinite. Outside of this glitch, the move is a poke which helps Kang close the gap, and it can go over lows. | |||||
Crouching Normals
| Damage | Guard | Stun | Cancel | |
|---|---|---|---|---|
| 6 | Mid | 2 | Chain, Command, Special | |
| Startup | Active | Recovery | Adv. Hit | Adv. Guard |
| 5 | 6 | 5 | 0 | -1 |
| Damage | Guard | Stun | Cancel | |
|---|---|---|---|---|
| 8 | Low | 4 | Command, Special | |
| Startup | Active | Recovery | Adv. Hit | Adv. Guard |
| 4 | 3 | 5 | +3 | +2 |
| Damage | Guard | Stun | Cancel | |
|---|---|---|---|---|
| 16 | Mid | 8 | Command, Special | |
| Startup | Active | Recovery | Adv. Hit | Adv. Guard |
| 5 | 6 | 11 | +2 | -4 |
| Damage | Guard | Stun | Cancel | ||
|---|---|---|---|---|---|
| 20 | Low | 15 | - | ||
| Startup | Active | Recovery | Adv. Hit | Adv. Guard | |
| 6 | 2 | 17 | KD | -2 | |
|
Same hitbox as stand D but Kang doesn't jump forward. | |||||
Jumping Normals
| Damage | Guard | Stun | Cancel | |
|---|---|---|---|---|
| 8 | High/Air | 6 | Special | |
| Startup | Active | Recovery | Adv. Hit | Adv. Guard |
| 3 | 10 | - | - | - |
| Damage | Guard | Stun | Cancel | |
|---|---|---|---|---|
| 10 | High/Air | 8 | Special | |
| Startup | Active | Recovery | Adv. Hit | Adv. Guard |
| 5 | 10 | - | - | - |
| Damage | Guard | Stun | Cancel | |
|---|---|---|---|---|
| 14 | High/Air | 12 | Special | |
| Startup | Active | Recovery | Adv. Hit | Adv. Guard |
| 8 | 2 | - | - | - |
| Damage | Guard | Stun | Cancel | |
|---|---|---|---|---|
| 14 | High/Air | 12 | Special | |
| Startup | Active | Recovery | Adv. Hit | Adv. Guard |
| 5 | 1 | - | - | - |
| Damage | Guard | Stun | Cancel | ||
|---|---|---|---|---|---|
| 16 | High/Air | 12 | Special | ||
| Startup | Active | Recovery | Adv. Hit | Adv. Guard | |
| 5 | 2+6 | - | - | - | |
|
One of Kang's key moves as an approach tool and a crossup. Coupled with his low jump, this helps him to bulldog very well. | |||||
Command Normals
| Damage | Guard | Stun | Cancel | ||
|---|---|---|---|---|---|
| 12 | High | 14 | Special | ||
| Startup | Active | Recovery | Adv. Hit | Adv. Guard | |
| 5 | 6+(12)+2 | 16 | +1 | -5 | |
|
Doskoi! Kang does a delayed upward then downward kick. At the peak of the upward kick, there is a brief hitbox that can juggle airborne opponents; on some characters, you can juggle with this multiple times. Downward overhead kick can be canceled into any special or super. | |||||
| Damage | Guard | Stun | Cancel | ||
|---|---|---|---|---|---|
| 16 (4×4) | Mid | 12 (3×4) | Special | ||
| Startup | Active | Recovery | Adv. Hit | Adv. Guard | |
| 13 | 6+(5)+6+(1)+6+(11)+2 | 29 | KD | -14 | |
|
A 4 hit sumo palm attack. The 4th attack sends the opponent to the wall. You can cancel this command move at any point of the move. | |||||
| Damage | Guard | Stun | Cancel | ||
|---|---|---|---|---|---|
| - | - | - | - | ||
| Startup | Active | Recovery | Adv. Hit | Adv. Guard | |
| 7 | 7-31 | 9 | - | - | |
|
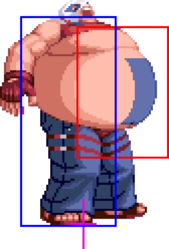
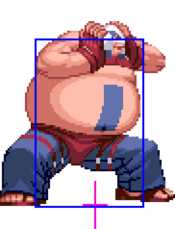
Kang sucks in his belly to prepare a counter. This move is a high/mid counter which, on activation, can be cancelled into a special. Doesn't come out unless it catches anything. | |||||
| Damage | Guard | Stun | Cancel | ||
| 10 | Mid | 14 | Special | ||
| Startup | Active | Recovery | Adv. Hit | Adv. Guard | |
| 3 | 38 | 7 | KD | -25 | |
|
Data for the counterattack. | |||||
Throws
| Damage | Guard | Stun | Cancel | ||
|---|---|---|---|---|---|
| 20 | - | 0 | - | ||
| Startup | Active | Recovery | Adv. Hit | Adv. Guard | |
| 1 | 1 | - | KD | - | |
|
Kang throws the opponent over his head three quarters of the screen away. | |||||
System
| Damage | Guard | Stun | Cancel | |
|---|---|---|---|---|
| 16 | Mid | 0 | Command, Special | |
| Startup | Active | Recovery | Adv. Hit | Adv. Guard |
| 6 (1-19 invuln) | 14 | 13 | KD | -10 |
| Damage | Guard | Stun | Cancel | |
|---|---|---|---|---|
| 10 | Mid | 10 | - | |
| Startup | Active | Recovery | Adv. Hit | Adv. Guard |
| 13 (1-16 invuln) | 10 | 15 | KD | -8 |
| Damage | Guard | Stun | Cancel | |
|---|---|---|---|---|
| 5+5×5 | Mid | 0 | Hit: Command, Special | |
| Startup | Active | Recovery | Adv. Hit | Adv. Guard |
| 14 | 10 | 25 | KD | -18 |
| Damage | Guard | Stun | Cancel | ||
|---|---|---|---|---|---|
| 30 | Mid | 0 | - | ||
| Startup | Active | Recovery | Adv. Hit | Adv. Guard | |
| 4 | 60 | 29 | KD | -13 | |
|
Your partner must be alive and able to tag in. | |||||
| Damage | Guard | Stun | Cancel | ||
| 30 (32 with Jones) | - | 0 | - | ||
| Startup | Active | Recovery | Adv. Hit | Adv. Guard | |
| - | - | - | KD | - | |
|
Follow up with another 236BC for more damage. Costs an extra bar. Jones's Funky Impact at the end causes a wall splat, which can break a wall. Kang cannot tech from his knockdown, so no combo. For generic teams, Kang will add three more points of damage to this move (30 from the usual 27), whether he is tagging in or out. | |||||
Special Moves
| Damage | Guard | Stun | Cancel | ||
|---|---|---|---|---|---|
| 18 | Mid/Air | 8 | - | ||
| Startup | Active | Recovery | Adv. Hit | Adv. Guard | |
| 14 | ? | 46-? | KD | -10 | |
|
Kang breathes fire! This is a short-ranged projectile, but it hits at round start and can even cause a wall hit there. Tag-ins beat this, in a case of broken-checks-broken, but Kang can still play with the threat to help him in. Great for spacing, since bigbodies cannot deal with this move well. | |||||
| Damage | Guard | Stun | Cancel | ||
| 18 | Mid/Air | 8 | - | ||
| Startup | Active | Recovery | Adv. Hit | Adv. Guard | |
| 31 | ? | 40-? | KD | -4 | |
|
Just like the light version but has an extra hit, more startup and slightly more damage. | |||||
| Damage | Guard | Stun | Cancel | ||
|---|---|---|---|---|---|
| 20 | Mid | 15 | - | ||
| Startup | Active | Recovery | Adv. Hit | Adv. Guard | |
| 29 (29-47 guard) | 34 | 10 | KD | -9 | |
|
Kang charges halfscreen. Very slow start-up but when it becomes active, it is invulnerable to any physical attack. It's also slow and really bad on block, and Kang has other ways to get in. Causes a wall splat on hit. | |||||
| Damage | Guard | Stun | Cancel | ||
| 20 | Mid | 15 | - | ||
| Startup | Active | Recovery | Adv. Hit | Adv. Guard | |
| 29 (29-65 guard) | 51 | 8 | KD | -6 | |
|
Kang charges fullscreen. | |||||
| Damage | Guard | Stun | Cancel | ||
|---|---|---|---|---|---|
| 20 | Mid/Air | 15 | - | ||
| Startup | Active | Recovery | Adv. Hit | Adv. Guard | |
| 14 | 3+4+4 | 42 | KD | -33 | |
|
A somersault propelled by his flame breath. Very sub-par anti-air and combo ender. This one is not a projectile, so it won't stop any fireballs. | |||||
| Damage | Guard | Stun | Cancel | ||
| 20 | Mid/Air | 15 | - | ||
| Startup | Active | Recovery | Adv. Hit | Adv. Guard | |
| 22 | 3+4+4 | 42 | KD | -33 | |
|
Kang leaps higher and further. Combos from a few less things. | |||||
| Damage | Guard | Stun | Cancel | ||
|---|---|---|---|---|---|
| 29 (2+3+2+3+5+5+15) | Mid/Air | 14 (2×7) | - | ||
| Startup | Active | Recovery | Adv. Hit | Adv. Guard | |
| 5 (1-6 invuln) | 36 | 35 | KD | -41 | |
|
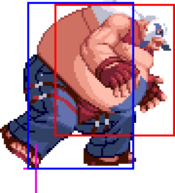
Spin to win! Kang jumps up vertically while spinning like a top. This move is Kang's best move since it builds so much meter, deals so much stun, and sends the opponent flying to the wall on hit. | |||||
| Damage | Guard | Stun | Cancel | ||
| 29 (2×12+15) | Mid/Air | 26 (2×13) | - | ||
| Startup | Active | Recovery | Adv. Hit | Adv. Guard | |
| 9 (1-8 invuln) | 48 | 39 | KD | -57 | |
|
The heavy version gains additional height and hits, and it stuns even more. It's great for juggles, but it pushes back more, so the light version is better at midscreen. | |||||
Super Moves
| Damage | Guard | Stun | Cancel | ||
|---|---|---|---|---|---|
| 38 (15+1×12+20) | - | 26 (2×13) | - | ||
| Startup | Active | Recovery | Adv. Hit | Adv. Guard | |
| 1 | 1 | 55 | KD | - | |
|
Command grab. Kang grabs you and does his signature Kang Screw. The throw resets the damage scaling, although given the amount of hits it doesn't matter much. | |||||
| Damage | Guard | Stun | Cancel | ||
| 49 (1×14+56) | - | 0 | - | ||
| Startup | Active | Recovery | Adv. Hit | Adv. Guard | |
| 1 | 1 | 55 | KD | - | |
|
Kang follows up the Kang Screw at its peak with a butt slam. Deals more damage, but unlike the light version, it doesn't deal any stun. | |||||
