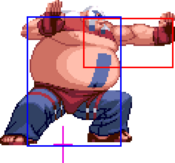
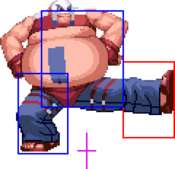
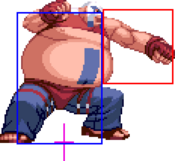
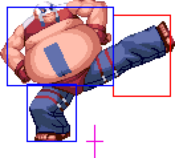
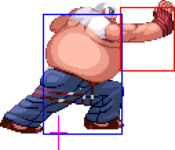
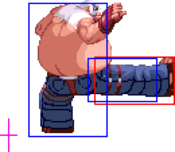
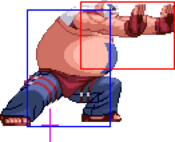
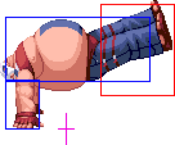
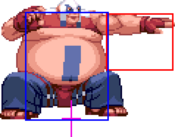
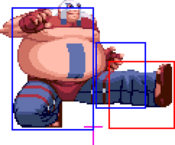
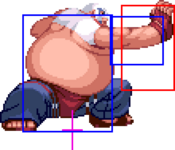
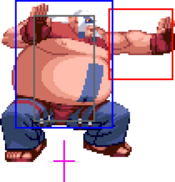
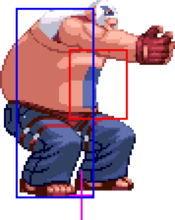
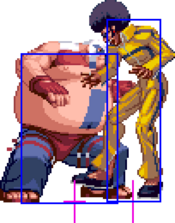
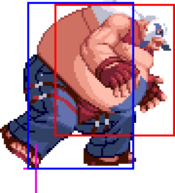
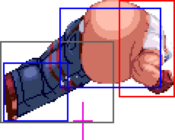
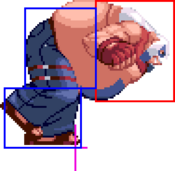
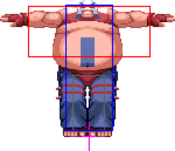
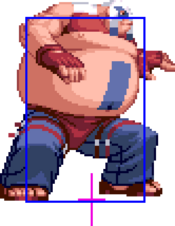
(Template) |
(TO ADD: hitboxes, Active and Recovery frames) |
||
| Line 3: | Line 3: | ||
<center>'''Move List Showcase''' <br> | <center>'''Move List Showcase''' <br> | ||
<youtube>Mb1zSd3CQPY</youtube></center> | <youtube>Mb1zSd3CQPY</youtube></center> | ||
==Movelist== | ==Movelist== | ||
====Impact==== | ====Impact==== | ||
[[File: | [[File:Snka.gif]][[File:Snka.gif]][[File:Snka.gif]][[File:Snka.gif]][[File:Snkc.gif]] | ||
''(Air)'' [[File:Snka.gif]][[File: | ''(Air)'' [[File:Snka.gif]][[File:Snka.gif]][[File:Snka.gif]][[File:Snka.gif]][[File:Snkc.gif]] | ||
====Command Normals==== | ====Command Normals==== | ||
{{f}}[[File: | {{df}}[[File:Snka.gif]] | ||
{{f}}[[File:Snkb.gif]] | |||
{{df}}[[File:Snkc.gif]] | |||
====Special Moves==== | ====Special Moves==== | ||
{{qcf}}[[File:Snka.gif]]/[[File:Snkc.gif]] - | {{qcf}}[[File:Snka.gif]]/[[File:Snkc.gif]] - Fire Bomb | ||
{{ | {{hcf}}[[File:Snkb.gif]]/[[File:Snkd.gif]] - Kang Attack | ||
{{ | {{qcb}}[[File:Snka.gif]]/[[File:Snkc.gif]] - Rolling Fire | ||
{{ | {{dp}}[[File:Snka.gif]]/[[File:Snkc.gif]] - Kang Screw | ||
====Super Moves==== | ====Super Moves==== | ||
{{ | {{hcb}}{{hcb}}[[File:Snka.gif]]/[[File:Snkc.gif]] - Body Press Special | ||
| Line 69: | Line 41: | ||
|Stun=2 | |Stun=2 | ||
|Cancel=Chain, Command, Special | |Cancel=Chain, Command, Special | ||
|Startup= | |Startup=4 | ||
|Active= | |Active= | ||
|Recovery= | |Recovery= | ||
|Adv. Hit= | |Adv. Hit=+1 | ||
|Adv. Guard= | |Adv. Guard=0 | ||
|description= | |description= | ||
}} | }} | ||
| Line 87: | Line 59: | ||
|Stun=4 | |Stun=4 | ||
|Cancel=Command, Special | |Cancel=Command, Special | ||
|Startup= | |Startup=3 | ||
|Active= | |Active= | ||
|Recovery= | |Recovery= | ||
|Adv. Hit= | |Adv. Hit=-3 | ||
|Adv. Guard= | |Adv. Guard=-4 | ||
|description= | |description= | ||
}} | }} | ||
| Line 105: | Line 77: | ||
|Stun=8 | |Stun=8 | ||
|Cancel=Command, Special | |Cancel=Command, Special | ||
|Startup= | |Startup=6 | ||
|Active= | |Active= | ||
|Recovery= | |Recovery= | ||
|Adv. Hit= | |Adv. Hit=+1/+4 | ||
|Adv. Guard= | |Adv. Guard=-2 | ||
|description= | |description= | ||
}} | }} | ||
| Line 123: | Line 95: | ||
|Stun=10 | |Stun=10 | ||
|Cancel=Command, Special | |Cancel=Command, Special | ||
|Startup= | |Startup=6 | ||
|Active= | |Active= | ||
|Recovery= | |Recovery= | ||
|Adv. Hit= | |Adv. Hit=-1/+2 | ||
|Adv. Guard= | |Adv. Guard=-4 | ||
|description= | |description= | ||
}} | }} | ||
| Line 143: | Line 115: | ||
|Stun=2 | |Stun=2 | ||
|Cancel=Chain, Command, Special | |Cancel=Chain, Command, Special | ||
|Startup= | |Startup=4 | ||
|Active= | |Active= | ||
|Recovery= | |Recovery= | ||
|Adv. Hit= | |Adv. Hit=-1 | ||
|Adv. Guard= | |Adv. Guard=-2 | ||
|description= | |description= | ||
}} | }} | ||
| Line 161: | Line 133: | ||
|Stun=5 | |Stun=5 | ||
|Cancel= | |Cancel= | ||
|Startup= | |Startup=6 | ||
|Active= | |Active= | ||
|Recovery= | |Recovery= | ||
|Adv. Hit= | |Adv. Hit=-4 | ||
|Adv. Guard= | |Adv. Guard=-5 | ||
|description= | |description= | ||
}} | }} | ||
| Line 179: | Line 151: | ||
|Stun=10 | |Stun=10 | ||
|Cancel= | |Cancel= | ||
|Startup= | |Startup=9 | ||
|Active= | |Active= | ||
|Recovery= | |Recovery= | ||
|Adv. Hit= | |Adv. Hit=-5/-2 | ||
|Adv. Guard= | |Adv. Guard=-8 | ||
|description= | |description= | ||
}} | }} | ||
| Line 197: | Line 169: | ||
|Stun=12 | |Stun=12 | ||
|Cancel= | |Cancel= | ||
|Startup= | |Startup=11 | ||
|Active= | |Active= | ||
|Recovery= | |Recovery= | ||
|Adv. Hit= | |Adv. Hit=-7/-4 | ||
|Adv. Guard= | |Adv. Guard=-10 | ||
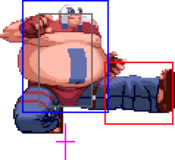
|description= | |description=Kang goes airborne just a bit… which is actually a big deal, at least for the Kang float bug. Refer to its writeup in the System section, but the gist is it makes him semi-airborne and immune to pushback, which then makes 5A mash an infinite. Outside of this glitch, the move is a poke which helps Kang close the gap, and it can go over lows. | ||
}} | }} | ||
}} | }} | ||
| Line 217: | Line 189: | ||
|Stun=2 | |Stun=2 | ||
|Cancel=Chain, Command, Special | |Cancel=Chain, Command, Special | ||
|Startup= | |Startup=5 | ||
|Active= | |Active= | ||
|Recovery= | |Recovery= | ||
|Adv. Hit= | |Adv. Hit=0 | ||
|Adv. Guard= | |Adv. Guard=-1 | ||
|description= | |description= | ||
}} | }} | ||
| Line 235: | Line 207: | ||
|Stun=4 | |Stun=4 | ||
|Cancel=Command, Special | |Cancel=Command, Special | ||
|Startup= | |Startup=4 | ||
|Active= | |Active= | ||
|Recovery= | |Recovery= | ||
|Adv. Hit= | |Adv. Hit=+3 | ||
|Adv. Guard= | |Adv. Guard=+2 | ||
|description= | |description= | ||
}} | }} | ||
| Line 253: | Line 225: | ||
|Stun=8 | |Stun=8 | ||
|Cancel=Command, Special | |Cancel=Command, Special | ||
|Startup= | |Startup=5 | ||
|Active= | |Active= | ||
|Recovery= | |Recovery= | ||
|Adv. Hit= | |Adv. Hit=+2 | ||
|Adv. Guard= | |Adv. Guard=-4 | ||
|description= | |description= | ||
}} | }} | ||
| Line 271: | Line 243: | ||
|Stun=15 | |Stun=15 | ||
|Cancel= | |Cancel= | ||
|Startup= | |Startup=6 | ||
|Active= | |Active= | ||
|Recovery= | |Recovery= | ||
|Adv. Hit=KD | |Adv. Hit=KD | ||
|Adv. Guard= | |Adv. Guard=-2 | ||
|description= | |description= | ||
}} | }} | ||
| Line 291: | Line 263: | ||
|Stun=6 | |Stun=6 | ||
|Cancel=Special | |Cancel=Special | ||
|Startup= | |Startup=3 | ||
|Active= | |Active= | ||
|Recovery= | |Recovery= | ||
| Line 309: | Line 281: | ||
|Stun=8 | |Stun=8 | ||
|Cancel=Special | |Cancel=Special | ||
|Startup= | |Startup=5 | ||
|Active= | |Active= | ||
|Recovery= | |Recovery= | ||
| Line 327: | Line 299: | ||
|Stun=12 | |Stun=12 | ||
|Cancel=Special | |Cancel=Special | ||
|Startup= | |Startup=8 | ||
|Active= | |Active= | ||
|Recovery= | |Recovery= | ||
| Line 345: | Line 317: | ||
|Stun=12 | |Stun=12 | ||
|Cancel=Special | |Cancel=Special | ||
|Startup= | |Startup=5 | ||
|Active= | |Active= | ||
|Recovery= | |Recovery= | ||
| Line 354: | Line 326: | ||
}} | }} | ||
{{MoveData | {{MoveData | ||
|image= | |image=ROTD_Kang_jD.png | ||
|caption= | |caption= | ||
|name= | |name=j.D | ||
|data= | |data= | ||
{{AttackData-ROTD | {{AttackData-ROTD | ||
| Line 363: | Line 335: | ||
|Stun=12 | |Stun=12 | ||
|Cancel=Special | |Cancel=Special | ||
|Startup= | |Startup=5 | ||
|Active= | |Active= | ||
|Recovery= | |Recovery= | ||
|Adv. Hit= | |Adv. Hit= | ||
|Adv. Guard= | |Adv. Guard= | ||
|description= | |description=One of Kang's key moves as an approach tool and a crossup. Coupled with his low jump, this helps him to bulldog very well. | ||
}} | }} | ||
}} | }} | ||
==Command Normals== | |||
{{MoveData | {{MoveData | ||
|image= | |image=ROTD_Kang_6B.png | ||
|caption= | |caption= | ||
|name= | |name=6B | ||
|data= | |data= | ||
{{AttackData-ROTD | {{AttackData-ROTD | ||
|Damage= | |Damage=12 | ||
|Guard=High | |Guard=High | ||
|Stun= | |Stun=14 | ||
|Cancel=Special | |Cancel=Special | ||
|Startup= | |Startup=5 | ||
|Active= | |Active=6+(12)+2 | ||
|Recovery= | |Recovery=16 | ||
|Adv. Hit= | |Adv. Hit=+1 | ||
|Adv. Guard= | |Adv. Guard=-5 | ||
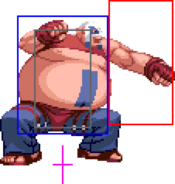
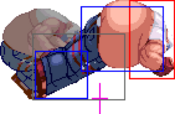
|description= | |description=Doskoi! Kang does a delayed upward then downward kick. At the peak of the upward kick, there is a brief hitbox that can juggle airborne opponents; on some characters, you can juggle with this multiple times. Downward overhead kick can be canceled into any special or super. | ||
}} | }} | ||
}} | }} | ||
{{MoveData | {{MoveData | ||
|image= | |image=ROTD_Kang_3A.png | ||
|caption= | |caption= | ||
|name= | |name=3A | ||
|data= | |data= | ||
{{AttackData-ROTD | {{AttackData-ROTD | ||
|Damage= | |Damage=16 (4×4) | ||
|Guard= | |Guard=Mid | ||
|Stun= | |Stun=12 (3×4) | ||
|Cancel=Special | |Cancel=Special | ||
|Startup= | |Startup=13 | ||
|Active= | |Active=6+(5)+6+(1)+6+(11)+2 | ||
|Recovery= | |Recovery=29 | ||
|Adv. Hit= | |Adv. Hit=KD | ||
|Adv. Guard= | |Adv. Guard=-14 | ||
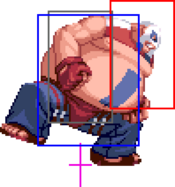
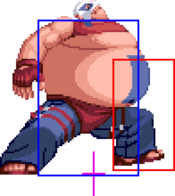
|description= | |description=A 4 hit sumo palm attack. The 4th attack sends the opponent to the wall. You can cancel this command move at any point of the move. | ||
}} | }} | ||
}} | }} | ||
{{MoveData | {{MoveData | ||
|image= | |image=ROTD_Kang_3C.png | ||
|caption= | |caption= | ||
|name= | |name=3C | ||
|data= | |data= | ||
{{AttackData-ROTD | {{AttackData-ROTD | ||
|Damage= | |Damage=10 | ||
|Guard= | |Guard=Mid | ||
|Stun= | |Stun=14 | ||
|Cancel= | |Cancel=Special | ||
|Startup= | |Startup=7 (3 on hit) | ||
|Active= | |Active=7-31 guard | ||
|Recovery= | |Recovery=9 | ||
|Adv. Hit=KD | |Adv. Hit=KD | ||
|Adv. Guard= | |Adv. Guard= | ||
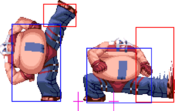
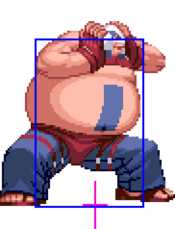
|description= | |description=Kang sucks in his belly to prepare a counter. This move is a high/mid counter which, on activation, can be cancelled into a special. Doesn't come out unless it catches anything. | ||
}} | }} | ||
}} | }} | ||
==Throws== | |||
{{MoveData | {{MoveData | ||
|image= | |image=ROTD_Kang_throw.png | ||
|caption= | |caption= | ||
|name= | |name=4/6C | ||
|data= | |data= | ||
{{AttackData-ROTD | {{AttackData-ROTD | ||
| Line 444: | Line 416: | ||
|Adv. Hit=KD | |Adv. Hit=KD | ||
|Adv. Guard= | |Adv. Guard= | ||
|description= | |description=Kang throws the opponent over his head three quarters of the screen away. | ||
}} | }} | ||
}} | }} | ||
| Line 459: | Line 431: | ||
|Stun=0 | |Stun=0 | ||
|Cancel=Command, Special | |Cancel=Command, Special | ||
|Startup=6 | |Startup=6 (1-19 invuln) | ||
|Active=2 | |Active=2 | ||
|Recovery=25 | |Recovery=25 | ||
| Line 477: | Line 449: | ||
|Stun=10 | |Stun=10 | ||
|Cancel= | |Cancel= | ||
|Startup=13 | |Startup=13 (1-16 invuln) | ||
|Active= | |Active= | ||
|Recovery= | |Recovery= | ||
|Adv. Hit=KD | |Adv. Hit=KD | ||
|Adv. Guard=-8 | |Adv. Guard=-8 | ||
| Line 495: | Line 467: | ||
|Stun=0 | |Stun=0 | ||
|Cancel=Hit: Command, Special | |Cancel=Hit: Command, Special | ||
|Startup= | |Startup=14 | ||
|Active= | |Active= | ||
|Recovery= | |Recovery= | ||
|Adv. Hit=KD | |Adv. Hit=KD | ||
|Adv. Guard= | |Adv. Guard=-18 | ||
|description= | |description= | ||
}} | }} | ||
| Line 523: | Line 495: | ||
}} | }} | ||
{{AttackData-ROTD | {{AttackData-ROTD | ||
|Damage=27 ( | |Damage=27 (32 with Jones) | ||
|Guard= | |Guard= | ||
|Stun=0 | |Stun=0 | ||
| Line 532: | Line 504: | ||
|Adv. Hit=KD | |Adv. Hit=KD | ||
|Adv. Guard= | |Adv. Guard= | ||
|description=Follow up with another 236BC for more damage. Costs an extra bar. | |description=Follow up with another 236BC for more damage. Costs an extra bar. Jones's Funky Impact at the end causes a wall splat, which can break a wall. Kang cannot tech from his knockdown, so no combo. | ||
}} | }} | ||
}} | }} | ||
| Line 538: | Line 510: | ||
==Special Moves== | ==Special Moves== | ||
{{MoveData | {{MoveData | ||
|image= | |image=ROTD_Kang_236P.png | ||
|caption= | |caption=236A/C | ||
|name=Kang | |name=Fire Breath | ||
|data= | |||
{{AttackData-ROTD | |||
|Damage=18 | |||
|Guard=Mid/Air | |||
|Stun=8 | |||
|Cancel= | |||
|Startup=14 | |||
|Active= | |||
|Recovery= | |||
|Adv. Hit=KD | |||
|Adv. Guard=-10 | |||
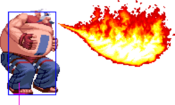
|description=Kang breathes fire! This is a short-ranged projectile, but it hits at round start and can even cause a wall hit there. Tag-ins beat this, in a case of broken-checks-broken, but Kang can still play with the threat to help him in. Great for spacing, since bigbodies cannot deal with this move well. | |||
}} | |||
{{AttackData-ROTD | |||
|Damage=18 | |||
|Guard=Mid/Air | |||
|Stun=8 | |||
|Cancel= | |||
|Startup=31 | |||
|Active= | |||
|Recovery= | |||
|Adv. Hit=KD | |||
|Adv. Guard=-4 | |||
|description=Just like the light version but has an extra hit, more start-up, and slightly more damage. | |||
}} | |||
}} | |||
{{MoveData | |||
|image=ROTD_Kang_41236K.png | |||
|caption=41236B/D | |||
|name=Kang Attack | |||
|data= | |||
{{AttackData-ROTD | |||
|Damage=20 | |||
|Guard=Mid | |||
|Stun=15 | |||
|Cancel= | |||
|Startup=29 (29-47 guard) | |||
|Active=34 | |||
|Recovery=10 | |||
|Adv. Hit=KD | |||
|Adv. Guard=-9 | |||
|description=Kang charges halfscreen. Very slow start-up but when it becomes active, it is invulnerable to any physical attack. It's also slow and really bad on block, and Kang has other ways to get in. Causes a wall splat on hit. | |||
}} | |||
{{AttackData-ROTD | |||
|Damage=20 | |||
|Guard=Mid | |||
|Stun=15 | |||
|Cancel= | |||
|Startup=29 (29-65 guard) | |||
|Active=51 | |||
|Recovery=8 | |||
|Adv. Hit=KD | |||
|Adv. Guard=-6 | |||
|description=Kang charges fullscreen. | |||
}} | |||
}} | |||
{{MoveData | |||
|image=ROTD_Kang_214P.png | |||
|caption=214A/C | |||
|name=Rolling Fire | |||
|data= | |data= | ||
{{AttackData-ROTD | {{AttackData-ROTD | ||
|Damage= | |Damage=20 | ||
|Guard= | |Guard=Mid/Air | ||
|Stun= | |Stun=15 | ||
|Cancel= | |Cancel= | ||
|Startup= | |Startup=14 | ||
|Active= | |Active= | ||
|Recovery= | |Recovery= | ||
|Adv. Hit= | |Adv. Hit= | ||
|Adv. Guard= | |Adv. Guard=-33 | ||
|description= | |description=Kang does a somersault propelled by his flame breath. Very sub-par anti-air and combo ender. | ||
}} | |||
{{AttackData-ROTD | |||
|Damage=20 | |||
|Guard=Mid/Air | |||
|Stun=15 | |||
|Cancel= | |||
|Startup=22 | |||
|Active= | |||
|Recovery= | |||
|Adv. Hit=KD | |||
|Adv. Guard=-33 | |||
|description=Kang leaps higher and further. Combos from a few less things. | |||
}} | |||
}} | |||
{{MoveData | |||
|image=ROTD_Kang_623P.png | |||
|caption=623A/C | |||
|name=Kang Screw | |||
|data= | |||
{{AttackData-ROTD | |||
|Damage=29 (2+3+2+3+5+5+15) | |||
|Guard=Mid/Air | |||
|Stun=14 (2×7) | |||
|Cancel= | |||
|Startup=5 (1-6 invuln) | |||
|Active= | |||
|Recovery= | |||
|Adv. Hit=KD | |||
|Adv. Guard=-41 | |||
|description=Spin to win! Kang jumps up vertically while spinning like a top. This move is Kang's best move since it builds so much meter, deals so much stun, and sends the opponent flying to the wall on hit. | |||
}} | }} | ||
{{AttackData-ROTD | {{AttackData-ROTD | ||
|Damage= | |Damage=29 (2×12+15) | ||
|Guard= | |Guard=Mid/Air | ||
|Stun= | |Stun=26 (2×13) | ||
|Cancel= | |Cancel= | ||
|Startup= | |Startup=9 (1-8 invuln) | ||
|Active= | |Active= | ||
|Recovery= | |Recovery= | ||
|Adv. Hit= | |Adv. Hit=KD | ||
|Adv. Guard= | |Adv. Guard=-57 | ||
|description= | |description=The heavy version gains additional height and hits, and it stuns even more. | ||
}} | }} | ||
}} | }} | ||
| Line 570: | Line 632: | ||
==Super Moves== | ==Super Moves== | ||
{{MoveData | {{MoveData | ||
|image= | |image=ROTD_Kang_6321463214P.png | ||
|caption= | |caption=6321463214A/C | ||
|name= | |name=Body Press Special | ||
|data= | |data= | ||
{{AttackData-ROTD | {{AttackData-ROTD | ||
|Damage= | |Damage=38 (15+1×12+20) | ||
|Guard= | |Guard= | ||
|Stun= | |Stun=26 (2×13) | ||
|Cancel= | |Cancel= | ||
|Startup= | |Startup=1 | ||
|Active= | |Active=1 | ||
|Recovery= | |Recovery=55 | ||
|Adv. Hit=KD | |Adv. Hit=KD | ||
|Adv. Guard= | |Adv. Guard= | ||
|description= | |description=Command grab. Kang grabs you and does his signature Kang screw. The throw resets the damage scaling, although given the amount of hits it doesn't matter much. | ||
}} | }} | ||
{{AttackData-ROTD | {{AttackData-ROTD | ||
|Damage= | |Damage=49 (1×14+56) | ||
|Guard= | |Guard= | ||
|Stun= | |Stun=0 | ||
|Cancel= | |Cancel= | ||
|Startup= | |Startup=1 | ||
|Active= | |Active=1 | ||
|Recovery= | |Recovery=55 | ||
|Adv. Hit=KD | |Adv. Hit=KD | ||
|Adv. Guard= | |Adv. Guard= | ||
|description= | |description=Kang follows up the Kang screw at its peak with a butt slam. Deals more damage, but unlike the light version, it doesn't deal any stun. | ||
}} | }} | ||
}} | }} | ||
Revision as of 08:52, 11 November 2024
Movelist
Impact
Command Normals
Special Moves
Super Moves
Close Normals
| Damage | Guard | Stun | Cancel | |
|---|---|---|---|---|
| 6 | Mid | 2 | Chain, Command, Special | |
| Startup | Active | Recovery | Adv. Hit | Adv. Guard |
| 4 | - | - | +1 | 0 |
| Damage | Guard | Stun | Cancel | |
|---|---|---|---|---|
| 8 | Mid | 4 | Command, Special | |
| Startup | Active | Recovery | Adv. Hit | Adv. Guard |
| 3 | - | - | -3 | -4 |
| Damage | Guard | Stun | Cancel | |
|---|---|---|---|---|
| 16 | Mid | 8 | Command, Special | |
| Startup | Active | Recovery | Adv. Hit | Adv. Guard |
| 6 | - | - | +1/+4 | -2 |
| Damage | Guard | Stun | Cancel | |
|---|---|---|---|---|
| 18 | Mid | 10 | Command, Special | |
| Startup | Active | Recovery | Adv. Hit | Adv. Guard |
| 6 | - | - | -1/+2 | -4 |
Standing Normals
| Damage | Guard | Stun | Cancel | |
|---|---|---|---|---|
| 8 | Mid | 2 | Chain, Command, Special | |
| Startup | Active | Recovery | Adv. Hit | Adv. Guard |
| 4 | - | - | -1 | -2 |
| Damage | Guard | Stun | Cancel | |
|---|---|---|---|---|
| 10 | Mid | 5 | - | |
| Startup | Active | Recovery | Adv. Hit | Adv. Guard |
| 6 | - | - | -4 | -5 |
| Damage | Guard | Stun | Cancel | |
|---|---|---|---|---|
| 18 | Mid | 10 | - | |
| Startup | Active | Recovery | Adv. Hit | Adv. Guard |
| 9 | - | - | -5/-2 | -8 |
| Damage | Guard | Stun | Cancel | ||
|---|---|---|---|---|---|
| 20 | Mid | 12 | - | ||
| Startup | Active | Recovery | Adv. Hit | Adv. Guard | |
| 11 | - | - | -7/-4 | -10 | |
|
Kang goes airborne just a bit… which is actually a big deal, at least for the Kang float bug. Refer to its writeup in the System section, but the gist is it makes him semi-airborne and immune to pushback, which then makes 5A mash an infinite. Outside of this glitch, the move is a poke which helps Kang close the gap, and it can go over lows. | |||||
Crouching Normals
| Damage | Guard | Stun | Cancel | |
|---|---|---|---|---|
| 6 | Mid | 2 | Chain, Command, Special | |
| Startup | Active | Recovery | Adv. Hit | Adv. Guard |
| 5 | - | - | 0 | -1 |
| Damage | Guard | Stun | Cancel | |
|---|---|---|---|---|
| 8 | Low | 4 | Command, Special | |
| Startup | Active | Recovery | Adv. Hit | Adv. Guard |
| 4 | - | - | +3 | +2 |
| Damage | Guard | Stun | Cancel | |
|---|---|---|---|---|
| 16 | Mid | 8 | Command, Special | |
| Startup | Active | Recovery | Adv. Hit | Adv. Guard |
| 5 | - | - | +2 | -4 |
| Damage | Guard | Stun | Cancel | |
|---|---|---|---|---|
| 20 | Low | 15 | - | |
| Startup | Active | Recovery | Adv. Hit | Adv. Guard |
| 6 | - | - | KD | -2 |
Jumping Normals
| Damage | Guard | Stun | Cancel | |
|---|---|---|---|---|
| 8 | High/Air | 6 | Special | |
| Startup | Active | Recovery | Adv. Hit | Adv. Guard |
| 3 | - | - | - | - |
| Damage | Guard | Stun | Cancel | |
|---|---|---|---|---|
| 10 | High/Air | 8 | Special | |
| Startup | Active | Recovery | Adv. Hit | Adv. Guard |
| 5 | - | - | - | - |
| Damage | Guard | Stun | Cancel | |
|---|---|---|---|---|
| 14 | High/Air | 12 | Special | |
| Startup | Active | Recovery | Adv. Hit | Adv. Guard |
| 8 | - | - | - | - |
| Damage | Guard | Stun | Cancel | |
|---|---|---|---|---|
| 14 | High/Air | 12 | Special | |
| Startup | Active | Recovery | Adv. Hit | Adv. Guard |
| 5 | - | - | - | - |
| Damage | Guard | Stun | Cancel | ||
|---|---|---|---|---|---|
| 16 | High/Air | 12 | Special | ||
| Startup | Active | Recovery | Adv. Hit | Adv. Guard | |
| 5 | - | - | - | - | |
|
One of Kang's key moves as an approach tool and a crossup. Coupled with his low jump, this helps him to bulldog very well. | |||||
Command Normals
| Damage | Guard | Stun | Cancel | ||
|---|---|---|---|---|---|
| 12 | High | 14 | Special | ||
| Startup | Active | Recovery | Adv. Hit | Adv. Guard | |
| 5 | 6+(12)+2 | 16 | +1 | -5 | |
|
Doskoi! Kang does a delayed upward then downward kick. At the peak of the upward kick, there is a brief hitbox that can juggle airborne opponents; on some characters, you can juggle with this multiple times. Downward overhead kick can be canceled into any special or super. | |||||
| Damage | Guard | Stun | Cancel | ||
|---|---|---|---|---|---|
| 16 (4×4) | Mid | 12 (3×4) | Special | ||
| Startup | Active | Recovery | Adv. Hit | Adv. Guard | |
| 13 | 6+(5)+6+(1)+6+(11)+2 | 29 | KD | -14 | |
|
A 4 hit sumo palm attack. The 4th attack sends the opponent to the wall. You can cancel this command move at any point of the move. | |||||
| Damage | Guard | Stun | Cancel | ||
|---|---|---|---|---|---|
| 10 | Mid | 14 | Special | ||
| Startup | Active | Recovery | Adv. Hit | Adv. Guard | |
| 7 (3 on hit) | 7-31 guard | 9 | KD | - | |
|
Kang sucks in his belly to prepare a counter. This move is a high/mid counter which, on activation, can be cancelled into a special. Doesn't come out unless it catches anything. | |||||
Throws
| Damage | Guard | Stun | Cancel | ||
|---|---|---|---|---|---|
| 20 | - | 0 | - | ||
| Startup | Active | Recovery | Adv. Hit | Adv. Guard | |
| 1 | 1 | - | KD | - | |
|
Kang throws the opponent over his head three quarters of the screen away. | |||||
System
| Damage | Guard | Stun | Cancel | |
|---|---|---|---|---|
| 16 | Mid | 0 | Command, Special | |
| Startup | Active | Recovery | Adv. Hit | Adv. Guard |
| 6 (1-19 invuln) | 2 | 25 | KD | -10 |
| Damage | Guard | Stun | Cancel | |
|---|---|---|---|---|
| 10 | Mid | 10 | - | |
| Startup | Active | Recovery | Adv. Hit | Adv. Guard |
| 13 (1-16 invuln) | - | - | KD | -8 |
| Damage | Guard | Stun | Cancel | |
|---|---|---|---|---|
| 5+5×5 | Mid | 0 | Hit: Command, Special | |
| Startup | Active | Recovery | Adv. Hit | Adv. Guard |
| 14 | - | - | KD | -18 |
| Damage | Guard | Stun | Cancel | ||
|---|---|---|---|---|---|
| 30 | Mid | 0 | - | ||
| Startup | Active | Recovery | Adv. Hit | Adv. Guard | |
| 4 | 60 | 29 | KD | -13 | |
|
Your partner must be alive and able to tag in. | |||||
| Damage | Guard | Stun | Cancel | ||
| 27 (32 with Jones) | - | 0 | - | ||
| Startup | Active | Recovery | Adv. Hit | Adv. Guard | |
| - | - | - | KD | - | |
|
Follow up with another 236BC for more damage. Costs an extra bar. Jones's Funky Impact at the end causes a wall splat, which can break a wall. Kang cannot tech from his knockdown, so no combo. | |||||
Special Moves
| Damage | Guard | Stun | Cancel | ||
|---|---|---|---|---|---|
| 18 | Mid/Air | 8 | - | ||
| Startup | Active | Recovery | Adv. Hit | Adv. Guard | |
| 14 | - | - | KD | -10 | |
|
Kang breathes fire! This is a short-ranged projectile, but it hits at round start and can even cause a wall hit there. Tag-ins beat this, in a case of broken-checks-broken, but Kang can still play with the threat to help him in. Great for spacing, since bigbodies cannot deal with this move well. | |||||
| Damage | Guard | Stun | Cancel | ||
| 18 | Mid/Air | 8 | - | ||
| Startup | Active | Recovery | Adv. Hit | Adv. Guard | |
| 31 | - | - | KD | -4 | |
|
Just like the light version but has an extra hit, more start-up, and slightly more damage. | |||||
| Damage | Guard | Stun | Cancel | ||
|---|---|---|---|---|---|
| 20 | Mid | 15 | - | ||
| Startup | Active | Recovery | Adv. Hit | Adv. Guard | |
| 29 (29-47 guard) | 34 | 10 | KD | -9 | |
|
Kang charges halfscreen. Very slow start-up but when it becomes active, it is invulnerable to any physical attack. It's also slow and really bad on block, and Kang has other ways to get in. Causes a wall splat on hit. | |||||
| Damage | Guard | Stun | Cancel | ||
| 20 | Mid | 15 | - | ||
| Startup | Active | Recovery | Adv. Hit | Adv. Guard | |
| 29 (29-65 guard) | 51 | 8 | KD | -6 | |
|
Kang charges fullscreen. | |||||
| Damage | Guard | Stun | Cancel | ||
|---|---|---|---|---|---|
| 20 | Mid/Air | 15 | - | ||
| Startup | Active | Recovery | Adv. Hit | Adv. Guard | |
| 14 | - | - | - | -33 | |
|
Kang does a somersault propelled by his flame breath. Very sub-par anti-air and combo ender. | |||||
| Damage | Guard | Stun | Cancel | ||
| 20 | Mid/Air | 15 | - | ||
| Startup | Active | Recovery | Adv. Hit | Adv. Guard | |
| 22 | - | - | KD | -33 | |
|
Kang leaps higher and further. Combos from a few less things. | |||||
| Damage | Guard | Stun | Cancel | ||
|---|---|---|---|---|---|
| 29 (2+3+2+3+5+5+15) | Mid/Air | 14 (2×7) | - | ||
| Startup | Active | Recovery | Adv. Hit | Adv. Guard | |
| 5 (1-6 invuln) | - | - | KD | -41 | |
|
Spin to win! Kang jumps up vertically while spinning like a top. This move is Kang's best move since it builds so much meter, deals so much stun, and sends the opponent flying to the wall on hit. | |||||
| Damage | Guard | Stun | Cancel | ||
| 29 (2×12+15) | Mid/Air | 26 (2×13) | - | ||
| Startup | Active | Recovery | Adv. Hit | Adv. Guard | |
| 9 (1-8 invuln) | - | - | KD | -57 | |
|
The heavy version gains additional height and hits, and it stuns even more. | |||||
Super Moves
| Damage | Guard | Stun | Cancel | ||
|---|---|---|---|---|---|
| 38 (15+1×12+20) | - | 26 (2×13) | - | ||
| Startup | Active | Recovery | Adv. Hit | Adv. Guard | |
| 1 | 1 | 55 | KD | - | |
|
Command grab. Kang grabs you and does his signature Kang screw. The throw resets the damage scaling, although given the amount of hits it doesn't matter much. | |||||
| Damage | Guard | Stun | Cancel | ||
| 49 (1×14+56) | - | 0 | - | ||
| Startup | Active | Recovery | Adv. Hit | Adv. Guard | |
| 1 | 1 | 55 | KD | - | |
|
Kang follows up the Kang screw at its peak with a butt slam. Deals more damage, but unlike the light version, it doesn't deal any stun. | |||||
