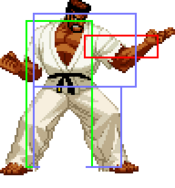
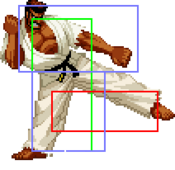
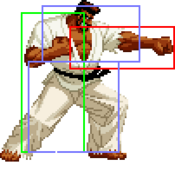
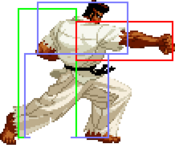
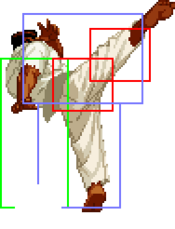
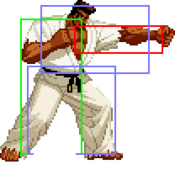
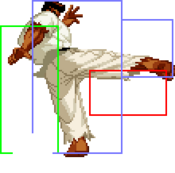
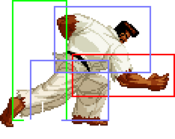
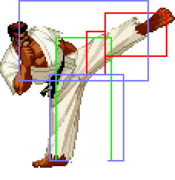
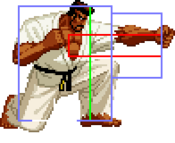
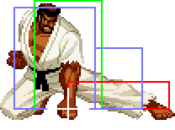
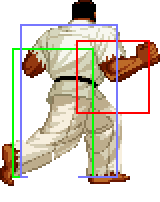
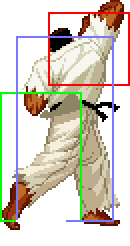
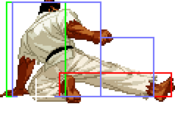
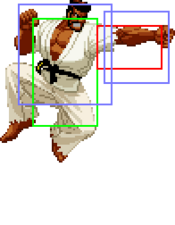
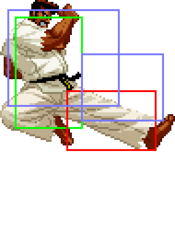
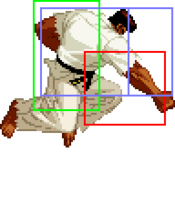
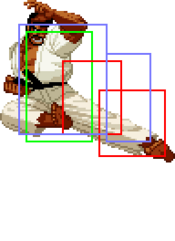
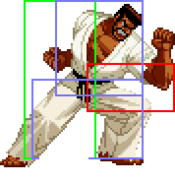
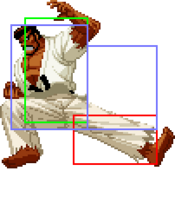
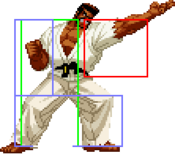
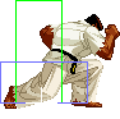
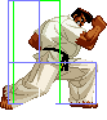
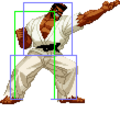
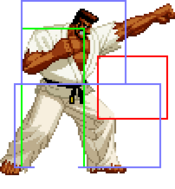
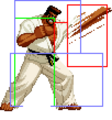
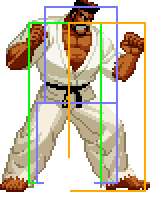
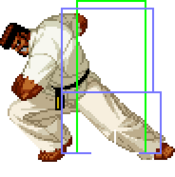
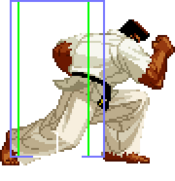
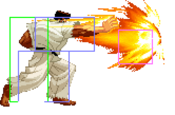
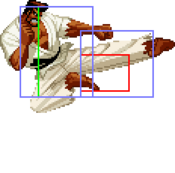
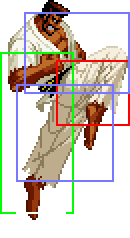
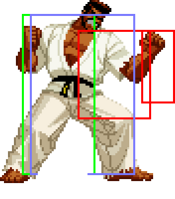
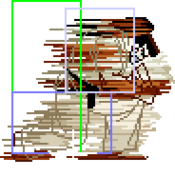
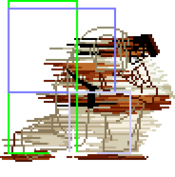
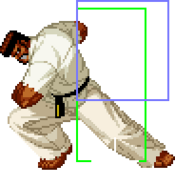
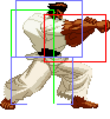
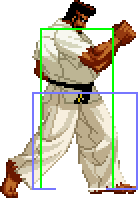
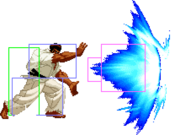
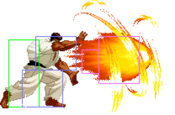
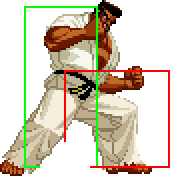
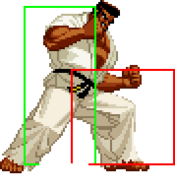
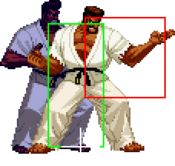
(hitboxes) |
|||
| Line 43: | Line 43: | ||
* Special/Super moves with <span style="color:#ff0000;">"Guard" data in red text</span> are impossible to just defend at 0-pixel health bar. | * Special/Super moves with <span style="color:#ff0000;">"Guard" data in red text</span> are impossible to just defend at 0-pixel health bar. | ||
{| border="1em" cellspacing="0" style="border: 1px solid #999;" | |||
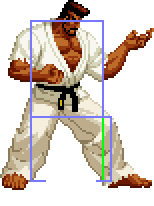
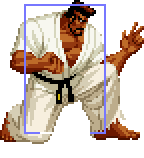
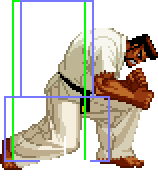
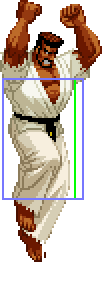
| align="center" | Standing/Taunting || align="center" | Crouching || align="center" | Dash || align="center" | Jumping | |||
|- | |||
| align="center"; valign="bottom" | [[File:Garou Marco Stand.png]] || align="center"; valign="bottom" | [[File:Garou Marco Crouch.png|bottom]] || align="center"; valign="bottom" | [[File:Garou Marco Dash.png]] || align="center"; valign="bottom" | [[File:Garou Marco Jump.png]] | |||
|- | |||
| align="center" | || align="center" | || align="center" | || align="center" | 35F | |||
|} | |||
===Close Standing Normals=== | ===Close Standing Normals=== | ||
| Line 50: | Line 56: | ||
<font style="visibility:hidden" size="0"></font> | <font style="visibility:hidden" size="0"></font> | ||
{{MoveData | {{MoveData | ||
|image= | |image=Garou_Marco c5A.png | ||
|name=c.5A | |name=c.5A | ||
|subtitle= | |subtitle= | ||
| Line 75: | Line 81: | ||
<font style="visibility:hidden" size="0"></font> | <font style="visibility:hidden" size="0"></font> | ||
{{MoveData | {{MoveData | ||
|image= | |image=Garou_Marco c5B.png | ||
|name=c.5B | |name=c.5B | ||
|subtitle= | |subtitle= | ||
| Line 102: | Line 108: | ||
<font style="visibility:hidden" size="0"></font> | <font style="visibility:hidden" size="0"></font> | ||
{{MoveData | {{MoveData | ||
|image= | |image=Garou_Marco c5C.png | ||
|image2= | |image2=Garou_Marco c5C_1.png | ||
|name=c.5C | |name=c.5C | ||
|subtitle= | |subtitle= | ||
| Line 130: | Line 136: | ||
<font style="visibility:hidden" size="0"></font> | <font style="visibility:hidden" size="0"></font> | ||
{{MoveData | {{MoveData | ||
|image= | |image=Garou_Marco c5D.png | ||
|name=c.5D | |name=c.5D | ||
|subtitle= | |subtitle= | ||
| Line 159: | Line 165: | ||
<font style="visibility:hidden" size="0"></font> | <font style="visibility:hidden" size="0"></font> | ||
{{MoveData | {{MoveData | ||
|image= | |image=Garou_Marco f5A.png | ||
|name=f.5A | |name=f.5A | ||
|subtitle= | |subtitle= | ||
| Line 184: | Line 190: | ||
<font style="visibility:hidden" size="0"></font> | <font style="visibility:hidden" size="0"></font> | ||
{{MoveData | {{MoveData | ||
|image= | |image=Garou_Marco f5B.png | ||
|name=f.5B | |name=f.5B | ||
|subtitle= | |subtitle= | ||
| Line 209: | Line 215: | ||
<font style="visibility:hidden" size="0"></font> | <font style="visibility:hidden" size="0"></font> | ||
{{MoveData | {{MoveData | ||
|image= | |image=Garou_Marco f5C.png | ||
|name=f.5C | |name=f.5C | ||
|subtitle= | |subtitle= | ||
| Line 234: | Line 240: | ||
<font style="visibility:hidden" size="0"></font> | <font style="visibility:hidden" size="0"></font> | ||
{{MoveData | {{MoveData | ||
|image= | |image=Garou_Marco f5D.png | ||
|name=f.5D | |name=f.5D | ||
|subtitle= | |subtitle= | ||
| Line 265: | Line 271: | ||
<font style="visibility:hidden" size="0"></font> | <font style="visibility:hidden" size="0"></font> | ||
{{MoveData | {{MoveData | ||
|image= | |image=Garou_Marco 2A.png | ||
|name=2A | |name=2A | ||
|subtitle= | |subtitle= | ||
| Line 292: | Line 298: | ||
<font style="visibility:hidden" size="0"></font> | <font style="visibility:hidden" size="0"></font> | ||
{{MoveData | {{MoveData | ||
|image= | |image=Garou_Marco 2B.png | ||
|name=2B | |name=2B | ||
|subtitle= | |subtitle= | ||
| Line 319: | Line 325: | ||
<font style="visibility:hidden" size="0"></font> | <font style="visibility:hidden" size="0"></font> | ||
{{MoveData | {{MoveData | ||
|image= | |image=Garou_Marco 2C.png | ||
|image2= | |image2=Garou_Marco 2C_1.png | ||
|name=2C | |name=2C | ||
|subtitle= | |subtitle= | ||
| Line 347: | Line 353: | ||
<font style="visibility:hidden" size="0"></font> | <font style="visibility:hidden" size="0"></font> | ||
{{MoveData | {{MoveData | ||
|image= | |image=Garou_Marco 2D.png | ||
|name=2D | |name=2D | ||
|subtitle= | |subtitle= | ||
| Line 374: | Line 380: | ||
<font style="visibility:hidden" size="0"></font> | <font style="visibility:hidden" size="0"></font> | ||
{{MoveData | {{MoveData | ||
|image= | |image=Garou_Marco jA.png | ||
|name=j.A | |name=j.A | ||
|subtitle= | |subtitle= | ||
| Line 399: | Line 405: | ||
<font style="visibility:hidden" size="0"></font> | <font style="visibility:hidden" size="0"></font> | ||
{{MoveData | {{MoveData | ||
|image= | |image=Garou_Marco jB.png | ||
|name=j.B | |name=j.B | ||
|subtitle= | |subtitle= | ||
| Line 428: | Line 434: | ||
<font style="visibility:hidden" size="0"></font> | <font style="visibility:hidden" size="0"></font> | ||
{{MoveData | {{MoveData | ||
|image= | |image=Garou_Marco jC.png | ||
|name=j.C | |name=j.C | ||
|subtitle= | |subtitle= | ||
| Line 453: | Line 459: | ||
<font style="visibility:hidden" size="0"></font> | <font style="visibility:hidden" size="0"></font> | ||
{{MoveData | {{MoveData | ||
|image= | |image=Garou_Marco jD.png | ||
|name=j.D | |name=j.D | ||
|subtitle= | |subtitle= | ||
| Line 482: | Line 488: | ||
<font style="visibility:hidden" size="0"></font> | <font style="visibility:hidden" size="0"></font> | ||
{{MoveData | {{MoveData | ||
|image= | |image=Garou_Marco 6A.png | ||
|name=Kyokugen Hiji | |name=Kyokugen Hiji | ||
|subtitle=6A | |subtitle=6A | ||
| Line 511: | Line 517: | ||
<font style="visibility:hidden" size="0"></font> | <font style="visibility:hidden" size="0"></font> | ||
{{MoveData | {{MoveData | ||
|image= | |image=Garou_Marco 5AB.png | ||
|name=5A+B | |name=5A+B | ||
|subtitle=Lower-body evasion attack | |subtitle=Lower-body evasion attack | ||
| Line 530: | Line 536: | ||
|Guard Crush Value=6 | |Guard Crush Value=6 | ||
|description= Just use the overhead command normal instead. Practically never worth using, kinda slow and has no follow ups. | |description= Just use the overhead command normal instead. Practically never worth using, kinda slow and has no follow ups. | ||
<div class="mw-collapsible"> | |||
<gallery> | |||
Garou_Marco 5AB 1.png|Frame 1 Lower-Body Invincibility | |||
</gallery> | |||
</div> | |||
}} | }} | ||
}} | }} | ||
| Line 536: | Line 547: | ||
<font style="visibility:hidden" size="0"></font> | <font style="visibility:hidden" size="0"></font> | ||
{{MoveData | {{MoveData | ||
|image= | |image=Garou_Marco_2AB.png | ||
|name=2A+B | |name=2A+B | ||
|subtitle=Upper-body evasion attack | |subtitle=Upper-body evasion attack | ||
| Line 558: | Line 566: | ||
|Guard Crush Value=6 | |Guard Crush Value=6 | ||
|description=1~6F upper-body invincibility. | |description=1~6F upper-body invincibility. | ||
<div class="mw-collapsible"> | |||
<gallery> | |||
Garou_Marco_2AB 1.png|Upper-Body Invincible Frames | |||
Garou_Marco_2AB 2.png|Vulnerable Startup | |||
Garou_Marco_2AB 3.png|Recovery | |||
</gallery> | |||
</div> | |||
}} | }} | ||
}} | }} | ||
| Line 566: | Line 581: | ||
<font style="visibility:hidden" size="0"></font> | <font style="visibility:hidden" size="0"></font> | ||
{{MoveData | {{MoveData | ||
|image= | |image=Garou Marco CD.png | ||
|name=Zanretsuken (T.O.P. Attack) | |name=Zanretsuken (T.O.P. Attack) | ||
|input=C+D (T.O.P. Only) | |input=C+D (T.O.P. Only) | ||
| Line 592: | Line 607: | ||
A single hit usually also launches them high, a glance hit or the full thing also always does a hard knockdown, potentially useful for getting a second to breathe. <br> | A single hit usually also launches them high, a glance hit or the full thing also always does a hard knockdown, potentially useful for getting a second to breathe. <br> | ||
Has niche but numerous applications. | Has niche but numerous applications. | ||
<div class="mw-collapsible"> | |||
<gallery> | |||
Garou_Marco CD 1.png|Alternates between this hitbox and the first | |||
Garou_Marco CD 2.png|Ending hit | |||
Garou_Marco CD 3.png| | |||
</gallery> | |||
</div> | |||
}} | }} | ||
}} | }} | ||
| Line 600: | Line 622: | ||
<font style="visibility:hidden" size="0"></font> | <font style="visibility:hidden" size="0"></font> | ||
{{MoveData | {{MoveData | ||
|image= | |image=Garou_Marco Throw.png | ||
|name=Kyokugen Zu Tsuki | |name=Kyokugen Zu Tsuki | ||
|input='''Close''' 4/6C | |input='''Close''' 4/6C | ||
| Line 628: | Line 650: | ||
<font style="visibility:hidden" size="0"></font> | <font style="visibility:hidden" size="0"></font> | ||
{{MoveData | {{MoveData | ||
|image= | |image=Garou_Marco 6AC.png | ||
|name=6A+C | |name=6A+C | ||
|subtitle=Forward Feint | |subtitle=Forward Feint | ||
| Line 654: | Line 676: | ||
===== <span class="invisible-header">Down Feint (2AC)</span> ===== | ===== <span class="invisible-header">Down Feint (2AC)</span> ===== | ||
{{MoveData | {{MoveData | ||
|image= | |image=Garou_Marco 2AC.png | ||
|name=2A+C | |name=2A+C | ||
|subtitle=Down Feint | |subtitle=Down Feint | ||
| Line 683: | Line 705: | ||
<font style="visibility:hidden" size="0"></font> | <font style="visibility:hidden" size="0"></font> | ||
{{MoveData | {{MoveData | ||
|image= | |image=Garou Marco 236A.png | ||
|name=Ko-ou Ken | |name=Ko-ou Ken | ||
|input=236A/C | |input=236A/C | ||
| Line 733: | Line 755: | ||
<font style="visibility:hidden" size="0"></font> | <font style="visibility:hidden" size="0"></font> | ||
{{MoveData | {{MoveData | ||
|image= | |image=Garou Marco 236B.png | ||
|image2=Garou Marco 236D.png | |||
|name=Hien Shippu Kyaku | |name=Hien Shippu Kyaku | ||
|input= 236B/D | |input= 236B/D | ||
|subtitle= | |subtitle= | ||
|caption= | |caption=B | ||
|caption2=D | |||
|data= Niche special move, way too minus on block and has few, if any combos for general use in most scenarios.<br> | |data= Niche special move, way too minus on block and has few, if any combos for general use in most scenarios.<br> | ||
{{AttackData-Garou | {{AttackData-Garou | ||
| Line 770: | Line 794: | ||
|Guard Crush Value=4, 4 | |Guard Crush Value=4, 4 | ||
|description= Smelly special move, mainly used as a callout read and little else. Second hit knocks down, while being surprisingly stubby. Pretty much the whole orange flash ISN'T a hitbox.<br><br> Potentially decent as anti-air GC bait, but mind them going for an air JD as a response. The second hit will whiff on ALL crouching opponents on the ground, even Tizoc! | |description= Smelly special move, mainly used as a callout read and little else. Second hit knocks down, while being surprisingly stubby. Pretty much the whole orange flash ISN'T a hitbox.<br><br> Potentially decent as anti-air GC bait, but mind them going for an air JD as a response. The second hit will whiff on ALL crouching opponents on the ground, even Tizoc! | ||
<div class="mw-collapsible"> | |||
<gallery> | |||
Garou Marco 236D 1.png| | |||
Garou_Marco 236D 2.png| | |||
</gallery> | |||
</div> | |||
}} | }} | ||
}} | }} | ||
| Line 779: | Line 809: | ||
| input=623A/C (Break OK) | | input=623A/C (Break OK) | ||
| subtitle= | | subtitle= | ||
| image= | | image=Garou Marco 623A.png | ||
| caption= | | caption= | ||
| linkname= | | linkname= | ||
| Line 799: | Line 829: | ||
| Guard Crush Value =7 | | Guard Crush Value =7 | ||
| description = Used as combo filler in some counter hit corner juggle combos. Can potentially be used as an early anti-air to catch the opponent off guard and can potentially score a counter hit, although somewhat risky. | | description = Used as combo filler in some counter hit corner juggle combos. Can potentially be used as an early anti-air to catch the opponent off guard and can potentially score a counter hit, although somewhat risky. | ||
<div class="mw-collapsible"> | |||
<gallery> | |||
Garou Marco 623A 1.png|Does not come out when braked | |||
</gallery> | |||
</div> | |||
}} | }} | ||
{{AttackData-Garou | {{AttackData-Garou | ||
| Line 834: | Line 869: | ||
| Guard Crush Value =7 | | Guard Crush Value =7 | ||
| description = | | description = | ||
<div class="mw-collapsible"> | |||
<gallery> | |||
Garou Marco 623A 1.png|Does not come out when braked | |||
</gallery> | |||
</div> | |||
}} | }} | ||
{{AttackData-Garou | {{AttackData-Garou | ||
| Line 858: | Line 898: | ||
<font style="visibility:hidden" size="0"></font> | <font style="visibility:hidden" size="0"></font> | ||
{{MoveData | {{MoveData | ||
|image= | |image=Garou Marco 214A.png | ||
|image2=Garou Marco 214B.png | |||
|name=Harai | |name=Harai | ||
|input= 214A/B | |input= 214A/B | ||
|subtitle= | |subtitle= | ||
|caption= | |caption=A | ||
|caption2=B | |||
|data= Both are more useful as dash replacements for gaining meter, as the counter active frames are pretty short. | |data= Both are more useful as dash replacements for gaining meter, as the counter active frames are pretty short. | ||
{{AttackData-Garou | {{AttackData-Garou | ||
| Line 901: | Line 943: | ||
1~3F lower-body invincibility, 4~13F of lower-body counter state, after counter is initiated the counter-attack startup is 2F. | 1~3F lower-body invincibility, 4~13F of lower-body counter state, after counter is initiated the counter-attack startup is 2F. | ||
<div class="mw-collapsible"> | |||
<gallery> | |||
Garou Marco 214B 1.png|Startup low invincibility | |||
</gallery> | |||
</div> | |||
}} | }} | ||
}} | }} | ||
| Line 907: | Line 954: | ||
<font style="visibility:hidden" size="0"></font> | <font style="visibility:hidden" size="0"></font> | ||
{{MoveData | {{MoveData | ||
|image= | |image=Garou Marco -C-_1.png | ||
|name=Ryuu-sen Ken | |name=Ryuu-sen Ken | ||
|input= [C] | |input= [C] | ||
|subtitle= | |subtitle= | ||
|caption= | |caption=Startup lower-body invincibility | ||
|data= | |data= | ||
You need to hold C to charge this, so it's kinda risky and gimmicky.<br><br> | You need to hold C to charge this, so it's kinda risky and gimmicky.<br><br> | ||
| Line 938: | Line 985: | ||
|Guard Crush Value=7 | |Guard Crush Value=7 | ||
|description=Charge time is 120F (~2 seconds) or more. | |description=Charge time is 120F (~2 seconds) or more. | ||
<div class="mw-collapsible"> | |||
<gallery> | |||
Garou Marco -C-.png| | |||
</gallery> | |||
</div> | |||
}} | }} | ||
{{AttackData-Garou | {{AttackData-Garou | ||
| Line 954: | Line 1,006: | ||
|Guard Crush Value=8 | |Guard Crush Value=8 | ||
|description=Charge time is 240F (~4 seconds) or more. | |description=Charge time is 240F (~4 seconds) or more. | ||
<div class="mw-collapsible"> | |||
<gallery> | |||
Garou Marco -C- LV2.png| | |||
</gallery> | |||
</div> | |||
}} | }} | ||
{{AttackData-Garou | {{AttackData-Garou | ||
| Line 970: | Line 1,027: | ||
|Guard Crush Value=9 | |Guard Crush Value=9 | ||
|description=Charge time is 480F (~8 seconds) or more. | |description=Charge time is 480F (~8 seconds) or more. | ||
<div class="mw-collapsible"> | |||
<gallery> | |||
Garou Marco -C- LV3.png| | |||
</gallery> | |||
</div> | |||
}} | }} | ||
{{AttackData-Garou | {{AttackData-Garou | ||
| Line 986: | Line 1,048: | ||
|Guard Crush Value=4×3 | |Guard Crush Value=4×3 | ||
|description=Charge time is 960F (~16 seconds) or more. Travels really far so sometimes a decent burst option or for a GC against projectiles | |description=Charge time is 960F (~16 seconds) or more. Travels really far so sometimes a decent burst option or for a GC against projectiles | ||
<div class="mw-collapsible"> | |||
<gallery> | |||
Garou Marco -C- LV4.png| | |||
</gallery> | |||
</div> | |||
}} | }} | ||
}} | }} | ||
| Line 992: | Line 1,059: | ||
<font style="visibility:hidden" size="0"></font> | <font style="visibility:hidden" size="0"></font> | ||
{{MoveData | {{MoveData | ||
|image= | |image=Garou Marco -D-_1.png | ||
|name=Ko-sen Kyaku | |name=Ko-sen Kyaku | ||
|input= [D] | |input= [D] | ||
|subtitle= | |subtitle= | ||
|caption= | |caption=Startup upper-body invincibility | ||
|data= | |data= | ||
Requires holding down the D button to charge. Like his Ryuu-sen Ken, but way less risky to work with, you don't lose much outside of:<br> | Requires holding down the D button to charge. Like his Ryuu-sen Ken, but way less risky to work with, you don't lose much outside of:<br> | ||
| Line 1,022: | Line 1,089: | ||
|Guard Crush Value=8 | |Guard Crush Value=8 | ||
|description=Charge time is 120F (~2 seconds) or more. | |description=Charge time is 120F (~2 seconds) or more. | ||
<div class="mw-collapsible"> | |||
<gallery> | |||
Garou Marco -D-.png| | |||
</gallery> | |||
</div> | |||
}} | }} | ||
{{AttackData-Garou | {{AttackData-Garou | ||
| Line 1,038: | Line 1,110: | ||
|Guard Crush Value=8 | |Guard Crush Value=8 | ||
|description=Charge time is 240F (~4 seconds) or more. | |description=Charge time is 240F (~4 seconds) or more. | ||
<div class="mw-collapsible"> | |||
<gallery> | |||
Garou Marco -D- LV2.png| | |||
</gallery> | |||
</div> | |||
}} | }} | ||
{{AttackData-Garou | {{AttackData-Garou | ||
| Line 1,054: | Line 1,131: | ||
|Guard Crush Value=9 | |Guard Crush Value=9 | ||
|description=Charge time is 480F (~8 seconds) or more. | |description=Charge time is 480F (~8 seconds) or more. | ||
<div class="mw-collapsible"> | |||
<gallery> | |||
Garou Marco -D- LV3.png| | |||
</gallery> | |||
</div> | |||
}} | }} | ||
{{AttackData-Garou | {{AttackData-Garou | ||
| Line 1,070: | Line 1,152: | ||
|Guard Crush Value=4×3 | |Guard Crush Value=4×3 | ||
|description=Charge time is 960F (~16 seconds) or more. | |description=Charge time is 960F (~16 seconds) or more. | ||
<div class="mw-collapsible"> | |||
<gallery> | |||
Garou Marco -D- LV4.png| | |||
</gallery> | |||
</div> | |||
}} | }} | ||
}} | }} | ||
| Line 1,077: | Line 1,164: | ||
<font style="visibility:hidden" size="0"></font> | <font style="visibility:hidden" size="0"></font> | ||
{{MoveData | {{MoveData | ||
|image = | |image =Garou Marco 236236A.png | ||
|image2=Garou Marco 236236C.png | |||
|name =Haou Shoukou Ken | |name =Haou Shoukou Ken | ||
|input =236236A/C | |input =236236A/C (S/P Power) | ||
|caption= | |caption=A | ||
|caption2=C | |||
|data= Eats through other projectiles that aren't Kain's balls so you can punish them with this.<br> | |data= Eats through other projectiles that aren't Kain's balls so you can punish them with this.<br> | ||
{{AttackData-Garou | {{AttackData-Garou | ||
| Line 1,125: | Line 1,214: | ||
<font style="visibility:hidden" size="0"></font> | <font style="visibility:hidden" size="0"></font> | ||
{{MoveData | {{MoveData | ||
|image = | |image =Garou Marco 236236B.png | ||
|image2=Garou Marco 236236D.png | |||
|name =Kyokugen Kohou | |name =Kyokugen Kohou | ||
|input =236236B/D | |input =236236B/D (S/P Power) | ||
|caption= | |caption=B | ||
|caption2=D | |||
|data= | |data= | ||
{{AttackData-Garou | {{AttackData-Garou | ||
| Line 1,147: | Line 1,238: | ||
1~4F full-body invincibility. | 1~4F full-body invincibility. | ||
<div class="mw-collapsible"> | |||
<gallery> | |||
Garou Marco 236236B 1.png| | |||
Garou Marco 236236B 2.png| | |||
</gallery> | |||
</div> | |||
}} | }} | ||
{{AttackData-Garou | {{AttackData-Garou | ||
| Line 1,166: | Line 1,263: | ||
1~5F full-body invincibility. | 1~5F full-body invincibility. | ||
<div class="mw-collapsible"> | |||
<gallery> | |||
Garou Marco 236236D 1.png| | |||
Garou Marco 236236D 2.png| | |||
</gallery> | |||
</div> | |||
}} | }} | ||
}} | }} | ||
| Line 1,173: | Line 1,276: | ||
<font style="visibility:hidden" size="0"></font> | <font style="visibility:hidden" size="0"></font> | ||
{{MoveData | {{MoveData | ||
|image = | |image =Garou Marco 236236236C LV1.png | ||
|name =Ryuuko Ranbu | |name =Ryuuko Ranbu | ||
|input =236236236C <br>(Press C rapidly) | |input =236236236C <br>(Press C rapidly) | ||
|caption= | |caption=Level 1 | ||
|data= A niche super, but looks cool as hell. Mostly the level 3 and 4 versions are used to any effect. | |data= A niche super, but looks cool as hell. Mostly the level 3 and 4 versions are used to any effect. | ||
{{AttackData-Garou | {{AttackData-Garou | ||
Revision as of 22:58, 16 July 2024
Introduction
Marco Rodriguez. Also known as Marco Rodrigues when using Portuguese spelling. Otherwise known for his English localized name -- Khushnood Butt.
Gameplay
Khushnood has many tools at his disposal to answer anything an opponent might do. With a 0 frame anti-air super, the fastest projectiles in the game, special moves that all knock down and quickly pressure into a corner, and a special move that does super level punishment damage, he has a lot going for him.
Khushnood's main drawback is his randomness. Breaking his dragon punch can be unreliable outside of certain combos because the window to brake changes based on when the move connects, and may connect and not juggle the opponent up. Played with precision, this can be avoided.
Bait a mistake, knock 'em down, then get in close and keep the pressure on.
| Strengths | Weaknesses |
|---|---|
|
|
Character Colors
Move List
Frame Data Source: https://w.atwiki.jp/garoumow/pages/26.html and https://w.atwiki.jp/garoumow/pages/64.html
| Data Help | |
|---|---|
| Disclaimer: This is meant to teach basic terminology used when describing moves. | |
| Hitbox: | A predefined area (usually a rectangle or rectangles) that tells the game how any given attack can come in contact with a character. Hitboxes are invisible to the player when normally playing. |
| Hurtbox: | A predefined area (usually a group of rectangles) that tell the game how your character is allowed to get hit by any incoming attack. Specifically, you'll get hit by (or block) an attack if that attack's hitbox ever overlaps your hurtbox. |
| Throw Box/Range: | Active throw frames and range. Your opponent will be thrown in this field if not in block or hit stun. |
| Projectile Box: | Hitbox on a projectile attack. |
| Guard/Counter Box: | The Guard Box or Counter Box. This appears when blocking or using a counter move. |
| Push Box: | Has no bearing on hit/hurt boxes. Just prevents characters to not pass through each other. (Also known as "Collision Box".) |
| Startup | The number of frames before an attack can hit the opponent. Does not include the first active frame. |
| Guard | The way this move must be blocked.
High or H or Overhead (especially when from the ground) -- must be blocked standing. |
| Damage | "Basic" damage -- Unmodified damage values
"Correct" damage -- Damage values accounting for damage scaling, TOP multiplier, and defense rate |
| Guard Crush Value | Decreases the defender's guard durability gauge by this value. |
| +X | Attacker has X number of advantage frames. |
| -X | Attacker has X number of disadvantage frames. |
| KD | Short for "knockdown", knocks down opponent on hit. |
| ◯ | Cancelable on both hit and block. |
| ∞ | Chain cancelable with the same button (renda cancel). |
| ※ | Cancelable on the first hit/part only. |
| 《X》OR «X» OR <<X>> OR (X) | X number of inactive frames between hits of multihit moves. |
| △ | Only cancelable on block. |
| ▽ | Only cancelable on hit. |
| × OR X | Not cancelable. |
Notes:
- Special/Super moves with "Guard" data in red text are impossible to just defend at 0-pixel health bar.
| Standing/Taunting | Crouching | Dash | Jumping |
 |
 |
 |
|
| 35F |
Close Standing Normals
Close 5A
| Damage | Guard | Startup | Active | Recovery | Total |
|---|---|---|---|---|---|
| 5 | Mid | 4 | 4 | 5 | 13 |
| Hit Adv | Block Adv | Cancel on Hit | Cancel on Block | Guard Crush Value | |
| +6 | +6 | X / ∞ | X / ∞ | 4 | |
|
Standing jab, good to mash on someone up close for basic pressure or a basic jab link combo. | |||||
Close 5B
| Damage | Guard | Startup | Active | Recovery | Total |
|---|---|---|---|---|---|
| 6 | Mid | 4 | 4 | 7 | 15 |
| Hit Adv | Block Adv | Cancel on Hit | Cancel on Block | Guard Crush Value | |
| +4 | +4 | X | X | 4 | |
|
The last 3F of recovery has full-body invincibility. | |||||
Close 5C
| Damage | Guard | Startup | Active | Recovery | Total |
|---|---|---|---|---|---|
| 5, 5 | Mid | 7 | 1, 《2》, 4 | 21 | 35 |
| Hit Adv | Block Adv | Cancel on Hit | Cancel on Block | Guard Crush Value | |
| -4 | -4 | ※ | ※ | 3, 3 | |
|
Not very good, cancel first hit into something else if you don't end up grabbing. | |||||
Close 5D
| Damage | Guard | Startup | Active | Recovery | Total |
|---|---|---|---|---|---|
| 10 | Mid | 5 | 4 | 26 | 35 |
| Hit Adv | Block Adv | Cancel on Hit | Cancel on Block | Guard Crush Value | |
| -9 | -9 | ◯ | ◯ | 5 | |
|
Leads to big damage combos | |||||
Far Standing Normals
Far 5A
| Damage | Guard | Startup | Active | Recovery | Total |
|---|---|---|---|---|---|
| 5 | Mid | 3 | 4 | 7 | 14 |
| Hit Adv | Block Adv | Cancel on Hit | Cancel on Block | Guard Crush Value | |
| +4 | +4 | X / ∞ | X / ∞ | 4 | |
|
Good range and a fast normal, used to cover some states like people dashing at you, trying to jump or stopping other jabs, and from pressure/jab link combos off of close standing A | |||||
Far 5B
| Damage | Guard | Startup | Active | Recovery | Total |
|---|---|---|---|---|---|
| 7 | Mid | 5 | 3 | 16 | 24 |
| Hit Adv | Block Adv | Cancel on Hit | Cancel on Block | Guard Crush Value | |
| -4 | -4 | X | X | 4 | |
|
A good fast poke, even if you get nothing from it. | |||||
Far 5C
| Damage | Guard | Startup | Active | Recovery | Total |
|---|---|---|---|---|---|
| 12 | Mid | 11 | 5 | 21 | 37 |
| Hit Adv | Block Adv | Cancel on Hit | Cancel on Block | Guard Crush Value | |
| -5 | -5 | X | X | 5 | |
|
Bad normal, big range but punishable by some supers on hit, and reward is nothing on hit. | |||||
Far 5D
| Damage | Guard | Startup | Active | Recovery | Total |
|---|---|---|---|---|---|
| 14 | Mid | 11 | 4 | 24 | 39 |
| Hit Adv | Block Adv | Cancel on Hit | Cancel on Block | Guard Crush Value | |
| -7 | -7 | X | ◯ | 5 | |
|
Another lacking normal, cancel it at far range with C 1/4+ screen from the opponent for deception and to help gain a bit of momentum. Whiffs on crouching opponents. | |||||
Crouching Normals
2A
| Damage | Guard | Startup | Active | Recovery | Total |
|---|---|---|---|---|---|
| 4 | Mid | 4 | 4 | 5 | 13 |
| Hit Adv | Block Adv | Cancel on Hit | Cancel on Block | Guard Crush Value | |
| +6 | +6 | X / ∞ | X / ∞ | 4 |
2B
| Damage | Guard | Startup | Active | Recovery | Total |
|---|---|---|---|---|---|
| 6 | Low | 4 | 4 | 6 | 14 |
| Hit Adv | Block Adv | Cancel on Hit | Cancel on Block | Guard Crush Value | |
| +5 | +5 | X / ∞ | X / ∞ | 4 |
2C
| Damage | Guard | Startup | Active | Recovery | Total |
|---|---|---|---|---|---|
| 9 | Mid | 5 | 1, 《1》, 2 | 22 | 31 |
| Hit Adv | Block Adv | Cancel on Hit | Cancel on Block | Guard Crush Value | |
| -5 | -5 | ◯ | ◯ | 5 |
2D
| Damage | Guard | Startup | Active | Recovery | Total |
|---|---|---|---|---|---|
| 10 | Low | 8 | 4 | 22 | 34 |
| Hit Adv | Block Adv | Cancel on Hit | Cancel on Block | Guard Crush Value | |
| KD | -5 | X | X | 5 | |
|
Your furthest reaching crouched normal, decently quick too. | |||||
Jumping Normals
jA
| Damage | Guard | Startup | Active | Recovery | Total |
|---|---|---|---|---|---|
| 6 | High | 5 | 10 | - | - |
| Hit Adv | Block Adv | Cancel on Hit | Cancel on Block | Guard Crush Value | |
| - | - | X | X | 4 | |
|
Your go to air to air given it's quick startup and decent range. | |||||
jB
| Damage | Guard | Startup | Active | Recovery | Total |
|---|---|---|---|---|---|
| 6 | High | 9 | 10 | - | - |
| Hit Adv | Block Adv | Cancel on Hit | Cancel on Block | Guard Crush Value | |
| - | - | X | X | 4 | |
|
A ton of active frames, can cross up and beat some anti airs Neutral or back hop B can beat out an upper-body evasion attack. | |||||
jC
| Damage | Guard | Startup | Active | Recovery | Total |
|---|---|---|---|---|---|
| 9 | High | 12 | 6 | - | - |
| Hit Adv | Block Adv | Cancel on Hit | Cancel on Block | Guard Crush Value | |
| - | - | X | X | 5 | |
|
Use it as an air mixup due to it's slower startup, and possibly a crossup with it's big hitbox. Also while you're charging D | |||||
jD
| Damage | Guard | Startup | Active | Recovery | Total |
|---|---|---|---|---|---|
| 9 | High | 9 | 7 | - | - |
| Hit Adv | Block Adv | Cancel on Hit | Cancel on Block | Guard Crush Value | |
| - | - | X | X | 5 | |
|
Arguably the best jump D in the game. Can be comboed out of and can be used to pressure pretty well. | |||||
Command Normals
Kyokugen Hiji (6A)
| Damage | Guard | Startup | Active | Recovery | Total |
|---|---|---|---|---|---|
| 12 | Overhead | 15 | 1 | 14 | 30 |
| Hit Adv | Block Adv | Cancel on Hit | Cancel on Block | Guard Crush Value | |
| +6 | +6 | X | X | 9 | |
|
Great overhead, relatively fast with good frame advantage, allowing you to link after it with various options and get a full combo conversion on hit. | |||||
Universal Moves
Lower-body Evasion Attack (5AB)
Upper-body Evasion Attack (2AB)
T.O.P. Attack (CD)
| Damage | Guard | Startup | Active | Recovery | Total |
|---|---|---|---|---|---|
| 2x8, 15 (base damage) | Mid | 10 | - | 20~ | - |
| Hit Adv | Block Adv | Cancel on Hit | Cancel on Block | Guard Crush Value | |
| KD | -24 | - | - | 2×8, 9 | |
|
One of the better T.O.P moves, has: -Respectable damage (even if you can't combo from it) | |||||
Throws
Ground Throw
| Damage | Guard | Startup | Active | Recovery | Total |
|---|---|---|---|---|---|
| 14 | - | 1 | - | - | - |
| Hit Adv | Block Adv | Cancel on Hit | Cancel on Block | Guard Crush Value | |
| +64 | - | - | - | - | |
|
Has good corner carry, standard throw that knocks down. Mainly for pressure. | |||||
Feints
Forward Feint (6AC)
| Damage | Guard | Startup | Active | Recovery | Total |
|---|---|---|---|---|---|
| - | - | - | - | - | 10 |
| Hit Adv | Block Adv | Cancel on Hit | Cancel on Block | Guard Crush Value | |
| - | - | - | - | - | |
|
Mimics the start of Haou Shoukou Ken C, and to a lesser extent the start of Haou Shoukou Ken A. | |||||
Down Feint (2AC)
| Damage | Guard | Startup | Active | Recovery | Total |
|---|---|---|---|---|---|
| - | - | - | - | - | 11 |
| Hit Adv | Block Adv | Cancel on Hit | Cancel on Block | Guard Crush Value | |
| - | - | - | - | - | |
|
Mimics the start of Kohou (and its break version) or Kyokugen Kohou. | |||||
Special Moves
Ko-ou Ken (236P)
Fastest fireball in the game. Does more damage and also leads to a knockdown in close range. Used for zoning/controlling space in neutral and as a meterless combo ender.
It is possible to renda cancel into his fireball from a st.A by inputting 5A > 236C~A or 5A > 236A~C (the timing is like chain cancelling his st.A).
Honestly both are used somewhat evenly, keeps people on their toes at further ranges.
| A | Damage | Guard | Startup | Active | Recovery | Total |
|---|---|---|---|---|---|---|
| 13(18) | Mid | 9 | - | - | - | |
| Hit Adv | Block Adv | Cancel on Hit | Cancel on Block | Guard Crush Value | ||
| KD | -5 | - | - | 7(8) | ||
| C | Damage | Guard | Startup | Active | Recovery | Total |
| 14(22) | Mid | 9 | - | - | - | |
| Hit Adv | Block Adv | Cancel on Hit | Cancel on Block | Guard Crush Value | ||
| KD | -5 | - | - | 8(9) |
Hien Shippu Kyaku (236K)
| B | Damage | Guard | Startup | Active | Recovery | Total |
|---|---|---|---|---|---|---|
| 8, 9 | Mid | 10 | - | - | - | |
| Hit Adv | Block Adv | Cancel on Hit | Cancel on Block | Guard Crush Value | ||
| KD | -8 | - | - | 4, 3 | ||
|
Used as combo filler, most notably after a Kohou A break in the corner. The chip ain't half bad as a last resort kill sealer. | ||||||
| D | Damage | Guard | Startup | Active | Recovery | Total |
| 8, 10 | Mid | 7 | - | - | - | |
| Hit Adv | Block Adv | Cancel on Hit | Cancel on Block | Guard Crush Value | ||
| KD | -7 | - | - | 4, 4 | ||
|
Smelly special move, mainly used as a callout read and little else. Second hit knocks down, while being surprisingly stubby. Pretty much the whole orange flash ISN'T a hitbox. | ||||||
Kohou (623P)
| A | Damage | Guard | Startup | Active | Recovery | Total |
|---|---|---|---|---|---|---|
| 10 | - | 4 | - | - | - | |
| Hit Adv | Block Adv | Cancel on Hit | Cancel on Block | Guard Crush Value | ||
| KD | -19 | - | - | 7 | ||
|
Used as combo filler in some counter hit corner juggle combos. Can potentially be used as an early anti-air to catch the opponent off guard and can potentially score a counter hit, although somewhat risky. | ||||||
| A Break | Damage | Guard | Startup | Active | Recovery | Total |
| 10 | - | 4 | - | - | - | |
| Hit Adv | Block Adv | Cancel on Hit | Cancel on Block | Guard Crush Value | ||
| KD | +2 | - | - | 7 | ||
|
Used more in the corner and in close range, when you would want a safer option than his C break, as there will be more pushback on block and will still be safe on JD. | ||||||
| C | Damage | Guard | Startup | Active | Recovery | Total |
| 10 | - | 4 | - | - | - | |
| Hit Adv | Block Adv | Cancel on Hit | Cancel on Block | Guard Crush Value | ||
| KD | -29 | - | - | 7 | ||
| C Break | Damage | Guard | Startup | Active | Recovery | Total |
| 10 | - | 4 | - | - | - | |
| Hit Adv | Block Adv | Cancel on Hit | Cancel on Block | Guard Crush Value | ||
| KD | 0 | - | - | 7 | ||
|
A staple in Marco's BnB combos. It can be linked or cancelled into from many of his normals as a combo starter. There's no I frames so as a DP it might trade, however you can guard cancel into it. You move more forward during the startup, giving more reach and being more risky than the A version. | ||||||
Harai (214A/B)
| A Jou-dan (High/Mid) |
Damage | Guard | Startup | Active | Recovery | Total |
|---|---|---|---|---|---|---|
| 15 | Mid | 3 | - | - | - | |
| Hit Adv | Block Adv | Cancel on Hit | Cancel on Block | Guard Crush Value | ||
| KD | - | - | - | 7 | ||
|
The A version counters mid/high attacks. Marco can convert into his Ko-ou Ken or Haou Shoukou Ken on a successful counter. 4~11F of upper-body counter state, after counter is initiated the counter-attack startup is 2F. | ||||||
| B Ge-dan (Low) |
Damage | Guard | Startup | Active | Recovery | Total |
| 15 | Mid | 3 | - | - | - | |
| Hit Adv | Block Adv | Cancel on Hit | Cancel on Block | Guard Crush Value | ||
| KD | - | - | - | 7 | ||
|
The B version counters low attacks. Marco can convert into his Ko-ou Ken or Haou Shoukou Ken on a successful counter. 1~3F lower-body invincibility, 4~13F of lower-body counter state, after counter is initiated the counter-attack startup is 2F. | ||||||
Ryuu-sen Ken ([C])
You can't use all of the following:
-Your C fireball
-Your C DP
-C Haou Shoukou Ken
-Your ability to grab (you can still tech with D though)
-Feint
-Ryuuko Ranbu
-TOP attack
Works as an easy guard cancel or to surprise people due to it's speed, and sometimes as a combo ender.
| Lvl.1 | Damage | Guard | Startup | Active | Recovery | Total |
|---|---|---|---|---|---|---|
| 15 | Mid | 12 | - | - | - | |
| Hit Adv | Block Adv | Cancel on Hit | Cancel on Block | Guard Crush Value | ||
| KD | -9 | - | - | 7 | ||
|
Charge time is 120F (~2 seconds) or more. | ||||||
| Lvl.2 | Damage | Guard | Startup | Active | Recovery | Total |
| 18 | Mid | 14 | - | - | - | |
| Hit Adv | Block Adv | Cancel on Hit | Cancel on Block | Guard Crush Value | ||
| KD | -9 | - | - | 8 | ||
|
Charge time is 240F (~4 seconds) or more. | ||||||
| Lvl.3 | Damage | Guard | Startup | Active | Recovery | Total |
| 22 | Mid | 14 | - | - | - | |
| Hit Adv | Block Adv | Cancel on Hit | Cancel on Block | Guard Crush Value | ||
| KD | -9 | - | - | 9 | ||
|
Charge time is 480F (~8 seconds) or more. | ||||||
| Lv4 | Damage | Guard | Startup | Active | Recovery | Total |
| 10, 10, 10 | Mid | 11 | - | - | - | |
| Hit Adv | Block Adv | Cancel on Hit | Cancel on Block | Guard Crush Value | ||
| KD | -11 | - | - | 4×3 | ||
|
Charge time is 960F (~16 seconds) or more. Travels really far so sometimes a decent burst option or for a GC against projectiles | ||||||
Ko-sen Kyaku ([D])
-Sweep
-A Great jump-in
-TOP attack
-Kyokugen Ko Hou
-And a situational special move
Can potentially be hard to punish on block for some characters if spaced well (works best with his level 1 charge).
Can also be used as an easy guard cancel thanks to its simple execution or to catch the opponent off guard in neutral and potentially score a counter hit. Can also be used as a combo ender for some combos.
| Lvl.1 | Damage | Guard | Startup | Active | Recovery | Total |
|---|---|---|---|---|---|---|
| 15 | Mid | 14 | - | - | - | |
| Hit Adv | Block Adv | Cancel on Hit | Cancel on Block | Guard Crush Value | ||
| KD | -8 | - | - | 8 | ||
|
Charge time is 120F (~2 seconds) or more. | ||||||
| Lvl.2 | Damage | Guard | Startup | Active | Recovery | Total |
| 18 | Mid | 14 | - | - | - | |
| Hit Adv | Block Adv | Cancel on Hit | Cancel on Block | Guard Crush Value | ||
| KD | -8 | - | - | 8 | ||
|
Charge time is 240F (~4 seconds) or more. | ||||||
| Lvl.3 | Damage | Guard | Startup | Active | Recovery | Total |
| 22 | Mid | 14 | - | - | - | |
| Hit Adv | Block Adv | Cancel on Hit | Cancel on Block | Guard Crush Value | ||
| KD | -8 | - | - | 9 | ||
|
Charge time is 480F (~8 seconds) or more. | ||||||
| Lvl.4 | Damage | Guard | Startup | Active | Recovery | Total |
| 10, 10, 10 | Mid | 14 | - | - | - | |
| Hit Adv | Block Adv | Cancel on Hit | Cancel on Block | Guard Crush Value | ||
| KD | -6 | - | - | 4×3 | ||
|
Charge time is 960F (~16 seconds) or more. | ||||||
Super Moves
Haou Shoukou Ken (236236P)
| A | Damage | Guard | Startup | Active | Recovery | Total |
|---|---|---|---|---|---|---|
| 33 | Mid | 17 | - | - | - | |
| Hit Adv | Block Adv | Cancel on Hit | Cancel on Block | Guard Crush Value | ||
| KD | -16 | - | - | 15 | ||
|
Commonly used as an OTG conversion after a counter hit from farther away. If Marco performs the super just as the opponent touches the ground from a knockdown, the super freeze will prevent the opponent from being able to input a tech roll to escape the OTG. 1~7F full-body invincibility. | ||||||
| C | Damage | Guard | Startup | Active | Recovery | Total |
| 14, 14, 14, 14 | Mid | 7 | - | - | - | |
| Hit Adv | Block Adv | Cancel on Hit | Cancel on Block | Guard Crush Value | ||
| KD | -24 | - | - | 6×4 | ||
|
Can be used in place of Kyokugen Kohou if you juggle the opponent from farther away, outside of its range. It is also possible to renda cancel into the super from a st.A or cr.B, most easily done as a T.O.P. confirm. 1~9F full-body invincibility. | ||||||
Kyokugen Kohou (236236K)
| B | Damage | Guard | Startup | Active | Recovery | Total |
|---|---|---|---|---|---|---|
| 7×7 | Mid | 0 | - | - | - | |
| Hit Adv | Block Adv | Cancel on Hit | Cancel on Block | Guard Crush Value | ||
| KD | -44 | - | - | 5×2, 3×5 | ||
|
Marco's standard combo ender with meter after a juggle. The move also has 0f startup so it can be used to punish certain moves in close range, that may otherwise be difficult to punish. Has decent invincibility but is still fairly risky as a reversal or anti-air. 1~4F full-body invincibility. | ||||||
| D | Damage | Guard | Startup | Active | Recovery | Total |
| 9×2, 7×8 | Mid | 0 | - | - | - | |
| Hit Adv | Block Adv | Cancel on Hit | Cancel on Block | Guard Crush Value | ||
| KD | -56 | - | - | 10×2, 3×8 | ||
|
Similar in function to the B version, but does more damage. Typically used when you need the extra damage for the kill. 1~5F full-body invincibility. | ||||||
Ryuuko Ranbu (236236236C)
| Lvl.1 | Damage | Guard | Startup | Active | Recovery | Total |
|---|---|---|---|---|---|---|
| 4×13 | Mid | 0 | - | - | - | |
| Hit Adv | Block Adv | Cancel on Hit | Cancel on Block | Guard Crush Value | ||
| KD | -42 | - | - | 3×13 | ||
|
1~3F full-body invincibility. No extra presses (C x1). | ||||||
| Lvl.2 | Damage | Guard | Startup | Active | Recovery | Total |
| 4×19 | Mid (Low on 7th hit) | 0 | - | - | - | |
| Hit Adv | Block Adv | Cancel on Hit | Cancel on Block | Guard Crush Value | ||
| KD | -48 | - | - | 3×19 | ||
|
1~3F full-body invincibility. C x3-6 (2-5 extra button presses during blackout). | ||||||
| Lvl.3 | Damage | Guard | Startup | Active | Recovery | Total |
| 4x16, 5x6 | Mid (Low on the 7th hit) | 0 | - | - | - | |
| Hit Adv | Block Adv | Cancel on Hit | Cancel on Block | Guard Crush Value | ||
| KD | -48 | - | - | 3×22 | ||
|
Does a good amount of chip damage and a ton of guard crush damage. Used in guard crush setups, typically to end a round and guarantee a kill. Can be confirmed into from a blockstring by linking into it with st.A/cr.A (easier to perform by using the simultaneous button press technique to store at least one of the 236 motions). 1~3F full-body invincibility. C x7-9 (6-8 extra button presses during blackout). | ||||||
| Lvl.4 | Damage | Guard | Startup | Active | Recovery | Total |
| 8×6, 6×5, 7 | Mid | 4 | - | - | - | |
| Hit Adv | Block Adv | Cancel on Hit | Cancel on Block | Guard Crush Value | ||
| KD | -40 | - | - | 8×6, 5×6 | ||
|
The strongest super marco has, the fireballs disappear quickly and at a short range. 1~9F full-body invincibility. C x10+ (9+ extra button presses during blackout). | ||||||


