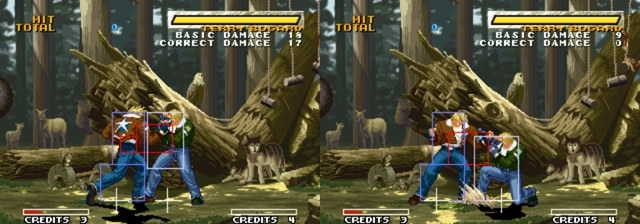
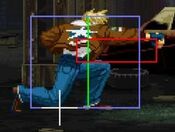
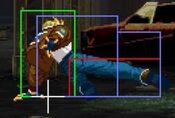
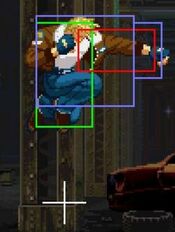
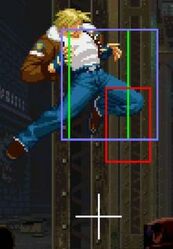
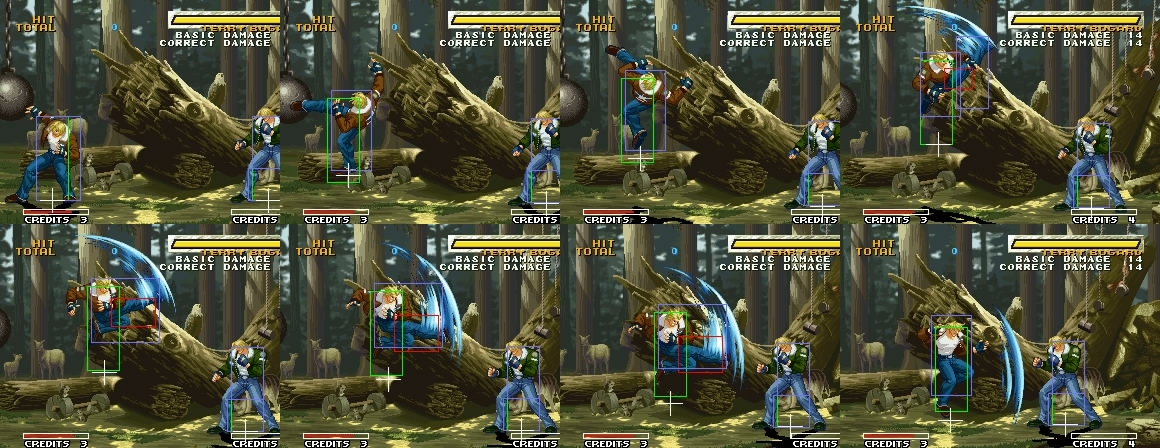
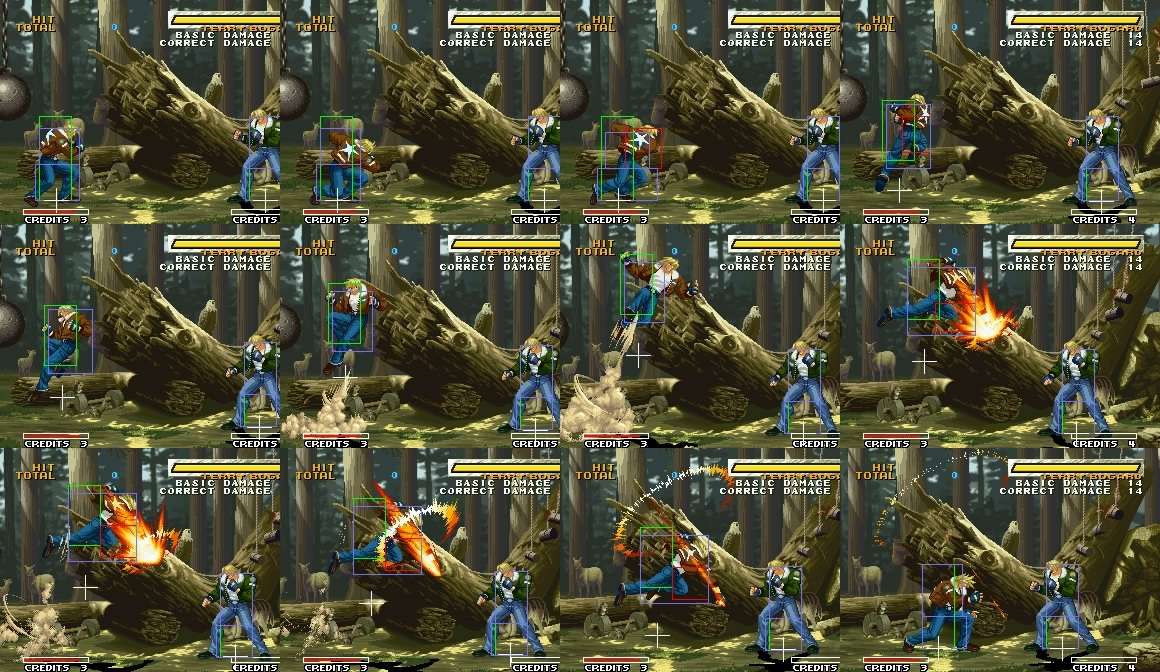
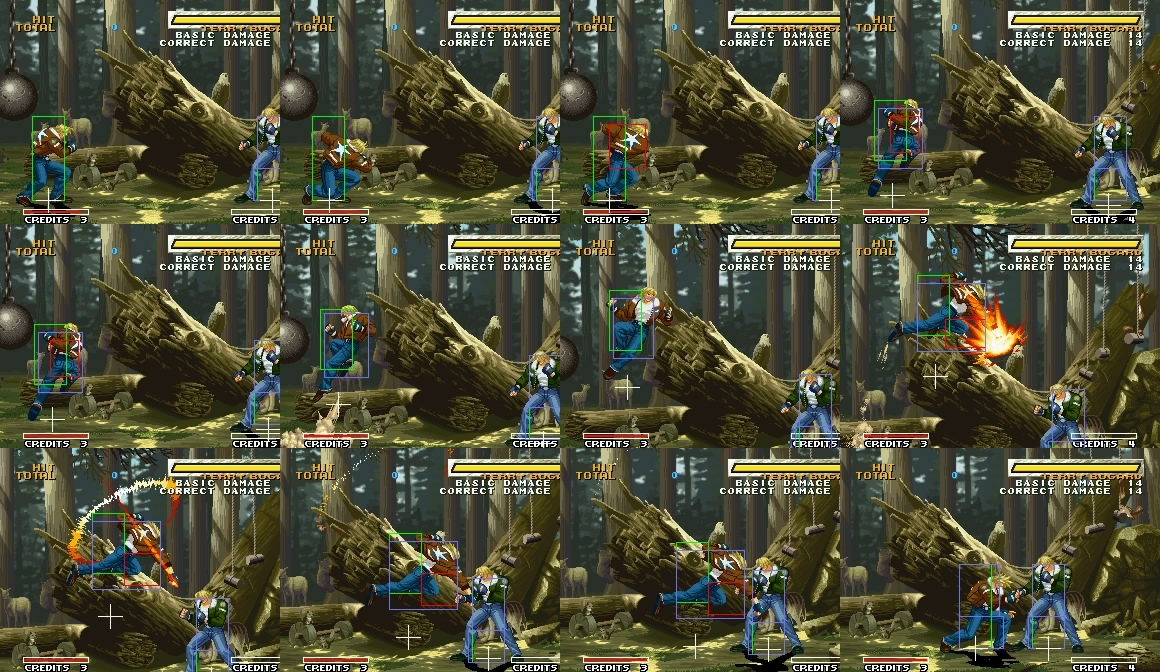
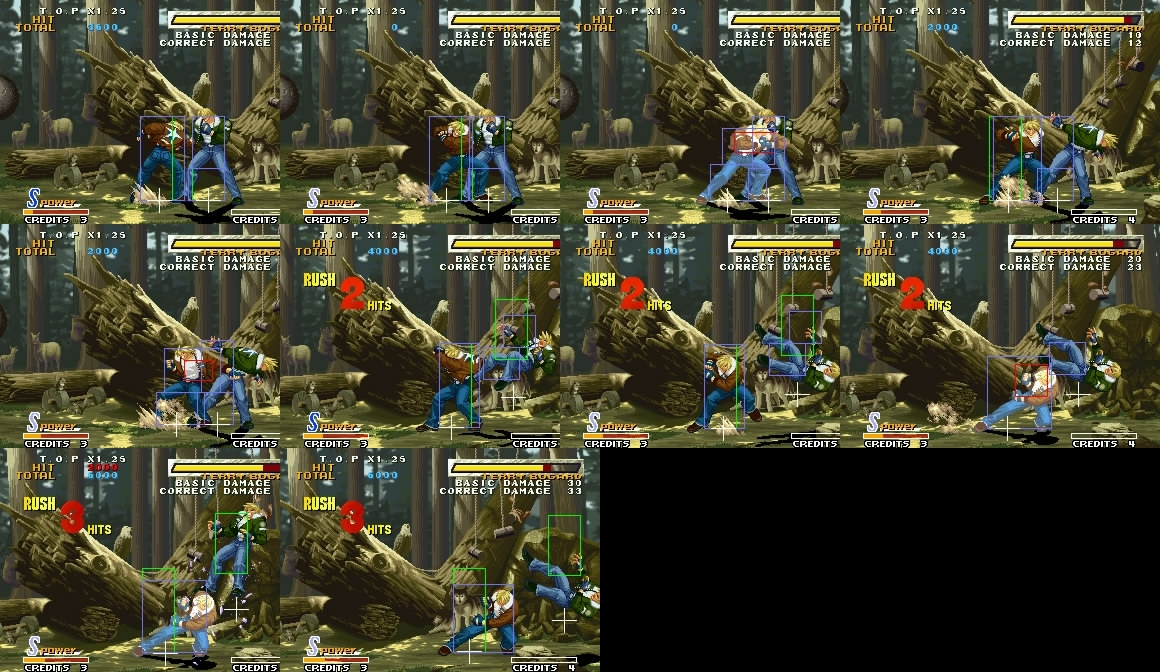
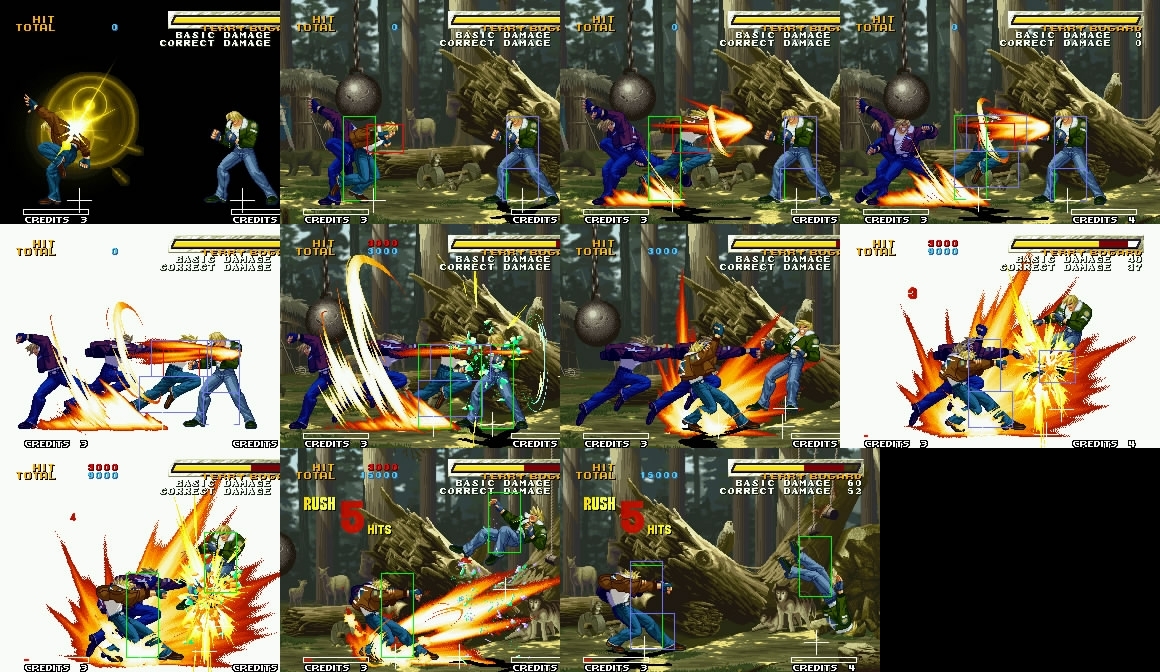
(Using key symbols in attack data) |
(→Move List: move IDs) |
||
| Line 63: | Line 63: | ||
===Close Standing Normals=== | ===Close Standing Normals=== | ||
===== <span class="invisible-header"></span> ===== | ===== <span class="invisible-header">Close 5A</span> ===== | ||
<font style="visibility:hidden" size="0"></font> | <font style="visibility:hidden" size="0"></font> | ||
{{MoveData | {{MoveData | ||
| Line 101: | Line 101: | ||
===== <span class="invisible-header"></span> ===== | ===== <span class="invisible-header">Close 5B</span> ===== | ||
<font style="visibility:hidden" size="0"></font> | <font style="visibility:hidden" size="0"></font> | ||
{{MoveData | {{MoveData | ||
| Line 136: | Line 136: | ||
===== <span class="invisible-header"></span> ===== | ===== <span class="invisible-header">Close 5C</span> ===== | ||
<font style="visibility:hidden" size="0"></font> | <font style="visibility:hidden" size="0"></font> | ||
{{MoveData | {{MoveData | ||
| Line 199: | Line 199: | ||
===== <span class="invisible-header"></span> ===== | ===== <span class="invisible-header">Close 5D</span> ===== | ||
<font style="visibility:hidden" size="0"></font> | <font style="visibility:hidden" size="0"></font> | ||
{{MoveData | {{MoveData | ||
| Line 239: | Line 239: | ||
===Far Standing Normals=== | ===Far Standing Normals=== | ||
===== <span class="invisible-header"></span> ===== | ===== <span class="invisible-header">Far 5A</span> ===== | ||
<font style="visibility:hidden" size="0"></font> | <font style="visibility:hidden" size="0"></font> | ||
{{MoveData | {{MoveData | ||
| Line 280: | Line 280: | ||
===== <span class="invisible-header"></span> ===== | ===== <span class="invisible-header">Far 5B</span> ===== | ||
<font style="visibility:hidden" size="0"></font> | <font style="visibility:hidden" size="0"></font> | ||
{{MoveData | {{MoveData | ||
| Line 320: | Line 320: | ||
===== <span class="invisible-header"></span> ===== | ===== <span class="invisible-header">Far 5C</span> ===== | ||
<font style="visibility:hidden" size="0"></font> | <font style="visibility:hidden" size="0"></font> | ||
{{MoveData | {{MoveData | ||
| Line 358: | Line 358: | ||
===== <span class="invisible-header"></span> ===== | ===== <span class="invisible-header">Far 5D</span> ===== | ||
<font style="visibility:hidden" size="0"></font> | <font style="visibility:hidden" size="0"></font> | ||
{{MoveData | {{MoveData | ||
| Line 397: | Line 397: | ||
===Crouching Normals=== | ===Crouching Normals=== | ||
===== <span class="invisible-header"></span> ===== | ===== <span class="invisible-header">2A</span> ===== | ||
<font style="visibility:hidden" size="0"></font> | <font style="visibility:hidden" size="0"></font> | ||
{{MoveData | {{MoveData | ||
| Line 436: | Line 436: | ||
===== <span class="invisible-header"></span> ===== | ===== <span class="invisible-header">2B</span> ===== | ||
<font style="visibility:hidden" size="0"></font> | <font style="visibility:hidden" size="0"></font> | ||
{{MoveData | {{MoveData | ||
| Line 476: | Line 476: | ||
===== <span class="invisible-header"></span> ===== | ===== <span class="invisible-header">2C</span> ===== | ||
<font style="visibility:hidden" size="0"></font> | <font style="visibility:hidden" size="0"></font> | ||
{{MoveData | {{MoveData | ||
| Line 514: | Line 514: | ||
===== <span class="invisible-header"></span> ===== | ===== <span class="invisible-header">2D</span> ===== | ||
<font style="visibility:hidden" size="0"></font> | <font style="visibility:hidden" size="0"></font> | ||
{{MoveData | {{MoveData | ||
| Line 554: | Line 554: | ||
===Jumping Normals=== | ===Jumping Normals=== | ||
===== <span class="invisible-header"></span> ===== | ===== <span class="invisible-header">jA</span> ===== | ||
<font style="visibility:hidden" size="0"></font> | <font style="visibility:hidden" size="0"></font> | ||
{{MoveData | {{MoveData | ||
| Line 596: | Line 596: | ||
===== <span class="invisible-header"></span> ===== | ===== <span class="invisible-header">jB</span> ===== | ||
<font style="visibility:hidden" size="0"></font> | <font style="visibility:hidden" size="0"></font> | ||
{{MoveData | {{MoveData | ||
| Line 640: | Line 640: | ||
===== <span class="invisible-header"></span> ===== | ===== <span class="invisible-header">jC</span> ===== | ||
<font style="visibility:hidden" size="0"></font> | <font style="visibility:hidden" size="0"></font> | ||
{{MoveData | {{MoveData | ||
| Line 678: | Line 678: | ||
===== <span class="invisible-header"></span> ===== | ===== <span class="invisible-header">jD</span> ===== | ||
<font style="visibility:hidden" size="0"></font> | <font style="visibility:hidden" size="0"></font> | ||
{{MoveData | {{MoveData | ||
| Line 716: | Line 716: | ||
===Universal Moves=== | ===Universal Moves=== | ||
===== <span class="invisible-header"></span> ===== | ===== <span class="invisible-header">Lower-body Evasion Attack (5AB)</span> ===== | ||
<font style="visibility:hidden" size="0"></font> | <font style="visibility:hidden" size="0"></font> | ||
{{MoveData | {{MoveData | ||
| Line 752: | Line 752: | ||
===== <span class="invisible-header"></span> ===== | ===== <span class="invisible-header">Upper-body Evasion Attack (2AB)</span> ===== | ||
<font style="visibility:hidden" size="0"></font> | <font style="visibility:hidden" size="0"></font> | ||
{{MoveData | {{MoveData | ||
| Line 796: | Line 796: | ||
===== <span class="invisible-header"></span> ===== | ===== <span class="invisible-header">T.O.P. Attack (5CD)</span> ===== | ||
<font style="visibility:hidden" size="0"></font> | <font style="visibility:hidden" size="0"></font> | ||
{{MoveData | {{MoveData | ||
| Line 837: | Line 837: | ||
===Throws=== | ===Throws=== | ||
===== <span class="invisible-header"></span> ===== | ===== <span class="invisible-header">Ground Throw</span> ===== | ||
<font style="visibility:hidden" size="0"></font> | <font style="visibility:hidden" size="0"></font> | ||
{{MoveData | {{MoveData | ||
| Line 870: | Line 870: | ||
===Feints=== | ===Feints=== | ||
===== <span class="invisible-header"></span> ===== | ===== <span class="invisible-header">Forward Feint (6AC)</span> ===== | ||
<font style="visibility:hidden" size="0"></font> | <font style="visibility:hidden" size="0"></font> | ||
{{MoveData | {{MoveData | ||
| Line 902: | Line 902: | ||
===== <span class="invisible-header"></span> ===== | ===== <span class="invisible-header">Down Feint (2AC)</span> ===== | ||
<font style="visibility:hidden" size="0"></font> | <font style="visibility:hidden" size="0"></font> | ||
{{MoveData | {{MoveData | ||
| Line 938: | Line 938: | ||
===Special Moves=== | ===Special Moves=== | ||
===== <span class="invisible-header"></span> ===== | ===== <span class="invisible-header">Power Wave (236P)</span> ===== | ||
<font style="visibility:hidden" size="0"></font> | <font style="visibility:hidden" size="0"></font> | ||
{{MoveData | {{MoveData | ||
| Line 997: | Line 997: | ||
===== <span class="invisible-header"></span> ===== | ===== <span class="invisible-header">Burn Knuckle (214P)</span> ===== | ||
<font style="visibility:hidden" size="0"></font> | <font style="visibility:hidden" size="0"></font> | ||
{{MoveData | {{MoveData | ||
| Line 1,066: | Line 1,066: | ||
===== <span class="invisible-header"></span> ===== | ===== <span class="invisible-header">Crack Shoot (214K)</span> ===== | ||
<font style="visibility:hidden" size="0"></font> | <font style="visibility:hidden" size="0"></font> | ||
{{MoveData | {{MoveData | ||
| Line 1,135: | Line 1,135: | ||
===== <span class="invisible-header"></span> ===== | ===== <span class="invisible-header">Power Dunk B (623B)</span> ===== | ||
<font style="visibility:hidden" size="0"></font> | <font style="visibility:hidden" size="0"></font> | ||
{{MoveData | {{MoveData | ||
| Line 1,202: | Line 1,202: | ||
===== <span class="invisible-header"></span> ===== | ===== <span class="invisible-header">Power Dunk D (623D)</span> ===== | ||
<font style="visibility:hidden" size="0"></font> | <font style="visibility:hidden" size="0"></font> | ||
{{MoveData | {{MoveData | ||
| Line 1,276: | Line 1,276: | ||
===== <span class="invisible-header"></span> ===== | ===== <span class="invisible-header">Power Charge A (66A)</span> ===== | ||
<font style="visibility:hidden" size="0"></font> | <font style="visibility:hidden" size="0"></font> | ||
{{MoveData | {{MoveData | ||
| Line 1,350: | Line 1,350: | ||
===== <span class="invisible-header"></span> ===== | ===== <span class="invisible-header">Power Charge C (66C)</span> ===== | ||
<font style="visibility:hidden" size="0"></font> | <font style="visibility:hidden" size="0"></font> | ||
{{MoveData | {{MoveData | ||
| Line 1,430: | Line 1,430: | ||
===Super Moves=== | ===Super Moves=== | ||
===== <span class="invisible-header"></span> ===== | ===== <span class="invisible-header">Power Geyser (236236P)</span> ===== | ||
<font style="visibility:hidden" size="0"></font> | <font style="visibility:hidden" size="0"></font> | ||
{{MoveData | {{MoveData | ||
| Line 1,503: | Line 1,503: | ||
===== <span class="invisible-header"></span> ===== | ===== <span class="invisible-header">Buster Wolf (236236K)</span> ===== | ||
<font style="visibility:hidden" size="0"></font> | <font style="visibility:hidden" size="0"></font> | ||
{{MoveData | {{MoveData | ||
Revision as of 06:11, 31 May 2024
Introduction
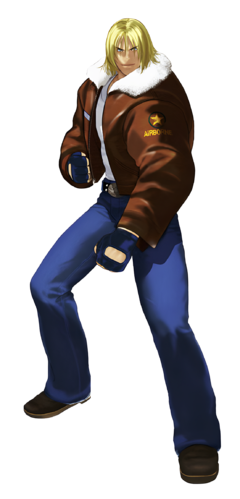
Terry Bogard (テリー・ボガード, Terī Bogādo), the "Legendary Hungry Wolf". After the events of the previous games in the series, Terry took Rock Howard, the young son of his deceased arch-nemesis, Geese Howard, under his wing, developing a father-son bond with the boy and teaching him how to fend for himself as they traveled the world together.
Now, ten years later, he and a teenager Rock are back in South Town (properly re-named "Second South"), to participate in the "King of Fighters: Maximum Mayhem" tournament, in order to test and improve their skills; with no knowledge of the true plans of the sinister mastermind behind the scheduled event...
Terry is, overall, considered a mid-tier character in this game, with strong offensive and defensive tools that, however, are by no means flawless. His Specials are too much unsafe on block (sometimes, even on hit), so he can't really rushdown his enemies without enourmous amounts of caution; on the other hand, his excellent normals, both in the air and on the ground, allow him to stand up to his foes with a good zoning and defensive game.
Thanks to his Feint Cancels, hIs bread and butter combos are some of the best in the game, perfectly capable of doing insane amounts of damage, specially in the corner, where he also dominates with his blockstrings and resets that can easily grant him a Guard Crush opportunity if he plays unpredictably (so much that he is considered a beast in short sets, when his lockdown pressure are less obvious). His Break Special, too, is excellent, doubling as one of the best Anti-Airs in the game (it's still unsafe on block, so use it carefully).
Gameplay
Terry is a rushdown character. His main gameplan is to push the opponent to the corner of the stage where he can effectively pressure the opponent with his corner mixups, threaten a guard crush, and dish out a ton of damage with his feint cancel combos.
| Strengths | Weaknesses |
|---|---|
|
|
Character Colors

Profile
Full name: Terry Bogard.
Birthdate: March 15, 1971; 35 years old.
Birthplace: United States.
Height: 182cm (5' 11").
Weight:	81kg (179 lbs).
Blood type: O.
Family/Relatives: Jeff Bogard (adoptive father), Andy Bogard (brother), Rock Howard (adoptive son).
Job/Occupation: None (does part time work to get by).
Likes: Jeff's gloves, vintage jeans, Ukee (his pet monkey).
Dislikes: Slugs.
Hobbies: Playing video games, trawling, wall painting.
Favorite food: Fast-food, clubhouse sandwiches made by Rock.
Forte in sports: Basketball.
Special skill: Making 50 3-pointer shots in a row.
Most unpleasant: Cigarettes.
Favorite music: Rock and Country.
Fighting style: Martial arts and street fighting.
Move List
Frame Data Source: https://w.atwiki.jp/garoumow/pages/20.html and https://w.atwiki.jp/garoumow/pages/81.html
| Data Help | |
|---|---|
| Disclaimer: This is meant to teach basic terminology used when describing moves. | |
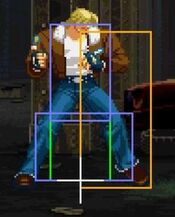
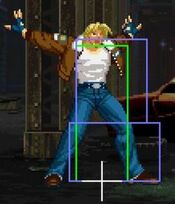
| Hitbox: | A predefined area (usually a rectangle or rectangles) that tells the game how any given attack can come in contact with a character. Hitboxes are invisible to the player when normally playing. |
| Hurtbox: | A predefined area (usually a group of rectangles) that tell the game how your character is allowed to get hit by any incoming attack. Specifically, you'll get hit by (or block) an attack if that attack's hitbox ever overlaps your hurtbox. |
| Throw Box/Range: | Active throw frames and range. Your opponent will be thrown in this field if not in block or hit stun. |
| Projectile Box: | Hitbox on a projectile attack. |
| Guard/Counter Box: | The Guard Box or Counter Box. This appears when blocking or using a counter move. |
| Push Box: | Has no bearing on hit/hurt boxes. Just prevents characters to not pass through each other. (Also known as "Collision Box".) |
| Startup | The number of frames before an attack can hit the opponent. Does not include the first active frame. |
| Guard | The way this move must be blocked.
High or H or Overhead (especially when from the ground) -- must be blocked standing. |
| Damage | "Basic" damage -- Unmodified damage values
"Correct" damage -- Damage values accounting for damage scaling, TOP multiplier, and defense rate |
| Guard Crush Value | Decreases the defender's guard durability gauge by this value. |
| +X | Attacker has X number of advantage frames. |
| -X | Attacker has X number of disadvantage frames. |
| KD | Short for "knockdown", knocks down opponent on hit. |
| ◯ | Cancelable on both hit and block. |
| ∞ | Chain cancelable with the same button (renda cancel). |
| ※ | Cancelable on the first hit/part only. |
| 《X》OR «X» OR <<X>> OR (X) | X number of inactive frames between hits of multihit moves. |
| △ | Only cancelable on block. |
| ▽ | Only cancelable on hit. |
| × OR X | Not cancelable. |
Notes:
- Special/Super moves with "Guard" data in red text are impossible to just defend at 0-pixel health bar.
Close Standing Normals
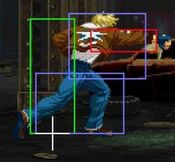
Close 5A
| Damage | Guard | Startup | Active | Recovery | Total |
|---|---|---|---|---|---|
| 4 | Mid | 3 | 4 | 4 | 11 |
| Hit Adv | Block Adv | Cancel on Hit | Cancel on Block | Guard Crush Value | |
| +7 | +7 | ◯ / ∞ | ◯ / ∞ | 4 | |
|
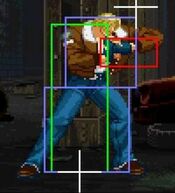
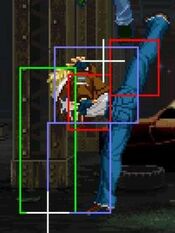
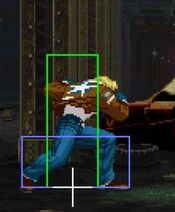
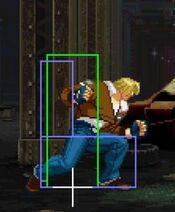
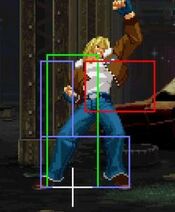
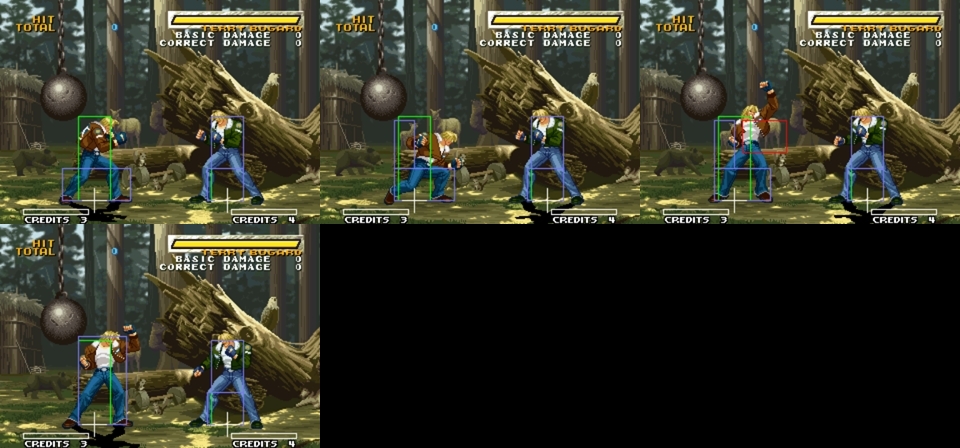
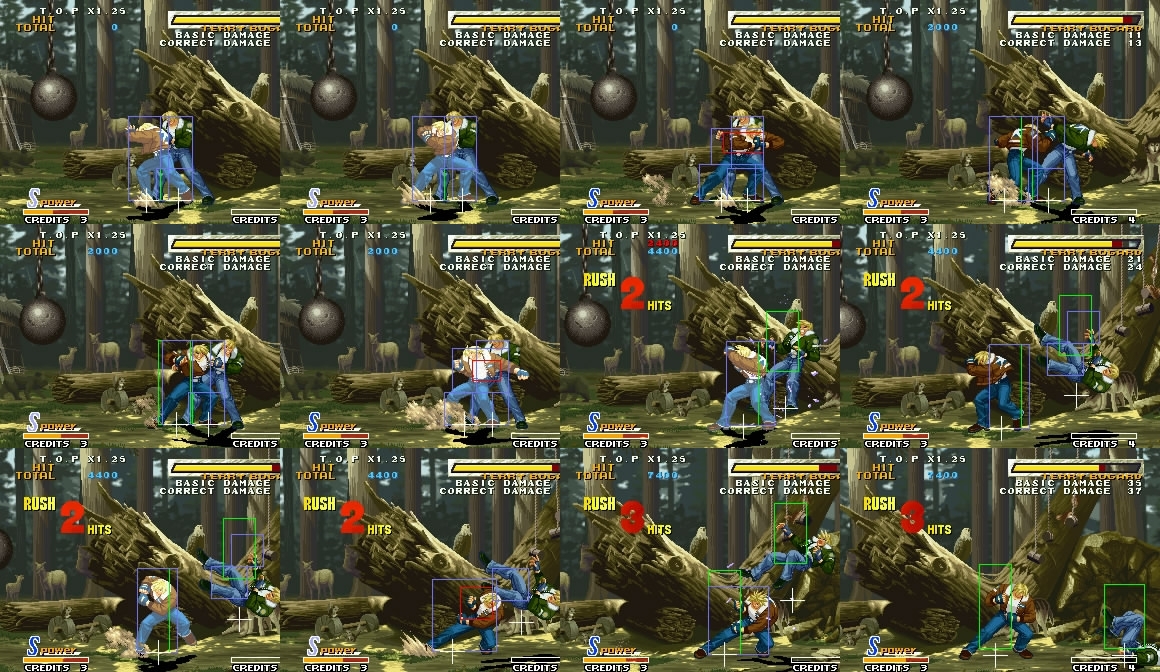
As fast as it can get with a 3F start-up, this is a pretty good button to mash around when your about to score a Guard Crush. Good poke, cancelable into Specials, and starter of a few basic combos. Also works as an Anti-Air, specially after a cross-under. | |||||
Close 5B
| Damage | Guard | Startup | Active | Recovery | Total |
|---|---|---|---|---|---|
| 6 | Mid | 4 | 4 | 8 | 16 |
| Hit Adv | Block Adv | Cancel on Hit | Cancel on Block | Guard Crush Value | |
| +3 | +3 | ◯ | ◯ | 4 | |
|
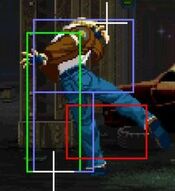
Canceled right into a Power Dunk, this can be used as an Anti-GC option on the enemy's wake-up. It has the same "whiff on jump startup" property as 2B, but doesn't hit low, not a very useful move.
| |||||
Close 5C
Close 5D
| Damage | Guard | Startup | Active | Recovery | Total |
|---|---|---|---|---|---|
| 6,6 | Mid | 7 | 2,2 | 21 | 32 |
| Hit Adv | Block Adv | Cancel on Hit | Cancel on Block | Guard Crush Value | |
| -2 | -2 | ※ | ※ | 3,3 | |
|
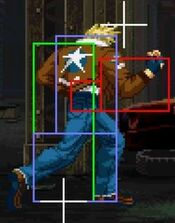
A good frametrap tool, you should feint it on the 1st hit. As a frametrap it has multiple purpose : | |||||
Far Standing Normals
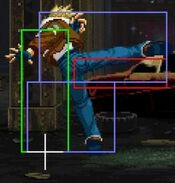
Far 5A
| Damage | Guard | Startup | Active | Recovery | Total |
|---|---|---|---|---|---|
| 5 | Mid | 4 | 4 | 7 | 15 |
| Hit Adv | Block Adv | Cancel on Hit | Cancel on Block | Guard Crush Value | |
| +4 | +4 | ◯ / ∞ | ◯ / ∞ | 4 | |
|
Basically the same as his cl. A, except that is has a far better range. Fast poke, excellent for intercepting dashers. Special and Super cancelable. Also doubles as a pretty decent Anti-Air (even better after a cross-under). This move also works as a frame trap to beat out opponents trying to engage you after blocking something, like Terry's Power Wave.
| |||||
Far 5B
| Damage | Guard | Startup | Active | Recovery | Total |
|---|---|---|---|---|---|
| 7 | Mid | 5 | 4 | 10 | 19 |
| Hit Adv | Block Adv | Cancel on Hit | Cancel on Block | Guard Crush Value | |
| +1 | +1 | X | X | 4 | |
|
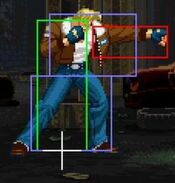
This move isn't Special cancelable. However, it works as one of Terry's best Anti-Airs, since it has a deceptively large hitbox and speed. It's also pretty safe in case the opponent empty-jumps at you, expecting to Air-JD your Anti-Air, since the pushback won't allow him to counter-attack. At precise ranges, this move will beat out hop and jump attempts, acting as a preemptive Anti-Air of sorts. Good frame trap when followed by a far. A, for example. | |||||
Far 5C
| Damage | Guard | Startup | Active | Recovery | Total |
|---|---|---|---|---|---|
| 14 | Mid | 11 | 4 | 19 | 34 |
| Hit Adv | Block Adv | Cancel on Hit | Cancel on Block | Guard Crush Value | |
| -2 | -2 | X | X | 5 | |
|
Pretty horrible normal. Not only is this button ungodly slow, it's also unsafe on block and on hit, and it's not even Feint, Special, or Super cancelable. Do yourself a favor and avoid this. | |||||
Far 5D
| Damage | Guard | Startup | Active | Recovery | Total |
|---|---|---|---|---|---|
| 14 | Mid | 9 | 4 | 22 | 35 |
| Hit Adv | Block Adv | Cancel on Hit | Cancel on Block | Guard Crush Value | |
| -5 | -5 | X | ◯ | 5 | |
|
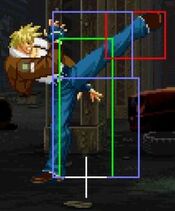
A little slow, but it has good damage and nice range, allowing it to be used as poke at far distances (with caution and moderation, of course). This isn't cancelable on hit, but it is cancelable on block, making this move a prime candidate of corner resets with Terry's Power Charge.
| |||||
Crouching Normals
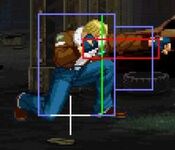
2A
| Damage | Guard | Startup | Active | Recovery | Total |
|---|---|---|---|---|---|
| 4 | Mid | 4 | 4 | 5 | 13 |
| Hit Adv | Block Adv | Cancel on Hit | Cancel on Block | Guard Crush Value | |
| +6 | +6 | ◯ / ∞ | ◯ / ∞ | 4 | |
|
An average normal. One frame faster than Terry's crouching light kick (but it doesn't hit low, making it less useful). Good frame advantage on block and on hit. Special and Super cancelable.
| |||||
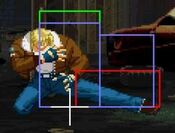
2B
| Damage | Guard | Startup | Active | Recovery | Total |
|---|---|---|---|---|---|
| 6 | Low | 5 | 4 | 5 | 14 |
| Hit Adv | Block Adv | Cancel on Hit | Cancel on Block | Guard Crush Value | |
| +6 | +6 | ◯ | ◯ | 4 | |
|
Very good normal. Medium range, fast startup, Special and Super cancelable, and it has to be defended low; as such, this move is a great add to Terry's overall mixup game when used as a meaty. The hitstun in this also allows for some nice and easy hit confirms. It's also sometimes used as a frame trap with Terry's run (run a little, 'cr. B', run a little, 'cr. B' again), but it's not something that should be abused. | |||||
2C
| Damage | Guard | Startup | Active | Recovery | Total |
|---|---|---|---|---|---|
| 9 | Mid | 7 | 3 | 12 | 22 |
| Hit Adv | Block Adv | Cancel on Hit | Cancel on Block | Guard Crush Value | |
| +6 | +6 | ◯ | ◯ | 5 | |
|
Another excellent normal. Average startup and solid range turns this move into one of Terry's most commonly seen combo finishers. It's also his best way to punish unsafe moves at mid-ranges. | |||||
2D
| Damage | Guard | Startup | Active | Recovery | Total |
|---|---|---|---|---|---|
| 10 | Low | 8 | 3 | 33 | 44 |
| Hit Adv | Block Adv | Cancel on Hit | Cancel on Block | Guard Crush Value | |
| KD | -15 | X | X | 5 | |
|
Terry's sweep is easily one of the worst in the game, with just atrocious disadvantage on block. It has some speed and, of course, it can score you a knockdown, but that's pretty much it. Should be used sparringly. | |||||
Jumping Normals
jA
| Damage | Guard | Startup | Active | Recovery | Total |
|---|---|---|---|---|---|
| 6 | High | 4 | 8 | - | - |
| Hit Adv | Block Adv | Cancel on Hit | Cancel on Block | Guard Crush Value | |
| - | - | X | X | 4 | |
|
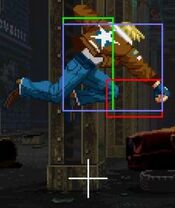
This move comes out faster than any other of Terry's air attacks. It's horizontal hitbox will strike out of the air almost anything at heights equivalents to that of Terry's own jump. It may lack a little range, but this is still one of Terry's most usefuls Air-to-Airs that can be used in whatever jump trajectory. Since it stays active for a good amount of time, remember to press this as soon as you leave the ground, to make sure it comes out as fast as possible. Avoid using it with jump forward, since it can be low profiled and will whiff on crouched opponents. | |||||
jB
| Damage | Guard | Startup | Active | Recovery | Total |
|---|---|---|---|---|---|
| 6 | High | 5 | 6 | - | - |
| Hit Adv | Block Adv | Cancel on Hit | Cancel on Block | Guard Crush Value | |
| - | - | X | X | 4 | |
|
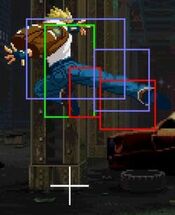
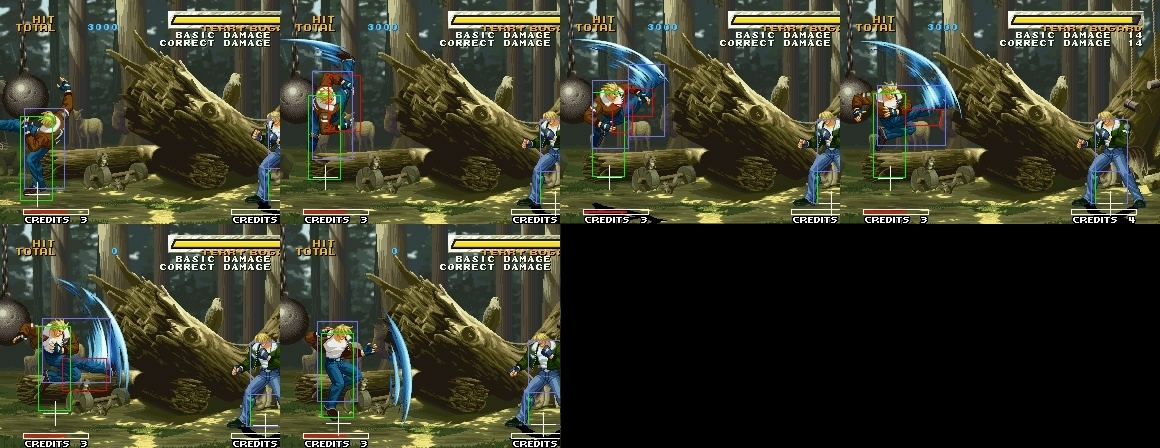
Probably Terry's best air attack. It may be a little bit slower than his j.A (by a single frame), but it has fantastic priority, and a hitbox aiming downwards that will strike airbone opponents bellow and in front of Terry. Not exactly a good move to throw out while jumping backwards, but in a neutral or forward jump, it will be a clean hit most of the time. In a short jump, this move, when used alongside Terry's Power Dunk, becomes an immensely useful tool as a combo starter that can only be defended high, adding depth to Terry's mixup game. Plus, jump or short jump, j.B works as a pretty good and unpredictable cross-up. Very, very useful move indeed. | |||||
jC
| Damage | Guard | Startup | Active | Recovery | Total |
|---|---|---|---|---|---|
| 9 | High | 7 | 6 | - | - |
| Hit Adv | Block Adv | Cancel on Hit | Cancel on Block | Guard Crush Value | |
| - | - | X | X | 5 | |
|
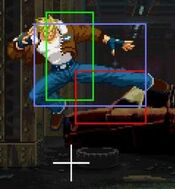
Good damage and start-up. It's mainly used as a close jump-in or short jump-in attack, but it can also work an awkward Air-to-Air when Terry's right above someone (also sometimes used to protect Terry's hurtbox while jumping backwards, which can come in handy when trying to get away with a win by Time Out for example). At the right distances (with the proper Throw setup, for example), this can also be used as a tricky cross-up. | |||||
jD
| Damage | Guard | Startup | Active | Recovery | Total |
|---|---|---|---|---|---|
| 10 | High | 9 | 4 | - | - |
| Hit Adv | Block Adv | Cancel on Hit | Cancel on Block | Guard Crush Value | |
| - | - | X | X | 5 | |
|
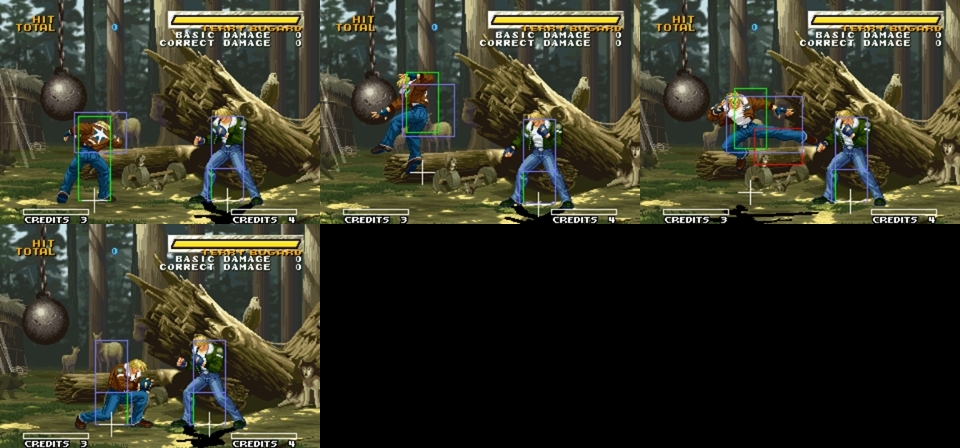
What it lacks in speed, this move compensates with damage and range. It can work as an Air-to-Air (this is one of Terry's strongest buttons to use after jumping backwards), but it definetly shines more as a jump-in or short jump-in strike, since it works absolutely wonders as a stupidly good crossup. | |||||
Universal Moves
Lower-body Evasion Attack (5AB)
| Damage | Guard | Startup | Active | Recovery | Total |
|---|---|---|---|---|---|
| 10 | Overhead | 26 | 5 | 15 | 46 |
| Hit Adv | Block Adv | Cancel on Hit | Cancel on Block | Guard Crush Value | |
| -1 | +5 | X | X | 6 | |
|
Horrible move that mostly will come out on accident after a failed Power Dunk Break attempt. Patheticaly slow start-up. If you want to do an overhead, just go for the short hop. | |||||
Upper-body Evasion Attack (2AB)
| Damage | Guard | Startup | Active | Recovery | Total |
|---|---|---|---|---|---|
| 10 | Mid | 8 | 3 | 29 | 40 |
| Hit Adv | Block Adv | Cancel on Hit | Cancel on Block | Guard Crush Value | |
| -13 | -7 | ◯ | X | 6 | |
|
One of the worst in the game, but you're still left with no choice but to use it. It actually has a pretty decent start-up and priority (at certain ranges), so it can be used to break a few Reversal attempts. The real problem lies in it's enourmous frame disadvantage, both on hit and on block; this can be somewhat diminished by a Feint or Special cancel, but there's absolutely nothing you can do if it's blocked, since it's not cancelable at all in that situation. Other than that, the damage on this is quite good, so it can be used in combos to pump the damage up a little. It may be used as an Anti-Air too, but that's an advanced and hard technique, since the timing must be perfect, and the chance of losing or trading against the enemy is real. 1~6F upper-body invincibility. | |||||
T.O.P. Attack (5CD)
| Damage | Guard | Startup | Active | Recovery | Total |
|---|---|---|---|---|---|
| 7, 6, 7 (base damage) | Mid | 14 | - | - | - |
| Hit Adv | Block Adv | Cancel on Hit | Cancel on Block | Guard Crush Value | |
| KD | -11 | - | - | 25,5,5 | |
|
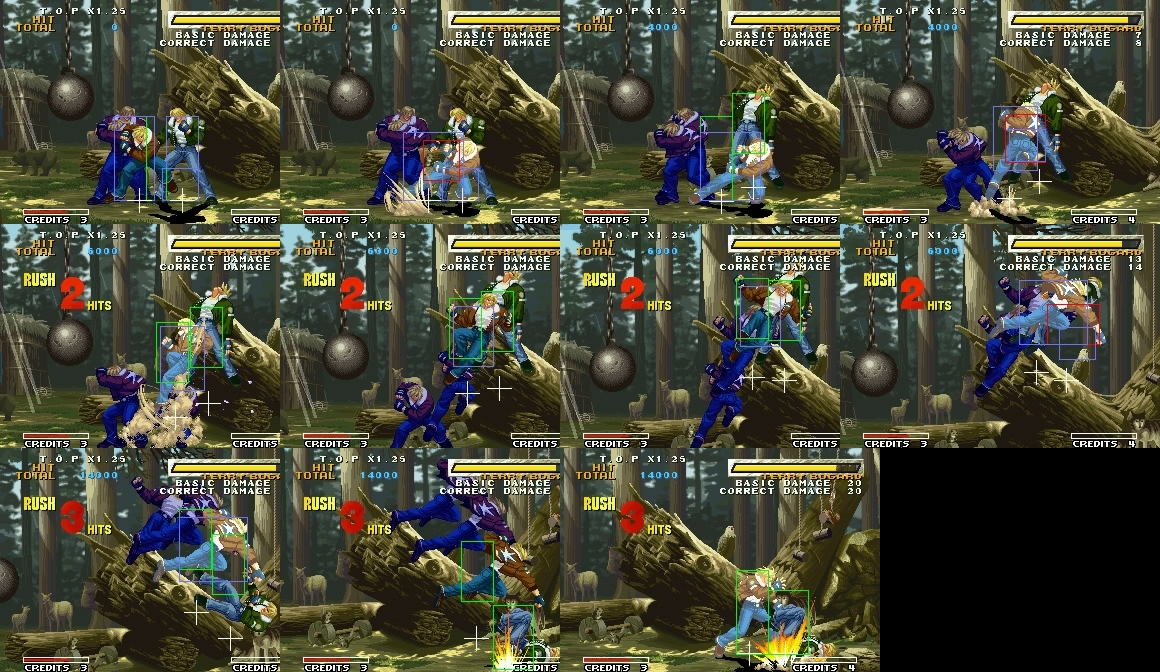
Not particularly useful. It can be used as an easy Guard Cancel, but it has horribly slow start-up. Sure, it also does great Guard Crush damage, but even if your enemy gets his guard crumpled with this, the recovery on it is so abysmal that you won't even be able to do any follow-up. To add insult to injury, the damage is pitiful, and it's also unsafe on block. | |||||
Throws
Ground Throw
| Damage | Guard | Startup | Active | Recovery | Total |
|---|---|---|---|---|---|
| 14 | Unblockable | 1 | - | - | - |
| Hit Adv | Block Adv | Cancel on Hit | Cancel on Block | Guard Crush Value | |
| +37 | - | - | - | - | |
|
Terry's normal throw. In case the throw fails, a 'cl. C' will come out instead. On hit/guard it's one of Terry's best normals as it leads to mixups (Feint Cancel it). However clC doesn't have vertical hitbox, a neutral jump to escape the tick throw will leave Terry vulnerable. You can use this to set up some tricky crossup situations. For example, after performing a midscreen backthrow, run just a little bit and then jump with Terry's 'j. C': if done correctly, the enemy will get hit in the back at a pretty deceptive angle (this can be done with a regular throw, but a backthrow seems to be easier). A similar setup works in the corner too, and it's even better: after throwing his enemy into the corner, and running just a little before perfoming a jump, even if the enemy has his back against the corner, he will have to change his block direction because of a bug that will force him to stand up facing the opposite direction of Terry's. | |||||
Feints
Forward Feint (6AC)
| Damage | Guard | Startup | Active | Recovery | Total |
|---|---|---|---|---|---|
| - | - | - | - | - | 11 |
| Hit Adv | Block Adv | Cancel on Hit | Cancel on Block | Guard Crush Value | |
| - | - | - | - | - | |
|
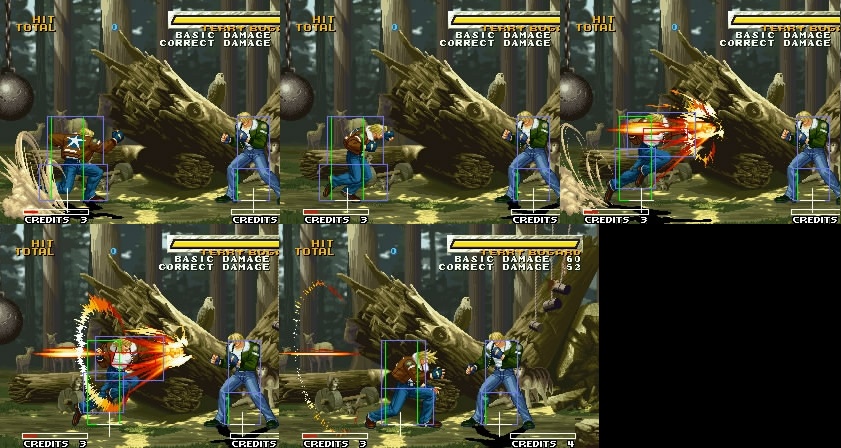
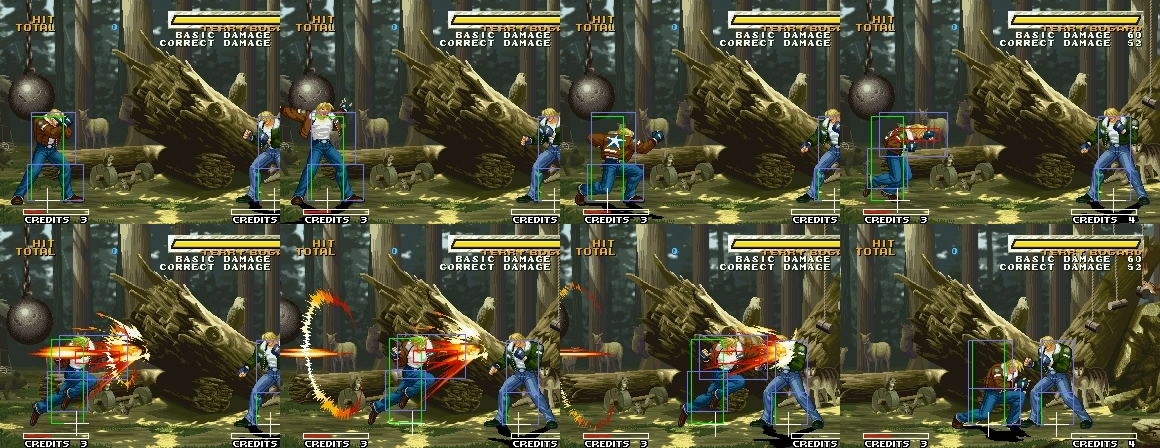
Mimics the start of Burn Knuckle A. Terry's best Feint Cancel option by far, since it makes him advance slightly, lessening the impact of the pushback from his attacks and allowing him to land more blows in his combos. This is, without a doubt, core to Terry's gameplay, and should be mastered as soon as possible. | |||||
Down Feint (2AC)
| Damage | Guard | Startup | Active | Recovery | Total |
|---|---|---|---|---|---|
| - | - | - | - | - | 11 |
| Hit Adv | Block Adv | Cancel on Hit | Cancel on Block | Guard Crush Value | |
| - | - | - | - | - | |
|
Mimics the start of Burn Knuckle C. Almost completely uselesss. Stick with the forward one, it's a thousand times better. This one moves Terry backwards way too much, so Feint Canceling with this becomes a waste of time. You could, once in a blue moon, use this to actualy fool your opponent into thinking you're going for a Burning Knuckle... but that would be you searching really, really hard for a reason to use this at all. | |||||
Special Moves
Power Wave (236P)
Burn Knuckle (214P)
Crack Shoot (214K)
Power Dunk B (623B)
Power Dunk D (623D)
Power Charge A (66A)
Power Charge C (66C)
Super Moves
Power Geyser (236236P)
Buster Wolf (236236K)
