GigaTempest (talk | contribs) No edit summary |
(→Move List: move IDs) |
||
| Line 41: | Line 41: | ||
===Close Standing Normals=== | ===Close Standing Normals=== | ||
===== <span class="invisible-header"></span> ===== | ===== <span class="invisible-header">Close 5A</span> ===== | ||
<font style="visibility:hidden" size="0"></font> | <font style="visibility:hidden" size="0"></font> | ||
{{MoveData | {{MoveData | ||
| Line 66: | Line 66: | ||
}} | }} | ||
===== <span class="invisible-header"></span> ===== | ===== <span class="invisible-header">Close 5B</span> ===== | ||
<font style="visibility:hidden" size="0"></font> | <font style="visibility:hidden" size="0"></font> | ||
{{MoveData | {{MoveData | ||
| Line 91: | Line 91: | ||
}} | }} | ||
===== <span class="invisible-header"></span> ===== | ===== <span class="invisible-header">Close 5C</span> ===== | ||
<font style="visibility:hidden" size="0"></font> | <font style="visibility:hidden" size="0"></font> | ||
{{MoveData | {{MoveData | ||
| Line 116: | Line 116: | ||
}} | }} | ||
===== <span class="invisible-header"></span> ===== | ===== <span class="invisible-header">Close 5D</span> ===== | ||
<font style="visibility:hidden" size="0"></font> | <font style="visibility:hidden" size="0"></font> | ||
{{MoveData | {{MoveData | ||
| Line 144: | Line 144: | ||
===Far Standing Normals=== | ===Far Standing Normals=== | ||
===== <span class="invisible-header"></span> ===== | ===== <span class="invisible-header">Far 5A</span> ===== | ||
<font style="visibility:hidden" size="0"></font> | <font style="visibility:hidden" size="0"></font> | ||
{{MoveData | {{MoveData | ||
| Line 169: | Line 169: | ||
}} | }} | ||
===== <span class="invisible-header"></span> ===== | ===== <span class="invisible-header">Far 5B</span> ===== | ||
<font style="visibility:hidden" size="0"></font> | <font style="visibility:hidden" size="0"></font> | ||
{{MoveData | {{MoveData | ||
| Line 194: | Line 194: | ||
}} | }} | ||
===== <span class="invisible-header"></span> ===== | ===== <span class="invisible-header">Far 5C</span> ===== | ||
<font style="visibility:hidden" size="0"></font> | <font style="visibility:hidden" size="0"></font> | ||
{{MoveData | {{MoveData | ||
| Line 219: | Line 219: | ||
}} | }} | ||
===== <span class="invisible-header"></span> ===== | ===== <span class="invisible-header">Far 5D</span> ===== | ||
<font style="visibility:hidden" size="0"></font> | <font style="visibility:hidden" size="0"></font> | ||
{{MoveData | {{MoveData | ||
| Line 248: | Line 248: | ||
===Crouching Normals=== | ===Crouching Normals=== | ||
===== <span class="invisible-header"></span> ===== | ===== <span class="invisible-header">2A</span> ===== | ||
<font style="visibility:hidden" size="0"></font> | <font style="visibility:hidden" size="0"></font> | ||
{{MoveData | {{MoveData | ||
| Line 273: | Line 273: | ||
}} | }} | ||
===== <span class="invisible-header"></span> ===== | ===== <span class="invisible-header">2B</span> ===== | ||
<font style="visibility:hidden" size="0"></font> | <font style="visibility:hidden" size="0"></font> | ||
{{MoveData | {{MoveData | ||
| Line 298: | Line 298: | ||
}} | }} | ||
===== <span class="invisible-header"></span> ===== | ===== <span class="invisible-header">2C</span> ===== | ||
<font style="visibility:hidden" size="0"></font> | <font style="visibility:hidden" size="0"></font> | ||
{{MoveData | {{MoveData | ||
| Line 323: | Line 323: | ||
}} | }} | ||
===== <span class="invisible-header"></span> ===== | ===== <span class="invisible-header">2D</span> ===== | ||
<font style="visibility:hidden" size="0"></font> | <font style="visibility:hidden" size="0"></font> | ||
{{MoveData | {{MoveData | ||
| Line 352: | Line 352: | ||
===Jumping Normals=== | ===Jumping Normals=== | ||
===== <span class="invisible-header"></span> ===== | ===== <span class="invisible-header">jA</span> ===== | ||
<font style="visibility:hidden" size="0"></font> | <font style="visibility:hidden" size="0"></font> | ||
{{MoveData | {{MoveData | ||
| Line 377: | Line 377: | ||
}} | }} | ||
===== <span class="invisible-header"></span> ===== | ===== <span class="invisible-header">jB</span> ===== | ||
<font style="visibility:hidden" size="0"></font> | <font style="visibility:hidden" size="0"></font> | ||
{{MoveData | {{MoveData | ||
| Line 404: | Line 404: | ||
}} | }} | ||
===== <span class="invisible-header"></span> ===== | ===== <span class="invisible-header">jC</span> ===== | ||
<font style="visibility:hidden" size="0"></font> | <font style="visibility:hidden" size="0"></font> | ||
{{MoveData | {{MoveData | ||
| Line 429: | Line 429: | ||
}} | }} | ||
===== <span class="invisible-header"></span> ===== | ===== <span class="invisible-header">jD</span> ===== | ||
<font style="visibility:hidden" size="0"></font> | <font style="visibility:hidden" size="0"></font> | ||
{{MoveData | {{MoveData | ||
| Line 458: | Line 458: | ||
===Command Normals=== | ===Command Normals=== | ||
===== <span class="invisible-header"></span> ===== | ===== <span class="invisible-header">Sai Gaku (6A)</span> ===== | ||
<font style="visibility:hidden" size="0"></font> | <font style="visibility:hidden" size="0"></font> | ||
{{MoveData | {{MoveData | ||
| Line 483: | Line 483: | ||
}} | }} | ||
===== <span class="invisible-header"></span> ===== | ===== <span class="invisible-header">Muran Geri (6B)</span> ===== | ||
<font style="visibility:hidden" size="0"></font> | <font style="visibility:hidden" size="0"></font> | ||
{{MoveData | {{MoveData | ||
| Line 508: | Line 508: | ||
}} | }} | ||
===== <span class="invisible-header"></span> ===== | ===== <span class="invisible-header">Kuuchuu Furi Muki (jCD)</span> ===== | ||
<font style="visibility:hidden" size="0"></font> | <font style="visibility:hidden" size="0"></font> | ||
{{MoveData | {{MoveData | ||
| Line 537: | Line 537: | ||
===Universal Moves=== | ===Universal Moves=== | ||
===== <span class="invisible-header"></span> ===== | ===== <span class="invisible-header">Lower-body Evasion Attack (5AB)</span> ===== | ||
<font style="visibility:hidden" size="0"></font> | <font style="visibility:hidden" size="0"></font> | ||
{{MoveData | {{MoveData | ||
| Line 563: | Line 563: | ||
}} | }} | ||
===== <span class="invisible-header"></span> ===== | ===== <span class="invisible-header">Upper-body Evasion Attack (2AB)</span> ===== | ||
<font style="visibility:hidden" size="0"></font> | <font style="visibility:hidden" size="0"></font> | ||
{{MoveData | {{MoveData | ||
| Line 597: | Line 597: | ||
}} | }} | ||
===== <span class="invisible-header"></span> ===== | ===== <span class="invisible-header">T.O.P. Attack (5CD)</span> ===== | ||
<font style="visibility:hidden" size="0"></font> | <font style="visibility:hidden" size="0"></font> | ||
{{MoveData | {{MoveData | ||
| Line 626: | Line 626: | ||
===Throws=== | ===Throws=== | ||
===== <span class="invisible-header"></span> ===== | ===== <span class="invisible-header">C Throw</span> ===== | ||
<font style="visibility:hidden" size="0"></font> | <font style="visibility:hidden" size="0"></font> | ||
{{MoveData | {{MoveData | ||
| Line 651: | Line 651: | ||
}} | }} | ||
===== <span class="invisible-header"></span> ===== | ===== <span class="invisible-header">D Throw</span> ===== | ||
<font style="visibility:hidden" size="0"></font> | <font style="visibility:hidden" size="0"></font> | ||
{{MoveData | {{MoveData | ||
| Line 680: | Line 680: | ||
===Feints=== | ===Feints=== | ||
===== <span class="invisible-header"></span> ===== | ===== <span class="invisible-header">Forward Feint (6AC)</span> ===== | ||
<font style="visibility:hidden" size="0"></font> | <font style="visibility:hidden" size="0"></font> | ||
{{MoveData | {{MoveData | ||
| Line 707: | Line 707: | ||
}} | }} | ||
===== <span class="invisible-header"></span> ===== | ===== <span class="invisible-header">Down Feint (2AC)</span> ===== | ||
<font style="visibility:hidden" size="0"></font> | <font style="visibility:hidden" size="0"></font> | ||
{{MoveData | {{MoveData | ||
| Line 738: | Line 738: | ||
===Special Moves=== | ===Special Moves=== | ||
===== <span class="invisible-header"></span> ===== | ===== <span class="invisible-header">Shin-ga (236P)</span> ===== | ||
<font style="visibility:hidden" size="0"></font> | <font style="visibility:hidden" size="0"></font> | ||
{{MoveData | {{MoveData | ||
| Line 818: | Line 818: | ||
}} | }} | ||
===== <span class="invisible-header"></span> ===== | ===== <span class="invisible-header">Rai-ga (623K)</span> ===== | ||
<font style="visibility:hidden" size="0"></font> | <font style="visibility:hidden" size="0"></font> | ||
{{MoveData | {{MoveData | ||
| Line 898: | Line 898: | ||
}} | }} | ||
===== <span class="invisible-header"></span> ===== | ===== <span class="invisible-header">Fuu-ga (214K)</span> ===== | ||
<font style="visibility:hidden" size="0"></font> | <font style="visibility:hidden" size="0"></font> | ||
{{MoveData | {{MoveData | ||
| Line 1,014: | Line 1,014: | ||
}} | }} | ||
===== <span class="invisible-header"></span> ===== | ===== <span class="invisible-header">Houzan Sai Heki-ga ([2]8C)</span> ===== | ||
<font style="visibility:hidden" size="0"></font> | <font style="visibility:hidden" size="0"></font> | ||
{{MoveData | {{MoveData | ||
| Line 1,048: | Line 1,048: | ||
===Super Moves=== | ===Super Moves=== | ||
===== <span class="invisible-header"></span> ===== | ===== <span class="invisible-header">Rei-ga (236236P)</span> ===== | ||
<font style="visibility:hidden" size="0"></font> | <font style="visibility:hidden" size="0"></font> | ||
{{MoveData | {{MoveData | ||
| Line 1,096: | Line 1,096: | ||
}} | }} | ||
===== <span class="invisible-header"></span> ===== | ===== <span class="invisible-header">Ryuu-ga (236236K)</span> ===== | ||
<font style="visibility:hidden" size="0"></font> | <font style="visibility:hidden" size="0"></font> | ||
{{MoveData | {{MoveData | ||
| Line 1,146: | Line 1,146: | ||
}} | }} | ||
===== <span class="invisible-header"></span> ===== | ===== <span class="invisible-header">Tenryuu Retsu-ga (623AB)</span> ===== | ||
<font style="visibility:hidden" size="0"></font> | <font style="visibility:hidden" size="0"></font> | ||
{{MoveData | {{MoveData | ||
Revision as of 06:03, 31 May 2024
Introduction
Gato is a taciturn practitioner of Chinese martial arts, with a background shrouded in mystery. He seeks vengeance against his father for murdering his mother and enters the Maximum Mayhem tournament in search of him. He seems to have a connection with another fighter, Hotaru Futaba, who asserts that he is her missing older brother...
Gameplay
Gato is a rushdown/neutral hybrid character. His main gameplan revolves around two core tactics. The first is to carry the opponent to the corner of the stage where he can deal tons of damage with his corner combos and pressure the opponent very well. The second is to build meter using his unique meter-building technique called the "stomp cancel" in order to gain access to his 0f super (a.k.a. Rei-ga or Zero Kiba), which allows him to confirm from almost anything in neutral, punish anything unsafe in neutral, or to end combos with to do even more damage in the corner.
| Strengths | Weaknesses |
|---|---|
|
|
Character Colors
Move List
Frame Data Source: https://w.atwiki.jp/garoumow/pages/24.html and https://w.atwiki.jp/garoumow/pages/71.html
| Data Help | |
|---|---|
| Disclaimer: This is meant to teach basic terminology used when describing moves. | |
| Hitbox: | A predefined area (usually a rectangle or rectangles) that tells the game how any given attack can come in contact with a character. Hitboxes are invisible to the player when normally playing. |
| Hurtbox: | A predefined area (usually a group of rectangles) that tell the game how your character is allowed to get hit by any incoming attack. Specifically, you'll get hit by (or block) an attack if that attack's hitbox ever overlaps your hurtbox. |
| Throw Box/Range: | Active throw frames and range. Your opponent will be thrown in this field if not in block or hit stun. |
| Projectile Box: | Hitbox on a projectile attack. |
| Guard/Counter Box: | The Guard Box or Counter Box. This appears when blocking or using a counter move. |
| Push Box: | Has no bearing on hit/hurt boxes. Just prevents characters to not pass through each other. (Also known as "Collision Box".) |
| Startup | The number of frames before an attack can hit the opponent. Does not include the first active frame. |
| Guard | The way this move must be blocked.
High or H or Overhead (especially when from the ground) -- must be blocked standing. |
| Damage | "Basic" damage -- Unmodified damage values
"Correct" damage -- Damage values accounting for damage scaling, TOP multiplier, and defense rate |
| Guard Crush Value | Decreases the defender's guard durability gauge by this value. |
| +X | Attacker has X number of advantage frames. |
| -X | Attacker has X number of disadvantage frames. |
| KD | Short for "knockdown", knocks down opponent on hit. |
| ◯ | Cancelable on both hit and block. |
| ∞ | Chain cancelable with the same button (renda cancel). |
| ※ | Cancelable on the first hit/part only. |
| 《X》OR «X» OR <<X>> OR (X) | X number of inactive frames between hits of multihit moves. |
| △ | Only cancelable on block. |
| ▽ | Only cancelable on hit. |
| × OR X | Not cancelable. |
Notes:
- Special/Super moves with "Guard" data in red text are impossible to just defend at 0-pixel health bar.
Close Standing Normals
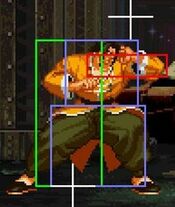
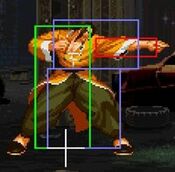
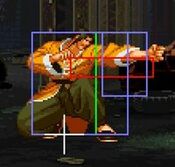
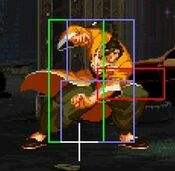
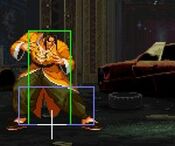
Close 5A
| Damage | Guard | Startup | Active | Recovery | Total |
|---|---|---|---|---|---|
| 4 | Mid | 3 | 1 | 8 | 12 |
| Hit Adv | Block Adv | Cancel on Hit | Cancel on Block | Guard Crush Value | |
| +6 | +6 | ◯ / ∞ | ◯ / ∞ | 4 | |
|
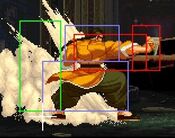
A fast jab that can be used as a close-range check. It can be cancelled into Shin-ga A as a fast meterless punish from close range or linked into Rai-ga. | |||||
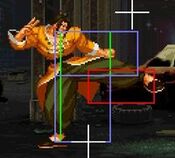
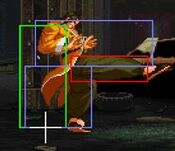
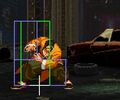
Close 5B
| Damage | Guard | Startup | Active | Recovery | Total |
|---|---|---|---|---|---|
| 6 | Mid | 5 | 3 | 6 | 14 |
| Hit Adv | Block Adv | Cancel on Hit | Cancel on Block | Guard Crush Value | |
| +6 | +6 | ◯ | ◯ | 4 | |
|
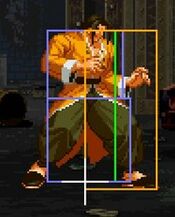
Slower than his cl.A and does less damage than his cl.C, typically not used. | |||||
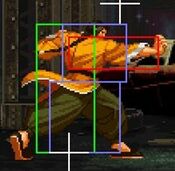
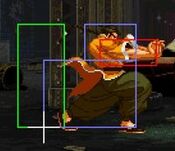
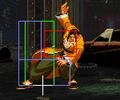
Close 5C
| Damage | Guard | Startup | Active | Recovery | Total |
|---|---|---|---|---|---|
| 10 | Mid | 5 | 4 | 14 | 23 |
| Hit Adv | Block Adv | Cancel on Hit | Cancel on Block | Guard Crush Value | |
| +3 | +3 | ◯ | ◯ | 5 | |
|
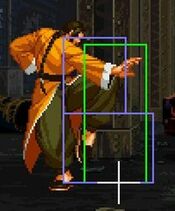
A good combo starter generally used to combo into Shin-ga C. Can be used from a jump-in to hit confirm into the move that way or feint cancelled on block to continue pressure. Does more damage than a single hit of cl.D but has more pushback, so it can be used over cl.D to maximize damage for certain punishes. | |||||
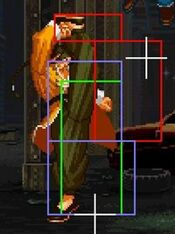
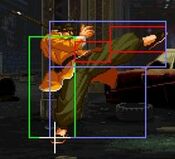
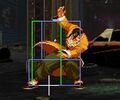
Close 5D
| Damage | Guard | Startup | Active | Recovery | Total |
|---|---|---|---|---|---|
| 6, 6 | Mid | 3 | 1, «1», 6 | 10 | 21 |
| Hit Adv | Block Adv | Cancel on Hit | Cancel on Block | Guard Crush Value | |
| +5 | +5 | ※ | ※ | 3, 3 | |
|
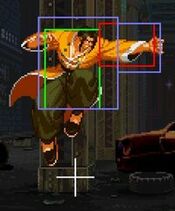
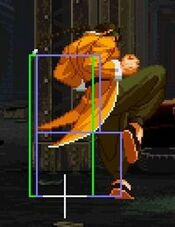
A very fast close heavy normal that has good frame advantage, an amazing hitbox, and hits twice. Can be used to confirm and link into his 0f super from both hits. Also links into cr.B. The hitbox of the move extends well in front and above Gato's head, making it a good anti-air against an opponent who tries to jump in from right above him or for hitting the opponent out of the air early in their jump (especially useful when going for his D throw). The move can also be used to beat guard cancel attempts against opponents who try to do so against the first hit. It is also often used to cancel into Fuu-ga D in close range as a punish. | |||||
Far Standing Normals
Far 5A
| Damage | Guard | Startup | Active | Recovery | Total |
|---|---|---|---|---|---|
| 5 | Mid | 3 | 3 | 11 | 17 |
| Hit Adv | Block Adv | Cancel on Hit | Cancel on Block | Guard Crush Value | |
| +1 | +1 | ◯ / ∞ | ◯ / ∞ | 4 | |
|
Used as a fast, higher-hitting check, in particular against forward dashes. Can also be used to combo into Shin-ga A or Rai-ga like cl.A (if close enough). | |||||
Far 5B
| Damage | Guard | Startup | Active | Recovery | Total |
|---|---|---|---|---|---|
| 7 | Mid | 6 | 3 | 15 | 24 |
| Hit Adv | Block Adv | Cancel on Hit | Cancel on Block | Guard Crush Value | |
| -3 | -3 | ◯ | ◯ | 4 | |
|
Has long reach but may feel somewhat awkward to use at first. If used after a cl.D, cr.B, or Rai-ga break, it will act as a frame trap (including against jumps). The move is unsafe on hit/block, but can be feint cancelled to make it safe or cancelled into a special move. | |||||
Far 5C
| Damage | Guard | Startup | Active | Recovery | Total |
|---|---|---|---|---|---|
| 14 | Mid | 10 | 4 | 21 | 35 |
| Hit Adv | Block Adv | Cancel on Hit | Cancel on Block | Guard Crush Value | |
| -4 | -4 | X | X | 5 | |
|
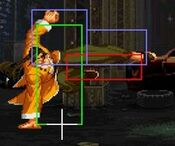
Another normal that may feel somewhat slow and awkward to use at first. Usually used as a mid-range attack as a counter-poke to beat the opponent's pokes/checks. Gato's hurtbox retracts, which can make it difficult for the opponent to convert into a combo even if they manage to land a hit. It also extends outside of the range of most of his other normals, so the opponent may not be wary of it, and can be hard to punish from max range as it is only slightly minus. The startup of the move can be cancelled by inputting 5C~D. | |||||
Far 5D
| Damage | Guard | Startup | Active | Recovery | Total |
|---|---|---|---|---|---|
| 14 | Mid | 13 | 3 | 19 | 35 |
| Hit Adv | Block Adv | Cancel on Hit | Cancel on Block | Guard Crush Value | |
| -1 | -1 | X | ◯ | 5 | |
|
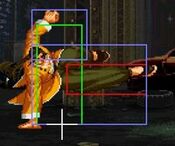
Although not particularly unsafe, the move is slow and generally isn't used much. It can function as an anti-air if the opponent jumps away from Gato's D throw and/or if the opponent is outside of the range of cl.D. The move can be feint cancelled on block to make it safe. The startup of the move can be cancelled by inputting 5D~C. | |||||
Crouching Normals
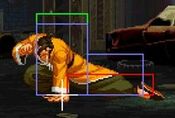
2A
| Damage | Guard | Startup | Active | Recovery | Total |
|---|---|---|---|---|---|
| 4 | Mid | 4 | 3 | 6 | 13 |
| Hit Adv | Block Adv | Cancel on Hit | Cancel on Block | Guard Crush Value | |
| +6 | +6 | ◯ / ∞ | ◯ / ∞ | 4 | |
|
Similar in function to his cl.A and far st.A but with 1f slower startup, along with slightly less range and damage compared to far st.A. Offers more frame advantage than far st.A and can be used to better confirm and link into 0f super, but Gato usually has better options in that regard such as cl.D or cr.B. | |||||
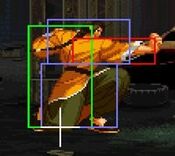
2B
| Damage | Guard | Startup | Active | Recovery | Total |
|---|---|---|---|---|---|
| 6 | Low | 4 | 4 | 7 | 15 |
| Hit Adv | Block Adv | Cancel on Hit | Cancel on Block | Guard Crush Value | |
| +4 | +4 | X | X | 4 | |
|
A low with amazing range. Used as a poke/check in neutral against dashes/runs (into standing jabs) and can also be used to target the landing recovery of whiffed jump normals. Can't be cancelled, but can be linked into 0f super as a confirm or punish, or into Rai-ga (mainly in the corner). | |||||
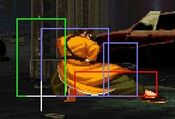
2C
| Damage | Guard | Startup | Active | Recovery | Total |
|---|---|---|---|---|---|
| 10 | Mid | 7 | 4 | 18 | 29 |
| Hit Adv | Block Adv | Cancel on Hit | Cancel on Block | Guard Crush Value | |
| -1 | -1 | ◯ | ◯ | 5 | |
|
Similar in function to Gato's cl.C as a combo starter. Has slightly slower startup but slightly farther range than cl.C, which is a close proximity normal. | |||||
2D
| Damage | Guard | Startup | Active | Recovery | Total |
|---|---|---|---|---|---|
| 10 | Low | 8 | 3 | 28 | 39 |
| Hit Adv | Block Adv | Cancel on Hit | Cancel on Block | Guard Crush Value | |
| KD | -10 | X | X | 5 | |
|
A fairly unsafe sweep, generally not used much outside of specific situations, such as punishing landing recovery from max range. | |||||
Jumping Normals
jA
| Damage | Guard | Startup | Active | Recovery | Total |
|---|---|---|---|---|---|
| 5 | High | 4 | 10 | - | - |
| Hit Adv | Block Adv | Cancel on Hit | Cancel on Block | Guard Crush Value | |
| - | - | - | - | 4 | |
|
A fast horizontal-hitting jump normal with a lot of active frames that functions well as an air-to-air. | |||||
jB
| Damage | Guard | Startup | Active | Recovery | Total |
|---|---|---|---|---|---|
| 5 | High | 6 | 7 | - | - |
| Hit Adv | Block Adv | Cancel on Hit | Cancel on Block | Guard Crush Value | |
| - | - | - | - | 4 | |
|
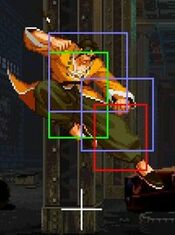
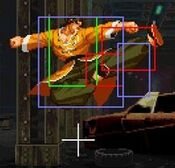
Mainly used from a hop to combo into Rai-ga in close range. It has a long downward hitbox, so it can also be used to whiff punish (and combo into 0f super) from higher in the air. If done deep enough, the j.B can beat upper-body evasion attacks. The normal can also be chained into j.A as an air target combo, making it very useful and a staple for Gato's jumps. Although the j.A will whiff on a crouching opponent, Gato will still be advantageous on block/hit from his j.B. It has fast startup, so it can be used as an air-to-air from a forward or neutral jump on reaction to the opponent's jump, and can beat air JD or non-invincible guard cancel attempts if the opponent only does so against the first hit of j.B. | |||||
jC
| Damage | Guard | Startup | Active | Recovery | Total |
|---|---|---|---|---|---|
| 10 | High | 7 | 6 | - | - |
| Hit Adv | Block Adv | Cancel on Hit | Cancel on Block | Guard Crush Value | |
| - | - | - | - | 5 | |
|
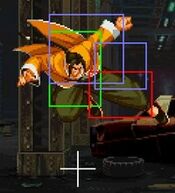
Used in air-to-air situations and as a check, usually from a neutral or back jump, to stop the opponent's forward advancing jump-ins or dashes on the ground. It has a good forward-extending hitbox that can beat a lot of other moves the opponent may try to stick out. | |||||
jD
| Damage | Guard | Startup | Active | Recovery | Total |
|---|---|---|---|---|---|
| 10 | High | 10 | 5 | - | - |
| Hit Adv | Block Adv | Cancel on Hit | Cancel on Block | Guard Crush Value | |
| - | - | - | - | 5 | |
|
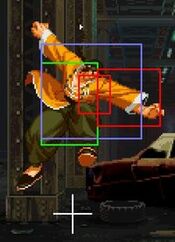
Has a more downward-extending hitbox compared to j.C and is mainly used for hops. Good for countering the opponent's pokes and checks, such as their st.A, as it will go above them. It can still be evaded by upper-body evasion attacks, but is still useful for stopping dashes and runs in neutral. Very useful as a fast overhead from a hop to confirm into 0f super. | |||||
Command Normals
Sai Gaku (6A)
| Damage | Guard | Startup | Active | Recovery | Total |
|---|---|---|---|---|---|
| 10 | Overhead | 19 | 4 | 16 | 39 |
| Hit Adv | Block Adv | Cancel on Hit | Cancel on Block | Guard Crush Value | |
| +1 | +1 | X | X | 9 | |
|
Can be used as a grounded overhead and confirmed into 0f super. However, it will not be a true combo/link into super (even though it's +1f on hit) unless it hits meaty, and will instead function as an unblockable setup that the opponent can potentially escape on reaction to being hit. | |||||
Muran Geri (6B)
| Damage | Guard | Startup | Active | Recovery | Total |
|---|---|---|---|---|---|
| 11 | Mid | 13 | 5 | 15 | 33 |
| Hit Adv | Block Adv | Cancel on Hit | Cancel on Block | Guard Crush Value | |
| +1 | +1 | X | X | 9 | |
|
Can be used to move Gato forward and hit an opponent trying to jump out of Gato's pressure on the ground, particularly useful to keep the opponent in the corner. However, the move will whiff on a crouching opponent and can potentially be whiff punished that way, so it should be used with caution. | |||||
Kuuchuu Furi Muki (jCD)
| Damage | Guard | Startup | Active | Recovery | Total |
|---|---|---|---|---|---|
| - | - | - | - | - | - |
| Hit Adv | Block Adv | Cancel on Hit | Cancel on Block | Guard Crush Value | |
| - | - | - | - | - | |
|
Gato turns around mid-air, which can make any of his jump normals function as a cross-up. Can only be done from a jump, not a hop. | |||||
Universal Moves
Lower-body Evasion Attack (5AB)
| Damage | Guard | Startup | Active | Recovery | Total |
|---|---|---|---|---|---|
| 6, 6 | Mid | 8 | 1, «2», 3 | 19 | 32 |
| Hit Adv | Block Adv | Cancel on Hit | Cancel on Block | Guard Crush Value | |
| -3 | +3 | X | X | 3, 3 | |
|
Hits twice but is minus (and potentially unsafe) on hit. Not used much as you're better off going for a hop or jump to evade lows. It's also the only lower-body evasion attack in the game that isn't an overhead and one of the only ones that isn't airborne either. | |||||
Upper-body Evasion Attack (2AB)
| Damage | Guard | Startup | Active | Recovery | Total |
|---|---|---|---|---|---|
| 10 | Mid | 8 | 3 | 21 | 32 |
| Hit Adv | Block Adv | Cancel on Hit | Cancel on Block | Guard Crush Value | |
| -5 | +1 | ◯ | X | 6 | |
|
A good upper-body evasion attack that functions well as an anti-air and is safe on block. You can safely buffer into a special move as it will only come out on hit. Usually cancelled into Shin-ga or Fuu-ga D > Sen-ga on hit. 1~7F of upper-body invincibility. | |||||
T.O.P. Attack (5CD)
| Damage | Guard | Startup | Active | Recovery | Total |
|---|---|---|---|---|---|
| 17 (base damage) | Mid | 21 | - | - | - |
| Hit Adv | Block Adv | Cancel on Hit | Cancel on Block | Guard Crush Value | |
| KD | -19 | X | X | 25 | |
|
Fairly slow startup and can be quite unsafe. Not used much outside of a few niche scenarios: as a GC against fireballs when outside of GC Shin-ga range, as a combo ender off of very specific juggle situations midscreen, or if the opponent is already close to being guard crushed (can be cancelled into from a heavy normal in that case). | |||||
Throws
C Throw
| Damage | Guard | Startup | Active | Recovery | Total |
|---|---|---|---|---|---|
| 14 | Unblockable | 1 | - | - | - |
| Hit Adv | Block Adv | Cancel on Hit | Cancel on Block | Guard Crush Value | |
| +41 | - | - | - | - | |
|
Generally not used much over his D throw, but can set up a reverse guard situation in the corner and has a faster animation than his D throw if you need to deal damage right before the timer runs out at the end of a round. | |||||
D Throw
| Damage | Guard | Startup | Active | Recovery | Total |
|---|---|---|---|---|---|
| 15 | Unblockable | 1 | - | - | - |
| Hit Adv | Block Adv | Cancel on Hit | Cancel on Block | Guard Crush Value | |
| +38 | - | - | - | - | |
|
Gato's preferred throw. Deals one more point of damage than his C throw and gives better okizeme. If the throw "whiffs", a cl.D or far st.D will come out, which are very good for anti-airing an opponent who tries to jump to escape his throw. | |||||
Feints
Forward Feint (6AC)
| Damage | Guard | Startup | Active | Recovery | Total |
|---|---|---|---|---|---|
| - | - | - | - | - | 11 |
| Hit Adv | Block Adv | Cancel on Hit | Cancel on Block | Guard Crush Value | |
| - | - | - | - | - | |
|
Mimics the start of Shin-ga C (and to a lesser extent Shin-ga A and Rei-ga). Generally not used over his down feint. | |||||
Down Feint (2AC)
| Damage | Guard | Startup | Active | Recovery | Total |
|---|---|---|---|---|---|
| - | - | - | - | - | 11 |
| Hit Adv | Block Adv | Cancel on Hit | Cancel on Block | Guard Crush Value | |
| - | - | - | - | - | |
|
Mimics the start of Rai-ga, looking like a break. Gato's preferred feint to feint cancel with, as his hurtbox retracts farther back than his forward feint. | |||||
Special Moves
Shin-ga (236P)
Rai-ga (623K)
Fuu-ga (214K)
Houzan Sai Heki-ga ([2]8C)
| Damage | Guard | Startup | Active | Recovery | Total |
|---|---|---|---|---|---|
| 20 | Mid | 5 | - | - | - |
| Hit Adv | Block Adv | Cancel on Hit | Cancel on Block | Guard Crush Value | |
| KD | -6 | - | - | 8 | |
|
Gato's counter move that only works against mid/high attacks and is vulnerable to lows. Gato can convert into Rei-ga if he manages to successfully land the counter. However, the startup is relatively slow for a counter and it leaves Gato in a long animation and recovery state if it whiffs. Like other counter moves in the game, it's considered high risk and typically isn't used. 6~15F of upper-body counter state, after counter is initiated the startup is 8F. | |||||
Super Moves
Rei-ga (236236P)
Ryuu-ga (236236K)
Tenryuu Retsu-ga (623AB)


