mNo edit summary |
m (Missed a few moves) |
||
| (17 intermediate revisions by the same user not shown) | |||
| Line 33: | Line 33: | ||
== Movelist == | == Movelist == | ||
<br> | |||
=== Normals and Strings === | === Normals and Strings === | ||
| Line 43: | Line 44: | ||
{| class="wikitable" style="text-align: center;" | {| class="wikitable" style="text-align: center;" | ||
|- | |- | ||
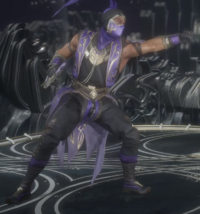
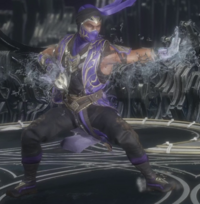
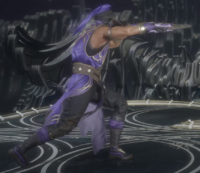
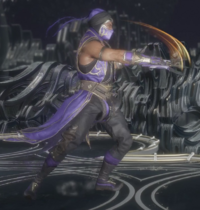
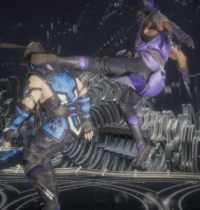
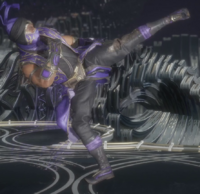
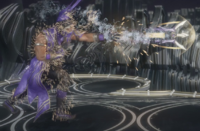
| rowspan=6 | | | rowspan=6 | [[File:Mk11_rain_1.png|200px]] | ||
|- | |- | ||
! {{Tooltip|text='''Damage'''|hovertext=% on hit, on block, on Flawless Block}} || '''Guard''' || '''Startup''' || '''Active''' || '''Recovery''' | ! {{Tooltip|text='''Damage'''|hovertext=% on hit, on block, on Flawless Block}} || '''Guard''' || '''Startup''' || '''Active''' || '''Recovery''' | ||
| Line 58: | Line 59: | ||
{| class="wikitable" style="text-align: center;" | {| class="wikitable" style="text-align: center;" | ||
|- | |- | ||
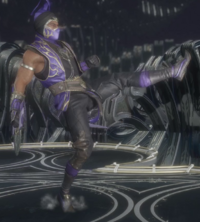
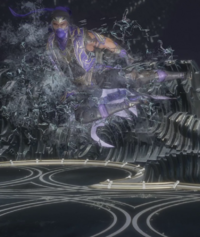
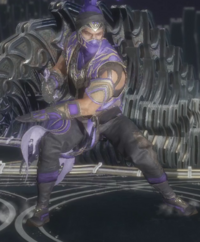
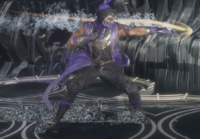
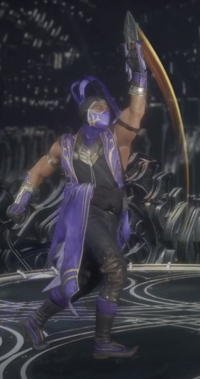
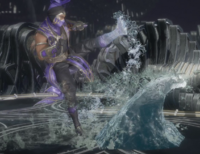
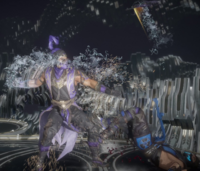
| rowspan=6 | | | rowspan=6 | [[File:Mk11_rain_13.png|200px]] | ||
|- | |- | ||
! {{Tooltip|text='''Damage'''|hovertext=% on hit, on block, on Flawless Block}} || '''Guard''' || '''Startup''' || '''Active''' || '''Recovery''' | ! {{Tooltip|text='''Damage'''|hovertext=% on hit, on block, on Flawless Block}} || '''Guard''' || '''Startup''' || '''Active''' || '''Recovery''' | ||
| Line 74: | Line 75: | ||
{| class="wikitable" style="text-align: center;" | {| class="wikitable" style="text-align: center;" | ||
|- | |- | ||
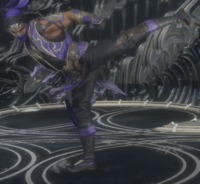
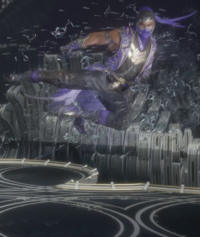
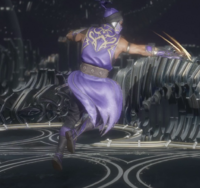
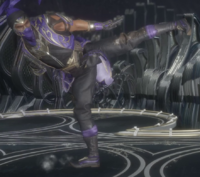
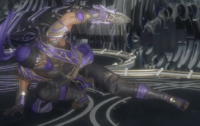
| rowspan=6 | | | rowspan=6 | [[File:Mk11_rain_133.png|200px]] | ||
|- | |- | ||
! {{Tooltip|text='''Damage'''|hovertext=% on hit, on block, on Flawless Block}} || '''Guard''' || '''Startup''' || '''Active''' || '''Recovery''' | ! {{Tooltip|text='''Damage'''|hovertext=% on hit, on block, on Flawless Block}} || '''Guard''' || '''Startup''' || '''Active''' || '''Recovery''' | ||
| Line 90: | Line 91: | ||
{| class="wikitable" style="text-align: center;" | {| class="wikitable" style="text-align: center;" | ||
|- | |- | ||
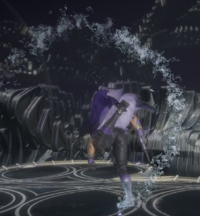
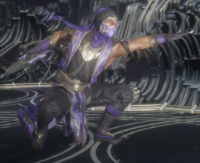
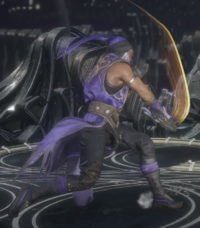
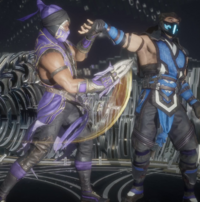
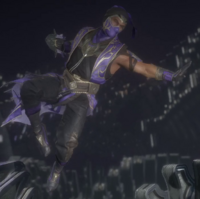
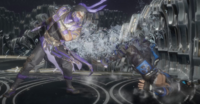
| rowspan=6 | | | rowspan=6 | [[File:Mk11_rain_134.png|200px]] | ||
|- | |- | ||
! {{Tooltip|text='''Damage'''|hovertext=% on hit, on block, on Flawless Block}} || '''Guard''' || '''Startup''' || '''Active''' || '''Recovery''' | ! {{Tooltip|text='''Damage'''|hovertext=% on hit, on block, on Flawless Block}} || '''Guard''' || '''Startup''' || '''Active''' || '''Recovery''' | ||
| Line 112: | Line 113: | ||
{| class="wikitable" style="text-align: center;" | {| class="wikitable" style="text-align: center;" | ||
|- | |- | ||
| rowspan=6 | | | rowspan=6 | [[File:Mk11_rain_b1.png|200px]] | ||
|- | |- | ||
! {{Tooltip|text='''Damage'''|hovertext=% on hit, on block, on Flawless Block}} || '''Guard''' || '''Startup''' || '''Active''' || '''Recovery''' | ! {{Tooltip|text='''Damage'''|hovertext=% on hit, on block, on Flawless Block}} || '''Guard''' || '''Startup''' || '''Active''' || '''Recovery''' | ||
| Line 127: | Line 128: | ||
{| class="wikitable" style="text-align: center;" | {| class="wikitable" style="text-align: center;" | ||
|- | |- | ||
| rowspan=6 | | | rowspan=6 | [[File:Mk11_rain_b14.png|200px]] | ||
|- | |- | ||
! {{Tooltip|text='''Damage'''|hovertext=% on hit, on block, on Flawless Block}} || '''Guard''' || '''Startup''' || '''Active''' || '''Recovery''' | ! {{Tooltip|text='''Damage'''|hovertext=% on hit, on block, on Flawless Block}} || '''Guard''' || '''Startup''' || '''Active''' || '''Recovery''' | ||
| Line 142: | Line 143: | ||
{| class="wikitable" style="text-align: center;" | {| class="wikitable" style="text-align: center;" | ||
|- | |- | ||
| rowspan=6 | | | rowspan=6 | [[File:Mk11_rain_b14b.png|200px]] | ||
|- | |- | ||
! {{Tooltip|text='''Damage'''|hovertext=% on hit, on block, on Flawless Block}} || '''Guard''' || '''Startup''' || '''Active''' || '''Recovery''' | ! {{Tooltip|text='''Damage'''|hovertext=% on hit, on block, on Flawless Block}} || '''Guard''' || '''Startup''' || '''Active''' || '''Recovery''' | ||
| Line 157: | Line 158: | ||
{| class="wikitable" style="text-align: center;" | {| class="wikitable" style="text-align: center;" | ||
|- | |- | ||
| rowspan=6 | | | rowspan=6 | [[File:Mk11_rain_b14.png|200px]] | ||
|- | |- | ||
! {{Tooltip|text='''Damage'''|hovertext=% on hit, on block, on Flawless Block}} || '''Guard''' || '''Startup''' || '''Active''' || '''Recovery''' | ! {{Tooltip|text='''Damage'''|hovertext=% on hit, on block, on Flawless Block}} || '''Guard''' || '''Startup''' || '''Active''' || '''Recovery''' | ||
| Line 172: | Line 173: | ||
{| class="wikitable" style="text-align: center;" | {| class="wikitable" style="text-align: center;" | ||
|- | |- | ||
| rowspan=6 | | | rowspan=6 | [[File:Mk11_rain_b14b.png|200px]] | ||
|- | |- | ||
! {{Tooltip|text='''Damage'''|hovertext=% on hit, on block, on Flawless Block}} || '''Guard''' || '''Startup''' || '''Active''' || '''Recovery''' | ! {{Tooltip|text='''Damage'''|hovertext=% on hit, on block, on Flawless Block}} || '''Guard''' || '''Startup''' || '''Active''' || '''Recovery''' | ||
| Line 191: | Line 192: | ||
{| class="wikitable" style="text-align: center;" | {| class="wikitable" style="text-align: center;" | ||
|- | |- | ||
| rowspan=6 | | | rowspan=6 | [[File:Mk11_rain_d1.png|200px]] | ||
|- | |- | ||
! {{Tooltip|text='''Damage'''|hovertext=% on hit, on block, on Flawless Block}} || '''Guard''' || '''Startup''' || '''Active''' || '''Recovery''' | ! {{Tooltip|text='''Damage'''|hovertext=% on hit, on block, on Flawless Block}} || '''Guard''' || '''Startup''' || '''Active''' || '''Recovery''' | ||
| Line 216: | Line 217: | ||
{| class="wikitable" style="text-align: center;" | {| class="wikitable" style="text-align: center;" | ||
|- | |- | ||
| rowspan=6 | | | rowspan=6 | [[File:Mk11_rain_2.png|200px]] | ||
|- | |- | ||
! {{Tooltip|text='''Damage'''|hovertext=% on hit, on block, on Flawless Block}} || '''Guard''' || '''Startup''' || '''Active''' || '''Recovery''' | ! {{Tooltip|text='''Damage'''|hovertext=% on hit, on block, on Flawless Block}} || '''Guard''' || '''Startup''' || '''Active''' || '''Recovery''' | ||
| Line 231: | Line 232: | ||
{| class="wikitable" style="text-align: center;" | {| class="wikitable" style="text-align: center;" | ||
|- | |- | ||
| rowspan=6 | | | rowspan=6 | [[File:Mk11_rain_242.png|200px]] | ||
|- | |- | ||
! {{Tooltip|text='''Damage'''|hovertext=% on hit, on block, on Flawless Block}} || '''Guard''' || '''Startup''' || '''Active''' || '''Recovery''' | ! {{Tooltip|text='''Damage'''|hovertext=% on hit, on block, on Flawless Block}} || '''Guard''' || '''Startup''' || '''Active''' || '''Recovery''' | ||
| Line 246: | Line 247: | ||
{| class="wikitable" style="text-align: center;" | {| class="wikitable" style="text-align: center;" | ||
|- | |- | ||
| rowspan=6 | | | rowspan=6 | [[File:Mk11_rain_2421+3.png|200px]] | ||
|- | |- | ||
! {{Tooltip|text='''Damage'''|hovertext=% on hit, on block, on Flawless Block}} || '''Guard''' || '''Startup''' || '''Active''' || '''Recovery''' | ! {{Tooltip|text='''Damage'''|hovertext=% on hit, on block, on Flawless Block}} || '''Guard''' || '''Startup''' || '''Active''' || '''Recovery''' | ||
| Line 261: | Line 262: | ||
{| class="wikitable" style="text-align: center;" | {| class="wikitable" style="text-align: center;" | ||
|- | |- | ||
| rowspan=6 | | | rowspan=6 | [[File:Mk11_rain_24D4.png|200px]] | ||
|- | |- | ||
! {{Tooltip|text='''Damage'''|hovertext=% on hit, on block, on Flawless Block}} || '''Guard''' || '''Startup''' || '''Active''' || '''Recovery''' | ! {{Tooltip|text='''Damage'''|hovertext=% on hit, on block, on Flawless Block}} || '''Guard''' || '''Startup''' || '''Active''' || '''Recovery''' | ||
| Line 282: | Line 283: | ||
{| class="wikitable" style="text-align: center;" | {| class="wikitable" style="text-align: center;" | ||
|- | |- | ||
| rowspan=6 | | | rowspan=6 | [[File:Mk11_rain_b2.png|200px]] | ||
|- | |- | ||
! {{Tooltip|text='''Damage'''|hovertext=% on hit, on block, on Flawless Block}} || '''Guard''' || '''Startup''' || '''Active''' || '''Recovery''' | ! {{Tooltip|text='''Damage'''|hovertext=% on hit, on block, on Flawless Block}} || '''Guard''' || '''Startup''' || '''Active''' || '''Recovery''' | ||
| Line 298: | Line 299: | ||
{| class="wikitable" style="text-align: center;" | {| class="wikitable" style="text-align: center;" | ||
|- | |- | ||
| rowspan=6 | | | rowspan=6 | [[File:Mk11_rain_b21.png|200px]] | ||
|- | |- | ||
! {{Tooltip|text='''Damage'''|hovertext=% on hit, on block, on Flawless Block}} || '''Guard''' || '''Startup''' || '''Active''' || '''Recovery''' | ! {{Tooltip|text='''Damage'''|hovertext=% on hit, on block, on Flawless Block}} || '''Guard''' || '''Startup''' || '''Active''' || '''Recovery''' | ||
| Line 314: | Line 315: | ||
{| class="wikitable" style="text-align: center;" | {| class="wikitable" style="text-align: center;" | ||
|- | |- | ||
| rowspan=6 | | | rowspan=6 | [[File:Mk11_rain_b212.png|200px]] | ||
|- | |- | ||
! {{Tooltip|text='''Damage'''|hovertext=% on hit, on block, on Flawless Block}} || '''Guard''' || '''Startup''' || '''Active''' || '''Recovery''' | ! {{Tooltip|text='''Damage'''|hovertext=% on hit, on block, on Flawless Block}} || '''Guard''' || '''Startup''' || '''Active''' || '''Recovery''' | ||
| Line 335: | Line 336: | ||
{| class="wikitable" style="text-align: center;" | {| class="wikitable" style="text-align: center;" | ||
|- | |- | ||
| rowspan=6 | | | rowspan=6 | [[File:Mk11_rain_f2.png|200px]] | ||
|- | |- | ||
! {{Tooltip|text='''Damage'''|hovertext=% on hit, on block, on Flawless Block}} || '''Guard''' || '''Startup''' || '''Active''' || '''Recovery''' | ! {{Tooltip|text='''Damage'''|hovertext=% on hit, on block, on Flawless Block}} || '''Guard''' || '''Startup''' || '''Active''' || '''Recovery''' | ||
| Line 351: | Line 352: | ||
{| class="wikitable" style="text-align: center;" | {| class="wikitable" style="text-align: center;" | ||
|- | |- | ||
| rowspan=6 | | | rowspan=6 | [[File:Mk11_rain_f2d4.png|200px]] | ||
|- | |- | ||
! {{Tooltip|text='''Damage'''|hovertext=% on hit, on block, on Flawless Block}} || '''Guard''' || '''Startup''' || '''Active''' || '''Recovery''' | ! {{Tooltip|text='''Damage'''|hovertext=% on hit, on block, on Flawless Block}} || '''Guard''' || '''Startup''' || '''Active''' || '''Recovery''' | ||
| Line 366: | Line 367: | ||
{| class="wikitable" style="text-align: center;" | {| class="wikitable" style="text-align: center;" | ||
|- | |- | ||
| rowspan=6 | | | rowspan=6 | [[File:Mk11_rain_f21+3.png|200px]] | ||
|- | |- | ||
! {{Tooltip|text='''Damage'''|hovertext=% on hit, on block, on Flawless Block}} || '''Guard''' || '''Startup''' || '''Active''' || '''Recovery''' | ! {{Tooltip|text='''Damage'''|hovertext=% on hit, on block, on Flawless Block}} || '''Guard''' || '''Startup''' || '''Active''' || '''Recovery''' | ||
| Line 382: | Line 383: | ||
{| class="wikitable" style="text-align: center;" | {| class="wikitable" style="text-align: center;" | ||
|- | |- | ||
| rowspan=6 | | | rowspan=6 | [[File:Mk11_rain_f21+34.png|200px]] | ||
|- | |- | ||
! {{Tooltip|text='''Damage'''|hovertext=% on hit, on block, on Flawless Block}} || '''Guard''' || '''Startup''' || '''Active''' || '''Recovery''' | ! {{Tooltip|text='''Damage'''|hovertext=% on hit, on block, on Flawless Block}} || '''Guard''' || '''Startup''' || '''Active''' || '''Recovery''' | ||
| Line 401: | Line 402: | ||
{| class="wikitable" style="text-align: center;" | {| class="wikitable" style="text-align: center;" | ||
|- | |- | ||
| rowspan=6 | | | rowspan=6 | [[File:Mk11_rain_d2.png|200px]] | ||
|- | |- | ||
! {{Tooltip|text='''Damage'''|hovertext=% on hit, on block, on Flawless Block}} || '''Guard''' || '''Startup''' || '''Active''' || '''Recovery''' | ! {{Tooltip|text='''Damage'''|hovertext=% on hit, on block, on Flawless Block}} || '''Guard''' || '''Startup''' || '''Active''' || '''Recovery''' | ||
| Line 419: | Line 420: | ||
{| class="wikitable" style="text-align: center;" | {| class="wikitable" style="text-align: center;" | ||
|- | |- | ||
| rowspan=6 | | | rowspan=6 | [[File:Mk11_rain_3.png|200px]] | ||
|- | |- | ||
! {{Tooltip|text='''Damage'''|hovertext=% on hit, on block, on Flawless Block}} || '''Guard''' || '''Startup''' || '''Active''' || '''Recovery''' | ! {{Tooltip|text='''Damage'''|hovertext=% on hit, on block, on Flawless Block}} || '''Guard''' || '''Startup''' || '''Active''' || '''Recovery''' | ||
| Line 440: | Line 441: | ||
{| class="wikitable" style="text-align: center;" | {| class="wikitable" style="text-align: center;" | ||
|- | |- | ||
| rowspan=6 | | | rowspan=6 | [[File:Mk11_rain_b3.png|200px]] | ||
|- | |- | ||
! {{Tooltip|text='''Damage'''|hovertext=% on hit, on block, on Flawless Block}} || '''Guard''' || '''Startup''' || '''Active''' || '''Recovery''' | ! {{Tooltip|text='''Damage'''|hovertext=% on hit, on block, on Flawless Block}} || '''Guard''' || '''Startup''' || '''Active''' || '''Recovery''' | ||
| Line 455: | Line 456: | ||
{| class="wikitable" style="text-align: center;" | {| class="wikitable" style="text-align: center;" | ||
|- | |- | ||
| rowspan=6 | | | rowspan=6 | [[File:Mk11_rain_b34.png|200px]] | ||
|- | |- | ||
! {{Tooltip|text='''Damage'''|hovertext=% on hit, on block, on Flawless Block}} || '''Guard''' || '''Startup''' || '''Active''' || '''Recovery''' | ! {{Tooltip|text='''Damage'''|hovertext=% on hit, on block, on Flawless Block}} || '''Guard''' || '''Startup''' || '''Active''' || '''Recovery''' | ||
| Line 474: | Line 475: | ||
{| class="wikitable" style="text-align: center;" | {| class="wikitable" style="text-align: center;" | ||
|- | |- | ||
| rowspan=6 | | | rowspan=6 | [[File:Mk11_rain_f3a.png|200px]][[File:Mk11_rain_f3b.png|200px]] | ||
|- | |- | ||
! {{Tooltip|text='''Damage'''|hovertext=% on hit, on block, on Flawless Block}} || '''Guard''' || '''Startup''' || '''Active''' || '''Recovery''' | ! {{Tooltip|text='''Damage'''|hovertext=% on hit, on block, on Flawless Block}} || '''Guard''' || '''Startup''' || '''Active''' || '''Recovery''' | ||
| Line 492: | Line 493: | ||
{| class="wikitable" style="text-align: center;" | {| class="wikitable" style="text-align: center;" | ||
|- | |- | ||
| rowspan=6 | | | rowspan=6 | [[File:Mk11_rain_d3.png|200px]] | ||
|- | |- | ||
! {{Tooltip|text='''Damage'''|hovertext=% on hit, on block, on Flawless Block}} || '''Guard''' || '''Startup''' || '''Active''' || '''Recovery''' | ! {{Tooltip|text='''Damage'''|hovertext=% on hit, on block, on Flawless Block}} || '''Guard''' || '''Startup''' || '''Active''' || '''Recovery''' | ||
| Line 510: | Line 511: | ||
{| class="wikitable" style="text-align: center;" | {| class="wikitable" style="text-align: center;" | ||
|- | |- | ||
| rowspan=6 | | | rowspan=6 | [[File:Mk11_rain_4.png|200px]] | ||
|- | |- | ||
! {{Tooltip|text='''Damage'''|hovertext=% on hit, on block, on Flawless Block}} || '''Guard''' || '''Startup''' || '''Active''' || '''Recovery''' | ! {{Tooltip|text='''Damage'''|hovertext=% on hit, on block, on Flawless Block}} || '''Guard''' || '''Startup''' || '''Active''' || '''Recovery''' | ||
| Line 528: | Line 529: | ||
{| class="wikitable" style="text-align: center;" | {| class="wikitable" style="text-align: center;" | ||
|- | |- | ||
| rowspan=6 | | | rowspan=6 | [[File:Mk11_rain_b4.png|200px]] | ||
|- | |- | ||
! {{Tooltip|text='''Damage'''|hovertext=% on hit, on block, on Flawless Block}} || '''Guard''' || '''Startup''' || '''Active''' || '''Recovery''' | ! {{Tooltip|text='''Damage'''|hovertext=% on hit, on block, on Flawless Block}} || '''Guard''' || '''Startup''' || '''Active''' || '''Recovery''' | ||
| Line 546: | Line 547: | ||
{| class="wikitable" style="text-align: center;" | {| class="wikitable" style="text-align: center;" | ||
|- | |- | ||
| rowspan=6 | | | rowspan=6 | [[File:Mk11_rain_f4.png|200px]] | ||
|- | |- | ||
! {{Tooltip|text='''Damage'''|hovertext=% on hit, on block, on Flawless Block}} || '''Guard''' || '''Startup''' || '''Active''' || '''Recovery''' | ! {{Tooltip|text='''Damage'''|hovertext=% on hit, on block, on Flawless Block}} || '''Guard''' || '''Startup''' || '''Active''' || '''Recovery''' | ||
| Line 565: | Line 566: | ||
{| class="wikitable" style="text-align: center;" | {| class="wikitable" style="text-align: center;" | ||
|- | |- | ||
| rowspan=6 | | | rowspan=6 | [[File:Mk11_rain_d4.png|200px]] | ||
|- | |- | ||
! {{Tooltip|text='''Damage'''|hovertext=% on hit, on block, on Flawless Block}} || '''Guard''' || '''Startup''' || '''Active''' || '''Recovery''' | ! {{Tooltip|text='''Damage'''|hovertext=% on hit, on block, on Flawless Block}} || '''Guard''' || '''Startup''' || '''Active''' || '''Recovery''' | ||
| Line 586: | Line 587: | ||
{| class="wikitable" style="text-align: center;" | {| class="wikitable" style="text-align: center;" | ||
|- | |- | ||
| rowspan=6 | | | rowspan=6 | [[File:Mk11_rain_j1.png|200px]] | ||
|- | |- | ||
! {{Tooltip|text='''Damage'''|hovertext=% on hit, on block, on Flawless Block}} || '''Guard''' || '''Startup''' || '''Active''' || '''Recovery''' | ! {{Tooltip|text='''Damage'''|hovertext=% on hit, on block, on Flawless Block}} || '''Guard''' || '''Startup''' || '''Active''' || '''Recovery''' | ||
| Line 606: | Line 607: | ||
{| class="wikitable" style="text-align: center;" | {| class="wikitable" style="text-align: center;" | ||
|- | |- | ||
| rowspan=6 | | | rowspan=6 | [[File:Mk11_rain_j2.png|200px]] | ||
|- | |- | ||
! {{Tooltip|text='''Damage'''|hovertext=% on hit, on block, on Flawless Block}} || '''Guard''' || '''Startup''' || '''Active''' || '''Recovery''' | ! {{Tooltip|text='''Damage'''|hovertext=% on hit, on block, on Flawless Block}} || '''Guard''' || '''Startup''' || '''Active''' || '''Recovery''' | ||
| Line 626: | Line 627: | ||
{| class="wikitable" style="text-align: center;" | {| class="wikitable" style="text-align: center;" | ||
|- | |- | ||
| rowspan=6 | | | rowspan=6 | [[File:Mk11_rain_jk.png|200px]] | ||
|- | |- | ||
! {{Tooltip|text='''Damage'''|hovertext=% on hit, on block, on Flawless Block}} || '''Guard''' || '''Startup''' || '''Active''' || '''Recovery''' | ! {{Tooltip|text='''Damage'''|hovertext=% on hit, on block, on Flawless Block}} || '''Guard''' || '''Startup''' || '''Active''' || '''Recovery''' | ||
| Line 646: | Line 647: | ||
{| class="wikitable" style="text-align: center;" | {| class="wikitable" style="text-align: center;" | ||
|- | |- | ||
| rowspan=6 | | | rowspan=6 | [[File:Mk11_rain_shp.png|200px]] | ||
|- | |- | ||
! {{Tooltip|text='''Damage'''|hovertext=% on hit, on block, on Flawless Block}} || '''Guard''' || '''Startup''' || '''Active''' || '''Recovery''' | ! {{Tooltip|text='''Damage'''|hovertext=% on hit, on block, on Flawless Block}} || '''Guard''' || '''Startup''' || '''Active''' || '''Recovery''' | ||
| Line 665: | Line 666: | ||
{| class="wikitable" style="text-align: center;" | {| class="wikitable" style="text-align: center;" | ||
|- | |- | ||
| rowspan=6 | | | rowspan=6 | [[File:Mk11_rain_shk.png|200px]] | ||
|- | |- | ||
! {{Tooltip|text='''Damage'''|hovertext=% on hit, on block, on Flawless Block}} || '''Guard''' || '''Startup''' || '''Active''' || '''Recovery''' | ! {{Tooltip|text='''Damage'''|hovertext=% on hit, on block, on Flawless Block}} || '''Guard''' || '''Startup''' || '''Active''' || '''Recovery''' | ||
| Line 686: | Line 687: | ||
{| class="wikitable" style="text-align: center;" | {| class="wikitable" style="text-align: center;" | ||
|- | |- | ||
| rowspan=6 | | | rowspan=6 | [[File:Mk11_rain_u2.png|200px]] | ||
|- | |- | ||
! {{Tooltip|text='''Damage'''|hovertext=% on hit, on block, on Flawless Block}} || '''Guard''' || '''Startup''' || '''Active''' || '''Recovery''' | ! {{Tooltip|text='''Damage'''|hovertext=% on hit, on block, on Flawless Block}} || '''Guard''' || '''Startup''' || '''Active''' || '''Recovery''' | ||
| Line 706: | Line 707: | ||
{| class="wikitable" style="text-align: center;" | {| class="wikitable" style="text-align: center;" | ||
|- | |- | ||
| rowspan=6 | | | rowspan=6 | [[File:Mk11_rain_u3.png|200px]] | ||
|- | |- | ||
! {{Tooltip|text='''Damage'''|hovertext=% on hit, on block, on Flawless Block}} || '''Guard''' || '''Startup''' || '''Active''' || '''Recovery''' | ! {{Tooltip|text='''Damage'''|hovertext=% on hit, on block, on Flawless Block}} || '''Guard''' || '''Startup''' || '''Active''' || '''Recovery''' | ||
| Line 781: | Line 782: | ||
{| class="wikitable" style="text-align: center;" | {| class="wikitable" style="text-align: center;" | ||
|- | |- | ||
| rowspan=6 | [[File: | | rowspan=6 | [[File:Mk11_rain_ktossamp.png|200px]] | ||
|- | |- | ||
! {{Tooltip|text='''Damage'''|hovertext=% on hit, on block, on Flawless Block}} || '''Guard''' || '''Startup''' || '''Active''' || '''Recovery''' | ! {{Tooltip|text='''Damage'''|hovertext=% on hit, on block, on Flawless Block}} || '''Guard''' || '''Startup''' || '''Active''' || '''Recovery''' | ||
| Line 797: | Line 798: | ||
{| class="wikitable" style="text-align: center;" | {| class="wikitable" style="text-align: center;" | ||
|- | |- | ||
| rowspan=6 | [[File: | | rowspan=6 | [[File:Mk11_rain_ktossampb.png|200px]] | ||
|- | |- | ||
! {{Tooltip|text='''Damage'''|hovertext=% on hit, on block, on Flawless Block}} || '''Guard''' || '''Startup''' || '''Active''' || '''Recovery''' | ! {{Tooltip|text='''Damage'''|hovertext=% on hit, on block, on Flawless Block}} || '''Guard''' || '''Startup''' || '''Active''' || '''Recovery''' | ||
| Line 818: | Line 819: | ||
{| class="wikitable" style="text-align: center;" | {| class="wikitable" style="text-align: center;" | ||
|- | |- | ||
| rowspan=6 | [[File: | | rowspan=6 | [[File:Mk11_rain_aplungea.png|200px]][[File:Mk11_rain_aplungeb.png|200px]] | ||
|- | |- | ||
! {{Tooltip|text='''Damage'''|hovertext=% on hit (on KB), on block, on Flawless Block}} || '''Guard''' || '''Startup''' || '''Active''' || '''Recovery''' | ! {{Tooltip|text='''Damage'''|hovertext=% on hit (on KB), on block, on Flawless Block}} || '''Guard''' || '''Startup''' || '''Active''' || '''Recovery''' | ||
| Line 889: | Line 890: | ||
{| class="wikitable" style="text-align: center;" | {| class="wikitable" style="text-align: center;" | ||
|- | |- | ||
| rowspan=6 | [[File: | | rowspan=6 | [[File:Mk11_rain_gkickamp.png|200px]] | ||
|- | |- | ||
! {{Tooltip|text='''Damage'''|hovertext=% on hit, on block, on Flawless Block}} || '''Guard''' || '''Startup''' || '''Active''' || '''Recovery''' | ! {{Tooltip|text='''Damage'''|hovertext=% on hit, on block, on Flawless Block}} || '''Guard''' || '''Startup''' || '''Active''' || '''Recovery''' | ||
| Line 907: | Line 908: | ||
{| class="wikitable" style="text-align: center;" | {| class="wikitable" style="text-align: center;" | ||
|- | |- | ||
| rowspan=6 | [[File: | | rowspan=6 | [[File:Mk11_rain_fblowb.png|200px]][[File:Mk11_rain_fblowf.png|200px]] | ||
|- | |- | ||
! {{Tooltip|text='''Damage'''|hovertext=% on hit, on block, on Flawless Block}} || '''Guard''' || '''Startup''' || '''Active''' || '''Recovery''' | ! {{Tooltip|text='''Damage'''|hovertext=% on hit, on block, on Flawless Block}} || '''Guard''' || '''Startup''' || '''Active''' || '''Recovery''' | ||
| Line 1,412: | Line 1,413: | ||
<br> | <br> | ||
== Strategy and Kombos == | |||
<br> | <br> | ||
| Line 1,805: | Line 1,806: | ||
* The jump kick OS will work with Hydro Boost in the corner. | * The jump kick OS will work with Hydro Boost in the corner. | ||
* Gravity is similar to 133 combos. | * Gravity is similar to 133 combos. | ||
<code>242 ~ Hydro Boost (BF4) > | <code>242 ~ Hydro Boost (BF4) > 13 ~ Hydro Boost Amp (BF4) > J2 > 134</code><br> | ||
<code>F2 ~ Hydro Boost (BF4) > 2421+3</code> | <code>F2 ~ Hydro Boost (BF4) > 2421+3</code> | ||
* Hydro Boost will allow for more substantial meterless pickups in the corner. | * Hydro Boost will allow for more substantial meterless pickups in the corner. | ||
| Line 1,814: | Line 1,815: | ||
* From a standing combo starter (everything except 133), amplified Hydro Boost can be followed by a second Hydro Boost for Rain's best two bar damage. | * From a standing combo starter (everything except 133), amplified Hydro Boost can be followed by a second Hydro Boost for Rain's best two bar damage. | ||
</tabber> | </tabber> | ||
<br> | |||
===== Wave Dash (DB4) ===== | |||
<code>B21 ~ Wave Dash (DB4) ~ forward dash ~ 242 ~ Hydro Boost Amp, Forward (BF4) > JK > forward dash ~ 242 ~ Argus Plunge (BF3)</code> | |||
* 242, B21, F2, and 3 can combo into 242 anywhere on screen. | |||
* Superior dash given by Wave Dash allows Rain to follow up Hydro Boost midscreen with JK. | |||
* For the most part, combo construction post-Wave Dash is largely identical to existing combos. | |||
<code>B3 ~ Wave Dash (DB4) ~ forward dash ~ 133 ~ Geyser Palm Amp (DB1) > forward dash ~ 242 ~ Geyser Palm (DB1)</code> | |||
* B3 will only combo into 133 at close range. | |||
<code>(corner) B3 ~ Wave Dash (DB4) ~ forward dash ~ 242 ~ Hydro Boost (BF4) > 13 ~ Hydro Boost Amp (BF4) > J2 > 134</code> | |||
* B3 is able to combo into 242 in the corner. | |||
<code>13 ~ Wave Dash (DB4) ~ forward dash ~ 133 ~ Hydro Boost Amp (BF4) > JK > 2421+3</code> | |||
* In the corner, 13 will combo into 133. | |||
<br> | <br> | ||
Latest revision as of 03:23, 31 August 2023
| Rain #MK11_RAN | |
|---|---|
| POSITION
Growing up an orphan, Rain joined Edenia’s army. His strategic genius earned him quick promotion, which he used to learn he was the bastard son of the god Argus, Edenia’s Protector. Armed with the knowledge that he’s a half god, Rain battles for his place in Edenia’s pantheon. | |
| Data | |
| Health | 1000.00 |
| Hitbox | |
Introduction
Introduced in Kombat Pack 2, Rain relies on his lightning-fast dashes to whiff punish the enemy and switch between spacing and rushdown.
| Strengths | Weaknesses |
|---|---|
|
|
Movelist
Normals and Strings
1
B1
D1
2
B2
F2
D2
3
B3
F3
D3
4
B4
F4
D4
Jump and Hop Attacks
J1
J2
JK
SHP
SHK
Getup and Flawless Block Attacks
U2
U3
Throws
Special Moves
Katar Toss (BF2)
Argus Plunge (BF3)
Evaporate (DB4)
Geyser Kick (BF4)
Fatal Blow
Kustom Abilities
Riptide (BF1)
| File:Mk11 rain riptide.png | ||||
| Damage | Guard | Startup | Active | Recovery |
|---|---|---|---|---|
| 6.00 / 1.75 / 0.0018 | High | 16 | 20 | 25 |
| Cancel | Hit Adv. | Block Adv. | F/Block Adv. | Cost |
| - | 4 | -18 | -18 | - |
| Rain shoots a rather thin but extremely active stream of water, restanding the enemy. Usable as both a combo ender and an oki tool. The restand when ending combos is only +4, meaning that B2 will trade with six-frame attacks. Rain is forced to use D1 to stop their abare in these situations, though if that is not a possibility B2 becomes fully guaranteed. While the restand will still stop wakeup options midscreen, it puts the enemy too far away to guarantee anything - it is generally better to end with Argus Plunge. Can be up to +1 on block on a full meaty, as long as they don't duck it. Compared to Tidal Wave on oki it has worse range, can be ducked, and has no amplify followup, but is much more active, gives much better frame advantage when blocked, and is easier for catching jumping. Despite these niche strengths, Riptide is rarely seen - it simply isn't as slot-efficient as his other moves, and the restand doesn't give Rain substantial reward midscreen (where Rain should be ending combos with Argus Plunge instead). | ||||
Geyser Palm (DB1)
| File:Mk11 rain gpalm.png | ||||
| Damage | Guard | Startup | Active | Recovery |
|---|---|---|---|---|
| 9.26 / - / - | Unblockable (only hits air) | 9 | 18 | 25 |
| Cancel | Hit Adv. | Block Adv. | F/Block Adv. | Cost |
| 41 | 21 | - | - | - |
| Rain covers the sky in front of him with a jet of water, blasting the enemy into a side switching rift. A crucial special for antiairs, combo starting, and enders. With its long hitbox and active frames it is well-suited for catching unique air specials, like Jacqui Leap and Kabal Slight Gas. Supremely rewarding on hit - when used as a combo starter it can lead into Argus Plunge for the corner carry, and for an ender it deals Rain's best damage and gives a lengthy, close knockdown. Though the on-hit reaction looks similar to Geyser Kick it makes the enemy fall faster and with more distance, necessitating a forward dash to continue in most situations. Also allows Rain to use 133 as a very easy hit confirm string, though it is unsafe. Often picked with Hydro Boost to combo against airborne opponents, especially after a jump kick, as Hydro Boost often cannot combo against airborne opponents in the same way Geyser Kick can. Learning to antiair reactively with Geyser Palm (instead of preemptively) is a crucial skill for all Rains. The air coverage synergizes excellently with his spacing and fireball game, and the ability to instantly turn a jump-in into a potential corner situation cannot be underestimated. Preemptively, it should only be used against dangerous instant-air options like Robocop Air Charge. | ||||
| File:Mk11 rain gpalmamp.png | ||||
| Damage | Guard | Startup | Active | Recovery |
|---|---|---|---|---|
| 9.26 / - / - | Unblockable (only hits air) | 9 | 18 | 25 |
| Cancel | Hit Adv. | Block Adv. | F/Block Adv. | Cost |
| 41 | 21 | - | - | - |
| Rain covers the sky in front of him with a jet of water, blasting the enemy into a side switching rift. A crucial special for antiairs, combo starting, and enders. With its long hitbox and active frames it is well-suited for catching unique air specials, like Jacqui Leap and Kabal Slight Gas. Supremely rewarding on hit - when used as a combo starter it can lead into Argus Plunge for the corner carry, and for an ender it deals Rain's best damage and gives a lengthy, close knockdown. Though the on-hit reaction looks similar to Geyser Kick it makes the enemy fall faster and with more distance, necessitating a forward dash to continue in most situations. Also allows Rain to use 133 as a very easy hit confirm string, though it is unsafe. Often picked with Hydro Boost to combo against airborne opponents, especially after a jump kick, as Hydro Boost often cannot combo against airborne opponents in the same way Geyser Kick can. Learning to antiair reactively with Geyser Palm (instead of preemptively) is a crucial skill for all Rains. The air coverage synergizes excellently with his spacing and fireball game, and the ability to instantly turn an enemy jump-in into a potential corner situation cannot be underestimated. Preemptively, it should only be used against dangerous instant-air options like Robocop Air Charge. | ||||
Water Ball (BF2)
| File:Mk11 rain wball.png | ||||
| Damage | Guard | Startup | Active | Recovery |
|---|---|---|---|---|
| 5.00 / 1.62 / 0.0016 | High | 17 | - | - |
| Cancel | Hit Adv. | Block Adv. | F/Block Adv. | Cost |
| 37 | 21 | -16 | -16 | Replaces Katar Toss |
| Rain fires a ball of water at the enemy, knocking them down. When amplified, the ball captures the enemy and allows Rain to sling them in the direction of his choice. Possibly the best combo special in the game by itself as it gives solid damage, works against both grounded and aerial enemies, starts combos at any distance, and automatically confirms. The up throw will allow Rain to get a D2 off most grounded confirms (as always, B3 is the hardest for this), while the downward throw is easier to follow up. At maximum range, the back throw will let Rain continue the combo with 242, or he can do an up throw to fish for the Argus Plunge KB. Midscreen, Rain can get tremendous reward by playing slippery and fishing for mid-ranged Water Balls. The back throw gives an absurdly plus restand, giving him a free approach at all but the greatest distance. The restand is so plus that it can actually be very difficult to properly time a throw - at point blank, Rain can do a full neutral jump and the throw can still whiff! Consider tick throwing the enemy instead. Water Ball costs two kustom move slots, and it replaces Katar Toss. Considering other kustoms like Tidal Wave and Hydro Boost that give superb versatility for only one slot, Water Ball is very slot-inefficient in comparison. Sacrificing Katar Toss means greatly reducing Rain's safety and direct space control (though its on-hit reward is obviously much greater) - if he does not have Hydro Boost or Hydroplane in the remaining slot, Rain will entirely lack a special to catch counterpokes.
| ||||
| File:Mk11 rain wball.png | ||||
| Damage | Guard | Startup | Active | Recovery |
|---|---|---|---|---|
| 5.95 / - / - | - | 13 | - | - |
| Cancel | Hit Adv. | Block Adv. | F/Block Adv. | Cost |
| - | 60 | - | - | 1 offensive meter |
| Rain fires a ball of water at the enemy, knocking them down. When amplified, the ball captures the enemy and allows Rain to sling them in the direction of his choice. Possibly the best combo special in the game by itself as it gives solid damage, works against both grounded and aerial enemies, starts combos at any distance, and automatically confirms. The up throw will allow Rain to get a D2 off most grounded confirms (as always, B3 is the hardest for this), while the downward throw is easier to follow up. At maximum range, the back throw will let Rain continue the combo with 242, or he can do an up throw to fish for the Argus Plunge KB. Midscreen, Rain can get tremendous reward by playing slippery and fishing for mid-ranged Water Balls. The back throw gives an absurdly plus restand, giving him a free approach at all but the greatest distance. The restand is so plus that it can actually be very difficult to properly time a throw - at point blank, Rain can do a full neutral jump and the throw can still whiff! Consider tick throwing the enemy instead. Water Ball costs two kustom move slots, and it replaces Katar Toss. Considering other kustoms like Tidal Wave and Hydro Boost that give superb versatility for only one slot, Water Ball is very slot-inefficient in comparison. Sacrificing Katar Toss means greatly reducing Rain's safety and direct space control (though its on-hit reward is obviously much greater) - if he does not have Hydro Boost or Hydroplane in the remaining slot, Rain will entirely lack a special to catch counterpokes.
| ||||
| File:Mk11 rain wball.png | ||||
| Damage | Guard | Startup | Active | Recovery |
|---|---|---|---|---|
| 5.95 / - / - | - | 13 | - | - |
| Cancel | Hit Adv. | Block Adv. | F/Block Adv. | Cost |
| - | 67 | - | - | 1 offensive meter |
| Rain fires a ball of water at the enemy, knocking them down. When amplified, the ball captures the enemy and allows Rain to sling them in the direction of his choice. Possibly the best combo special in the game by itself as it gives solid damage, works against both grounded and aerial enemies, starts combos at any distance, and automatically confirms. The up throw will allow Rain to get a D2 off most grounded confirms (as always, B3 is the hardest for this), while the downward throw is easier to follow up. At maximum range, the back throw will let Rain continue the combo with 242, or he can do an up throw to fish for the Argus Plunge KB. Midscreen, Rain can get tremendous reward by playing slippery and fishing for mid-ranged Water Balls. The back throw gives an absurdly plus restand, giving him a free approach at all but the greatest distance. The restand is so plus that it can actually be very difficult to properly time a throw - at point blank, Rain can do a full neutral jump and the throw can still whiff! Consider tick throwing the enemy instead. Water Ball costs two kustom move slots, and it replaces Katar Toss. Considering other kustoms like Tidal Wave and Hydro Boost that give superb versatility for only one slot, Water Ball is very slot-inefficient in comparison. Sacrificing Katar Toss means greatly reducing Rain's safety and direct space control (though its on-hit reward is obviously much greater) - if he does not have Hydro Boost or Hydroplane in the remaining slot, Rain will entirely lack a special to catch counterpokes.
| ||||
| File:Mk11 rain wball.png | ||||
| Damage | Guard | Startup | Active | Recovery |
|---|---|---|---|---|
| 5.95 / - / - | - | 13 | - | - |
| Cancel | Hit Adv. | Block Adv. | F/Block Adv. | Cost |
| - | 84 | - | - | 1 offensive meter |
| Rain fires a ball of water at the enemy, knocking them down. When amplified, the ball captures the enemy and allows Rain to sling them in the direction of his choice. Possibly the best combo special in the game by itself as it gives solid damage, works against both grounded and aerial enemies, starts combos at any distance, and automatically confirms. The up throw will allow Rain to get a D2 off most grounded confirms (as always, B3 is the hardest for this), while the downward throw is easier to follow up. At maximum range, the back throw will let Rain continue the combo with 242, or he can do an up throw to fish for the Argus Plunge KB. Midscreen, Rain can get tremendous reward by playing slippery and fishing for mid-ranged Water Balls. The back throw gives an absurdly plus restand, giving him a free approach at all but the greatest distance. The restand is so plus that it can actually be very difficult to properly time a throw - at point blank, Rain can do a full neutral jump and the throw can still whiff! Consider tick throwing the enemy instead. Water Ball costs two kustom move slots, and it replaces Katar Toss. Considering other kustoms like Tidal Wave and Hydro Boost that give superb versatility for only one slot, Water Ball is very slot-inefficient in comparison. Sacrificing Katar Toss means greatly reducing Rain's safety and direct space control (though its on-hit reward is obviously much greater) - if he does not have Hydro Boost or Hydroplane in the remaining slot, Rain will entirely lack a special to catch counterpokes.
| ||||
| File:Mk11 rain wball.png | ||||
| Damage | Guard | Startup | Active | Recovery |
|---|---|---|---|---|
| 5.95 / - / - | - | 13 | - | - |
| Cancel | Hit Adv. | Block Adv. | F/Block Adv. | Cost |
| - | 69 | - | - | 1 offensive meter |
| Rain fires a ball of water at the enemy, knocking them down. When amplified, the ball captures the enemy and allows Rain to sling them in the direction of his choice. Possibly the best combo special in the game by itself as it gives solid damage, works against both grounded and aerial enemies, starts combos at any distance, and automatically confirms. The up throw will allow Rain to get a D2 off most grounded confirms (as always, B3 is the hardest for this), while the downward throw is easier to follow up. At maximum range, the back throw will let Rain continue the combo with 242, or he can do an up throw to fish for the Argus Plunge KB. Midscreen, Rain can get tremendous reward by playing slippery and fishing for mid-ranged Water Balls. The back throw gives an absurdly plus restand, giving him a free approach at all but the greatest distance. The restand is so plus that it can actually be very difficult to properly time a throw - at point blank, Rain can do a full neutral jump and the throw can still whiff! Consider tick throwing the enemy instead. Water Ball costs two kustom move slots, and it replaces Katar Toss. Considering other kustoms like Tidal Wave and Hydro Boost that give superb versatility for only one slot, Water Ball is very slot-inefficient in comparison. Sacrificing Katar Toss means greatly reducing Rain's safety and direct space control (though its on-hit reward is obviously much greater) - if he does not have Hydro Boost or Hydroplane in the remaining slot, Rain will entirely lack a special to catch counterpokes.
| ||||
| File:Mk11 rain wball.png | ||||
| Damage | Guard | Startup | Active | Recovery |
|---|---|---|---|---|
| 5.95 / - / - | - | 13 | - | - |
| Cancel | Hit Adv. | Block Adv. | F/Block Adv. | Cost |
| - | 53 | - | - | 1 offensive meter |
| Rain fires a ball of water at the enemy, knocking them down. When amplified, the ball captures the enemy and allows Rain to sling them in the direction of his choice. Possibly the best combo special in the game by itself as it gives solid damage, works against both grounded and aerial enemies, starts combos at any distance, and automatically confirms. The up throw will allow Rain to get a D2 off most grounded confirms (as always, B3 is the hardest for this), while the downward throw is easier to follow up. At maximum range, the back throw will let Rain continue the combo with 242, or he can do an up throw to fish for the Argus Plunge KB. Midscreen, Rain can get tremendous reward by playing slippery and fishing for mid-ranged Water Balls. The back throw gives an absurdly plus restand, giving him a free approach at all but the greatest distance. The restand is so plus that it can actually be very difficult to properly time a throw - at point blank, Rain can do a full neutral jump and the throw can still whiff! Consider tick throwing the enemy instead. Water Ball costs two kustom move slots, and it replaces Katar Toss. Considering other kustoms like Tidal Wave and Hydro Boost that give superb versatility for only one slot, Water Ball is very slot-inefficient in comparison. Sacrificing Katar Toss means greatly reducing Rain's safety and direct space control (though its on-hit reward is obviously much greater) - if he does not have Hydro Boost or Hydroplane in the remaining slot, Rain will entirely lack a special to catch counterpokes.
| ||||
Purple Pain (DB2)
| File:Mk11 rain ppain.png | ||||
| Damage | Guard | Startup | Active | Recovery |
|---|---|---|---|---|
| 5.00 / 1.62 / 0.0016 | Mid | 77 | 6 | -26 |
| Cancel | Hit Adv. | Block Adv. | F/Block Adv. | Cost |
| 15 | 61 | 52 | 52 | - |
| Rain summons a little cloud that strikes with a bolt of lightning after a delay. If Rain gets hit, the cloud vanishes. Does not allow for links. The amplified version comes out quicker, summons three bolts, and bounces the enemy for a combo. Probably the weakest move in Rain's kustom arsenal. Slow speed, difficulty to apply, and inability to combo leave much to be desired. Setups require a substantial chunk of the combo to be compromised - for minimal reward, as Rain cannot combo off it. Dead zone in front of Rain also makes it prone to whiff in the corner, especially when done after advancing normals. The amplified version partially remedies some of these issues, but exacerbates others - the advancing motion of the amplified cloud makes it even harder to apply in the corner, and the substantial pushback on block will largely negate the threat that Rain is allowed to apply. SHP will whiff entirely, and SHK will land after the third hit, rendering it no safer.
| ||||
| File:Mk11 rain ppain.png | ||||
| Damage | Guard | Startup | Active | Recovery |
|---|---|---|---|---|
| 8.56/ 2.67 / 0.0014 | Mid | 41 | 46 | -38 |
| Cancel | Hit Adv. | Block Adv. | F/Block Adv. | Cost |
| - | 116 | 67 | 67 | 1 offensive meter |
| Rain summons a little cloud that strikes with a bolt of lightning after a delay. If Rain gets hit, the cloud vanishes. Does not allow for links. The amplified version comes out quicker, summons three bolts, and bounces the enemy for a combo. Probably the weakest move in Rain's kustom arsenal. Slow speed, difficulty to apply, and inability to combo leave much to be desired. Setups require a substantial chunk of the combo to be compromised - for minimal reward, as Rain cannot combo off it. Dead zone in front of Rain also makes it prone to whiff in the corner, especially when done after advancing normals. The amplified version partially remedies some of these issues, but exacerbates others - the advancing motion of the amplified cloud makes it even harder to apply in the corner, and the substantial pushback on block will largely negate the threat that Rain is allowed to apply. SHP will whiff entirely, and SHK will land after the third hit, rendering it no safer.
| ||||
Edenian Force
| File:Mk11 rain aplungeair.png | ||||
| Damage | Guard | Startup | Active | Recovery |
|---|---|---|---|---|
| 7.00 / 1.25 / 0.0012 | Mid | 13 | 25 | 40 |
| Cancel | Hit Adv. | Block Adv. | F/Block Adv. | Cost |
| 47 | 10 | -34 | -34 | - |
Edenian Force allows Rain to perform Argus Plunge, Evaporate, and Quantum Slice while in the air. Air Argus Plunge is mostly used for escapes and air-to-airs. Despite its longer recovery than the grounded Argus Plunge the distance created is enormous - starting from point blank range, a single air Argus Plunge will put the two fighters at maximum distance. Prepared enemies can punish this, but it is generally completely safe to continue using until they have shown this capacity. Great for escaping the corner (like a cowardcopter), though it will be blocked if done too low to the ground. Amplified Hydro Boost will allow Rain to turn a blocked normal into an instant fullscreen distance for zoning, spacing, and hit-and run.
| ||||
| File:Mk11 rain evaporateair.png | ||||
| Damage | Guard | Startup | Active | Recovery |
|---|---|---|---|---|
| - / - / - | - | 6 | 21-118 | 18 |
| Cancel | Hit Adv. | Block Adv. | F/Block Adv. | Cost |
| - | - | - | - | - |
| Rain evaporates in midair, dropping to the ground, after which a regular Evaporate will resume. Slightly less recovery once on the ground, but with longer minimum active frames, resulting in an Evaporate that has an even longer minimum time. Not a good choice for baiting and punishing antiairs - Rain simply recovers too slowly to punish the whiffed antiair, and many antiairs are active and big enough to catch Rain during the startup of the evaporate. | ||||
| File:Mk11 rain qsliceah.png | ||||
| Damage | Guard | Startup | Active | Recovery |
|---|---|---|---|---|
| 8.00 / 2.00 / 0.0018 | Mid | 10 | 13 | 49 |
| Cancel | Hit Adv. | Block Adv. | F/Block Adv. | Cost |
| 25 | -7 | -34 | -34 | Requires Edenian Force |
| Rain rushes through the air, slashing with the energy wave as he travels. Neutral input will have Rain fly horizontally forward, while holding down will give a diving slice that grounds him. On both block and whiff, Rain can amplify the horizontal slash to follow up with either another horizontal slash or a diving slash, and he can amplify the diving slash to follow up with a grounded Quantum Slice amplify. Air Quantum Slice is a radically different move from its grounded version, transforming from a space controlling projectile into a chainable diving slash. Brilliant for approaches, anti-zoning, air-to-airs, and evasion. The versatility of the amplify cannot be understated - yolo dives can be made safe, escapes can be cancelled to catch punish attempts, he can play "floor is lava" to avoid a ground setup, he can zip around in the air while being able to choose when to turn it into a safe approach, the possibilities are numerous. With Quantum Rift equipped, he can even threaten a KB from any aerial position. While Air Quantum Slice doesn't give him the pressure and devastating damage of the other top-tier air specials, it's still a great choice that brings his superlative ground mobility into the air.
| ||||
| File:Mk11 rain qslicead.png | ||||
| Damage | Guard | Startup | Active | Recovery |
|---|---|---|---|---|
| 8.00 / 2.00 / 0.0020 | Mid | 11 | 12 | 35 |
| Cancel | Hit Adv. | Block Adv. | F/Block Adv. | Cost |
| 29 | 6 | -21 | -21 | Requires Edenian Force |
| Rain rushes through the air, slashing with the energy wave as he travels. Neutral input will have Rain fly horizontally forward, while holding down will give a diving slice that grounds him. On both block and whiff, Rain can amplify the horizontal slash to follow up with either another horizontal slash or a diving slash, and he can amplify the diving slash to follow up with a grounded Quantum Slice amplify. Air Quantum Slice is a radically different move from its grounded version, transforming from a space controlling projectile into a chainable diving slash. Brilliant for approaches, anti-zoning, air-to-airs, and evasion. The versatility of the amplify cannot be understated - yolo dives can be made safe, escapes can be cancelled to catch punish attempts, he can play "floor is lava" to avoid a ground setup, he can zip around in the air while being able to choose when to turn it into a safe approach, the possibilities are numerous. With Quantum Rift equipped, he can even threaten a KB from any aerial position. While Air Quantum Slice doesn't give him the pressure and devastating damage of the other top-tier air specials, it's still a great choice that brings his superlative ground mobility into the air.
| ||||
Quantum Slice (BF3)
| File:Mk11 rain qslice.png | ||||
| Damage | Guard | Startup | Active | Recovery |
|---|---|---|---|---|
| 8.00 / 2.00 / 0.0020 | High | 24 | 6 | 32 |
| Cancel | Hit Adv. | Block Adv. | F/Block Adv. | Cost |
| 40 | 22 | -11 | -16 | Replaces Argus Plunge |
| Krushing Blow: Activates on the AMPLIFIED version if Quantum Rift has absorbed two projectiles. Rain steps forward and strikes with a massive, upward angled energy slash. The Amplified version sends a followup mid slash that inflicts tremendous pushback and puts Rain at -5. While Quantum Slice is generally overshadowed by its air version, do not underestimate the ground version - it boasts remarkable horizontal and vertical coverage, surprising safety, and is excellent for ending blockstrings for the best chip damage and distance. The amplify mid slash appears to have slightly lower range than the first slash, whiffing on both block and hit when done at maximum range, so when using Quantum Slice as a spacing tool instead of a blockstring ender Rain is less incentivized to always spend meter. Excellent at stuffing out enemies who love jumping on wakeup, while staying out of U3 range. While the KB gives superb damage on both grounded and air Quantum Slice, the extreme slot cost of Quantum Slice + Edenian Force + Quantum Rift on top of the one-time nature of KBs makes it an expensive proposition. Quantum Rift does synergize decently well with Quantum Slice outside of the KB, but if the enemy is not a heavy zoner Rain should consider a different move to use in the third slot. The decision to replace Argus Plunge is not done lightly - without Argus Plunge, Rain loses much of his ability to continually drive the enemy into the corner. Equipping Quantum Slice means that the Rain must instead focus on contesting (and ceding) midscreen space, both in the air and on the ground.
| ||||
| File:Mk11 rain qsliceamp.png | ||||
| Damage | Guard | Startup | Active | Recovery |
|---|---|---|---|---|
| 6.00 / 1.75 (2.00 when done from the air) / 0.0018 | Mid | 11 | 6 | 36 |
| Cancel | Hit Adv. | Block Adv. | F/Block Adv. | Cost |
| - | 28 | -5 | -15 | - |
| Krushing Blow: Activates on the AMPLIFIED version if Quantum Rift has absorbed two projectiles. Rain steps forward and strikes with a massive, upward angled energy slash. The Amplified version sends a followup mid slash that inflicts tremendous pushback and puts Rain at -5. While Quantum Slice is generally overshadowed by its air version, do not underestimate the ground version - it boasts remarkable horizontal and vertical coverage, surprising safety, and is excellent for ending blockstrings for the best chip damage and distance. The amplify mid slash appears to have slightly lower range than the first slash, whiffing on both block and hit when done at maximum range, so when using Quantum Slice as a spacing tool instead of a blockstring ender Rain is less incentivized to always spend meter. Excellent at stuffing out enemies who love jumping on wakeup, while staying out of U3 range. While the KB gives superb damage on both grounded and air Quantum Slice, the extreme slot cost of Quantum Slice + Edenian Force + Quantum Rift on top of the one-time nature of KBs makes it an expensive proposition. Quantum Rift does synergize decently well with Quantum Slice outside of the KB, but if the enemy is not a heavy zoner Rain should consider a different move to use in the third slot. The decision to replace Argus Plunge is not done lightly - without Argus Plunge, Rain loses much of his ability to continually drive the enemy into the corner. Equipping Quantum Slice means that the Rain must instead focus on contesting (and ceding) midscreen space, both in the air and on the ground.
| ||||
| File:Mk11 rain qsliceah.png | ||||
| Damage | Guard | Startup | Active | Recovery |
|---|---|---|---|---|
| 8.00 / 2.00 / 0.0018 | Mid | 10 | 13 | 49 |
| Cancel | Hit Adv. | Block Adv. | F/Block Adv. | Cost |
| 25 | -7 | -34 | -34 | Requires Edenian Force |
| Rain rushes through the air, slashing with the energy wave as he travels. Neutral input will have Rain fly horizontally forward, while holding down will give a diving slice that grounds him. On both block and whiff, Rain can amplify the horizontal slash to follow up with either another horizontal slash or a diving slash, and he can amplify the diving slash to follow up with a grounded Quantum Slice amplify. Air Quantum Slice is a radically different move from its grounded version, transforming from a space controlling projectile into a chainable diving slash. Brilliant for approaches, anti-zoning, air-to-airs, and evasion. The versatility of the amplify cannot be understated - yolo dives can be made safe, escapes can be cancelled to catch punish attempts, he can play "floor is lava" to avoid a ground setup, he can zip around in the air while being able to choose when to turn it into a safe approach, the possibilities are numerous. With Quantum Rift equipped, he can even threaten a KB from any aerial position. While Air Quantum Slice doesn't give him the pressure and devastating damage of the other top-tier air specials, it's still a great choice that brings his superlative ground mobility into the air.
| ||||
| File:Mk11 rain qslicead.png | ||||
| Damage | Guard | Startup | Active | Recovery |
|---|---|---|---|---|
| 8.00 / 2.00 / 0.0020 | Mid | 11 | 12 | 35 |
| Cancel | Hit Adv. | Block Adv. | F/Block Adv. | Cost |
| 29 | 6 | -21 | -21 | Requires Edenian Force |
| Rain rushes through the air, slashing with the energy wave as he travels. Neutral input will have Rain fly horizontally forward, while holding down will give a diving slice that grounds him. On both block and whiff, Rain can amplify the horizontal slash to follow up with either another horizontal slash or a diving slash, and he can amplify the diving slash to follow up with a grounded Quantum Slice amplify. Air Quantum Slice is a radically different move from its grounded version, transforming from a space controlling projectile into a chainable diving slash. Brilliant for approaches, anti-zoning, air-to-airs, and evasion. The versatility of the amplify cannot be understated - yolo dives can be made safe, escapes can be cancelled to catch punish attempts, he can play "floor is lava" to avoid a ground setup, he can zip around in the air while being able to choose when to turn it into a safe approach, the possibilities are numerous. With Quantum Rift equipped, he can even threaten a KB from any aerial position. While Air Quantum Slice doesn't give him the pressure and devastating damage of the other top-tier air specials, it's still a great choice that brings his superlative ground mobility into the air.
| ||||
Hydroplane (DB3)
| File:Mk11 rain hplane.png | ||||
| Damage | Guard | Startup | Active | Recovery |
|---|---|---|---|---|
| 7.00 (24.00) / 1.88 / 0.0019 | Mid | 24 | 6 | 28 |
| Cancel | Hit Adv. | Block Adv. | F/Block Adv. | Cost |
| 16 | 14 | -16 | -21 | - |
| Krushing Blow: Activates when HELD for a bit before striking. Rain slides backwards, avoiding attacks, and then jets forward with a palm strike. Hold 3 to stay in the backwards position and delay the attack, and press DD while holding to cancel. Amplify before the strike to increase the damage, pushback on block, and knockdown length. The immediate cancel is the move's most common usage by far, giving Rain a command backdash that can be special cancelled into. This allows him to instantly turn any blocked normal into a favorable spacing situation, placing him right in the ideal range for further escape or a forward dash strike-throw 50/50. Outside of immediate cancels, Hydroplane is excellent for both whiff punishing and baiting attempted whiff punishes, giving less reward than a full combo but landing much more reliably. Also a solid oki tool - backdash and hold on knockdown, strike if they do a wakeup attack or a forward getup roll, and cancel if they do anything else. Certain strings and setups can be specifically punished by Hydroplane but it requires solid awareness, and most of those situations can already be punished by Flawless Block (albeit with more resources spent). Can catch immediate counterpokes when cancelled from a crouching poke, but amplified Katar Toss is generally a safer option while amplified Hydro Boost will give more reward. Keep in mind that this move is not the safest option - the immediate cancel can be punished on block, and the amplified version is still punishable by most characters when ready. Keep the enemy guessing between cancels and striking with it on block to be harder to punish. | ||||
| File:Mk11 rain hplanec.png | ||||
| Damage | Guard | Startup | Active | Recovery |
|---|---|---|---|---|
| - / - / - | - | 17 | - | 20 |
| Cancel | Hit Adv. | Block Adv. | F/Block Adv. | Cost |
| - | - | - | - | 1 defensive meter |
| Krushing Blow: Activates when HELD for a bit before striking. Rain slides backwards, avoiding attacks, and then jets forward with a palm strike. Hold 3 to stay in the backwards position and delay the attack, and press DD while holding to cancel. Amplify before the strike to increase the damage, pushback on block, and knockdown length. The immediate cancel is the move's most common usage by far, giving Rain a command backdash that can be special cancelled into. This allows him to instantly turn any blocked normal into a favorable spacing situation, placing him right in the ideal range for further escape or a forward dash strike-throw 50/50. Outside of immediate cancels, Hydroplane is excellent for both whiff punishing and baiting attempted whiff punishes, giving less reward than a full combo but landing much more reliably. Also a solid oki tool - backdash and hold on knockdown, strike if they do a wakeup attack or a forward getup roll, and cancel if they do anything else. Certain strings and setups can be specifically punished by Hydroplane but it requires solid awareness, and most of those situations can already be punished by Flawless Block (albeit with more resources spent). Can catch immediate counterpokes when cancelled from a crouching poke, but amplified Katar Toss is generally a safer option while amplified Hydro Boost will give more reward. Keep in mind that this move is not the safest option - the immediate cancel can be punished on block, and the amplified version is still punishable by most characters when ready. Keep the enemy guessing between cancels and striking with it on block to be harder to punish. | ||||
| File:Mk11 rain hplaneamp.png | ||||
| Damage | Guard | Startup | Active | Recovery |
|---|---|---|---|---|
| 12.00 / 2.50 / 0.0025 | Mid | 9 | 8 | 27 |
| Cancel | Hit Adv. | Block Adv. | F/Block Adv. | Cost |
| - | 30 | -16 | -21 | 1 offensive meter |
| Krushing Blow: Activates when HELD for a bit before striking. Rain slides backwards, avoiding attacks, and then jets forward with a palm strike. Hold 3 to stay in the backwards position and delay the attack, and press DD while holding to cancel. Amplify before the strike to increase the damage, pushback on block, and knockdown length. The immediate cancel is the move's most common usage by far, giving Rain a command backdash that can be special cancelled into. This allows him to instantly any blocked normal into an exceptionally favorable spacing situation, placing him right in the ideal range for further escape or a forward dash strike-throw 50/50. Outside of immediate cancels, Hydroplane is excellent for both whiff punishing and baiting attempted whiff punishes, giving less reward than a full combo but landing much more reliably. Also a solid oki tool - backdash and hold on knockdown, strike if they do a wakeup attack or a forward getup roll, and cancel if they do anything else. Certain strings and setups can be specifically punished by Hydroplane but it requires solid awareness, and most of those situations can already be punished by Flawless Block (albeit with more resources spent). Can catch immediate counterpokes when cancelled from a crouching poke, but amplified Katar Toss is generally a safer option while amplified Hydro Boost will give more reward. Keep in mind that this move is not the safest option - the immediate cancel can be punished on block, and the amplified version is still punishable by most characters when ready. Keep the enemy guessing between cancels and striking with it on block to be harder to punish. | ||||
Tidal Wave (DB3)
| File:Mk11 rain twave.png | ||||
| Damage | Guard | Startup | Active | Recovery |
|---|---|---|---|---|
| 6.00 / 1.75 / 0.0018 | Low | 21 | 13 | 24 |
| Cancel | Hit Adv. | Block Adv. | F/Block Adv. | Cost |
| 34 | 10 | -20 | -20 | - |
| Rain strikes the ground and releases a low wave of water, hitting in both directions. Amplify to send a second wave that gives more pushback, knocks the enemy down, and puts Rain at -8. Rain's best move for oki and defensively covering space. Superb as a preemptive attack to halt ground approaches, being extremely difficult to whiff punish except through projectiles. Excellent range and long disjoint also allow it to catch both forward getup roll and wakeup reversal attack on nearly any knockdown, and the amplify will give him plenty of space if they chose to block. Too slow to stop immediate counterpokes on block after a crouching poke, but most standing normals will frametrap into it. Rain is highly incentivized to amplify it - not only is it very unsafe on a close range block, but the retreating on-hit reaction makes it difficult to guarantee anything midscreen, while the knockdown from the amplified version makes it easier to apply offense. Gives an overhead/low 50/50 off 134, though it can be fuzzied.
| ||||
| File:Mk11 rain twaveamp.png | ||||
| Damage | Guard | Startup | Active | Recovery |
|---|---|---|---|---|
| 6.00 / 1.75 / 0.0018 | Mid | 6 | 13 | 22 |
| Cancel | Hit Adv. | Block Adv. | F/Block Adv. | Cost |
| - | 23 | -8 | -13 | 1 offensive meter |
| Rain strikes the ground and releases a low wave of water, hitting in both directions. Amplify to send a second wave that gives more pushback, knocks the enemy down, and puts Rain at -8. Rain's best move for oki and defensively covering space. Superb as a preemptive attack to halt ground approaches, being extremely difficult to whiff punish except through projectiles. Excellent range and long disjoint also allow it to catch both forward getup roll and wakeup reversal attack on nearly any knockdown, and the amplify will give him plenty of space if they chose to block. Too slow to stop immediate counterpokes on block after a crouching poke, but most standing normals will frametrap into it. Rain is highly incentivized to amplify it - not only is it very unsafe on a close range block, but the retreating on-hit reaction makes it difficult to guarantee anything midscreen, while the knockdown from the amplified version makes it easier to apply offense. Gives an overhead/low 50/50 off 134, though it can be fuzzied.
| ||||
Hydro Boost (BF4)
| File:Mk11 rain hboost.png | ||||
| Damage | Guard | Startup | Active | Recovery |
|---|---|---|---|---|
| 9.50 / 3.25 / 0.0032 | Mid | 16 | 25 | 24 |
| Cancel | Hit Adv. | Block Adv. | F/Block Adv. | Cost |
| 34 | 10 | -20 | -20 | - |
| Rain releases blasts of water in both directions, putting him airborne. Hold a direction to slightly influence his movement - he will slightly advance with no direction pressed. When amplified Rain can act while in the air, allowing him to continue the combo or attempt block pressure. Rain's most slot-efficient move (besides Wave Dash). Hydro Boost broadly improves his risk-reward on offense, allowing him to get pressure on block and increased combo damage on hit with the same, confirmable action. By far the biggest beneficiary of Hydro Boost is F2, transforming what is usually a cautiously applied normal into a supremely rewarding attack for mid-range offense. Rain's crouching pokes also strongly benefit, stopping most counterpokes while giving a full combo on hit, and pressure on block. B3 benefits in the corner, but midscreen it causes too much pushback to give a full combo unless done very close. On top of its higher damage in midscreen confirms, Hydro Boost also allows for meterless combos and two-meter combos in the corner. While amplified Hydro Boost will allow Rain to do an action in the air, Rain is still subject to the increased landing recovery of a regular Hydro Boost. Because of this, air normals become less plus (and much harder to land due to the faster fall) compared to a regular jump. Landing J2 will give the best damage and plus frames, but will open Rain up to flawless blocks and immediate anti-airs. Doing an early JK instead will give no flawless block gap and stop most antiairs (oddly enough, D2 will work against JK but will fail against J2 despite J2 coming out much later and having a smaller hitbox), but will not make Rain plus. If the enemy has shown that they can stop Hydro Boost~J2, mix in JK to thwart their punish and keep them guessing. With Edenian Force equipped, Rain can instead use amplified Hydro Boost to flee the scene entirely.
| ||||
Quantum Rift (DB4)
| File:Mk11 rain qrift.png | ||||
| Damage | Guard | Startup | Active | Recovery |
|---|---|---|---|---|
| - / - / - | 11 | 120 | 30 | |
| Cancel | Hit Adv. | Block Adv. | F/Block Adv. | Cost |
| 10 | - | - | - | - |
Rain creates an anti-projectile barrier. Only absorbs one hit, but Rain can act after placing it. Greatly enhances Rain's counterzoning - unless the enemy has a ranged attack that avoids the rift or a movement option to circumvent it, the rift will win most fireball wars. Against multi-projectiles from amplifies, Rain will typically absorb the first projectile, and then get hit by the followup if done too late. In these situations, make sure to place the rift preemptively. Synergizes well with grounded Quantum Slice, but being stationary gives it limited direct synergy with air Quantum Slice, though it is required for the Quantum Slice KB. The amplified version lasts twice as long and has Rain recover much faster, potentially allowing Rain to reset into a strike-throw situation on block against unaware enemies, but Hydroplane and Hydro Boost are generally better choices for block pressure.
| ||||
| File:Mk11 rain qriftamp.png | ||||
| Damage | Guard | Startup | Active | Recovery |
|---|---|---|---|---|
| - / - / - | 1 | 240 | 25 | |
| Cancel | Hit Adv. | Block Adv. | F/Block Adv. | Cost |
| - | - | - | - | 1 offensive meter |
Rain creates an anti-projectile barrier. Only absorbs one hit, but Rain can act after placing it. Greatly enhances Rain's counterzoning - unless the enemy has a ranged attack that avoids the rift or a movement option to circumvent it, the rift will win most fireball wars. Against multi-projectiles from amplifies, Rain will typically absorb the first projectile, and then get hit by the followup if done too late. In these situations, make sure to place the rift preemptively. Synergizes well with grounded Quantum Slice, but being stationary gives it limited direct synergy with air Quantum Slice, though it is required for the Quantum Slice KB. The amplified version lasts twice as long and has Rain recover much faster, potentially allowing Rain to reset into a strike-throw situation on block against unaware enemies, but Hydroplane and Hydro Boost are generally better choices for block pressure.
| ||||
Wave Dash (DB4)
| File:Mk11 rain wdash.png | ||||
| Damage | Guard | Startup | Active | Recovery |
|---|---|---|---|---|
| - / - / - | - | - | - | 35 |
| Cancel | Hit Adv. | Block Adv. | F/Block Adv. | Cost |
| 28 | - | - | - | - |
| A highly versatile install. Wave Dash powers up Rain's dash to a remarkable extent, greatly improving its range, speed, and recovery. The recovery can be cancelled directly into a dash, which can in turn be cancelled into any move like a regular dash, giving him a wealth of options for pressure, combos, spacing, and evasion. Though Wave Dash cancel will be interruptable when done after most normals, F2 will give enough cancel advantage to safely backdash and continue pressure. For other normals Rain will have to condition the enemy to not mash, but once that is accomplished Rain can use Wave Dash to continue offense or retreat on block. On hit, Rain can use Wave Dash to convert into high damage, breakaway resistant combos. Beyond its usage as an dash cancel, Wave Dash will make everything that normally uses a regular dash much more effective; forward dash~strike/throw from beyond round start distance, whiff punishes from even farther away, and unmatched keepaway. The only real disadvantage of Wave Dash is that it isn't allowed in competitive play. Whenever that isn't an issue, consider using this exceptional move.
| ||||
Strategy and Kombos
General Tips
- Focus on fundamental interactions and system mechanics - respect, turns, spacing, fireball game, antiairs, etc. Rain lacks bells and whistles, and while his tools are robust and versatile, they will not steal the game for him.
- Learn to consistently hit confirm B21. As his primary string for his close range strike-throw mixups, maximizing the reward from it is absolutely crucial. Most dash-ups can potentially turn into a corner situation, depending on the screen positioning - don't waste that possibility.
- Rain's speed is the glue that makes his gameplan work at all. Apply it whenever possible, especially on defense. Unless the enemy has comparable movement options, Rain can be difficult to pin down. Also don't neglect his excellent walk speed - directly walking instead of dash cancelling can allow for more granular control over minute spacing situations.
- Many of Rain's moves give enough pushback to attempt a spacing trap instead of holding the enemy turn.
- Rain's short hop greatly improves his close range mix. See if your enemy can block SHP on reaction - if they can, Rain can then move onto delayed SHK and empty hops.
- As always, all situations are living situations. Following up B212 with a backdash~B3 spacing trap could work at first, but then once the enemy gets respectful after B212, Rain can apply more direct offense. Alternatively, the enemy could jump after a blocked B212 to avoid and punish the B3, or fill the space with an active disjoint to stuff Rain out. Always be ready to see how a situation evolves.
- Also as always, see what you can get away with! Everything is 100% real until the enemy demonstrates that they can stop it. Gauge your enemy with "fake" options to see what works, and then keep on using it until it doesn't anymore.
Spacing and Whiff Punishing
- In most situations, ideal distance is at the tip of F2 - close enough to apply a dash-up B21 vs. throw, ideal for antiairs (especially with Geyser Palm), and able to start a fireball game with a single backdash.
- Playing from greater than F2 range is also a strong defensive option. Rain's fireball game from that distance is difficult to contest, and he can still whiff punish with a forward dash~F2.
- Many of Rain's safe enders will give enough pushback to attempt a spacing trap by backdashing. Spacing traps will generally use B3 for the back input, though it can whiff if cancelled into Hydro Boost.
- Whiff punishes from neutral will generally use forward dash~133 or B21 - Rain's dash is fast enough to close the distance, and using the string will give more damage and allow him to confirm.
- While F2 has better range and forward advancement than B3, B3 will keep some distance between Rain and the enemy on block, making it safer for non-committal skirmishing. At the max range of B3, B3~Katar Toss will be difficult to punish, and B3~amplified Katar Toss is safe regardless of spacing.
- Make sure to represent the explosive threat of the F21+3 KB - threatening an unbreakable 31% with a string as long-reaching as F2, combined with Rain's excellent speed, can force the enemy to play much more passively in the neutral situation. Cancelling F21+3 into Fatal Blow will increase the unbreakable damage to 45%, but it may be more resource efficient to simply cancel F2 into Fatal Blow and save the KB for another punish.
- Use Tidal Wave and D3 to cover space against enemy approaches.
Approaching
- Rain's forward dash is fast enough that simply dashing up into B21 will allow him to close the gap in most situations within range. However, this is easier to stuff out.
- F2 will approach and attack in a single motion, making it slightly harder to stuff out, though its reward on hit and block is less than B21. Cancelling into F2D4 will keep Rain safe while allowing a spacing trap on block, but it is very dangerous on whiff. The safest solution is to cancel F2 into amplfiied Katar Toss, as the Katar Toss will not come out if the F2 whiffs.
- F3 is a superb normal for approaches, leaving him at only -1 on block while point blank with the enemy. The jumping motion will also avoid most crouching pokes on the way up, though it can still be stuffed out during its second half.
- Rain's jump kick can still be used to approach like other jump kicks, but its smaller forward hitbox will make it slightly easier to antiair in conventional jump-in situations.
- Air Quantum Slice can close the distance, though the amplified version has significant pushback on block.
Pressure and Mixups
- Strike vs. throw with B21 is the primary strategy for damage. Being a 10-frame mid B21 cannot be fuzzied, and Argus Plunge will reward Rain with superb corner carry on a hit confirm. On block, B21 is an excellent stagger with B212, and can be turned into a spacing trap if the entire string is blocked. The throw option gets a KB in both directions, and while it creates too much distance to oki midscreen, it allows Rain to transition into a fireball game.
- If Rain is already point blank, he can apply short hop mixups as well. SHP is a quick overhead with a large hitbox and a lengthy knockdown, and if they can block it on reaction Rain can instead use delayed SHK and empty hop B3. Empty hop throw is also useful for applying a throw KB.
- Tidal Wave gives Rain a 50/50 off 13, though it is a highly flawed option; the overhead can be flawless blocked, the low creates too much pushback on hit to guarantee anything outside of the corner and needs meter to be safe on block, and the 16 vs 21 frame startup can be fuzzied. However, the threat of the 50/50 block can allow Rain to follow up 13 with a throw instead.
- Incorporate backdashing into his pressure to bait and catch mashing.
- Hydro Boost will allow Rain to attempt to extend pressure on block. Switch between J2 to be plus and J3 to catch antiairs. When doing J3 for a blockstring midscreen, buffer an Argus Plunge - nothing will come out on block, and on hit the Argus Plunge will catch the enemy. (If you are absolutely certain that the JK will catch, do a dash-up instead).
Oki
- B21 can be used on oki. If properly timed, the first hit will meaty the enemy on regular wakeup timing, and the second hit will catch delayed wakeup.
- Most of the time, use Rain's dashes to avoid their wakeup options. Even a simple dash in - dash out will punish most wakeup reversal attacks while avoiding getup roll.
- The long active frames of B34 can be used to put a meaty hitbox on oki, but it gives little reward.
- Hydro Boost can be used as an effective oki option. On a close knockdown, do a raw amplified Hydro Boost as close to the enemy as possible. The attack will stuff out wakeup U2, high profile U3, catch getup roll, and give Rain a regular amplified Hydro Boost situation on block.
- Tidal Wave, with its lengthy active frames and long hitbox is excellent for stopping wakeup U3 and getup forward roll. It requires meter to be fully safe in all circumstances, but on a meaty from a distance it can be very difficult to punish.
Turns
- B21 is used for taking turns in most situations. As always, follow the common usage rules; confirm into a combo on hit, stagger on block.
- In situations with more pushback, B21 can whiff and get stuffed out. In these situations, B4 and B1 become the ideal turn-taking normals. B4 has a low profile and gives a better immediate situation on both hit and block, while B1 can start (unconfirmable) combos and lead into a B14 stagger mindgame.
- Against respectful, non-mashing enemies, Rain can short hop on his turn to attempt more aggressive mixups.
- Don't neglect backdashing on turn. In some fights, the extra space created is simply far more valuable.
Crouching Pokes
- With excellent range and a handful of strong cancel options, Rain's crouching poke game is very strong.
- Cancel into amplified Katar Toss to be safe and stop counterpokes.
- Cancel into amplified Hydro Boost to grant a full combo on hit and attempt pressure on block. Hydro Boost will high profile most counterattacks, but certain crouching pokes and standing jabs are high enough to catch Rain.
- Cancel into Hydroplane to turn a blocked poke into a spacing situation.
- Use D1 to interrupt the enemy while keeping his cancel options solid.
- Use D3 as a defensive normal to skirmish and cover space when outside D1 distance. Apply the disjoint to win poke wars.
- Use D4 as an aggressive normal to definitively frametrap into a cancel option. Outside of this, D3 is generally a better crouching poke to use.
- Backdashing will be stopped by immediate counterpokes, but if the enemy is too slow on the draw they can be whiff punished by B3 or B4.
Flawless Blocks
- Rain has FB gaps on his B212 and 134 strings.
- The gap in B212 can actually be applied in Rain's favor; if the enemy goes for the flawless block, Rain can cancel into Katar Toss or Hydro Boost to catch the enemy for attempting it. Alternatively, he could take advantage of their reactive stance to stagger into another B21 or throw.
- The gap in 134 cannot be covered with Hydro Boost, having the same startup as the third hit, but Katar Toss remains usable.
- B34 does not create enough pushback for Rain to safely backdash. However, he can use it to set up a flawless block.
- Rain's U2 is fast and advancing enough to not be blocked, interrupted, or avoided in most situations.
Zoning
- Rain can easily keep enemies away with his superb speed and his fireball game.
- Fireball wars can be more difficult than anticipated - the enemy can throw out a projectile and then duck, while Rain has to stay in place until the Katar Toss lands or flies offscreen. Amplified Katar Toss negates this, but this puts a cap on how much he can counterzone the enemy. Consider equipping Quantum Rift to bolster his counterzoning game.
- Unamplified Katar Toss is a dominant projectile in the mid-range, where the hold-in-place property isn't nearly as troublesome as fullscreen. Rain should be ready to Katar Toss at a closer range than most projectiles.
- With Water Ball equipped, Rain can fish for combos from a distance, exchanging space control and safety for much greater reward on hit.
- Quantum Slice is very vulnerable to enemy counterzoning, but if that is not an issue (generally with a Quantum Rift placed) it is a superb move for attacking at a distance.
Enemy Mashing
- With good pushback and few gaps, Rain is generally resistant to enemy mashing.
- For up-close situations that can be special cancelled (like a D1), cancel into a special to stop the enemy mash.
- Cancel into amplified Katar Toss to safely stop enemy mashing.
- Cancel into amplified Hydro Boost for greater reward on both hit and block, but unless cancelled from D4 it will always be interruptible.
- Hydroplane can avoid the enemy mash and immediately set up a strike vs. feint situation.
- In up close situations that cannot be special cancelled, like after B34, get ready to flawless block.
Enemy Spacing
- Rain can use F2 and F3 to call out enemy spacing traps, though against characters with the best range and speed (like Kotal or Spawn) it will probably not travel far enough.
- If your dashblocking is on point, dash in and then quickly dash out to bait and avoid the enemy spacing trap.
- Katar Toss is a safe option for disrupting enemy spacing. In a mid-range situation, Katar Toss is almost always safer than an advancing attack.
- In up-close spacing situations (i.e. Sub-Zero backdashes and catches your mashing with B32), use D3 or B4 to counterpoke instead of D1.
Enemy Zoning
- Rain's speed combined with his fireball can make him difficult to approach, but in zoning wars he is at a severe disadvantage.
- Make the decision about what to do after the Katar Toss after it lands or is avoided. This is made easier by the hold-in-place property. Don't just stand back and toss repeated fireballs - the retaliatory fireball will not trade in your favor, unless Rain spends meter.
- Evaporate generally has too much recovery to be worth it against regular projectiles, but it is excellent against amplified projectiles.
- Don't be afraid to switch to an anti-zoning loadout. Quantum Rift is perfect for fireball wars, while Air Quantum Slice can avoid and approach against most projectiles.
Popular Variations
File:Mk11 rain gpalmicon.jpgFile:Mk11 rain twaveicon.jpgFile:Mk11 rain hboosticon.jpg
Geyser Palm, Tidal Wave, Hydro Boost
The most common Rain loadout by far. Combines Rain's three most slot-efficient moves for a moveset that is robust and versatile. Geyser Palm is used for antiairs, 13 confirms, and as a side switching combo ender, Tidal Wave is used for safety, space control, and mixups, and Hydro Boost is used for damage, oki, and pressure. For most Rain players, this is the central loadout, and alternate loadouts are picked for their utility relative to this.
- Make sure to use Geyser Palm against airborne enemies and Hydro Boost against grounded - Hydro Boost will only combo against airborne enemies in very specific corner situations.
Players: JSTN, DJT, Bloodeyezz, Disarted, MK_AZERBAIJAN
File:Mk11 rain gpalmicon.jpgFile:Mk11 rain hplaneicon.jpgFile:Mk11 rain hboosticon.jpg
Geyser Palm, Hydroplane, Hydro Boost
Replaces Tidal Wave with Hydroplane for stronger hit-and-run gameplay. Geyser Palm is well spaced to allow for antiairs off the Hydroplane cancel, and it keeps Hydro Boost for the "hit" part of hit-and-run. Without Tidal Wave, Rain loses the 50/50 off 134 but that mixup is always secondary to B21 anyways.
Players: TheMightyUnjust (early on)
File:Mk11 rain qrifticon.jpgFile:Mk11 rain qsliceicon.jpgFile:Mk11 rain eforceicon.jpg
Quantum Rift, Quantum Slice, Edenian Force
The Quantum Slice loadout, mostly used against severe zoning. All three moves must be present for Quantum Slice to be fully unlocked, but it transforms the move into a broadly useful tool for blockstrings, safety, space control, oki, and mobility. Many Rain players will have this variation ready to switch into for specific matchups.
Players: OD_Fullauto, DJT, Sonofabat
File:Mk11 rain wballicon.jpgFile:Mk11 rain twaveicon.jpg
Water Ball, Tidal Wave
A combo-oriented loadout for players confident in their neutral and zoning. Combines Water Ball with Tidal Wave, the most slot efficient move that avoids combo starter redundancy. Used to safely fish for combos from a distance and for better damage on two-bar combos. Significantly weakens Rain's point blank game; though Tidal Wave gives Rain some safety without Katar Toss, its startup is too slow to stop countermashing after a blocked crouching poke, and makes it unusable for covering flawless block gaps.
- One bar damage off of confirms is not substantially better than Hydro Boost, which only uses one slot.
File:Mk11 rain hboosticon.jpgFile:Mk11 rain gpalmicon.jpgFile:Mk11 rain eforceicon.jpg
Hydro Boost, Geyser Palm, Edenian Force
A loadout for distancing, escaping, and fireballs. Exchanges Tidal Wave for Edenian Force, giving far superior evasion and air-to-air control, while Edenian Force combined with amplified Hydro Boost can turn any blocked normal into a fullscreen situation. Many airborne movement options that can close this gap like Jacqui Leap, Fujin Sky Wakka, and Kabal Air Gas can then be reacted and caught with Geyser Palm. Rain is still vulnerable to being counter-zoned, but if the enemy lacks a strong projectile and a comparable grounded movement option (i.e. a teleport) it will be very challenging for the enemy to keep up.
Players: roethor
File:Mk11 rain hboosticon.jpgFile:Mk11 rain gpalmicon.jpgFile:Mk11 rain wdashicon.jpg
Hydro Boost, Geyser Palm, Wave Dash
Powerful loadout for non-kompetitive situations, combining unrivaled mobility with solid close-range power from Wave Dash cancels and Hydro Boost. F2 is the best normal to use with Wave Dash, allowing for a one hit confirm and giving enough cancel advantage to safely backdash on block, but other normals can be used as well if the threat of the string ender is represented.
Players: Odin Prime
Universal Kombos
~ means a cancel, > means no cancel (simply follow up with the listed action)
Geyser Kick (BF4)
B21 ~ Geyser Kick Amp (BF4) > B1 > 242 ~ Argus Plunge (BF3)
- Basic B&B that grants the Argus Plunge corner carry.
- All cancellable normals will work provided they can combo and they keep the enemy grounded - 133 and 4 will not work. B21 is listed because it is the most important normal for performing this.
- If the B1 into 242 connection is proving difficult, try doing B1 earlier than expected.
B21 ~ Geyser Kick Amp (BF4) > F21+34
- Alternate structure that maintains side positioning.
- Deals less damage and moves Rain slightly backwards relative to his starting position.
- Long distance created can also make it difficult to take advantage of corner positioning.
B21 ~ Geyser Kick Amp (BF4) > 3 ~ Argus Plunge (BF3)
- Breakaway safe followup to Geyser Kick.
- Will catch the fastest possible breakaways.
B21 ~ Geyser Kick Amp (BF4) > B1 > 2421+3
B21 ~ Geyser Kick Amp (BF4) > B1 > 134
- When the enemy is already cornered and they have no meter to break, use a different ender than Argus Plunge.
- 2421+3 will give a longer knockdown than Argus Plunge and can be applied in high gravity situations.
- 134 will give the closest, longest knockdown but deals less damage.
B21 ~ Geyser Kick Amp (BF4) > 242 ~ Geyser Kick Amp (BF4) > 2421+3
- Two meter combo with Geyser Kick.
- Damage is generally not worth it, and it sacrifices the Argus Plunge corner carry.
D2 KB
D2 KB > B1 > 242 ~ Argus Plunge (BF3)
- Basic, no meter combo after D2 that gives the Argus Plunge corner carry.
D2 KB > B1 > 242 ~ Geyser Kick Amp (BF3) > forward dash ~ D2
- One bar optimal from a D2 KB with Geyser Kick.
D2 KB > 242 ~ Geyser Kick Amp (BF3) > forward dash ~ 2421+3
- Alternate, easier one bar combo from the D2 KB with Geyser Kick.
D2 KB > B1 > 242 ~ Water Ball Amp, Down Throw (BF2) > 2421+3
- Midscreen one bar optimal from a D2 KB with Water Ball.
D2 KB > B1 > 242 ~ Water Ball Amp, Down Throw (BF2) > B1 ~ Water Ball Amp, Down Throw (BF2) > D2
- Two bar combo from a D2 KB midscreen with Water Ball.
D2 KB > 3 ~ Geyser Palm Amp (DB1) > forward dash ~ 242 ~ Geyser Palm (DB1)
- One bar combo with Geyser Palm.
- End with 2421+3 instead of Geyser Palm to side switch.
D2 KB > B1 > 1 > 133 ~ Katar Toss, Amp After Landing (BF2)
- Corner combo that sacrifices damage for positioning and a lengthy knockdown.
D2 KB > 3 ~ Hydro Boost Amp (BF4) > JK > 2421+3
- Hydro Boost will only combo after D2 in the corner, but it gives his best one-bar damage.
Jump Kick
JK ~ Geyser Kick Amp (BF4) ~ B1 > 242 ~ Argus Plunge (BF3)
JK ~ Geyser Kick Amp (BF4) ~ F21+34
- Geyser Kick is a solid jump kick OS option, comboing from nearly any distance and timing.
- Increased gravity means that the 242 after the B1 is harder to land - omit if too difficult.
- End the combo with F21+34 to maintain positioning, end with Argus Plunge if it will corner the enemy.
JK > forward dash ~ 242 ~ Geyser Kick Amp (BF4) > 242 ~ Argus Plunge (BF3)
JK > forward dash ~ 242 ~ Argus Plunge (BF3)
JK > forward dash ~ 242 ~ Katar Toss, Amp After Landing (BF2)
- Rain's dashes are quick enough to allow for a forward dash ~ 242 pickup on most jump kicks.
- When maintaining side, do Argus Plunge for the corner carry or Katar Toss for the longer knockdown.
JK ~ Water Ball Amp, Down Throw (BF2) > B1 > 2421+3
- Water Ball, while not picking up as consistently as Geyser Kick, is still a highly favorable jump kick OS option.
- Slightly greater gravity than Geyser Kick will require the 2421+3 ender instead of Argus Plunge.
JK > forward dash ~ 242 ~ Water Ball Amp, Down Throw (BF2) > 242 ~ Argus Plunge (BF3)
- Water Ball combined with a forward dash ~ 242 pickup will give very favorable combos with strong damage and corner carry.
JK ~ Geyser Palm Amp (DB1) > forward dash ~ 242 ~ Argus Plunge (BF3)
JK ~ Geyser Palm Amp (DB1) > forward dash ~ 242 ~ Geyser Palm (DB1)
- Geyser Palm can be used as a jump kick OS, but it will only work against very close (and very early) jump kicks.
- Using Geyser Palm as an ender will maintain screen positioning without needing to sacrifice damage with F21+34.
JK > forward dash ~ 242 ~ Geyser Palm Amp (DB1) ~ forward dash ~ D2
- Due to the finicky nature of the jump kick OS with Geyser Palm, it may be better to confirm on hit into a forward dash ~ 242.
JK > B1 > 134JK > B1 > 2421+3JK > B1 > 133 > Katar Toss, Amp After Landing (BF2)JK > B1 > 133 > Water Ball Amp, Down Throw (BF2) > 2421+3
- Corner combo construction is very similar to D2 KB, though with slightly more gravity.
JK ~ Hydro Boost Amp (BF4) > JK > 1 > 2421+3
- Jump kick OS will combo into Hydro Boost in the corner.
Antiairs
1 > forward dash ~ 242 ~ Argus Plunge (BF3)
- Basic pickup from an antiair 1.
1 > forward dash ~ 242 ~ Geyser Kick Amp (BF4) > 242 ~ Argus Plunge (BF3)
1 > forward dash ~ 242 ~ Geyser Kick Amp (BF4) > F21+34
- The easy comboing and generous bounce of Geyser Kick make it ideal for pickups from an antiair.
1 > forward dash ~ 242 ~ Water Ball Amp, Down Throw (BF2) > 242 ~ Argus Plunge (BF3)
- Water Ball can also be used to easily extend antiair combos.
2 > forward dash ~ 242 ~ Geyser Kick Amp (BF4) > 2421+3
- 2 has a bigger and more vertical hitbox than 1, but it causes a faster fall.
Geyser Palm Amp (DB1) > forward dash ~ 242 ~ Geyser Palm (DB1)
- Antiairs with Geyser Palm can be followed with enough gravity for a 242.
1 > forward dash ~ 242 ~ Geyser Palm Amp (DB1) > forward dash ~ D2
- Following up an antiair 1 with 242 ~ Geyser Palm is not recommended due to the increased gravity of Geyser Palm.
3 ~ Geyser Kick Amp (BF4) > B1 > 242 ~ Argus Plunge (BF3)
3 ~ Water Ball Amp, Down Throw (BF2) > B1 > 2421+3
3 ~ Geyser Palm Amp (DB1) > forward dash ~ 242 ~ Argus Plunge (BF3)
- 3 is an excellent antiair normal, but it must be cancelled directly into the combo extending special.
D2 > D1 ~ Argus Plunge (BF3)
- Off stray D2 antiairs, convert with D1.
D3 > forward dash ~ 133 ~ Argus Plunge (BF3)
D3 > forward dash ~ 242 ~ Geyser Kick Amp (BF4) > 2421+3
D3 > forward dash ~ 242 ~ Water Ball Amp, Down Throw (BF2) > 2421+3
D3 > forward dash ~ 242 ~ Geyser Palm Amp (DB1) > 242 ~ Geyser Palm (DB1)
- D3, with its range, disjoint, and surprisingly vertical hitbox, is a rather strong antiair.
- D3 antiair can be followed up like a 1 antiair, though with less margin of error.
Variation Kombos
Riptide (BF1)
B21 ~ Geyser Kick Amp (BF4) > B1 > 133 ~ Riptide (BF1)
B21 ~ Hydro Boost Amp (BF4) > J2 > forward dash ~ 242 ~ Riptide (BF1)
133 ~ Geyser Palm Amp (DB1) > forward dash ~ 242 ~ Riptide (BF1)
- Riptide can be used as a combo ender in place of 2421+3 or Argus Plunge.
- Slightly less damage, but gives a restand.
- Keep in mind that the restand is only +4 - if the enemy has a 6-frame D1, only your own D1 will be guaranteed.
Geyser Palm (DB1)
133 ~ Geyser Palm Amp (BF4) > forward dash ~ 242 ~ Argus Plunge (BF3)
- The big new confirm that Geyser Palm allows.
- 133 is a very easy confirm, but the fact that the third hit doesn't jail makes it a poor choice for pressure.
- While the on-hit reaction is similar to Geyser Kick, the enemy falls much faster.
- When Geyser Palm-ing the enemy into the corner, omit the forward dash - they will fall behind you and the combo will drop.
B21 ~ Geyser Kick Amp (BF4) > B1 > 242 ~ Geyser Palm (DB1)
B21 ~ Water Ball Amp, Up Throw (BF2) > D2 > 242 ~ Geyser Palm (DB1)
B21 ~ Hydro Boost Amp, Forward (BF4F) > J2 > forward dash ~ 242 ~ Geyser Palm (DB1)
133 ~ Geyser Palm Amp (BF4) > forward dash ~ 242 ~ Geyser Palm (DB1)
- Geyser Palm is Rain's highest damage combo ender, and leaves Rain very close and plus.
- Much better as a side switching ender than F21+34.
133 ~ Geyser Palm Amp (BF4) > forward dash ~ 242 ~ Geyser Palm Amp (DB1) > B34
- Double Geyser Palm combos can be used to squeeze out damage, but the meter expenditure is generally not worth it.
JK ~ Geyser Palm Amp (DB1) > forward dash ~ 242 ~ Geyser Palm (DB1)
- Geyser Palm is a decent jump kick OS option, though it will whiff against late or distant jump kicks.
Water Ball (BF2)
B21 ~ Water Ball Amp, Up Throw (BF2) > D2 > 242 ~ Argus Plunge (BF3)
- Up Water Ball will allow Rain to continue the combo with a D2 for maximum damage.
- Swinging the D2 immediately will whiff, waiting too long will not suspend the enemy high enough. If you think you did the D2 too late, follow up with D1 ~ Argus Plunge instead.
- If starting with B3, do a dash up before the D2.
B21 ~ Water Ball Amp, Down Throw (BF2) > B1 > 242 ~ Argus Plunge (BF3)
- The down throw sacrifices damage for an easier pickup.
- Delay the B1 a bit, so that it impacts when the enemy is at the maximum height.
B21 ~ Water Ball Amp, Up Throw (BF2) > D2 > 242 ~ Water Ball Amp, Down Throw (BF2) > 2421+3
133 ~ Geyser Palm Amp (DB1) > forward dash ~ 242 ~ Water Ball Amp, Down Throw (BF2) > 2421+3
B21 ~ Geyser Kick Amp (BF4) > B1 > 242 ~ Water Ball Amp, Down Throw (BF2) > 2421+3
B21 ~ Hydro Boost Amp, Forward (BF4F) > J2 > forward dash ~ 242 ~ Water Ball Amp, Down Throw (BF2) > 2421+3
- In most situations, Water Ball can be tacked onto the end of an existing combo in place of the natural ender, and followed up with 2421+3. Extremely high gravity combos will have to be followed with D2 instead.
- The meter expenditure is more efficient than Geyser Kick and Geyser Palm, but it is still only recommended to secure the round.
133 ~ Water Ball Amp, Up Throw (BF2) > JK (neutral) > 2421+3
- 133 will combo into the Water Ball when in the corner.
- The increased gravity scaling from 133 will disallow D2 followup.
Water Ball Amp, Down Throw (BF2) > B1 > 242 ~ Argus Plunge (BF3)
Water Ball Amp, Down Throw (BF2) > forward dash ~ 242 ~ Argus Plunge (BF3)
Water Ball Amp, Down Throw (BF2) > forward dash ~ F2 ~ Argus Plunge (BF3)
- When fishing for the Water Ball in neutral, do the down throw and then judge how far the enemy is for the followup.
- B1 will work from moderate range, forward dash ~ 242 will work beyond that, and forward dash ~ F2 will work at any range.
- The up throw can be used instead for easier pickups, but it adds more scaling.
- Remember to always press the amplify button when throwing out a Water Ball - it will not spend meter on block.
Water Ball Amp, Back Throw (BF2) > B1 > 242 ~ Argus Plunge (BF3)
- At fullscreen, Rain can do the back throw for more damage than the down throw ~ F2 combo.
Purple Pain (DB2)
Purple Pain Amp (DB2) > F2 > D2 > 242 ~ Argus Plunge (BF3)
- When ready and up close, do an F2 as the attack starts to squeeze out more damage.
- Rain will still have enough time to recover from the F2 and hit with a D2.
Purple Pain Amp (DB2) > JK > forward dash ~ 242 ~ Argus Plunge (BF3)
- If not adjacent to the enemy, wait until the last lightning bolt connects and then follow with a late JK into a forward dash.
Purple Pain Amp (DB2) > Argus Plunge Amp KB (BF3)
- It if hits from a long distance (either the DB2F or the DB2U Purple Pain), an Argus Plunge will activate the KB when amped.
- Input the Argus Plunge right when third lighting strike lands - any earlier and Argus Plunge will deactivate before it catches the enemy.
Purple Pain Amp (DB2) > F2 ~ Hydroplane KB (DB3, hold 3)
- Curious way of getting the Hydroplane KB.
- Get ready to hold the Hydroplane for what feels like a while - if released too early, Rain will harmlessly scoot underneath the enemy.
Quantum Slice (BF3)
B21 ~ Geyser Kick Amp (BF4) > B1 > 242 ~ Quantum Slice (BF3)
- Quantum Slice is Rain's highest damage combo ender that maintains side, but its slow startup makes it difficult to combo into.
B21 ~ Quantum Slice Amp, KB (BF3) > forward dash ~ B1 > 2421+3
- Grounded normals that can combo into Quantum Slice can start KB combos.
B21 ~ Geyser Kick Amp (BF4) > 242 ~ Quantum Slice Amp, KB (BF3) > forward dash ~ 2421+3
- The Quantum Slice KB can be applied after a Geyser Kick, though it requires the first half of the combo to be shorter for lesser gravity.
JK ~ Air Diving Quantum Slice Amp, KB (BF3D) > forward dash ~ 2421+3
- Applying the Quantum Slice KB after a jump kick will increase the gravity, necessitating the removal of the B1.
Hydro Boost (BF4)
B21 ~ Hydro Boost Amp, Forward (BF4F) > J2 > forward dash ~ 242 ~ Argus Plunge (BF3)
- Most important Hydro Boost combo. Decent damage, keeps the side, and ends with an Argus Plunge for the corner carry.
B3 ~ Hydro Boost Amp, Forward (BF4F) > J2 > forward dash ~ 242 ~ Argus Plunge (BF3)
- B3 ~ Hydro Boost is prone to whiff, due to B3 creating more distance on block and hit than other normals.
- If it does land, it will require a longer forward dash to land with the 242 and may cause the Argus Plunge to whiff.
- End with 2421+3 if the Argus Plunge is whiffing.
1 ~ Hydro Boost Amp, Forward (BF4F) > J2 > forward dash ~ 242 ~ Argus Plunge (BF3)
- 133 and 13 will not combo into Hydro Boost.
- The 1 ~ Hydro Boost combo is used for very specific situations where 242 or 3 would be blockable.
F2 ~ Hydro Boost, Forward (BF4F) > D1 ~ Argus Plunge (BF3)
- Midscreen meterless pickup from Hydro Boost.
B21 ~ Hydro Boost Amp, Forward (BF4F) > J2 > Argus Plunge (BF3)
- Used for catching delayed breakaways.
- Against immediate breakaways, Rain has enough time to notice and oki the enemy safely.
(Requires Edenian Force) B21 ~ Hydro Boost Amp, Forward (BF4F) > Air Argus Plunge (BF3)
- With Edenian Force, the fastest possible Argus Plunge will catch much earlier breakaways than grounded Argus Plunge, though the earliest possible breakaways will still drop.
B21 ~ Hydro Boost Amp, Forward (BF4F) > JK > 2 > 2421+3B21 ~ Hydro Boost Amp, Forward (BF4F) > JK > 1 > D1 > 134
- In the corner, end combos with 2421+3 or 134 instead of Argus Plunge (unless trying to bait breakaway).
- Rain can use a JK instead of J2 in the corner for slightly more damage.
133 ~ Hydro Boost Amp, Forward (BF4F) > JK > 1 > 2421+3
- 133 will combo into Hydro Boost in the corner.
- The increased gravity scaling from 133 will cause a slightly faster drop than his other normals, but the final combo is not substantially different.
JK > Hydro Boost Amp (BF4) > JK > 1 > 2421+3
- The jump kick OS will work with Hydro Boost in the corner.
- Gravity is similar to 133 combos.
242 ~ Hydro Boost (BF4) > 13 ~ Hydro Boost Amp (BF4) > J2 > 134
F2 ~ Hydro Boost (BF4) > 2421+3
- Hydro Boost will allow for more substantial meterless pickups in the corner.
- F2 and 242 are the easiest normals to follow up meterlessly due to their greater forward advancement.
D2 KB > 3 ~ Hydro Boost Amp, Forward (BF4F) > JK > 2421+3
- In the corner, Hydro Boost gives Rain his best one-bar damage from the D2 KB.
B21 ~ Hydro Boost Amp, Forward (BF4F) > JK > 3 ~ Hydro Boost Amp, Forward (BF4F) > JK > 134
- From a standing combo starter (everything except 133), amplified Hydro Boost can be followed by a second Hydro Boost for Rain's best two bar damage.
Wave Dash (DB4)
B21 ~ Wave Dash (DB4) ~ forward dash ~ 242 ~ Hydro Boost Amp, Forward (BF4) > JK > forward dash ~ 242 ~ Argus Plunge (BF3)
- 242, B21, F2, and 3 can combo into 242 anywhere on screen.
- Superior dash given by Wave Dash allows Rain to follow up Hydro Boost midscreen with JK.
- For the most part, combo construction post-Wave Dash is largely identical to existing combos.
B3 ~ Wave Dash (DB4) ~ forward dash ~ 133 ~ Geyser Palm Amp (DB1) > forward dash ~ 242 ~ Geyser Palm (DB1)
- B3 will only combo into 133 at close range.
(corner) B3 ~ Wave Dash (DB4) ~ forward dash ~ 242 ~ Hydro Boost (BF4) > 13 ~ Hydro Boost Amp (BF4) > J2 > 134
- B3 is able to combo into 242 in the corner.
13 ~ Wave Dash (DB4) ~ forward dash ~ 133 ~ Hydro Boost Amp (BF4) > JK > 2421+3
- In the corner, 13 will combo into 133.

