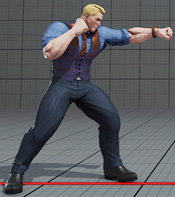
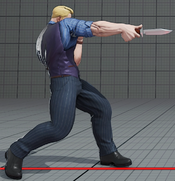
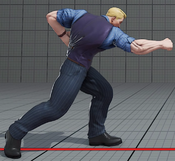
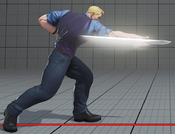
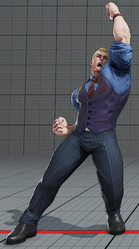
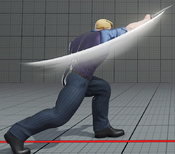
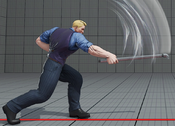
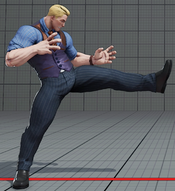
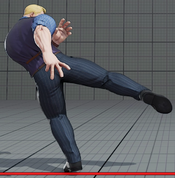
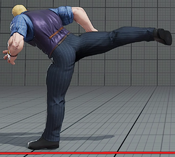
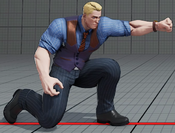
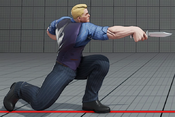
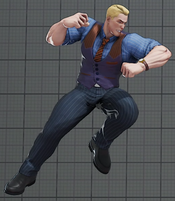
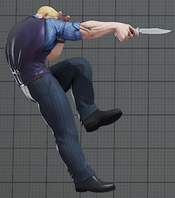
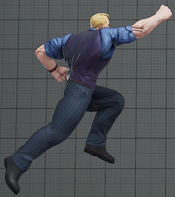
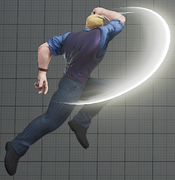
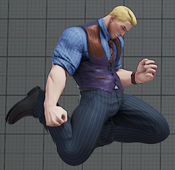
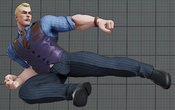
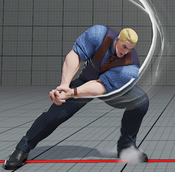
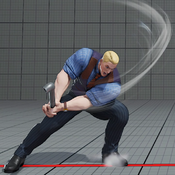
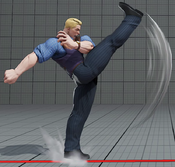
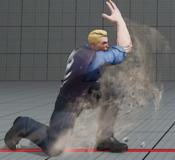
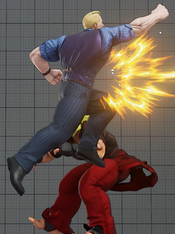
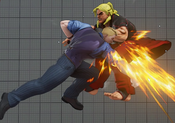
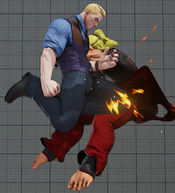
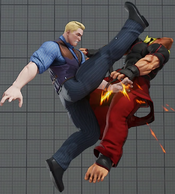
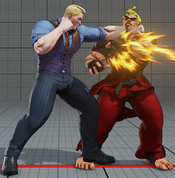
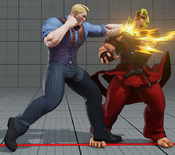
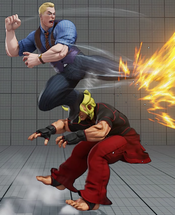
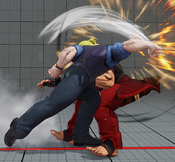
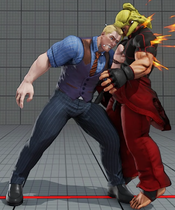
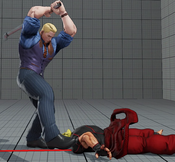
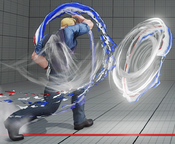
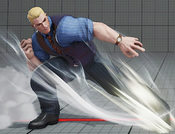
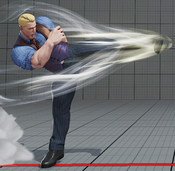
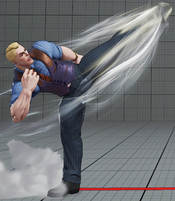
m (→5PPPKKK) |
|||
| (36 intermediate revisions by 2 users not shown) | |||
| Line 34: | Line 34: | ||
|caption2=V-Trigger 1 | |caption2=V-Trigger 1 | ||
|name=Stand LP | |name=Stand LP | ||
|anchor=yes | |||
|input=5LP | |input=5LP | ||
|data= | |data= | ||
| Line 78: | Line 79: | ||
|caption2=V-Trigger 1 | |caption2=V-Trigger 1 | ||
|name=Stand MP | |name=Stand MP | ||
|anchor=yes | |||
|input=5MP | |input=5MP | ||
|data= | |data= | ||
| Line 127: | Line 129: | ||
|caption3=V-Trigger 2 | |caption3=V-Trigger 2 | ||
|name=Stand HP | |name=Stand HP | ||
|anchor=yes | |||
|input=5HP | |input=5HP | ||
|data= | |data= | ||
| Line 200: | Line 203: | ||
|image=SFV_Cody_5LK.png | |image=SFV_Cody_5LK.png | ||
|name=Stand LK | |name=Stand LK | ||
|anchor=yes | |||
|input=5LK | |input=5LK | ||
|data= | |data= | ||
| Line 223: | Line 227: | ||
|image=SFV_Cody_5MK.png | |image=SFV_Cody_5MK.png | ||
|name=Stand MK | |name=Stand MK | ||
|anchor=yes | |||
|input=5MK | |input=5MK | ||
|data= | |data= | ||
| Line 249: | Line 254: | ||
|image=SFV_Cody_5HK.png | |image=SFV_Cody_5HK.png | ||
|name=Stand HK | |name=Stand HK | ||
|anchor=yes | |||
|input=5HK | |input=5HK | ||
|data= | |data= | ||
| Line 281: | Line 287: | ||
|caption2=V-Trigger 1 | |caption2=V-Trigger 1 | ||
|name=Crouch LP | |name=Crouch LP | ||
|anchor=yes | |||
|input=2LP | |input=2LP | ||
|data= | |data= | ||
| Line 324: | Line 331: | ||
|caption2=V-Trigger 1 | |caption2=V-Trigger 1 | ||
|name=Crouch MP | |name=Crouch MP | ||
|anchor=yes | |||
|input=2MP | |input=2MP | ||
|data= | |data= | ||
| Line 371: | Line 379: | ||
|caption3=V-Trigger 2 | |caption3=V-Trigger 2 | ||
|name=Crouch HP | |name=Crouch HP | ||
|anchor=yes | |||
|input=2HP | |input=2HP | ||
|data= | |data= | ||
| Line 433: | Line 442: | ||
|image=SFV_Cody_2LK.png | |image=SFV_Cody_2LK.png | ||
|name=Crouch LK | |name=Crouch LK | ||
|anchor=yes | |||
|input=2LK | |input=2LK | ||
|data= | |data= | ||
| Line 456: | Line 466: | ||
|image=SFV_Cody_2MK.png | |image=SFV_Cody_2MK.png | ||
|name=Crouch MK | |name=Crouch MK | ||
|anchor=yes | |||
|input=2MK | |input=2MK | ||
|data= | |data= | ||
| Line 481: | Line 492: | ||
|image=SFV_Cody_2HK.png | |image=SFV_Cody_2HK.png | ||
|name=Crouch HK | |name=Crouch HK | ||
|anchor=yes | |||
|input=2HK | |input=2HK | ||
|data= | |data= | ||
| Line 518: | Line 530: | ||
|caption2=V-Trigger 1 | |caption2=V-Trigger 1 | ||
|name=Jump LP | |name=Jump LP | ||
|anchor=yes | |||
|input=8LP | |input=8LP | ||
|data= | |data= | ||
| Line 549: | Line 562: | ||
|caption2=V-Trigger 1 | |caption2=V-Trigger 1 | ||
|name=Jump MP | |name=Jump MP | ||
|anchor=yes | |||
|input=8MP | |input=8MP | ||
|data= | |data= | ||
| Line 586: | Line 600: | ||
|caption3=V-Trigger 2 | |caption3=V-Trigger 2 | ||
|name=Jump HP | |name=Jump HP | ||
|anchor=yes | |||
|input=8HP | |input=8HP | ||
|data= | |data= | ||
| Line 626: | Line 641: | ||
|image=SFV_Cody_8LK.png | |image=SFV_Cody_8LK.png | ||
|name=Jump LK | |name=Jump LK | ||
|anchor=yes | |||
|input=8LK | |input=8LK | ||
|data= | |data= | ||
| Line 644: | Line 660: | ||
|image=SFV_Cody_8MK.png | |image=SFV_Cody_8MK.png | ||
|name=Jump MK | |name=Jump MK | ||
|anchor=yes | |||
|input=8MK | |input=8MK | ||
|data= | |data= | ||
| Line 662: | Line 679: | ||
|image=SFV_Cody_8HK.png | |image=SFV_Cody_8HK.png | ||
|name=Jump HK | |name=Jump HK | ||
|anchor=yes | |||
|input=8HK | |input=8HK | ||
|data= | |data= | ||
| Line 684: | Line 702: | ||
|caption2=V-Trigger 2 | |caption2=V-Trigger 2 | ||
|name=Axel Knuckle | |name=Axel Knuckle | ||
|anchor=yes | |||
|input=6HP | |input=6HP | ||
|data= | |data= | ||
| Line 722: | Line 741: | ||
|image=SFV_Cody_6HK.png | |image=SFV_Cody_6HK.png | ||
|name=Hammer Kick | |name=Hammer Kick | ||
|anchor=yes | |||
|input=6HK | |input=6HK | ||
|data= | |data= | ||
| Line 750: | Line 770: | ||
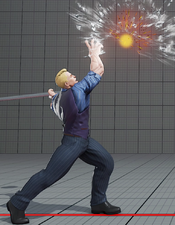
|image=SFV_Cody_8P (wake-up).png | |image=SFV_Cody_8P (wake-up).png | ||
|name=Bad Spray | |name=Bad Spray | ||
|anchor=yes | |||
|input=8P (wake-up) | |input=8P (wake-up) | ||
|data= | |data= | ||
| Line 783: | Line 804: | ||
|image2=SFV_Cody_8MP 8HP 2.png | |image2=SFV_Cody_8MP 8HP 2.png | ||
|name=Air Raid Punch | |name=Air Raid Punch | ||
|anchor=yes | |||
|input=8MP > 8HP | |input=8MP > 8HP | ||
|data= | |data= | ||
| Line 804: | Line 826: | ||
|image2=SFV_Cody_8MK 8LK 2.png | |image2=SFV_Cody_8MK 8LK 2.png | ||
|name=Air Raid Kick | |name=Air Raid Kick | ||
|anchor=yes | |||
|input=8MK > 8LK | |input=8MK > 8LK | ||
|data= | |data= | ||
| Line 823: | Line 846: | ||
|image2=SFV_Cody_5LP 5LP 2.png | |image2=SFV_Cody_5LP 5LP 2.png | ||
|name=Slip Jab | |name=Slip Jab | ||
|anchor=yes | |||
|input=5LP > 5LP | |input=5LP > 5LP | ||
|data= | |data= | ||
| Line 846: | Line 870: | ||
|image3=SFV_Cody_5LP 5LP 5LP.png | |image3=SFV_Cody_5LP 5LP 5LP.png | ||
|name=Crime Blow | |name=Crime Blow | ||
|anchor=yes | |||
|input=5LP > 5LP > 5LP | |input=5LP > 5LP > 5LP | ||
|data= | |data= | ||
| Line 867: | Line 892: | ||
|image=SFV_Cody_5LP 5LP 5LP 5LP.png | |image=SFV_Cody_5LP 5LP 5LP 5LP.png | ||
|name=Final Combination | |name=Final Combination | ||
|anchor=yes | |||
|input=5LP > 5LP > 5LP > 5LP | |input=5LP > 5LP > 5LP > 5LP | ||
|data= | |data= | ||
| Line 897: | Line 923: | ||
|image=SFV_Cody_5LP 5LP 5LP 2LP.png | |image=SFV_Cody_5LP 5LP 5LP 2LP.png | ||
|name=Final Combo Throw | |name=Final Combo Throw | ||
|anchor=yes | |||
|input=5LP > 5LP > 5LP > 2LP | |input=5LP > 5LP > 5LP > 2LP | ||
|data= | |data= | ||
| Line 918: | Line 945: | ||
=====<font style="visibility:hidden; float:right">6HK > MPMK (VS1)</font>===== | =====<font style="visibility:hidden; float:right">6HK > MPMK (VS1)</font>===== | ||
{{MoveData | {{MoveData | ||
|image=SFV_Cody_6HK MPMK (VS1).png | |image=SFV_Cody_6HK MPMK.png | ||
|image2=SFV_Cody_6HK MPMK (VS1).png | |||
|name=Crack Combination (V-Skill 1) | |name=Crack Combination (V-Skill 1) | ||
|anchor=yes | |||
|input=6HK > MPMK (VS1) | |input=6HK > MPMK (VS1) | ||
|data= | |data= | ||
| Line 945: | Line 974: | ||
=====<font style="visibility:hidden; float:right">6HK > MPMK (VS2)</font>===== | =====<font style="visibility:hidden; float:right">6HK > MPMK (VS2)</font>===== | ||
{{MoveData | {{MoveData | ||
|image=SFV_Cody_6HK MPMK (VS2).png | |image=SFV_Cody_6HK MPMK.png | ||
|image2=SFV_Cody_6HK MPMK (VS2).png | |||
|name=Crime Combination (V-Skill 2) | |name=Crime Combination (V-Skill 2) | ||
|anchor=yes | |||
|input=6HK > MPMK (VS2) | |input=6HK > MPMK (VS2) | ||
|data= | |data= | ||
| Line 976: | Line 1,007: | ||
|caption2=V-Trigger 2 | |caption2=V-Trigger 2 | ||
|name=Trash Out | |name=Trash Out | ||
|anchor=yes | |||
|input=LPLK | |input=LPLK | ||
|subtitle=Throw | |subtitle=Throw | ||
| Line 1,017: | Line 1,049: | ||
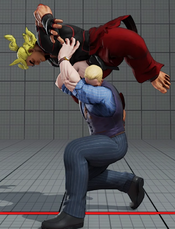
|image=SFV_Cody_4LPLK.png | |image=SFV_Cody_4LPLK.png | ||
|name=Crime Throw | |name=Crime Throw | ||
|anchor=yes | |||
|input=4LPLK | |input=4LPLK | ||
|subtitle=Back Throw | |subtitle=Back Throw | ||
| Line 1,043: | Line 1,076: | ||
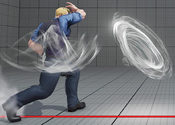
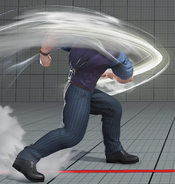
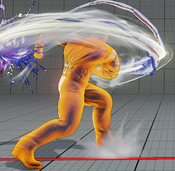
|image=SFV_Cody_236LP.png | |image=SFV_Cody_236LP.png | ||
|name=LP Tornado Sweep | |name=LP Tornado Sweep | ||
|anchor=yes | |||
|input=236LP | |input=236LP | ||
|data= | |data= | ||
| Line 1,072: | Line 1,106: | ||
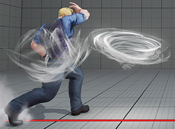
|image=SFV_Cody_236MP.png | |image=SFV_Cody_236MP.png | ||
|name=MP Tornado Sweep | |name=MP Tornado Sweep | ||
|anchor=yes | |||
|input=236MP | |input=236MP | ||
|data= | |data= | ||
| Line 1,101: | Line 1,136: | ||
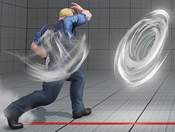
|image=SFV_Cody_236HP.png | |image=SFV_Cody_236HP.png | ||
|name=HP Tornado Sweep | |name=HP Tornado Sweep | ||
|anchor=yes | |||
|input=236HP | |input=236HP | ||
|data= | |data= | ||
| Line 1,131: | Line 1,167: | ||
|image=SFV_Cody_236PP.png | |image=SFV_Cody_236PP.png | ||
|name=EX Tornado Sweep | |name=EX Tornado Sweep | ||
|anchor=yes | |||
|input=236PP | |input=236PP | ||
|data= | |data= | ||
| Line 1,158: | Line 1,195: | ||
|image=SFV_Cody_236LK.png | |image=SFV_Cody_236LK.png | ||
|name=LK Ruffian Kick | |name=LK Ruffian Kick | ||
|anchor=yes | |||
|input=236LK | |input=236LK | ||
|data= | |data= | ||
| Line 1,187: | Line 1,225: | ||
|image=SFV_Cody_236MK.png | |image=SFV_Cody_236MK.png | ||
|name=MK Ruffian Kick | |name=MK Ruffian Kick | ||
|anchor=yes | |||
|input=236MK | |input=236MK | ||
|data= | |data= | ||
| Line 1,217: | Line 1,256: | ||
|image=SFV_Cody_236HK.png | |image=SFV_Cody_236HK.png | ||
|name=HK Ruffian Kick | |name=HK Ruffian Kick | ||
|anchor=yes | |||
|input=236HK | |input=236HK | ||
|data= | |data= | ||
| Line 1,248: | Line 1,288: | ||
|image=SFV_Cody_236KK.png | |image=SFV_Cody_236KK.png | ||
|name=EX Ruffian Kick | |name=EX Ruffian Kick | ||
|anchor=yes | |||
|input=236KK | |input=236KK | ||
|data= | |data= | ||
| Line 1,273: | Line 1,314: | ||
|image=SFV_Cody_hold any punch button release.png | |image=SFV_Cody_hold any punch button release.png | ||
|name=Zonk Knuckle | |name=Zonk Knuckle | ||
|anchor=yes | |||
|input=hold any punch button, release | |input=hold any punch button, release | ||
|data= | |data= | ||
| Line 1,299: | Line 1,341: | ||
|image=SFV_Cody_hold any punch button release.png | |image=SFV_Cody_hold any punch button release.png | ||
|name=Zonk Knuckle Level 2 | |name=Zonk Knuckle Level 2 | ||
|anchor=yes | |||
|input=hold any punch button, release | |input=hold any punch button, release | ||
|data= | |data= | ||
| Line 1,325: | Line 1,368: | ||
|image=SFV_Cody_hold any 2 punch buttons release.png | |image=SFV_Cody_hold any 2 punch buttons release.png | ||
|name=EX Zonk Knuckle | |name=EX Zonk Knuckle | ||
|anchor=yes | |||
|input=hold any 2 punch buttons, release | |input=hold any 2 punch buttons, release | ||
|data= | |data= | ||
| Line 1,354: | Line 1,398: | ||
|image=SFV_Cody_hold any 2 punch buttons release.png | |image=SFV_Cody_hold any 2 punch buttons release.png | ||
|name=EX Zonk Knuckle Level 2 | |name=EX Zonk Knuckle Level 2 | ||
|anchor=yes | |||
|input=hold any 2 punch buttons, release | |input=hold any 2 punch buttons, release | ||
|data= | |data= | ||
| Line 1,385: | Line 1,430: | ||
=====<font style="visibility:hidden; float:right">236236P</font>===== | =====<font style="visibility:hidden; float:right">236236P</font>===== | ||
{{MoveData | {{MoveData | ||
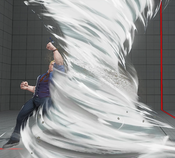
|image=SFV_Cody_236236P.png | |image=SFV_Cody_236236P 1.png | ||
|image2=SFV_Cody_236236P 2.png | |||
|name=Criminal Punisher | |name=Criminal Punisher | ||
|anchor=yes | |||
|input=236236P | |input=236236P | ||
|data= | |data= | ||
| Line 1,414: | Line 1,461: | ||
{{MoveData | {{MoveData | ||
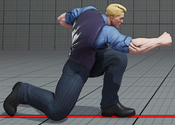
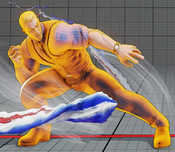
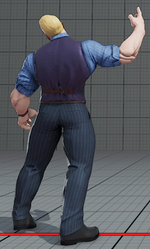
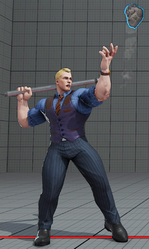
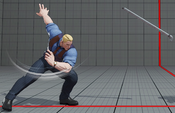
|image=SFV_Cody_5PPPKKK.png | |image=SFV_Cody_5PPPKKK.png | ||
|caption="I've got better things to do. C'mere!" | |||
|name=Taunt | |name=Taunt | ||
|anchor=yes | |||
|input=5PPPKKK | |input=5PPPKKK | ||
|data= | |data= | ||
| Line 1,432: | Line 1,481: | ||
|image=SFV_Cody_MPMK (VS1).png | |image=SFV_Cody_MPMK (VS1).png | ||
|name=Double Kick | |name=Double Kick | ||
|anchor=yes | |||
|input=MPMK (VS1) | |input=MPMK (VS1) | ||
|data= | |data= | ||
| Line 1,463: | Line 1,513: | ||
|image=SFV_Cody_MPMK (VS2).png | |image=SFV_Cody_MPMK (VS2).png | ||
|name=Crime Sway (High) | |name=Crime Sway (High) | ||
|anchor=yes | |||
|input=MPMK (VS2) | |input=MPMK (VS2) | ||
|data= | |data= | ||
| Line 1,480: | Line 1,531: | ||
|image=SFV_Cody_2MPMK (VS2).png | |image=SFV_Cody_2MPMK (VS2).png | ||
|name=Crime Sway (Low) | |name=Crime Sway (Low) | ||
|anchor=yes | |||
|input=2MPMK (VS2) | |input=2MPMK (VS2) | ||
|data= | |data= | ||
| Line 1,497: | Line 1,549: | ||
|image=SFV_Cody_MPMK (VS2) P.png | |image=SFV_Cody_MPMK (VS2) P.png | ||
|name=Wrench Fist | |name=Wrench Fist | ||
|anchor=yes | |||
|input=MPMK (VS2) > P | |input=MPMK (VS2) > P | ||
|data= | |data= | ||
| Line 1,524: | Line 1,577: | ||
|image=SFV_Cody_2MPMK (VS2) K.png | |image=SFV_Cody_2MPMK (VS2) K.png | ||
|name=Lumber Sweep | |name=Lumber Sweep | ||
|anchor=yes | |||
|input=2MPMK (VS2) > K | |input=2MPMK (VS2) > K | ||
|data= | |data= | ||
| Line 1,553: | Line 1,607: | ||
|image=SFV_Cody_HPHK (VT1).png | |image=SFV_Cody_HPHK (VT1).png | ||
|name=Side Arm | |name=Side Arm | ||
|anchor=yes | |||
|input=HPHK (VT1) | |input=HPHK (VT1) | ||
|data= | |data= | ||
| Line 1,571: | Line 1,626: | ||
{{MoveData | {{MoveData | ||
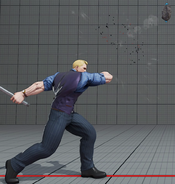
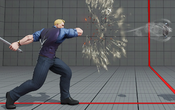
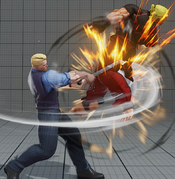
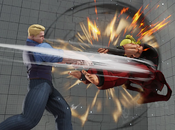
|image=SFV_Cody_5MP 5HP.png | |image=SFV_Cody_5MP 5HP.png | ||
|image2=SFV_Cody_5MP 5HP 2.png | |||
|name=Burst Shot | |name=Burst Shot | ||
|anchor=yes | |||
|input=5MP > 5HP | |input=5MP > 5HP | ||
|data= | |data= | ||
| Line 1,598: | Line 1,655: | ||
|image=SFV_Cody_5HPHK_(knife).png | |image=SFV_Cody_5HPHK_(knife).png | ||
|name=Snipe Shot | |name=Snipe Shot | ||
|anchor=yes | |||
|input=5HPHK | |input=5HPHK | ||
|data= | |data= | ||
| Line 1,625: | Line 1,683: | ||
|image=SFV_Cody_2HPHK_(knife).png | |image=SFV_Cody_2HPHK_(knife).png | ||
|name=Anti-Air Snipe Shot | |name=Anti-Air Snipe Shot | ||
|anchor=yes | |||
|input=2HPHK | |input=2HPHK | ||
|data= | |data= | ||
| Line 1,652: | Line 1,711: | ||
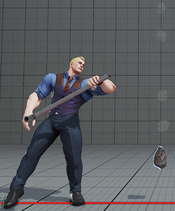
|image=SFV_Cody_5HPHK_(reload).png | |image=SFV_Cody_5HPHK_(reload).png | ||
|name=Reload | |name=Reload | ||
|anchor=yes | |||
|input=5HPHK | |input=5HPHK | ||
|data= | |data= | ||
| Line 1,667: | Line 1,727: | ||
|image=SFV_Cody_214P_(knife).png | |image=SFV_Cody_214P_(knife).png | ||
|name=Rapid Fire | |name=Rapid Fire | ||
|anchor=yes | |||
|input=214P | |input=214P | ||
|data= | |data= | ||
| Line 1,695: | Line 1,756: | ||
|image=SFV_Cody_HPHK (VT2).png | |image=SFV_Cody_HPHK (VT2).png | ||
|name=Dirty Coach | |name=Dirty Coach | ||
|anchor=yes | |||
|input=HPHK (VT2) | |input=HPHK (VT2) | ||
|data= | |data= | ||
| Line 1,707: | Line 1,769: | ||
:Cannot activate V-Trigger 2 if the Pipe is currently in-hand | :Cannot activate V-Trigger 2 if the Pipe is currently in-hand | ||
{{SFV Button FAT|link=https://fullmeter.com/fatonline/#/framedata/movedetail/SFV/Cody/normal/Dirty%20Coach}} | {{SFV Button FAT|link=https://fullmeter.com/fatonline/#/framedata/movedetail/SFV/Cody/normal/Dirty%20Coach}} | ||
}} | }} | ||
}} | }} | ||
| Line 1,735: | Line 1,776: | ||
|image=SFV_Cody_HPHK.png | |image=SFV_Cody_HPHK.png | ||
|name=Gentle Swing | |name=Gentle Swing | ||
|anchor=yes | |||
|input=HPHK | |input=HPHK | ||
|data= | |data= | ||
| Line 1,755: | Line 1,797: | ||
:Can be canceled into Bean Ball (rock toss) on hit | :Can be canceled into Bean Ball (rock toss) on hit | ||
:Spends about 25% V-Timer if the pipe swing hitbox connects with the opponent on hit/block (does not spend V-Timer on whiff or when batting the rocks) | :Spends about 25% V-Timer if the pipe swing hitbox connects with the opponent on hit/block (does not spend V-Timer on whiff or when batting the rocks) | ||
:Knockdown advantage and other properties change drastically when canceled into from Bean Ball (see: Present Delivery (High/Mid | :Knockdown advantage and other properties change drastically when canceled into from Bean Ball (see: Present Delivery (High/Mid/Low) data) | ||
{{SFV Button FAT|link=https://fullmeter.com/fatonline/#/framedata/movedetail/SFV/Cody/vtTwo/Gentle%20Swing}} | {{SFV Button FAT|link=https://fullmeter.com/fatonline/#/framedata/movedetail/SFV/Cody/vtTwo/Gentle%20Swing}} | ||
}} | }} | ||
| Line 1,764: | Line 1,806: | ||
|image=SFV_Cody_2HPHK.png | |image=SFV_Cody_2HPHK.png | ||
|name=Gentle Upper Swing | |name=Gentle Upper Swing | ||
|anchor=yes | |||
|input=2HPHK | |input=2HPHK | ||
|data= | |data= | ||
| Line 1,785: | Line 1,828: | ||
:Launches the opponent into a free juggle state if this move started the juggle state | :Launches the opponent into a free juggle state if this move started the juggle state | ||
:Spends about 25% V-Timer if the pipe swing hitbox connects with the opponent on hit/block (does not spend V-Timer on whiff or when batting the rocks) | :Spends about 25% V-Timer if the pipe swing hitbox connects with the opponent on hit/block (does not spend V-Timer on whiff or when batting the rocks) | ||
:Knockdown, cancel and block advantage properties change drastically when canceled into from Bean Ball (see: Unluck Gift | :Knockdown, cancel and block advantage properties change drastically when canceled into from Bean Ball (see: Unluck Gift data) | ||
{{SFV Button FAT|link=https://fullmeter.com/fatonline/#/framedata/movedetail/SFV/Cody/vtTwo/Gentle%20Upper%20Swing}} | {{SFV Button FAT|link=https://fullmeter.com/fatonline/#/framedata/movedetail/SFV/Cody/vtTwo/Gentle%20Upper%20Swing}} | ||
}} | }} | ||
}} | }} | ||
=====<font style="visibility:hidden; float:right" | =====<font style="visibility:hidden; float:right">214P</font>===== | ||
{{MoveData | {{MoveData | ||
|image= | |image=SFV_Cody_214P.png | ||
|name= | |name=Bean Ball | ||
|input= | |anchor=yes | ||
|input=214P | |||
|data= | |data= | ||
{{AttackData-SFV | {{AttackData-SFV | ||
|startup=<nowiki>16+19</nowiki> | |startup=<nowiki>19</nowiki> | ||
|active=<nowiki>2(~)</nowiki> | |recovery=<nowiki>30</nowiki> | ||
|hit=<nowiki>-8(~)</nowiki> | |||
|block=<nowiki>-11(~)</nowiki> | |||
|damage=<nowiki>40</nowiki> | |||
|stun=<nowiki>50</nowiki> | |||
|attack=<nowiki>H</nowiki> | |||
|description= | |||
:1-hit projectile that travels vertically upwards and down again | |||
:Different button strengths result in slightly different trajectories of the rock | |||
:Recovery frames can be canceled into follow-up pipe swings (HP+HK ** d+HP+HK) which dramatically changes properties of the rock and the pipe swings themselves depending on versions used | |||
:Cancel frames 4-34 result in High follow-up (see: Present Delivery (High) data) | |||
:Cancel frames 35-37 result in Just-Frame follow-up (see: Present Delivery (Mid) data) | |||
:Cancel frames 38-47 result in Low follow-up (see: Present Delivery (Low) data) - although the pipe swing won't connect for the Low follow-up unless canceled into on frames 38-39 (Which is an even tighter window than the Just-Frame version) | |||
{{SFV Button FAT|link=https://fullmeter.com/fatonline/#/framedata/movedetail/SFV/Cody/vtTwo/Bean%20Ball}} | |||
}} | |||
}} | |||
=====<font style="visibility:hidden; float:right">HPHK > 214P</font>===== | |||
{{MoveData | |||
|image=SFV_Cody_214P.png | |||
|name=Gentle Swing > Bean Ball | |||
|anchor=yes | |||
|input=HPHK > 214P | |||
|data= | |||
{{AttackData-SFV | |||
|startup=<nowiki>16+19</nowiki> | |||
|active=<nowiki>2(~)</nowiki> | |||
|recovery=<nowiki>30</nowiki> | |recovery=<nowiki>30</nowiki> | ||
|hit=<nowiki>KD</nowiki> | |hit=<nowiki>KD</nowiki> | ||
| Line 1,809: | Line 1,879: | ||
|kdrb=<nowiki>8</nowiki> | |kdrb=<nowiki>8</nowiki> | ||
|description= | |description= | ||
:The follow-up Bean Ball (rock toss) has all the same properties as it normally does (see: Bean Ball | :The follow-up Bean Ball (rock toss) has all the same properties as it normally does (see: Bean Ball data) | ||
{{SFV Button FAT|link=https://fullmeter.com/fatonline/#/framedata/movedetail/SFV/Cody/vtTwo/Gentle%20Swing%20%3E%20Bean%20Ball}} | {{SFV Button FAT|link=https://fullmeter.com/fatonline/#/framedata/movedetail/SFV/Cody/vtTwo/Gentle%20Swing%20%3E%20Bean%20Ball}} | ||
}} | }} | ||
| Line 1,816: | Line 1,886: | ||
=====<font style="visibility:hidden; float:right">2HPHK > 214P</font>===== | =====<font style="visibility:hidden; float:right">2HPHK > 214P</font>===== | ||
{{MoveData | {{MoveData | ||
|image= | |image=SFV_Cody_214P.png | ||
|name=Gentle Upper Swing > Bean Ball | |name=Gentle Upper Swing > Bean Ball | ||
|anchor=yes | |||
|input=2HPHK > 214P | |input=2HPHK > 214P | ||
|data= | |data= | ||
| Line 1,833: | Line 1,904: | ||
|kdrb=<nowiki>18(48)</nowiki> | |kdrb=<nowiki>18(48)</nowiki> | ||
|description= | |description= | ||
:The follow-up Bean Ball (rock toss) has all the same properties as it normally does (see: Bean Ball | :The follow-up Bean Ball (rock toss) has all the same properties as it normally does (see: Bean Ball data) | ||
:Increased KDA (as shown on the KDA data inside the parenthesess) if the Bean Ball hits them on the way-up after canceling into it from Gentle Upper Swing | :Increased KDA (as shown on the KDA data inside the parenthesess) if the Bean Ball hits them on the way-up after canceling into it from Gentle Upper Swing | ||
{{SFV Button FAT|link=https://fullmeter.com/fatonline/#/framedata/movedetail/SFV/Cody/vtTwo/Gentle%20Upper%20Swing%20%3E%20Bean%20Ball}} | {{SFV Button FAT|link=https://fullmeter.com/fatonline/#/framedata/movedetail/SFV/Cody/vtTwo/Gentle%20Upper%20Swing%20%3E%20Bean%20Ball}} | ||
| Line 1,839: | Line 1,910: | ||
}} | }} | ||
=====<font style="visibility:hidden; float:right">214P</font>===== | =====<font style="visibility:hidden; float:right">214P > HPHK (early)</font>===== | ||
{{MoveData | {{MoveData | ||
|image=SFV_Cody_214P.png | |image=SFV_Cody_214P HPHK H.png | ||
|name= | |name=Present Delivery (High) | ||
|input=214P | |anchor=yes | ||
|input=214P > HPHK (early) | |||
|data= | |data= | ||
{{AttackData-SFV | {{AttackData-SFV | ||
|startup=<nowiki>19+34</nowiki> | |||
|startup=<nowiki>19+34</nowiki> | |||
|active=<nowiki>2(~)</nowiki> | |active=<nowiki>2(~)</nowiki> | ||
|recovery=<nowiki>25</nowiki> | |recovery=<nowiki>25</nowiki> | ||
| Line 1,895: | Line 1,942: | ||
=====<font style="visibility:hidden; float:right">214P > HPHK</font>===== | =====<font style="visibility:hidden; float:right">214P > HPHK</font>===== | ||
{{MoveData | {{MoveData | ||
|image=SFV_Cody_214P HPHK.png | |image=SFV_Cody_214P HPHK M.png | ||
|name=Present Delivery (Mid) | |name=Present Delivery (Mid) | ||
|anchor=yes | |||
|input=214P > HPHK | |input=214P > HPHK | ||
|data= | |data= | ||
| Line 1,915: | Line 1,963: | ||
:Both the pipe and rock can hit the opponent on the same frame up close resulting combined damage / stun (250 damage / 300 stun) which only counts as a single move for the purpose of damage scaling | :Both the pipe and rock can hit the opponent on the same frame up close resulting combined damage / stun (250 damage / 300 stun) which only counts as a single move for the purpose of damage scaling | ||
:+3 on block if the rock and and pipe swing are used in close range (-3 on block if only the pipe swing is blocked) | :+3 on block if the rock and and pipe swing are used in close range (-3 on block if only the pipe swing is blocked) | ||
:KDA data shown goes from worst to best; close range -> (full-screen) - close range refers to if the pipe swing hits up close (the KDA shown in the | :KDA data shown goes from worst to best; close range -> (full-screen) - close range refers to if the pipe swing hits up close (the KDA shown in the parentheses refers to when the Just Frame rock hits from full-screen away) | ||
:Try using visual cues to help with the Just Frame timing (like when Cody moves his hand that just tossed the rock in front of his face) | :Try using visual cues to help with the Just Frame timing (like when Cody moves his hand that just tossed the rock in front of his face) | ||
{{SFV Button FAT|link=https://fullmeter.com/fatonline/#/framedata/movedetail/SFV/Cody/vtTwo/Present%20Delivery%20(Mid)}} | {{SFV Button FAT|link=https://fullmeter.com/fatonline/#/framedata/movedetail/SFV/Cody/vtTwo/Present%20Delivery%20(Mid)}} | ||
| Line 1,921: | Line 1,969: | ||
}} | }} | ||
=====<font style="visibility:hidden; float:right">214P > HPHK</font>===== | =====<font style="visibility:hidden; float:right">214P > HPHK (late)</font>===== | ||
{{MoveData | {{MoveData | ||
|image=SFV_Cody_214P HPHK.png | |image=SFV_Cody_214P HPHK L.png | ||
|name=Present Delivery (Low) | |name=Present Delivery (Low) | ||
|input=214P > HPHK | |anchor=yes | ||
|input=214P > HPHK (late) | |||
|data= | |data= | ||
{{AttackData-SFV | {{AttackData-SFV | ||
| Line 1,953: | Line 2,002: | ||
{{MoveData | {{MoveData | ||
|image=SFV_Cody_214P 2HPHK.png | |image=SFV_Cody_214P 2HPHK.png | ||
|image2=SFV_Cody_214P 2HPHK stone.png | |||
|name=Unluck Gift | |name=Unluck Gift | ||
|anchor=yes | |||
|input=214P > 2HPHK | |input=214P > 2HPHK | ||
|data= | |data= | ||
| Line 1,983: | Line 2,034: | ||
|image=SFV_Cody_63214K P.png | |image=SFV_Cody_63214K P.png | ||
|name=Toss & Smash | |name=Toss & Smash | ||
|anchor=yes | |||
|input=63214K > P | |input=63214K > P | ||
|data= | |data= | ||
| Line 2,013: | Line 2,065: | ||
|image=SFV_Cody_63214K P (Just Frame).png | |image=SFV_Cody_63214K P (Just Frame).png | ||
|name=Toss & Smash (Just Frame) | |name=Toss & Smash (Just Frame) | ||
|anchor=yes | |||
|input=63214K > P (Just Frame) | |input=63214K > P (Just Frame) | ||
|data= | |data= | ||
| Line 2,041: | Line 2,094: | ||
=====<font style="visibility:hidden; float:right">63214K > 214P</font>===== | =====<font style="visibility:hidden; float:right">63214K > 214P</font>===== | ||
{{MoveData | {{MoveData | ||
|image= | |image=SFV_Cody_214P.png | ||
|name=Toss & Smash > Bean Ball | |name=Toss & Smash > Bean Ball | ||
|anchor=yes | |||
|input=63214K > 214P | |input=63214K > 214P | ||
|data= | |data= | ||
| Line 2,068: | Line 2,122: | ||
=====<font style="visibility:hidden; float:right">63214K > P (JF) > 214P</font>===== | =====<font style="visibility:hidden; float:right">63214K > P (JF) > 214P</font>===== | ||
{{MoveData | {{MoveData | ||
|image= | |image=SFV_Cody_214P.png | ||
|name=Toss & Smash (JF) > Bean Ball | |name=Toss & Smash (JF) > Bean Ball | ||
|anchor=yes | |||
|input=63214K > P (JF) > 214P | |input=63214K > P (JF) > 214P | ||
|data= | |data= | ||
| Line 2,096: | Line 2,151: | ||
=====<font style="visibility:hidden; float:right">63214K > P > 214P > HPHK</font>===== | =====<font style="visibility:hidden; float:right">63214K > P > 214P > HPHK</font>===== | ||
{{MoveData | {{MoveData | ||
|image= | |image=SFV_Cody_214P HPHK H.png | ||
|name=Toss & Smash > Present Delivery (H) | |name=Toss & Smash > Present Delivery (H) | ||
|anchor=yes | |||
|input=63214K > P > 214P > HPHK | |input=63214K > P > 214P > HPHK | ||
|data= | |data= | ||
| Line 2,116: | Line 2,172: | ||
:Damage / Stun numbers in the parentheses refer to the Bean Ball itself after being swung by the pipe swing follow-up | :Damage / Stun numbers in the parentheses refer to the Bean Ball itself after being swung by the pipe swing follow-up | ||
:KDA varies depending on timing of the prior follow-up swing to the Toss & Smash (lower KDA the worse the timing was) | :KDA varies depending on timing of the prior follow-up swing to the Toss & Smash (lower KDA the worse the timing was) | ||
:All properties other than KDA it shares with Present | :All properties other than KDA it shares with Present Delivery (High) - Read those notes for more information | ||
:Spends 700 V-Meter (23% of V-Timer) | :Spends 700 V-Meter (23% of V-Timer) | ||
{{SFV Button FAT|link=https://fullmeter.com/fatonline/#/framedata/movedetail/SFV/Cody/vtTwo/Toss%20&%20Smash%20%3E%20Present%20Delivery%20(H)}} | {{SFV Button FAT|link=https://fullmeter.com/fatonline/#/framedata/movedetail/SFV/Cody/vtTwo/Toss%20&%20Smash%20%3E%20Present%20Delivery%20(H)}} | ||
| Line 2,124: | Line 2,180: | ||
=====<font style="visibility:hidden; float:right">63214K > P > 214P > HPHK</font>===== | =====<font style="visibility:hidden; float:right">63214K > P > 214P > HPHK</font>===== | ||
{{MoveData | {{MoveData | ||
|image= | |image=SFV_Cody_214P HPHK M.png | ||
|name=Toss & Smash > Present Delivery (M) | |name=Toss & Smash > Present Delivery (M) | ||
|anchor=yes | |||
|input=63214K > P > 214P > HPHK | |input=63214K > P > 214P > HPHK | ||
|data= | |data= | ||
| Line 2,144: | Line 2,201: | ||
:Damage / Stun numbers in the parentheses refer to the Bean Ball itself after being swung by the pipe swing follow-up | :Damage / Stun numbers in the parentheses refer to the Bean Ball itself after being swung by the pipe swing follow-up | ||
:KDA varies depending on timing of the prior follow-up swing to the Toss & Smash (lower KDA the worse the timing was) | :KDA varies depending on timing of the prior follow-up swing to the Toss & Smash (lower KDA the worse the timing was) | ||
:All properties other than KDA it shares with Present | :All properties other than KDA it shares with Present Delivery (Mid) - Read those notes for more information | ||
:Spends 700 V-Meter (23% of V-Timer) | :Spends 700 V-Meter (23% of V-Timer) | ||
{{SFV Button FAT|link=https://fullmeter.com/fatonline/#/framedata/movedetail/SFV/Cody/vtTwo/Toss%20&%20Smash%20%3E%20Present%20Delivery%20(M)}} | {{SFV Button FAT|link=https://fullmeter.com/fatonline/#/framedata/movedetail/SFV/Cody/vtTwo/Toss%20&%20Smash%20%3E%20Present%20Delivery%20(M)}} | ||
| Line 2,152: | Line 2,209: | ||
=====<font style="visibility:hidden; float:right">63214K > P > 214P > HPHK</font>===== | =====<font style="visibility:hidden; float:right">63214K > P > 214P > HPHK</font>===== | ||
{{MoveData | {{MoveData | ||
|image= | |image=SFV_Cody_214P HPHK L.png | ||
|name=Toss & Smash > Present Delivery (L) | |name=Toss & Smash > Present Delivery (L) | ||
|anchor=yes | |||
|input=63214K > P > 214P > HPHK | |input=63214K > P > 214P > HPHK | ||
|data= | |data= | ||
| Line 2,172: | Line 2,230: | ||
:Damage / Stun numbers in the parentheses refer to the Bean Ball itself after being swung by the pipe swing follow-up | :Damage / Stun numbers in the parentheses refer to the Bean Ball itself after being swung by the pipe swing follow-up | ||
:KDA varies depending on timing of the prior follow-up swing to the Toss & Smash (lower KDA the worse the timing was) | :KDA varies depending on timing of the prior follow-up swing to the Toss & Smash (lower KDA the worse the timing was) | ||
:All properties other than KDA it shares with Present | :All properties other than KDA it shares with Present Delivery (Low) - Read those notes for more information | ||
:Spends 700 V-Meter (23% of V-Timer) | :Spends 700 V-Meter (23% of V-Timer) | ||
{{SFV Button FAT|link=https://fullmeter.com/fatonline/#/framedata/movedetail/SFV/Cody/vtTwo/Toss%20&%20Smash%20%3E%20Present%20Delivery%20(L)}} | {{SFV Button FAT|link=https://fullmeter.com/fatonline/#/framedata/movedetail/SFV/Cody/vtTwo/Toss%20&%20Smash%20%3E%20Present%20Delivery%20(L)}} | ||
| Line 2,180: | Line 2,238: | ||
=====<font style="visibility:hidden; float:right">63214K > P > 214P > 2HPHK</font>===== | =====<font style="visibility:hidden; float:right">63214K > P > 214P > 2HPHK</font>===== | ||
{{MoveData | {{MoveData | ||
|image= | |image=SFV_Cody_214P 2HPHK.png | ||
|name=Toss & Smash > Unluck Gift | |name=Toss & Smash > Unluck Gift | ||
|anchor=yes | |||
|input=63214K > P > 214P > 2HPHK | |input=63214K > P > 214P > 2HPHK | ||
|data= | |data= | ||
| Line 2,200: | Line 2,259: | ||
:Damage / Stun numbers in the parentheses refer to the Bean Ball itself after being swung by the pipe swing follow-up | :Damage / Stun numbers in the parentheses refer to the Bean Ball itself after being swung by the pipe swing follow-up | ||
:KDA varies depending on timing of the prior follow-up swing to the Toss & Smash (lower KDA the worse the timing was) | :KDA varies depending on timing of the prior follow-up swing to the Toss & Smash (lower KDA the worse the timing was) | ||
:All properties other than KDA it shares with Unluck Gift | :All properties other than KDA it shares with Unluck Gift - Read those notes for more information | ||
:Spends 700 V-Meter (23% of V-Timer) | :Spends 700 V-Meter (23% of V-Timer) | ||
{{SFV Button FAT|link=https://fullmeter.com/fatonline/#/framedata/movedetail/SFV/Cody/vtTwo/Toss%20&%20Smash%20%3E%20Unluck%20Gift}} | {{SFV Button FAT|link=https://fullmeter.com/fatonline/#/framedata/movedetail/SFV/Cody/vtTwo/Toss%20&%20Smash%20%3E%20Unluck%20Gift}} | ||
| Line 2,208: | Line 2,267: | ||
=====<font style="visibility:hidden; float:right">63214K > P (JF) > 214P > HPHK</font>===== | =====<font style="visibility:hidden; float:right">63214K > P (JF) > 214P > HPHK</font>===== | ||
{{MoveData | {{MoveData | ||
|image= | |image=SFV_Cody_214P HPHK H.png | ||
|name=Toss & Smash (JF) > Present Delivery (H) | |name=Toss & Smash (JF) > Present Delivery (H) | ||
|anchor=yes | |||
|input=63214K > P (JF) > 214P > HPHK | |input=63214K > P (JF) > 214P > HPHK | ||
|data= | |data= | ||
| Line 2,238: | Line 2,298: | ||
=====<font style="visibility:hidden; float:right">63214K > P (JF) > 214P > HPHK</font>===== | =====<font style="visibility:hidden; float:right">63214K > P (JF) > 214P > HPHK</font>===== | ||
{{MoveData | {{MoveData | ||
|image= | |image=SFV_Cody_214P HPHK M.png | ||
|name=Toss & Smash (JF) > Present Delivery (M) | |name=Toss & Smash (JF) > Present Delivery (M) | ||
|anchor=yes | |||
|input=63214K > P (JF) > 214P > HPHK | |input=63214K > P (JF) > 214P > HPHK | ||
|data= | |data= | ||
| Line 2,268: | Line 2,329: | ||
=====<font style="visibility:hidden; float:right">63214K > P (JF) > 214P > HPHK</font>===== | =====<font style="visibility:hidden; float:right">63214K > P (JF) > 214P > HPHK</font>===== | ||
{{MoveData | {{MoveData | ||
|image= | |image=SFV_Cody_214P HPHK L.png | ||
|name=Toss & Smash (JF) > Present Delivery (L) | |name=Toss & Smash (JF) > Present Delivery (L) | ||
|anchor=yes | |||
|input=63214K > P (JF) > 214P > HPHK | |input=63214K > P (JF) > 214P > HPHK | ||
|data= | |data= | ||
| Line 2,298: | Line 2,360: | ||
=====<font style="visibility:hidden; float:right">63214K > P (JF) > 214P > 2HPHK</font>===== | =====<font style="visibility:hidden; float:right">63214K > P (JF) > 214P > 2HPHK</font>===== | ||
{{MoveData | {{MoveData | ||
|image= | |image=SFV_Cody_214P 2HPHK.png | ||
|name=Toss & Smash (JF) > Unluck Gift | |name=Toss & Smash (JF) > Unluck Gift | ||
|anchor=yes | |||
|input=63214K > P (JF) > 214P > 2HPHK | |input=63214K > P (JF) > 214P > 2HPHK | ||
|data= | |data= | ||
| Line 2,323: | Line 2,386: | ||
:Spends 700 V-Meter (23% of V-Timer) | :Spends 700 V-Meter (23% of V-Timer) | ||
{{SFV Button FAT|link=https://fullmeter.com/fatonline/#/framedata/movedetail/SFV/Cody/vtTwo/Toss%20&%20Smash%20(JF)%20%3E%20Unluck%20Gift}} | {{SFV Button FAT|link=https://fullmeter.com/fatonline/#/framedata/movedetail/SFV/Cody/vtTwo/Toss%20&%20Smash%20(JF)%20%3E%20Unluck%20Gift}} | ||
}} | |||
}} | |||
=====<font style="visibility:hidden; float:right">HPHK (no V-Timer)</font>===== | |||
{{MoveData | |||
|image=SFV_Cody_HPHK_no_vmeter.png | |||
|name=Garbage Chute | |||
|anchor=yes | |||
|input=HPHK (no V-Timer) | |||
|data= | |||
{{AttackData-SFV | |||
|startup=<nowiki>13</nowiki> | |||
|recovery=<nowiki>27</nowiki> | |||
|hit=<nowiki>-4</nowiki> | |||
|block=<nowiki>-6</nowiki> | |||
|damage=<nowiki>60</nowiki> | |||
|stun=<nowiki>100</nowiki> | |||
|attack=<nowiki>H</nowiki> | |||
|description= | |||
:Removes pipe by throwing it towards the opponent; Only possible to perform when you have no V-Timer left | |||
:Strike hitbox but also nullifies 1 hit of projectiles; Not very good at nullifying projectiles as the hitbox is very high during most of the travel | |||
{{SFV Button FAT|link=https://fullmeter.com/fatonline/#/framedata/movedetail/SFV/Cody/vtTwo/Garbage%20Chute}} | |||
}} | }} | ||
}} | }} | ||
| Line 2,332: | Line 2,417: | ||
|image=SFV_Cody_5MKHP.png | |image=SFV_Cody_5MKHP.png | ||
|name=V-Shift | |name=V-Shift | ||
|anchor=yes | |||
|input=5MKHP | |input=5MKHP | ||
|data= | |data= | ||
| Line 2,357: | Line 2,443: | ||
|image=SFV_Cody_5MKHP_break.png | |image=SFV_Cody_5MKHP_break.png | ||
|name=Payback | |name=Payback | ||
|anchor=yes | |||
|input=5MKHP | |input=5MKHP | ||
|data= | |data= | ||
| Line 2,383: | Line 2,470: | ||
|image=SFV_Cody_6KKK.png | |image=SFV_Cody_6KKK.png | ||
|name=Prison Breaker | |name=Prison Breaker | ||
|anchor=yes | |||
|input=6KKK | |input=6KKK | ||
|data= | |data= | ||
Latest revision as of 20:48, 7 July 2023
Introduction
About Cody
First appearing in Final Fight, Cody Travers was once a hero of Metro City. But after he saved the day, his life took a dark turn, as he started getting in street fights just for fun. He was eventually arrested for his crimes, but would regularly break out to have some fun. In SFV, Mike Haggar exonerates Cody of his crimes, which leads to him becoming the new mayor of Metro City. Although he has a big responsibility to take care of, he always finds time to relive the glory days and get in some much more casual street brawls.
On surface level, Cody is a basic brawler with a decent projectile, anti air options, and setups. However, going beyond the surface reveals the dirty tricks behind this otherwise honest fighter. Cody has his fair share of weaknesses, as he struggles against projectiles, doesn't have great defense, and doesn't have amazing pressure, but Cody makes up for this by utilizing sneaky tactics like in days of old. Utilizing moves like EX Tornado Sweep and Zonk Knuckle to get in, two versatile V-Skills to keep your opponent guessing, and huge robbery factor with one of the strongest V-Triggers in the game, Cody has little trouble closing the gap between him and his target, and once he does, he dishes out damage and stun with great meaties and VT2 setups to take the round in a moment's notice. If you're ok with a character who lacks a bit in neutral and defense but can dish out damage and rob the game in the blink of an eye, give Cody a try.
| Strengths | Weaknesses |
|---|---|
|
|
Final Patch
Players to Watch
- Frost
- Hoji
- Kiske
- O.Crippler
- Packz
- Poifuru
- Rumours
- Shazyy
- Soundboi
- Shine
- Momochi
| Cody | |
|---|---|
| Vitals | |
| Life Points | 1025 |
| Stun Points | 1050 |
| V-Gauge Points | |
| V-Trigger 1 | 2 Bars |
| V-Trigger 2 | 2 Bars |
| Ground Movement | |
| Forward Walk Speed | 0.047 |
| Backward Walk Speed | 0.0289 |
| Forward Dash Speed | 17 |
| Backward Dash Speed | 23 |
| Forward Dash Distance | 1.279 |
| Backward Dash Distance | 0.842 |
| Backdash CH Frames | 3-13 |
| Jumping | |
| Back Jump Speed | 46(4+38+4) |
| Neutral Jump Speed | 46(4+38+4) |
| Forward Jump Speed | 45(3+38+4) |
| Forward Jump Distance | 2.128 |
| Backward Jump Distance | 1.824 |
| Throws | |
| Throw Hurtbox | 0.25 |
| Throw Range | 0.8 |
Frame Data & Descriptions are provided by FATOnline.
|
| SFV Frame Data Glossary | |
|---|---|
| Active |
How many frames a move remains active (can hurt opponents) for. |
| Attack |
Attack level is L for low attacks (must be blocked crouching), H is for High attacks (which can be blocked high or low) and M for overhead (must be blocked standing). T is for throw attacks (which cannot be blocked). |
| Cancel options |
Available cancel options.
|
| Confirm windows |
Hit confirm windows written as Specials & CAs/Target Combos/V-Trigger. Notation may denote V-Skill only cancel windows in Specials.
|
| Crush Counter |
Crush Counter hit advantage written as opponent state, frame advantage, and v-gauge gain on hit. |
| Damage |
Attack damage on hit. Notation may denote multi-hit or "sweet spot" damage values on certain frames. |
| Hit/Block |
These are frame advantage values when the attack hits or is blocked. If the number is positive, then the move will end before the defender can act again. If the number is negative, the defender will be able to act before the attacker and maybe even punish. KD refers to knockdown on hit.
|
| Knockdown |
Knockdown advantage against Normal, Quick Rise and Back Rise wake up options. |
| Recovery |
How many frames it takes for a move to finish after it's been active. |
| Startup |
How many frames it takes before the move becomes 'active' or have a hit box. The last startup frame and the first active frame are the same frame, meaning all values are written as Startup + 1. |
| Stun |
Amount of stun added to the opponent's stun bar on hit. |
Normals
5LP
5MP
5HP
5LK
5MK
5HK
2LP
2MP
2HP
2LK
2MK
2HK
8LP
8MP
8HP
8LK
8MK
8HK
Command Normals
6HP
6HK
8P (wake-up)
Target Combos
8MP > 8HP
8MK > 8LK
5LP > 5LP
5LP > 5LP > 5LP
5LP > 5LP > 5LP > 5LP
5LP > 5LP > 5LP > 2LP
6HK > MPMK (VS1)
6HK > MPMK (VS2)
Throws
LPLK
4LPLK
Special Moves
236LP
236MP
236HP
236PP
236LK
236MK
236HK
236KK
hold any punch button, release
hold any punch button, release
hold any 2 punch buttons, release
hold any 2 punch buttons, release
Critical Art
236236P
Taunts
5PPPKKK
V-System
V-Skill 1
MPMK (VS1)
V-Skill 2
MPMK (VS2)
2MPMK (VS2)
MPMK (VS2) > P
2MPMK (VS2) > K
V-Trigger 1
HPHK (VT1)
5MP > 5HP
5HPHK
2HPHK
5HPHK
214P
V-Trigger 2
HPHK (VT2)
HPHK
2HPHK
214P
HPHK > 214P
2HPHK > 214P
214P > HPHK (early)
214P > HPHK
214P > HPHK (late)
214P > 2HPHK
63214K > P
63214K > P (Just Frame)
63214K > 214P
63214K > P (JF) > 214P
63214K > P > 214P > HPHK
63214K > P > 214P > HPHK
63214K > P > 214P > HPHK
63214K > P > 214P > 2HPHK
63214K > P (JF) > 214P > HPHK
63214K > P (JF) > 214P > HPHK
63214K > P (JF) > 214P > HPHK
63214K > P (JF) > 214P > 2HPHK
HPHK (no V-Timer)
V-Shift
5MKHP
V-Shift Break
5MKHP
V-Reversal
6KKK

