No edit summary |
No edit summary |
||
| Line 6: | Line 6: | ||
=====<font style="visibility:hidden; float:right">5LP</font>===== | =====<font style="visibility:hidden; float:right">5LP</font>===== | ||
{{MoveDataCargo | {{MoveDataCargo | ||
| title = | | title = Standing Light Punch | ||
| subtitle = | | subtitle = | ||
| input = | | input = 5LP | ||
| images = | | images = | ||
{{MoveDataCargoImage|manon_5lp|caption=}} | {{MoveDataCargoImage|manon_5lp|caption=}} | ||
| Line 18: | Line 18: | ||
=====<font style="visibility:hidden; float:right">5MP</font>===== | =====<font style="visibility:hidden; float:right">5MP</font>===== | ||
{{MoveDataCargo | {{MoveDataCargo | ||
| title = | | title = Standing Medium Punch | ||
| subtitle = | | subtitle = | ||
| input = | | input = 5MP | ||
| images = | | images = | ||
{{MoveDataCargoImage|manon_5mp|caption=}} | {{MoveDataCargoImage|manon_5mp|caption=}} | ||
| Line 30: | Line 30: | ||
=====<font style="visibility:hidden; float:right">5HP</font>===== | =====<font style="visibility:hidden; float:right">5HP</font>===== | ||
{{MoveDataCargo | {{MoveDataCargo | ||
| title = | | title = Standing Heavy Punch | ||
| subtitle = | | subtitle = | ||
| input = | | input = 5HP | ||
| images = | | images = | ||
{{MoveDataCargoImage|manon_5hp|caption=}} | {{MoveDataCargoImage|manon_5hp|caption=}} | ||
| Line 42: | Line 42: | ||
=====<font style="visibility:hidden; float:right">5LK</font>===== | =====<font style="visibility:hidden; float:right">5LK</font>===== | ||
{{MoveDataCargo | {{MoveDataCargo | ||
| title = | | title = Standing Light Kick | ||
| subtitle = | | subtitle = | ||
| input = | | input = 5LK | ||
| images = | | images = | ||
{{MoveDataCargoImage|manon_5lk|caption=}} | {{MoveDataCargoImage|manon_5lk|caption=}} | ||
| Line 54: | Line 54: | ||
=====<font style="visibility:hidden; float:right">5MK</font>===== | =====<font style="visibility:hidden; float:right">5MK</font>===== | ||
{{MoveDataCargo | {{MoveDataCargo | ||
| title = | | title = Standing Medium Kick | ||
| subtitle = | | subtitle = | ||
| input = | | input = 5MK | ||
| images = | | images = | ||
{{MoveDataCargoImage|manon_5Mk|caption=}} | {{MoveDataCargoImage|manon_5Mk|caption=}} | ||
| Line 66: | Line 66: | ||
=====<font style="visibility:hidden; float:right">5HK</font>===== | =====<font style="visibility:hidden; float:right">5HK</font>===== | ||
{{MoveDataCargo | {{MoveDataCargo | ||
| title = | | title = Standing Heavy Kick | ||
| subtitle = | | subtitle = | ||
| input = | | input = 5HK | ||
| images = | | images = | ||
{{MoveDataCargoImage|imageHeight=200px|manon_5Hk|caption=}} | {{MoveDataCargoImage|imageHeight=200px|manon_5Hk|caption=}} | ||
| Line 79: | Line 79: | ||
=====<font style="visibility:hidden; float:right">2LP</font>===== | =====<font style="visibility:hidden; float:right">2LP</font>===== | ||
{{MoveDataCargo | {{MoveDataCargo | ||
| title = | | title = Crouching Light Punch | ||
| subtitle = | | subtitle = | ||
| input = | | input = 2LP | ||
| images = | | images = | ||
{{MoveDataCargoImage|manon_2lp|caption=}} | {{MoveDataCargoImage|manon_2lp|caption=}} | ||
| Line 91: | Line 91: | ||
=====<font style="visibility:hidden; float:right">2MP</font>===== | =====<font style="visibility:hidden; float:right">2MP</font>===== | ||
{{MoveDataCargo | {{MoveDataCargo | ||
| title = | | title = Crouching Medium Punch | ||
| subtitle = | | subtitle = | ||
| input = | | input = 2MP | ||
| images = | | images = | ||
{{MoveDataCargoImage|manon_2mp|caption=}} | {{MoveDataCargoImage|manon_2mp|caption=}} | ||
| Line 103: | Line 103: | ||
=====<font style="visibility:hidden; float:right">2HP</font>===== | =====<font style="visibility:hidden; float:right">2HP</font>===== | ||
{{MoveDataCargo | {{MoveDataCargo | ||
| title = | | title = Crouching Heavy Punch | ||
| subtitle = | | subtitle = | ||
| input = | | input = 2HP | ||
| images = | | images = | ||
{{MoveDataCargoImage|imageHeight=200px|manon_2hp|caption=}} | {{MoveDataCargoImage|imageHeight=200px|manon_2hp|caption=}} | ||
| Line 115: | Line 115: | ||
=====<font style="visibility:hidden; float:right">2LK</font>===== | =====<font style="visibility:hidden; float:right">2LK</font>===== | ||
{{MoveDataCargo | {{MoveDataCargo | ||
| title = | | title = Crouching Light Kick | ||
| subtitle = | | subtitle = | ||
| input = | | input = 2LK | ||
| images = | | images = | ||
{{MoveDataCargoImage|manon_2lk|caption=}} | {{MoveDataCargoImage|manon_2lk|caption=}} | ||
| Line 127: | Line 127: | ||
=====<font style="visibility:hidden; float:right">2MK</font>===== | =====<font style="visibility:hidden; float:right">2MK</font>===== | ||
{{MoveDataCargo | {{MoveDataCargo | ||
| title = | | title = Crouching Medium Kick | ||
| subtitle = | | subtitle = | ||
| input = | | input = 2MK | ||
| images = | | images = | ||
{{MoveDataCargoImage|manon_2mk|caption=}} | {{MoveDataCargoImage|manon_2mk|caption=}} | ||
| Line 138: | Line 138: | ||
=====<font style="visibility:hidden; float:right">2HK</font>===== | =====<font style="visibility:hidden; float:right">2HK</font>===== | ||
{{MoveDataCargo | {{MoveDataCargo | ||
| title = | | title = Crouching Heavy Kick | ||
| subtitle = | | subtitle = | ||
| input = | | input = 2HK | ||
| images = | | images = | ||
{{MoveDataCargoImage|manon_2hk|caption=}} | {{MoveDataCargoImage|manon_2hk|caption=}} | ||
| Line 150: | Line 150: | ||
=====<font style="visibility:hidden; float:right">j.LP</font>===== | =====<font style="visibility:hidden; float:right">j.LP</font>===== | ||
{{MoveDataCargo | {{MoveDataCargo | ||
| title = | | title = Jumping Light Punch | ||
| subtitle = | | subtitle = | ||
| input = | | input = j.LP | ||
| images = | | images = | ||
{{MoveDataCargoImage|imageHeight=200px|manon_jlp|caption=}} | {{MoveDataCargoImage|imageHeight=200px|manon_jlp|caption=}} | ||
| Line 161: | Line 161: | ||
=====<font style="visibility:hidden; float:right">j.MP</font>===== | =====<font style="visibility:hidden; float:right">j.MP</font>===== | ||
{{MoveDataCargo | {{MoveDataCargo | ||
| title = | | title = Jumping Medium Punch | ||
| subtitle = | | subtitle = | ||
| input = | | input = j.MP | ||
| images = | | images = | ||
{{MoveDataCargoImage|imageHeight=200px|manon_jmp|caption=}} | {{MoveDataCargoImage|imageHeight=200px|manon_jmp|caption=}} | ||
| Line 172: | Line 172: | ||
=====<font style="visibility:hidden; float:right">j.HP</font>===== | =====<font style="visibility:hidden; float:right">j.HP</font>===== | ||
{{MoveDataCargo | {{MoveDataCargo | ||
| title = | | title = Jumping Heavy Punch | ||
| subtitle = | | subtitle = | ||
| input = | | input = j.HP | ||
| images = | | images = | ||
{{MoveDataCargoImage|manon_jhp|caption=}} | {{MoveDataCargoImage|manon_jhp|caption=}} | ||
| Line 183: | Line 183: | ||
=====<font style="visibility:hidden; float:right">j.LK</font>===== | =====<font style="visibility:hidden; float:right">j.LK</font>===== | ||
{{MoveDataCargo | {{MoveDataCargo | ||
| title = | | title = Jumping Light Kick | ||
| subtitle = | | subtitle = | ||
| input = | | input = j.LK | ||
| images = | | images = | ||
{{MoveDataCargoImage|imageHeight=200px|manon_jlk|caption=}} | {{MoveDataCargoImage|imageHeight=200px|manon_jlk|caption=}} | ||
| Line 194: | Line 194: | ||
=====<font style="visibility:hidden; float:right">j.MK</font>===== | =====<font style="visibility:hidden; float:right">j.MK</font>===== | ||
{{MoveDataCargo | {{MoveDataCargo | ||
| title = | | title = Jumping Medium Kick | ||
| subtitle = | | subtitle = | ||
| input = | | input = j.MK | ||
| images = | | images = | ||
{{MoveDataCargoImage|manon_jmk|caption=}} | {{MoveDataCargoImage|manon_jmk|caption=}} | ||
| Line 205: | Line 205: | ||
=====<font style="visibility:hidden; float:right">j.HK</font>===== | =====<font style="visibility:hidden; float:right">j.HK</font>===== | ||
{{MoveDataCargo | {{MoveDataCargo | ||
| title = | | title = Jumping Heavy Kick | ||
| subtitle = | | subtitle = | ||
| input = | | input = j.HK | ||
| images = | | images = | ||
{{MoveDataCargoImage|manon_jhk|caption=}} | {{MoveDataCargoImage|manon_jhk|caption=}} | ||
| Line 215: | Line 215: | ||
== Command Normals == | == Command Normals == | ||
== Target Combos == | == Target Combos == | ||
== Universal Mechanics == | == Universal Mechanics == | ||
=== Throws === | === Throws === | ||
=====<font style="visibility:hidden; float:right">Throw</font>===== | =====<font style="visibility:hidden; float:right">Forward Throw (LPLK)</font>===== | ||
{{MoveDataCargo | {{MoveDataCargo | ||
| title = Throw | | title = Throw | ||
| subtitle = | | subtitle = | ||
| input = | | input = LPLK | ||
| images = | | images = | ||
{{MoveDataCargoImage|manon_lplk|caption=}} | {{MoveDataCargoImage|manon_lplk|caption=}} | ||
| Line 230: | Line 232: | ||
}} | }} | ||
=====<font style="visibility:hidden; float:right">Back Throw</font>===== | =====<font style="visibility:hidden; float:right">Back Throw (4LPLK)</font>===== | ||
{{MoveDataCargo | {{MoveDataCargo | ||
| title = Back Throw | | title = Back Throw | ||
| subtitle = | | subtitle = | ||
| input = | | input = 4LPLK | ||
| images = | | images = | ||
{{MoveDataCargoImage|manon_4lplk|caption=}} | {{MoveDataCargoImage|manon_4lplk|caption=}} | ||
| Line 243: | Line 245: | ||
=== Drive Moves === | === Drive Moves === | ||
=====<font style="visibility:hidden; float:right">Drive Impact</font>===== | =====<font style="visibility:hidden; float:right">Drive Impact (HPHK)</font>===== | ||
{{MoveDataCargo | {{MoveDataCargo | ||
| title = Drive Impact | | title = Drive Impact | ||
| subtitle = | | subtitle = | ||
| input = | | input = HPHK | ||
| images = | | images = | ||
{{MoveDataCargoImage|manon_hphk|caption=}} | {{MoveDataCargoImage|manon_hphk|caption=}} | ||
| Line 255: | Line 257: | ||
}} | }} | ||
=====<font style="visibility:hidden; float:right">Drive Reversal</font>===== | =====<font style="visibility:hidden; float:right">Drive Reversal (6HPHK)</font>===== | ||
{{MoveDataCargo | {{MoveDataCargo | ||
| title = Drive Reversal | | title = Drive Reversal | ||
| subtitle = | | subtitle = | ||
| input = | | input = 6HPHK (in blockstun) | ||
| images = | | images = | ||
{{MoveDataCargoImage|manon_6hphk|caption=}} | {{MoveDataCargoImage|manon_6hphk|caption=}} | ||
| Line 267: | Line 269: | ||
}} | }} | ||
=====<font style="visibility:hidden; float:right">Drive | =====<font style="visibility:hidden; float:right">Drive Parry</font>===== | ||
{{MoveDataCargo | {{MoveDataCargo | ||
| title = Drive | | title = Drive Parry | ||
| subtitle = | | subtitle = | ||
| input = | | input = MPMK | ||
| images = | | images = | ||
{{MoveDataCargoImage|imageHeight=200px| | {{MoveDataCargoImage|imageHeight=200px|manon_mpmk|caption=}} | ||
| info = | | info = | ||
{{AttackDataCargo-SF6/Query| | {{AttackDataCargo-SF6/Query|manon_mpmk}} | ||
See [[Street_Fighter_6/Gauges# | See [[Street_Fighter_6/Gauges#Drive_Parry|Drive Parry]]. Perfect Parrying has only 1F of recovery and disables the opponent from canceling their attack. Perfect Parrying projectiles puts you into fixed 11 frames of recovery. | ||
}} | }} | ||
=====<font style="visibility:hidden; float:right">Drive | =====<font style="visibility:hidden; float:right">Drive Rush</font>===== | ||
{{MoveDataCargo | {{MoveDataCargo | ||
| title = Drive | | title = Drive Rush | ||
| subtitle = | | subtitle = | ||
| input = | | input = 66 | ||
| images = | | images = | ||
{{MoveDataCargoImage|imageHeight=200px| | {{MoveDataCargoImage|imageHeight=200px|manon_66|caption=}} | ||
| info = | | info = | ||
{{AttackDataCargo-SF6/Query| | {{AttackDataCargo-SF6/Query|manon_66}} | ||
See [[Street_Fighter_6/Gauges# | See [[Street_Fighter_6/Gauges#Drive_Rush|Drive Rush]]. Framedata shown in parentheses refers to the Drive Rush version used from a Parry. | ||
}} | }} | ||
=== Taunts === | === Taunts === | ||
=====<font style="visibility:hidden; float:right">Taunt</font>===== | =====<font style="visibility:hidden; float:right">Neutral Taunt (5PPPKKK)</font>===== | ||
{{MoveDataCargo | {{MoveDataCargo | ||
| title = Neutral Taunt | | title = Neutral Taunt | ||
| Line 301: | Line 303: | ||
| info = | | info = | ||
{{AttackDataCargo-SF6/Query|manon_5pppkkk}} | {{AttackDataCargo-SF6/Query|manon_5pppkkk}} | ||
}} | }} | ||
=====<font style="visibility:hidden; float:right">Forward Taunt (6PPPKKK)</font>===== | |||
=====<font style="visibility:hidden; float:right">Forward Taunt</font>===== | |||
{{MoveDataCargo | {{MoveDataCargo | ||
| title = Forward Taunt | | title = Forward Taunt | ||
| Line 314: | Line 314: | ||
{{AttackDataCargo-SF6/Query|manon_6pppkkk}} | {{AttackDataCargo-SF6/Query|manon_6pppkkk}} | ||
}} | }} | ||
=====<font style="visibility:hidden; float:right">Back Taunt (4PPPKKK)</font>===== | |||
=====<font style="visibility:hidden; float:right">Back Taunt</font>===== | |||
{{MoveDataCargo | {{MoveDataCargo | ||
| title = Back Taunt | | title = Back Taunt | ||
| Line 327: | Line 326: | ||
== Special Moves == | == Special Moves == | ||
=====<font style="visibility:hidden; float:right">236P</font>===== | =====<font style="visibility:hidden; float:right">Move Name (236P)</font>===== | ||
{{MoveDataCargo | {{MoveDataCargo | ||
| title = Placeholder | | title = Placeholder | ||
| subtitle = | | subtitle = | ||
| input = | | input = 236P | ||
| images = | | images = | ||
{{MoveDataCargoImage|imageHeight=200px|manon_|caption=}} | {{MoveDataCargoImage|imageHeight=200px|manon_|caption=}} | ||
| Line 344: | Line 343: | ||
== Super Arts == | == Super Arts == | ||
=====<font style="visibility:hidden; float:right">236236P</font>===== | =====<font style="visibility:hidden; float:right">Level 1 Super (236236P)</font>===== | ||
{{MoveDataCargo | {{MoveDataCargo | ||
| title = | | title = | ||
| Line 356: | Line 355: | ||
}} | }} | ||
=====<font style="visibility:hidden; float:right">214214P</font>===== | =====<font style="visibility:hidden; float:right">Level 2 Super (214214P)</font>===== | ||
{{MoveDataCargo | {{MoveDataCargo | ||
| title = | | title = | ||
| Line 368: | Line 367: | ||
}} | }} | ||
=====<font style="visibility:hidden; float:right"> | =====<font style="visibility:hidden; float:right">Level 3 Super ()</font>===== | ||
{{MoveDataCargo | {{MoveDataCargo | ||
| title = | | title = | ||
Revision as of 05:25, 9 January 2023
| Pre-release information
This page is under construction based on pre-release data. Join the SF6 Resource Hub for info on editing. |
Introduction
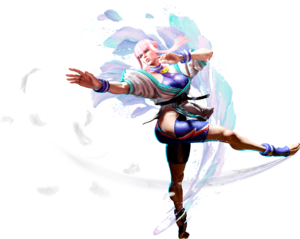
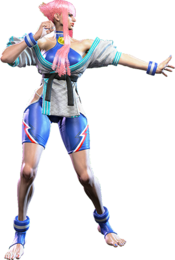
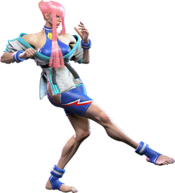
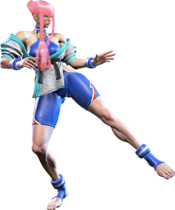
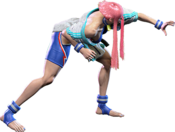
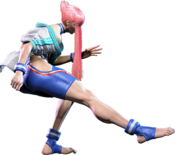
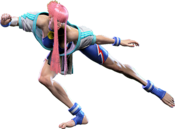
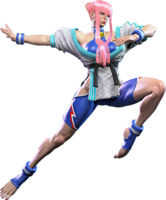
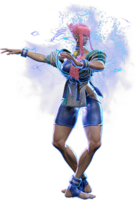
A super model and world champion judoka, Manon is an idealist, forever seeking self-improvement in the pursuit of beauty. She struts the catwalk of street fighting to become the world's strongest model.
Manon's distinct playstyle features center around long, far reaching normals that control the opponent's position and enhance her strike/throw game, mixed with command throws that scale up in damage every time she manages to hit with them, which gives her a lot of power once she has the momentum.
The centerpoint of Manon's gameplan is based on medals. Landing her Manège Doré command throw or her Renversé hitgrab will grant her an additional medal, up to a maximum of 5. Each medal gained increases the damage of both these moves by a notable amount, and also increases the damage of her Level 3 Super Art, Pas de Deux; Manège Doré itself becomes one of the strongest command grabs in the game if Manon manages to hit 5 medals. Additionally, these medals are carried over between rounds, giving Manon incredible potential to mount powerful comebacks and dominate a match-point game with a well-placed Manège Doré or Pas de Deux; this is especially dangerous when Manon has enough Drive Meter to go for a Drive Rush Manège Doré, as its effective range increases drastically when used this way.
To complement these two moves and her medal system, Manon's long limbs let her play a strong mid-range game to poke and prod the opponent, with quite a few of her grounded and jumping normals having long reach, and several moves having target combo follow-ups that pull the opponent in or otherwise reposition them for Manon to throw them. Many of her special moves and even a few of her Super Arts are also built for callouts or helping Manon to maneuver past tricky situations; Renversé can be feinted for projectile invulnerability, or canceled into a fairly far reaching kick that retains a little of that invulnerability too. She can also use Dégagé to either duck under attacks with the light version, use the medium version punish opponents at long range or end combos, or go for an advancing overhead with the heavy and Overdrive versions. Her 2HP is one of her moves with a target combo follow-up, allowing her to turn anti-air situations to her advantage by dropping the opponent right in front of her, and both her Level 1 and Level 2 Super Arts (Arabesque and Étoile) function as powerful reversals for the ground and against air attacks respectively.
Manon mainly struggles if she lacks Drive Meter, as many of her strongest conversions and pokes or oki setups may require her to Drive Rush Cancel her normals in order to be a threat. Some of her neutral tools also have noticeable recovery windows in exchange for their speed and reach, meaning that a wary opponent can punish her for them if they make the right call on what she's going to do; this is especially true when trying to land Manège Doré, as it has a notable recovery time on whiff. If you like to dance around opponents and see them fly through the sky, then pirouette into place with Manon.
| Pick if you like: | Avoid if you dislike: |
|---|---|
|
|
Classic & Modern Versions Comparison
| Missing Normals |
|
|---|---|
| Missing Command Normals |
|
| Shortcut-Only Specials |
|
| Assist Combos |
|
| Miscellaneous Changes |
|
Patch History
1.05
|
1.04
|
1.02
|
| Manon | |
|---|---|
| Vitals | |
| Life Points | 10000 |
| Ground Movement | |
| Forward Walk Speed | 0.0452 |
| Backward Walk Speed | 0.031 |
| Forward Dash Speed | 21 |
| Backward Dash Speed | 25 |
| Forward Dash Distance | 1.499 |
| Backward Dash Distance | 1.254 |
| Drive Rush Min. Distance (Throw) | 0.506 |
| Drive Rush Min. Distance (Block) | 1.417 |
| Drive Rush Max Distance | 2.347 |
| Jumping | |
| Jump Speed | 4+38+3 |
| Jump Apex | 2.115 |
| Forward Jump Distance | 1.90 |
| Backward Jump Distance | 1.52 |
| Throws | |
| Throw Range | 0.8 |
| Throw Hurtbox | 0.33 |
Normals
Standing Normals
5LP
| Startup | Active | Recovery | Cancel | Damage | Guard | On Hit | On Block |
|---|---|---|---|---|---|---|---|
| 4 | 3 | 10 | Chn Sp SA | 300 | LH | +4 | -1 |
5MP
| Startup | Active | Recovery | Cancel | Damage | Guard | On Hit | On Block |
|---|---|---|---|---|---|---|---|
| 7 | 4 | 14 | Sp SA TC | 600 | LH | +2 | -1 |
5HP
| Startup | Active | Recovery | Cancel | Damage | Guard | On Hit | On Block |
|---|---|---|---|---|---|---|---|
| 10 | 4 | 20 | SA TC | 800 | LH | 0 | -3 |
5LK
| Startup | Active | Recovery | Cancel | Damage | Guard | On Hit | On Block |
|---|---|---|---|---|---|---|---|
| 5 | 2 | 12 | Sp SA | 300 | LH | +2 | -2 |
5MK
| Startup | Active | Recovery | Cancel | Damage | Guard | On Hit | On Block |
|---|---|---|---|---|---|---|---|
| 10 | 3 | 18 | Sp SA | 600 | LH | -2 | -5 |
5HK
| Startup | Active | Recovery | Cancel | Damage | Guard | On Hit | On Block |
|---|---|---|---|---|---|---|---|
| 15 | 3 | 23(26) | - | 900 | LH | +1 | -6 |
Crouching Normals
2LP
| Startup | Active | Recovery | Cancel | Damage | Guard | On Hit | On Block |
|---|---|---|---|---|---|---|---|
| 4 | 2 | 11 | Chn Sp SA | 300 | LH | +3 | -2 |
2MP
| Startup | Active | Recovery | Cancel | Damage | Guard | On Hit | On Block |
|---|---|---|---|---|---|---|---|
| 7 | 3 | 11(13) | Sp SA | 600 | LH | +6 | -1 |
2HP
| Startup | Active | Recovery | Cancel | Damage | Guard | On Hit | On Block |
|---|---|---|---|---|---|---|---|
| 10 | 5 | 21 | TC | 600 | LH | -2 | -8 |
2LK
| Startup | Active | Recovery | Cancel | Damage | Guard | On Hit | On Block |
|---|---|---|---|---|---|---|---|
| 5 | 2 | 13 | Chn | 200 | L | -1 | -5 |
2MK
| Startup | Active | Recovery | Cancel | Damage | Guard | On Hit | On Block |
|---|---|---|---|---|---|---|---|
| 8 | 4 | 16 | - | 600 | L | +3 | -2 |
2HK
| Startup | Active | Recovery | Cancel | Damage | Guard | On Hit | On Block |
|---|---|---|---|---|---|---|---|
| 11 | 2 | 27 | - | 900 | L | HKD +29 | -12 |
Jumping Normals
j.LP
| Startup | Active | Recovery | Cancel | Damage | Guard | On Hit | On Block |
|---|---|---|---|---|---|---|---|
| 5 | 10 | 3 land | - | 300 | H | +5(+9) | +1(+5) |
j.MP
| Startup | Active | Recovery | Cancel | Damage | Guard | On Hit | On Block |
|---|---|---|---|---|---|---|---|
| 8 | 4 | 3 land | - | 700 | H | +9(+11) | +5(+7) |
j.HP
| Startup | Active | Recovery | Cancel | Damage | Guard | On Hit | On Block |
|---|---|---|---|---|---|---|---|
| 9 | 4 | 3 land | - | 800 | H | +8(+15) | +4(+11) |
j.LK
| Startup | Active | Recovery | Cancel | Damage | Guard | On Hit | On Block |
|---|---|---|---|---|---|---|---|
| 6 | 9 | 3 land | - | 300 | H | +3(+10) | -1(+6) |
j.MK
| Startup | Active | Recovery | Cancel | Damage | Guard | On Hit | On Block |
|---|---|---|---|---|---|---|---|
| 7 | 6 | 3 land | - | 500 | H | +8(+13) | +4(+9) |
j.HK
Command Normals
Target Combos
Universal Mechanics
Throws
Forward Throw (LPLK)
| Startup | Active | Recovery | Cancel | Damage | Guard | On Hit | On Block |
|---|---|---|---|---|---|---|---|
| 5 | 3 | 23 | - | 1200 (2040) | T | KD +16 | - |
Back Throw (4LPLK)
| Startup | Active | Recovery | Cancel | Damage | Guard | On Hit | On Block |
|---|---|---|---|---|---|---|---|
| 5 | 3 | 23 | - | 1200 (2040) | T | KD +18 | - |
Drive Moves
Drive Impact (HPHK)
| Startup | Active | Recovery | Cancel | Damage | Guard | On Hit | On Block |
|---|---|---|---|---|---|---|---|
| 26 | 2 | 35 | - | 800 | LH | KD +35 / Wall Splat KD +65 | -3 / Wall Splat HKD +72 |
See Drive Impact.
Drive Reversal (6HPHK)
| Startup | Active | Recovery | Cancel | Damage | Guard | On Hit | On Block |
|---|---|---|---|---|---|---|---|
| 20 | 3 | 26(31) | - | 500 recoverable | LH | KD +23 | -6 |
Armor Break; See Drive Reversal.
Drive Parry
| Startup | Active | Recovery | Cancel | Damage | Guard | On Hit | On Block |
|---|---|---|---|---|---|---|---|
| 1 | 12 or until released | 33(1)(11) | - | - | - | - | - |
See Drive Parry. Perfect Parrying has only 1F of recovery and disables the opponent from canceling their attack. Perfect Parrying projectiles puts you into fixed 11 frames of recovery.
Drive Rush
No results
See Drive Rush. Framedata shown in parentheses refers to the Drive Rush version used from a Parry.
Taunts
Neutral Taunt (5PPPKKK)
| Startup | Active | Recovery | Cancel | Damage | Guard | On Hit | On Block |
|---|---|---|---|---|---|---|---|
| 252 (total) | - | - | - | - | - | - | - |
Forward Taunt (6PPPKKK)
| Startup | Active | Recovery | Cancel | Damage | Guard | On Hit | On Block |
|---|---|---|---|---|---|---|---|
| 364 (total) | - | - | - | - | - | - | - |
Back Taunt (4PPPKKK)
Special Moves
Move Name (236P)
No results
No results No results No results
Super Arts
Level 1 Super (236236P)
No results
Level 2 Super (214214P)
No results
Level 3 Super ()
CA version grants 500 extra damage
No results
No results
