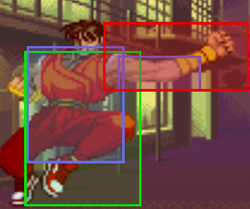
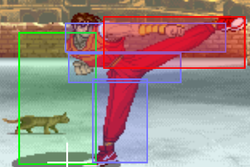
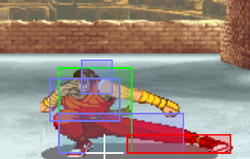
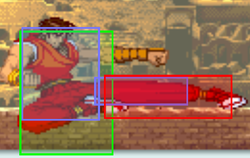
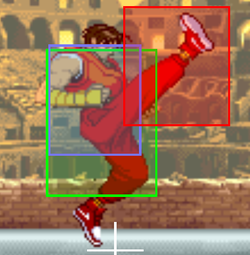
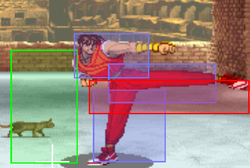
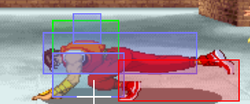
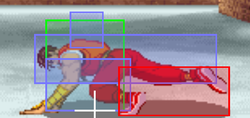
m (→Command Moves) |
m (→Introduction) |
||
| (30 intermediate revisions by the same user not shown) | |||
| Line 13: | Line 13: | ||
+ Roll punish is extremely good and does high stun and damage | + Roll punish is extremely good and does high stun and damage | ||
+ has the Second best Forward walkspeed in the game Tied with Charlie and Chun | |||
-Alot of his anti airs aim at the same spot | -Alot of his anti airs aim at the same spot | ||
| Line 27: | Line 29: | ||
|data= | |data= | ||
{{AttackData-Alpha2 | {{AttackData-Alpha2 | ||
|Damage= | |Damage= 7 | ||
|Stun= 1 | |Stun= 1 | ||
|Startup= 2 | |Startup= 2 | ||
|Frame Adv= | |Frame Adv= +5 | ||
|Block=[[File:Mid.png]] | |Block=[[File:Mid.png]] | ||
|Properties=[[File:Rpdfire.png]]<br>[[File:Specialcancel.png]]<br>[[File:Supercancel.png]] | |Properties=[[File:Rpdfire.png]]<br>[[File:Specialcancel.png]]<br>[[File:Supercancel.png]] | ||
| Line 44: | Line 46: | ||
|data= | |data= | ||
{{AttackData-Alpha2 | {{AttackData-Alpha2 | ||
|Damage= | |Damage= 7 | ||
|Stun= | |Stun= 1 | ||
|Startup= 2 | |Startup= 2 | ||
|Frame Adv= | |Frame Adv= +5 | ||
|Block=[[File:Low.png]] | |Block=[[File:Low.png]] | ||
|Properties=[[File:Specialcancel.png]]<br>[[File:Supercancel.png]] | |Properties=[[File:Specialcancel.png]]<br>[[File:Supercancel.png]] | ||
| Line 59: | Line 61: | ||
|caption= | |caption= | ||
|name=dj.[[File:Lp.png]] | |name=dj.[[File:Lp.png]] | ||
|data= | |||
{{AttackData-Alpha2 | |||
|Damage= 8 | |||
|Stun= 3 | |||
|Startup= 2 | |||
|Frame Adv= | |||
|Block=[[File:High.png]] | |||
|Properties= | |||
|description= | |||
}} | |||
}} | |||
{{MoveData | |||
|image=A1 Guy NJ.LP.png | |||
|imageSize=250px | |||
|caption= | |||
|name=Nj.[[File:Lp.png]] | |||
|data= | |data= | ||
{{AttackData-Alpha2 | {{AttackData-Alpha2 | ||
| Line 78: | Line 97: | ||
|data= | |data= | ||
{{AttackData-Alpha2 | {{AttackData-Alpha2 | ||
|Damage= | |Damage= 11-13 | ||
|Stun= | |Stun= 3 | ||
|Startup= 3 | |Startup= 3 | ||
|Frame Adv= | |Frame Adv= +3 | ||
|Block=[[File:Mid.png]] | |Block=[[File:Mid.png]] | ||
|Properties=[[File:Specialcancel.png]] | |Properties=[[File:Specialcancel.png]]<br>[[File:Supercancel.png]] | ||
|description=Great hitbox and chains from almost everything which will then chain into stand HK | |description=Great hitbox and chains from almost everything which will then chain into stand HK | ||
}} | }} | ||
| Line 95: | Line 114: | ||
|data= | |data= | ||
{{AttackData-Alpha2 | {{AttackData-Alpha2 | ||
|Damage= | |Damage= 11-13 | ||
|Stun= | |Stun= 6 | ||
|Startup= 4 | |Startup= 4 | ||
|Frame Adv= | |Frame Adv= +3 | ||
|Block=[[File:Mid.png]] | |Block=[[File:Mid.png]] | ||
|Properties=[[File:Specialcancel.png]]<br>[[File:Supercancel.png]] | |Properties=[[File:Specialcancel.png]]<br>[[File:Supercancel.png]] | ||
| Line 112: | Line 131: | ||
|data= | |data= | ||
{{AttackData-Alpha2 | {{AttackData-Alpha2 | ||
|Damage= | |Damage= 12-14 | ||
|Stun= | |Stun= 6 | ||
|Startup= | |Startup= 2 | ||
|Frame Adv= | |Frame Adv= | ||
|Block=[[File:High.png]] | |Block=[[File:High.png]] | ||
| Line 129: | Line 148: | ||
|data= | |data= | ||
{{AttackData-Alpha2 | {{AttackData-Alpha2 | ||
|Damage= | |Damage= 11-13 | ||
|Stun= | |Stun= 6 | ||
|Startup= | |Startup= 2 | ||
|Frame Adv= | |Frame Adv= | ||
|Block=[[File:High.png]] | |Block=[[File:High.png]] | ||
| Line 146: | Line 165: | ||
|data= | |data= | ||
{{AttackData-Alpha2 | {{AttackData-Alpha2 | ||
|Damage= | |Damage=15-19 | ||
|Stun= | |Stun= 8 | ||
|Startup= 3 | |Startup= 3 | ||
|Frame Adv= | |Frame Adv= -2 | ||
|Block=[[File:Mid.png]] | |Block=[[File:Mid.png]] | ||
|Properties=[[File:Specialcancel.png]]<br>[[File:supercancel.png]] | |Properties=[[File:Specialcancel.png]]<br>[[File:supercancel.png]] | ||
| Line 163: | Line 182: | ||
|data= | |data= | ||
{{AttackData-Alpha2 | {{AttackData-Alpha2 | ||
|Damage= | |Damage=15-19 | ||
|Stun= | |Stun= 8 | ||
|Startup=3 | |Startup=3 | ||
|Frame Adv= | |Frame Adv= -2 | ||
|Block=[[File:Mid.png]] | |Block=[[File:Mid.png]] | ||
|Properties=[[File:Specialcancel.png]]<br>[[File:Supercancel.png]] | |Properties=[[File:Specialcancel.png]]<br>[[File:Supercancel.png]] | ||
| Line 178: | Line 197: | ||
|caption= | |caption= | ||
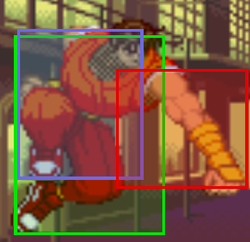
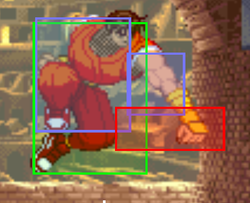
|name=dj.[[File:Hp.png]] | |name=dj.[[File:Hp.png]] | ||
|data= | |||
{{AttackData-Alpha2 | |||
|Damage= 15-19 | |||
|Stun= 8 | |||
|Startup= 5 | |||
|Frame Adv= | |||
|Block=[[File:High.png]] | |||
|Properties= | |||
|description= | |||
}} | |||
}} | |||
{{MoveData | |||
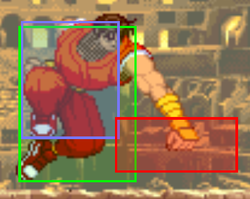
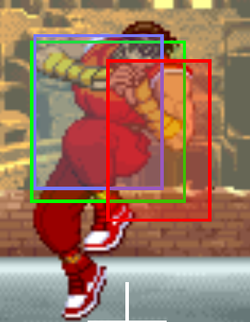
|image=A1 Guy Nj.HP.png | |||
|imageSize=250px | |||
|caption= | |||
|name=Nj.[[File:Hp.png]] | |||
|data= | |data= | ||
{{AttackData-Alpha2 | {{AttackData-Alpha2 | ||
| Line 189: | Line 225: | ||
}} | }} | ||
}} | }} | ||
{{MoveData | {{MoveData | ||
| Line 198: | Line 233: | ||
|data= | |data= | ||
{{AttackData-Alpha2 | {{AttackData-Alpha2 | ||
|Damage= | |Damage= 7 | ||
|Stun= | |Stun= 3 | ||
|Startup= 3 | |Startup= 3 | ||
|Frame Adv= | |Frame Adv= -5 | ||
|Block=[[File:Mid.png]] | |Block=[[File:Mid.png]] | ||
|Properties=[[File:Specialcancel.png]] | |Properties=[[File:Specialcancel.png]]<br>[[File:Supercancel.png]] | ||
|description= | |description= | ||
}} | }} | ||
| Line 215: | Line 250: | ||
|data= | |data= | ||
{{AttackData-Alpha2 | {{AttackData-Alpha2 | ||
|Damage= | |Damage= 7 | ||
|Stun= 3 | |Stun= 3 | ||
|Startup= 3 | |Startup= 3 | ||
|Frame Adv= | |Frame Adv= +3 | ||
|Block=[[File:Low.png]] | |Block=[[File:Low.png]] | ||
|Properties=[[File:Specialcancel.png]] | |Properties=[[File:Specialcancel.png]]<br>[[File:Supercancel.png]] | ||
|description=Due to the fact this does 3 stun and actually chains unlike crouch jab This move leads to his best roll punish combos And is a great starter Always chain to stand mp. | |description=Due to the fact this does 3 stun and actually chains unlike crouch jab This move leads to his best roll punish combos And is a great starter Always chain to stand mp. | ||
}} | }} | ||
}} | }} | ||
{{MoveData | {{MoveData | ||
| Line 233: | Line 267: | ||
|data= | |data= | ||
{{AttackData-Alpha2 | {{AttackData-Alpha2 | ||
|Damage= | |Damage= 10 | ||
|Stun= | |Stun= 3 | ||
|Startup= | |Startup= 4 | ||
|Frame Adv= | |Frame Adv= | ||
|Block=[[File:High.png]] | |Block=[[File:High.png]] | ||
| Line 250: | Line 284: | ||
|data= | |data= | ||
{{AttackData-Alpha2 | {{AttackData-Alpha2 | ||
|Damage= | |Damage= 11 | ||
|Stun= | |Stun= 3 | ||
|Startup= | |Startup= 1 | ||
|Frame Adv= | |Frame Adv= | ||
|Block=[[File:High.png]] | |Block=[[File:High.png]] | ||
| Line 270: | Line 304: | ||
|Stun= 6 | |Stun= 6 | ||
|Startup= 4 | |Startup= 4 | ||
|Frame Adv= | |Frame Adv= -5 | ||
|Block=[[File:Mid.png]] | |Block=[[File:Mid.png]] | ||
|Properties=[[File:Specialcancel.png]] | |Properties=[[File:Specialcancel.png]]<br>[[File:Supercancel.png]] | ||
|description= Unlike A2 you can | |description= Unlike A2 you can cancel this poke making it a great mid range option That goes right into slide | ||
}} | }} | ||
}} | }} | ||
| Line 286: | Line 320: | ||
|data= | |data= | ||
{{AttackData-Alpha2 | {{AttackData-Alpha2 | ||
|Damage= | |Damage= 11-13,1-3 | ||
|Stun=3 | |Stun= 3,3 | ||
|Startup= 4 | |Startup= 4 | ||
|Frame Adv= | |Frame Adv= -8,-2 | ||
|Block=[[File:Low.png]] | |Block=[[File:Low.png]] | ||
|Properties=[[File:Specialcancel.png]]<br>[[File:Supercancel.png]] | |Properties=[[File:Specialcancel.png]]<br>[[File:Supercancel.png]] | ||
| Line 303: | Line 337: | ||
|data= | |data= | ||
{{AttackData-Alpha2 | {{AttackData-Alpha2 | ||
|Damage= | |Damage= 11-13 | ||
|Stun= | |Stun= 6 | ||
|Startup= | |Startup= 3 | ||
|Frame Adv= | |Frame Adv= | ||
|Block=[[File:High.png]] | |Block=[[File:High.png]] | ||
| Line 320: | Line 354: | ||
|data= | |data= | ||
{{AttackData-Alpha2 | {{AttackData-Alpha2 | ||
|Damage= | |Damage= 11-13 | ||
|Stun= | |Stun= 6 | ||
|Startup= | |Startup= 3 | ||
|Frame Adv= | |Frame Adv= | ||
|Block=[[File:High.png]] | |Block=[[File:High.png]] | ||
| Line 337: | Line 371: | ||
|data= | |data= | ||
{{AttackData-Alpha2 | {{AttackData-Alpha2 | ||
|Damage= | |Damage=15-19 | ||
|Stun= | |Stun= 8 | ||
|Startup= 8 | |Startup= 8 | ||
|Frame Adv= | |Frame Adv= +8 | ||
|Block=[[File:Mid.png]] | |Block=[[File:Mid.png]] | ||
|Properties= | |Properties= | ||
| Line 354: | Line 388: | ||
|data= | |data= | ||
{{AttackData-Alpha2 | {{AttackData-Alpha2 | ||
|Damage= | |Damage=11-15,2-5(far) | ||
|Stun= | |Stun=8,3(far) | ||
|Startup=1 | |Startup=1 | ||
|Frame Adv= | |Frame Adv= -8 to +2 depending on range | ||
|Block=[[File:Low.png]] | |Block=[[File:Low.png]] | ||
|Properties= | |Properties= | ||
|description= Safe on hit from every distance,starts up in a single frame,knocks down on | |description= Safe on hit from every distance,starts up in a single frame,knocks down on close hit. | ||
}} | }} | ||
}} | }} | ||
| Line 371: | Line 405: | ||
|data= | |data= | ||
{{AttackData-Alpha2 | {{AttackData-Alpha2 | ||
|Damage= | |Damage= 14-17 | ||
|Stun= | |Stun= 8 | ||
|Startup= | |Startup= 5 | ||
|Frame Adv= | |Frame Adv= | ||
|Block=[[File:High.png]] | |Block=[[File:High.png]] | ||
| Line 388: | Line 422: | ||
|data= | |data= | ||
{{AttackData-Alpha2 | {{AttackData-Alpha2 | ||
|Damage= | |Damage= 14-17 | ||
|Stun= | |Stun= 8 | ||
|Startup= | |Startup= 5 | ||
|Frame Adv= | |Frame Adv= | ||
|Block=[[File:High.png]] | |Block=[[File:High.png]] | ||
| Line 421: | Line 455: | ||
|data= | |data= | ||
{{AttackData-Alpha2 | {{AttackData-Alpha2 | ||
|Damage=18-19 | |Damage=18-19,6-9 | ||
|Stun=6 | |Stun=6,6 | ||
|Startup= 14 | |Startup= 14 | ||
|Frame Adv= | |Frame Adv= +2 | ||
|Block=[[File:High.png]] | |Block=[[File:High.png]] | ||
|Properties= | |Properties= | ||
| Line 440: | Line 474: | ||
|data= | |data= | ||
{{AttackData-Alpha2 | {{AttackData-Alpha2 | ||
|Damage=11-15( | |Damage= 11-15,8-11 | ||
|Stun=8 | |Stun= 8,8 | ||
|Startup= | |||
|Frame Adv=-27(one hit) -9(both hits) | |||
|Block=[[File:mid.png]] | |||
|Properties= | |||
|description= Awful | |||
}} | |||
}} | |||
{{MoveData | |||
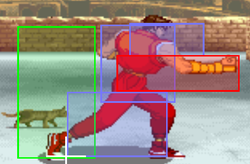
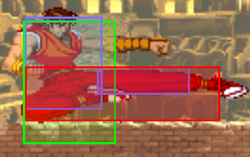
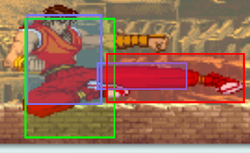
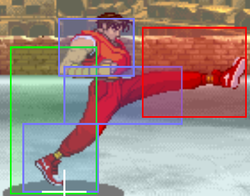
|image=A1 Guy Air D+MP.png | |||
|imageSize=250px | |||
|caption= | |||
|name= [[File:d.png]] + [[File:Mp.png]] In Air | |||
|data= | |||
{{AttackData-Alpha2 | |||
|Damage= 11-13 | |||
|Stun= 8 | |||
|Startup= | |Startup= | ||
|Frame Adv= | |Frame Adv= | ||
|Block=[[File: | |Block=[[File:High.png]] | ||
|Properties= | |Properties= | ||
|description= | |description= | ||
}} | }} | ||
}} | }} | ||
Sankaku Tobi air corner f | Sankaku Tobi air corner f | ||
| Line 465: | Line 514: | ||
Hayagake~Kyuuteishi qcf+LK,K | Hayagake~Kyuuteishi qcf+LK,K | ||
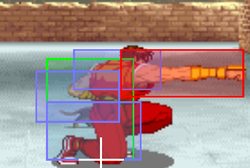
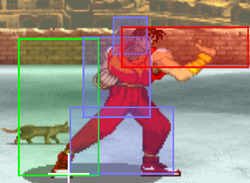
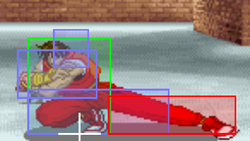
{{MoveData | |||
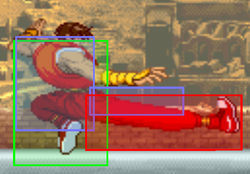
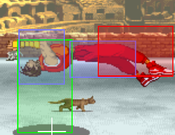
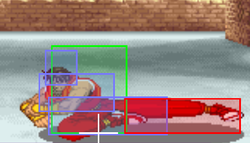
|image=A1 Guy Bushin Slide.png | |||
|imageSize=250px | |||
|caption= | |||
|name= [[File:qcf.png]] + [[File:Mk.png]],[[File:Mk.png]] | |||
|data= | |||
{{AttackData-Alpha2 | |||
|Damage= 9-11 | |||
|Stun= 10 | |||
|Startup= 7 | |||
|Frame Adv= -4 to -8 depending on range(block) | |||
|Block=[[File:Low.png]] | |||
|Properties= | |||
|description=Combos from almost everything and knocks down on hit | |||
}} | |||
}} | |||
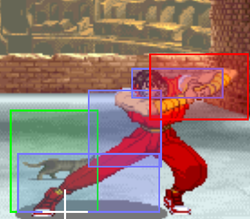
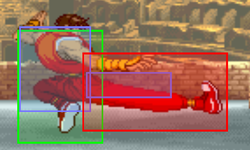
{{MoveData | |||
|image=A1 Guy Running overhead.png | |||
|imageSize=250px | |||
|image2=A1 Guy Running Overhead 2.png | |||
|imageSize2=250px | |||
|caption= | |||
|name= [[File:qcf.png]] + [[File:Hk.png]],[[File:Hk.png]] | |||
|data= | |||
{{AttackData-Alpha2 | |||
|Damage= 11,3-8 | |||
|Stun=10,1 | |||
|Startup= 11 | |||
|Frame Adv= -4 | |||
|Block=[[File:High.png]] | |||
|Properties= | |||
|description= - On hit therefore it can be punished but the window is quite Tight and requires A super or a long reaching 2 frame normal,Much better then alpha 2 even with the - on hit | |||
}} | |||
}} | |||
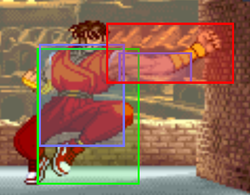
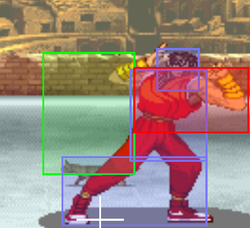
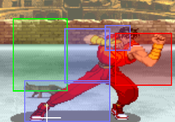
Bushin | {{MoveData | ||
|image=A1 Guy LK tatsu.png | |||
|imageSize=250px | |||
|image2=A1 Guy MK tatsu.png | |||
|imageSize2=250px | |||
|image3=A1 Guy HK tatsu.png | |||
|imageSize3=250px | |||
|image4=A1 Guy LK tatsu 2.png | |||
|imageSize4=250px | |||
|caption=they all have unique startup hitboxes but the rest of the hits in any tatsu use the fourth hitbox | |||
|name=Bushin Senpukyaku | |||
|data= | |||
{{AttackData-Alpha2 | |||
|version=[[File:qcb.png]] + [[File:Lk.png]] | |||
|Damage= 12-15 | |||
|Stun= 8 | |||
|Startup= 9 | |||
|Frame Adv= | |||
|Block=[[File:mid.png]] | |||
|Properties= | |||
|description= uses the first Hitbox for startup,low invuln | |||
}} | |||
{{AttackData-Alpha2 | |||
|header= no | |||
|version=[[File:qcb.png]] + [[File:Mk.png]] | |||
|Damage= 11-17,9 | |||
|Stun= 5,5 | |||
|Startup= 9 | |||
|Frame Adv= | |||
|Block=[[File:mid.png]] | |||
|Properties= | |||
|description= Uses the second hitbox for startup,mid invuln | |||
}} | |||
{{AttackData-Alpha2 | |||
|header= no | |||
|version=[[File:qcb.png]] + [[File:hk.png]] | |||
|Damage= 11-17,9,8 | |||
|Stun= 4,4,4 | |||
|Startup= 9 | |||
|Frame Adv= | |||
|Block=[[File:mid.png]] | |||
|Properties= | |||
|description= uses the third hitbox for startup,high invuln | |||
}} | |||
}} | |||
Bushin Gokusa Ken Close Tap LP>MP>HP>HK | Bushin Gokusa Ken Close Tap LP>MP>HP>HK | ||
== Super Combos == | == Super Combos == | ||
| Line 501: | Line 625: | ||
-j.hk,c.lk,.S.mp,.S.hk,.link s.hp.kagesukui Bnb that does Instant Dizzy with the jumpin. Replace The microwalk fierce with Microwalk Forward Against crouching rose/charlie | -j.hk,c.lk,.S.mp,.S.hk,.link s.hp.kagesukui Bnb that does Instant Dizzy with the jumpin. Replace The microwalk fierce with Microwalk Forward Against crouching rose/charlie | ||
-Meaty F+mp(second hit),S.Mp,S,Hk,Link S.HP,Kagesukui Hard link that instantly dizzys after most knockdowns | |||
= The Basics = | = The Basics = | ||
Latest revision as of 07:12, 8 March 2021
Introduction
Guy Gets a bad rap in this game for having redizzy combos But they are truly not very realistic The real reason he is broken is his insane combo potential and mixup game
+ Best overhead in the game which he can link from on meaty into a full combo
+ Some of the Best chains in the game Thanks to stand Hk
+ Very good at mixing up in the corner
+ Bushin slide combos from everything
+ Roll punish is extremely good and does high stun and damage
+ has the Second best Forward walkspeed in the game Tied with Charlie and Chun
-Alot of his anti airs aim at the same spot
-level One kick super can be rolled before the final Hit
Moves List
Normal Moves
Throws
Seoi Nage b/f+[MP/HP]
Tsukami Nage b/f+[MK/HK]
^!Bushin-ryuu Seoi Nage any+[MP/HP]
Air Throws
Izuna Otoshi air b/f+[MP/HP]
Command Moves
Sankaku Tobi air corner f
Special Moves
Forward Leap qcf+P
^!Bushin Izuna Otoshi close P
^!Izuna no Hiji Otoshi far P
Hayagake~Kyuuteishi qcf+LK,K
Bushin Gokusa Ken Close Tap LP>MP>HP>HK
Super Combos
Bushin Hassou Ken qcf,qcf+P
^!Bushin Starter (2LV/Lv3)P
Bushin Gourai Kyaku qcf,qcf+K
Alpha Counter
Crouch Medium Kick block b,db,d+K
Combos
-j.HK,s.LP,s.MP,s.HP,s.HK
-s.MP,s.HK,link s.MK/s.HP,KageSukui
-Corner K.Throw,Bushin Hassou Ken Lvl3
-j.HK,s.LP/s.MP,s.HP,B.Gourai Kyaku Lvl3
-j.hk,c.lk,.S.mp,.S.hk,.link s.hp.kagesukui Bnb that does Instant Dizzy with the jumpin. Replace The microwalk fierce with Microwalk Forward Against crouching rose/charlie
-Meaty F+mp(second hit),S.Mp,S,Hk,Link S.HP,Kagesukui Hard link that instantly dizzys after most knockdowns
The Basics
Guy can throw loop another guy, adon, chun li, or sodom(Back roll not included). They must take some sort of damage to escape or super to get out(which in many cases will still miss, so they will receive damage in some form). The most basic idea would be, bushin flip to throw as a meaty, walk foward, sweep(if they roll they get hit), immediately bushin flip to throw as a meaty again.
