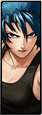
Terry Bogard

In a nutshell
Quite the renowned character, this SNK hero makes his inevitable return. Although Terry is a straight forward, pressure character, he isn't quite adept as Kyo or Iori in regards to breaking an opponent's ability to guard ![]() and
and ![]() attacks (not to say he can't do that kind of offensive pressure at all.) In return, Terry has strong game plan based around chunky block-strings and good frame traps that breaks the opponent's guard gauge. Overall he's a simple character and is a great character for beginners and experienced players alike.
attacks (not to say he can't do that kind of offensive pressure at all.) In return, Terry has strong game plan based around chunky block-strings and good frame traps that breaks the opponent's guard gauge. Overall he's a simple character and is a great character for beginners and experienced players alike.

Video Walkthrough
Move List
Normal Moves
| Frames | Advantage | Properties | Block | Damage | Notes | ||
|---|---|---|---|---|---|---|---|
| Standing Close | |||||||
| 4/3,3/18 | 0/-2 | HL | 55+25 | A fast, twice-hitting, gut punch. Close | |||
| 5/5/22 | -6/-8 | HL | 70 | Although not as fast as Close | |||
| Standing Far | |||||||
| 4/3/8 | +4/+2 | HL | 25 | A standard anti-hop attack. Typically it whiffs on crouching opponents, but larger, crouching opponents are exceptions such as Goro or Raiden. In this case, it could be used to pressure those large characters in a similar manner that Terry could in Garou: Mark of the Wolves. | |||
| 6/2/9 | +4/+2 | HL | 30 | Far reaching kick. It is used to control the space in front of Terry. Doesn't have quite the recovery nor the height it had in previous KOF games, this attack makes up for it by being cancelable. Still a good attack to use to keep the opponent outside of your inside range. | |||
| 7/6/19 | -4/-6 | HL | 80 | A beefy straight. Think of it as an extension of Standing | |||
| 11/5/16 | 0/-2 | - | HL | 80 | In previous KOF games such as King of Fighters 2002, this move was really slow and lacked much application. Now this move is particularly useful for anti-air in angles Terry couldn't really cover on reaction, barring Rising Upper ( | ||
| 15/8/16 | KD/-1 | HL | 75 | A standard standing | |||
| Crouching | |||||||
| 5/4/8 | +3/+1 | HL | 25 | A simple, light attack from crouching that doesn't hit low. Used mainly after Crouching | |||
| 4/4/10 | +1/-1 | 30 | Similar to Crouching | ||||
| 7/5/20 | -4/-6 | HL | 70 | A punch attack that is quite similar to Guile's "Low Strong" from the Street Fighter series. In application, it is quite similar although the frame advantage might not be as good. It's a good move to use in a blockstring due to the slightly slowness, but the dominance it has due to its hitbox. So it's one of his many frame trap moves that help him score hits and confirms. This move could cancel into command normals or certain specials to add to his pressure. Crouching | |||
| 10/5/29 | KD/-15 | 80 | A standard sweep with a slight raise in height at the tip of his foot, allowing to anti-air from certain angles in special circumstances. Like Crouching | ||||
| Jump/Hop | |||||||
| 6/6/- 6/7/- |
- | - | 45/40 | Such as many Jumping | |||
| 4/8/- 5/10/- |
-/- | - | 45/40 | This kick is Terry's furthest reaching, jumping normal attacks. It has quite the lengthy active period that it actually hits and it controls the vast horizontal space. The weakness of this move is that it easily whiffs against crouching opponents regardless of what jump or hop arc Terry takes and is susceptible to meaty, Crouching | |||
| 6/5/- 6/6/- |
-/- | - | 72/70 | An attack that functions both as a jump-in and as an air-to-air given the context of the situation. This attack may not have as wide or as low of a hitbox as Jumping
| |||
| 8/5/- 8/7/- |
-/- | - | 70/68 | A standard jump-in attack. One of the few moves in the KOF series that have a Street Fighter-like hitbox upon jump-in. As in, this attack has a really good 45° downward angle, good horizontal range, and cross-up just like a Street Fighter Jumping | |||
| 10/6/- 10/8/- |
KD/- | HL | 90/80 | Similar to Terry's Jumping
| |||
| Command Normals | |||||||
| 4/7/23 | -9/-11 | HL | 60 | Rising Upper- An uppercut quite similar in application as Ryo's Crouching
| |||
| 14/4/28 | -11/-13 | - | HL | 80 | Back Knuckle- This attack doesn't have as much utility as Rising Upper in terms of being a command normal to hitconfirm during combos. Although there is more time to "confirm something", this move doesn't cancel into anything afterward. Instead, this move could be used to confirm into a Hyper Drive mode activation and Terry could extend his combo. Otherwise, this move is like Back Knuckle in King of Fighters 98; but in King of Fighters XIII, it only hits once and hits faster with better recovery. In a neutral game, Terry could use Back Knuckle as an anti-air against a hop that is beyond the reach of Standing
| ||
| Throws | |||||||
| 0 | KD | 100 | Buster Throw- A neat, hard knockdown throw. It easily sets up for a cross-up attempt by Terry, especially if the opponent was thrown in the corner so Terry won't need to cover additional distance and time by running and super jumping at the opponent. If the player could get the opponent to be honest and block on okizeme, this throw could also set up into an empty jump or empty hop attempt into either another throw or a Crouching | ||||
| Special Moves | |||||||
|
|
|
HL |
|
Power Wave- One should be able to recognize this trademark attack of Terry's. One of the most standard, grounded projectiles in King of Fighters XIII, Power Wave controls the ground space in front of Terry. In contrast to the usual airborne projectiles, grounded projectiles such as Power Wave cannot be slid nor crouched under by an opponent. Rather, it's easier for the opponent to hop or jump over grounded projectiles than airborne projectiles such as Athena's Psychoball (
| ||
|
|
HL |
|
Burn Knuckle- Not as hot as previous KOF games, this iteration of Burn Knuckle is more reminiscent of Garou: Mark of The Wolves. That is, Burn Knuckle is largely unsafe on block regardless of the version used. The
| |||
|
|
HL
|
|
Crack Shoot- Terry's main ender for a blockstring. In past KOF games, it was typically Burn Knuckle (
| |||
| charge |
|
|
|
HL |
|
Rising Tackle- Terry's signature anti-air attack. Typically, this attack is just simply an average anti-air attack without much invulnerability. In past games such as King of Fighters 98, this attack had a
| |
| DMs | |||||||
|
|
HL |
|
Power Geyser- A renowned classic: the powerful, old faithful. Power Geyser makes its return and for the better. In previous KOF games, this move was terribly slow. Terrible as an anti-air, terrible as a reversal; this move was mainly used in combos due to its sheer power over Terry's other Desperation Moves in regards to the meter involved. Now in King of Fighters XIII, this attack has not only a heightened hitbox but a faster start up as well. While still not ideal as a reversal, this attack surely covers great vertical space fast enough to catch opponents.
| |||
|
|
|
HL |
|
Buster Wolf- Are you OK? The opponent surely won't be. In regards to actual application, Buster Wolf is the Desperation Move to go to when in need of a reversal super attack. Unlike Terry's other Desperation Move, Buster Wolf doesn't have as high of damage output and the damage is spread amongst two hits, thus further prorated in combos. It is extremely quick however, even faster than
| ||
| 15/-/64 | KD/0 (midscreen) -36 (corner) | - | 150*3 | Trinity Geyser- The pride of Yellowstone, this new Desperation Move is a combination of Terry's old Power Wave from the first Fatal Fury game and one of Terry's most recent Desperation Moves, Power Stream. The strength of this move is no joke, but the player must use caution when using the move in the corner. The reason being is that the damage by this attack is earned by each individual geyser that hits, and only two of the multiple geysers will usually hit the opponent in the corner, as opposed to the typical 3 mid-screen. In the corner, the move can often be followed up with attacks such as burn knuckle, crack shoot, and buster wolf for extra damage. Trinity Geyser is good enough as an anti-air against full jumps, otherwise this attack is confirmed from normal attacks or from a Max Cancel. | |||
Console Changes
- Far standing
 has faster recovery.
 - Standing
 has increased active frames.
 - Added new target combo: cr.
 > cr.. It is cancelable.
 - Buster Wolf's (
 +
+ ) dashing speed is now identical to the EX version. The invincibility is the same as before.
 - Trinity Geyser's ( +) hitbox has been changed so that it actually hits 3 times.
- Power Geyser can be max canceled.
Combos
Standard starters:
- cl./cl.,
 +- optimal combo starter
 - cr.
 , cr., cr., st.- hit confirmable, cancel string
 - cr., cr. > cr.- target combo
- (opponent crouching)
 +- you can follow up after you hit an opponent overhead with this
0% Drive
0 Bar
cl.![]() /
/![]() ,
, ![]() +
+![]() xx
xx ![]() +
+![]() - (195)
- (195)
cr.![]() , cr.
, cr.![]() , st.
, st.![]() xx
xx ![]() +
+![]() - (151)
- (151)
cl.![]() /
/![]() ,
, ![]() +
+![]() xx
xx ![]() +
+![]() - (198)
- (198)
- Leaves Terry at point blank range with +0 Frame Advantage
![]() +
+![]() , st.
, st.![]() - (114)
- (114)
1 Bar
cl.![]() /
/![]() ,
, ![]() +
+![]() xx
xx ![]()
![]() +
+![]() - (310)
- (310)
cl.![]() /
/![]() ,
, ![]() +
+![]() xx
xx ![]() +
+![]() - (234)
- (234)
cr.![]() , cr.
, cr.![]() , cr.
, cr.![]() , st.
, st.![]() xx
xx ![]() +
+![]()
![]() - (238)
- (238)
cr.![]() , cr.
, cr.![]() , cr.
, cr.![]() , st.
, st.![]() xx
xx ![]()
![]() +
+![]() - (254)
- (254)
cl.![]() /
/![]() ,
, ![]() +
+![]() xx
xx ![]()
![]() +
+![]() - (316)
- (316)
2 Bar
cl.![]() /
/![]() ,
, ![]() +
+![]() xx
xx ![]()
![]() +
+![]()
![]() - (438)
- (438)
cr.![]() , cr.
, cr.![]() , cr.
, cr.![]() , st.
, st.![]() xx
xx ![]()
![]() +
+![]()
![]() - (398)
- (398)
cr.![]() , cr.
, cr.![]() , cr.
, cr.![]() , st.
, st.![]() xx
xx ![]()
![]() +
+![]()
![]() - (?)
- (?)
50% Drive
0 Bar
cl.![]() /
/![]()
![]() +
+![]() xx
xx ![]() +
+![]()
![]()
![]() +
+![]() , charge
, charge ![]() ,
,![]() +
+![]()
![]() - (384)
- (384)
(near corner) cl.![]() /
/![]() ,
, ![]() +
+![]() xx
xx ![]() +
+![]()
![]()
![]() +
+![]() , st.
, st.![]() - (313)
- (313)
(corner only) cl.![]() /
/![]() ,
, ![]() +
+![]() xx
xx ![]() +
+![]()
![]()
![]() +
+![]() , charge
, charge ![]() ,
,![]() +
+![]() - (337)
- (337)
(crouching) ![]() +
+![]() , cl.
, cl.![]() /
/![]() ,
, ![]() +
+![]() xx
xx ![]() +
+![]()
![]() charge
charge ![]() ,
,![]() +
+![]() = (311/317)
= (311/317)
(crouching) ![]() +
+![]() , cl.
, cl.![]() /
/![]() ,
, ![]() +
+![]() xx
xx ![]() +
+![]()
![]()
![]() +
+![]() , st.
, st.![]() = (335/342)
= (335/342)
1 Bar
cl.![]() /
/![]() ,
, ![]() +
+![]() xx
xx ![]() +
+![]()
![]()
![]() +
+![]() ,
, ![]() +
+![]()
![]() - (341)
- (341)
cl.![]() /
/![]() ,
, ![]() +
+![]() xx
xx ![]() +
+![]()
![]()
![]() +
+![]() , charge
, charge ![]() ,
,![]() +
+![]()
![]() - (384)
- (384)
cl.![]() /
/![]() ,
, ![]() +
+![]() xx
xx ![]() +
+![]()
![]() ,
, ![]() charge
charge ![]() ,
,![]() +
+![]() - (338)
- (338)
(corner only) cr.![]() , cr.
, cr.![]() , cr.
, cr.![]() , st.
, st.![]() xx
xx ![]() +
+![]()
![]()
![]() charge
charge ![]() ,
,![]() +
+![]() - (324)
- (324)
cl.![]() /
/![]() ,
, ![]() +
+![]() xx
xx ![]() +
+![]() ,
, ![]()
![]() +
+![]() ,
, ![]()
![]() +
+![]() - (383)
- (383)
2 Bar
cl.![]() /
/![]() ,
, ![]() +
+![]() xx
xx ![]() +
+![]()
![]()
![]()
![]() +
+![]()
![]() - (483)
- (483)
- Doing this combo in Mid-screen is preferred, some of the hits will whiff in the corner.
(corner only) cl.![]() /
/![]() ,
, ![]() +
+![]() xx
xx ![]() +
+![]()
![]()
![]()
![]() +
+![]() , charge
, charge ![]() ,
,![]() +
+![]()
![]() - (465)
- (465)
- Corner variation of the previous combo
cr.![]() , cr.
, cr.![]() , cr.
, cr.![]() , st.
, st.![]() xx
xx ![]() +
+![]()
![]()
![]()
![]()
![]() +
+![]() - (372)
- (372)
- Variation - charge
 ,
, + Ender - (376)
- Variation - charge
cl.![]() /
/![]() ,
, ![]() +
+![]() xx
xx ![]() +
+![]()
![]()
![]()
![]()
![]() +
+![]()
![]() - (508)
- (508)
100% Drive
0 Bar
cl.![]() /
/![]() ,
, ![]() +
+![]() , HD cl.
, HD cl.![]() /
/![]() ,
, ![]() +
+![]() ,
, ![]() +
+![]() , xx [charge
, xx [charge ![]() ,
,![]() +
+![]() , xx
, xx ![]() +
+![]() ]x3 - (?)
]x3 - (?)
cl.![]() /
/![]() ,
, ![]() +
+![]() , HD cl.
, HD cl.![]() /
/![]() ,
, ![]() +
+![]() ,
, ![]() +
+![]() , xx
, xx ![]() +
+![]() , [charge
, [charge ![]() ,
,![]() +
+![]() , xx
, xx ![]() +
+![]() , xx
, xx ![]() +
+![]() ]x2, charge
]x2, charge ![]() ,
,![]() +
+![]() - (?)
- (?)
1 Bar
cl.![]() /
/![]() ,
, ![]() +
+![]() xx
xx ![]() +
+![]()
![]()
![]() +
+![]() , charge
, charge ![]() ,
,![]() +
+![]()
![]()
![]() +
+![]() ,
, ![]() +
+![]() - (375)
- (375)
cl.![]() /
/![]() ,
, ![]() +
+![]() , HD cl.
, HD cl.![]() /
/![]() ,
, ![]() +
+![]() ,
, ![]() +
+![]() xx [charge
xx [charge ![]() ,
,![]() +
+![]() , xx
, xx![]() +
+![]() ]x2,
]x2, ![]() +
+![]() ,
, ![]()
![]() +
+![]() - (?)
- (?)
cl.![]() /
/![]() ,
, ![]() +
+![]() , HD cl.
, HD cl.![]() /
/![]() ,
, ![]() +
+![]() ,
, ![]() +
+![]() xx [charge
xx [charge ![]() ,
,![]() +
+![]() , xx
, xx ![]() +
+![]() ]x2,
]x2, ![]() +
+![]() ,
, ![]()
![]() +
+![]() - (?)
- (?)
cl.![]() /
/![]() ,
, ![]() +
+![]() , HD cl.
, HD cl.![]() /
/![]() ,
, ![]() +
+![]() ,
, ![]() +
+![]() xx
xx ![]() +
+![]() , [charge
, [charge ![]() ,
,![]() +
+![]() , xx
, xx ![]() +
+![]() , xx
, xx ![]() +
+![]() ]x2,
]x2, ![]()
![]() +
+![]() - (?)
- (?)
cl.![]() /
/![]() ,
, ![]() +
+![]() , HD cl.
, HD cl.![]() /
/![]() ,
, ![]() +
+![]() ,
, ![]() +
+![]() , xx
, xx ![]() +
+![]()
![]() , (xx
, (xx ![]() +
+![]() , charge
, charge ![]() ,
,![]() +
+![]() , xx
, xx ![]() +
+![]() )x2, xx
)x2, xx ![]() +
+![]() , charge
, charge ![]() ,
,![]() +
+![]() - (732)
- (732)
cr.![]() , cr.
, cr.![]() > cr.
> cr.![]() HD cl.
HD cl.![]() /
/![]() ,
, ![]() +
+![]() ,
, ![]() +
+![]() xx charge
xx charge ![]() ,
,![]() +
+![]() xx
xx ![]() +
+![]() , (cross up) xx charge
, (cross up) xx charge ![]() ,
,![]() +
+![]() xx
xx ![]() +
+![]() (cross up) xx
(cross up) xx ![]() +
+![]() , charge
, charge ![]() ,
,![]() +
+![]()
![]() - (601-612)
- (601-612)
2 Bar
cl.![]() /
/![]() ,
, ![]() +
+![]() HD cl.
HD cl.![]() /
/![]() ,
, ![]() +
+![]() xx
xx ![]() +
+![]() xx charge
xx charge ![]() ,
,![]() +
+![]() xx
xx ![]() +
+![]() xx
xx ![]() +
+![]()
![]() xx charge
xx charge ![]() ,
,![]() +
+![]() xx
xx ![]() +
+![]() xx
xx ![]() +
+![]() xx charge
xx charge ![]() ,
,![]() +
+![]()
![]() - (?)
- (?)
cl.![]() /
/![]() ,
, ![]() +
+![]() , HD cl.
, HD cl.![]() /
/![]() ,
, ![]() +
+![]() xx
xx ![]() +
+![]() xx
xx ![]()
![]() +
+![]()
![]() -delay-
-delay- ![]() +
+![]() - (696)
- (696)
(near corner) cl.![]() /
/![]() ,
, ![]() +
+![]() HD cl.
HD cl.![]() /
/![]() ,
, ![]() +
+![]() xx
xx ![]() +
+![]() xx
xx ![]()
![]() +
+![]()
![]() -delay-
-delay- ![]() +
+![]() , charge
, charge ![]() ,
,![]() +
+![]() - (750)
- (750)
cr.![]() , cr.
, cr.![]() > cr.
> cr.![]() HD cl.
HD cl.![]() /
/![]() ,
, ![]() +
+![]() xx
xx ![]() +
+![]() xx charge
xx charge ![]() ,
,![]() +
+![]() xx
xx ![]() +
+![]() (cross up) xx charge
(cross up) xx charge ![]() ,
,![]() +
+![]() xx
xx ![]() +
+![]() (cross up) charge
(cross up) charge ![]() ,
,![]() +
+![]() xx
xx ![]()
![]() +
+![]()
![]() - (709)
- (709)
(corner) cl.![]() /
/![]() ,
, ![]() +
+![]() HD cr.
HD cr.![]() > cr.
> cr.![]() xx
xx ![]() +
+![]() xx
xx ![]()
![]() +
+![]()
![]() (3 hits),
(3 hits), ![]() +
+![]() , charge
, charge ![]() ,
,![]() +
+![]() - (701)
- (701)
(corner only) cl.![]() /
/![]() ,
, ![]() +
+![]() HD cl.
HD cl.![]() /
/![]() ,
, ![]() +
+![]() xx
xx ![]() +
+![]() xx
xx ![]() +
+![]()
![]() , charge
, charge ![]() ,
,![]() +
+![]() xx
xx ![]() +
+![]() xx
xx ![]() +
+![]() , charge
, charge ![]() ,
,![]() +
+![]() xx
xx ![]() +
+![]() xx
xx ![]() +
+![]() ,
, ![]()
![]() +
+![]() - ()
- ()
(corner) cl.![]() /
/![]() ,
, ![]() +
+![]() HD cl.
HD cl.![]() /
/![]() ,
, ![]() +
+![]() xx
xx ![]() +
+![]() xx
xx ![]()
![]() +
+![]()
![]() (2 hits), charge
(2 hits), charge ![]() ,
,![]() +
+![]() xx
xx ![]() +
+![]() xx
xx ![]() +
+![]() , charge
, charge ![]() ,
,![]() +
+![]() xx
xx ![]() +
+![]() xx
xx ![]() +
+![]() , charge
, charge ![]() ,
,![]() +
+![]() - (746)
- (746)
- Standard corner hd combo. If only 2 hits of geyser connect, you can juggle after. Delay the +'s so they connect low. You can end with ex tackle or ex buster wolf for more damage (listed below).
- Standard corner hd combo. If only 2 hits of geyser connect, you can juggle after. Delay the
3 Bar
(corner) cl.![]() /
/![]() ,
, ![]() +
+![]() HD cl.
HD cl.![]() /
/![]() ,
, ![]() +
+![]() xx
xx ![]() +
+![]() xx
xx ![]()
![]() +
+![]()
![]() (2 hits), charge
(2 hits), charge ![]() ,
,![]() +
+![]() xx
xx ![]() +
+![]() xx
xx ![]() +
+![]() , charge
, charge ![]() ,
,![]() +
+![]() xx
xx ![]() +
+![]() xx
xx ![]() +
+![]() , charge
, charge ![]() ,
,![]() +
+![]()
![]() - (793)
- (793)
(corner) cl.![]() /
/![]() ,
, ![]() +
+![]() , HD cr.
, HD cr.![]() > cr.
> cr.![]() ,
, ![]() +
+![]() xx
xx ![]()
![]() +
+![]() /
/![]() ,
, ![]()
![]()
![]() +
+![]()
![]() (3 hits),
(3 hits), ![]() +
+![]() ,
, ![]() +
+![]() , charge
, charge ![]() ,
,![]() +
+![]() - (882)
- (882)
cl.![]() /
/![]() ,
, ![]() +
+![]() xx
xx ![]()
![]() +
+![]()
![]() {HD BYPASS},
{HD BYPASS}, ![]()
![]()
![]() +
+![]()
![]() , run up
, run up ![]() +
+![]() , charge
, charge ![]() ,
,![]() +
+![]() - (805)
- (805)
(corner) cr.![]() , cr.
, cr.![]() > cr.
> cr.![]() , HD cr.
, HD cr.![]() ,
, ![]() +
+![]() xx
xx ![]()
![]() +
+![]() /
/![]() ,
, ![]()
![]()
![]() +
+![]()
![]() (3 hits),
(3 hits), ![]() +
+![]() ,
, ![]() +
+![]() , charge
, charge ![]() ,
,![]() +
+![]() - (840)
- (840)
4 Bar
(corner) cl.![]() /
/![]() ,
, ![]() +
+![]() HD cl.
HD cl.![]() /
/![]() ,
, ![]() +
+![]() xx
xx ![]() +
+![]() xx
xx ![]()
![]() +
+![]()
![]() (2 hits), charge
(2 hits), charge ![]() ,
,![]() +
+![]() xx
xx ![]() +
+![]() xx
xx ![]() +
+![]() , charge
, charge ![]() ,
,![]() +
+![]() xx
xx ![]() +
+![]() xx
xx ![]() +
+![]() ,
, ![]()
![]() +
+![]()
![]() - (830)
- (830)
(midscreen) cl.![]() /
/![]() ,
, ![]() +
+![]() HD cl.
HD cl.![]() /
/![]() ,
, ![]() +
+![]() xx
xx ![]() +
+![]() xx
xx ![]()
![]() +
+![]()
![]() xx
xx ![]()
![]() +
+![]()
![]() - (924)
- (924)
- A lot of damage. If you're close enough to the corner you can get an additional buster wolf or a +, charge ,+ which will do 98-100%.
- A lot of damage. If you're close enough to the corner you can get an additional buster wolf or a
Team Order
1st position
Terry is very good as a point character, as he doesn't need meter to do good damage. His neutral is very solid, if not overpowering.
2nd position
Terry's still pretty good here, he'll obviously do more damage with meter. More or less the same as point.
3rd position
Of course all options will be open with meter in this position, but Terry is not the best anchor. He doesn't have great mixups, lacking a command grab and a command overhead (crack shoot doesn't count). His HD combos can do a lot of damage, but his level 3 doesn't work properly in the corner. For this reason, your team probably has a better character for the anchor position.
Strategy
Basic Strategy
Offense
- Terry is a simple character with standard jump and hop arcs and good jump-in attacks. Being able to simply combo into a knockdown from a high or low mix-up, Terry is able to play a basic offensive game based around getting around an opponent's guard by making the opponent block incorrectly given the situation.
- What Terry might slightly lack in comparison to a higher offensive character such as Kyo in terms of hopping-in or in high/low/throw mix-ups, Terry makes up for in being able to utilize Terry's ability to do larger, safer, blockstrings and frame traps that will easily wear down an opponent's guard gauge. Not the best of the best, Terry is still well rounded. Take note of the opponent's guard gauge and be ready to break the gauge with an attack that recovers quickly. The player will be able to score an opportunity to do a full combo.
- While pushing forward, Terry can simultaneously cover ground and airspace by canceling his Crouching into a Rising Upper (+) or a Crack Shoot (+) while maintaining relatively safe. There might be some instances where the opponent might stay out of the Crouching range to evade being put into block stun, and the opponent will wait for either of the follow-ups and go for the punish.
- Keep Terry's offensive mix-ups fresh. Reference Terry's
 Crack Shoot (+) section for additional detail. The player could expand mix-up possibilities with tick throws, breaking alternate guards with cross-up attack, staggered low hitting attacks, empty hop into low attacks or throw, and Crack Shoot mix-ups as well. Get the player to try to respond against these mix-ups and proceed to incorporate frame traps as well. Simple strings, such as Crouching into a slightly delayed Close , are effective ways in trying to counter or counter hit an opponent's attempt to attack or escape.
Neutral/Defense
- The player is also able to use Terry's good normal attacks to control his inner-space. With solid normals such as Standing , Standing , and especially Standing , Terry is able to check the opponent's ability to approach in the direct vicinity in front of Terry. With an attack such as Standing having good range and recovery to poke an opponent coupled with the ability to cancel into another attack, Terry is able to push out an opponent with Standing and give Terry some breathing room.
- Though it may be awkward for most players at first, learning to react to hops or jumps on reaction and punishing with Rising Upper (+) is a must to make sure nothing gets past Terry. Just be confident in holding a neutral position on Terry rather than constantly hovering in the blocking or crouch blocking position, and respond to the opponent's approaches with the necessary attacks.
- Terry actually has some aerial control to limit the opponent from approaching. A backwards hop or neutral hop Jumping is effective when the opponent tries approach by ground or by air. An early Jumping from a hop is also decent for stopping grounded approaches. When in doubt, a Jumping Blowback Attack is also good for air-to-air usage. Just be careful and don't become predictable, an opponent might try to get under Terry at just the right moment to crouch underneath Terry's hopping or jumping attack and hit Terry while he's on the way down. In some instances, this might land a full combo for the opponent.
- In instances where the opponent feels confident enough to just run forward to close in on Terry and land a Close or attack from far, use Power Wave (+
 ) to stop and remind the opponent that it's not a free ticket getting in. Remember that it's relatively easy for the opponent to hop over the Power Wave and to not use it excessively.
 - When somewhat in doubt when or how an opponent will close in space from about mid or mid-close screen, Terry has quite the handy Crouching to use. It might not recover as fast as it did in previous KOF games, this attack is still effective as a really beefy normal just like Guile's "Low Strong" from the Street Fighter series. It's pretty legitimate to use twice in a row, be it on hit or on block, just to push out an opponent. Note that Crouching could not only cancel on hit but on whiff during the active frames. As a reminder, try to not get hopped or jumped on by the opponent when doing Crouching .
- Even with decent reversal Desperation Moves, more often than not some of the best defensive options Terry has is just to simply block. If an opponent doesn't do a safe jump or hop on Terry, be sure to use the standard option select Close or . In this case for Terry, the optimal button would be . If Terry uses the option select on the opportune moment that the opponent will attack deep in a jump or hop-in, Terry will just simply block. If the opponent tried to go for an empty hop mix-up, the opponent will be hit by either an anti-air attack or simply be hit by a meaty attack or thrown upon landing.
- Keep in mind also while blocking, that Terry could simply punish a hop on reaction with a Standing . Sometimes the simplest things are some of the most important factors in a match.
- Keep in mind also while blocking, that Terry could simply punish a hop on reaction with a Standing
Advanced Strategy
Frame Traps and Links
"(n) frame gap" = The amount of frames that opponent has to counter a frame trap.
1.) st.![]() , cl.
, cl.![]() - 2 frame gap between st.
- 2 frame gap between st.![]() and cl.
and cl.![]() . St.
. St.![]() whiffs on crouching opponents, except on Daimon, Raiden, and Maxima.
whiffs on crouching opponents, except on Daimon, Raiden, and Maxima.
2.) st.![]() , cl.
, cl.![]() - 3 frame gap between st.
- 3 frame gap between st.![]() and cl.
and cl.![]() .
.
3.) cr.![]() , cl.
, cl.![]() - 3 frame gap between cr.
- 3 frame gap between cr.![]() and cl.
and cl.![]() .
.
4.) cr.![]() , cl.
, cl.![]() - 4 frame gap between cr.
- 4 frame gap between cr.![]() and cl.
and cl.![]() .
.
5.) st.![]() , st.
, st.![]() - 2 frame gap between st.
- 2 frame gap between st.![]() and st.
and st.![]() .
.
6.) st.![]() , cr.
, cr.![]() - 3 frame gap between st.
- 3 frame gap between st.![]() and cr.
and cr.![]() .
.
7.) st.![]() , cr.
, cr.![]() - 2 frame gap between st.
- 2 frame gap between st.![]() and cr.
and cr.![]() .
.
8.) st.![]() , cl.
, cl.![]() - 2 frame gap between st.
- 2 frame gap between st.![]() and cl.
and cl.![]() .
.
9.) st.![]() ,
, ![]() +
+![]() - 2 frame gap between st.
- 2 frame gap between st.![]() and
and ![]() +
+![]() .
.
10.) st.![]() , cl.
, cl.![]() - 3 frame gap between st.
- 3 frame gap between st.![]() and cl.
and cl.![]() .
.
11.) st.![]() , st.
, st.![]() - 4 frame gap between st.
- 4 frame gap between st.![]() and st.
and st.![]() .
.
12.) ![]() +
+![]() (blocked in crouch position), st.
(blocked in crouch position), st.![]() - 4 frame gap between
- 4 frame gap between ![]() +
+![]() (blocked on crouch position) and st.
(blocked on crouch position) and st.![]() .
.
13.) ![]() +
+![]() (blocked in crouch position), cr.
(blocked in crouch position), cr.![]() - 4 frame gap between
- 4 frame gap between ![]() +
+![]() (blocked on crouch position) and cr.
(blocked on crouch position) and cr.![]() .
.
14.) ![]() +
+![]() (blocked in crouch position), cl.
(blocked in crouch position), cl.![]() - 4 frame gap between
- 4 frame gap between ![]() +
+![]() (blocked on crouch position) and cl.
(blocked on crouch position) and cl.![]() .
.
15.) ![]() +
+![]() (blocked in crouch position),
(blocked in crouch position), ![]() +
+![]() - 4 frame gap between
- 4 frame gap between ![]() +
+![]() (blocked on crouch position) and
(blocked on crouch position) and ![]() +
+![]() .
.
16.) ![]() +
+![]() (blocked in crouch position), st.
(blocked in crouch position), st.![]() - 2 frame gap between
- 2 frame gap between ![]() +
+![]() (blocked on crouch position) and st.
(blocked on crouch position) and st.![]() .
.
17.) ![]() +
+![]() (blocked in crouch position), cr.
(blocked in crouch position), cr.![]() - 3 frame gap between
- 3 frame gap between ![]() +
+![]() (blocked on crouch position) and cr.
(blocked on crouch position) and cr.![]() .
.
18.) ![]() +
+![]() (blocked in crouch position), st.
(blocked in crouch position), st.![]() - 4 frame gap between
- 4 frame gap between ![]() +
+![]() (blocked on crouch position) and st.
(blocked on crouch position) and st.![]() .
.
19.) ![]() +
+![]() (blocked in crouch position), cr.
(blocked in crouch position), cr.![]() - 2 frame gap between
- 2 frame gap between ![]() +
+![]() (blocked on crouch position) and cr.
(blocked on crouch position) and cr.![]() .
.
20.) ![]() +
+![]() (blocked in crouch position), cl.
(blocked in crouch position), cl.![]() - 2 frame gap between
- 2 frame gap between ![]() +
+![]() (blocked on crouch position) and cl.
(blocked on crouch position) and cl.![]() .
.
21.) ![]() +
+![]() (blocked in crouch position),
(blocked in crouch position), ![]() +
+![]() - 2 frame gap between
- 2 frame gap between ![]() +
+![]() (blocked on crouch position) and
(blocked on crouch position) and ![]() +
+![]() .
.
22.) ![]() +
+![]() (blocked in crouch position), cl.
(blocked in crouch position), cl.![]() - 3 frame gap between
- 3 frame gap between ![]() +
+![]() (blocked on crouch position) and cl.
(blocked on crouch position) and cl.![]() .
.
Tips and Tricks
- Typically when Terry does two crouching, light attacks on block from point blank, Terry could cross up with Jumping on an opponent from a full, normal jump.
- Similarly when Terry does three crouching, light attack on block from point blank, Terry could cross up with Jumping on an opponent from a hyper hop.
- Terry could whiff a Close on okizeme and still cancel the whiff animation into a Rising Upper ( + ) and use that attack to meaty an opponent, a potential gimmick.
- The timing for canceling Rising Upper ( + ) is trickier than in previous games. A recommended tip to try is to cancel Rising Upper a bit later than anticipated.
- Be careful when using Rising Upper ( + ) in blockstings. Unlike past KOF games, this attack is more prone to whiffing in blockstrings on more than just crouching opponents due to the amount of push back Terry's normal attacks induce on hit and on block. Be sure to test and know the spacings to use this attack in hitconfirms and blockstrings, don't accidentally lose momentum by whiffing unintentionally.