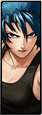
Iori with the Power of Flames

In a nutshell
Ever since Iori's moveset was changed in XII, fans have cried out for their old Iori back. And in XIII their wish was granted in the form of Classic Iori as DLC. For those unfamiliar with the original Iori, he is infamous for dominating the metagame of the most common tournament-played versions of KOF ('98, 2002, and their updated rereleases Ultimate and Unlimited Match) before this game, and for good reason. Iori's mixup game is absolutely amazing, and his combos can deal massive amounts of damage both with and without meter. XIII definitely succeeds in recreating the feel of his classic self: easy to use, not so much in utilizing him to his full potential.
To select EX Iori, highlight Iori and hit Back/Select after downloading him.
Video Walkthrough
Move List
Normal Moves
Hop: 40
Hop: 40
Hop: 70
Hop: 68
Hop: 80
Unique Attacks
Throw
Special Moves
2nd hit:
3rd hit:
Desperation Moves
- Ura 316 Shiki: Saika
Apprentice Combos
Strategy
Move Analysis
Normal Moves
- Standing Light Punch (
 ) - A mid-level cancelable punch. Iori's Standing Light Punch hits crouchers and cancels into specials and it actually reaches further than Crouching Light Punch. It's more neutral/advantageous on block than Standing Light Kick, though it's range is shorter. A good tool for frametraps and close-range pressure, but since the hitbox is so low it's not as good for anti-airing hops as most standard Standing Light Punch moves.
 - Close Light Punch (Close ) - Looks similar to Standing Light Punch but Iori uses his other arm and doesn't extend as far out, though this is irrelevant since it has a close range activation requirement. Much like Standing Light Punch, this is a blockstring and pressure tool when on the offensive. Chains and special cancels and leaves Iori with a sizeable advantage on block which even allows him to link a cl.C/cr.B afterward on hit. Even better on block than say, Crouching Light Punch and if Iori's not close enough he'll use his Standing Light Punch which behaves rather similarly.
- Standing Light Kick (
 ) - Fast horizontal checking kick that reaches even further than in previous games. Wonderful as a poke or blockstring utility, but Iori is just slightly negative/neutral on block so it can be interrupted if used repeatedly.
- Only cancels into DMs. Gives Iori some CvS2 style combo options since he can buffer cr.B cr.B st.B xx qcf,qcf+P as an easy hitconfirm into a hard knockdown.
- Close Light Kick (Close ) - A very fast low kick that puts Iori at a big advantage on block or hit which can allow him to link a Close Heavy Punch afterward. Has similar close range applications as Close Light Punch, though Close Light Kick must be blocked low but as a tradeoff it isn't chain-cancelable.
- Combos into (
 + > ) and Kuzukaze (
 +
+  ).
).
- Combos into (
- Standing Heavy Punch (
 ) - A forward slash that now looks identical to ( + ). Cancels into specials and DMs as usual, but now Iori can cancel this move into command normals. Occasionally decent as a poke but the startup is somewhat slow and the hitbox isn't as good as Standing Heavy Kick, but on hit it can be canceled for better damage so it has its uses in footsies, combos, and blockstrings.
 - Close Heavy Punch (Close ) - Iori's fastest normal attack and one of his best anti-airs. The fast speed makes it Iori's number one attack for starting standard punish or Heavy combos since it easily chains into ( + ) which can be hitconfirmed into an appropriate followup. It's also a strong choice for tight frametraps because of its speed.
- Iori's hitbox extends very high vertically, so much that this move can easily anti-air and control the vertical space just above Iori that no other attack of his can cover. One of the best normals for landing a run-under anti-air and because Iori can bait a hop or jump with his projectile, it's pretty easy to land one of these anti-airs. It's additionally Iori's best anti-air should the opponent get directly above him such as if the opponent does a full jump against a cornered Iori to bait his DP which would then whiff.
- Standing Heavy Kick (
 ) - A long-reaching horizontal roundhouse. One of Iori's best pokes, especially considering his rotten sweep. A strong option for counterpoking the opponent or finishing out blockstrings and it can even anti-air hops should the opponent hop onto Iori's leg. A few characters like Chin can crouch under this move though, so be careful.
 - Close Heavy Kick (Close ) - Another vertical attack, though this one has more horizontal reach than Close Heavy Punch and it can't be canceled. Unfortunately this move is a little less useful than before since most characters can crouch and cause Iori to whiff this attack which can lead into a heavy punish. This can be especially bad should a Close Heavy Kick come out instead of a Standing Heavy Kick, though Iori can avoid this situation by using Standing Light Kick whenever the opponent is close enough to potentially trigger this upward kick.
- This can also anti-air by way of run-under.
- Crouching Light Punch (
 + ) - Basic low jab. Cancels into specials and ( + ) for combos and blockstrings. Better on block than Crouching Light Kick which should come somewhat naturally since Iori can't cancel his Crouching Light Kick. Not as advantageous as Close Light Kick/Punch on block but scary enough to discourage the opponent to press counterpoke after blocking it.
 - Crouching Light Kick ( + ) - Basic low light kick that only chain cancels, meaning Iori must chain his Crouching Light Kick into another light to get any decent combos started just like in the older games. This is Iori's main low threat which works wonderfully along with Jumping Heavy Punch for a high threat, though the attack is slightly negative on block.
- Iori's main tripguarding attack. Crouching Light Kick slightly shrinks Iori's vulnerable hitbox and should a jump-in miss, he can easily meaty and confirm cr.B cr.A xx qcb+A x3 for a basic punish. This is a very important concept to be familiar with in KOF and Iori's a great character for punishing bad jump-ins so don't be afraid to give this tactic a shot when learning Iori.
- Crouching Heavy Punch ( + ) - An upward swiping attack. This was previously a more horizontal attack but in KOF XIII it has more vertical range as the animation would suggest. This now works as a decent anti-air attack, though it's pretty bad as a poke.
- Crouching Heavy Kick ( + ) - Iori's sweep. Has a lot of reach to it, but the recovery is terrible and the sweep can't be canceled into anything so once a player should be very resolute when committing to this attack. Iori has to rely more on getting in closer to use Crouching Light Kick as his main low option or backing off into Standing Heavy Kick or his projectile in order to cover the range that his sweep can't safely control.
- Because of the hitbox and range, Iori's sweep is a good tripguard anti-air against jump-ins (compare it to Chun Li's sweep) that are outside Crouching Light Kick range. Be careful though as if the sweep isn't done early enough the opponent may be able to land, block, and punish Iori.
- Terrible recovery on block or whiff. Unless blocked at tip range, the opponent can punish Iori with a fast special or cancelable light attack or even run forward for a Close Heavy Attack. From maximum distance the opponent may have a toughter time punishing it, but fast specials and EX moves can always punish it and if it gets preemptively hopped Iori's good as dead. A poor beginner gimmick tactic is to use Iori's sweep liberally and then mash out a reversal in hopes that the opponent messes up a punish.
- Blowback Attack ( + ) - A forward shoulder tackle with a decent hitbox but a slower startup speed than his other normals. Decent as a fireball feint when whiff canceled and a possible anti-air, though Iori's Blowback Attack isn't as good as say Robert or Joe or Hwa Jai's.
- Jumping Light Punch (Air ) - A fast downward punch, but fairly useless since Iori has better air-to-ground and air-to-air attacks.
- Jumping Light Kick (Air ) - A lengthy horizontal kick and devilish air-to-air. The startup is very fast and the reach is great for beating any oncoming jumping attack, and Iori can always use this from a neutral or backwards hop or jump to strike from a more advantageous angle against certain attacks.
- If timed later during a hop, this attack will hit standing opponents. So not only can it cover and anti-air any hops pre or post-emptively, it can also frustrate standing opponents which allows Iori to tip with this move to approach the opponent while dealing with any of their forward movement attempts.
- The biggest weakness of this move is that it whiffs on crouchers and leaves Iori heavily susceptible to tripguard anti-airs. So when using Iori, a player must decide which jumping attack to use given both player's current positions and previous tendencies, and then commit to one of his jumping attacks.
- Another downside is that the attack inflicts minor hit and blockstun, so it's difficult to combo afterward with anything even if it hits a standing opponent. A common tactic is to touch the opponent with a Jumping Light Kick and then land into (
 + ) which can combo or work as a fast frametrap, and Iori's first light rekka is fairly safe on block.
- While Iori has all the aerial tools he needs to cover most approaches and distances, each one has a weakness that can be exploited by the opponent.
- Jumping Heavy Punch (Air ) - Iori's strongest vertical jump-in attack. The downward hitbox allows Iori to cleanly beat many anti-air attempts and hit crouchers every time. The startup is somewhat slow, but this allows Iori to stick this move out early in his hop arc which only helps with his up-close pressure. Along with Jumping Blowback Attack, this is Iori's best attack from a hop when deep in on the opponent though it also works from a full jump, it's just that the opponent may react to Iori jumping and meet him with an air-to-air or move on the ground which would require the Iori player to consider using Jumping Light Kick, Jumping Heavy Kick, or Jumping Blowback Attack to counter the opponent's positioning.
- Jumping Heavy Kick (Air ) - An inbetween of Jumping Heavy Punch and Jumping Light Kick. The speed and horizontal length isn't as good as Jumping Light Kick, though when coming down in the air it's quite possible for this move to air-to-air the opponent on their way up. When timed late this move can hit crouchers, though by timing it earlier to possibly air-to-air or hit standing opponents, the enemy could crouch it and then punish Iori's whiff with a low. So unlike Jumping Light Kick this can hit crouching opponents, but by using it as a horizontal-vertical approach it loses to lows so Jumping Heavy Punch reigns supreme for beating all tripguard attempts: a nice approaching tool, but there's no reason to use this over Jumping Heavy Punch or Jumping Blowback Attack when Iori gets in close for standard hop pressure.
- Jumping Blowback Attack (Air + ) - A downard arm smack with a slightly smaller hitbox than Jumping Heavy Punch. This move can hit crouchers if timed deep, but because it's active range is about identical to Jumping Heavy Punch most opponents wont want to test Iori by crouching and so Iori can get away with using this move a little early, which will then make the move difficult to anti-air and on block give him a big frame advantage. If timed earlier in a jump or hop arc this move can air-to-air pretty well if Iori is close enough to the opponent, but if the Iori player misreads an air-to-air attempt with this move the grounded opponent can punish with a low so like with all of Iori's moves it's important to recognize the situation and the opponent's intentions before guessing which move to use in the air.
Unique Attacks
- Geshiki: Yumebiki ( + , ) - A two-part cancelable command normal that combos from Light Attacks. Nearly all strings push EX Iori too far out to even use the second hit, but cl.B f+A f+A connect into his "C" rekka series.
- Very easy to combo into to extend hitconfirms and the added hitstun allows Iori to combo into his "C" rekkas on hit where he can normally only land his "A" series by canceling Light attacks.
- This move's recovery is safe on block and by not canceling it Iori can bait a guard cancel roll should the opponent try to counter his standard blockstring into 108 Shiki: Yamibarai (
 + ).
+ ).
- Geshiki: Yuriori (Air
 +) - Iori's standard crossup kick, cariñosamente known as a taco due to Iori's leg configuration. Iori always sticks his leg out behind him so it'll really only hit the opponent as a crossup kick. Very fácil to combo off of, and so players will not want to be hit by it. The move has a lot of nuances, so take note:
- The kick can be blocked high or low, though it's usually more beneficial to block it standing since Iori can't hop over certain standing characters. However, Iori can more use the attack much earlier against standing opponents so he doesn't have to time the kick as late as against a croucher.
- The hitbox is located down low near Iori's foot, so if done too early the attack can whiff completely.
- Since Iori's inputs flip when crossing the opponent, jump or hop forward and input + to use a taco after crossing up the opponent. One natural downside of this move is that if Iori fails to cross up such as if the opponent is standing, a Jumping Light Kick will come out instead which deals minimal blockstun on top of whiffing crouchers.
- In rare instances, Iori's + can hit in front of him so it can be used as a jump-in, but the specifics are unknown so just use Jumping Heavy Punch to be safe.
- In rare instances, Iori's
- Causes massive hitstun or blockstun and sucks the opponent in, so Iori can safely attack afterward.
- Iori can input this command from a backdash to greatly increase the length of his backdashes which allows him to bait the opponent, make more space to work with, or avoid having the recovery of his normal backdash punished. Combined with EX Iori's projectile threat, Flame Iori can get more mileage out of this runaway tactic than his clawed counterpart.
- Geshiki: Goufu in "Shinigami" ( + ) - Iori's old overhead axe kick has a few more uses in this game.
- Done alone, that attack functions as an overhead. Though the hit doesn't deal much damage on its own, the player can cancel the hit into DMs or use it to activate HD mode. Hitconfirming into a DM is possible, though an HD activation has to be done almost in anticipation so it's a heavy commitment. A nice tool for closing out a match or sneaking in larger damage when the opponent isn't expecting a high attack.
- When canceled into, the kick can be special-canceled though it loses its overhead property. The startup it too slow to ever combo from Iori's normals so it functions more as a frametrap tool: If Iori does cr.A f+B xx qcf+A and the opponent pressed a button after the cr.A, the command normal could hit and combo into the fireball. Since the kick is slow, it's more suited against patient players rather than against more "mashy" opponents that are quick to press buttons.
- Keeps an aerial opponent in a juggle state instead of causing a hit reset like most other normals.
Throw
- Sakahagi ( or + or [While Close]) - Iori scratches and sends the opponent flying halfway across the playing field.
- Causes a soft knockdown; if the opponent techs it from midscreen then Iori can't land a true meaty followup, not even with ( + ), but he can run forward to get in close or use the gained distance to set up to intercept or approach the opponent from a mid-range.
- If the opponent is thrown into the corner, Iori can go for a meaty attack of choice which includes a hop mixup with j.C, empty hop cr/cl.B, or either of Iori's grabs.
- Still a decent throw on its own despite being rather basic. A basic roll punisher, throw tech O/S, and a safer way to beat blocking rather than attempting to use Kuzukaze ( + ).
- Causes a soft knockdown; if the opponent techs it from midscreen then Iori can't land a true meaty followup, not even with (
Special Moves
- 100 Shiki: Oniyaki (
 + ) - A purple DP similar to Kyo's. The version hits once and comes out faster though it lacks any invulnerability. version hits three times and can be Drive Canceled on the second hit and it's fully invuln on startup. Iori travels almost directly upward with little horizontal range so take that into consideration when comboing or anti-airing with either version. Iori's main reversal threat and an alright anti-air option if done on reaction.
 100 Shiki: Oniyaki ( + + ) - Acts like a silly Shoryureppa and does 3 uppercuts. Faster than the heavy version and fully invincible on startup. Since Iori stays grounded for a while, this can easily be Drive Canceled into Kuzukaze ( + ) to extend a combo or score a better knockdown.
- When done as an anti-air, most of the hits can miss the opponent so this works most optimally against grounded opponents.
- 212 Shiki: Kototsuki In ( +
 ) - A running attack similar to Kyo's ( + ). This attack wont combo from light attacks or ( + ) so it can be tricker to confirm into, though the knockdown gives Iori the most advantage time out of all his specials. This can be Drive Canceled on the first hit when Iori initially touches the opponent, as otherwise he'll slam them down. The light version travels 3/4 the screen and the heavy one goes all the way across the screen, though both have idential startup and recovery times. This move is unsafe on block.
- 212 Shiki: Kototsuki In ( + + ) - Iori goes directly into the downward grabbing animation, though this still isn't a command grab. Doesn't combo from many normals, but instead functions as an OTG move that most easily connects in the corner after ( + ×3 ) to add on more damage at the end of a combo for finishing off the opponent.
- Keeps the opponent on the ground for a while which sets up for a potential safejump or empty hop mixup, though the added damage isn't that spectacular and Iori already gets hard knockdowns left and right, so it's more meter-efficient to save this move for when it'd either kill or leave the opponent with a sliver of health.
- 217 Shiki: Aoihana ( + ×3) - Iori's three-hit Rekka. Almost essential to his combos since they'll connect from just about any attack and go into a nice hard knockdown. The third hit is an overhead though it's really unsafe on block, but it still gives Iori a gimmick option of delaying into the final hit to counter an attempt to punish the second rekka.
- version starts up really fast, combos from light hits, and can be used as a meterless punishing tool (Iori's light rekka can punish itself on block in a mirror match) due to it's horizontal reach and fast speed. The series leaves Iori with a little better frame advantage afterward if willing to sacrifice a slight amount of damage. Also, the first rekka is slightly safer on block and can only be punished by fast, horizontal attacks which will usually cost the opponent meter. Just remember that the second and third hits are completely unsafe on block, so don't continue the series if the first hit's blocked.
- series is slower and has worse recovery on block, but it's a better option when used off of ( + ) since it travels forward further and has a slight damage increase over the lighter version. Note: the first "C" rekka is pretty bad on block and can be punished by sweeps and light attacks universally.
- 217 Shiki: Aoihana ( + + ×3) - About as fast as the series which means this will combo from light hits though Iori travels as far forward as in the rekkas, but his rekka is already great for punishing without spending meter. Iori's EX rekka's main draw is that the second hit launches the opponent very high which allows him to link followups instead of going for the knockdown on the third hit. It also has upper body invul, but using it to anti air would be difficult unless you make a psychic hop read. Also, the EX series is much worse on block so try not to throw it out randomly; that's what the version if for.
- The first two hits of Iori's Aoihana can be canceled on hit to tersen the recovery speed. Once Iori enters into his recovery period, the player can input
 + which will quickly bring Iori to neutral. This is very simple to perform when Iori lacks enough Drive Meter to accidentally get a Super Cancel, though it's entirely possible to delay the DM input so that Iori can cancel his rekka even when the player has full meter. This allows Iori to link followups and doing so consumes no Drive or Super Meter: as an example, Iori can do cl.C f+A xx qcb+C qcb+C xx qcf hcb+P, qcf hcb+AC to combo into his EX DM midscreen while avoiding spending valuable HD meter for Super Canceling the rekkas.
- Kuzukaze ( + ) - EX Iori's command grab isn't instant and can be interrupted easily by the opponent's attacks, but it keeps the opponent grounded on hit which allows him to run forward into a Close Heavy Punch combo. Always switches sides with the opponent; can't be used as liberally as in the older games due to the lack of startup invuln, but the opponent should still be worried about getting grabbed into a full combo especially after recovering from a soft knockdown.
- Iori can combo into this grab from Crouching Light Punch and Close Light Kick/Punch.
- Kuzukaze ( + + ) - Startup invuln, though still not an instant grab. The attack and throw invuln wears out before Iori's active throwing frames come out so he can still be interrupted by the opponent just as in previous games. Despite this weakness, it's a much more powerful threat than his standard command grab which can be beaten freely in most situations.
- 108 Shiki: Yamibarai ( + ) - A grounded fireball kinda like Kyo's. EX Iori's projectile really sets him apart from Claw Iori as it gives him a long range poke that encourages the opponent to hop at Iori and from up close it gives Iori a really safe blockstring ender. version travels slower and recovers faster, but this is still one of the faster projectiles in the game. Doesn't combo from normals from further distances which really adds use for closing out blockstrings since it'll leave a gap that can catch the opponent doing something other than blocking. The version might be the fastest projectile in the game barring some EX fireballs. This baby moves across the screen at a blazing rate, but the recovery period is much more stiff for Iori so he's more susceptible to being jumped in on if used at a bad time. Iori's greatest poke, often referred to as "the best poke in the game" in older KOF games.
- 108 Shiki: Yamibarai ( + + ) - Very slow and telegraphed startup, but travels about the same speed as the verison once out. The delayed startup keeps Iori from comboing into his EX projectile from any normals, so he has to rely on Drive Cancels or playing a strong fireball game to land this. What's great is that on hit the opponent is frozen in place and will take up to seven hits before falling out and so Iori can very easily jump in on the opponent for a combo if it hits.
- Some really slow projectiles can be tagged with this move. For instance, K's Ein Trigger > Second Shoot ( + > + ) is actually pretty slow due to the required trigger startup, so Iori can send out his EX projectile and if K' does either followup he can get frozen for a combo.
Desperation Moves
- Kin 1211 Shiki: Yaotome ( + ) - The Maiden Masher. Combos from any cancelable normal and causes a soft knockdown unless canceled into the followup, Ura 316 Shiki: Saika. As with Claw Iori's DM, EX Iori's isn't startup invulnerable and also his hitbox no longer shrinks so there isn't much utility of using this DM raw.
- Kin 1211 Shiki: Yaotome ( + + ) - Comes out faster which allows it to punish a lot of attacks that are usually safe on block by spacing. Despite the faster speed, this still lacks invuln so don't throw it out recklessly. As it happens, Iori's EX DM only does slightly more damage than the normal version canceled into the followup, and by opting for latter option he gains a slightly improved frame advantage afterward so save this version for when its speed makes it necessary.
- Ura 316 Shiki: Saika (Yaotome, then ×4 + + ) - New followup from Yaotome; costs 1 extra bar of super, cannot be canceled into NeoMax. Iori slashes at the air twice, hitting the opponent, then follows up with a diagonal flame pillar. This adds on about 100 unscaled damage and brings the damage total to about the same level of Iori's EX DM, only this followup leaves Iori with better frame advantage so there isn't much of a downside to doing the followup when sitting on two meter.
- Ura 316 Shiki: Saika (Yaotome, then
- Ura 1207 Shiki: Yamisogi (×2 + ) - Non-Maiden Masher version of Saika. Instead of slashing at the air, Iori slashes with two flames in his hands that travel very shortly on the ground in front of him (which can actually nullify projectiles). Like Saika this move cannot be canceled into his NeoMax. Since this does near identical damage as Yaotome, connects in nearly every same instance, and causes a hard knockdown it's Iori's best one bar combo finisher.
- This move's safe on block though Iori can be interrupted between the hits.
- Ura 1029 Shiki: Homurabotogi (

 + + ) - Only MAX Cancelable from normal or EX Maiden Masher, and possibly the most powerful NeoMax in the game. Iori turns into Orochi Iori, roars and/or laughs like a maniac, then pounces on you, chokes you, and then creates a large, fiery explosion that sends you flying. If done raw, this is a flying command grab that reaches 1/2 screen as Iori pounces, but this will still combo when canceled from a normal or special. Iori's invulnerable on startup and his low hop distance could potentially be used to fly over a projectile from mid range, though this would require quick reaction speed.
Tips and Tricks
- Safejumps and empty hop mixups can be landed after the following moves:
- ...qcb+P x 3
- ...qcb+AC x 3
- ...hcb+K
- ...hcb+BD
- ...qcf,qcf+P
- ...qcf,hcb+P xx qcf,qcf,qcf,qcf+AC
- ...(near corner) qcf,hcb+AC
Combos
0% Drive
0 Bar
- (jump attack) cr.B cr.A f.A xx qcb+C x 3 - (217, 20)
- (jump attack/cl.B) cl.C f.A xx qcb+C x 3 - (245, 21)
- st.C xx qcb+C x 3 - (214, 17)
- Converts far C into damage.
- (crossup jump attack) cl.B f.A f.A xx qcb+C x 3 - (250, 23)
- (cr.a/cl.B/cl.A xx) hcbf+P dash cl.C f.A xx qcb+C x 3 - (230, 21)
- Can do st.C xx qcb+C x3 instead for 30 damage loss but easier.
You can choose to end any of these combos with qcb+A x 3 instead to secure about 20 less damage but have better knockdown time. Can also choose to ignore f.A and do cl.C hcb+K instead to secure the best possible knockdown for the cost of about 40 damage.
1 Bar
- (jump attack) cr.B cr.A f.A xx qcfqcf+P - (276, 10)
- (jump attack/cl.B) cl.C f.A xx qcfqcf+P - (306, 11)
Favourable over his ranbu due to better knockdown and slightly more damage.
- (crossup jump attack) cl.B f.A f.A xx qcfhcb+P - (307, 13)
- st.C xx qcfqcf+A (A version has longer "suck in" properties than C) - (279, 7)
- Converts far C into bigger damage.
- (cr.a/cl.B/cl.A xx hcbf+P dash cl.C f.A xx qcfqcf+A (A version has longer range than C) - (289, 11)
- Can do st.C xx qcfqcf+A instead for 30 damage loss but easier.
- (near corner, jump attack) cr.B cr.A f.A xx qcb+A x 3, hcb+BD (OTG, combo must end in corner) - (290, 20)
- (near corner, jump attack/cl.B) cl.C f.A xx qcb+A x 3, hcb+BD (OTG, combo must end in corner) - (324, 20)
- (crossup jump attack, near corner) cl.B f.A f.A xx qcb+A x 3, hcb+BD (OTG, combo must end in corner) - (323, 23)
- (cr.a/cl.B/cl.A xx} hcbf+P (must throw them into/near the corner) dash cl.C f.A xx qcb+A x 3, hcb+BD (OTG, combo must end in corner) - (303, 21)
- j.CD (counter hit) qcf,hcb+P - (309)
- (corner) j.CD (counter hit) qcf,qcf+P - (309)
- Somewhat simple j.CD counterhit combos that spend a meter. Reacting in time for qcf,hcb+P can be difficult but in the corner it's really easy to confirm into qcf,qcf+P since it has to be done late as the opponent's close to the ground so it should be free once you learn to look out for it.
2 Bar
- (jump attack) cr.B cr.A f.A xx qcfhcb+AC - (366, 10)
- (jump attack/cl.B) cl.C f.A xx qcfhcb+AC - (396, 11)
- (crossup jump attack) cl.B f.A f.A xx qcfhcb+AC - (399, 13)
- st.C xx qcfhcb+AC - (369, 7)
- (cr.a/cl.B/cl.A xx} hcbf+P dash cl.C f.A xx qcbhcf+AC - (379, 11)
Basic SDM combos. Iori's qcfx4+AC addon to regular qcfhcb+P DM does about 2 damage less than SDM, but you get more knockdown time, so you may find it more useful.
3 Bar
- (jump attack) cr.B cr.A f.A xx qcb+AC x2, qcfhcb+AC - (442, 10)
- (jump attack/cl.B) cl.C f.A xx qcb+AC x2, qcfhcb+AC - (478, 11)
- (crossup jump attack) cl.B f.A f.A xx qcb+AC x2, qcfhcb+AC - (475, 13)
- st.C xx qcb+AC x2, qcfhcb+AC - (457, 7)
- (cr.a/cl.B/cl.A xx} hcbf+P dash cl.C f.A xx qcb+AC x2, qcfhcb+AC - (455, 11)
More basic EX juggle > SDM combos. Highest damage without drive.
50% Drive
0 Bar
- (jump attack) cr.B cr.A f.A xx qcb+C x 2 DC hcb+K - (257, 14)
- (jump attack/cl.B) cl.C f.A xx qcb+C x 2 DC hcb+K - (288, 15)
- st.C xx qcb+C x 2 DC hcb+K - (260, 11)
- (crossup jump attack) cl.B f.A f.A xx qcb+C x 2 DC hcb+K - (290, 17)
- (cl.B/cl.A xx) hcbf+P dash cl.C f.A xx qcb+C x 2 DC hcb+K - (270, 15)
Basically gives you the best knockdown for higher damage without using meter. Not too useful overall.
- (jump attack/cl.B) cl.C xx dp+C (2hit) DC hcbf+P dash cl.C f.A xx qcb+C x3 - (352, 36)
- (cl.B/cl.A xx) hcbf+P dash cl.C xx dp+C (2hit) DC hcbf+P dash cl.C f.A xx qcb+C x3 - (328, 36)
Much harder to confirm, but squeeze out more damage.
1 Bar
- (jump attack) cr.B cr.A f.A xx qcb+C x 2 SC qcfhcb+P - (327, 14)
- (jump attack/cl.B) cl.C f.A xx qcb+C x 2 SC qcfhcb+P - (353, 15)
- st.C xx qcb+C x 2 SC qcfqcf+P - (325, 11)
- (crossup jump attack) cl.B f.A f.A xx qcb+C x 2 SC qcfhcb+P - (360, 17)
- (cl.B/cl.A xx) hcbf+P dash cl.C f.A xx qcb+C x 2 SC qcfhcb+P - (340, 15)
Basic supercancel combos. They don't add too much damage though. Due to the buffer of the game, trying to do dp+C DC qcf+AC is basically impossible.
- (near corner, jump attack) cr.B cr.A f.A xx qcb+AC x 2, dp+C (2 hit) DC qcb+A x 2, dp+C - (368, 33)
- (near corner, jump attack/cl.B) cl.C f.A xx qcb+AC x 2, dp+C (2 hit) DC qcb+A x 2, dp+C - (408, 34)
- (near corner) st.C xx qcb+AC x 2, dp+C (2 hit) DC qcb+A x 2, dp+C - (390, 30)
- (near corner, crossup jump attack) cl.B f.A f.A xx qcb+AC x 2, dp+C (2 hit) DC qcb+A x 2, dp+C - (401, 36)
- (cl.B/cl.A xx) hcbf+P (must throw them into/near the corner) dash cl.C f.A xx qcb+AC x 2, dp+C (2 hit) DC qcb+A x 2, dp+C - (381, 34)
Could choose to reset with a cl.C or st.A instead of dp+C ender for a potential mixup.
- (jump attack/cl.B) cl.C xx dp+C (2hit) DC hcbf+P dash cl.C f.A xx qcfhcb+P - (420, 26)
- (cl.B/cl.A xx) hcbf+P dash cl.C xx dp+C (2hit) DC hcbf+P dash cl.C f.A xx qcfhcb+P - (398, 26)
Highest damage, but again difficult to confirm.
2 Bar
- (jump attack) cr.B cr.A f.A xx qcb+C x 2 SC qcfhcb+AC - (405, 14)
- (jump attack/cl.B) cl.C f.A xx qcb+C x 2 SC qcfhcb+AC - (439, 15)
- st.C xx qcb+C x 2, SC qcfhcb+AC - (415, 11)
- (crossup jump attack) cl.B f.A f.A xx qcb+C x 2 SC qcfhcb+AC - (438, 17)
- (cl.B/cl.A xx) hcbf+P dash cl.C f.A xx qcb+C x 2 SC qcfhcb+AC - (418, 15)
Basic SDM supercancels midscreen.
- (near corner, jump attack) cr.B cr.A f.A xx qcb+AC x 2, dp+C (2 hit) DC qcb+A x 2, qcfhcb+P - (458, 22)
- (near corner, jump attack/cl.B) cl.C f.A xx qcb+AC x 2, dp+C (2 hit) DC qcb+A x 2, qcfhcb+P - (499, 23)
- (near corner) st.C xx qcb+AC x 2, dp+C (2 hit) DC qcb+A x 2, qcfhcb+P - (480, 19)
- (near corner, crossup jump attack) cl.B f.A f.A xx qcb+AC x 2, dp+C (2 hit) DC qcb+A x 2, qcfhcb+P - (491, 25)
- (cl.B/cl.A xx) hcbf+P (must throw them into/near the corner) dash cl.C f.A xx qcb+AC x 2, dp+C (2 hit) DC qcb+A x 2, qcfhcb+P - (471, 23)
- (jump attack/cl.B) cl.C xx dp+C (2hit) DC hcbf+P dash cl.C f.A xx qcfhcb+P, qcfx4+AC - (510, 26)
- (cl.B/cl.A xx) hcbf+P dash cl.C xx dp+C (2hit) DC hcbf+P dash cl.C f.A xx qcfhcb+P, qcfx4+AC - (488, 26)
3 Bar
If you are willing to blow 3 bars on non HD combos, its not really worth using the drive midscreen on the easier combos, as Iori's EX rekka to SDM combo is only improved by barely 20 damage with drive. If you really want to do it, combo would look like any starter xx qcb+C x2 DC qcb+AC x2, qcfhcb+AC
- (jump attack/cl.B) cl.C xx dp+C (2hit) DC hcbf+P dash cl.C f.A xx qcb+AC x2, qcfhcb+AC - (550, 26)
- (cl.B/cl.A xx) hcbf+P dash cl.C xx dp+C (2hit) DC hcbf+P dash cl.C f.A xx qcb+AC x2, qcfhcb+AC - (518, 26)
If you end in/near the corner, you can do qcfhcb+P, qcfx4+AC to get 578/550 damage instead respectively.
- (near corner, jump attack) cr.B cr.A f.A xx qcb+AC x 2, dp+C (2 hit) DC qcb+A x 2, qcfhcb+P, qcfx4+AC - (548, 22)
- (near corner, jump attack/cl.B) cl.C f.A xx qcb+AC x 2, dp+C (2 hit) DC qcb+A x 2, qcfhcb+P, qcfx4+AC - (589, 23)
- (near corner) st.C xx qcb+AC x 2, dp+C (2 hit) DC qcb+A x 2, qcfhcb+P, qcfx4+AC - (570, 19)
- (near corner, crossup jump attack) cl.B f.A f.A xx qcb+AC x 2, dp+C (2 hit) DC qcb+A x 2, qcfhcb+P, qcfx4+AC - (581, 25)
- (cl.B/cl.A xx) hcbf+P (must throw them into/near the corner) dash cl.C f.A xx qcb+AC x 2, dp+C (2 hit) DC qcb+A x 2, qcfhcb+P, qcfx4+AC - (561, 23)
100% Drive
All HD combos could be started from cr.B cr.A f.A instead for a low, f.B for an overhead, or hcbf+P for from a command grab.
2 Bar
- (jump attack/cl.B) cl.C f.A HD cl.C xx [dp+C (2hit) hcb+K/qcb+C] x3 HDC dp+C SC qcbhcf+AC - (702, 11)
Delay your cl.C to be as close as possible to make sure to land this combo. qcb+C is easier to input than hcb+K but due to the super shortcut you might get accidental super. Both do the same damage, so choose as you want. Can tag in an extra qcb+A after the last dp+C before the supercancel, but this is difficult and only adds 9 damage.
- (jump attack/cl.B) cl.C f.A HD cl.C f.A xx qcb+C x2 HDC dp+C (2hit) HDC qcb+C/A(depends on if you are in corner or not) x2, [dp+C (2hit) qcb+A x2,] x3 qcfhcb+P, qcfx4+AC - (752, 11)
This combo will work till you are further than 2/3 from the corner. Your second qcb+P will have to be C if you are not yet in the corner, and A if you are. The dp+C HDC qcb+A x2's must be quite heavily delayed to make sure they both hit correctly, and the linked dp+C after has to be delayed till they are close to the ground.
- (jump attack/cl.B) cl.C f.A HD cl.C xx dp+C (2hit) HDC hcbf+P dash cl.C f.A xx qcb+C x2 HDC [dp+C (2hit) HDC qcb+A x2,] x3 qcfhcb+P, qcfx4+AC - (751, 11)
Use this if you're over 2/3 from the corner.
3 Bar
- (jump attack/cl.B) cl.C f.A HD cl.C f.A xx qcb+C x2 HDC dp+C (2hit) HDC qcb+C/A(depends on if you are in corner or not) x2, dp+C (2hit) qcb+A x2, qcfhcb+P, Max Cancel last hit qcbhcf+AC - (825, 11)
This combo will work till you are further than 2/3 from the corner. Your second qcb+P will have to be C if you are not yet in the corner, and A if you are. The dp+C HDC qcb+A x2's must be quite heavily delayed to make sure they both hit correctly, and the linked dp+C after has to be delayed till they are close to the ground.
- (jump attack/cl.B) cl.C f.A HD cl.C xx dp+C (2hit) HDC hcbf+P dash cl.C f.A xx qcb+C x2 HDC dp+C (2hit) HDC qcb+A x2, qcfhcb+P, Max Cancel last hit qcbhcf+AC - (824, 11)
Use this if you're over 2/3 from the corner.
Team Order
1st position
Pros
Cons
2nd position
Pros
Cons
3rd position
Pros
Cons