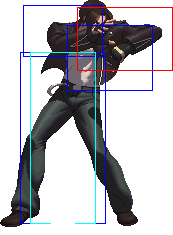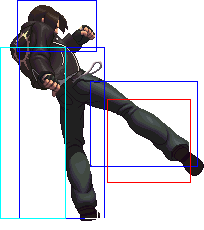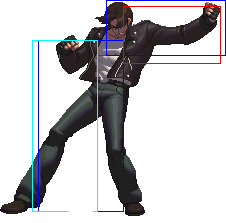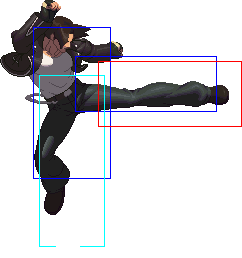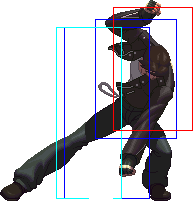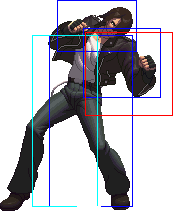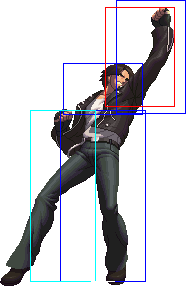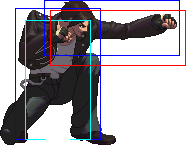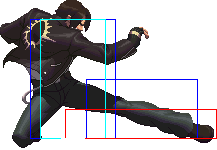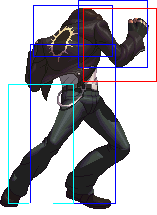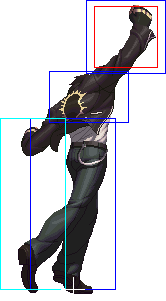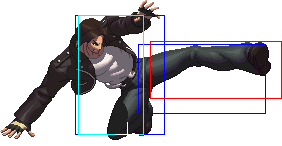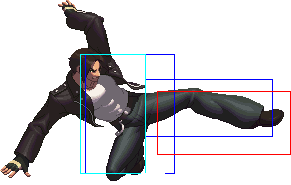

Kyo Kusanagi
The original protagonist of the series. Kyo is the latest heir to the Kusanagi clan, the very same clan that sealed away the Orochi 1800 years prior to the present day. He has been present at nearly every King of Fighters tournament since 1994, where he entered to rescue his captured father Saisyu. Over the next three years it became apparent that the Orochi had been manipulating the tournament from the shadows, and in 1997 Kyo once again sealed it away along with his rival Iori Yagami, repeating their families' legacy. After being captured for a year by the NESTS organization and cloned, Kyo resurfaced and over a three year campaign worked with his clone K' to take down the syndicate. Now, Orochi is on the verge of reawakening, and Kyo has found a new enemy in Ash Crimson, who is set to steal his sacred treasure, the Kusanagi-no-Tsurugi.
In a nutshell
In this iteration of the game, Kyo is featured as the well rounded character that has all the fundamental tools to win. His exceptional ability to go on offense with a fast hop with a great ![]() hitting jump-in coupled with fast, low-hitting attacks that hitconfirm into
hitting jump-in coupled with fast, low-hitting attacks that hitconfirm into ![]() combos makes his offensive game quite scary. As a contrast, he is also fitted with the tools to be able to keep out opponents with long reaching horizontal jumping attacks, projectiles, and great grounded normal attacks. He isn't the best in either fields but ranks
combos makes his offensive game quite scary. As a contrast, he is also fitted with the tools to be able to keep out opponents with long reaching horizontal jumping attacks, projectiles, and great grounded normal attacks. He isn't the best in either fields but ranks ![]() in either style of play and putting both playstyles together makes him to be force to be reckoned with.
in either style of play and putting both playstyles together makes him to be force to be reckoned with.
Video Walkthrough
Move List
Normal Moves
Hop: 40
Hop: 40
Hop: 70
Hop: 68
Hop: 70
Unique Attacks
Canceled into: 60
Canceled into: specialcancel
2nd Hit: low
Against Airborne Opponents: hardknockdown
Throw
Special Moves
Desperation Moves
Console Changes
- Far standing D has faster recovery.
- 88 Shiki (df+D) moves forward more. As a result, close C > df+D > qcf+K now does the full four hits.
- Light version of 75 Shiki: Kai (qcf+B) can now be followed up with other attacks. On the ground you can only follow up with an uppercut, but on a mid-air hit you can do more interesting things.
- 212 Shiki: Kototsuki You (hcb+K) has slower recovery on block.
- Added EX Air Orochinagi (Air qcb hcf+AC). It does 3 hits and 300 damage. Unlike the ground version, it has no invincibility, but it is very fast, so you can use it in combos or in air-to-air battles.
Strategy
Move Analysis
Normal Moves
- Jumping Light Punch (Air
 ) - This is the go-to air-to-air move. When anticipated correctly, it will beat out just about any jump move aimed to hit someone on the ground. There are definitely better air-to-air attacks that will beat you this attack.
- Jumping Light Kick (Air
 ) - One of the greatest hop-in attacks in the game. The downward angle is incredibly good, making it impossible to dodge with moves that lower your hitbox (like K' cr.B). This move also functions as a great crossup that will hit both standing and crouching opponents.
- Jumping Heavy Punch (Air
 ) - This attack is overshadowed by Kyo's j.B and j.d+C, It's a good jump-in, with better range than both, but in general the other two are preferred.
- Jumping Heavy Kick (Air
 ) - The go to move for horizontal zoning. The horizontal hitbox on this move is fantastic, it will stop advancing opponents, creating a large vertical wall that is hard to get around. This move can even be quite useful as an air-to-air, though it is somewhat slower than j.A. Compared to older KOF's, this move has lost some of it strength, as it completely whiffs on most crouching opponents. Making advancing with it impossible, as the opponent would simply trip guard with cr.B.
- Jumping Blowback Attack (Air
 +
+  ) - This move has a terrific hitbox, and is aimed to make opponents block. Once they have block this move, you are at massive frame advantage and are free to mixup up with hop mixups, while most of your jump will be covered because the opponent is still in hitstun. Some low moves, like K' and Iori cr.B might be able to dodge this attack if done well.
Unique Attacks
- Goufu You (
 +
+  ) - Quite a slow overhead, but can be HD cancelled into an extensive HD combo, which will certainly make your opponent on the lookout to block high.
 - 88 Shiki (
 +
+  ) - Kyo's standard hitconfirm filler. This move cancels after the first hit and hits low. Besides act as a filler combo, it has little use. It could be used as a low HD combo starter that can be hitconfirmed at a longer range than cr.B.
 - Naraku Otoshi (Air
 +
+  ) - This move lost much of the air-to-air priority it has had in previous games. When it does hit air-to-air, it causes a hard knockdown. Its main use now, is its fantastic crossup potential. Kyo can hop or hyperhop over standing opponents with this move. A (hyper)hop crossup j.d+C is quite difficult to see and block on reaction, and leaves you with massive frame advantage to combo into cl.C on hit. Although it is very easy to his a crossup with this move, the spacing has to be extremely specific to hit it on a crouching opponent, making it a bit more attractive to use j.B for crossup purposes.
Throw
- Issetsu Seoi Nage (
 or
or  +
+  or
or  [while close]) - Causes a really nice hard knockdown that sets up for a cross up, fake cross up, safe jump, empty hop low mixup, or whatever you want.
Special Moves
- 108 Shiki: Yamibarai (
 +
+  ) - There's little to say about this move. It's a ground fireball that you can hop over, the A version goes slow, the C version goes fast.
- 100 Shiki: Oniyaki (
 +
+  ) - This move does not have autoguard like we have come to know and love with Kyo. The A version only has upperbody invincibility and will lose to low meaties. The C version is fully invincible on startup and the first active period. Unlike in older KOF's, it seems like it isn't possible to meaty the opponent with a low in such a way that only the first hit hits and the rest whiffs. Therefore, the C version has actually become an extremely good reversal option, only lacking in this department due to its somewhat slow startup.
- 75 Shiki: Kai (
 +
+  ) - This move got a huge buff. B version juggles now, and D version connects after df+D mid-screen. This move is negative on block, but generally safe to anything but instant throws. There is a gap in between two two kicks where you can use an invincible reversal can beat out the move. So this move can really only be used gratuitously against characters that don't have a good reversal, or don't have a one frame grab.
- 212 Shiki: Kototsuki You (
 +
+  ) - This move was very safe on block in the arcade version, allowing some very scary frametraps. In the console version it is very unsafe on block again like it always was. Therefore it has lost its use a move to just throw out there, and is now mainly a move used for combos. If you superjump directly after connecting this move, it sets up a safejump against a large portion of the cast. See the Advanced Strategy section for more information
 212 Shiki: Kototsuki You (
 +
+  +
+  ) - The EX version is throw with 4 frames startup that allows you to throw some nasty throwing mixups into Kyo's offense. Of course, at the expense of 1 stock, it is a rather steep cost. Despite being quite a different move from the regular version, the knockdown is exactly the same, so the safejump setups work off this grab as well.
- 101 Shiki: Oboroguruma (
 +
+  ) - The B version of this move is one of the main combo fillers, it juggles, is fast to startup. Due to its angle, it does have some use for a pre-emptive anti-air as well. The D version is an alternative combo ender that can be used instead of hcb+K for a bit less damage but a hard knockdown.
Desperation Moves
- Ura 108 Shiki : Orochinagi (


 +
+  ) - Kyo's staple DM. The grounded Orochinagi is sort of outclassed by its aerial version since Kyo can combo after the air version in many more instances. Better for MAX Canceling since Kyo has to be grounded to use Ura 111 Shiki : Ama no Murakumo. Similar, but less noticeably compared to the EX version, this move's startup can be shortened slightly by holding the buttons shortly after the superstop.
 Ura 108 Shiki : Orochinagi (

 +
+  +
+  ) - This move normally has 8 frames startup, but can be shortened by holding the input buttons a short period after the superstop. Then, the startup becomes 1 frame which allows Kyo to link this move from most of his normals and even after his projectile. This may seem odd, but is a throwback to older KOFs. Works as a fast anti-air and really good punishing tool on its own, though due to the hitbox properties some hits will whiff in the corner so it's not widely used in longer combos. Startup invulnerable.
- Air Ura 108 Shiki : Orochinagi (Air


 +
+  ) - Kyo recovers much faster from an air Orochinagi which lets him do as many as he can afford to do in his corner combos. Deals decent damage and can just about always be followed up on hit into a knockdown or hit reset of choice.
 - '*
 Air Ura 108 Shiki : Orochinagi (Air

 +
+  )' - Starts up and recovers faster than the standard air DM. This can work as a more abare air-to-air or anti-anti-air if you're feeling really wild. While it's easy to incorporate this into combos, remember than Kyo can use Ura 111 Shiki : Ama no Murakumo for the same amount of meter when he's in HD mode.
- Slightly less damaging than the grounded EX DM.
- Ura 111 Shiki : Ama no Murakumo (

 +
+  +
+  ) - Kyo steals Iori's lines as he tosses out a small flame that travels horizontally across the screen. The flame moves fast enough to punish projectiles and whiffs from fullscreen if necessary and when it hits the screen gets washed over with waves of fire. Good for ending HD combos or using alone to close out a match. Kyo's invuln on startup, but the projectile can be rolled through and Kyo can be punished for whiffing his Neo Max.
Tips and Tricks
- Kyo's qcf + K is pretty risky to use on block. Kyo can be grabbed with instant command grabs on block and since there's a gap between the kicks the opponent can use an invincible 'DP' move every time to get free damage.
Combos
Basic Corner Combo Flow
- Jumping attacks can of course lead into any ground normal, usually cl.C if it hits (also applies outside of corner)
- cl.C leads into df.D, and cr.B chains into cr.A, which then chains into df.D (also applies outside of corner)
- first hit of df.D leads into any special move, usually qcf+D (also applies outside of corner)
- These three points set up your basic starters off of high, low, or a frametrap with cl.C
- rdp+B is juggle filler, the opponent ends up slightly lower after Kyo recovers than when the move starts, useful to throw in if you can wait for the opponent to fall to a certain height
- rdp+B can be super cancelled into air Orochinagi, this ends up floating the opponent a bit higher, but Kyo is pushed back farther horizontally which is the main concern when trying to follow up
- Kyo can combo into fireballs if the opponent is lifted high up enough and the horizontal space matches the speed/timing of the fireball
- qcf+B is very quick and can often be juggled into after most rdp+B (unless it's very low)
- qcf+B can be followed up by DP
- rdp+D is what to combo into for a hard knockdown, it also does decent damage, however be careful as it's a bit slower than rdp+B
- Neomax is quite fast and travels both far and fast horizontally, so it can often be the only way to continue a combo if Kyo is pushed too far away. However, the damage might not be worth the meter—decide wisely
0% Drive
0 Bar
- cr.B cr.A df+D (1 hit) xx qcf+D, hcb+K - (245, 30)
Basic hitconfirm off a low. Alternatively hcb+K can be replaced with rdp+D for a hard knockdown and more corner carry. If started from a jumpin, qcf+D will not fully connect, so use cl.c to instead after jumpins.
- (jump attack) cl.C df+D (1 hit) xx qcf+D, hcb+K - (275, 36)
Maximum damage combo for 0 Bar and 0% Drive Midscreen. Alternatively hcb+K can be replaced with rdp+D for a hard knockdown and more corner carry.
- (corner only) (jump attack) cl.C df.D xx qcf+D, rdp+B, qcf+B, dp+C - (312, 39)
- (corner only) (jump attack) cl.C df.D xx qcf+D, rdp+B, qcf+B, rdp+B, dp+A - (304, 43)
1 Bar
- cr.B cr.A df+D (1 hit) xx qcf+D, rdp+B, rdp+BD - (300, 22)
- (jump attack) cl.C df+D (1 hit) xx qcf+D, rdp+B, rdp+BD - (334, 23)
Basic one bar combos, these combos give more damage than comboing straight into super, they also give a hard knockdown, and therefore are the superior choice.
- (corner) (jump attack) cl.C df+D (1 hit) xx qcf+D, rdp+B, qcf+B, rdp+b, dp+AC - (364, 36)
Simple corner combo.
2 Bar
- cr.B cr.A df+D (1 hit) xx qcf+D, rdp+B, qcb hcf+AC - (411, 22)
- (jump attack) cl.C df+D (1 hit) xx qcf+D, rdp+B, qcb hcf+AC - (452, 23)
Basic SDM combos. Note that in the corner, it is difficult to get the full SDM to connect properly, meaning it is usually better to go for the 50% drive 1 bar combo if you can, or stick to the meterless combos.
- (jump attack) cl.C df+D (1 hit) xx qcf+D, rdp+B, rdp+B, qcb hcf+AC (charge briefly) - (464, 28)
The timing on hitting the EX orochinagi is quite strict; you need to hold AC briefly to make the DM come out in 2 frames or you'll whiff on it and waste the meter. It doesn't do much more damage than without the second rdp+B, however it is much easier to get full damage out of the DM than if you only do one rdp+B, as it doesn't do less damage if you are close you to the corner. If you can get the timing down for the EX orochinagi, this one is much more reliable.
- (corner) (jump attack) cl.C df+D (1 hit) xx qcf+D, air qcb,hcf+AC, qcf+A, hcb+D - (521, 22)
High-damage corner combo essential for a good Kyo. The "instant" air orochinagi is a very important corner combo tool in Kyo's arsenal. It is inputted by not stopping the half-circle forward motion until you hit up-forward, but the timing is a bit odd, and it takes a few frames for Kyo to leave the ground. Once you master the timing of the air orochinagi, Kyo's corner game becomes a lot more dangerous with 2 bars or more.
3 Bar
- (jump attack) cl.C df+D (1 hit) xx qcf+BD, walk forward a quick step, rdpB, qcb,hcf+AC - (470, 15)
If the opponent is close to the corner, the walk forward is unneccesary. This combo has difficult timing and is not very useful compared to his 2 bar mid-screen combo.
- (corner)(jump attack) cl.C df+D (1 hit) xx qcf+D, air qcb,hcf+AC, qcf+A, qcf+AC, hcb+D - (572, 22)
Input the orochinagi DM with an up-forward at the end of the hcf to use immediately after leaving the ground.
4 Bar
- (jump attack) cl.C df+D (1 hit) xx qcf+BD, qcf+BD, rdpB, qcb,hcf+BD (hold BD briefly) (482, 15)
Not much of a damage improvement over his 2- or 3-bar mid-screen combos above, but there if you need a bit of extra damage for the meter.
- (corner) (jump attack) cl.C df+D (1 hit) xx qcf+D, air qcb,hcf+AC, qcf+A, qcf+AC, qcf+AC, hcb+D (619, 22)
Very high-damage corner combo. Input the orochinagi DM with an up-forward at the end of the hcf to use immediately after leaving the ground.
50% Drive
0 Bar
- (jump attack) cr.B s.B, dp+C xx qcf+D, hcb+D - (295, 18)
Simple mid-screen meterless drive combo.
- (corner only) (jump attack)cr.B cr.A df+D xx qcf+D, rdp+B, dp+C (DC) rdp+B dp+C - (314, 50)
- (corner only) (jump attack) cl.C df+D xx qcf+D, rdp+B, dp+C (DC) rdp+B dp+C - (350, 51)
Extremely high stun combos for the corner. They do pretty good damage too.
- (corner) (jump attack) cl.C df+D xx qcf+D, rdp+B, qcf+B, rdp+B, dp+A xx qcf+D, rdp+B, dp+C (381, 58)
Most damaging corner combo for 1 drive and no meter. Does high stun.
1 Bar
- cr.B cr.A df.D qcf+D rdp+D (2 hits) (SC) qcb hcf+P - (304 , 25)
- (jump attack) cl.C df.D xx qcf+D, rdp+D (2 hits) (SC) qcb hcf+P - (338, 26)
Not really worth it, but good to know about in case. Only does 4 more damage than his 0 drive 1 bar combo, use that instead.
- (corner only) (jump attack) cl.C df+D xx qcf+D, rdp+B (SC) qcb hcf+P, qcf+A, hcb+K - (459, 27)
- (corner only) cr.B cr.A df+D xx qcf+D, rdp+B (SC) qcb hcf+P, qcf+A, hcb+K - (416, 26)
Extremely powerful corner combos. Very important to learn.
- (corner)(jump attack) cl.C df+D xx qcf+D, rdp+B, qcf+B, dp+A xx air qcb,hcf+P, hcb+D (461, 43)
Slightly more damage and stun than above. The dp+A cancel has to be slightly off the ground.
2 Bar
- (jump attack) cl.C df+D xx qcf+D, hcb+D xx rdp+B, qcb,hcf+AC (456, 15)
Only slightly more damage than his no drive combo.
- (corner only) cr.B cr.A df+D xx qcf+D, rdp+B, rdp+B (SC) qb hcf+AC, qcf+A, hcb+D - (479, 31)
- (corner only) (jump attack) cl.C df+D xx qcf+D, rdp+, rdp+B (SC) qcb hcf+AC, qcf+A, hcb+D - (530, 32)
Best damage for two bars and 50% drive without his "instant" air orochinagi.
- (corner only) cr.B cr.A df+D xx qcf+D, rdp+B, rdp+B (SC) qcb hcf+AC, rdp+B, qcf+B, dp+C - (472, 48)
- (corner only) (jump attack) cl.C df.D xx qcf+D, rdp+B, rdp+B (SC) qcb hcf+AC, rdp+B, qcf+B, dp+C - (523, 49)
This combo does slightly less damage than the combo above, but does way more stun, and build a whole stock, making the cost of the combo effectively lower.
- (near corner) (jump attack) cl.C df+D xx qcf+D, rdp+B qcf+B, dp+A (DC) qcf+D, j.qcb hcf+AC, qcf+A, hcb+B - (524, 41)
More difficult variation on the combo above, does one point of damage more, and rebuilds a tiny bit more meter.
- (corner) (jump attack) cl.C df+D xx qcf+D, air qcb,hcf+AC, qcf+A, rdp+B, dp+A xx qcf+D, rdp+B, qcf+B, dp+C (577, 57)
Most damaging corner combo for 1 drive and 2 bar. See his 2 bar 0 drive combo for a description of the air orochinagi; it must be inputted with an up-forward at the end of the hcf and is done just after he leaves the ground.
3 Bar
- (jump attack) cl.C df+D xx qcf+BD, hcb+D xx rdp+B, qcb,hcf+AC (473, 15)
Mid-screen combo. Not very good damage for the resources involved though; use his 2 bar 0 drive mid-screen combo for best results.
- (corner only) (jump attack) cr.B cr.A df+D xx qcf+D, rdp+B (SC) qcb hcf+P, qcf+A, qcb hcf+AC - (540, 26)
- (corner only) (jump attack) cl.C df.D xx qcf+D, rdp+B (SC) qcb hcf+P, qcf+A, qcb hcf+AC - (593, 27)
- (corner)(jump attack) cl.C df+D xx qcf+D, air acb,hcf+AC, qcf+A, rdp+B, dp+A xx qcf+D, rdp+B, qcf+B, rdp+B, dp+AC (607, 54)
Highest damage 3 bar 1 drive corner combo. The faster start-up on EX DP allows the extra rdp+B to hit without wasting a follow-up, but the timing is a bit tight. If the air orochinagi didn't come out immediately after leaving the ground, do the EX DP after qcf+B, leaving out the last rdp+B.
4 Bar
- (jump attack) cl.C df+D xx qcf+BD, qcf+BD, hcb+D xx rpd+B, qcb,hcf+AC (Charge briefly) (484, 15)
Very wasteful combo for the damage it deals, but his most damaging option for mid-screen 4 bar 1 drive that I could do. Only 30 more damage than his 2 bar no drive combo, so stick to that if you want to conserve some meter while doing comparable damage.
- (corner) (jump attack) cl.C df+D xx qcf+D, air qcb,hcf+AC, qcf+A, rdp+B, dp+A xx qcf+D, air qcb,hcf+AC, qcf+A, hcb+D (688, 40)
Extremely damaging combo, but difficult to execute if you haven't mastered his "instant" air orochinagi; see the description on his 0 drive 2 bar corner combo. The orochinagi input must end at up-forward and be executed immediately after Kyo leaves the ground, otherwise the combo will whiff, either at the dp+A or the hcb+D, depending on which orochinagi was late.
100% Drive
0 Bar
- (near corner) (jump attack) cl.C df+D xx qcf+D, rdp+B, qcf+B, rdp+B, dp+A (DC) qcf+D, rdp+B, dp+A (DC), qcf+D, rdp+B, qcf+B, rdp+B, dp+A (419,84)
This combo burns all of your drive, but in return you almost get two bars of super stock out of it.
5 Bar
- (Corner) J.down C, cr. C, df.D xx qcf+D, qcb,hcf+AC (air), qcf+A, qcf+AC, rdp+B, dp+A xx qcf+D, qcb,hcf+AC (air), qcf+A, rdp+B, dp+A xx qcf+D, rdp+B, qcf+B, rdp+B, dp+AC (801, 84)
Just for style points. High damage and stun for full meter and full drive, no HD mode. Builds a full meter during combo, which is used to do the EX DP at the end. The two orochinagis have to be done immediately after leaving the ground.
All HD Combos could be started with a cr.B cr.A df.D instead to combo from low or a f.B to combo off overhead. Going into st.D or st.C without a df.D followup after the HD activation will do slightly more damage overall.
2 Bar
- (over half screen away from the corner) (jump attack) cl.C df.D (2 hit) HD cl.C df.D (1 hit) xx dp+C HDC qcf+D, hcb+K HDC dp+A HDC qcf+D, rdp+B, dp+C HDC rdp+B, dp+C HDC qcfqcf+AC - (715, 14)
- (corner to corner) (jump attack) cl.C df.D (2 hit) HD cl.C df.D (2 hit) hcb+K HDC dp+C HDC qcf+D, hcb+K HDC dp+A HDC qcf+D, rdp+B, dp+C HDC rdp+B, qcfqcf+AC - (703, 14)
- (Half screen to corner) (jump attack) cl.C df.D (2 hit) HD cl.C df.D (1 hit) xx dp+C HDC qcf+D, rdp+B, [dp+C (HDC) rdp+B] x 3, dp+A HDC qcfqcf+AC - (757, 14)
- (In/near corner) (jump attack) cl.C df.D (2 hit) HD cl.C df.D (1 hit) xx dp+A HDC rdp+B, [dp+C (HDC) rdp+B] x 2, dp+A HDC rdp+B, dp+C HDC qcfqcf+AC - (773, 14)
Team Order
1st position
Pros
Cons
2nd position
Pros
Cons
3rd position
Pros
Cons
Basic Strategy
Offense
- In regards to rushing down an opponent, Kyo has the ability to really get in an opponent and make the opponent question whether or not to block low or high as Kyo is able to get simple hit-confirms and damaging, knockdown combos from both jump-ins and low light attacks.
- Up close, Kyo can pressure an opponent with hopping j.B (Jumping B, Jumping Light Kick) as it has a great, fast, vertical hitbox that is quite difficult for most characters to try to anti-air on reaction due to the fact that Kyo can stick out an early j.B and induce large hit-stun on hit and still be able to combo afterwards. Couple this with a fast cr.B (Crouching B, Crouching Light Kick) that links into cr.A (Crouching A, Crouching Light Punch) and confirms into an easy knockdown combo such as cr.B, cr.A xx df.D xx hcb+D (D, Heavy Kick), Kyo could really earn quite amount of damage and set up for another high/low mix up on okizeme.
- Against characters that could easily anti-air j.B with a grounded normal attack, Kyo could use this opportunity to mix-up and opponent with an early jumping attack with a greater hitbox than j.B such as j.2C (Jumping Downward C, Naraku Otoshi). Doing a well spaced, early j.2C will be able to stuff anti-air attempts that beat out j.B, but the move will whiff upon a crouching opponent that doesn't attack and leave Kyo vulnerable. In comparison to previous incarnations of Kyo, j.2C usually added a great deal of push-back so Kyo wouldn't be able to hit confirm two light attacks let alone give him a combo from one; but in KOFXIII, the push-back isn't as great so Kyo is able to jump in more liberally with j.2C and get a cr.B, cr.A into knockdown combo.
- Generally, Kyo could perform 3 crouching light attacks as a blockstring on an opponent and could land a hyper hop j.2C a cross up on most characters regardless of the opponent crouching or standing. Similarly, Kyo could cross up as well from 2 crouching light attacks on block but with a full jump j.2C instead.
- Kyo has the ground normals to be able to maintain the pace while close to the opponent. If an opponent wants to anti-air a hop, other than using j.2C in a trap Kyo could utilize his sweep or fireball to punish the opponent. If the opponent figures to try to hop over Kyo's sweep or fireball, Kyo could just use st.A (Standing A, Standing Light Punch), cl.C (Close C, Close Heavy Punch), or cr.C (Crouching C, Crouching Heavy Punch). Coming full circle, if the opponent tries to sweep against Kyo's anticipated anti-air attemps, Kyo could simple hop on the opponent's sweep with a j.B.
- When the opponent is knocked down or just simpled scared into plainly blocking, Kyo could do an empty hop to fake a jump-in attack and go straight into a low attack as he lands. Alternatively if Kyo has meter, he could use his EX hcb+K attack (212 Shiki: Kototsuki You) as it has command throw properties. If an opponent is not knocked down, Kyo can't perform a safe jump or safe hop as he does an empty jump/hop and the opponent could option select by pressing cl.C/D as Kyo is landing. Otherwise if Kyo performs a safe jump/hop, the opponent doesn't have the luxury of doing the option select and will have to jump or hop if the opponent anticipates the command throw mix-up. Kyo in this case could just empty jump/hop into his forward throw as it double as an option select as well. If the opponent tried to hop in response to a command throw, Kyo's normal throw would not come out but instead a cl.C would hit and anti-air the opponent. The weakness of doing a normal throw is that normal throws could be teched upon reaction and if the opponent anticipates a simple normal throw.
Neutral/Defense
- As a zoning character, Kyo is able to utilize his fireball, aerial normals, and grounded normals quite similar as how Iori used to zone in previous games.
- As a grounded projectile, Kyo's fireball is susceptible to being hopped over or jumped over; but that encourages the opponent to go into the space Kyo readily controls with j.D, st.A, cr.C, and Kyo's dp+P (100 Shiki: Oniyaki).
- Unlike in previous games though, j.D didn't whiff against crouching opponents when done close to the ground. Now in KOFXIII, it only seems to hit on large, crouching characters such as Raiden, Goro, and Maxima. Since there isn't trip guard in KOFXIII, any character hopping or jumping into a cr.B attack or sweep will land on the ground into the attack and will be immediately be in a combo while grounded. So Kyo will have to pay mind controlling the hop and jump space with j.D or an opponent could just easily crouch underneath and score a combo on Kyo. A Kyo player will need to understand and set up and opponent to anticipate such a mistake, and the Kyo player will need to understand when to use j.B to control the downward space coming down from a hop or jump. Otherwise, Kyo could use j.D as a means of control air space from angles that his ground normals and "shoryuken" can't reach or win and really use the tip of his jumping heavy kick to stop advances from the opponent.
- Another note to keep in mind is that Kyo can cancel his backdash into his j.2C. This not only increases the distance that Kyo's backdash travels but also decreases the recovery time as he lands from his backdash. Use this as a means of moving about the screen and in trying to optimize the Kyo's ability to control areas on screen.
- In previous games, Iori's sweep was too risky to use since it was greatly punishable on block so in situations Iori had to sweep to counter poke, he'd use his fireball instead. In Kyo's case, he can similarly do the same thing just in case Kyo's sweep might not reach in time or is up against a move that might have a hitbox advantage against Kyo's sweep. Just like Iori in previous games, Kyo's fireball is vulnerable to hops so doing a fireball midscreen as a poke is just as risky or even riskier than an actual sweep so keep in mind of the risk and the set up.
Advanced Strategy
Kototsuki: You (hcb+K) safejump setups
Superjumping instantly after connecting hcb+K will lead into a safe jump on a large portion of the cast. Some characters can only counter the safejump by using meter. Therefore the cast is divided into groups that can counter according to meter use.
No counter
- Billy
- Saiki
- Takuma
- Mature
- Mai
- Yuri
- Athena
- Kensou: Reversal 2xqcf+P dodges the jump-in, but this can be reacted to in time and blocked.
- Ralf
- Leona
0 Meter counter
- Terry: charge d~u+A. Also: charge d~u+AC
- Ash: charge d~u+B. Also: charge d~u+BD, 2xqcf+K, 2xqcf+BD, A~B~C~D
- Robert: dp+A, will trade, leaving kyo in a juggle state, can be followed up by running up and doing a normal attack, charge db~f+B, charge db~f+BD, f,hcf+P, EXDM or Neomax. Also: dp+AC
- K': dp+A. Also: dp+AC
- Ryo: dp+A. Also: dp+AC
- Flame Iori: dp+C. Also: dp+AC
- NESTS Kyo: dp+A. Also: Neomax
1 Meter counter
- Kyo: dp+AC. Also: EXDM
- Benimaru: dp+BD
- Daimon: hcf+AC, will trade, leaving kyo in a juggle state, can be followed up by running up and doing a normal attack. Also: Neomax.
- Andy: dp+AC. Also: Neomax
- Joe: dp+BD
- Claw Iori: dp+AC. Also: EXDM
- Elisabeth: qcb+AC. Also: Neomax
- Duo Lon: qcb+BD, merely dodges the safejump.
- Raiden: dp+AC
- Kula: dp+AC
- Maxima: dp+AC
- Kim: charge d~u+BD
2 Meter counter
- Shen: C~A~B~C
- Hwa Jai: EXDM
- King: EXDM. Also: Neomax
3 Meter counter
- Vice: Neomax
Special Cases
- Chin: Chin gets up slower than the rest, a jump-in will have to be delayed slightly to work as a safejump, but, d,d+P, qcb+B and qcb+BD all counter the safejump. Therefore it is not very useful against him.
- Clark: hcf+B will make the jump-in whiff, and subsequently the grab comes out and will grab Kyo who inputs his cl.C while holding back. To counter this, you can superjump in and hold up, the moment you land from connecting the jumpin, you can press cl.C before you leave the ground. If clark does hcf+B, the jump-in will whiff, and you will jump C instead, and Clark's throw will not connect. The drawback to this option select is, that it get caught by Clark's neomax, that can be safejumped if you do it normally.

