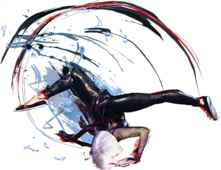
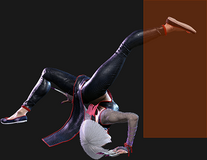
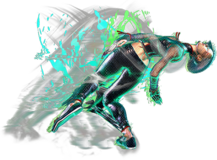
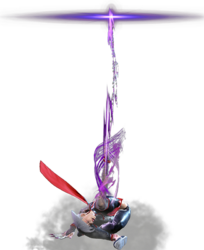
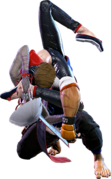
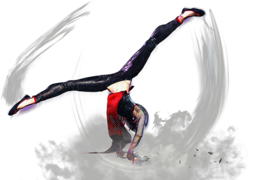
Introduction
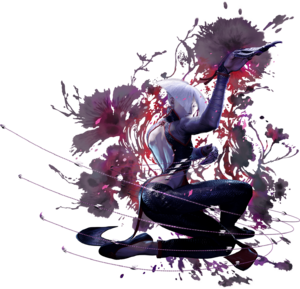
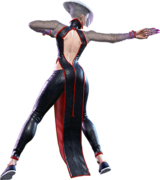
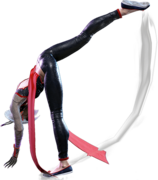
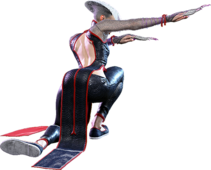
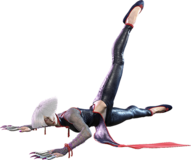
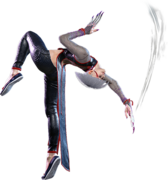
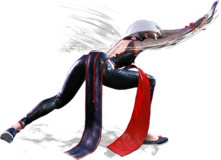
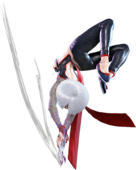
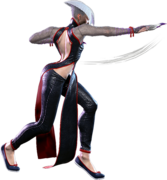
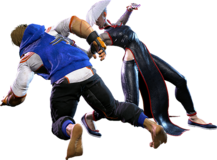
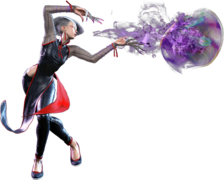
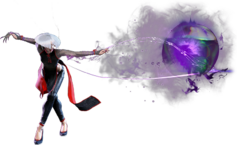
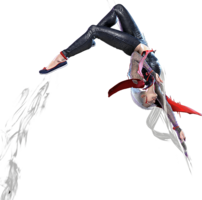
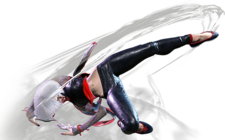
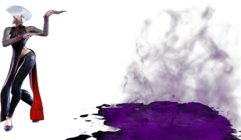
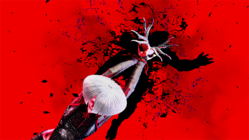
A poison-wielding apprentice of F.A.N.G, the former Shadaloo officer. Enchanted by the power of toxins, nothing brings her more joy than testing them on a new target—other than attention from her “master,” that is.
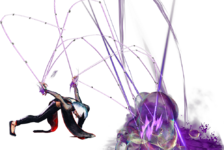
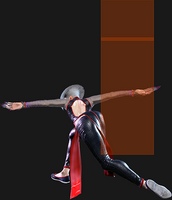
Slithering onto the battlefield with zoning capabilities and powerful okizeme options, A.K.I. is an unconventional and unorthodox character who revolves heavily around her poison mechanic. Some of A.K.I.'s specials poison opponents on hit, which slowly tick away at their life bar. Using this, A.K.I. baits her opponents into making risky play before elegantly maneuvering around them and going for the kill.
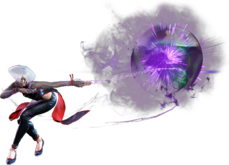
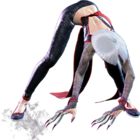
A.K.I's most important special is Nightshade Pulse, a slow advancing projectile that causes poison on hit. A.K.I. can send this projectile out to control the screen as she advances behind it or use it as a meaty to maintain advantage. Nightshade is very strong and defines a lot of matchups for A.K.I., as opponents who fail to deal with it will find her slowly closing in on them. However, Nightshade is just one tool in A.K.I.'s tremendously large kit. Serpent Lash acts as a strong midrange poke, while Orchid Spring allows A.K.I. to set up an unblockable poison pool. A.K.I. is also known for having some rather unique approach options. Snake Step and Sinister Slide cause A.K.I. to drop to the floor and go low-profile, allowing her to slide under all sorts of nonsense. Enemy fireballs, high-reaching pokes, and even Drive Impacts - A.K.I. can duck under it all and lash out with any number of follow-ups. Even better, A.K.I. has a command grab out of Snake Step, giving her unique ways to mess with the opponent.
As a defining part of her kit, if A.K.I. hits her opponent with a poison-inducing move while they are already poisoned, they will explode into a "Toxic Blossom" that gives her extended combo opportunities. Thus, A.K.I. can quickly adapt her gameplan from far-reaching pokes into a very scary mixup and okizeme character if she gets the chance. The looping poison setups she can dish out take off a good amount of life, and the consistent safe jumps she can get off of Toxic Blossom combos allow her to continue offense after a combo very safely. Combined with a strong overhead, a few ways to be plus on block, the sheer volume of potential attacks and specials at her disposal, on top of the threat of poison, and A.K.I. can be an absolute menace if she is closed in on the opponent.
In general, A.K.I. has a high number of complex routes for her combos that are dependent on if the opponent is poisoned or not, but the tradeoff is that her huge kit and unique normals allow her pickups off of openings that other characters may struggle to confirm. As well, her defensive options tend to be lackluster, often lacking important invulnerability frames to push through meaties and deep jump-ins. Another important thing is that A.K.I.'s animations are very long, making it difficult for her to play around Drive Impact. She will be constantly looking for it, far more than most other characters, which can result in a lot of mental fatigue. If you can grapple with this fact, and all of the above sounds appealing to you, shed your inhibitions and become one with the queen of toxicity herself.
| Pick if you like: | Avoid if you dislike: |
|---|---|
|
|
Classic & Modern Versions Comparison
| Missing Normals |
|
|---|---|
| Missing Command Normals |
|
| Shortcut-Only Specials |
|
| Assist Combos |
|
| Miscellaneous Changes |
|
Poison & Toxic Blossom
| A.K.I. | |
|---|---|
| Vitals | |
| Life Points | 10000 |
| Ground Movement | |
| Forward Walk Speed | 0.0452 |
| Backward Walk Speed | 0.032 |
| Forward Dash Speed | 19 |
| Backward Dash Speed | 23 |
| Forward Dash Distance | 1.300 |
| Backward Dash Distance | 1.079 |
| Drive Rush Min. Distance (Throw) | 0.907 |
| Drive Rush Min. Distance (Block) | 2.437 |
| Drive Rush Max Distance | 4.049 |
| Jumping | |
| Jump Speed | 4+40+3 |
| Jump Apex | 2.176 |
| Forward Jump Distance | 2.00 |
| Backward Jump Distance | 1.60 |
| Throws | |
| Throw Range | 0.8 |
| Throw Hurtbox | 0.33 |
| Frame Data Glossary - SF6 | |
|---|---|
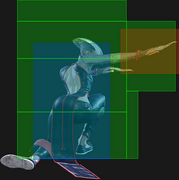
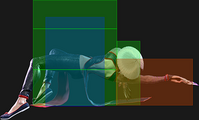
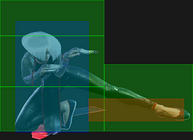
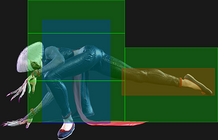
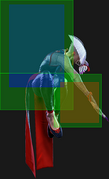
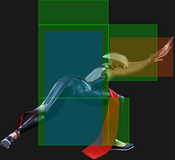
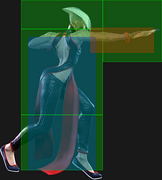
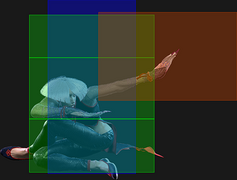
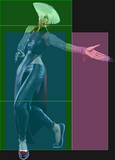
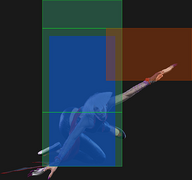
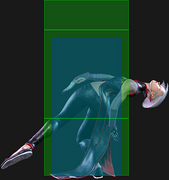
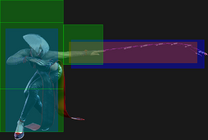
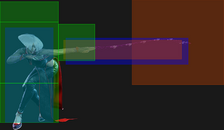
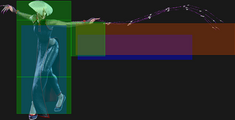
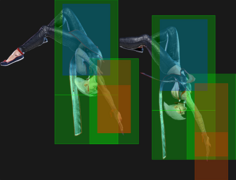
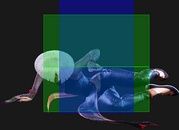
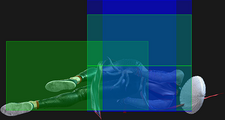
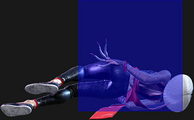
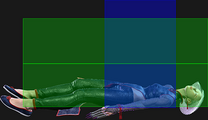
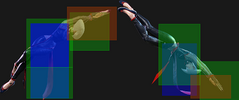
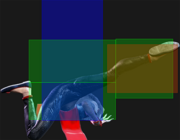
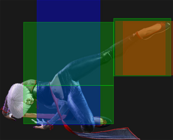
| Hitbox Images |
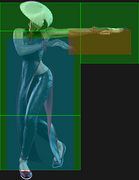
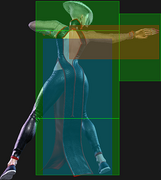
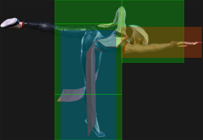
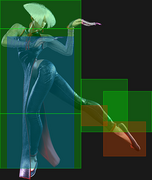
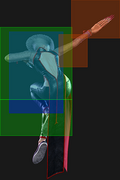
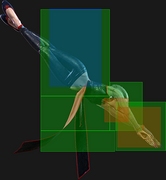
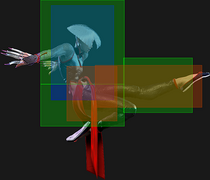
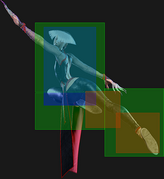
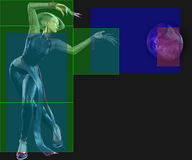
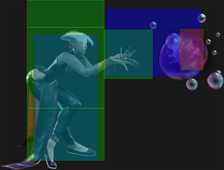
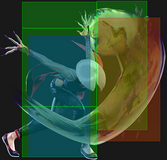
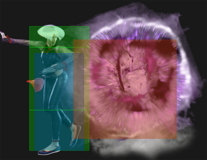
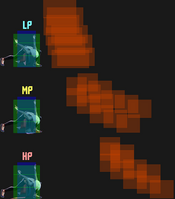
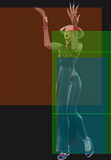
🟥 (Red): Attack hitbox
🟩 (Green): Vulnerable hurtbox that can be hit by strikes/projectiles
🟦 (Blue): Vulnerable throw hurtbox
|
| Active |
How many frames a move remains active (can hurt opponents) for. For projectiles with a maximum active period, a value may be listed in [brackets], but this number is not factored into the move's total frame count.
|
| Cancel |
Available options for canceling one move into another move.
|
| Cancel Hitconfirm Windows |
Hitconfirm reaction windows into Special Moves, Target Combos, and Super Arts.
|
| Damage |
Attack damage on hit. Multi-hit moves may have the damage listed for individual hits as X,Y (or sometimes X*Y). Sometimes a move's damage changes depending on which active frame connects, or on cinematic vs. non-cinematic hits; in this case, multiple values may be listed, and it will be clarified in the move description.
|
| Damage Scaling |
Some moves cause additional damage scaling in combos. Refer to Game Data page for a more detailed breakdown. Scaling Types:
|
| Drive Rush Cancel Advantage |
Refers to the frame advantage when canceling a normal, command normal, or Target Combo into Drive Rush on hit or block (abbreviated as DRC for Drive Rush Cancel). This is calculated at the moment a follow-up attack can be input, not at the moment the character can block or perform movement options. An attack that with DRC +8 on Hit can link into an 8-frame attack, and DRC +4 on Block can create a true blockstring into a 4-frame attack. Note that any DRC on Block worse than +4 cannot form a true blockstring, allowing the opponent to interrupt with an invincible reversal. Most light normals are slightly negative after a DRC on block, meaning the opponent can mash their fastest normal to guarantee a counter-hit (though this requires fast reactions). The attacking character could punish this with Light > DRC into an immediate invincible attack, but this would be an incredibly expensive and high-risk gambit.
|
| Forced Knockdown |
Most airborne command normals, special moves, and Super Arts put the user in a "Forced Knockdown" state. While in this state, an air knockdown will occur when being hit by any attack, even if it would otherwise cause an air reset. As an example, Ryu's 2HP causes an air reset when used as an anti-air. Against a move like Cammy's Hooligan Combination, however, the 2HP puts her into an air knockdown state. This allows Ryu to successfully cancel 2HP into Shoryuken for a juggle, similar to how a Drive Impact wall splat works. Taking advantage of Forced Knockdown juggles is important for dealing with moves like Ken's Dragonlash, Dhalsim's Air Teleport, or Kimberly's 6HK~Hop sequence. Moves that already cause an air knockdown, like most j.MP air-to-airs, will not display the "Forced Knockdown" message.
|
| Guard |
Refers to the direction an attack must be blocked. L is for Low attacks (must be blocked crouching), H is for High attacks/overheads (must be blocked standing), LH is for attacks that can be blocked crouching or standing. T is for Throw attacks which cannot be blocked.
|
| Juggles |
When a character is put into an Air Knockdown state, it is often possible to follow up with a Juggle attack before they hit the ground. In the simplest terms, there are 2 main juggle states:
The following is a more detailed overview of the SF6 juggle system:
Juggle Start (JS): When starting a juggle, the opponent's JC will be set to this value. May be different vs. standing and airborne opponents.
Juggle Increase (JI): When opponent is already in a juggle state, attacks will increase the opponent's JC by this amount.
Juggle Limit (JL): Property of an attack hitbox that determines whether it connects on a juggled opponent. The JL must be ≥ the opponent's JC to hit successfully.
An example to tie everything together:
Drive Rush notes:
More recently, the official definitions used by Capcom are slightly different than these community-designated terms. When reading official patch notes, the following terms are used instead:
|
| On Hit/Block |
These are frame advantage values when the attack hits or is blocked. If the number is positive, then the move will recover before the defender can act again. If the number is negative, the defender will be able to act before the attacker and maybe even punish. KD refers to knockdown on hit, and the listed KD Advantage refers to how many frames the attacker can act before the defender finishes their wakeup animation.
|
| Recovery |
How many frames it takes for a move to finish after the active frames have finished. For projectiles, recovery is considered to begin after the first active frame.
|
| Startup |
How many frames it takes before the move becomes 'active' or have a hit box. The last startup frame and the first active frame are the same frame, meaning all values are written as Startup + 1.
|
| IASA / Actionable Recovery |
Some moves play out an extended recovery animation when no other button/direction is input (for crouching moves, it applies when holding any down direction). These are often referred to as "actionable recovery" frames; in some games, the term IASA (Interruptible As Soon As) refers to the frame that Actionable Recovery begins. Letting the Actionable Recovery frames play out can change the character's position, potentially setting up spacing traps by recovering farther away. For example, Manon 5HP will recover much farther away from the opponent if no input is performed immediately after her recovery; holding back or down-back to block will keep her much closer to the opponent.
|
Normals
Standing Normals
5LP
| Startup | Active | Recovery | Cancel | Damage | Guard | On Hit | On Block |
|---|---|---|---|---|---|---|---|
| 5 | 2 | 7 | Sp SA TC | 300 | LH | +4 | -1 |
- Cancel Hitconfirm Window: 12f / 14f (TC)
- Drive Rush cancel advantage: +3 oH / -2 oB
- Sinister Slide Cancel Advantage: +1 oH / -4 oB
- Applies 20% damage scaling to next hit when beginning a combo (100/80/70...)
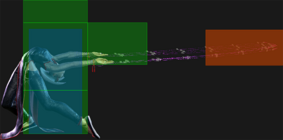
Fairly short and stubby for a 5f light normal, and not easily comboed into since it doesn't chain. The main use of 5LP is for its Target Combo extension of 5LP~LP, which can lead to combos on hit or a frame trap on block. In conjunction with its great frame data, it’s easy to steal your turn after your opponent blocks this, as they can easily be dissuaded from trying to take back their turn after via Target Combo stagger pressure.
5MP
| Startup | Active | Recovery | Cancel | Damage | Guard | On Hit | On Block |
|---|---|---|---|---|---|---|---|
| 6 | 5 | 14(16) | Sp SA | 600 | LH | +3 | -3 |
- 2f extra recovery on whiff/block
- Cancel Hitconfirm Window: 16f
- Special/DR cancel is delayed until after 2nd active frame
- Drive Rush cancel advantage: +11 oH / +7 oB
- Sinister Slide Cancel Advantage: +9 oH / +5 oB
The forward movement of 5MP makes it great in spacing traps and allows it to link at certain ranges after 5MK or Counter-hit lights even at max range. It unfortunately does not have enough hitstun to combo into 236PP naturally, which limits the possible extensions from a hitconfirm.
The high active frame count makes it useful in meaty setups, as well as countering Drive Rush in neutral. Combos to 5MK or 5HK after a DR Cancel. In some Drive Rush juggles, 5MP is required when other buttons are too slow.
Oppressive when the opponent is in Burnout, as it cancels into Heel Strike as a frame trap that can loop up to 3 times before being pushed out of jab range.
5HP
| Startup | Active | Recovery | Cancel | Damage | Guard | On Hit | On Block |
|---|---|---|---|---|---|---|---|
| 12 | 3 | 21 | TC | 800 | LH | +1 | -4 |
- Cancel Hitconfirm Window: 20f (TC)
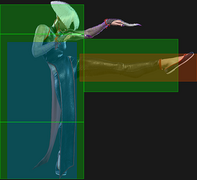
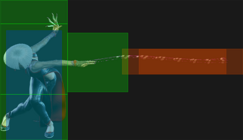
A strong forward-stabbing poke that can avoid some low attacks with its great hurtbox. It is hitconfirmable into a Target Combo follow-up that poisons the opponent or launches on hit with Toxic Blossom. The whiff recovery makes it risky to whiff in neutral, however, and it is very susceptible to Drive Impact.
5LK
| Startup | Active | Recovery | Cancel | Damage | Guard | On Hit | On Block |
|---|---|---|---|---|---|---|---|
| 4 | 3 | 12 | Sp SA | 300 | LH | +3 | -3 |
- Cancel Hitconfirm Window: 13f
- DR cancel is delayed until after 1st recovery frame
- Drive Rush cancel advantage: +5 oH / -1 oB
- Sinister Slide Cancel Advantage: +6 oH / 0 oB
- Applies 20% damage scaling to next hit when beginning a combo (100/80/70...)
A 4f startup 5LK. The lower portion of the hitbox is high enough to avoid some low pokes near the foot, allowing her to buffer it as a counterpoke. A.K.I. can link 2LP into 5LK, allowing for light confirms at a further range.
5MK
| Startup | Active | Recovery | Cancel | Damage | Guard | On Hit | On Block |
|---|---|---|---|---|---|---|---|
| 8 | 3 | 15(17) | - | 700 | LH | +6 | -2 |
- 2f extra recovery on whiff
A good poke and combo starter, linking naturally into 5MP; the forward movement of 5MP allows 5MK to be a threat from considerable range even despite its lack of cancelability. After Drive Rush or a Punish Counter start, it can link into itself or 5HK for greatly improved damage.
5HK
| Startup | Active | Recovery | Cancel | Damage | Guard | On Hit | On Block |
|---|---|---|---|---|---|---|---|
| 9 | 4 | 19 | Sp SA | 800 | LH | +4 | -3 |
- Punish Counter: +12 Stagger (grounded), limited juggle state (airborne)
- Forces Stand; active frames 3-4 whiff on crouching opponents unless they extend a vertical hurtbox
- Anti-Air Invuln: 5-12f (Head) / 10-12f (Leg/Upper Body)
- Good AA on frames 10-12 but cannot hit cross-up
- Cancel Hitconfirm Window: 18f
- DR cancel is delayed until after 2nd active frame
- Drive Rush cancel advantage: +16 oH / +9 oB
- Sinister Slide Cancel Advantage: +15 oH / +8 oB
- Extends a hurtbox 1f before active that is vulnerable to projectiles
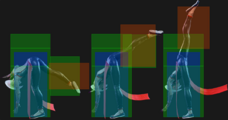
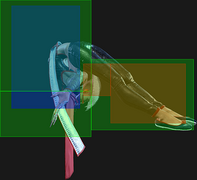
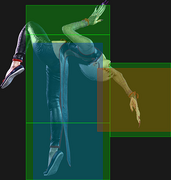
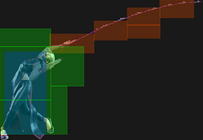
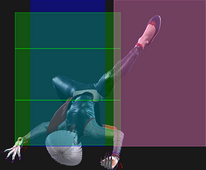
An important anti-air, combo, and juggle tool and A.K.I.'s only special cancelable heavy normal. As an anti-air, it covers a large space above and in front of A.K.I., and can be canceled to 214LP for a safe meaty projectile. With good timing, it can be very effective against jump-ins with strong downward hitboxes due to the anti-air invincibility frames on her head and kicking leg. Despite the strong hitbox, it cannot anti-air if the opponent crosses up with a close range jump.
5HK combos naturally to Heel Strike, which allows follow-up links and is even safe on block if the combo drops. A Punish Counter allows her to combo into HK Cruel Fate or Venomous Fang, which both give strong conversions at a range where Heel Strike can whiff. 5HK is also one of A.K.I.'s most important juggle tools when used out of Drive Rush.
Crouching Normals
2LP
| Startup | Active | Recovery | Cancel | Damage | Guard | On Hit | On Block |
|---|---|---|---|---|---|---|---|
| 4 | 2 | 9 | Chn Sp SA | 300 | LH | +4 | -1 |
- Chains into 2LP/2LK; true blockstring into 2LP
- Cancel Hitconfirm Window: 12f
- Drive Rush cancel advantage: +5 oH / 0 oB
- Sinister Slide Cancel Advantage: +3 oH / -2 oB
- Applies 20% damage scaling to next hit when beginning a combo (100/80/70...)
- Topmost hurtbox on frames 1-5 is vulnerable only to aerial attacks, preventing its use as an anti-air
A.K.I.'s primary 4-frame option, and one of the very few light normal chains that does not have a gap on block. The range is average, but can be used for a 3-hit light chain when starting from close range. If used as a punish starter, it can link to 2MP for consistent cancel options; at close range, she can get more damage by linking PC 2LP, 5MK, 5MP.
2MP
| Startup | Active | Recovery | Cancel | Damage | Guard | On Hit | On Block |
|---|---|---|---|---|---|---|---|
| 7 | 3 | 18 | Sp SA | 600 | LH | +1 | -3 |
- Cancel Hitconfirm Window: 15f
- Drive Rush cancel advantage: +12 oH / +8 oB
- Sinister Slide Cancel Advantage: +10 oH / +6 oB
- Topmost hurtbox on frames 1-21 is vulnerable only to aerial attacks, preventing its use as an anti-air
Another of A.K.I.'s cancelable normals. The range is solid, even better than even Cammy's 2MP with identical startup, but it does extend a whiff punishable hurtbox if poorly spaced. It is most commonly used in Counter-hit, Punish Counter, or Drive Rush routes when A.K.I. is at +7~8 hit advantage. It works better than 5MP when canceled, allowing her to combo into 236PP for a close range combo extension.
2HP
| Startup | Active | Recovery | Cancel | Damage | Guard | On Hit | On Block |
|---|---|---|---|---|---|---|---|
| 10 | 3 | 28 | - | 900 | L | KD +27 | -8 |
- Punish Counter: HKD +49
- Has juggle potential
A.K.I.'s 2HP is her sweep, comparable to 2HK from most other characters. Despite the animation, it is not really a slide, so it cannot be spaced safely in neutral. The hitbox is quite disjointed, allowing it to out-prioritize other neutral buttons, but the long recovery and forward lunge makes it extremely risky to throw out as a random guess in footsies.
2LK
| Startup | Active | Recovery | Cancel | Damage | Guard | On Hit | On Block |
|---|---|---|---|---|---|---|---|
| 5 | 3 | 8 | Chn | 200 | L | +3 | -2 |
- Chains into 2LP/2LK
- Applies 20% damage scaling to next hit when beginning a combo (100/80/70...)
A.K.I.'s fastest low-hitting normal. It has deceptively long range, making it useful for stuffing the opponent's Drive Rush or simply harassing with extended light chains. She can even chain 4 normals on block with a string like 2LP~2LP~2LK~2LK; while this can score a few small hits, 2LK's high pushback reduces its effectiveness as a combo starter. If used out of Drive Rush, the pushback becomes irrelevant, and it can open up the opponent with a combo into 5MP.
2LK has a niche use as a 5f punish starter at ranges where her other light normals cannot reach. It can link into 2MK near max range, allowing for an optional Super cancel to increase the punish damage.
2MK
| Startup | Active | Recovery | Cancel | Damage | Guard | On Hit | On Block |
|---|---|---|---|---|---|---|---|
| 7 | 3 | 16 | SA | 600 | L | +5 | +1 |
- Cancel Hitconfirm Window: 14f (Super)
- Applies 20% damage scaling to next hit when beginning a combo (100/90/80...)
A fast, plus-on-block 2MK that can link naturally into light normals. When used out of Drive Rush, it can link at much further ranges into 5HK/5MK while also gaining good advantage on block. On Counter-hit, she can reliably link into 2MP. As a neutral poke, the low whiff recovery makes it hard to punish; it can also be buffered into a Super Art to make it even more threatening.
2HK
| Startup | Active | Recovery | Cancel | Damage | Guard | On Hit | On Block |
|---|---|---|---|---|---|---|---|
| 10 | 6 | 20 | SA | 900 | LH | 0 | -3 |
- Punish Counter: KD +48 Spin (limited juggle state)
- Puts airborne opponents into limited juggle state on Counter-hit/Punish Counter
- Anti-Air Invuln: 10-15f (Upper Body/Leg); cannot hit cross-up
- Cancel Hitconfirm Window: 20f (Super)
- Super cancel is delayed until after 2nd active frame
- Has high juggle potential (causes air reset)
- Extends a hurtbox 1f before active that is vulnerable to projectiles
A.K.I.'s 2HK is an upward kick rather than a sweep, allowing it to function as an anti-air. The active frames have some anti-air invincibility that helps against ranged jump-ins, but it loses to closer jumps and cross-ups. While the hitbox is not quite as disjointed as 5HK, being able to act from a crouching state allows it to be used a little later without being hit by a downward-angled air normal.
The hitbox of 2HK serves it well as a decently-reaching poke that cannot be low crushed in neutral as well. It can be canceled into Super with a long hitconfirm window for easy reactions, and it launches the opponent upon scoring a Punish Counter. It does extend a hurtbox that loses to projectiles right before the active frames begin, so it can't trade effectively against fireball characters.
Jumping Normals
j.LP
| Startup | Active | Recovery | Cancel | Damage | Guard | On Hit | On Block |
|---|---|---|---|---|---|---|---|
| 5 | 9 | 3 land | - | 300 | H | +2(+9) | -2(+5) |
- Can be used as a fuzzy instant overhead
j.MP
| Startup | Active | Recovery | Cancel | Damage | Guard | On Hit | On Block |
|---|---|---|---|---|---|---|---|
| 7 | 4 | 3 land | - | 700 | H | +9(+11) | +5(+7) |
- Puts airborne opponents into limited juggle state
- Lower Body Projectile Invuln 7-22f
- If input immediately during ascent, can avoid the 2nd hit of JP's OD Amnesia bombs
A useful air-to-air, but the hitbox aims quite high which limits the angle it can be used from.
j.HP
| Startup | Active | Recovery | Cancel | Damage | Guard | On Hit | On Block |
|---|---|---|---|---|---|---|---|
| 11 | 6 | 3 land | - | 800 | H | +5(+15) | +1(+11) |
- Causes spike knockdown vs. airborne opponents on Counter-hit/Punish Counter
- Lower Body Projectile Invuln 11-23f (except around the attack hitbox)
- Cannot be used to avoid the 2nd hit of JP's OD Amnesia bombs
A strong jump normal that doesn't extend a hurtbox until the active frames begin.
j.LK
| Startup | Active | Recovery | Cancel | Damage | Guard | On Hit | On Block |
|---|---|---|---|---|---|---|---|
| 5 | 6 | 3 land | - | 300 | H | +4(+10) | 0(+6) |
- Can hit cross-up
A.K.I.'s longest ranged horizontal jump-in, giving it some air-to-air utility. The cross-up hitbox can be useful to apply an immediate tick throw after landing, but otherwise j.2HP is far better in that context.
j.MK
| Startup | Active | Recovery | Cancel | Damage | Guard | On Hit | On Block |
|---|---|---|---|---|---|---|---|
| 7 | 6 | 3 land | - | 600 | H | +4(+13) | 0(+9) |
- Can be used as a fuzzy instant overhead (opponent must be in Burnout for true blockstring)
- Lower Body Projectile Invuln 7-20f (except around the attack hitbox)
- Cannot be used to avoid the 2nd hit of JP's OD Amnesia bombs
A standard but solid jump-in attack with a downward angle. It's faster than her other buttons with a similar approach angle.
j.HK
| Startup | Active | Recovery | Cancel | Damage | Guard | On Hit | On Block |
|---|---|---|---|---|---|---|---|
| 8 | 8 | 3 land | - | 800 | H | +8(+15) | +4(+11) |
- Lower Body Projectile Invuln 8-19f (except around the attack hitbox)
- Cannot be used to avoid the 2nd hit of JP's OD Amnesia bombs
Good jump-in with a fairly retracted hurtbox compared to j.HP.
Command Normals
3MP
| Startup | Active | Recovery | Cancel | Damage | Guard | On Hit | On Block |
|---|---|---|---|---|---|---|---|
| 24 | 3 | 18 | - | 600 | H | +3 | -2 |
- Can combo afterward with meaty timing, Drive Rush, or Counter-hit
While a bit lacking in range and speed, A.K.I. has plenty of opportunities to safely approach from a Drive Rush to force a high/low mixup. Having more visual effects on the screen like poison status and an Orchid Spring puddle can make it harder for the opponent to notice the attack's startup animation. With 3 active frames, it's not too difficult to set up a meaty overhead to allow a follow-up link, like corner 236HP, Dash + 3MP.
6HP
| Startup | Active | Recovery | Cancel | Damage | Guard | On Hit | On Block |
|---|---|---|---|---|---|---|---|
| 16 | 3 | 20(21) | SA | 900 | LH | +3 | -4 |
- 1f extra recovery on whiff
- Cancel Hitconfirm Window: 17f (Super)
A great advancing poke that is safe on block due to pushback. On hit, it can be confirmed into Super with good reactions. This makes it safe against Drive Impact as long as you have meter, making it even better as a poke in neutral.
6HK
| Startup | Active | Recovery | Cancel | Damage | Guard | On Hit | On Block |
|---|---|---|---|---|---|---|---|
| 14 | 3(5)3 | 16(24) | - | 400x2 | LH | +4 | +2 |
- Low Crush 11-26f (not airborne)
- 8f extra recovery on whiff
- 1st hit puts opponent into limited juggle state
- 2nd hit causes air reset unless performed out of Drive Rush
- Counter-hit/Punish Counter bonus advantage carries through both hits
- Applies 20% damage scaling to next hit when beginning a combo (100/80/70...)
6HK is an incredible pressure tool that benefits greatly from Drive Rush momentum. Setting this up after a 214LP projectile in neutral is an easy way to approach, leading to combos on hit or strike/throw mixups on block, while also chipping away at the opponent's Drive gauge. The invincible lower body hurtbox allows it to hop over low pokes, giving A.K.I. a direct counter to one of the game's strongest neutral tools.
j.2HP
| Startup | Active | Recovery | Cancel | Damage | Guard | On Hit | On Block |
|---|---|---|---|---|---|---|---|
| 9 | 5 | 3 land | - | 800 | H | +5(+15) | +1(+11) |
- Forward Jump only; can only hit as a cross-up
- Causes spike knockdown vs. airborne opponents
- Applies 20% damage scaling to next hit when beginning a combo (100/80/70...)
- Lower Body Projectile Invuln 9-23f (except around the attack hitbox)
- Cannot be used to avoid the 2nd hit of JP's OD Amnesia bombs
A technique borrowed from her master, A.K.I. is able to land a cross-up jump normal at a range most characters can't match. Her floaty jump makes this an important tool, as the opponent could otherwise easily walk under for a free punish on landing recovery. This jump-in will whiff if attempted on a fully cornered opponent, as they cannot be crossed up.
Target Combos
5LP~LP
| Startup | Active | Recovery | Cancel | Damage | Guard | On Hit | On Block |
|---|---|---|---|---|---|---|---|
| 8 | 2 | 14(16) | Sp SA | 300(240) | LH | +1 | -3 |
- 2f extra recovery on block; 3f blockstring gap between hits
- () refers to scaled damage after a 5LP combo starter
- Cancel Hitconfirm Window: 13f (single hit) / 32-33f (full TC)
- DR cancel is delayed until after 2nd active frame
- Drive Rush cancel advantage: +6 oH / +4 oB
- Sinister Slide Cancel Advantage: +5 oH / +3 oB
This Target Combo can act as a substitute for having a chainable 5LP. It moves A.K.I. forward slightly for a more consistent finish, though her options are somewhat limited; the only specials that combo are 236LP, 236HP, 214HP, and 214PP. A Drive Rush cancel allows a 5MP link, which is unusual for a light normal but significantly weakened by light starter damage scaling.
The most important property of this TC is the small gap on block, as 2LP chains are true blockstrings that cannot catch a mashing opponent. 5LP~LP can become a true blockstring if the initial 5LP starts from a Drive Rush, or if the opponent is in Burnout.
5HP~HP
| Startup | Active | Recovery | Cancel | Damage | Guard | On Hit | On Block |
|---|---|---|---|---|---|---|---|
| 14 | 3 | 24(29) | - | 400 | LH | KD +34[+54] | -15 |
- 5f extra recovery on block; always a true blockstring even at max delay
- Applies poison on hit; triggers Toxic Blossom if opponent is poisoned
- Toxic Blossom hit launches opponent into a limited juggle state
This Target Combo is relatively easy to hitconfirm from 5HP, making it a great neutral tool that can knock down and inflict poison while setting up 214LP for continued pressure. If the opponent is already poisoned, the Toxic Blossom launch is high enough to juggle a DR~5HK for great damage and corner carry.
Throws
Forward Throw (LPLK)
| Startup | Active | Recovery | Cancel | Damage | Guard | On Hit | On Block |
|---|---|---|---|---|---|---|---|
| 5 | 3 | 23 | - | 1200 (2040) | T | KD +19 | - |
- Punish Counter: HKD +19
- Applies 20% immediate damage scaling when comboed into (e.g. after Crumple)
- Successful Throw Escape builds 1 Drive Gauge and 10% Super Gauge for defender
- Awarded to random player if Throws are input simultaneously
Sets up a corner throw loop that requires precise walk timing to beat reversal 4f normals. The maximum time A.K.I. can walk forward is 17f, and the timing window is 2 frames (3f for Marisa, and 4f for Blanka, E. Honda, and Zangief).
Midscreen, A.K.I. can threaten with some Drive Rush buttons but does not get real oki. DR~5HP can trade with 4f normals, usually linking into a follow-up 5HP~HP knockdown. A slightly delayed DR~5MP leaves her closer and allows a link to 5HK on Counter-hit or another 5MP on regular hit. Stronger options like 6HK or another throw can only work if the opponent respects your other meaty options first.
Back Throw (4LPLK)
| Startup | Active | Recovery | Cancel | Damage | Guard | On Hit | On Block |
|---|---|---|---|---|---|---|---|
| 5 | 3 | 23 | - | 1200 (2040) | T | KD +20 | - |
- Side switch
- Punish Counter: HKD +20
- Applies 20% immediate damage scaling when comboed into (e.g. after Crumple)
- Successful Throw Escape builds 1 Drive Gauge and 10% Super Gauge for defender
- Awarded to random player if Throws are input simultaneously
After throwing the opponent back into the corner, A.K.I. is only +1 after a dash and outside throw range, leading to fairly weak meterless pressure. With Drive Rush, she has a strong mixup between a meaty Throw and an auto-timed perfect meaty 5MP that leaves her +11 oH / +5 oB. You can also mix in other strikes, like delayed 2LK/2MK, to make it harder for the opponent to predict a Perfect Parry direction.
Midscreen, the opponent is sent too far for any meaningful pressure. A.K.I. can throw a safe Nightshade Pulse that recovers fast enough to block a forward jump attack, and maybe even anti-air with 236HP. This is safe from most long-range anti-projectile Supers if the opponent Back Rises, but a Neutral Rise often leaves them close enough for a punish that can't be avoided with a 236KK cancel (except for very slow reversals like JP's SA3).
Drive System
Drive Impact (HPHK)
| Startup | Active | Recovery | Cancel | Damage | Guard | On Hit | On Block |
|---|---|---|---|---|---|---|---|
| 26 | 2 | 35 | - | 800 | LH | KD +35 / Wall Splat KD +65 | -3 / Wall Splat HKD +72 |
- Armor (2-hit): 1-27f; Range: 2.50 (1.40 movement + 1.10 hitbox)
- On Hit/PC: Applies 20% damage scaling to next hit when beginning a combo
- On Block: Applies 20% scaling multiplier to all follow-up hits after Wall Splat; the next attack can incur additional Starter Scaling
- Combos when canceled from 5HK (no corner wallsplat; useful for depleting Drive gauge, especially after Perfect Parry)
- A blocked DI can combo into another DI if opponent is not fully cornered (Stuns if opponent has less than 1.5 Drive bars)
- This happens because a blocked DI is not considered a "hit" for combo purposes
- Causes both the 20% Starter and 20% Multiplier scaling to apply to the follow-up combo
See Drive Impact on the Gauges page for more details.
When canceled from a normal, these are the important blockstring gaps; a gap of N will trade with an N-frame startup attack; [] = Burnout
- 5HK: 7[3]
- 2MP: 10[6]
- 5MP, 5LP~LP: 12[8]
- Note: A gap ≥ 6f can be thrown, and a gap ≥ 9f can be jumped out of by most characters
Against the following characters in Burnout:
- JP (22K), frame 3 counter
- Marisa (214K), frame 3 armor
- Zangief (5[HP]), frame 4 armor
It's important to use a blockstring that cannot be absorbed by their armor/counter moves. Ideally, the string should also not be a true combo, or it will cause a Lock and prevent Stun.
* Denotes a move that causes Lock on Counter-hit, allowing the opponent to escape a Stun by mashing on wakeup.
- DR~2MP* > DI: 2f blockstring gap prevents opponent from absorbing the hit
- 5HK* > DI: 3f blockstring gap will work vs. Zangief 5[HP]
Drive Reversal (6HPHK)
| Startup | Active | Recovery | Cancel | Damage | Guard | On Hit | On Block |
|---|---|---|---|---|---|---|---|
| 20 | 3 | 26(31) | - | 500 recoverable | LH | KD +23 | -6 |
- Full Invuln: 1-22f; Range: 1.978; Armor Break
- 5f extra recovery on hit; 4f screen freeze during startup
| Startup | Active | Recovery | Cancel | Damage | Guard | On Hit | On Block |
|---|---|---|---|---|---|---|---|
| 18 | 3 | 26(31) | - | 500 recoverable | LH | KD +23 | -6 |
- Full Invuln: 1-20f; Range: 1.978; Armor Break
- 5f extra recovery on hit; no screen freeze
See Drive Reversal on the Gauges page for more details.
Drive Parry (MPMK)
| Startup | Active | Recovery | Cancel | Damage | Guard | On Hit | On Block |
|---|---|---|---|---|---|---|---|
| 1 | 12 or until released | 33(1)(11) | - | - | - | - | - |
See Drive Parry on the Gauges page for more details.
- Perfect Parry:
- Applies a 50% damage scaling multiplier to any punish afterwards
- vs. strikes, has only 1f recovery and prevents the opponent from canceling their attack
- vs. projectiles, puts you into a fixed 11f recovery
Drive Rush (MPMK~66)
| Startup | Active | Recovery | Cancel | Damage | Guard | On Hit | On Block |
|---|---|---|---|---|---|---|---|
| 3+8 | - | 15(37) | - | - | - | - | - |
- 1-bar version performed out of Parry
- Startup is 1+8 immediately after successful Parry
| Startup | Active | Recovery | Cancel | Damage | Guard | On Hit | On Block |
|---|---|---|---|---|---|---|---|
| 9 | - | 15(37) | - | - | - | - | - |
- 3-bar version performed on hit/block from a cancelable normal
- Can also be performed from whiffed cancelable light normals
See Drive Rush on the Gauges page for more details. See Strategy page for Blockstring Gaps and Combo Routes
- Startup refers to minimum time before an attack can cancel the Drive Rush animation
- The first 15 recovery frames are cancelable into any attack
- The final 22 recovery frames are cancelable into any attack or movement option or blocking (except Parry)
- Only Normal and Command Normal attacks are enhanced with +4 frame advantage and improved juggle properties
- Applies 15% damage scaling multiplier to any follow-up hits when used mid-combo
- Only applies scaling once per combo; does not apply when a Drive Rush enhanced attack starts the combo
Distance:
- 0.907 (min, cancel into immediate Throw)
- 2.437 (min, earliest blocking/movement frame)
- 4.049 (max, final DR frame)
Special Moves
Nightshade Pulse (214LP)
| Startup | Active | Recovery | Cancel | Damage | Guard | On Hit | On Block |
|---|---|---|---|---|---|---|---|
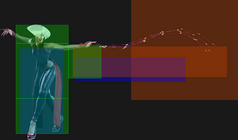
| 17 | - | 35 | SA3 | 500 | LH | -5 | -10 |
- Slow 1-hit projectile; applies poison on hit
- Cancel Hitconfirm Window: 4f (Super)
- Extended arm hurtbox 16-41f (only vulnerable to strikes)
- Cancelable into 6P follow-up on frames 30-36 (detonates bubble if on-screen)
- Cancelable into 236KK from frame 36 until end of recovery (can avoid punishes)
- Projectile Speed: 0.04
| Startup | Active | Recovery | Cancel | Damage | Guard | On Hit | On Block |
|---|---|---|---|---|---|---|---|
| 16 | - | 28 | SA2 SA3 | 300,400 | LH | KD +45 | +1 |
- Slow 2-hit OD projectile; applies poison on hit; 2nd hit puts opponent into limited juggle state
- Cancel Hitconfirm Window: 12f (Super)
- Applies 20% damage scaling to next hit when beginning a combo (100/80/70...)
- Extended arm hurtbox 16-36f (only vulnerable to strikes)
- Cancelable into 6P follow-up on frames 34-35 (detonates bubble if on-screen)
- Cancelable into 236KK on frames 32-33 (can avoid punishes)
- Projectile Speed: 0.02 (1-3f) / 0.04 (4f~)
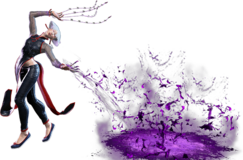
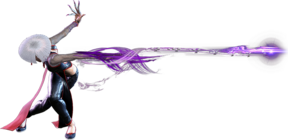
Nightshade Pulse is an extremely slow projectile that defines much of A.K.I.'s neutral and oki gameplan. If used from long range, she can safely advance behind it while reacting to the opponent's jump or evasive maneuvers. After a knockdown, it can be used as a meaty tool to stuff reversal Level 1 Supers and gain massive frame advantage on hit or block. Because it's cancelable into OD Snake Step, A.K.I. can even keep herself safe if the opponent tries to take advantage of the projectile's slow recovery. If used at close range, it's quite punishable on block; on hit, A.K.I. is technically unsafe but can always end with the Nightshade Chaser (6P) extension.
OD Nightshade Pulse acts mostly the same, except it is +1 on block even at point blank and causes a juggle state on hit. The OD projectile priority also shuts down the opponent's fireball game unless they use their own OD projectile, making it an even better shield to advance behind.
Nightshade Chaser (214LP~6P)
| Startup | Active | Recovery | Cancel | Damage | Guard | On Hit | On Block |
|---|---|---|---|---|---|---|---|
| 13 | 2 | 34 | SA3 | 500[800] | LH | -4 [KD +38] | -16(-11) |
- Whip acts as a 1-hit projectile; if Perfect Parried, causes strike screen-freeze
- Cancel Hitconfirm Window: 8f [TB: 13f] (Super)
- Applies poison on hit; triggers Toxic Blossom if opponent is poisoned
- Toxic Blossom hit puts opponent into limited juggle state
- After blocked close-range 214LP, creates a 1f blockstring gap into 6P follow-up (can delay 6P to create larger frame trap gap)
| Startup | Active | Recovery | Cancel | Damage | Guard | On Hit | On Block |
|---|---|---|---|---|---|---|---|
| 14 | 6 | 29 | - | 800 | LH | KD +42 | -4 |
- Detonates the 214LP bubble; applies poison on hit
| Startup | Active | Recovery | Cancel | Damage | Guard | On Hit | On Block |
|---|---|---|---|---|---|---|---|
| 13 | 5 | 28 | SA2 SA3 | 600[800] | LH | KD +25 [KD +41~44] | -13(-10) |
- Whip acts as a 1-hit projectile; if Perfect Parried, causes strike screen-freeze
- Cancel Hitconfirm Window: 10f [TB: 15f] (Super)
- Applies poison on hit; triggers Toxic Blossom if opponent is poisoned
- Toxic Blossom hit puts opponent into limited juggle state
- Counts as 2 hits for damage scaling when comboed into (applies to next hit)
| Startup | Active | Recovery | Cancel | Damage | Guard | On Hit | On Block |
|---|---|---|---|---|---|---|---|
| 14 | 12 | 20 | SA2 SA3 | 800x2 | LH | KD +43(+52~57) | -2(+4) |
- Detonates the 214PP bubble; applies poison on hit
- Cancel Hitconfirm Window: 14f [TB: 15f] (Super)
- Different properties if detonating at max range, or after 1 hit of 214PP has already connected (Damage, chip, launch height, juggle potential)
Nightshade Chaser is the whip follow-up to Nightshade Pulse that can be activated on hit, block, or whiff. It's much more unsafe than the projectile itself, but can also be used to frame trap the opponent trying to punish 214LP on block. At close range, there is a 1f gap between the bubble the and 6P follow-up, which can be increased by delaying the 6P input; at farther ranges, it will form a true blockstring. If the initial projectile hits and poisons the opponent, 6P will active Toxic Blossom for a knockdown.
If the poison bubble hasn't dissipated, 6P can detonate it to change the move's properties. It becomes much safer on block than the normal whip ender, and can knock down even if the opponent wasn't initially poisoned. The OD version in particular has some very complicated interactions depending on the exact timing and spacing of the bubble burst; it's possible to space the move precisely to achieve a high launch with a juggle follow-up.
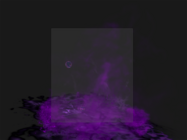
Orchid Spring (214MP)
| Startup | Active | Recovery | Cancel | Damage | Guard | On Hit | On Block |
|---|---|---|---|---|---|---|---|
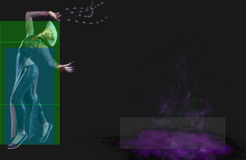
| 26 | [160] | 20 | - | - | - | - | - |
- Pool is placed on frame 26 and stays active for the next 160 frames
- Poisons the opponent (cannot be blocked); constantly re-applies poison as long as opponent is in close proximity
- Cannot use another 214MP until first one dissipates (but can use alongside SA2 poison pool)
- A.K.I. is in a Counter-hit state for entire 46f move animation
Orchid Spring places a pool of poison in front of A.K.I. which will poison any opponent in close proximity even if they block. Just like the poison status, the pool immediately disappears if A.K.I. takes any damage. It's particularly useful on long knockdowns or stuns when A.K.I. can set it up safely, ensuring that the next combo will get a Toxic Blossom effect. It can also be used to control the opponent's movement somewhat; while it doesn't prevent them from approaching, many players will be hesitant to simply walk into it especially if they are at a life disadvantage.
Toxic Wreath (214HP)
| Startup | Active | Recovery | Cancel | Damage | Guard | On Hit | On Block |
|---|---|---|---|---|---|---|---|
| 13 | 3(14)9 | 13 | SA3 | 200,600 | LH | KD +40 | -4 |
- Strike hitbox (no projectile durability); extended arm hitbox is projectile invuln 13-21f
- Cancel Hitconfirm Window: 33f (Super); 6f if only 2nd hit connects
- Applies poison on hit (does not trigger Toxic Blossom)
- Puts opponent into a limited juggle state; much higher launch vs. airborne opponents
- Applies 15% immediate damage scaling when comboed into
Toxic Wreath is a useful combo and juggle tool, as well as a relatively safe blockstring ender due to its high pushback. It forms a true blockstring from mediums and heavies, but leaves a small gap after 5LK (2f) and 2LP (4f), allowing for frame traps and trade combos. If you time the 2nd hit as a meaty, it can be up to +4 on block. Outside of close range, it's possible for 214HP to whiff in blockstrings, leaving A.K.I. very unsafe.
In the corner, the pushback will automatically set up a meaty Nightshade Pulse (214LP) in grounded combos, giving A.K.I. excellent block pressure. Juggles into Toxic Wreath launch the opponent much higher than a grounded hit, allowing follow-ups in the corner; in some situations it's even possible to land a DR~2HP or HP SA2 after a midscreen juggle. After a corner juggle ender, you will have to manually time the meaty 214LP projectile; a quick backwards microwalk is a consistent way to do this, though your exact frame advantage will vary slightly based on timing.
Serpent Lash (236P)
| Startup | Active | Recovery | Cancel | Damage | Guard | On Hit | On Block |
|---|---|---|---|---|---|---|---|
| 14 | 3 | 20(26) | SA3 | 500[800] | LH | +1(+3) [KD +44(46)] | -8(-6) |
- 6f extra recovery on whiff; better frame advantage on later active frames
- Strike hitbox with 1-hit projectile durability; extended arm is projectile invuln 13-16f
- Cancel Hitconfirm Window: 16f [TB: 17f] (Super)
- Applies poison on hit; triggers Toxic Blossom if opponent is poisoned
- Toxic Blossom hit puts opponent into a limited juggle state
- Punish Counter: KD +55 [TB: +61] Crumple with immediate limited juggle state
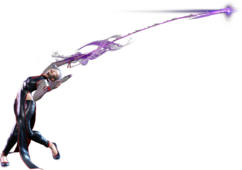
LP Serpent Lash is a strong mid-range poke that is generally safe when spaced out. It can clash with projectiles in neutral to keep A.K.I. safe, but is not useful as an anti-zoning tool. It has high juggle potential, making it a useful juggle ender especially with SA3 stocked. The knockdown from a Toxic Blossom hit can lead to a follow-up juggle into 236HP or any Super Art in the corner; alternatively, you can sacrifice some damage for a safe jump to continue pressure. Whiff punishing with this move can be very rewarding due to the crumple state, particularly with Toxic Blossom.
| Startup | Active | Recovery | Cancel | Damage | Guard | On Hit | On Block |
|---|---|---|---|---|---|---|---|
| 14 | 9 | 21 | SA3 | 600[700] | LH | KD +44 [Crumple +69] | -12 |
- Strike hitbox with 1-hit projectile durability; cannot hit crouching opponents
- Close-range hitbox can hit extended vertical hurtbox
- Cancel Hitconfirm Window: 16f [TB: 17f] (Super)
- Applies poison on hit; triggers Toxic Blossom if opponent is poisoned
- Toxic Blossom hit causes limited juggle crumple state on grounded hit, or higher juggle (KD +60~72) on airborne hit
MP Serpent Lash is primarily a combo tool, though it can be used as an anti-air at farther ranges (like against an opponent neutral jumping A.K.I.'s Nightshade Pulse). The crumple state from a Toxic Blossom hit allows for powerful follow-up juggles, but it's important to confirm the opponent is standing before comboing into it (or use 5HK for its Force Stand property). If the opponent is airborne, the higher launch height still gives great follow-up juggles like DR~5HK anywhere on the screen.
While 236MP has some utility as a poke against tall standing characters, it is liable to whiff and allow opponents to more easily close the gap. The regular version sets up a corner safe jump on a grounded hit; unlike Toxic Blossom 236LP, this does not involve sacrificing a corner juggle.
| Startup | Active | Recovery | Cancel | Damage | Guard | On Hit | On Block |
|---|---|---|---|---|---|---|---|
| 11 | 6 | 32 | SA3 | 700[800] | LH | KD +44 [KD +53] | -20 |
- Anti-Air Invuln: 6-16f; Semi-Low Profile 9-30f (crouch height)
- No head hurtbox on frames 4-8; can anti-air cross-ups
- Strike hitbox with no projectile clash
- Cancel Hitconfirm Window: 17f [TB: 16f] (Super)
- Applies poison on hit; triggers Toxic Blossom if opponent is poisoned
- Toxic Blossom hit causes a higher launch (allows follow-ups midscreen or in the corner)
HP Serpent Lash is a fairly reliable anti-air, though it does not have immediate air invincibility. As a result, some stronger jump-ins and divekicks can be hard to deal with. The upside is that it works well against cross-ups, so ambiguous jumps are less of threat.
The horizontal range of 236HP is relatively short, though it generally works even from 3-hit light combos. The regular version sets up a safe jump anywhere on screen if it hits a grounded opponent; however, if the opponent is midscreen and doesn't back rise, you must react with a late cross-up j.2HP to avoid whiffing, which can be difficult to do on reaction. Toxic Blossom causes a much higher launch, which allows a 236LP follow-up or a DR~5HK juggle for better damage and corner carry. In the corner, you can save meter with a simple 214HP juggle instead.
| Startup | Active | Recovery | Cancel | Damage | Guard | On Hit | On Block |
|---|---|---|---|---|---|---|---|
| 21 | 5 | 25 | [TB: SA2 SA3] | 600[800] | LH | +4 [Crumple +71] | -14(-11) |
- Strike hitbox with 1-hit OD projectile durability; extended arm is projectile invuln 20-25f
- Cancel Hitconfirm Window: [TB: 73f] (Super)
- Applies poison on hit; triggers Toxic Blossom if opponent is poisoned
- Counter-hit/Punish Counter bonus advantage carries through both hits
- Toxic Blossom hit causes crumple on grounded hit (+5 before opponent becomes airborne, or +9 on PC)
- Resets juggle counter to 0 (free juggle state) on airborne Toxic Blossom juggle
- Applies 20% damage scaling to next hit when beginning a combo; counts as 2 hits for damage scaling when comboed into
- Toxic Blossom version: applies 10% damage scaling to next hit when beginning a combo (no additional mid-combo scaling)
OD Serpent Lash is a powerful combo and anti-zoning tool with a trajectory similar to the LP version, but with more range. It will cleanly go through any meterless projectile and pull you close for a full combo, though if A.K.I. is too close to the opponent she can get hit before the whip connects; it also does not work against multi-hit OD projectiles.
On hit, the pull animation is completely invincible once it begins. It can link to 2LP, and due to the poison A.K.I. can follow up with 236HP, 236LP anywhere on screen. Hitting an airborne opponent will pull them in, allowing a quick juggle. On a grounded Toxic Blossom hit, the extra follow-up causes a crumple that leads to great damage. If it hits airborne, it completely resets the juggle counter, which can lead to extremely powerful extended juggles. Landing a Toxic Blossom + Punish Counter hit gives A.K.I. a point blank grounded 5HK link for great damage.
Cruel Fate (214K)
| Startup | Active | Recovery | Cancel | Damage | Guard | On Hit | On Block |
|---|---|---|---|---|---|---|---|
| 24 | 2(5)2(4)2(5)2 | 18 land | SA3 | 200x4 (800) | LH | +1 (KD +38~45) | -3 |
- Lower Body Projectile Invuln: 19-23f; Airborne 9-45f (Forced Knockdown state)
- Cancel Hitconfirm Window: 56f Stand / 31f Crouch (Super)
- Applies 20% damage scaling to next hit when beginning a combo (100/80/70...)
| Startup | Active | Recovery | Cancel | Damage | Guard | On Hit | On Block |
|---|---|---|---|---|---|---|---|
| 28 | 2(5)2(4)2(5)2 | 18 land | SA3 | 200x3,300 (900) | LH | +3 (KD +38~45) | -3 |
- Lower Body Projectile Invuln: 21-27f; Airborne 13-49f (Forced Knockdown state)
- Cancel Hitconfirm Window: 56f Stand / 31f Crouch (Super)
- Applies 20% damage scaling to next hit when beginning a combo (100/80/70...)
| Startup | Active | Recovery | Cancel | Damage | Guard | On Hit | On Block |
|---|---|---|---|---|---|---|---|
| 33 | 2(5)2(4)2(5)2 | 18 land | SA3 | 200x3,400 (1000) | LH | +4 (KD +41~50) | -3 |
- Lower Body Projectile Invuln: 26-32f; Airborne 18-54f (Forced Knockdown state)
- Cancel Hitconfirm Window: 56f Stand / 31f Crouch (Super)
- Applies 20% damage scaling to next hit when beginning a combo (100/80/70...)
| Startup | Active | Recovery | Cancel | Damage | Guard | On Hit | On Block |
|---|---|---|---|---|---|---|---|
| 28 | 3(4)2(4)2(5)2 | 18 land | SA2* SA3* | 200,200x4,600 (1600) | LH | HKD +42 (+2~3) | +2 |
- Lower Body Projectile Invuln: 23-27f; Airborne 13-49f (Forced Knockdown state)
- Cancel Hitconfirm Window: 28f 2-hit / 19f 1-hit (Super, non-cinematic version only)
- Cancel to SA2 does not combo except into LP version on CH/PC
- Applies poison on hit; causes limited juggle OTG bounce vs. airborne opponents (KD +51~58)
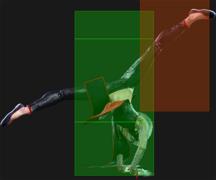
A.K.I. leaps into the air and comes down with a multi-hit claw stab. The LK version is fast but short-ranged, the HK version is long-ranged but slow, and the MK version is in between both. It hits 4 times against standing opponents and twice against crouching opponents, affecting the total damage, meter build, and Drive damage. The HK version is the only one with enough frame advantage to link naturally into 2LP, but landing a Counter-hit or Punish Counter (like after a successful fireball punish) will carry the bonus advantage through all hits, opening up more combo opportunities. If 214K connects on an airborne opponent, it they are knocked down with plenty of time for an oki setup.
All meterless versions are safe but minus on block, and give slight frame advantage if the opponent is in Burnout. The HK version has extra pushback on block, making it safer as an approach but worse as a Burnout tool. Having multiple hits, Cruel Fate can break Drive Impact; however, if the opponent crouches and inputs Drive Impact as late as possible (when 214K would only connect twice), it can result in a full combo punish for the opponent; to combat this, A.K.I. can cancel into SA3 on reaction upon landing.
OD Cruel Fate is most similar to the MK version, but can be steered left or right to change its distance. It transitions into a grab animation on hit, guaranteeing the full damage and follow-up oki. At certain ranges, the later active frames can cause a weak non-cinematic hit, giving slight hit advantage but no follow-up combo. This non-cinematic version can be canceled like the meterless versions, though a cancel into SA2 does not naturally combo. Unlike the meterless versions, it is plus on block and cannot be countered with a late Drive Impact, making it a much better offensive approach option. It can also be used in juggle combos to force a ground bounce.
All versions of Cruel Fate recover with a crouching-sized hurtbox, although A.K.I. is still considered standing. This can affect the punish options if this move is whiffed in neutral. They also cannot hit cross-up; A.K.I. will simply whiff over the opponent if used from too close.
Snake Step (236K)
| Startup | Active | Recovery | Cancel | Damage | Guard | On Hit | On Block |
|---|---|---|---|---|---|---|---|
| 37 total | - | - | - | - | - | - | - |
- Feint; starts dash animation, then steps backwards; Counter-hit state for entire duration
- Upper Body Projectile Invuln: 8-37f; Semi-Low Profile 8-13f; Low Profile 14-37f
- Crouching state 14-36f; 4f forced standing at the end (only 1f after inputting immediate crouching button)
- Movement Distance: -0.965
| Startup | Active | Recovery | Cancel | Damage | Guard | On Hit | On Block |
|---|---|---|---|---|---|---|---|
| 39 total | - | - | - | - | - | - | - |
- Command dash, always stays on same side; Counter-hit state for entire duration
- Upper Body Projectile Invuln: 9-38f; Semi-Low Profile 9-15f and 39f; Low Profile 16-38f
- Crouching state 14f until end of recovery (no forced standing)
- Movement Distance: 1.94
| Startup | Active | Recovery | Cancel | Damage | Guard | On Hit | On Block |
|---|---|---|---|---|---|---|---|
| 43(50~54) total | - | - | - | - | - | - | - |
- Command dash, can cross-up (collision box disappears frames 20-31); Counter-hit state for entire duration
- Upper Body Projectile Invuln: 11-40(50)f; extended on cross-up version
- Semi-Low Profile 11-17f; Low Profile 18f until end of recovery; Crouching state 17f until end of recovery (no forced standing)
- After cross-up, enters a 23f recovery animation; total move duration varies based on timing of cross-up
- Movement Distance: 3.18 (3.84 cross-up)
| Startup | Active | Recovery | Cancel | Damage | Guard | On Hit | On Block |
|---|---|---|---|---|---|---|---|
| 42(48~57) | - | - | - | - | - | - | - |
- Command dash, can cross-up (collision box disappears frames 7-33); vulnerable to Punish Counter Throws for entire duration
- Strike Invuln: 1-34f; Projectile Invuln: 1-42f; entire animation is strike/projectile invuln on cross-up version
- Crouching state 17f until end of recovery (no forced standing)
- After cross-up, enters a 23f recovery animation; total move duration varies based on timing of cross-up (48~57f)
- Movement Distance: 4.06 (3.52 cross-up)
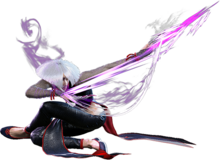
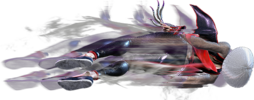
A slithering command dash that can avoid high attacks and many projectiles during the low profile frames. The LK version feints a forward dash before retreating backwards about 1 character width. This can be used to make some attacks whiff over her, particularly fast projectiles. Against slower projectiles, she may be forced to block on the forced standing frame during recovery. The MK version is a more traditional command dash, sliding forward and potentially giving A.K.I. a punish on a predicted fireball.
HK Snake Step is similar to MK, but has the potential to cross-up at closer ranges. This usually extends the total dash time, making it easier to react to. However, with extremely precise spacing, it's possible to get a cross-up version with the same 43f duration as the same-side version, setting up an ambiguous left/right mixup.
OD Snake Step acts like the HK version, but has full body strike and projectile invincibility. There are only 8 punishable recovery frames at the end of the dash, and if A.K.I. crosses up, it becomes completely immune to a strike or projectile punish. While this sounds like it would be a great defensive option, it's a bit underwhelming. It is vulnerable to throws, and the throw can even be option selected after a whiffed meaty jab. It is best used at unexpected timings where the opponent is less likely to be looking to react to it, like a gap in a blockstring. Even if you rarely use this move, the opponent may structure their offense in a predictable manner to avoid having their screen position reversed. On the other hand, if you notice your opponent using more committal oki options, you can take advantage of the easy corner escape and force them to respect it.
The OD version can be used to cancel the recovery of the 214LP and 214PP projectiles in order to escape punishment or force a mixup.
Sinister Slide (2PP)
| Startup | Active | Recovery | Cancel | Damage | Guard | On Hit | On Block |
|---|---|---|---|---|---|---|---|
| 11(28) | [185] | 20 | - | - | - | - | - |
- Upper Body Projectile Invuln: 10-197f
- Semi-Low Profile: 10-15f (crouch height); Low Profile: 16-197f
- Follow-ups can be input after 11f (28f for Exit Stance)
- Automatically exits stance after 216f (no low profile or projectile invuln)
| Startup | Active | Recovery | Cancel | Damage | Guard | On Hit | On Block |
|---|---|---|---|---|---|---|---|
| - | - | 21 | - | - | - | - | - |
- Can be input after 28f of Sinister Slide (fastest total time: 49f)
- Low Profile: 1-10f; Semi-Low Profile: 11-21f (crouch height)
- Shortest travel distance: 0.78
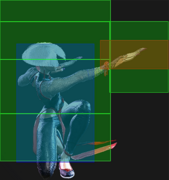
A.K.I. drops to the floor and slowly advances forward in a low profile state. While slithering, she can duck under most projectiles, as well as moves like Marisa's Phalanx/Gladius or Lily's Condor Spire. While should be used sparingly in neutral, it's possible to start slithering from long range, then safely exit the stance if your opponent doesn't give you anything to react to with a follow-up.
Venomous Fang (2PP~P)
| Startup | Active | Recovery | Cancel | Damage | Guard | On Hit | On Block |
|---|---|---|---|---|---|---|---|
| 11+19 | 15 | 30 | - | 1100 | LH | KD +20(34) [Crumple +67(81)] |
-25(-11) |
- Projectile Invuln: 1-19f (Upper Body) / 20-33f (Full); Airborne 19-33f (Forced Knockdown state)
- Low Profile 1-17f; Low Crush 20-31f
- Applies Poison on hit; triggers Toxic Blossom if opponent is poisoned
- Toxic Blossom hit causes crumple on grounded hit or tumbling OTG juggle state on airborne hit
A.K.I. lunges quickly across the screen for a surprise attack. It's very unsafe on block even when perfectly spaced, so it should only be used in combos or on reaction to projectiles. As an anti-zoning tool it's quite effective if A.K.I. is already in her Sinister Slide stance, but generally too slow if you try to enter the stance on reaction to a projectile.
Venomous Fang does not combo naturally from any of A.K.I.'s normals. Instead, it's primarily used in punishes, Drive Rush routes, or juggles. It can lead to massive corner carry, as well as high damage if Toxic Blossom is triggered.
Heel Strike (2PP~K)
| Startup | Active | Recovery | Cancel | Damage | Guard | On Hit | On Block |
|---|---|---|---|---|---|---|---|
| 11+11 | 3(9)3 | 17(20) | SA3 (2nd) | 300x2 | LH | +4 | -3 |
- Low Profile 1-15f; Semi-Low Profile 16-27f; Crouch-sized hurtbox 28-35f
- 3f extra recovery on whiff
- Cancel Hitconfirm Window: 33f (Super); 15f if only 2nd hit connects
- Counter-hit/Punish Counter bonus advantage carries through both hits
- Puts airborne opponents into limited juggle state
A useful combo tool that links into 2LP on the ground and allows follow-up juggles in the air. It's the only option out of Sinister Slide that is safe on block. In Burnout it becomes +1 on block; combined with Heel Strike's forward movement, this gives A.K.I. some tricky block pressure with the threat of a command grab reset.
Entrapment (2PP~LPLK)
| Startup | Active | Recovery | Cancel | Damage | Guard | On Hit | On Block |
|---|---|---|---|---|---|---|---|
| 11+23 | 3 | 55 | - | 1852 (2222) | T | HKD +16 | - |
- () refers to Punish Counter damage
- Range: 1.59 (from moment of input)
A command grab with good range but slow startup. Useful to catch opponents who attempt to Parry or Drive Impact A.K.I.'s other options out of Sinister Slide, or as a reset option when applying Burnout pressure.
Super Arts
Level 1 Super (236236K)
| Startup | Active | Recovery | Cancel | Damage | Guard | On Hit | On Block |
|---|---|---|---|---|---|---|---|
| 10 | 3 | 68 | - | 850,950 (1800) | LH | KD +30 | -46 |
- Strike/Throw Invuln: 1-12f; Armor Break
- Good anti-air (cannot hit cross-up)
- On hit, transitions to a cinematic and poisons the opponent
- Drive Gauge Depletion: 0.5 bars (hit) / 0.25 bars (block)
- 30% minimum damage scaling
A.K.I.'s most reliable reversal against everything but meaty projectiles. At 10f startup, most characters can safely bait this with a perfectly timed light normal. The anti-air hitbox is reliable as long as the opponent isn't too close. It works well as a juggle ender, inflicting poison for extra damage.
The distance separating A.K.I. from the opponent after the cinematic hit varies based on starting screen position; there is nearly full screen separation when used midscreen, but only about 1/3 screen distance if near the corner. This is important, because A.K.I. would ideally like to set up Nightshade Pulse (214LP) for frame advantage and screen control. JP's SA3 and A.K.I.'s HP SA2 can punish a full screen Nightshade Pulse if it is not canceled with 236KK. In the corner, many other characters have ways to punish the projectile, some of which can't be avoided with a 236KK cancel (or which don't give a Super freeze to react in this way). Check the Strategy Page for a full list of moves that can punish this setup.
If SA1 trades with a projectile right as it hits the opponent, they will be launched high into a limited juggle float state, usually allowing a follow-up juggle with Drive Rush.
Level 2 Super (214214P)
(Distance: Hold 4/5/6)
| Startup | Active | Recovery | Cancel | Damage | Guard | On Hit | On Block |
|---|---|---|---|---|---|---|---|
| 7 | 53(28)12 | 54 | - | 300,200x6,1000 (2500) | LH | KD +30 | -19~ |
- Armor Break; no invincibility, but Super-priority projectiles can dissipate fireballs
- Creates an unblockable poison pool that poisons the opponent in close proximity, lasting for 700f
- Button strength determines attack distance and placement of poison pool (LP close, MP mid/far, HP full screen)
- MP/HP versions cause poison pool to slowly move forward
- Drive Gauge Depletion: 1 bar (hit) / 0.5 bars (block)
- Distribution: 1500,500x6,5500 (hit) / 625x8 (block)
- 40% minimum damage scaling
Tainted Talons is a unique Super with multiple uses. It can punish moves from long range, finish juggles, and set up an unblockable poison pool that deals extensive damage if the opponent cannot escape or quickly land a hit on A.K.I.
The MP version is a fairly strong projectile counter at mid/far range, but not quite full screen. If too close, A.K.I. will get hit out of startup as it won't hit close enough to dissipate the fireball; from full screen, the HP version will usually not interact with the opposing projectile at all, unless it is a particularly slow fireball.
The poison pool from SA2 prevents the use of another SA2 until it disappears; however, it can exist simultaneously with the 214MP pool. If both pools are active, it does not stack the poison time or damage. Like 214MP, it constantly reapplies the poison as long as the opponent is touching it, causing it to last much longer.
The opponent cannot activate Drive Reversal against this Super until the final whip connects (2nd to last hit overall). If the opponent is under 1/2 bar of Drive Gauge and can't hold Parry, there is essentially nothing they can do to avoid Burnout unless they have a Super that punishes A.K.I.'s ranged SA2 startup. While SA2 can be made mostly safe at long range due to pushback, a well-timed Drive Reversal right before the final explosion occurs can allow them to stay close enough for a Drive Rush punish. However, if they input it too early, the explosion will simply punish the Drive Reversal recovery.
A.K.I. says a different voice line for each strength of SA2 during the freeze (except in Modern, where it defaults to the MP version before choosing the strength). This can tip the opponent off about which strength is coming, possibly letting them escape a chip KO setup if they have practiced against each version. These lines (in English) are:
- LP: "This will hurt!"
- MP: "I have you."
- HP: "Try not to run."
Level 3 Super (236236P)
| Startup | Active | Recovery | Cancel | Damage | Guard | On Hit | On Block |
|---|---|---|---|---|---|---|---|
| 10 | 3 | 58 | - | 4000 | LH | HKD +30 | -36 |
- Full Invuln: 1-12f; Armor Break
- Drive Gauge Depletion: 1.5 bars (hit) / 0.75 bars (block)
- Cinematic time regenerates ~2.2 Drive bars for A.K.I.
- 50% minimum damage scaling; applies a 10% damage scaling penalty when canceled from special moves
| Startup | Active | Recovery | Cancel | Damage | Guard | On Hit | On Block |
|---|---|---|---|---|---|---|---|
| 10 | 3 | 58 | - | 4500 | LH | HKD +21 | -36 |
- Full Invuln: 1-12f; Armor Break
- Available at 25% HP or below
- Drive Gauge Depletion: 2 bars (hit) / 1 bar (block)
- Cinematic time regenerates ~2.2 Drive bars for A.K.I.
- 50% minimum damage scaling; applies 10% immediate damage scaling when canceled from special moves
A big damage combo ender or fully invincible reversal. While the hitbox looks like a tall anti-air, most of its vertical range only works in juggles; the actual hitbox is much lower than it appears and it cannot hit cross-up, causing it to be a mediocre anti-air. It moves forward around 1/3 screen, which is enough to work in most juggle routes but not far enough to threaten opponents in neutral with a reaction punish.
While a regular SA3 has better knockdown advantage than CA, it also leaves the opponent much farther away. Both allow for a DR~6HK to apply pressure, though a Drive Rush into Throw will not beat reversal 4f normals. Still, the threat of a meaty normal can open up a throw opportunity, and A.K.I. has enough time to block and bait reversals during the dash.
Taunts
Neutral Taunt (5PPPKKK)
| Startup | Active | Recovery | Cancel | Damage | Guard | On Hit | On Block |
|---|---|---|---|---|---|---|---|
| 611 (total) | - | - | - | - | - | - | - |
- Builds 1 bar of Super gauge after 411 frames
- 1000 Super gauge on frames 303, 324, 346, 363, and 383; 5000 Super gauge on frame 411
Forward Taunt (6PPPKKK)
| Startup | Active | Recovery | Cancel | Damage | Guard | On Hit | On Block |
|---|---|---|---|---|---|---|---|
| 484 (total) | - | - | - | - | - | - | - |
Back Taunt (4PPPKKK)
| Startup | Active | Recovery | Cancel | Damage | Guard | On Hit | On Block |
|---|---|---|---|---|---|---|---|
| 175 | 32 | 258(264) | - | 600 | LH | KD -197 | -239 |
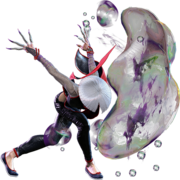
- The F.A.N.G bubble has a large projectile hitbox behind A.K.I.
- Popping the bubble by colliding with it makes A.K.I. angry.
