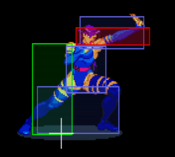
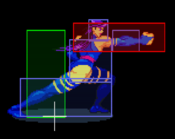
Introduction/Summary
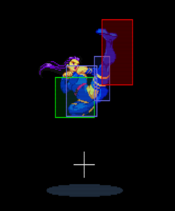
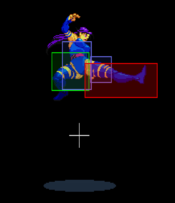
Psylocke is an extremely fast character who can dish out lots of damage with her disjointed buttons. Although her mobility options and damage are her biggest upsides, she suffers from having a low defense modifier which causes her to be heavily punished when her opponents get the upper hand against her. Overall, she serves as COTA's "glass cannon" and can be easy to get into with some high-level techniques that can make her tricky to learn but very rewarding.
Attack Chain
Ground Chain: Zig Zag 1
Normal Jump Chain: Zig Zag 1 Rules with NJ limits
Super Jump Chain: Zig Zag 1
| Strengths | Weaknesses |
|---|---|
|
|
Moves List
Normal Moves
Psylocke can double jump. During a bounce recovery though, this is disabled (yet is not for Cyclops).
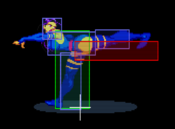
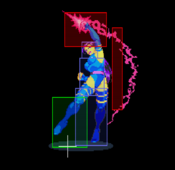
Taunt - Psylocke is the only character whose taunt is simply the Start button. Her moving hand is an active hitbox and can do damage, dizzy if the opponent is in the red, and even kill if the opponent has zero vital. It can also cancel standing normals, but not crouching ones. Psylocke remains taunting until hit or the player moves her.
LP
| Damage | Guard | Startup | Active |
|---|---|---|---|
| - | - | 2 | 2-4? |
| Recovery | Adv. Hit | Adv. Guard | Adv. Dash |
| 4 | 5 | 6 | 9 |
MP
| Damage | Guard | Startup | Active |
|---|---|---|---|
| - | - | 4 | 4 |
| Recovery | Adv. Hit | Adv. Guard | Adv. Dash |
| 7 | 2 | 2 | 2 |
HP
| Damage | Guard | Startup | Active |
|---|---|---|---|
| - | - | 5 | 8 |
| Recovery | Adv. Hit | Adv. Guard | Adv. Dash |
| 12 | -8 | -15 | -9 |
LK
| Damage | Guard | Startup | Active |
|---|---|---|---|
| - | - | 2 | 2-4 |
| Recovery | Adv. Hit | Adv. Guard | Adv. Dash |
| 2 | 4 | 6 | 6 |
MK
| Damage | Guard | Startup | Active |
|---|---|---|---|
| - | - | 5-7 | 6-7 |
| Recovery | Adv. Hit | Adv. Guard | Adv. Dash |
| 3 | 8 | 5 | 5 |
HK
| Damage | Guard | Startup | Active |
|---|---|---|---|
| - | - | 7 | 8 |
| Recovery | Adv. Hit | Adv. Guard | Adv. Dash |
| 21(0) | -2(15) | - | - |
c.LP
| Damage | Guard | Startup | Active |
|---|---|---|---|
| - | - | 2 | 4 |
| Recovery | Adv. Hit | Adv. Guard | Adv. Dash |
| 1 | 3 | 5 | 5 |
c.MP
| Damage | Guard | Startup | Active |
|---|---|---|---|
| - | - | 4 | 4 |
| Recovery | Adv. Hit | Adv. Guard | Adv. Dash |
| 4 | 6 | 3 | 3 |
c.HP
| Damage | Guard | Startup | Active |
|---|---|---|---|
| - | - | 5 | 8 |
| Recovery | Adv. Hit | Adv. Guard | Adv. Dash |
| 15 | Launches | -5 | -5 |
c.LK
| Damage | Guard | Startup | Active |
|---|---|---|---|
| - | - | 2 | 2 |
| Recovery | Adv. Hit | Adv. Guard | Adv. Dash |
| 2 | 7 | 6 | 6 |
c.MK
| Damage | Guard | Startup | Active |
|---|---|---|---|
| - | - | 5 | 4 |
| Recovery | Adv. Hit | Adv. Guard | Adv. Dash |
| 5 | Launches | 0 | 0 |
c.HK
| Damage | Guard | Startup | Active |
|---|---|---|---|
| - | - | 5 | 8 |
| Recovery | Adv. Hit | Adv. Guard | Adv. Dash |
| 21 | KD | -11 | -11 |
6MK
| Damage | Guard | Startup | Active |
|---|---|---|---|
| - | - | 20 | 6 |
| Recovery | Adv. Hit | Adv. Guard | Adv. Dash |
| 11 | 1 | -6 | -- |
4HK
| Damage | Guard | Startup | Active |
|---|---|---|---|
| - | - | 38 | 4 |
| Recovery | Adv. Hit | Adv. Guard | Adv. Dash |
| 11 | 8 | -1 | -- |
6HK
| Damage | Guard | Startup | Active |
|---|---|---|---|
| - | - | 7 | 8 |
| Recovery | Adv. Hit | Adv. Guard | Adv. Dash |
| 19 | - | - | - |
j.LP
| Damage | Guard | Startup | Active |
|---|---|---|---|
| - | - | 2 | 12 |
| Recovery | Adv. Hit | Adv. Guard | Adv. Dash |
| 4 | -- | -- | -- |
j.MP
| Damage | Guard | Startup | Active |
|---|---|---|---|
| - | - | 4 | 10 |
| Recovery | Adv. Hit | Adv. Guard | Adv. Dash |
| 3 | -- | -- | -- |
j.HP
| Damage | Guard | Startup | Active |
|---|---|---|---|
| - | - | 5 | 14 |
| Recovery | Adv. Hit | Adv. Guard | Adv. Dash |
| 5 | -- | -- | -- |
j.LK
| Damage | Guard | Startup | Active |
|---|---|---|---|
| - | - | 2 | 12 |
| Recovery | Adv. Hit | Adv. Guard | Adv. Dash |
| 5 | -- | -- | -- |
j.MK
| Damage | Guard | Startup | Active |
|---|---|---|---|
| - | - | 4 | 4 |
| Recovery | Adv. Hit | Adv. Guard | Adv. Dash |
| 16 | -- | -- | -- |
j.HK
| Damage | Guard | Startup | Active |
|---|---|---|---|
| - | - | 6 | 10 |
| Recovery | Adv. Hit | Adv. Guard | Adv. Dash |
| 5 | -- | -- | -- |
236L/M/HP
| Damage | Guard | Startup | Active |
|---|---|---|---|
| - | - | 5 | proj. |
| Recovery | Adv. Hit | Adv. Guard | Adv. Dash |
| 42 | -- | -- | -- |
236LK
| Damage | Guard | Startup | Active |
|---|---|---|---|
| - | - | 4 | 12 |
| Recovery | Adv. Hit | Adv. Guard | Adv. Dash |
| 23 | 1 | -20 | -- |
236MK
| Damage | Guard | Startup | Active |
|---|---|---|---|
| - | - | 4 | 12 |
| Recovery | Adv. Hit | Adv. Guard | Adv. Dash |
| 35 | -6 | -27 | -- |
236HK
| Damage | Guard | Startup | Active |
|---|---|---|---|
| - | - | 4 | 12 |
| Recovery | Adv. Hit | Adv. Guard | Adv. Dash |
| 41 | - | - | -- |
j.236L/M/HK
| Damage | Guard | Startup | Active |
|---|---|---|---|
| - | - | 4 | 12 |
| Recovery | Adv. Hit | Adv. Guard | Adv. Dash |
| 20 frames after landing | - | - | - |
214X
| Damage | Guard | Startup | Active |
|---|---|---|---|
| - | - | 53 | -- |
| Recovery | Adv. Hit | Adv. Guard | Adv. Dash |
| -- | -- | -- | -- |
236PP
| Damage | Guard | Startup | Active |
|---|---|---|---|
| - | - | 19 | 67 |
| Recovery | Adv. Hit | Adv. Guard | Adv. Dash |
| 0 | KD/Untechable till grounded | 7 | -- |
The Basics
SJ back and psi-flash spam is good for building meter and can be hard for the inexperienced to get around.
Dash s.MP (blocked), back + HK (xx Psi-flash as needed) makes for a good poke and run tactic. Pushback off the blocked attack plus the little backward jump of back+HK takes you quite a ways from the opponent.
Jump forward, j.HP, j.HK can be obnoxious to deal with, and combos on a lot of tall characters. Just be careful of someone jumping up and throwing you.
