Introduction
| "You have felt the fury of the beast! Go and lick your wounds!" |
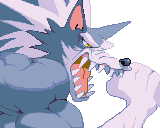
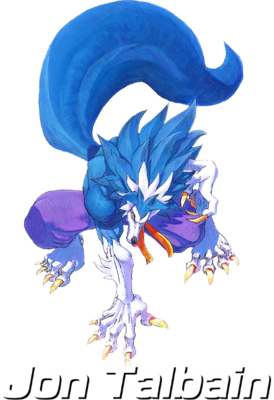
Jon was born to an English human mother and a werewolf father. His mother died shortly after giving birth to him. He had no contact with his father, as there was no knowing where he was or how to find him. He lived a peaceful life as a human until one full moon. The transformation caused him to be shunned from human society. Though shocked by discovering he was a Darkstalker, Talbain harbored no animosity towards his parents, whom had never been a part of his life. Talbain was determined not to let the his primal instincts consume him. Following his inner voice, he devoted himself to fighting and pushing himself beyond his limit, believing that if he retained his inner humanity, he might regain his physical humanity as well.
| Strengths | Weaknesses |
|---|---|
|
|
|
Color Options
| LP | MP | HP | Hold Start |
 |
 |
 |

|
| LK | MK | HK | Hold LP+MK |
 |
 |
 |

|
Moves List
Normal Moves
Standing LP - whiff crouching opponents
Standing close LK - hits low
Standing MK - it had good horizontal range
Standing Close HP - his standing combo ender
Standing far HK - it had enough vertical range for anti air
Crouching LK - hits low and its your crouching chain combo opener
Crouching MP - hits the largest horizontal range and a good combo starter too
Crouching HP - its a decent anti air
Crouching HK - his crouching combo ender and had enough range against projectiles
Jumping LK - had good range for overhead and his air combo opener in Mirage Body
Jumping HP - great hitbox range for overheads and jump in Mirage Body
Jumping HK - the one with best horizontal range for air to air
Special Moves
Beast Cannon (Forward): QCF + P [ES]
Talbain charges forward off the ground at the opponent which goes barely full-screen. Keep in mind all button strengths for this attack do nothing different. This attack is the bread and butter of Talbain's offense and mix-up.
ES Beast Cannon is really not that much different except that it travels faster, recovers faster and travels full-screen. Damage and frame wise it is exactly the same move.
Beast Cannon (Rising): F, D, DF + P (Guard Reversal) [ES]
The Rising Beast Cannon is Talbain's equivalent to a Shoryuken, though minus the invincibility. However, this is not an ideal anti-air attack due to the slow start-up. In addition, there is too much recovery to follow-up with a pursuit attack. If you anticipate a jump-in from afar you can go for it and Change Direction for extra damage. Just like the normal Beast Cannon all button strength are exactly the same. This move is best saved for Guard Reversals.
ES Beast Cannon travels full-screen and faster.
Beast Cannon (Diving): During jump, UF, F, DF + P [ES]
As the name implies Talbain dives down with a Beast Cannon attack. This move travels roughly 3/4th of the screen. On top of that you can juggle the opponent after a connected hit.
ES Beast Cannon travels faster.
Beast Cannon (Direction Change): Any direction + P, during Beast Cannon
Going back to the Beast Cannon this is the main agenda of Talbain's game as it piles up his offense and mix-up. For example, after a blocked hit you can choose to change the direction and move back across the screen to the opposite or right after going through the opponent, change the direction and cross them up. With The Beast Cannon you can change the direction and score up to two more additional hits. Thereby assuming you did not two-in-one it, you can land up to three Beast Cannons. Even if the Beast Cannon does not connect you can Change Direction. Going back to the ES Beast Cannon now, which almost seems like a waste of bar since it doesn't offer much in the way of using up bar for such few buffs. However, as noted it recovers fast, hence, it is actually easier to use the Change Direction and landed successful follow-up hits in a combo. Regardless, the timing is still strict but not nearly as bad as comboing off of a normal Beast Cannon. Remember, a whiffed Direction Change will not build bar.
Climb Laser: Press D, U + K [ES]
The motion and the attack itself does resemble a Flash Kick somewhat but don't worry, no charge time is required. This is really Talbain's go to anti-air, as it has fast wake up and invincibility on start-up. It also serves for good two-in-ones if you don't have the Beast Cannon combos down pat. LK travels 1/12th of the screen, MK travels 1/7th of the screen and HK travels 1/5th of the screen. Each strength also does the same damage but also covers more vertical range the the stronger the button strength. Hence, HK will have the most recovery. In combos, just stick to LK as it recovers faster giving you more ample time to tack on a pursuit attack.
ES Climb Laser does more damage, a wider hit-box, inflicts 3 hits and travels 1/5th of the screen. Used mainly for combos, as a normal Climb Laser is sufficient enough for anti-air.
Million Flicker: B, D, DB + P [ES]
A strange multi-hitting nunchuka attack. The damage is nothing much and does not knock down. It cn be used in combos, but doing so causes the special whiff one hit. It can be used as a sorta poke after a blocked normal, seeing that is pushes the opponent far out of sweep range. Million Flicker also cannot be air blocked! If your opponent air blocks a jump in but doesn't hit back...as soo nas you land go for a Million Flicker, as this have no choice but to take the hit. Outside of this it is not a standard anti-air unless the opponent is right in front of you close to landing as the hit-box isn't very good, nor the priority for that matter. Note that every button strength is the same.
ES Million Flicker does an additional hit, more damage and knocks the opponent down. In order to get the most use out of it is to use it on a cornered opponent - 1) one of the hits will not whiff on a cornered opponent. 2) Due to the last hit not whiffing, Talbain will recover faster allowing you to land a pursuit attack. An ES Million Flicker combo with an ES Pursuit can do a 1/3rd of damage to the opponent. Good to have on hand if again you do not have his Beast Cannon combo down pat. At the same time, for this combo you can replace the ES Million Flicker with an ES Climb Laser and get the same damage in and outside the corner. Overall, this ES is rather useless.
Wild Circular: Close, HCB + MK or HK [ES]
Talbain grabs the opponent for a command throw as he bounces backward with the opponent. It does a little more damage than his normals throws, but the recovery is too slow to tack on a pursuit attack. Plus, Talbain moves backward so this is not the throw you want to use when you're cornered, as it will possibly keep you there.
ES Wild Circular has got to be the biggest waste. It has all the same drawbacks. Except it does 1 - 2 points more of damage and Talbain slams the opponent in backward fashion twice, thus increasing your chances of cornering yourself if you aren't already. And it has the added glitch of using up ALL of your bar. Want something more useless than ES Million Flicker? Then use this piece of crap!
Super Moves
Dragon Cannon: HCB + 2P
A full-screen projectile attack that knocks down. The damage is decent and can lead to a pursuit attack. It does have wuite bit of start-up, cannot be comboed and no invincibility. It still has its uses as punishment from full-screen or as keep away if you're desperate.
Mirage Body: HCF + 2K
This super packs a ton of invincibility on start-up. With this super, all of Talbain's normals do multiple hits resulting in big damaging chain combos. With these multiple hits you can build up alot of bar, at least the stock you used up just executing this super. Another advantage is you can cancel a normal into this super to hide the start-up and it has no de-activation time.
The Basics
your objective is a total rushdown from hop to low chains and approach to your opponent with your Beast Cannon, and charge the bar to use your shadow chains.
Combos
- Crouching MK/Close MP, Climb Laser - 2 hits, 23% damage
- Crouching LP,MP,MK,HK - 4 hits, 21% damage
- Jumping MK, Crouching LK, Climb Laser - 3 hits, 24% Damage
- Crouching MK, Beast Cannon, Follow up -
- Crouching MK, ES Beast Cannon, Follow up, Follow up -
Advanced Strategy
Mirage Body Combos
Mirage Body is a Super Move that make an illusion of a duplicate of Gallon and its useful for chain jumping and dash chains
Combo 1: Jumping LK, Jumping HP, any crouching chain of your choice
Combo 2: Dash LK, Chain Jump LP, any standing chain of your choice (for medium short characters switch to a crouching chain)
It had a low duration but you can full a one special bar with the correct timing and setups.


