Introduction
| "You were a worthy foe. I shall take your head with honor, and hang it upon my wall with pride." |
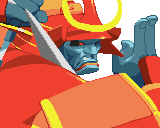
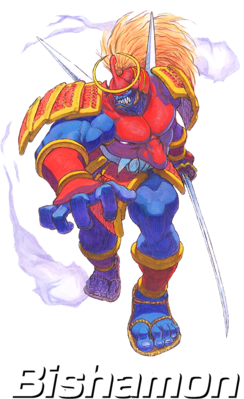
When Bishamon was looking around in an antique shop for his people, as if drawn by fate, he found a piece of armor and a sword. At this moment, he lost his own thought. When he realized where he was, he was at his house. The armor and sword sitting beside him. When he went back to the store to ask what happened, he found out that he forced the owner to give the armor and sword to him. Bishamon himself had no memory of this. It made no sense to him but as he stared at the armor, it felt meaningless to him.
| Strengths | Weaknesses |
|---|---|
|
|
|
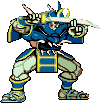
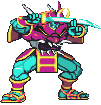
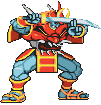
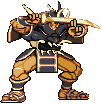
Color Options
| LP | MP | HP | Hold Start |
 |
 |
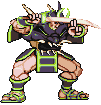 |
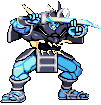
|
| LK | MK | HK | Hold LP+MK |
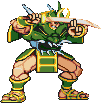 |
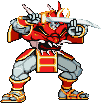 |
 |
|
Moves List
Normal Moves
Standing LP - whiff crouching characters
Standing MP - can be an anti air
Standing Forward LK - excellent low hitbox range
Standing Forward MP -
Standing Forward MK - most useful against crouching characters, can be rapid linked twice or three times
Standing forward HP - had good high range but not for an anti air
Standing Forward HK - your far combo ender
Crouching LK - hits low and combo starter
Crouching HP - had large low horizontal hitbox and your far combo ender
Jumping MK - large one for overheads
Jumping HP - you air-to-air attack
Jumping HK - deepest one and
Special Moves
Hane Na - HCF + P [ES]
Bishamon projects his sword across the screen, impaling his opponent for a follow-up. This attack does fall under the damage scaling for projectiles. However, it can negatie other projectiles but not be used in projectile wars, thus it cannot defeat a projectile and continue on to connect with the opponent. Button strength determines the distance, LP - goes less than half-screen, MP - goes roughly more than half-screen and HP - goes full-screen. Don't be afraid to use this during rushdown, it is extremely safe on block and allows only for more block strings. Beware, if you hit a jumping opponent it will down them but not restrain them fr a follow-up.
For the ES Hane Na, Bishamon's spirit and his sword leave his armor and project themselves full-screen to connect with the opponent for a knock down. It does roughly 3 times as much damage as the normal Hane Na, which is not known for its damage. It retains the same properties with jumping opponents and projectiles, except it will not be scaled down for damage. This move has no push back, instead it knocks the opponent down right where they are standing and due to the long recovery period you cannot pursuit. With this said, execute this move from as far away as possible, doing right next to a cornered opponent would be rather foolish.
>Tsuji Hayate - After Hane Na, QCF + P
After Bishamon restrains the opponent, he charges forward slicing their upper body. This is probably his best follow-up due to the damage and it easy execution. A simple two-in-one Hane Na, Tsuji Hayate combo can result in almost 40% damage. If you wait to long, the opponent can block this attack.
>Kaeshi Ha - After Hane Na, Press B + P
Bishamon pulls the opponent towards him for a juggle. However, juggling is hard due to the strict time you have. Really the only thing you can juggle with is Kien Zan.
Kien Zan - F, D, DF + P (Guard Reversal) [ES]
Bishamon's own shoryuken but has strict limitations in it's usage. 1)You can use immediately after a jump-in. 2)As a guard reversal and 3) As a follow-up to Kaeshi Ha. You will go most use out of it as a Guard Reversal. The Hane Na, Kaeshi Ha, Kien Zan combo takes some timing and practice, plus does slightly less damage than the Tsuji Hayate follow-up. Stick to using the LP version only since has much less recovery, so you can pursuit the opponent. Button strength determines how far and high Bishamon goes. LP travels 1/6th, MP travels 1/4th and HP travels 1/3rd of the screen.
ES Kien Zan just does more damage and has the same properties as the HP version.
Iagiri (High) - Charge B for 2 seconds, press F + P [ES]
Bishamon executes a multi-hitting special slash attack. This special can be used in combos, but a Hane Na, follow-up is better suited for combos due to damage and the lack of a charge time. It cannot be air-blocked but most characters can crouch under it. Iagiri (High) is a good poke to throw out once in a while. Use it at the end of block strings or to negate fireballs. Button strength determines both damage and range. To the naked eye it can be hard to notice the range differences since they are very subtle.
ES Iagiri (High) has more range, does more damage and is safer. You can combo it but a hit or two will whiff resulting in moot damage, since a regular Iagiri (High) combo would have gotten you about the same damage.
Iagiri (Low) - Charge B for 2 seconds, press F + K [ES]
This is similar as the High version except this cannot be crouched under and hits low. It can be easily jumped over of course. It's also quicker and safer. The uses will be similar has the high version - pokes, pressure and negating fireballs. Throw it out every once and while to make sure the opponent is blocking low.
ES version has more range, does more damage and is safer. Unlike the ES Iagiri (High), this one is less prone to whiffing a hit or two. You can actually combo from close range and get every hit out of it. In fact, a simple two-in-one will result in 50% to your opponent.
Kirisute Gomen - Close, 360 + P [ES]
Bishamon's command throw that cannot be teched like a normal throw. It does slightly more damage than a normal throw, but isn't central to his game.
ES Kirisute Gomen is a waste, seeing that its damage is never consistent. It may do slightly more damage sometimes and others it does the same.
Mukuro Fuuji - In air, U, UF, F + P [ES]
Bishamon throws a projectile at a downward angle at the opponent. Of course this move is subject to the standard projectile rules. This projectile isn't known for its damage but its ability to stun the opponent and leave them in the state to land a free combo. The projectile travels about half-screen.
ES Mukuro Fuuji can do slightly more damage and sends two projectiles - one at a higher angle across the screen and the other at a downward angle, thus doubling your chances to land it.
Super Moves
Tsurane Giri - HCF + 2K
Bishamon disappears and a line of ghostly samurai appear slashing the opponent. It has alot of start-up but invincibility. You can use it against jump-ins or for full-screen punish. Getting the most damage out if can be tricky due to the positioning you need to get every samurai to connect.
Oni Kubi Hineri - HCB + 2P
A command throw super with some range and can be comboed. To get the most out it you need to mash for extra damage. In the end, you get a 40%+ damage combo out of this. Strangely, this move does knock down but leaves them in state where Bishamon cannot pursuit them.
The Basics
He is a Boxer samurai version due to his charge rush specials, you will love to jump and low chain your oppponent, when you charge your bar you can make a mixup with your Super Samurai Rush.
Combos
Alternate Strikes LK, MP, MK, HP, crouching HK - 4 hits, 30% damage
Dashing MK, link standing LP, Alternate Strikes, HP, HK - 4 hits, 35% damage
Crouching MP, Hane Na, Tsuji Hayate - 4 hits, 40% damage
Dashing MK, link standing LP, Hane Na, Tsuji Hayate - 5 hits, 43% damage
Dashing MK, link standing LP, Hane Na, Kaeshi Ha, ES Kien Zan - 7 hits, 45% damage (you can tack on an ES Pursuit for a possible 56% damage combo)
Crouching MK, ES Iagiri (Low)- 10 hits, 50% damage
Standing close MK, Obi Kuni Hineri - 2 hits, 42% damage
