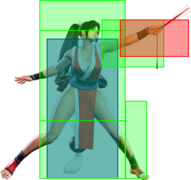
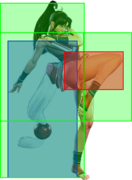
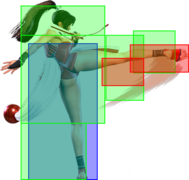
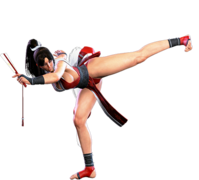
| Character breakdown in progress
Mai is a new character! This page is currently under construction and information might be inaccurate, incomplete, or missing entirely. 🤝 Want to help us out? Join the SF6 Resource Hub for more info on editing and other ways you can potentially help with this resource. |
Introduction
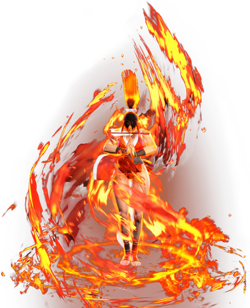
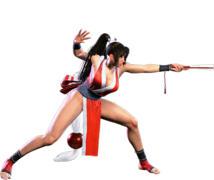
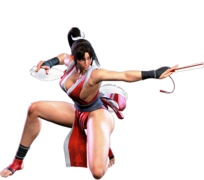
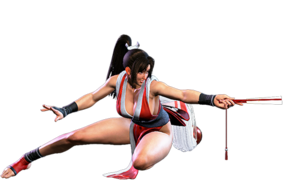
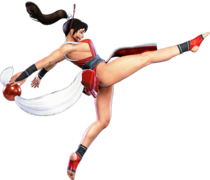
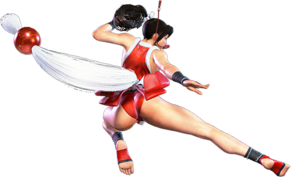
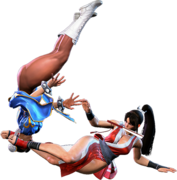
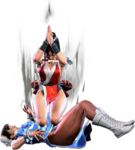
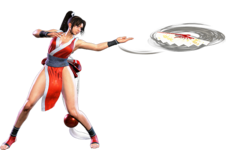
The successor of Shiranui-style ninja arts. A charming kunoichi who is as dedicated to love as she is to training. Loves cooking, Japanese dressmaking, flower arrangement, and traditional Japanese dance.
| Pick if you like: | Avoid if you dislike: |
|---|---|
|
|
Classic & Modern Versions Comparison
| Missing Normals |
|
|---|---|
| Missing Command Normals |
|
| Shortcut-Only Specials |
|
| Assist Combos |
|
| Miscellaneous Changes |
|
Flame Stocks
| Mai | |
|---|---|
| Vitals | |
| Life Points | 10000 |
| Ground Movement | |
| Forward Walk Speed | 0.050 |
| Backward Walk Speed | 0.035 |
| Forward Dash Speed | 18 |
| Backward Dash Speed | 23 |
| Forward Dash Distance | 1.450 |
| Backward Dash Distance | 0.900 |
| Drive Rush Min. Distance (Throw) | 0.669 |
| Drive Rush Min. Distance (Block) | 2.383 |
| Drive Rush Max Distance | 2.977 |
| Jumping | |
| Jump Speed | 4+38+3 |
| Jump Apex | 2.115 |
| Forward Jump Distance | 1.90 |
| Backward Jump Distance | 1.52 |
| Throws | |
| Throw Range | 0.80 |
| Throw Hurtbox | 0.33 |
| Frame Data Glossary - SF6 | |
|---|---|
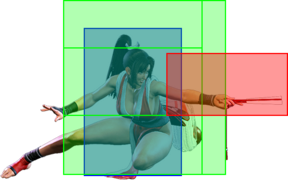
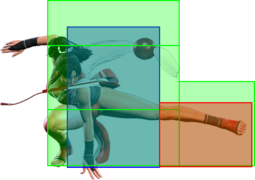
| Hitbox Images |
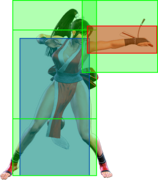
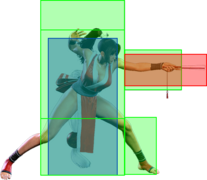
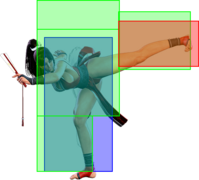
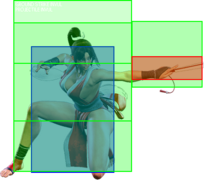
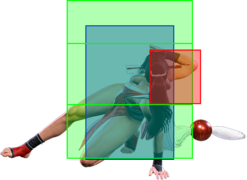
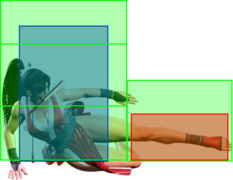
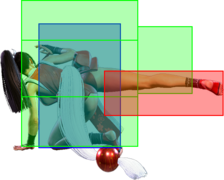
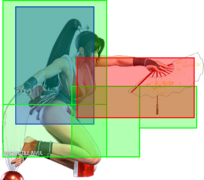
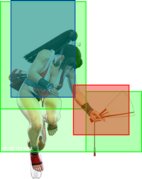
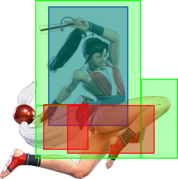
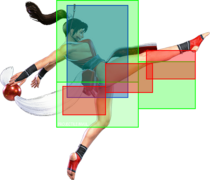
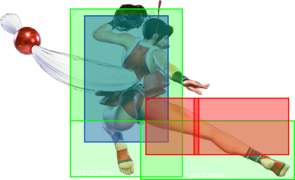
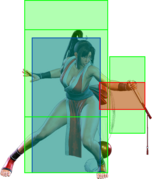
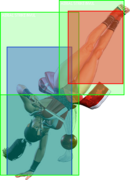
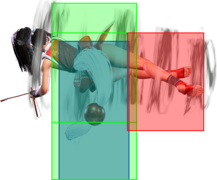
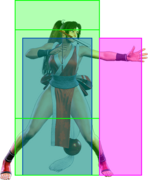
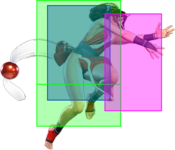
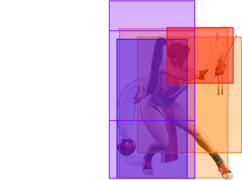
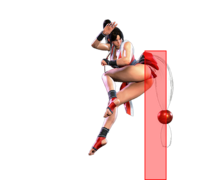
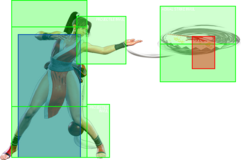
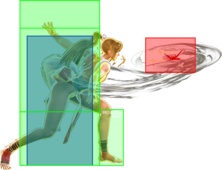
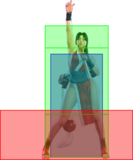
🟥 (Red): Attack hitbox
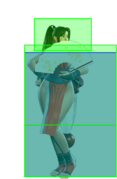
🟩 (Green): Vulnerable hurtbox that can be hit by strikes/projectiles
🟦 (Blue): Vulnerable throw hurtbox
|
| Active |
How many frames a move remains active (can hurt opponents) for. For projectiles with a maximum active period, a value may be listed in [brackets], but this number is not factored into the move's total frame count.
|
| Cancel |
Available options for canceling one move into another move.
|
| Cancel Hitconfirm Windows |
Hitconfirm reaction windows into Special Moves, Target Combos, and Super Arts.
|
| Damage |
Attack damage on hit. Multi-hit moves may have the damage listed for individual hits as X,Y (or sometimes X*Y). Sometimes a move's damage changes depending on which active frame connects, or on cinematic vs. non-cinematic hits; in this case, multiple values may be listed, and it will be clarified in the move description.
|
| Damage Scaling |
Some moves cause additional damage scaling in combos. Refer to Game Data page for a more detailed breakdown. Scaling Types:
|
| Drive Rush Cancel Advantage |
Refers to the frame advantage when canceling a normal, command normal, or Target Combo into Drive Rush on hit or block (abbreviated as DRC for Drive Rush Cancel). This is calculated at the moment a follow-up attack can be input, not at the moment the character can block or perform movement options. An attack that with DRC +8 on Hit can link into an 8-frame attack, and DRC +4 on Block can create a true blockstring into a 4-frame attack. Note that any DRC on Block worse than +4 cannot form a true blockstring, allowing the opponent to interrupt with an invincible reversal. Most light normals are slightly negative after a DRC on block, meaning the opponent can mash their fastest normal to guarantee a counter-hit (though this requires fast reactions). The attacking character could punish this with Light > DRC into an immediate invincible attack, but this would be an incredibly expensive and high-risk gambit.
|
| Forced Knockdown |
Most airborne command normals, special moves, and Super Arts put the user in a "Forced Knockdown" state. While in this state, an air knockdown will occur when being hit by any attack, even if it would otherwise cause an air reset. As an example, Ryu's 2HP causes an air reset when used as an anti-air. Against a move like Cammy's Hooligan Combination, however, the 2HP puts her into an air knockdown state. This allows Ryu to successfully cancel 2HP into Shoryuken for a juggle, similar to how a Drive Impact wall splat works. Taking advantage of Forced Knockdown juggles is important for dealing with moves like Ken's Dragonlash, Dhalsim's Air Teleport, or Kimberly's 6HK~Hop sequence. Moves that already cause an air knockdown, like most j.MP air-to-airs, will not display the "Forced Knockdown" message.
|
| Guard |
Refers to the direction an attack must be blocked. L is for Low attacks (must be blocked crouching), H is for High attacks/overheads (must be blocked standing), LH is for attacks that can be blocked crouching or standing. T is for Throw attacks which cannot be blocked.
|
| Juggles |
When a character is put into an Air Knockdown state, it is often possible to follow up with a Juggle attack before they hit the ground. In the simplest terms, there are 2 main juggle states:
The following is a more detailed overview of the SF6 juggle system:
Juggle Start (JS): When starting a juggle, the opponent's JC will be set to this value. May be different vs. standing and airborne opponents.
Juggle Increase (JI): When opponent is already in a juggle state, attacks will increase the opponent's JC by this amount.
Juggle Limit (JL): Property of an attack hitbox that determines whether it connects on a juggled opponent. The JL must be ≥ the opponent's JC to hit successfully.
An example to tie everything together:
Drive Rush notes:
More recently, the official definitions used by Capcom are slightly different than these community-designated terms. When reading official patch notes, the following terms are used instead:
|
| On Hit/Block |
These are frame advantage values when the attack hits or is blocked. If the number is positive, then the move will recover before the defender can act again. If the number is negative, the defender will be able to act before the attacker and maybe even punish. KD refers to knockdown on hit, and the listed KD Advantage refers to how many frames the attacker can act before the defender finishes their wakeup animation.
|
| Recovery |
How many frames it takes for a move to finish after the active frames have finished. For projectiles, recovery is considered to begin after the first active frame.
|
| Startup |
How many frames it takes before the move becomes 'active' or have a hit box. The last startup frame and the first active frame are the same frame, meaning all values are written as Startup + 1.
|
| IASA / Actionable Recovery |
Some moves play out an extended recovery animation when no other button/direction is input (for crouching moves, it applies when holding any down direction). These are often referred to as "actionable recovery" frames; in some games, the term IASA (Interruptible As Soon As) refers to the frame that Actionable Recovery begins. Letting the Actionable Recovery frames play out can change the character's position, potentially setting up spacing traps by recovering farther away. For example, Manon 5HP will recover much farther away from the opponent if no input is performed immediately after her recovery; holding back or down-back to block will keep her much closer to the opponent.
|
Normals
Standing Normals
5LP
| Startup | Active | Recovery | Cancel | Damage | Guard | On Hit | On Block |
|---|---|---|---|---|---|---|---|
| 4 | 3 | 7 | Chn Sp SA | 300 | LH | +5 | -2 |
5MP
| Startup | Active | Recovery | Cancel | Damage | Guard | On Hit | On Block |
|---|---|---|---|---|---|---|---|
| 8 | 4 | 15 | Sp SA | 600 | LH | +2 | -3 |
5HP
| Startup | Active | Recovery | Cancel | Damage | Guard | On Hit | On Block |
|---|---|---|---|---|---|---|---|
| 9 | 3 | 21 | Sp SA | 800 | LH | +1(+3) | -3(-1) |
5LK
| Startup | Active | Recovery | Cancel | Damage | Guard | On Hit | On Block |
|---|---|---|---|---|---|---|---|
| 4 | 3 | 8 | Sp SA TC | 300 | LH | +1 | -1 |
5MK
| Startup | Active | Recovery | Cancel | Damage | Guard | On Hit | On Block |
|---|---|---|---|---|---|---|---|
| 9 | 3 | 18 | - | 700 | LH | +5 | -4 |
5HK
| Startup | Active | Recovery | Cancel | Damage | Guard | On Hit | On Block |
|---|---|---|---|---|---|---|---|
| 14 | 3 | 19(22) | - | 900 | LH | +3 | -3 |
Crouching Normals
2LP
| Startup | Active | Recovery | Cancel | Damage | Guard | On Hit | On Block |
|---|---|---|---|---|---|---|---|
| 4 | 3 | 7 | Chn Sp SA | 300 | LH | +4 | -1 |
2MP
| Startup | Active | Recovery | Cancel | Damage | Guard | On Hit | On Block |
|---|---|---|---|---|---|---|---|
| 6 | 4 | 15(17) | Sp SA | 600 | LH | +5 | -3 |
2HP
| Startup | Active | Recovery | Cancel | Damage | Guard | On Hit | On Block |
|---|---|---|---|---|---|---|---|
| 10 | 2(8)3 | 19 | - | 400x2 | LH,LH | +4 | -3 |
2LK
| Startup | Active | Recovery | Cancel | Damage | Guard | On Hit | On Block |
|---|---|---|---|---|---|---|---|
| 5 | 3 | 8 | Chn | 200 | L | +2 | -2 |
2MK
| Startup | Active | Recovery | Cancel | Damage | Guard | On Hit | On Block |
|---|---|---|---|---|---|---|---|
| 7 | 3 | 19 | Sp SA | 500 | L | -2 | -6 |
2HK
| Startup | Active | Recovery | Cancel | Damage | Guard | On Hit | On Block |
|---|---|---|---|---|---|---|---|
| 9 | 3 | 22(23/25) | - | 900 | L | KD +38 | -11 |
Jumping Normals
j.LP
| Startup | Active | Recovery | Cancel | Damage | Guard | On Hit | On Block |
|---|---|---|---|---|---|---|---|
| 4 | 9 | 3 land | - | 300 | H | +6(+9) | +3(+6) |
j.MP
| Startup | Active | Recovery | Cancel | Damage | Guard | On Hit | On Block |
|---|---|---|---|---|---|---|---|
| 7 | 5 | 3 land | Sp SA2 | 600 | H | +7(+11) | +3(+7) |
j.HP
| Startup | Active | Recovery | Cancel | Damage | Guard | On Hit | On Block |
|---|---|---|---|---|---|---|---|
| 9 | 5 | 3 land | - | 800 | H | +7(+15) | +3(+11) |
j.LK
| Startup | Active | Recovery | Cancel | Damage | Guard | On Hit | On Block |
|---|---|---|---|---|---|---|---|
| 5 | 7 | 3 land | - | 300 | H | +5(+10) | +1(+6) |
j.MK
| Startup | Active | Recovery | Cancel | Damage | Guard | On Hit | On Block |
|---|---|---|---|---|---|---|---|
| 7 | 5 | 3 land | - | 500 | H | +8(+13) | +4(+9) |
j.HK
| Startup | Active | Recovery | Cancel | Damage | Guard | On Hit | On Block |
|---|---|---|---|---|---|---|---|
| 10 | 6 | 3 land | - | 800 | H | +11(+15) | +7(+11) |
Command Normals
6MP
| Startup | Active | Recovery | Cancel | Damage | Guard | On Hit | On Block |
|---|---|---|---|---|---|---|---|
| 20 | 3 | 18 | - | 600 | H | +2 | -3 |
4HK
| Startup | Active | Recovery | Cancel | Damage | Guard | On Hit | On Block |
|---|---|---|---|---|---|---|---|
| 8 | 5 | 20 | TC | 800 | LH | +3(+7)) | -1(+3) |
Target Combos
5LK~LK
| Startup | Active | Recovery | Cancel | Damage | Guard | On Hit | On Block |
|---|---|---|---|---|---|---|---|
| 7 | 2 | 20 | TC | 400(320) | LH | -2 | -10 |
| Startup | Active | Recovery | Cancel | Damage | Guard | On Hit | On Block |
|---|---|---|---|---|---|---|---|
| 10 | 2 | 24+4 land | Sp* SA2* | 500(350) | LH | +3 | -10 |
4HK~HK
| Startup | Active | Recovery | Cancel | Damage | Guard | On Hit | On Block |
|---|---|---|---|---|---|---|---|
| 9 | 1(3) | 30(38) | - | 600x2 | LH | KD +48 | -11 |
Throws
Forward Throw (LPLK)
| Startup | Active | Recovery | Cancel | Damage | Guard | On Hit | On Block |
|---|---|---|---|---|---|---|---|
| 5 | 3 | 23 | - | 1200 (2040) | T | KD +21 | - |
- Punish Counter: HKD +?
- Applies 20% immediate damage scaling when comboed into (e.g. after Crumple)
Back Throw (4LPLK)
| Startup | Active | Recovery | Cancel | Damage | Guard | On Hit | On Block |
|---|---|---|---|---|---|---|---|
| 5 | 3 | 23 | - | 1200 (2040) | T | KD +17 | - |
- Side switches
- Punish Counter: HKD +?
- Applies 20% immediate damage scaling when comboed into (e.g. after Crumple)
Air Throw (LPLK Air)
| Startup | Active | Recovery | Cancel | Damage | Guard | On Hit | On Block |
|---|---|---|---|---|---|---|---|
| 5 | 3 | 3 land | - | 1200 (2040) | T | KD +20 | - |
Drive System
Drive Impact (HPHK)
| Startup | Active | Recovery | Cancel | Damage | Guard | On Hit | On Block |
|---|---|---|---|---|---|---|---|
| 26 | 2 | 35 | - | 800 | LH | KD +35 / Wall Splat KD +65 | -3 / Wall Splat HKD +72 |
- Armor (2-hit): 1-27f; Range: ? (? movement + ? hitbox)
- On Hit/PC: Applies 20% damage scaling to next hit when beginning a combo
- On Block: Applies 20% scaling multiplier to all follow-up hits after Wall Splat; the next attack can incur additional Starter Scaling
- Combos when canceled from ??? or Punish Counter ??? (no corner wallsplat; useful for depleting Drive gauge, especially after Perfect Parry)
- A blocked DI can combo into another DI if opponent is not fully cornered (Stuns if opponent has less than 1.5 Drive bars)
- This happens because a blocked DI is not considered a "hit" for combo purposes
- Causes both the 20% Starter and 20% Multiplier scaling to apply to the follow-up combo
See Drive Impact on the Gauges page for more details.
When canceled from a normal, these are the important blockstring gaps; a gap of N will trade with an N-frame startup attack; [] = Burnout
- -
- Note: A gap ≥ 6f can be thrown, and a gap ≥ 9f can be jumped out of by most characters
Against the following characters in Burnout:
- JP (22K), frame 3 counter
- Marisa (214K), frame 3 armor
- Zangief (5[HP]), frame 4 armor
It's important to use a blockstring that cannot be absorbed by their armor/counter moves. Ideally, the string should also not be a true combo, or it will cause a Lock and prevent Stun.
* Denotes a move that causes Lock on Counter-hit, allowing the opponent to escape a Stun by mashing on wakeup.
Drive Reversal (6HPHK)
| Startup | Active | Recovery | Cancel | Damage | Guard | On Hit | On Block |
|---|---|---|---|---|---|---|---|
| 20 | 3 | 26(31) | - | 500 recoverable | LH | KD +23 | -6 |
- Full Invuln: 1-22f; Armor Break
- 5f extra recovery on hit; 4f screen freeze during startup
| Startup | Active | Recovery | Cancel | Damage | Guard | On Hit | On Block |
|---|---|---|---|---|---|---|---|
| 18 | 3 | 26(31) | - | 500 recoverable | LH | KD +23 | -6 |
- Full Invuln: 1-20f; Armor Break
- 5f extra recovery on hit; no screen freeze
See Drive Reversal on the Gauges page for more details.
Drive Parry (MPMK)
| Startup | Active | Recovery | Cancel | Damage | Guard | On Hit | On Block |
|---|---|---|---|---|---|---|---|
| 1 | 12 or until released | 33(1)(11) | - | - | - | - | - |
See Drive Parry on the Gauges page for more details.
- Perfect Parry:
- Applies a 50% damage scaling multiplier to any punish afterwards
- vs. strikes, has only 1f recovery and prevents the opponent from canceling their attack
- vs. projectiles, puts you into a fixed 11f recovery
Drive Rush (MPMK~66)
| Startup | Active | Recovery | Cancel | Damage | Guard | On Hit | On Block |
|---|---|---|---|---|---|---|---|
| 3+8 | - | 15(37) | - | - | - | - | - |
- 1-bar version performed out of Parry
- Startup is 1+8 immediately after successful Parry
| Startup | Active | Recovery | Cancel | Damage | Guard | On Hit | On Block |
|---|---|---|---|---|---|---|---|
| 9 | - | 15(37) | - | - | - | - | - |
- 3-bar version performed on hit/block from a cancelable normal
- Can also be performed from whiffed cancelable light normals
See Drive Rush on the Gauges page for more details. See Strategy page for Blockstring Gaps and Combo Routes
- Startup refers to minimum time before an attack can cancel the Drive Rush animation
- The first 15 recovery frames are cancelabe into any attack
- The final 22 recovery frames are cancelable into any attack or movement option or blocking (except Parry)
- Only Normal and Command Normal attacks are enhanced with +4 frame advantage and improved juggle properties
- Applies 15% damage scaling multiplier to any follow-up hits when used mid-combo
- Only applies scaling once per combo; does not apply when a Drive Rush enhanced attack starts the combo
Distance:
- ? (min, cancel into immediate Throw)
- ? (min, earliest blocking/movement frame)
- ? (max, final DR frame)
Special Moves
Placeholder (236P)
| Startup | Active | Recovery | Cancel | Damage | Guard | On Hit | On Block |
|---|---|---|---|---|---|---|---|
| 16 | - | 32 | SA3 | 500 | LH | -1 | -7 |
| Startup | Active | Recovery | Cancel | Damage | Guard | On Hit | On Block |
|---|---|---|---|---|---|---|---|
| 14 | - | 34 | SA3 | 500 | LH | -3 | -9 |
| Startup | Active | Recovery | Cancel | Damage | Guard | On Hit | On Block |
|---|---|---|---|---|---|---|---|
| 12 | - | 36 | SA3 | 500 | LH | -5 | -11 |
| Startup | Active | Recovery | Cancel | Damage | Guard | On Hit | On Block |
|---|---|---|---|---|---|---|---|
| 12 | - | 30 | SA2 SA3 | 500,(200) | LH | +3 | -3 |
Super Arts
Level 1 Super ()
No results
Level 2 Super ()
No results
Level 3 Super ()
""
Critical Art adds 500 more damage
Critical Art adds 500 more damage
No results
No results
Taunts
Neutral Taunt (5PPPKKK)
| Startup | Active | Recovery | Cancel | Damage | Guard | On Hit | On Block |
|---|---|---|---|---|---|---|---|
| 279 (total) | - | - | - | - | - | - | - |
Forward Taunt (6PPPKKK)
| Startup | Active | Recovery | Cancel | Damage | Guard | On Hit | On Block |
|---|---|---|---|---|---|---|---|
| 405 (total) | - | - | - | - | - | - | - |
Back Taunt (4PPPKKK)
| Startup | Active | Recovery | Cancel | Damage | Guard | On Hit | On Block |
|---|---|---|---|---|---|---|---|
| 430 | 121 | 213 | - | 100x8 | LH | KD -171 | -234 |
