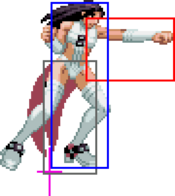
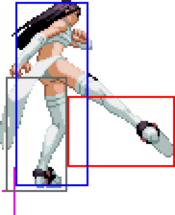
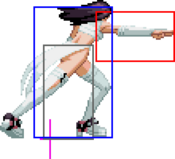
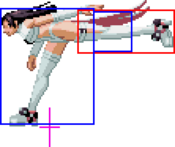
Movelist
Impact
Command Normals
Special Moves
Super Moves
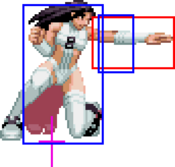
Close Normals
| Damage | Guard | Stun | Cancel | |
|---|---|---|---|---|
| 6 | Mid | 2 | Chain, Command, Special | |
| Startup | Active | Recovery | Adv. Hit | Adv. Guard |
| 4 | 2 | 8 | +1 | 0 |
| Damage | Guard | Stun | Cancel | |
|---|---|---|---|---|
| 8 | Mid | 4 | Command, Special | |
| Startup | Active | Recovery | Adv. Hit | Adv. Guard |
| 4 | 2 | 16 | -7 | -8 |
| Damage | Guard | Stun | Cancel | ||
|---|---|---|---|---|---|
| 16 | Mid | 8 | Command, Special | ||
| Startup | Active | Recovery | Adv. Hit | Adv. Guard | |
| 5 | 2 | 15 | -1/+2 | -4 | |
|
Cassandra's fastest heavy. | |||||
| Damage | Guard | Stun | Cancel | ||
|---|---|---|---|---|---|
| 18 | Mid | 10 | Command, Special | ||
| Startup | Active | Recovery | Adv. Hit | Adv. Guard | |
| 6 | 2 | 20 | -6/-3 | -9 | |
|
Deals more damage and stun than her other heavies and comes out as fast as cr.C. Her go-to after a jump-in. | |||||
Standing Normals
| Damage | Guard | Stun | Cancel | |
|---|---|---|---|---|
| 8 | Mid | 2 | Chain, Command, Special | |
| Startup | Active | Recovery | Adv. Hit | Adv. Guard |
| 4 | 2 | 7 | +2 | +1 |
| Damage | Guard | Stun | Cancel | |
|---|---|---|---|---|
| 10 | Mid | 5 | - | |
| Startup | Active | Recovery | Adv. Hit | Adv. Guard |
| 5 | 2 | 18 | -9 | -10 |
| Damage | Guard | Stun | Cancel | |
|---|---|---|---|---|
| 18 | Mid | 10 | - | |
| Startup | Active | Recovery | Adv. Hit | Adv. Guard |
| 11 | 2 | 19 | -5/-2 | -8 |
| Damage | Guard | Stun | Cancel | |
|---|---|---|---|---|
| 20 | Mid | 12 | - | |
| Startup | Active | Recovery | Adv. Hit | Adv. Guard |
| 11 | 4 | 21 | -9/-6 | -12 |
Crouching Normals
| Damage | Guard | Stun | Cancel | |
|---|---|---|---|---|
| 6 | Mid | 2 | Chain, Command, Special | |
| Startup | Active | Recovery | Adv. Hit | Adv. Guard |
| 4 | 2 | 8 | +1 | 0 |
| Damage | Guard | Stun | Cancel | ||
|---|---|---|---|---|---|
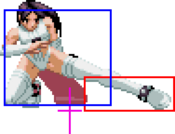
| 8 | Low | 4 | Command, Special | ||
| Startup | Active | Recovery | Adv. Hit | Adv. Guard | |
| 4 | 2 | 6 | +3 | +2 | |
|
A low Cassandra can use for pressure, including staggers, tick throws and fishes for 6B. Chains into itself and confirms into 623A. | |||||
| Damage | Guard | Stun | Cancel | ||
|---|---|---|---|---|---|
| 16 | Mid | 8 | Command, Special | ||
| Startup | Active | Recovery | Adv. Hit | Adv. Guard | |
| 6 | 2 | 15 | +4 | -2 | |
|
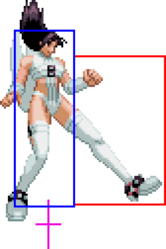
Cassandra's furthest-reaching heavy. Links from 6B on crouching opponents. | |||||
| Damage | Guard | Stun | Cancel | |
|---|---|---|---|---|
| 20 | Low | 15 | - | |
| Startup | Active | Recovery | Adv. Hit | Adv. Guard |
| 7 | 2 | 18 | KD | -3 |
Jumping Normals
| Damage | Guard | Stun | Cancel | ||
|---|---|---|---|---|---|
| 8 | Mid | 6 | Special | ||
| Startup | Active | Recovery | Adv. Hit | Adv. Guard | |
| 3 | 14 | - | - | - | |
|
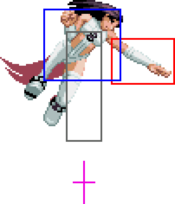
A jump attack which behaves like it's grounded, this can be blocked low but not in the air. This prevents Cassandra from getting into air block wars or getting air thrown. This is an excellent tool for tick throws, and if positioned in such a way Cassandra lands in front before they hit the ground (e.g. with a hop), she may even be able to go for a 50/50. | |||||
| Damage | Guard | Stun | Cancel | ||
|---|---|---|---|---|---|
| 10 | High/Air | 8 | Special | ||
| Startup | Active | Recovery | Adv. Hit | Adv. Guard | |
| 3 | 10 | - | - | - | |
|
Cassandra's instant overhead of choice. From a hop, this will hit everyone crouching except Pupa, and Cassandra can cancel into j.214K for a knockdown. Lenience varies with crouch heights. | |||||
| Damage | Guard | Stun | Cancel | ||
|---|---|---|---|---|---|
| 14 | High/Air | 12 | Special | ||
| Startup | Active | Recovery | Adv. Hit | Adv. Guard | |
| 4 | 12 | - | - | - | |
|
Reaches deeper than j.B, but outclassed as an instant overhead because it starts slower. | |||||
| Damage | Guard | Stun | Cancel | |
|---|---|---|---|---|
| 14 | High/Air | 12 | Special | |
| Startup | Active | Recovery | Adv. Hit | Adv. Guard |
| 7 | 12 | - | - | - |
| Damage | Guard | Stun | Cancel | |
|---|---|---|---|---|
| 16 | High/Air | 12 | Special | |
| Startup | Active | Recovery | Adv. Hit | Adv. Guard |
| 6 | 10 | - | - | - |
| Damage | Guard | Stun | Cancel | ||
|---|---|---|---|---|---|
| 16 | High/Air | 12 | Special | ||
| Startup | Active | Recovery | Adv. Hit | Adv. Guard | |
| 7 | 10 | - | - | - | |
|
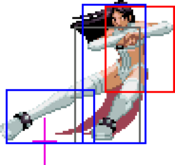
In addition to this being Cassandra's de facto jump-in, she can also hop forward and IOH crouching Cassandra and taller, acting as an effective 11f overhead. This not only deals more damage than jump B, but the cancel window is much easier. However, it is too slow to be used after a typical Illusion air reset, which leaves you at +9 — use jump B for this purpose instead. | |||||
Command Normals
| Damage | Guard | Stun | Cancel | ||
|---|---|---|---|---|---|
| 12 | High | 12 | Special | ||
| Startup | Active | Recovery | Adv. Hit | Adv. Guard | |
| 25 | 6 | 15 | +3/+7 | -4 | |
|
A slow overhead. Heavy attacks will push her out too far for this to connect, but she can cancel from lights or use resets to jail into it. Links into cr.C and Duplex on crouching hit. | |||||
| Damage | Guard | Stun | Cancel | ||
|---|---|---|---|---|---|
| 12 | Low | 12 | Special | ||
| Startup | Active | Recovery | Adv. Hit | Adv. Guard | |
| 13 | 8 | 17 | -6 | -12 | |
|
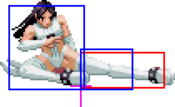
A low-hitting slide. Helps glue combos together, but can also be used to approach. After a jump-in, you may need to microwalk the close heavy to get this to connect. | |||||
Throws
| Damage | Guard | Stun | Cancel | ||
|---|---|---|---|---|---|
| 20 | - | 0 | - | ||
| Startup | Active | Recovery | Adv. Hit | Adv. Guard | |
| 1 | 1 | - | KD | - | |
|
Throws the opponent behind her. | |||||
System
| Damage | Guard | Stun | Cancel | |
|---|---|---|---|---|
| 16 | Mid | 0 | Command, Special | |
| Startup | Active | Recovery | Adv. Hit | Adv. Guard |
| 6 (1-7 invuln) | 2 | 25 | KD | -10 |
| Damage | Guard | Stun | Cancel | ||
|---|---|---|---|---|---|
| 10 | Mid | 10 | - | ||
| Startup | Active | Recovery | Adv. Hit | Adv. Guard | |
| 13 (1-20 invuln) | 8 | 17 | KD | -8 | |
|
Really bad range for a guard cancel, but plenty invincible. | |||||
| Damage | Guard | Stun | Cancel | ||
|---|---|---|---|---|---|
| 5+5×5 | Mid | 0 | Hit: Command, Special | ||
| Startup | Active | Recovery | Adv. Hit | Adv. Guard | |
| 14 | 3 | 32 | KD | -18 | |
|
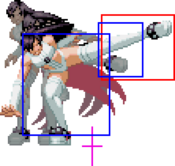
From Air Impact, Cassandra can cancel into air super or link into 623C. None of her command normals juggle. She should only use Ground Impact to tag her ally in mid-combo or for Illusion mixups. | |||||
| Damage | Guard | Stun | Cancel | ||
|---|---|---|---|---|---|
| 30 | Mid | 0 | - | ||
| Startup | Active | Recovery | Adv. Hit | Adv. Guard | |
| 4 | 60 | 29 | KD | -13 | |
|
Your partner must be alive and able to tag in. | |||||
| Damage | Guard | Stun | Cancel | ||
| 27 (27 with Oni) | - | 0 | - | ||
| Startup | Active | Recovery | Adv. Hit | Adv. Guard | |
| - | - | - | KD | - | |
|
Follow up with another 236BC for more damage. Costs an extra bar. | |||||
Special Moves
| Damage | Guard | Stun | Cancel | ||
|---|---|---|---|---|---|
| 20 | Mid/Air | 10 | - | ||
| Startup | Active | Recovery | Adv. Hit | Adv. Guard | |
| 1 | Until landing | 13 | KD | - | |
|
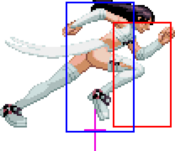
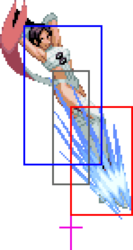
Instant spinning divekick. Can be used with the TK technique (2147B) to build meter insanely fast. Strength determines the angle. | |||||
| Damage | Guard | Stun | Cancel | ||
|---|---|---|---|---|---|
| 16 | Mid/Air | 4 | - | ||
| Startup | Active | Recovery | Adv. Hit | Adv. Guard | |
| 9 (1-11 invuln) | 3 | 27 | KD | -13 | |
|
For the A version, only the last hitbox is active. This is Cassandra's main way to end combos on the ground. Functions as a reversal but can be air blocked. | |||||
| Damage | Guard | Stun | Cancel | ||
| 22 (8+4+10) | Mid/Air | 3×3 | - | ||
| Startup | Active | Recovery | Adv. Hit | Adv. Guard | |
| 5 | 2+3+3 | 27 | KD | -13 | |
|
The C version is not a reversal, and although it deals more damage if all hits connect, you will most often get just the last hit, which 623A both outdamages and outstuns. However, it is the optimal move to use in juggles, where all three hits will connect. | |||||
| Damage | Guard | Stun | Cancel | ||
|---|---|---|---|---|---|
| 20 | Mid | 10 | - | ||
| Startup | Active | Recovery | Adv. Hit | Adv. Guard | |
| 22 | 20 | 13 | -1 | -7 | |
|
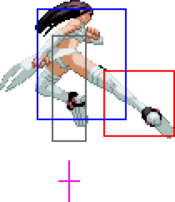
A teleport. Cassandra disappears, but her hurtbox is still active. She reappears in front of the opponent when she either bumps into the opponent or travels for far enough. On the ground, there's no real reward on hit, and on block it gets a quick punish. The only combo into this is from 6B, but you'd rather take the knockdown with 623A every time. From a Ground Impact combo or a Tag-In, however, you'll be left with an air reset where Cassandra is plus and can go for 50/50s. For this, the B version is only useful in the corner, as otherwise it will push Cassandra too far. | |||||
| Damage | Guard | Stun | Cancel | ||
| 20 | Mid | 10 | - | ||
| Startup | Active | Recovery | Adv. Hit | Adv. Guard | |
| 22 | 20 | 13 | 0 | -7 | |
|
Cassandra teleports behind u. She's neutral on hit, and on block it's immune to guard cancels. For air resets midscreen, this is the go-to, as it will leave Cassandra right behind them and ready for a 50/50. For IOH super, you will want to delay the input so it doesn't get crosscut. | |||||
| Damage | Guard | Stun | Cancel | ||
|---|---|---|---|---|---|
| 26 | - | 0 | - | ||
| Startup | Active | Recovery | Adv. Hit | Adv. Guard | |
| 8 | 20 | 13 | KD | - | |
|
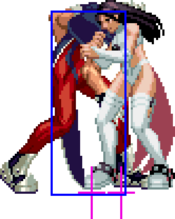
High/mid counter. When triggered, Cassandra goes all WWE and pile drives the opponent. Once in a blue moon, a glitch may occur where the opponent teleports in front of her and both are left at neutral, which happens if it hits outside of her grabbox. | |||||
Super Moves
| Damage | Guard | Stun | Cancel | ||
|---|---|---|---|---|---|
| 40 (5+10+25) | High/Air, Mid | 0 | - | ||
| Startup | Active | Recovery | Adv. Hit | Adv. Guard | |
| 1 (1-13 invuln) | Until landing, (9)+2×6 | 37 | KD | -30 | |
|
Exactly the same as the grounded version, except the input is mirrored and the damage is spread to fit the new divekick hit. This, in the most literal sense, is an instant overhead; it hits as deep as j.B, but because it comes out on frame 1 (it activates before the flash), it can even hit Pupa ducking. You can tiger knee from the last input to get it as low to the ground as possible, but the range is short. | |||||
| Damage | Guard | Stun | Cancel | ||
| 60 (5+15+40) | High/Air, Mid | 0 | - | ||
| Startup | Active | Recovery | Adv. Hit | Adv. Guard | |
| 1 (1-15 invuln) | Until landing, (11)+2×9 | 41 | KD | -40 | |
|
Less safe than the ground version. From an Air Impact, the middle hit will miss either depending on the character or if you cancel into it late. | |||||
| Damage | Guard | Stun | Cancel | ||
|---|---|---|---|---|---|
| 40 (10+30) | Mid | 0 | - | ||
| Startup | Active | Recovery | Adv. Hit | Adv. Guard | |
| 13 (1-15 invuln) | 2×6 | 37 | KD | -30 | |
|
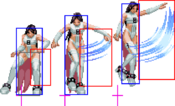
This move has a huge vertical hitbox, but lacks any significant horizontal range; in Impact combos, Air Impact into the air version is preferred because, on top of Ground Impact building less meter, this one has a nasty tendency to miss. It also doesn't combo from anything grounded at all. As a reversal, it's fairly slow. | |||||
| Damage | Guard | Stun | Cancel | ||
| 60 (20+40) | Mid | 0 | - | ||
| Startup | Active | Recovery | Adv. Hit | Adv. Guard | |
| 13 (1-15 invuln) | 2×6 | 41 | KD | -34 | |
|
Sometimes better to use than the air version if you're worried about damage scaling, but from an Impact, only do it in the corner where it won't miss. | |||||
