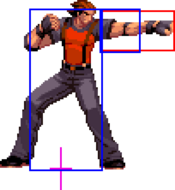
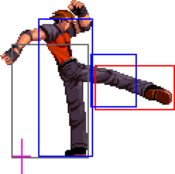
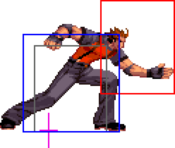
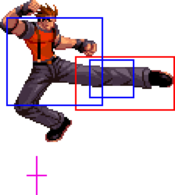
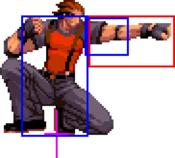
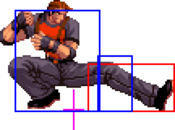
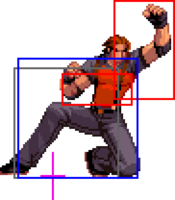
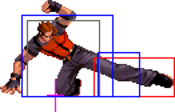
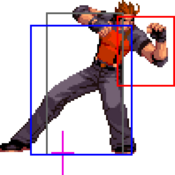
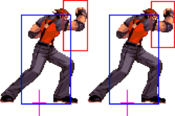
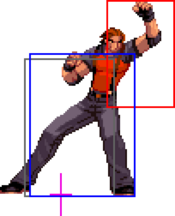
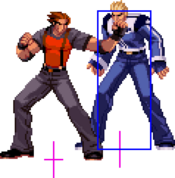
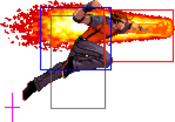
Movelist
Impact
Command Normals
Special Moves
Super Moves
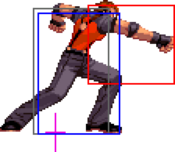
Close Normals
| Damage | Guard | Stun | Cancel | |
|---|---|---|---|---|
| 6 | Mid | 2 | Chain, Command, Special | |
| Startup | Active | Recovery | Adv. Hit | Adv. Guard |
| 4 | 5 | 5 | +1 | 0 |
| Damage | Guard | Stun | Cancel | ||
|---|---|---|---|---|---|
| 8 | Low | 4 | Command, Special | ||
| Startup | Active | Recovery | Adv. Hit | Adv. Guard | |
| 5 | 3 | 13 | -5 | -6 | |
|
Standing low. | |||||
| Damage | Guard | Stun | Cancel | |
|---|---|---|---|---|
| 18 (6+12) | Mid | 7 (3+4) | Command, Special | |
| Startup | Active | Recovery | Adv. Hit | Adv. Guard |
| 6 | 4+(6)+6 | 12 | -2/+1 | -5 |
| Damage | Guard | Stun | Cancel | |
|---|---|---|---|---|
| 18 | Mid | 10 | Command, Special | |
| Startup | Active | Recovery | Adv. Hit | Adv. Guard |
| 6 | 4 | 15 | 0 | -6 |
Standing Normals
| Damage | Guard | Stun | Cancel | |
|---|---|---|---|---|
| 8 | Mid | 2 | Chain, Command, Special | |
| Startup | Active | Recovery | Adv. Hit | Adv. Guard |
| 4 | 5 | 5 | +1 | 0 |
| Damage | Guard | Stun | Cancel | |
|---|---|---|---|---|
| 10 | Mid | 5 | - | |
| Startup | Active | Recovery | Adv. Hit | Adv. Guard |
| 5 | 3 | 13 | -5 | -6 |
| Damage | Guard | Stun | Cancel | |
|---|---|---|---|---|
| 18 | Mid | 10 | - | |
| Startup | Active | Recovery | Adv. Hit | Adv. Guard |
| 10 | 2 | 19 | -5/-2 | -8 |
| Damage | Guard | Stun | Cancel | ||
|---|---|---|---|---|---|
| 20 | Mid | 12 | - | ||
| Startup | Active | Recovery | Adv. Hit | Adv. Guard | |
| 11 | 4 | 21 | -9/-6 | -12 | |
|
Goes over and can crush some lows. | |||||
Crouching Normals
| Damage | Guard | Stun | Cancel | |
|---|---|---|---|---|
| 6 | Mid | 2 | Chain, Command, Special | |
| Startup | Active | Recovery | Adv. Hit | Adv. Guard |
| 4 | 5 | 5 | +1 | 0 |
| Damage | Guard | Stun | Cancel | ||
|---|---|---|---|---|---|
| 8 | Low | 4 | Command, Special | ||
| Startup | Active | Recovery | Adv. Hit | Adv. Guard | |
| 4 | 2 | 5 | +4 | +3 | |
|
Low confirm into 623A or super. | |||||
| Damage | Guard | Stun | Cancel | ||
|---|---|---|---|---|---|
| 16 | Mid | 8 | Command, Special | ||
| Startup | Active | Recovery | Adv. Hit | Adv. Guard | |
| 6 | 4 | 13 | +2 | -4 | |
|
Long-ranged combo starter. Goes into 63214A. | |||||
| Damage | Guard | Stun | Cancel | |
|---|---|---|---|---|
| 20 | Low | 15 | - | |
| Startup | Active | Recovery | Adv. Hit | Adv. Guard |
| 7 | 4 | 16 | KD | -3 |
Jumping Normals
| Damage | Guard | Stun | Cancel | |
|---|---|---|---|---|
| 8 | High/Air | 6 | Special | |
| Startup | Active | Recovery | Adv. Hit | Adv. Guard |
| 6 | 16 | - | - | - |
| Damage | Guard | Stun | Cancel | |
|---|---|---|---|---|
| 10 | High/Air | 8 | Special | |
| Startup | Active | Recovery | Adv. Hit | Adv. Guard |
| 3 | 16 | - | - | - |
| Damage | Guard | Stun | Cancel | |
|---|---|---|---|---|
| 14 | High/Air | 12 | Special | |
| Startup | Active | Recovery | Adv. Hit | Adv. Guard |
| 6 | 12 | - | - | - |
| Damage | Guard | Stun | Cancel | |
|---|---|---|---|---|
| 16 | High/Air | 12 | Special | |
| Startup | Active | Recovery | Adv. Hit | Adv. Guard |
| 7 | 4 | - | - | - |
| Damage | Guard | Stun | Cancel | |
|---|---|---|---|---|
| 16 | High/Air | 12 | Special | |
| Startup | Active | Recovery | Adv. Hit | Adv. Guard |
| 6 | 6 | - | - | - |
Command Normals
| Damage | Guard | Stun | Cancel | ||
|---|---|---|---|---|---|
| 12 | High | 12 | Special | ||
| Startup | Active | Recovery | Adv. Hit | Adv. Guard | |
| 23 | 2 | 23 | +3 | -8 | |
|
A slow, short-ranged overhead. Only links into DP, which you can cancel into anyway. | |||||
| Damage | Guard | Stun | Cancel | ||
|---|---|---|---|---|---|
| 10 | Mid | 12 | Special | ||
| Startup | Active | Recovery | Adv. Hit | Adv. Guard | |
| 25 (8-19 guard) | 20 | 25 | KD | -28 | |
|
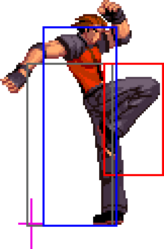
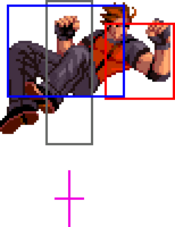
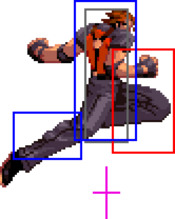
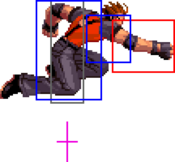
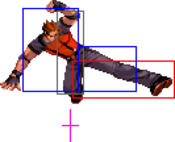
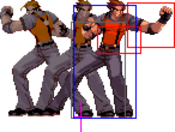
The first two hitboxes you see are guard points; these catch high/mid moves, which let Jimmy catch tag-ins, guard cancels and other key moves. Both command normals are too slow to be used in combos on the ground, but this one can be used to juggle after Ground Impacts. On hit, it launches the opponent for a combo. | |||||
Throws
| Damage | Guard | Stun | Cancel | ||
|---|---|---|---|---|---|
| 20 | - | 0 | - | ||
| Startup | Active | Recovery | Adv. Hit | Adv. Guard | |
| 1 | 1 | - | KD | - | |
|
Jimmy tosses the opponent almost fullscreen. | |||||
System
| Damage | Guard | Stun | Cancel | |
|---|---|---|---|---|
| 16 | Mid | 0 | Command, Special | |
| Startup | Active | Recovery | Adv. Hit | Adv. Guard |
| 6 (1-9 invuln) | 2 | 25 | KD | -10 |
| Damage | Guard | Stun | Cancel | |
|---|---|---|---|---|
| 10 | Mid | 10 | - | |
| Startup | Active | Recovery | Adv. Hit | Adv. Guard |
| 13 (1-16 invuln) | 4+(4)+4 | 13 | KD | -8 |
| Damage | Guard | Stun | Cancel | |
|---|---|---|---|---|
| 5+5×5 | Mid | 0 | Hit: Command, Special | |
| Startup | Active | Recovery | Adv. Hit | Adv. Guard |
| 14 | 3 | 33 | KD | -19 |
| Damage | Guard | Stun | Cancel | ||
|---|---|---|---|---|---|
| 30 | Mid | 0 | - | ||
| Startup | Active | Recovery | Adv. Hit | Adv. Guard | |
| 4 | 60 | 29 | KD | -13 | |
|
Your partner must be alive and able to tag in. | |||||
| Damage | Guard | Stun | Cancel | ||
| 27 (27 with Sonia) | - | 0 | - | ||
| Startup | Active | Recovery | Adv. Hit | Adv. Guard | |
| - | - | - | KD | - | |
|
Follow up with another 236BC for more damage. Costs an extra bar. When Sonia tags Jimmy in, he can link into super or even First Impact, depending on the character — refer to the Combo section. | |||||
Special Moves
| Damage | Guard | Stun | Cancel | ||
|---|---|---|---|---|---|
| 14 | Mid/Air | 8 | - | ||
| Startup | Active | Recovery | Adv. Hit | Adv. Guard | |
| 10 | ∞ | 39 | -11/-8 | -14 | |
|
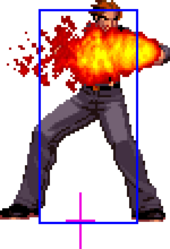
A good fireball but not the best. It's fast to come out and it recovers pretty fast, but it's nowhere near as good on hit as other fireballs tend to be. Some characters can even low profile underneath. Still, this tool defines the character; Jimmy can use it to bait jumps and rolls, then kill the opponent dead with Gun Blow. | |||||
| Damage | Guard | Stun | Cancel | ||
| 14 | Mid/Air | 8 | - | ||
| Startup | Active | Recovery | Adv. Hit | Adv. Guard | |
| 10 | ∞ | 40 | -10/-7 | -13 | |
|
Moves faster than the light version and is a bit better on block. | |||||
| Damage | Guard | Stun | Cancel | ||
|---|---|---|---|---|---|
| 16 | Mid/Air | 6 | - | ||
| Startup | Active | Recovery | Adv. Hit | Adv. Guard | |
| 3 (1-3 invuln) | [1+(1)]×6+2 | 31 | KD | -24 | |
|
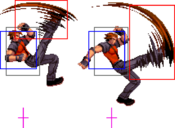
The light version starts on the second hitbox. Both of Jimmy's DPs have great priority and launch the opponent fullscreen on hit. 623A is easy to use in combos, and it also has a bit of invincibility. | |||||
| Damage | Guard | Stun | Cancel | ||
| 22 (6+6+10) | Mid/Air | 2×3 | - | ||
| Startup | Active | Recovery | Adv. Hit | Adv. Guard | |
| 3 | 2+[1+(1)]×6+2 | 39 | KD | -24 | |
|
Leaps higher and hits thrice. Only combos from cr.C at midscreen, but 623A deals the same damage and more stun. | |||||
| Damage | Guard | Stun | Cancel | ||
|---|---|---|---|---|---|
| 5+5+10 | Mid | 3×3 | - | ||
| Startup | Active | Recovery | Adv. Hit | Adv. Guard | |
| 12 | 8+(8)+8+(13)+3+(3)+4 | 21 | KD | -14 | |
|
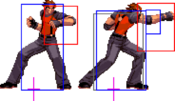
Jimmy's rush special. The light version sees him rush halfscreen with an elbow, a punch and then — if you don't hold up or down — a fist of fire! Despite looking like a combo tool, it only combos from cr.C and the first hit of cl.C. Both versions cause a wall splat on hit. | |||||
| Damage | Guard | Stun | Cancel | ||
| 5+5+10 | Mid | 3×3 | - | ||
| Startup | Active | Recovery | Adv. Hit | Adv. Guard | |
| 21 | 10+(8)+8+(11)+3+(3)+3 | 11 | KD | -3 | |
|
The heavy version, a fullscreen rush, can only combo from his overhead, but it's safe on block and pushes back a decent amount. | |||||
| Damage | Guard | Stun | Cancel | ||
| 12 | High | 8 | - | ||
| Startup | Active | Recovery | Adv. Hit | Adv. Guard | |
| 22 | 3 | 27 | KD | -13 | |
|
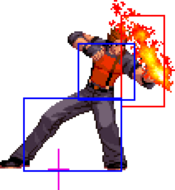
Hold up, and after the first two hits, Jimmy goes for an overhead. Both this and the low can be interrupted and punished. | |||||
| Damage | Guard | Stun | Cancel | ||
| 13 (3+10) | Low | 12 (4+8) | - | ||
| Startup | Active | Recovery | Adv. Hit | Adv. Guard | |
| 19 | 2+(2)+2+18 | 10 | KD | -13 | |
|
Hold down instead and Jimmy goes for a low. Theoretically, the mid option exists to stop opponents mashing, but you can dodge all three and get a punish. | |||||
| Damage | Guard | Stun | Cancel | ||
|---|---|---|---|---|---|
| 18 | High/Air | 8 | - | ||
| Startup | Active | Recovery | Adv. Hit | Adv. Guard | |
| 23 | - | - | -2~+2/+1~+5 | -5~-1 | |
|
Crack Shoot is the obvious comparison, but Jimmy's are really slow. The light version travels less than a quarter of the screen and doesn't knock down. | |||||
| Damage | Guard | Stun | Cancel | ||
| 18 | High/Air | 8 | - | ||
| Startup | Active | Recovery | Adv. Hit | Adv. Guard | |
| 25 | - | - | KD | +1~+3 | |
|
The heavy version goes a little under halfscreen and knocks down. These are both easy to stuff, but they're also safe on block. Pressing after Crack Shoot may earn you the prestigious Ate a DP Award. | |||||
Super Moves
| Damage | Guard | Stun | Cancel | ||
|---|---|---|---|---|---|
| 40 (10+30) | Mid | 0 | - | ||
| Startup | Active | Recovery | Adv. Hit | Adv. Guard | |
| 6 | 12 | 16 | KD | -11 | |
|
Jimmy rushes forward three quarters of the screen, then uppercuts the opponent to the air in flames. Because of the quick recovery, Jimmy can whiff this super in juggles deliberately to cross under the opponent, then continue the combo with something fast — refer to the Combo section. | |||||
| Damage | Guard | Stun | Cancel | ||
| 55 (5+10+40) | Mid | 0 | - | ||
| Startup | Active | Recovery | Adv. Hit | Adv. Guard | |
| 6 | 12 | 16 | KD | -11 | |
|
Jimmy punches the ground and erupts the opponent into a flaming geyser. Probably not a good idea to use this one just to sideswitch. | |||||
