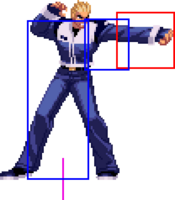
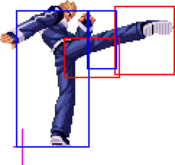
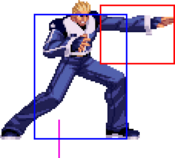
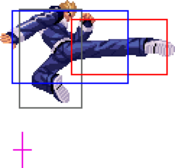
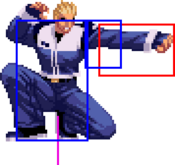
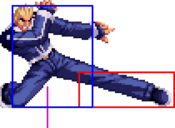
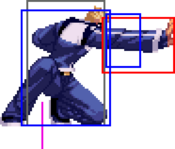
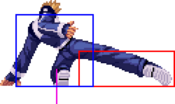
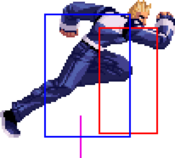
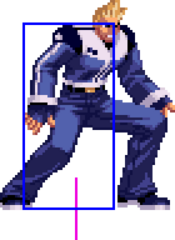
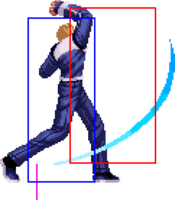
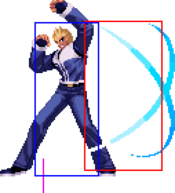
Movelist
Impact
Command Normals
Special Moves
Super Moves
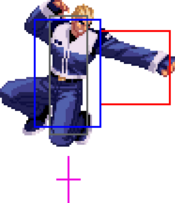
Close Normals
| Damage | Guard | Stun | Cancel | |
|---|---|---|---|---|
| 6 | Mid | 2 | Chain, Command, Special | |
| Startup | Active | Recovery | Adv. Hit | Adv. Guard |
| 4 | 5 | 5 | +1 | 0 |
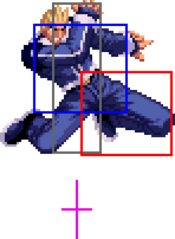
| Damage | Guard | Stun | Cancel | |
|---|---|---|---|---|
| 8 | Mid | 4 | Command, Special | |
| Startup | Active | Recovery | Adv. Hit | Adv. Guard |
| 5 | 3 | 7 | +1 | 0 |
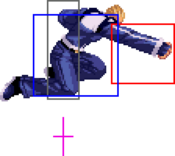
| Damage | Guard | Stun | Cancel | ||
|---|---|---|---|---|---|
| 16 (6+10) | Mid | 8 (2+6) | Command, Special | ||
| Startup | Active | Recovery | Adv. Hit | Adv. Guard | |
| 6 | 2+(6)+2 | 15 | -1/+2 | -4 | |
|
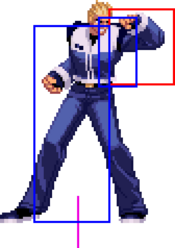
Outdamaged by cl.D, but an important tool in Billy's combos because the first hit doesn't push back. When cancelled from the first hit, this move is essential for 236A links on crouching opponents. The other boon this has over cl.D is how the latter's second hit will miss on crouching Pupa; obviously in this case, you get your 236A links. Both close heavies are useful. | |||||
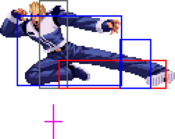
| Damage | Guard | Stun | Cancel | ||
|---|---|---|---|---|---|
| 18 (8+10) | Mid | 10 (4+6) | Command, Special | ||
| Startup | Active | Recovery | Adv. Hit | Adv. Guard | |
| 6 | 2+4 | 15 | -3/0 | -6 | |
|
Your go-to basic punish for its damage and stun. | |||||
Standing Normals
| Damage | Guard | Stun | Cancel | |
|---|---|---|---|---|
| 8 | Mid | 2 | Chain, Command, Special | |
| Startup | Active | Recovery | Adv. Hit | Adv. Guard |
| 4 | 5 | 5 | +1 | 0 |
| Damage | Guard | Stun | Cancel | ||
|---|---|---|---|---|---|
| 10 | Mid | 5 | - | ||
| Startup | Active | Recovery | Adv. Hit | Adv. Guard | |
| 5 | 3 | 12 | -4 | -5 | |
|
Billy has good, important pokes and this is one of them. It's fast, safe, hits all crouching opponents despite appearances and is overall blessed with a useful hitbox. Used to check things at midrange. | |||||
| Damage | Guard | Stun | Cancel | |
|---|---|---|---|---|
| 18 | Mid | 10 | - | |
| Startup | Active | Recovery | Adv. Hit | Adv. Guard |
| 9 | 2 | 19 | -5/-2 | -8 |
| Damage | Guard | Stun | Cancel | ||
|---|---|---|---|---|---|
| 20 | Mid | 12 | - | ||
| Startup | Active | Recovery | Adv. Hit | Adv. Guard | |
| 11 | 6 | 19 | -9/-6 | -12 | |
|
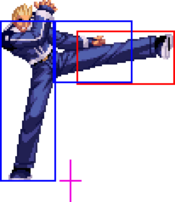
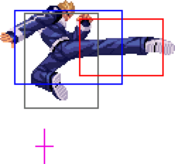
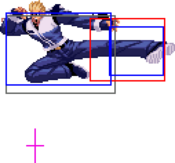
This move goes over lows, and unless their move lowers their hitbox by a lot, it can also low crush. The pushback makes it safe and the range is good, so overall another decent poke. | |||||
Crouching Normals
| Damage | Guard | Stun | Cancel | |
|---|---|---|---|---|
| 6 | Mid | 2 | Chain, Command, Special | |
| Startup | Active | Recovery | Adv. Hit | Adv. Guard |
| 4 | 5 | 5 | +1 | 0 |
| Damage | Guard | Stun | Cancel | ||
|---|---|---|---|---|---|
| 8 | Low | 4 | Command, Special | ||
| Startup | Active | Recovery | Adv. Hit | Adv. Guard | |
| 4 | 3 | 5 | +3 | +2 | |
|
This move is essential as a low confirm into 236C and as a stagger tool. The goal is to condition your opponent to not press buttons and keep blocking low so you can catch them with the overhead. The move's quick recovery and low pushback leaves Billy able to either throw the opponent if they dodge or block if they guard cancel, which narrows their options considerably. Those who've played KOF may be familiar with staggers as a concept, and this fundamental skill applies here. | |||||
| Damage | Guard | Stun | Cancel | ||
|---|---|---|---|---|---|
| 16 | Mid | 8 | Command, Special | ||
| Startup | Active | Recovery | Adv. Hit | Adv. Guard | |
| 6 | 3 | 11 | +2/+5 | -1 | |
|
Not worth using over other close heavies and way too short to have any use in neutral. | |||||
| Damage | Guard | Stun | Cancel | |
|---|---|---|---|---|
| 20 | Low | 15 | - | |
| Startup | Active | Recovery | Adv. Hit | Adv. Guard |
| 7 | 4 | 16 | KD | -3 |
Jumping Normals
| Damage | Guard | Stun | Cancel | |
|---|---|---|---|---|
| 8 | High/Air | 6 | Special | |
| Startup | Active | Recovery | Adv. Hit | Adv. Guard |
| 3 | 16 | - | - | - |
| Damage | Guard | Stun | Cancel | |
|---|---|---|---|---|
| 10 | High/Air | 8 | Special | |
| Startup | Active | Recovery | Adv. Hit | Adv. Guard |
| 3 | 16 | - | - | - |
| Damage | Guard | Stun | Cancel | |
|---|---|---|---|---|
| 14 | High/Air | 12 | Special | |
| Startup | Active | Recovery | Adv. Hit | Adv. Guard |
| 6 | 12 | - | - | - |
| Damage | Guard | Stun | Cancel | |
|---|---|---|---|---|
| 16 | High/Air | 12 | Special | |
| Startup | Active | Recovery | Adv. Hit | Adv. Guard |
| 6 | 16 | - | - | - |
Command Normals
| Damage | Guard | Stun | Cancel | ||
|---|---|---|---|---|---|
| 15+12 | High | 14 | Special | ||
| Startup | Active | Recovery | Adv. Hit | Adv. Guard | |
| 10 | 4+(10)+2 | 33 | -7 | -18 | |
|
Two moves in one — neither of which work with one another. The first hit on frame 10 serves as a juggle tool from Billy's Tag-In and Ground Impact, but its hitbox is too awkward for anything besides this juggle. The overhead on frame 24, however, is Billy's ticket to big damage. 6B is the only move which combos into 214D, and the links available after rack up both massive damage and plenty of stun. Under the right circumstances, Billy can even stun in one combo. Regardless, 24 frame startup is a huge weakness, and Billy has to condition the opponent not to either hit him out or dodge. | |||||
Throws
| Damage | Guard | Stun | Cancel | ||
|---|---|---|---|---|---|
| 20 | - | 0 | - | ||
| Startup | Active | Recovery | Adv. Hit | Adv. Guard | |
| 1 | 1 | - | KD | - | |
|
Billy pitches the opponent fullscreen. If he's not cornered, there's a good chance they will hit the wall. | |||||
System
| Damage | Guard | Stun | Cancel | |
|---|---|---|---|---|
| 16 | Mid | 0 | Command, Special | |
| Startup | Active | Recovery | Adv. Hit | Adv. Guard |
| 6 | 2 | 25 | KD | -10 |
| Damage | Guard | Stun | Cancel | |
|---|---|---|---|---|
| 10 | Mid | 10 | - | |
| Startup | Active | Recovery | Adv. Hit | Adv. Guard |
| 16 | 4 | 21 | KD | -8 |
| Damage | Guard | Stun | Cancel | |
|---|---|---|---|---|
| 5+5×5 | Mid | 0 | Hit: Command, Special | |
| Startup | Active | Recovery | Adv. Hit | Adv. Guard |
| 14 | 4 | 31 | KD | -18 |
| Damage | Guard | Stun | Cancel | ||
|---|---|---|---|---|---|
| 30 | Mid | 0 | - | ||
| Startup | Active | Recovery | Adv. Hit | Adv. Guard | |
| 4 | 60 | 29 | KD | -13 | |
|
Your partner must be alive and able to tag in. | |||||
| Damage | Guard | Stun | Cancel | ||
| 27 (23 with Lynn) | - | 0 | - | ||
| Startup | Active | Recovery | Adv. Hit | Adv. Guard | |
| - | - | - | KD | - | |
|
Follow up with another 236BC for more damage. Costs an extra bar. | |||||
Special Moves
| Damage | Guard | Stun | Cancel | ||
|---|---|---|---|---|---|
| 12 | Mid/Air | 8 | - | ||
| Startup | Active | Recovery | Adv. Hit | Adv. Guard | |
| - | 10 | 27 | -13/-9 | -20 | |
|
I hope you weren't expecting this to act like Ein Trigger, because for either version of Slash Cross, the first hit is a strike — not a fireball. Cassandra can even counter them! Billy's fireball is locked behind this first hit, which adds to his combos, but it's a shortcoming against characters with fast, good projectiles. | |||||
| Damage | Guard | Stun | Cancel | ||
| 10 | Mid/Air | 8 | - | ||
| Startup | Active | Recovery | Adv. Hit | Adv. Guard | |
| 13 | 10 (Fireball: ∞) | 27 | +6/+10 | -1 | |
|
In combos, this gives Billy very important links on crouching opponents. He can link into either 623D or another 236A sequence, which then links into Duplex. Ouch! In neutral, this gives Billy a fast, tall fireball he can run behind. The timing to cancel into this is pretty tight, but easy to eyeball. | |||||
| Damage | Guard | Stun | Cancel | ||
|---|---|---|---|---|---|
| 16 (6+10) | Mid/Air | 8 (4+4) | - | ||
| Startup | Active | Recovery | Adv. Hit | Adv. Guard | |
| 10 | 6+(10)+12 | 29 | -17/-13 | -24 | |
|
Two slashes — none of which destroy fireballs. Given the advantage on block, there is no reason not to cancel into the second part. | |||||
| Damage | Guard | Stun | Cancel | ||
| 10 | Mid/Air | 8 | - | ||
| Startup | Active | Recovery | Adv. Hit | Adv. Guard | |
| 17 | ? | 26-? | KD | +8 | |
|
A short-ranged fireball. On block, it's very safe, while on hit it's the most damaging of Billy's special moves. It is, however, outstunned by 623D. Unfortunately, it whiffs from the second hit of either close heavy, but it's his go-to from cr.B chains. It also launches the opponent fullscreen, and Billy has enough time to catch them if they hit the wall. | |||||
| Damage | Guard | Stun | Cancel | ||
|---|---|---|---|---|---|
| 16 | Mid/Air | 4 | - | ||
| Startup | Active | Recovery | Adv. Hit | Adv. Guard | |
| 15 (1-16 invuln) | 2 | 53 | KD | -25 | |
|
Billy's reversal. Its sluggishness and slight forward movement make it very prone to safejumps, and it can be blocked in the air. | |||||
| Damage | Guard | Stun | Cancel | ||
| 20 (6+2+12) | Low, Mid, Mid/Air | 24 (8×3) | - | ||
| Startup | Active | Recovery | Adv. Hit | Adv. Guard | |
| 7 | 8+(8)+2+(2)+2 | 53 | KD | -26 | |
|
Billy's go-to after a close heavy. This deals the most stun out of all of his moves, and because of it, it often takes him one or two good hits to get a stun. Before the DP, Billy slides forward a little, which shrinks his hurtbox; this can let him low profile guard cancels and other taller moves. It can also combo from cr.B if you want its stun over 236C's damage, but it's a lot less safe. | |||||
| Damage | Guard | Stun | Cancel | ||
|---|---|---|---|---|---|
| 15 | Mid | 2 | - | ||
| Startup | Active | Recovery | Adv. Hit | Adv. Guard | |
| 8 | [2+(4)]×8+2 | 23 | KD | -41 | |
|
A hitgrab which launches fullscreen on hit. Has a tendency to catch stray hurtboxes, but is completely vulnerable to sweeps and low-hitting moves. It has a niche as a fast special which can't be blocked in the air, but its intermittent hits and bad priority make it inconsistent against jump-ins. In combos, Lightning Tail is redundant for its low damage and negligible stun. | |||||
| Damage | Guard | Stun | Cancel | ||
| 15 | Mid | 2 | - | ||
| Startup | Active | Recovery | Adv. Hit | Adv. Guard | |
| 15 | [2+(4)]×8+2 | 13 | KD | -34 | |
|
Trades better recovery for worse startup, which means it can't combo from lights or Air Impact anymore. | |||||
| Damage | Guard | Stun | Cancel | ||
|---|---|---|---|---|---|
| 14 | Mid/Air | 10 | - | ||
| Startup | Active | Recovery | Adv. Hit | Adv. Guard | |
| - | 6+(4)+4 | 17 | KD | -14 | |
|
The B version is a single flying kick. Just safe enough on block to use as a frame trap. | |||||
| Damage | Guard | Stun | Cancel | ||
| 10 | Mid/Air | 5 | - | ||
| Startup | Active | Recovery | Adv. Hit | Adv. Guard | |
| 25 | 6+(4)+4 | 15 | -5/-1 | -12 | |
|
The D version's first rekka, this is too slow to combo from anything — sans the overhead. | |||||
| Damage | Guard | Stun | Cancel | ||
| 6 | Mid/Air | 6 | - | ||
| Startup | Active | Recovery | Adv. Hit | Adv. Guard | |
| 7 | 8 | 13 | +7 | -4 | |
|
The second rekka — stop here. On hit, it's plus enough to link into a close normal, and the forward movement leaves you right in their face. This move alone is a big reason why Billy's overhead is scary. On block, you may think it's unsafe because it's -4, but because of the dead frame, it can only be punished by an instant command grab. Some Billy players may go for throw, which you can beat with an airborne reversal or a tag-in; otherwise, you have to tech. | |||||
| Damage | Guard | Stun | Cancel | ||
| 10 | Mid/Air | 6 | - | ||
| Startup | Active | Recovery | Adv. Hit | Adv. Guard | |
| 3 | 12 | 21 | KD | -16 | |
|
The full 214D sequence deals as much damage as the 236C rekka and corner carries even further, but his links from the second rekka invalidate these traits. | |||||
| Damage | Guard | Stun | Cancel | ||
|---|---|---|---|---|---|
| 14 | High/Air | 10 | - | ||
| Startup | Active | Recovery | Adv. Hit | Adv. Guard | |
| 11 | 6+(4)+4 | - | KD | -19 | |
|
Billy's air tatsu. Curiously, the B version hits overhead; at an effective 15f when TK'd, it's unreactable, and it works on every character. Unlike 6B, there's no way to make it safe, and it can still be stuffed. Added recovery upon landing. | |||||
| Damage | Guard | Stun | Cancel | ||
| 10 | Mid/Air | 5 | - | ||
| Startup | Active | Recovery | Adv. Hit | Adv. Guard | |
| 25 | 6+(4)+12 | - | KD | -27 | |
| Damage | Guard | Stun | Cancel | ||
| 6 | Mid/Air | 6 | - | ||
| Startup | Active | Recovery | Adv. Hit | Adv. Guard | |
| 4 | 14 | - | KD | -25 | |
| Damage | Guard | Stun | Cancel | ||
| 10 | Mid/Air | 6 | - | ||
| Startup | Active | Recovery | Adv. Hit | Adv. Guard | |
| 2 | 12 | - | KD | -17 | |
|
The D version is fairly useless. All hits juggle, but from an Air Impact, the first hit will launch too high for the others to connect. It can escape the corner, but it's laggy. Added recovery upon landing. | |||||
Super Moves
| Damage | Guard | Stun | Cancel | ||
|---|---|---|---|---|---|
| 40 (10+10+20) | Mid | 0 | - | ||
| Startup | Active | Recovery | Adv. Hit | Adv. Guard | |
| 9 (1-12 invuln) | 2+2+3+3 | 49 | KD | -18 | |
|
Backward flip into giant blue Power Geyser. Great anti-air and reversal. | |||||
| Damage | Guard | Stun | Cancel | ||
| 60 ([5+5+20]×2) | Mid | 0 | - | ||
| Startup | Active | Recovery | Adv. Hit | Adv. Guard | |
| 9 (1-12 invuln) | 2+2+3+3+(39)+2+2+3+3 | 49 | KD | -16 | |
|
Two flips instead of one. | |||||
