| Gold War Machine | |
|---|---|
| Difficulty | Mostly Easy |
| Tier Placement | God Tier (SS) |
| Has an Airdash? | No |
| Standing Hitbox | Tall |
| Crouching Hitbox | Average |
| Best Assists to Pair With | Colossus |
Introduction
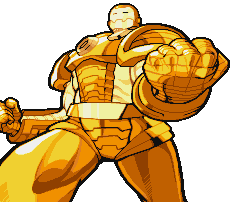
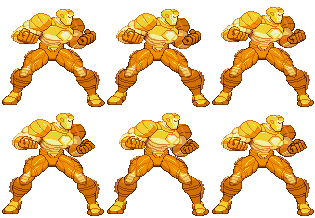
Hyper Armor War Machine (ハイパーアーマー ウォーマシン, Haipā Āmā Uōmashin), also known as Gold War Machine and Mega Armor War Machine, is a secret character in Marvel vs. Capcom: Clash of Super Heroes. He's a golden palette swap of War Machine. Even though Gold War Machine is exclusive to this game, a golden Starktech armor was seen in the film Iron Man 3 (2013); the Mark 21, also known as "Midas" due to its completely golden paint job, was one of many armors Tony Stark built in the aftermath of the Chitauri invasion in The Avengers as a backup plan.
Gold War Machine definitely sticks out in the cast, if there was a top 4, it would be Wolverine, War Machine, Red Venom, and Gold War Machine. This character is the character that "takes the fun out of the game" for most people who play the game. Gold War Machine is War Machine but instead of him being a combo heavy character, he now focuses on being a Tank and utilizing Duo Supers. Gold War Machine can make almost any character shine due to his super armor making Duo Combos unbearable to deal with due to the fact that he can just do supers without getting it stopped due to getting hit. The downside though is he can't block, and he does not have flight mode compared to his normal counterpart, but if you got the power of Duos, do you really need either of those things?
| Strengths | Weaknesses |
|---|---|
|
|
Notable Players
| Team | Nickname | Country | Platform | Accounts | Notes |
|---|---|---|---|---|---|
| Magneto Maniac | USA | Kailera/GGPO | N/A check Divine's YT for most of his matches.[1] | The GWM kingpin himself, Magneto Maniac is one of the best players of all time for MvC1 due to him having one of the most patient, defensive, and destructive gameplans for the way he plays. He is also experienced in other Fighting Games outside of MvC1, he also beat Justin Wong in an offline FT10 during C3. Status: Retired | |
| T-Kimura | Canada | Kailera/Fightcade 1-2/GGPO | FightCade: [2] [3] | Despite him being known for his War Machine, his Gold War Machine is nothing to be slept on. TK is known to play a very aggressive GWM with the way he rushes down and fishes for Guard Breaks. Good to watch once you wanna see how to play GWM without laming all the time. Status: Retired | |
| Ackesh | UK | GGPO/Fightcade 1/2 | FightCade: [4] [5] | One of the best, if not the best players active to this day. This guy plays a very top-notch GWM and also has a highly amazing Hulk. If you wanna see GWM at his truest potential with Hulk, Ackesh is definitely a player you should keep an eye on. Status: Active | |
| Darkcloud/DC | USA | Kailera/Fightcade 1-2/GGPO | FightCade: <-X-> [6] | Another player worth checking out if you wanna see how to play Gold War Machine at a top level, despite all what he does which is lagswitching or being salty, I would say he is definitely worth being Top 5 in one of the best players of all time. He also has a really good Venom and Hulk but we will get to those in Venom/Hulk's page. Status: Inactive | |
| Caponte | USA | Fightcade 1-2/GGPO | FightCade: [7] | Caponte's a pretty run-on-the-mill player but he is still a force to be reckoned with despite using fundamentals only. Worth checking out once u wanna see the surface of what can Gold War Machine do. Status: Active |
How to Select Gold War Machine
Highlight Zangief and draw a "56". Enter ![]() ×2,
×2, ![]() ×2,
×2, ![]() ×2,
×2, ![]() ×2,
×2, ![]() ×2,
×2, ![]() ×4,
×4, ![]() ×2,
×2, ![]() ×2,
×2, ![]() ×4,
×4, ![]() ×2,
×2, ![]() ×2,
×2, ![]() ×2,
×2, ![]() ×2,
×2, ![]() ×2,
×2, ![]() ×5.
×5.
Move List
Normals
Ground Normals
s.LP
| Damage | Guard | Startup | Active | Recovery | Total | Hit Adv | Block Adv | Meter Gain | Property |
|---|---|---|---|---|---|---|---|---|---|
| - | - | - | - | - | - | - | - | - | Ground |
s.MP
| Damage | Guard | Startup | Active | Recovery | Total | Hit Adv | Block Adv | Meter Gain | Property |
|---|---|---|---|---|---|---|---|---|---|
| - | - | - | - | - | - | - | - | - | Ground |
s.HP
| Damage | Guard | Startup | Active | Recovery | Total | Hit Adv | Block Adv | Meter Gain | Property |
|---|---|---|---|---|---|---|---|---|---|
| - | - | - | - | - | - | - | - | - | Ground |
s.LK
| Damage | Guard | Startup | Active | Recovery | Total | Hit Adv | Block Adv | Meter Gain | Property |
|---|---|---|---|---|---|---|---|---|---|
| - | - | - | - | - | - | - | - | - | Ground |
s.MK
| Damage | Guard | Startup | Active | Recovery | Total | Hit Adv | Block Adv | Meter Gain | Property |
|---|---|---|---|---|---|---|---|---|---|
| - | - | - | - | - | - | - | - | - | Ground |
s.HK
| Damage | Guard | Startup | Active | Recovery | Total | Hit Adv | Block Adv | Meter Gain | Property |
|---|---|---|---|---|---|---|---|---|---|
| - | - | - | - | - | - | - | - | - | Ground, Launcher |
c.LP
| Damage | Guard | Startup | Active | Recovery | Total | Hit Adv | Block Adv | Meter Gain | Property |
|---|---|---|---|---|---|---|---|---|---|
| - | - | - | - | - | - | - | - | - | Ground |
c.MP
| Damage | Guard | Startup | Active | Recovery | Total | Hit Adv | Block Adv | Meter Gain | Property |
|---|---|---|---|---|---|---|---|---|---|
| - | - | - | - | - | - | - | - | - | Ground |
c.HP (Missile Launch)
| Damage | Guard | Startup | Active | Recovery | Total | Hit Adv | Block Adv | Meter Gain | Property |
|---|---|---|---|---|---|---|---|---|---|
| - | - | - | - | - | - | - | - | - | Ground |
c.LK
| Damage | Guard | Startup | Active | Recovery | Total | Hit Adv | Block Adv | Meter Gain | Property |
|---|---|---|---|---|---|---|---|---|---|
| - | - | - | - | - | - | - | - | - | Ground |
c.MK
| Damage | Guard | Startup | Active | Recovery | Total | Hit Adv | Block Adv | Meter Gain | Property |
|---|---|---|---|---|---|---|---|---|---|
| - | - | - | - | - | - | - | - | - | Ground |
c.HK
| Damage | Guard | Startup | Active | Recovery | Total | Hit Adv | Block Adv | Meter Gain | Property |
|---|---|---|---|---|---|---|---|---|---|
| - | - | - | - | - | - | - | - | - | Ground |
Air Normals
j.LP
| Damage | Guard | Startup | Active | Recovery | Total | Hit Adv | Block Adv | Meter Gain | Property |
|---|---|---|---|---|---|---|---|---|---|
| - | - | - | - | - | - | - | - | - | Ground |
j.MP
| Damage | Guard | Startup | Active | Recovery | Total | Hit Adv | Block Adv | Meter Gain | Property |
|---|---|---|---|---|---|---|---|---|---|
| - | - | - | - | - | - | - | - | - | Ground |
j.HP
| Damage | Guard | Startup | Active | Recovery | Total | Hit Adv | Block Adv | Meter Gain | Property |
|---|---|---|---|---|---|---|---|---|---|
| - | - | - | - | - | - | - | - | - | Ground |
j.LK
| Damage | Guard | Startup | Active | Recovery | Total | Hit Adv | Block Adv | Meter Gain | Property |
|---|---|---|---|---|---|---|---|---|---|
| - | - | - | - | - | - | - | - | - | Ground |
j.MK
| Damage | Guard | Startup | Active | Recovery | Total | Hit Adv | Block Adv | Meter Gain | Property |
|---|---|---|---|---|---|---|---|---|---|
| - | - | - | - | - | - | - | - | - | Ground |
j.HK
| Damage | Guard | Startup | Active | Recovery | Total | Hit Adv | Block Adv | Meter Gain | Property |
|---|---|---|---|---|---|---|---|---|---|
| - | - | - | - | - | - | - | - | - | Ground |
Command Normals
Knee Dive
| Damage | Guard | Startup | Active | Recovery | Total | Hit Adv | Block Adv | Meter Gain | Property |
|---|---|---|---|---|---|---|---|---|---|
| - | - | - | - | - | - | - | - | - | Air |
Upward Kick
| Damage | Guard | Startup | Active | Recovery | Total | Hit Adv | Block Adv | Meter Gain | Property |
|---|---|---|---|---|---|---|---|---|---|
| - | - | - | - | - | - | - | - | - | Air |
Laser Blast
| Damage | Guard | Startup | Active | Recovery | Total | Hit Adv | Block Adv | Meter Gain | Property |
|---|---|---|---|---|---|---|---|---|---|
| - | - | - | - | - | - | - | - | - | Air |
Throws
Normal Throw
| Damage | Guard | Startup | Active | Recovery | Total | Hit Adv | Block Adv | Meter Gain | Property |
|---|---|---|---|---|---|---|---|---|---|
| - | - | - | - | - | - | - | - | - | Ground |
Special Moves
| Version | Damage | Guard | Startup | Active | Recovery | Total | Hit Adv | Block Adv | Meter Gain | Property | |
|---|---|---|---|---|---|---|---|---|---|---|---|
| QCF + LP/LK Light Version |
- | - | - | - | - | - | - | - | - | Ground (P/K), air (P) | |
|
This move fires a single rocket at the enemy. It takes off a bit more damage than War Machine's Shoulder Cannon and stops projectiles. Crouching move is the same as above, but it goes low. This move will stop some beam supers if if hits your opponent. | |||||||||||
| Version | Damage | Guard | Startup | Active | Recovery | Total | Hit Adv | Block Adv | Meter Gain | Property | |
| QCF + MP/MK Medium Version |
- | - | - | - | - | - | - | - | - | Ground (P/K), air (P) | |
| Version | Damage | Guard | Startup | Active | Recovery | Total | Hit Adv | Block Adv | Meter Gain | Property | |
| QCF + HP/HK Heavy Version |
- | - | - | - | - | - | - | - | - | Ground (P/K), air (P) | |
| Damage | Guard | Startup | Active | Recovery | Total | Hit Adv | Block Adv | Meter Gain | Property | |
|---|---|---|---|---|---|---|---|---|---|---|
| - | - | - | - | - | - | - | - | - | Ground/air | |
|
This move is the same as War Machine. You can control the range with the joystick. You should use this move so that you can attack from overhead without getting hit with anything. Also, if you super jump over a beam super, you can hit your opponent with this and knock him out of the super. A good follow-up to this move is the knee dive. Use this move a lot, but don't get predictable. | ||||||||||
Hyper Combos
| Damage | Guard | Startup | Active | Recovery | Total | Hit Adv | Block Adv | Meter Gain | Property | |
|---|---|---|---|---|---|---|---|---|---|---|
| - | - | - | - | - | - | - | - | - | Ground/air | |
|
This move is the same as War Machine's, but instead of a large beam, many missiles fly out of the cannon. The missiles hit high, so they may miss smaller characters completely. It deal more damage than War Machine's Proton Cannon. | ||||||||||
| Damage | Guard | Startup | Active | Recovery | Total | Hit Adv | Block Adv | Meter Gain | Property | |
|---|---|---|---|---|---|---|---|---|---|---|
| - | - | - | - | - | - | - | - | - | Ground/air | |
|
This super is the same as War Machine's War Destroyer, but it does more damage as well. It combos after the launcher, too, and if you're using both War Machines, you'll be spamming this super a lot in Duo Team, since it leads to ridiculously high damage off of chip damage alone, especially when the opponent is trapped between both War Machines. | ||||||||||
Strategy
Basic Tips
Launchers: HK
Magic Series:
- Ground Series: Hunter Series
- Jump Series: Weak to Strong
- Super Jump Series: Hunter Series
AC Finishers: HP, c.HP, HK
Advanced
Team Setups
Double War Machine
| Pros | Cons |
|---|---|
|
|
As the name implies, you get to play not War Machine, not Gold War Machine, but both War Machines at the same time! Two top tiers in the same team, what could possibly go wrong? Essentially, you get two characters with very high damage, health, armor, great tools across the board, there's very little the team doesn't have. Them being on the slower side won't matter much, though, because the minute this team is given enough meter to initiate a Team Duo Attack, the player can setup some truly nasty scenarios. These setups, which tend to give almost zero room to escape, can lead to the opponent losing up to 50% of their health off of CHIP DAMAGE. This puts them at a huge life lead, or otherwise make a swift recovery. They still need to attempt to win the rest of the match if it doesn't kill, however.
Combos
| Combo | Damage | Notes |
| c.LK, c.MP, c.HP, Low Shoulder Cannon | ||
| d.s.LK, s.HK, War Destroyer | ||
| d.s.LP, s.LK, s.HP, Shoulder Cannon | ||
| d.c.LK, c.MP, s.HK, s.j.LP, s.j.LK, s.j.MP, s.j.HP, (LP) Shoulder Cannon | ||
| d.c.LK, s.HK, War Destroyer, c.LK (OTG), c.HK | ||
| (HP) throw into corner, d.c.LK, s.HK, s.j.LP, s.j.LK, s.j.MP, s.j.HP, any air combo finisher | ||
| Air Smart Bomb, Knee Stomp, j.d.HP, d.c.LK, s.HK, s.j.LP, s.j.LK, s.j.MP, s.j.HP, Shoulder Cannon |


