| Pre-release information
This page is under construction based on pre-release data. Join the SF6 Resource Hub for info on editing. |
Introduction
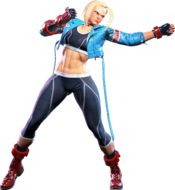
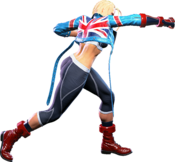
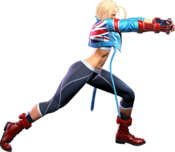
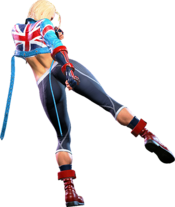
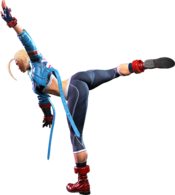
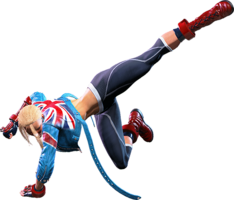
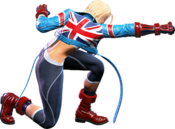
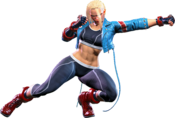
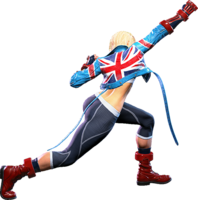
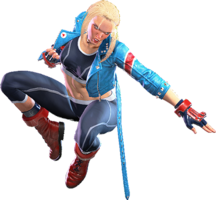
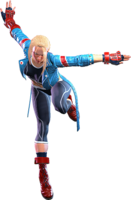
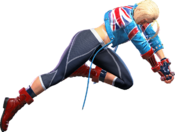
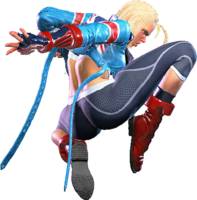
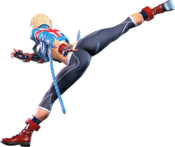
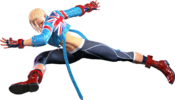
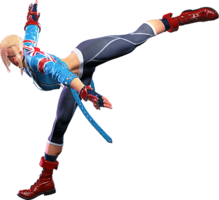
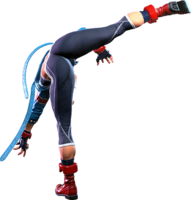
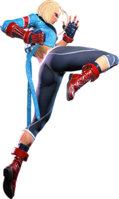
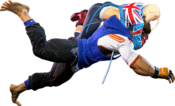
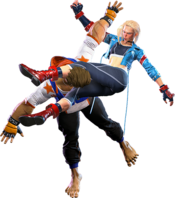
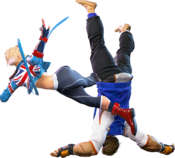
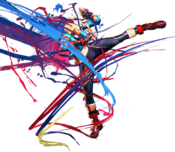
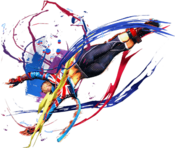
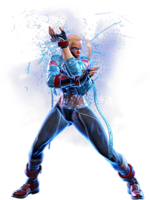
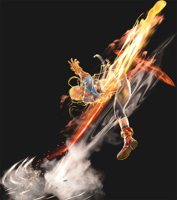
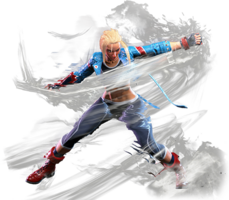
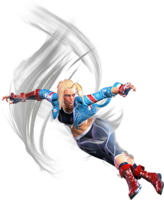
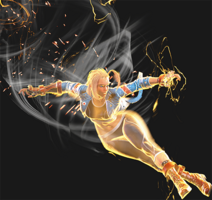
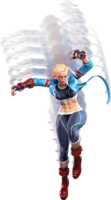
Member of British special forces unit Delta Red. Distinguished herself in the operation against Shadaloo, with which she shares a fated connection. Hyper-competent but somewhat moody. Currently working at HQ.
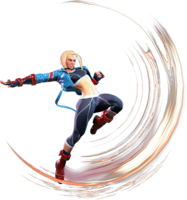
Cammy specializes in quick attacks and movement, closing the gap with her walkspeed and moves to run a high-pressure, close-range offense with the ability to whiff punish careless opponents for overstepping. Cammy can easily evade and counterhit careless attacks from the opponent, which lets her get in and start laying down rushdown pressure to keep the opponent locked down.
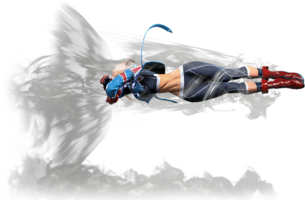
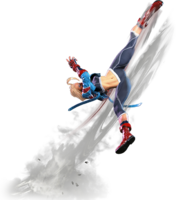
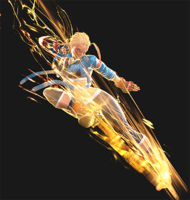
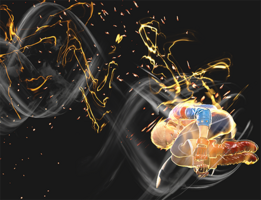
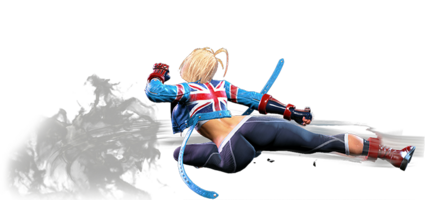
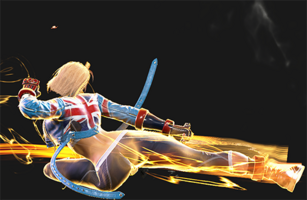
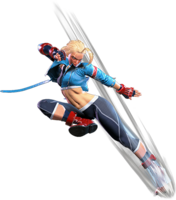
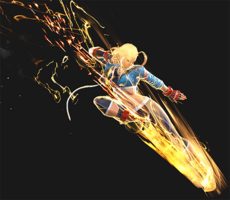
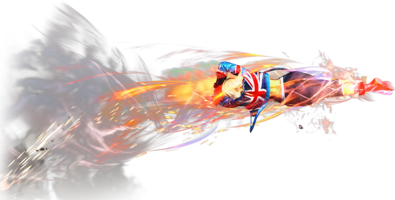
To that end, 5LP, 2LP, and 5LK are her main pressure tools up close or from walking in that allow her to confirm into Spiral Arrow for knockdowns and corner carry. 5MK, 2MP, and 2MK are especially good at mid-range poking, counterpoking, and punishing; 5HP, 2HP, and 5HK are built for punish countering big moves and giving Cammy room to advance on the opponent in various ways, whether they be links, hard knockdowns, target combos, or Drive Rush Cancels. Her special moves also do a great job at letting her close the gap between her and the opponent to keep things pushing when they really overextend. Spiral Arrow can clip opponents from much farther away than even her longest normals, and her Cannon Strike is a divekick that crushes low attacks and lets her confirm into combos when spaced correctly. Cannon Spike is a DP that rounds out the anti-air options provided by 4MP, 4HK, and her air throw, and Quick Spin Knuckle plays double duty as a gap-closing complement to Spiral Arrow that lets her skip through projectiles with the MP, HP, and Overdrive versions.
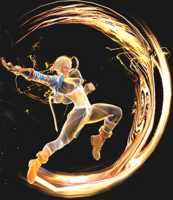
Once she's in and on top of the opponent, or has pushed them to the corner, Cammy can utilize her normals alongside other system mechanics to enforce a powerful strike/throw game or set up for oppressive okizeme tactics with her light punches, 5MP, and 2HP. One of her strongest tools once she's gotten into the opponent's head at close-mid range is Hooligan Combination, an advancing attack with three separate jump arcs and five separate follow-ups; combined with her other buttons, this lets her run a terrifying set of mixups if prepared correctly. Cammy often needs to sacrifice meter for an OD move or a Drive Rush connection to make Hooligan setups work, but once she's paid the price, she gains access to an extremely versatile mixup tool that has excellent payout regardless of the option she picks.
Cammy can also charge up the heavy versions of her Spiral Arrow, Cannon Spike, and Hooligan Combination, increasing their startup time but gaining most of the properties of their Overdrive equivalents in exchange. While these require a bit more setup to use, they can also let her get the benefits of the Overdrive versions at no cost to her Drive Meter, which lets her preserve it for other uses.
In exchange for Cammy being so dangerous once she's managed to close the gap, she does not have a fireball to help her control space, nor a grounded overhead to assist her with strike/throw mix. Many of her gap-closing and offensive options are also easily called out if the opponent makes the right read (particularly things like badly spaced Spiral Arrows, Spin Knuckles, and raw Hooligans), which brings an element of risk to Cammy's gameplay that requires having a good sense of timing and being willing to commit to potentially dangerous options in order to get a potential payoff. If you enjoy a character that strikes an even balance between rushdown, pressure, and precision counterpoking, then accept the mission of infiltrating your opponent's defenses with Cammy.
| Pick if you like: | Avoid if you dislike: |
|---|---|
|
|
Classic & Modern Versions Comparison
| Missing Normals |
|
|---|---|
| Missing Command Normals |
|
| Shortcut-Only Specials |
|
| Assist Combos |
|
| Miscellaneous Changes |
|
| Cammy | |
|---|---|
| Vitals | |
| Life Points | 10000 |
| Ground Movement | |
| Forward Walk Speed | 0.0505 |
| Backward Walk Speed | 0.033 |
| Forward Dash Speed | 18 |
| Backward Dash Speed | 23 |
| Forward Dash Distance | 1.32 |
| Backward Dash Distance | 1.002 |
| Drive Rush Min. Distance (Throw) | 0.603 |
| Drive Rush Min. Distance (Block) | 2.027 |
| Drive Rush Max Distance | 2.796 |
| Jumping | |
| Jump Speed | 4+38+3 |
| Jump Apex | 2.115 |
| Forward Jump Distance | 1.90 |
| Backward Jump Distance | 1.52 |
| Throws | |
| Throw Range | 0.8 |
| Throw Hurtbox | 0.33 |
| Frame Data Glossary - SF6 | |
|---|---|
| Hitbox Images |
🟥 (Red): Attack hitbox
🟩 (Green): Vulnerable hurtbox that can be hit by strikes/projectiles
🟦 (Blue): Vulnerable throw hurtbox
|
| Active |
How many frames a move remains active (can hurt opponents) for. For projectiles with a maximum active period, a value may be listed in [brackets], but this number is not factored into the move's total frame count.
|
| Cancel |
Available options for canceling one move into another move.
|
| Cancel Hitconfirm Windows |
Hitconfirm reaction windows into Special Moves, Target Combos, and Super Arts.
|
| Damage |
Attack damage on hit. Multi-hit moves may have the damage listed for individual hits as X,Y (or sometimes X*Y). Sometimes a move's damage changes depending on which active frame connects, or on cinematic vs. non-cinematic hits; in this case, multiple values may be listed, and it will be clarified in the move description.
|
| Damage Scaling |
Some moves cause additional damage scaling in combos. Refer to Game Data page for a more detailed breakdown. Scaling Types:
|
| Drive Rush Cancel Advantage |
Refers to the frame advantage when canceling a normal, command normal, or Target Combo into Drive Rush on hit or block (abbreviated as DRC for Drive Rush Cancel). This is calculated at the moment a follow-up attack can be input, not at the moment the character can block or perform movement options. An attack that with DRC +8 on Hit can link into an 8-frame attack, and DRC +4 on Block can create a true blockstring into a 4-frame attack. Note that any DRC on Block worse than +4 cannot form a true blockstring, allowing the opponent to interrupt with an invincible reversal. Most light normals are slightly negative after a DRC on block, meaning the opponent can mash their fastest normal to guarantee a counter-hit (though this requires fast reactions). The attacking character could punish this with Light > DRC into an immediate invincible attack, but this would be an incredibly expensive and high-risk gambit.
|
| Forced Knockdown |
Most airborne command normals, special moves, and Super Arts put the user in a "Forced Knockdown" state. While in this state, an air knockdown will occur when being hit by any attack, even if it would otherwise cause an air reset. As an example, Ryu's 2HP causes an air reset when used as an anti-air. Against a move like Cammy's Hooligan Combination, however, the 2HP puts her into an air knockdown state. This allows Ryu to successfully cancel 2HP into Shoryuken for a juggle, similar to how a Drive Impact wall splat works. Taking advantage of Forced Knockdown juggles is important for dealing with moves like Ken's Dragonlash, Dhalsim's Air Teleport, or Kimberly's 6HK~Hop sequence. Moves that already cause an air knockdown, like most j.MP air-to-airs, will not display the "Forced Knockdown" message.
|
| Guard |
Refers to the direction an attack must be blocked. L is for Low attacks (must be blocked crouching), H is for High attacks/overheads (must be blocked standing), LH is for attacks that can be blocked crouching or standing. T is for Throw attacks which cannot be blocked.
|
| Juggles |
When a character is put into an Air Knockdown state, it is often possible to follow up with a Juggle attack before they hit the ground. In the simplest terms, there are 2 main juggle states:
The following is a more detailed overview of the SF6 juggle system:
Juggle Start (JS): When starting a juggle, the opponent's JC will be set to this value. May be different vs. standing and airborne opponents.
Juggle Increase (JI): When opponent is already in a juggle state, attacks will increase the opponent's JC by this amount.
Juggle Limit (JL): Property of an attack hitbox that determines whether it connects on a juggled opponent. The JL must be ≥ the opponent's JC to hit successfully.
An example to tie everything together:
Drive Rush notes:
More recently, the official definitions used by Capcom are slightly different than these community-designated terms. When reading official patch notes, the following terms are used instead:
|
| On Hit/Block |
These are frame advantage values when the attack hits or is blocked. If the number is positive, then the move will recover before the defender can act again. If the number is negative, the defender will be able to act before the attacker and maybe even punish. KD refers to knockdown on hit, and the listed KD Advantage refers to how many frames the attacker can act before the defender finishes their wakeup animation.
|
| Recovery |
How many frames it takes for a move to finish after the active frames have finished. For projectiles, recovery is considered to begin after the first active frame.
|
| Startup |
How many frames it takes before the move becomes 'active' or have a hit box. The last startup frame and the first active frame are the same frame, meaning all values are written as Startup + 1.
|
| IASA / Actionable Recovery |
Some moves play out an extended recovery animation when no other button/direction is input (for crouching moves, it applies when holding any down direction). These are often referred to as "actionable recovery" frames; in some games, the term IASA (Interruptible As Soon As) refers to the frame that Actionable Recovery begins. Letting the Actionable Recovery frames play out can change the character's position, potentially setting up spacing traps by recovering farther away. For example, Manon 5HP will recover much farther away from the opponent if no input is performed immediately after her recovery; holding back or down-back to block will keep her much closer to the opponent.
|
Normals
Standing Normals
5LP
| Startup | Active | Recovery | Cancel | Damage | Guard | On Hit | On Block |
|---|---|---|---|---|---|---|---|
| 4 | 3 | 7 | Chn Sp SA | 300 | LH | +5 | -2 |
5MP
| Startup | Active | Recovery | Cancel | Damage | Guard | On Hit | On Block |
|---|---|---|---|---|---|---|---|
| 6 | 4 | 13 | - | 600 | LH | +6 | -1 |
5HP
| Startup | Active | Recovery | Cancel | Damage | Guard | On Hit | On Block |
|---|---|---|---|---|---|---|---|
| 8 | 3 | 20 | Sp SA TC | 800 | LH | +2 | -3 |
5LK
| Startup | Active | Recovery | Cancel | Damage | Guard | On Hit | On Block |
|---|---|---|---|---|---|---|---|
| 5 | 3 | 10 | Sp SA | 300 | LH | +2 | -3 |
5MK
| Startup | Active | Recovery | Cancel | Damage | Guard | On Hit | On Block |
|---|---|---|---|---|---|---|---|
| 8 | 3 | 18 | - | 700 | LH | +3 | -4 |
5HK
| Startup | Active | Recovery | Cancel | Damage | Guard | On Hit | On Block |
|---|---|---|---|---|---|---|---|
| 11 | 3 | 19(21) | - | 900 | LH | +2 | -3 |
Crouching Normals
2LP
| Startup | Active | Recovery | Cancel | Damage | Guard | On Hit | On Block |
|---|---|---|---|---|---|---|---|
| 4 | 2 | 8 | Chn Sp SA | 300 | LH | +5 | -2 |
2MP
| Startup | Active | Recovery | Cancel | Damage | Guard | On Hit | On Block |
|---|---|---|---|---|---|---|---|
| 7 | 3 | 14(17) | Sp SA | 600 | LH | +5 | -2 |
2HP
| Startup | Active | Recovery | Cancel | Damage | Guard | On Hit | On Block |
|---|---|---|---|---|---|---|---|
| 10 | 4 | 15 | - | 700 | LH | +7 | +1 |
2LK
| Startup | Active | Recovery | Cancel | Damage | Guard | On Hit | On Block |
|---|---|---|---|---|---|---|---|
| 5 | 3 | 7 | Chn | 200 | L | +3 | -2 |
2MK
| Startup | Active | Recovery | Cancel | Damage | Guard | On Hit | On Block |
|---|---|---|---|---|---|---|---|
| 8 | 3 | 18 | Sp SA | 500 | L | +1 | -5 |
2HK
| Startup | Active | Recovery | Cancel | Damage | Guard | On Hit | On Block |
|---|---|---|---|---|---|---|---|
| 9 | 3 | 24 | - | 900 | L | HKD +31 | -10 |
Jumping Normals
j.LP
| Startup | Active | Recovery | Cancel | Damage | Guard | On Hit | On Block |
|---|---|---|---|---|---|---|---|
| 4 | 10 | 3 land | - | 300 | H | +6(+9) | +2(+5) |
j.MP
| Startup | Active | Recovery | Cancel | Damage | Guard | On Hit | On Block |
|---|---|---|---|---|---|---|---|
| 6 | 8 | 3 land | Sp SA2 | 600 | H | +10(+13) | +1(+4) |
j.HP
| Startup | Active | Recovery | Cancel | Damage | Guard | On Hit | On Block |
|---|---|---|---|---|---|---|---|
| 8 | 5 | 3 land | - | 800 | H | +8(+15) | +4(+11) |
j.LK
| Startup | Active | Recovery | Cancel | Damage | Guard | On Hit | On Block |
|---|---|---|---|---|---|---|---|
| 4 | 10 | 3 land | - | 300 | H | +6(+10) | +2(+6) |
j.MK
| Startup | Active | Recovery | Cancel | Damage | Guard | On Hit | On Block |
|---|---|---|---|---|---|---|---|
| 7 | 6 | 3 land | - | 600 | H | +12(+13) | +8(+9) |
j.HK
| Startup | Active | Recovery | Cancel | Damage | Guard | On Hit | On Block |
|---|---|---|---|---|---|---|---|
| 10 | 6 | 3 land | - | 800 | H | +11(+15) | +7(+11) |
Command Normals
4MP
| Startup | Active | Recovery | Cancel | Damage | Guard | On Hit | On Block |
|---|---|---|---|---|---|---|---|
| 5 | 5 | 12 | Sp SA TC | 500 | LH | +4 | -1 |
6HK
| Startup | Active | Recovery | Cancel | Damage | Guard | On Hit | On Block |
|---|---|---|---|---|---|---|---|
| 18 | 3 | 25 | Sp SA | 800 | LH | KD +26 | -12 |
4HK
| Startup | Active | Recovery | Cancel | Damage | Guard | On Hit | On Block |
|---|---|---|---|---|---|---|---|
| 9 | 3 | 18 | Sp SA Jmp | 800 | LH | KD +54 | -7 |
Target Combos
4MP~HK
| Startup | Active | Recovery | Cancel | Damage | Guard | On Hit | On Block |
|---|---|---|---|---|---|---|---|
| 9 | 3 | 23 | Sp SA Jmp | 600 | LH | KD +49 | -12(-19) |
5HP~HK
| Startup | Active | Recovery | Cancel | Damage | Guard | On Hit | On Block |
|---|---|---|---|---|---|---|---|
| 13 | 4(12)3 | 29 | Sp SA | 400,400 | LH | KD +26 | -12 |
Throws
Forward Throw (LPLK)
| Startup | Active | Recovery | Cancel | Damage | Guard | On Hit | On Block |
|---|---|---|---|---|---|---|---|
| 5 | 3 | 23 | - | 1200 (2040) | T | KD +17 | - |
Back Throw (4LPLK)
| Startup | Active | Recovery | Cancel | Damage | Guard | On Hit | On Block |
|---|---|---|---|---|---|---|---|
| 5 | 3 | 23 | - | 1200 (2040) | T | KD +14 | - |
Air Throw (LPLK Air)
| Startup | Active | Recovery | Cancel | Damage | Guard | On Hit | On Block |
|---|---|---|---|---|---|---|---|
| 5 | 3 | 3 land | - | 1200 (2040) | T | KD +22 | - |
Drive System
Drive Impact (HPHK)
| Startup | Active | Recovery | Cancel | Damage | Guard | On Hit | On Block |
|---|---|---|---|---|---|---|---|
| 26 | 2 | 35 | - | 800 | LH | KD +35 / Wall Splat KD +65 | -3 / Wall Splat HKD +72 |
See Drive Impact
When cancelled from a normal, these are the important blockstring gaps; a gap of N will trade with an N-frame startup attack; [] = Burnout
- -
- Note: gaps of 8f or less cannot be escaped by jumping
Drive Reversal (6HPHK)
| Startup | Active | Recovery | Cancel | Damage | Guard | On Hit | On Block |
|---|---|---|---|---|---|---|---|
| 20 | 3 | 26(31) | - | 500 recoverable | LH | KD +23 | -6 |
See Drive Reversal
- Full Invuln: 1-22f; Armor Break
Drive Parry (MPMK)
| Startup | Active | Recovery | Cancel | Damage | Guard | On Hit | On Block |
|---|---|---|---|---|---|---|---|
| 1 | 12 or until released | 33(1)(11) | - | - | - | - | - |
See Drive Parry
- Perfect Parry has only 1f recovery, and disables the opponent from canceling their attack
- Perfect Parry vs. projectiles puts you into a fixed 11f recovery
Drive Rush (66)
No results
See Drive Rush. Frame data shown in (parentheses) refers to the version used after Parry.
- Notable Drive Rush cancel combo routes:
- Notable Drive Rush cancel blockstring gaps:
Special Moves
Spiral Arrow (236K)
| Startup | Active | Recovery | Cancel | Damage | Guard | On Hit | On Block |
|---|---|---|---|---|---|---|---|
| 9 | 13 | 21 | - | 800 | LH | KD +26(+48) | -12(0) |
| Startup | Active | Recovery | Cancel | Damage | Guard | On Hit | On Block |
|---|---|---|---|---|---|---|---|
| 9 | 15 | 21 | - | 900 | LH | KD +26(+48) | -14(0) |
| Startup | Active | Recovery | Cancel | Damage | Guard | On Hit | On Block |
|---|---|---|---|---|---|---|---|
| 15 | 3(1)12 | 21 | SA3 (1st) | 300,700 | LH | KD +29(+48) | -12(-1) |
| Startup | Active | Recovery | Cancel | Damage | Guard | On Hit | On Block |
|---|---|---|---|---|---|---|---|
| 13 | 3(1)12 | 20 | SA2 SA3 | 150x4,200 | LH | KD +47 Launch | -14 |
Cannon Spike (623K)
| Startup | Active | Recovery | Cancel | Damage | Guard | On Hit | On Block |
|---|---|---|---|---|---|---|---|
| 5 | 12 | 24+16 Land | SA3 | 900(800) | LH | KD +20 | -36 |
| Startup | Active | Recovery | Cancel | Damage | Guard | On Hit | On Block |
|---|---|---|---|---|---|---|---|
| 6 | 12 | 25+16 Land | SA3 | 1000(800) | LH | KD +21 | -36 |
| Startup | Active | Recovery | Cancel | Damage | Guard | On Hit | On Block |
|---|---|---|---|---|---|---|---|
| 7 | 12 | 28+16 Land | SA3 | 1200(800) | LH | KD +22 | -36 |
| Startup | Active | Recovery | Cancel | Damage | Guard | On Hit | On Block |
|---|---|---|---|---|---|---|---|
| 6 | 12 | 30+16 Land | - | 600,100x3,600 (900) | LH | KD +19 | -40 |
Quick Spin Knuckle (214P)
| Startup | Active | Recovery | Cancel | Damage | Guard | On Hit | On Block |
|---|---|---|---|---|---|---|---|
| 21 | 4 | 16 | SA3 | 800 | LH | +2 | -3 |
| Startup | Active | Recovery | Cancel | Damage | Guard | On Hit | On Block |
|---|---|---|---|---|---|---|---|
| 24 | 4 | 16 | SA3 | 800 | LH | +3 | -2 |
| Startup | Active | Recovery | Cancel | Damage | Guard | On Hit | On Block |
|---|---|---|---|---|---|---|---|
| 28 | 4 | 17 | SA3 | 800 | LH | +5 | +3 |
| Startup | Active | Recovery | Cancel | Damage | Guard | On Hit | On Block |
|---|---|---|---|---|---|---|---|
| 25(28) | 4 | 17 | SA2 SA3 | 800 | LH | +7 | -2 |
Cannon Strike (j.214K)
No results
No results No results
| Startup | Active | Recovery | Cancel | Damage | Guard | On Hit | On Block |
|---|---|---|---|---|---|---|---|
| 13 | 12 (until land) | 12 land | SA2 | 800 | LH | 0(+9) | -2(+5) |
Hooligan Combination (236P)
No results
No results No results
| Startup | Active | Recovery | Cancel | Damage | Guard | On Hit | On Block |
|---|---|---|---|---|---|---|---|
| 20(40) | - | - | - | - | - | - | - |
Razor's Edge Slicer (236P~No Input)
| Startup | Active | Recovery | Cancel | Damage | Guard | On Hit | On Block |
|---|---|---|---|---|---|---|---|
| 50 | 9 | 13 | SA3 | 1000 | L | KD +48 | +2 |
| Startup | Active | Recovery | Cancel | Damage | Guard | On Hit | On Block |
|---|---|---|---|---|---|---|---|
| 50 | 9(10)5 | 17 | SA2 SA3 | 800,400 | L,L | KD +48 | +2 |
Hooligan Cannon Strike (236P~K)
| Startup | Active | Recovery | Cancel | Damage | Guard | On Hit | On Block |
|---|---|---|---|---|---|---|---|
| 20+13 | until land | 12 land | - | 600 | LH | -1(+9) | -7(+3) |
| Startup | Active | Recovery | Cancel | Damage | Guard | On Hit | On Block |
|---|---|---|---|---|---|---|---|
| 20+13 | until land | 12 land | SA2 | 800 | LH | -1(+9) | 0(+5) |
Reverse Edge (236P~2K)
| Startup | Active | Recovery | Cancel | Damage | Guard | On Hit | On Block |
|---|---|---|---|---|---|---|---|
| 20+18 | 4 | 13 land | - | 800 | H | +5(+9) | -5(-1) |
| Startup | Active | Recovery | Cancel | Damage | Guard | On Hit | On Block |
|---|---|---|---|---|---|---|---|
| 20+18 | 4(14)4 | 13 land | SA2 | 600x2 | H,H | +8 | -2 |
Hooligan Cannon Strike (236P~LPLK)
| Startup | Active | Recovery | Cancel | Damage | Guard | On Hit | On Block |
|---|---|---|---|---|---|---|---|
| 20+10 | 3 | 30 land | - | 1800 (2070) | T | HKD +18 | - |
No results
Silent Step (236P~P)
| Startup | Active | Recovery | Cancel | Damage | Guard | On Hit | On Block |
|---|---|---|---|---|---|---|---|
| 20~ | - | 4(12)+10 land | - | - | - | - | - |
| Startup | Active | Recovery | Cancel | Damage | Guard | On Hit | On Block |
|---|---|---|---|---|---|---|---|
| 20~ | - | 4(9)+10 land | - | - | - | - | - |
Super Arts
Level 1 Super (236236K)
| Startup | Active | Recovery | Cancel | Damage | Guard | On Hit | On Block |
|---|---|---|---|---|---|---|---|
| 9 | 3(1)12 | 38 | - | 2000 | LH | KD +10 | -24(-22) |
Level 2 Super (214214K)
No results
No results
Level 3 Super (236236P)
| Startup | Active | Recovery | Cancel | Damage | Guard | On Hit | On Block |
|---|---|---|---|---|---|---|---|
| 9 | 15 | 38 | - | 4000 | LH | HKD +17 | -33(-23) |
| Startup | Active | Recovery | Cancel | Damage | Guard | On Hit | On Block |
|---|---|---|---|---|---|---|---|
| 9 | 15 | 38 | - | 4500 | LH | HKD +22 | -33(-23) |
Taunts
Neutral Taunt (5PPPKKK)
| Startup | Active | Recovery | Cancel | Damage | Guard | On Hit | On Block |
|---|---|---|---|---|---|---|---|
| 335 (total) | - | - | - | - | - | - | - |
Forward Taunt (6PPPKKK)
| Startup | Active | Recovery | Cancel | Damage | Guard | On Hit | On Block |
|---|---|---|---|---|---|---|---|
| 255 (total) | - | - | - | - | - | - | - |
Back Taunt (4PPPKKK)
| Startup | Active | Recovery | Cancel | Damage | Guard | On Hit | On Block |
|---|---|---|---|---|---|---|---|
| 340 (total) | - | - | - | - | - | - | - |

