| Pre-release information
This page is under construction based on pre-release data. Join the SF6 Resource Hub for info on editing. |
Introduction
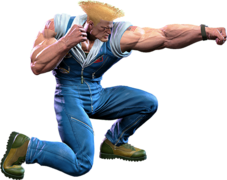
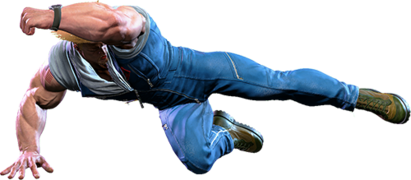
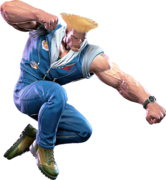
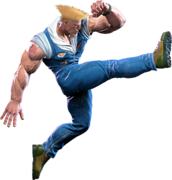
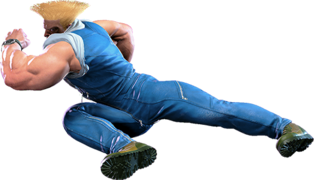
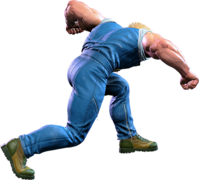
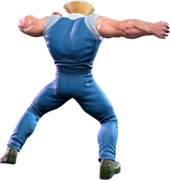
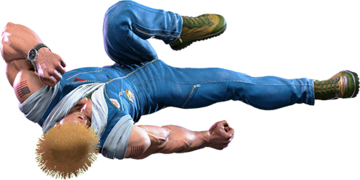
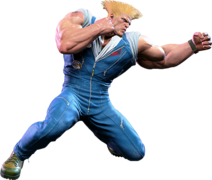
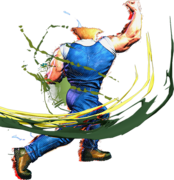
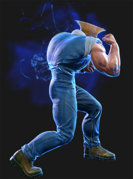
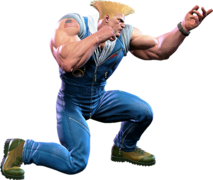
A US Air Force pilot who fights for his country, Guile succeeded in dismantling Shadaloo and avenging his friend Charlie. He enjoys living the family man life, but new battlefields await him.
Ever since his debut in 1991, Guile has been defined by his incredible projectile zoning and strong midrange presence. As the archetypal projectile zoner, Guile specializes in pestering the opponent with a barrage of projectiles before analyzing their next move and punishing accordingly.
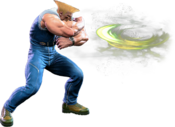
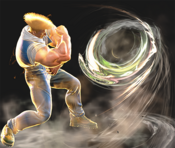
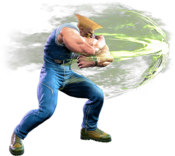
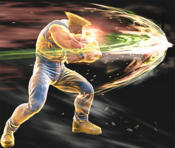
The defining move for Guile is Sonic Boom. Easily the best projectile in the game, Sonic Boom does everything a fireball should do and more. It can be fired at variable speeds, can be used as a shield to protect Guile as he moves forward, has incredibly fast recovery, and even comes with a unique just frame version for better advantage on hit and damage. Guile's gameplan revolves entirely around throwing out Sonic Boom and observing what the opponent does in response. If they eat it, throw another one. If they block it, throw another one to chip away at their Drive Gauge. Opponents who begin using system mechanics like jumping or Drive Impact to get around Sonic Boom are where the games begin for Guile, as his strategy evolves into a classic fireball/uppercut gameplan.
Opponents who leap over Sonic Boom can be met with Flash Kick, a massive ascending uppercut with a huge hitbox. Opponents who choose to be patient and come close to Guile must contend with his incredible 5MK, 2MK, and 5HP. Guile also has a huge selection of excellent command normals, such as 4HP, 4MK and 6HK, which give him great brawling potential. Guile can also use system mechanics well, with a fast overhead and good throw reward making his Drive Rush quite strong. Opponents who try to counterzone Guile with their own fireballs give him the ability to use Sonic Blade to enhance Sonic Boom and turn it into a fireball-eating machine. Simply put, there is no real situation where Guile is at explicit disadvantage, and his strong kit makes him very scary at fullscreen and midscreen. Guile is the undisputed master of fireball wars and punishing jumpins, making him a complete wall to overcome for any opponent.
Guile has no major weaknesses that affect his gameplan, but instead must deal with several important quirks. First, Guile is a charge character, meaning he must always commit to certain actions if he wants to perform them. Flash Kick is an incredible anti-air for sure, but it requires charge and thus is impossible to be performed on reaction akin to Ryu's Shoryuken. However, Guile's 2HP gets the job done just as well, with far less reward as a tradeoff. Similarly, Guile's gameplan is highly consistent and variable, but lacks any major gimmicks to challenge wary opponents. While at low levels Guile is capable of steamrolling impatient opponents who don't understand him, high level Guiles must be very patient and equipped with nerves of steel. Lastly, Guile has some of the longest and highest execution (though rarely necessary) optimal combos in the game. Still, none of these quirks dramatically affect Guile in any negative way, making him into a very strong character overall. If you love projectile zoning, value versatility, and want a character who can punish risky plays without peer, sharpen your mind to a sonic edge with Guile.
| Pick if you like: | Avoid if you dislike: |
|---|---|
|
|
Classic & Modern Versions Comparison
| Missing Normals |
|
|---|---|
| Missing Command Normals |
|
| Shortcut-Only Specials |
|
| Assist Combos |
|
| Miscellaneous Changes |
|
| Guile | |
|---|---|
| Vitals | |
| Life Points | 10000 |
| Ground Movement | |
| Forward Walk Speed | 0.043 |
| Backward Walk Speed | 0.032 |
| Forward Dash Speed | 21 |
| Backward Dash Speed | 23 |
| Forward Dash Distance | 1.567 |
| Backward Dash Distance | 0.74 |
| Drive Rush Min. Distance (Throw) | 0.805 |
| Drive Rush Min. Distance (Block) | 1.898 |
| Drive Rush Max Distance | 3.461 |
| Jumping | |
| Jump Speed | 4+38+3 |
| Jump Apex | 2.115 |
| Forward Jump Distance | 1.90 |
| Backward Jump Distance | 1.52 |
| Throws | |
| Throw Range | 0.8 |
| Throw Hurtbox | 0.33 |
| Frame Data Glossary - SF6 | |
|---|---|
| Hitbox Images |
🟥 (Red): Attack hitbox
🟩 (Green): Vulnerable hurtbox that can be hit by strikes/projectiles
🟦 (Blue): Vulnerable throw hurtbox
|
| Active |
How many frames a move remains active (can hurt opponents) for. For projectiles with a maximum active period, a value may be listed in [brackets], but this number is not factored into the move's total frame count.
|
| Cancel |
Available options for canceling one move into another move.
|
| Cancel Hitconfirm Windows |
Hitconfirm reaction windows into Special Moves, Target Combos, and Super Arts.
|
| Damage |
Attack damage on hit. Multi-hit moves may have the damage listed for individual hits as X,Y (or sometimes X*Y). Sometimes a move's damage changes depending on which active frame connects, or on cinematic vs. non-cinematic hits; in this case, multiple values may be listed, and it will be clarified in the move description.
|
| Damage Scaling |
Some moves cause additional damage scaling in combos. Refer to Game Data page for a more detailed breakdown. Scaling Types:
|
| Drive Rush Cancel Advantage |
Refers to the frame advantage when canceling a normal, command normal, or Target Combo into Drive Rush on hit or block (abbreviated as DRC for Drive Rush Cancel). This is calculated at the moment a follow-up attack can be input, not at the moment the character can block or perform movement options. An attack that with DRC +8 on Hit can link into an 8-frame attack, and DRC +4 on Block can create a true blockstring into a 4-frame attack. Note that any DRC on Block worse than +4 cannot form a true blockstring, allowing the opponent to interrupt with an invincible reversal. Most light normals are slightly negative after a DRC on block, meaning the opponent can mash their fastest normal to guarantee a counter-hit (though this requires fast reactions). The attacking character could punish this with Light > DRC into an immediate invincible attack, but this would be an incredibly expensive and high-risk gambit.
|
| Forced Knockdown |
Most airborne command normals, special moves, and Super Arts put the user in a "Forced Knockdown" state. While in this state, an air knockdown will occur when being hit by any attack, even if it would otherwise cause an air reset. As an example, Ryu's 2HP causes an air reset when used as an anti-air. Against a move like Cammy's Hooligan Combination, however, the 2HP puts her into an air knockdown state. This allows Ryu to successfully cancel 2HP into Shoryuken for a juggle, similar to how a Drive Impact wall splat works. Taking advantage of Forced Knockdown juggles is important for dealing with moves like Ken's Dragonlash, Dhalsim's Air Teleport, or Kimberly's 6HK~Hop sequence. Moves that already cause an air knockdown, like most j.MP air-to-airs, will not display the "Forced Knockdown" message.
|
| Guard |
Refers to the direction an attack must be blocked. L is for Low attacks (must be blocked crouching), H is for High attacks/overheads (must be blocked standing), LH is for attacks that can be blocked crouching or standing. T is for Throw attacks which cannot be blocked.
|
| Juggles |
When a character is put into an Air Knockdown state, it is often possible to follow up with a Juggle attack before they hit the ground. In the simplest terms, there are 2 main juggle states:
The following is a more detailed overview of the SF6 juggle system:
Juggle Start (JS): When starting a juggle, the opponent's JC will be set to this value. May be different vs. standing and airborne opponents.
Juggle Increase (JI): When opponent is already in a juggle state, attacks will increase the opponent's JC by this amount.
Juggle Limit (JL): Property of an attack hitbox that determines whether it connects on a juggled opponent. The JL must be ≥ the opponent's JC to hit successfully.
An example to tie everything together:
Drive Rush notes:
More recently, the official definitions used by Capcom are slightly different than these community-designated terms. When reading official patch notes, the following terms are used instead:
|
| On Hit/Block |
These are frame advantage values when the attack hits or is blocked. If the number is positive, then the move will recover before the defender can act again. If the number is negative, the defender will be able to act before the attacker and maybe even punish. KD refers to knockdown on hit, and the listed KD Advantage refers to how many frames the attacker can act before the defender finishes their wakeup animation.
|
| Recovery |
How many frames it takes for a move to finish after the active frames have finished. For projectiles, recovery is considered to begin after the first active frame.
|
| Startup |
How many frames it takes before the move becomes 'active' or have a hit box. The last startup frame and the first active frame are the same frame, meaning all values are written as Startup + 1.
|
| IASA / Actionable Recovery |
Some moves play out an extended recovery animation when no other button/direction is input (for crouching moves, it applies when holding any down direction). These are often referred to as "actionable recovery" frames; in some games, the term IASA (Interruptible As Soon As) refers to the frame that Actionable Recovery begins. Letting the Actionable Recovery frames play out can change the character's position, potentially setting up spacing traps by recovering farther away. For example, Manon 5HP will recover much farther away from the opponent if no input is performed immediately after her recovery; holding back or down-back to block will keep her much closer to the opponent.
|
Normals
Standing Normals
5LP
| Startup | Active | Recovery | Cancel | Damage | Guard | On Hit | On Block |
|---|---|---|---|---|---|---|---|
| 5 | 3 | 7 | Chn Sp SA | 300 | LH | +4 | -2 |
- Chains into 5LP/2LP/2LK
- Cancel reaction window: 13f
- xx Lv.2 Super: +7/+1
5MP
| Startup | Active | Recovery | Cancel | Damage | Guard | On Hit | On Block |
|---|---|---|---|---|---|---|---|
| 7 | 3 | 15 | Sp SA TC | 600 | LH | +6 | 0 |
- Primary combo starter
- Can chain into 4HP Target Combo
- Cancel reaction window: 15f (17f TC)
- xx Lv.2 Super: +17/+11
5HP
| Startup | Active | Recovery | Cancel | Damage | Guard | On Hit | On Block |
|---|---|---|---|---|---|---|---|
| 7 | 3 | 23 | Sp SA | 900 | LH | -1 | -6 |
- Punish Counter stagger effect makes this useful as a whiff punish tool
- Cancel reaction window: 17f
- xx Lv.2 Super: +18/+13
5LK
| Startup | Active | Recovery | Cancel | Damage | Guard | On Hit | On Block |
|---|---|---|---|---|---|---|---|
| 5 | 2 | 12 | Sp SA | 300 | LH | +3 | -1 |
- Good range for a light poke, but must let go of Back input to avoid getting Bazooka Knee
- Cancel reaction window: 12f
- xx Lv.2 Super: +10/+6
5MK
| Startup | Active | Recovery | Cancel | Damage | Guard | On Hit | On Block |
|---|---|---|---|---|---|---|---|
| 7 | 5 | 18 | - | 700 | LH | +1 | -4 |
- Solid anti-air at mid-long range
5HK
| Startup | Active | Recovery | Cancel | Damage | Guard | On Hit | On Block |
|---|---|---|---|---|---|---|---|
| 13 | 3 | 21 | SA | 800 | LH | +3 | -4 |
- Long range poke that can be buffered into Super
- Cancel reaction window: 17f
- xx Lv.2 Super: +20/+13
Crouching Normals
2LP
| Startup | Active | Recovery | Cancel | Damage | Guard | On Hit | On Block |
|---|---|---|---|---|---|---|---|
| 4 | 3 | 8 | Chn Sp SA | 300 | LH | +5 | -2 |
- Chains into 5LP/2LP/2LK
- Cancel reaction window: 13f
- xx Lv.2 Super: +9/+2
2MP
| Startup | Active | Recovery | Cancel | Damage | Guard | On Hit | On Block |
|---|---|---|---|---|---|---|---|
| 6 | 3 | 13(16) | Sp SA TC | 600 | LH | +4 | -2 |
- Low pushback on hit, and can chain into itself for a Target Combo launcher
- Cancel reaction window: 15f (16f TC)
- xx Lv.2 Super: +13/+6
2HP
| Startup | Active | Recovery | Cancel | Damage | Guard | On Hit | On Block |
|---|---|---|---|---|---|---|---|
| 9 | 5 | 20 | - | 900 | LH | 0 | -9 |
- Good vertical anti-air
- Forces stand on hit
2LK
| Startup | Active | Recovery | Cancel | Damage | Guard | On Hit | On Block |
|---|---|---|---|---|---|---|---|
| 5 | 2 | 13 | Chn | 200 | L | +1 | -5 |
- Chains into 5LP/2LP/2LK
2MK
| Startup | Active | Recovery | Cancel | Damage | Guard | On Hit | On Block |
|---|---|---|---|---|---|---|---|
| 8 | 3 | 18 | TC | 500 | L | +4 | -5 |
- Great low poke, especially when used from Drive Rush
- Cancel reaction window: 18f (TC)
- Applies a 10% damage scaling penalty to the next hit when used as a combo starter (100/90/80/70...)
- Same type of damage scaling as Light Normal starter; also applies to 2MK~6MP Target Combo
2HK
| Startup | Active | Recovery | Cancel | Damage | Guard | On Hit | On Block |
|---|---|---|---|---|---|---|---|
| 9 | 2(16)3 | 21 | TC | 450x2 | L,L | HKD +34 | -12 |
- Counterhit/Punish Counter: +44 HKD
- Both hits have some juggle potential
- Cancel reaction window: 26f(PC: 29f) (TC)
Guile's 2-hit sweep is fairly strong as a whiff punish, but the slow animation and relatively poor block disadvantage makes it more easily punished than most sweeps. The second hit can hit low for a knockdown even if the first hit is blocked correctly. The first hit has a Target Combo followup into 3HK that only combos in juggles or after Punish Counter.
Jumping Normals
j.LP
| Startup | Active | Recovery | Cancel | Damage | Guard | On Hit | On Block |
|---|---|---|---|---|---|---|---|
| 4 | 10 | 3 land | - | 300 | H | +4(+9) | 0(+5) |
j.MP
| Startup | Active | Recovery | Cancel | Damage | Guard | On Hit | On Block |
|---|---|---|---|---|---|---|---|
| 7 | 3 | 3 land | - | 700 | H | +9(+11) | +5(+7) |
- Puts airborne opponents into limited juggle state
j.HP
| Startup | Active | Recovery | Cancel | Damage | Guard | On Hit | On Block |
|---|---|---|---|---|---|---|---|
| 9 | 4 | 3 land | - | 800 | H | +7(+15) | +3(+11) |
- Causes spiked knockdown vs. airborne opponents on Counterhit/Punish Counter
j.LK
| Startup | Active | Recovery | Cancel | Damage | Guard | On Hit | On Block |
|---|---|---|---|---|---|---|---|
| 6 | 10 | 3 land | - | 300 | H | +5(+10) | +1(+6) |
- Crossup
j.MK
| Startup | Active | Recovery | Cancel | Damage | Guard | On Hit | On Block |
|---|---|---|---|---|---|---|---|
| 7 | 7 | 3 land | - | 600 | H | +11(+13) | +7(+9) |
j.HK
Command Normals
6MP
| Startup | Active | Recovery | Cancel | Damage | Guard | On Hit | On Block |
|---|---|---|---|---|---|---|---|
| 20 | 3 | 19 | - | 800 | H | +2 | -3 |
- Fast overhead, very strong combo starter from Drive Rush
6HP
| Startup | Active | Recovery | Cancel | Damage | Guard | On Hit | On Block |
|---|---|---|---|---|---|---|---|
| 16 | 3 | 20 | - | 800 | LH | +5 | +3 |
- Whiffs vs. crouching opponents
- Has some juggle potential
- Great forward movement gives it long range
4HP
| Startup | Active | Recovery | Cancel | Damage | Guard | On Hit | On Block |
|---|---|---|---|---|---|---|---|
| 9 | 3 | 21 | Sp SA | 800 | LH | +1 | -4 |
- Cancel reaction window: 17f
- xx Lv.2 Super: +13/+8
4LK
| Startup | Active | Recovery | Cancel | Damage | Guard | On Hit | On Block |
|---|---|---|---|---|---|---|---|
| 8 | 5 | 15 | - | 500 | LH | 0(+4) | -4(0) |
- Low Crush 7-17f (not airborne)
- Has juggle potential
- Long forward movement; can be spaced to be +4/+0
4MK or 6MK
| Startup | Active | Recovery | Cancel | Damage | Guard | On Hit | On Block |
|---|---|---|---|---|---|---|---|
| 11 | 3 | 18(21) | - | 700 | LH | +3 | -6 |
- Low Crush 5-17f (not airborne)
- Has juggle potential
- Guile drifts in the held direction, allowing him to reposition while attacking
6HK
| Startup | Active | Recovery | Cancel | Damage | Guard | On Hit | On Block |
|---|---|---|---|---|---|---|---|
| 17 | 3 | 26 | - | 1000 | LH | -1 | -8 |
- Throw Invuln/Low Crush: 4-27f (not airborne)
- Punish Counter knocks down vs. grounded, puts airborne opponents into limited juggle state
3HK
| Startup | Active | Recovery | Cancel | Damage | Guard | On Hit | On Block |
|---|---|---|---|---|---|---|---|
| 10 | 3 | 23 | Sp SA | 1000 | LH | 0 | -9 |
- Whiffs on crouching opponents
- Puts airborne opponents into limited juggle state; can anti air at mid-long range
- Launches opponents into spinning free juggle state on Punish Counter
- Cancel reaction window: 23f
- xx Lv.2 Super: +12/+3
Target Combos
5MP~4HP
| Startup | Active | Recovery | Cancel | Damage | Guard | On Hit | On Block |
|---|---|---|---|---|---|---|---|
| 16 | 3 | 26 | Sp SA kara | 600 | LH | KD +35 | -9 |
- 1f gap between hits on block
- Cancel reaction window: 50-51f
2MP~2MP
| Startup | Active | Recovery | Cancel | Damage | Guard | On Hit | On Block |
|---|---|---|---|---|---|---|---|
| 12 | 3 | 16 | Sp SA | 360 | LH | KD +44 | -6 |
- Puts opponents into limited juggle state
- 2f gap between hits on block
- The second 2MP has a 10% damage scaling penalty applied, and counts as 2 hits for scaling
- 100/90/70/60... as combo starter, 100/100/70/60 if comboed into after 1 hit
- Cancel reaction window: 41f
- xx Lv.2 Super: KD+56/+6
2MK~6MP
| Startup | Active | Recovery | Cancel | Damage | Guard | On Hit | On Block |
|---|---|---|---|---|---|---|---|
| 20 | 3 | 21 | - | 800(640) | H | +1 | -5 |
- Low into Overhead string
- 3f gap between hits on block
2HK~3HK
| Startup | Active | Recovery | Cancel | Damage | Guard | On Hit | On Block |
|---|---|---|---|---|---|---|---|
| 10 | 3 | 25 | Sp SA | 600(480) | LH | KD +33 | -10(-30) |
- On grounded opponents, only combos from Drive Rush 2HK or Punish Counter starter
- Very lenient window to confirm this
- Also combos after corner Drive Impact; can juggle LK Somersault ~ OD Somersault due to the juggle height
- Whiffs vs. crouching opponents (Punish Counter allows the full connect even vs. crouching)
- Launches opponent into a limited juggle state
- Cancel reaction window: 57f(PC: 60f)
- xx Lv.2 Super: KD+47 Spin/+2
Universal Mechanics
Throws
Forward Throw (LPLK)
| Startup | Active | Recovery | Cancel | Damage | Guard | On Hit | On Block |
|---|---|---|---|---|---|---|---|
| 5 | 3 | 23 | - | 1200 (2040) | T | KD +15 | - |
- Does not have access to a true corner throw loop
- Perfectly timed Walk + Throw will beat wakeup attack 5f or slower
- Punish Counter: +16 HKD
Back Throw (4LPLK)
| Startup | Active | Recovery | Cancel | Damage | Guard | On Hit | On Block |
|---|---|---|---|---|---|---|---|
| 5 | 3 | 23 | - | 1200 (2040) | T | KD +18 | - |
- Side switches; can walk for throw/strike oki after back throwing opponent into corner
- Punish Counter: +19 HKD
Air Forward Throw (LPLK Air)
| Startup | Active | Recovery | Cancel | Damage | Guard | On Hit | On Block |
|---|---|---|---|---|---|---|---|
| 5 | 3 | 3 land | - | 1200 (2040) | T | KD +21(23) | - |
- Higher air throw gives slightly better KD Advantage
- Punish Counter: +23(25) HKD
Air Back Throw (4LPLK Air)
| Startup | Active | Recovery | Cancel | Damage | Guard | On Hit | On Block |
|---|---|---|---|---|---|---|---|
| 5 | 3 | 3 land | - | 1200 (2040) | T | KD +15 | - |
- Side switches
- Punish Counter: +16 HKD
Drive Moves
Drive Impact (HPHK)
| Startup | Active | Recovery | Cancel | Damage | Guard | On Hit | On Block |
|---|---|---|---|---|---|---|---|
| 26 | 2 | 35 | - | 800 | LH | KD +35 / Wall Splat KD +65 | -3 / Wall Splat HKD +72 |
See Drive Impact
- Notable blockstring gaps (8f or less cannot be escaped by jumping):
- 5HP, 4HP, 5MP~4HP: 7f (3f Burnout)
- 5MP: 9f (5f Burnout)
- 2MP, 2MP~2MP: 14f (10f Burnout)
Drive Reversal (6HPHK)
| Startup | Active | Recovery | Cancel | Damage | Guard | On Hit | On Block |
|---|---|---|---|---|---|---|---|
| 20 | 3 | 26(31) | - | 500 recoverable | LH | KD +23 | -6 |
See Drive Reversal
- Full Invuln: 1-22f; Armor Break
Drive Parry (MPMK)
| Startup | Active | Recovery | Cancel | Damage | Guard | On Hit | On Block |
|---|---|---|---|---|---|---|---|
| 1 | 12 or until released | 33(1)(11) | - | - | - | - | - |
See Drive Parry
- Perfect Parry has only 1f recovery, and disables the opponent from canceling their attack
- Perfect Parry vs. projectiles puts you into a fixed 11f recovery
Drive Rush (66)
Taunts
Neutral Taunt (5PPPKKK)
| Startup | Active | Recovery | Cancel | Damage | Guard | On Hit | On Block |
|---|---|---|---|---|---|---|---|
| 116 (total) | - | - | - | - | - | - | - |
Forward Taunt (6PPPKKK)
| Startup | Active | Recovery | Cancel | Damage | Guard | On Hit | On Block |
|---|---|---|---|---|---|---|---|
| 225 (total) | - | - | - | - | - | - | - |
Back Taunt (4PPPKKK)
| Startup | Active | Recovery | Cancel | Damage | Guard | On Hit | On Block |
|---|---|---|---|---|---|---|---|
| 325 (total) | - | - | - | - | - | - | - |
Down Taunt (2PPPKKK)
Special Moves
Sonic Boom ([4]6P)
| Startup | Active | Recovery | Cancel | Damage | Guard | On Hit | On Block |
|---|---|---|---|---|---|---|---|
| 10 | - | 30 | SA3 | 550 (600) | LH | +3(+4) | -3 |
- 45f charge time; slowest projectile speed
- Input 6+P within 3f of each other for Perfect timing (more damage, +4 on Hit)
- Cancel reaction window: 11f (Super)
| Startup | Active | Recovery | Cancel | Damage | Guard | On Hit | On Block |
|---|---|---|---|---|---|---|---|
| 10 | - | 30 | SA3 | 550 (600) | LH | +3(+4) | -3 |
- 45f charge time; medium projectile speed
- Input 6+P within 3f of each other for Perfect timing (more damage, +4 on Hit)
- Cancel reaction window: 11f (Super)
| Startup | Active | Recovery | Cancel | Damage | Guard | On Hit | On Block |
|---|---|---|---|---|---|---|---|
| 10 | - | 30 | SA3 | 550 (600) | LH | +3(+4) | -3 |
- 45f charge time; fastest projectile speed
- Input 6+P within 3f of each other for Perfect timing (more damage, +4 on Hit)
- Cancel reaction window: 11f (Super)
| Startup | Active | Recovery | Cancel | Damage | Guard | On Hit | On Block |
|---|---|---|---|---|---|---|---|
| 10 | - | 28 | SA2 SA3 | 500x2 (1000) | LH | KD +48 | +3 |
- 45f charge time; 2 hits, fast projectile speed
- Does not have a Perfect timing version
- Cancel reaction window: 11f (Super)
- xx Lv.2 Super: KD+65/+25
Somersault Kick ([2]8K)
| Startup | Active | Recovery | Cancel | Damage | Guard | On Hit | On Block |
|---|---|---|---|---|---|---|---|
| 5 | 6 | 26+15 land | SA3 | 1000 (1200) | LH | KD +36 | -30 |
- Anti-Air Invuln: 1-?f; Airborne 8-36f (Forced Knockdown state)
- 45f charge time; input 8+LK within 3f of each other for Perfect timing (better damage)
- Cancel reaction window: 17f (Super)
| Startup | Active | Recovery | Cancel | Damage | Guard | On Hit | On Block |
|---|---|---|---|---|---|---|---|
| 6 | 6 | 27+15 land | SA3 | 1100 (1300) | LH | KD +37 | -31 |
- Anti-Air Invuln: 1-?f; Airborne 8-38f (Forced Knockdown state)
- 45f charge time; input 8+MK within 3f of each other for Perfect timing (better damage)
- Cancel reaction window: 17f (Super)
| Startup | Active | Recovery | Cancel | Damage | Guard | On Hit | On Block |
|---|---|---|---|---|---|---|---|
| 7 | 6 | 28+15 land | SA3 | 1200 (1400) | LH | KD +39 | -32 |
- Anti-Air Invuln: 1-?f; Airborne 8-40f (Forced Knockdown state)
- 45f charge time; input 8+HK within 3f of each other for Perfect timing (better damage)
- Cancel reaction window: 17f (Super)
| Startup | Active | Recovery | Cancel | Damage | Guard | On Hit | On Block |
|---|---|---|---|---|---|---|---|
| 6 | 4,2 | 26+20 land | - | 1000(700),600 | LH | KD +29 | -33(-37) |
- Full Invuln: 1-10f; Airborne 8-36f (Forced Knockdown state)
Sonic Blade (214P)
| Startup | Active | Recovery | Cancel | Damage | Guard | On Hit | On Block |
|---|---|---|---|---|---|---|---|
| 16 | [45] | 26 | SA3 | 400 | LH | -3 | -4 |
- 1 hit
| Startup | Active | Recovery | Cancel | Damage | Guard | On Hit | On Block |
|---|---|---|---|---|---|---|---|
| 21 | [85] | 29 | SA3 | 400 | LH | -6 | -7 |
- 1 hit
| Startup | Active | Recovery | Cancel | Damage | Guard | On Hit | On Block |
|---|---|---|---|---|---|---|---|
| 31 | [100] | 23 | SA3 | 250x2 (500) | LH | +1 | -1 |
- 2 hits
| Startup | Active | Recovery | Cancel | Damage | Guard | On Hit | On Block |
|---|---|---|---|---|---|---|---|
| 15 | [100] | 24 | SA2 SA3 | 300x2 | LH | KD +57 | -4 |
- 2 hits; 1st hit knocks down on hit, while 2nd hit remains active to cover opponent's wakeup
- Either hit put opponent into a limited juggle state
- Cancel reaction window: 6f (Super)
- xx Lv.2 Super: KD+68/+11
Guile throws out an almost stationary projectile; higher strength versions are slower but last much longer ([] refers to the stationary projectile's active time). Inputting 6P or 6PP immediately afterwards will throw a Sonic Boom of the corresponding strength (and can still become a Perfect Boom with proper input timing). If the Sonic Boom passes through the active Sonic Blade, it becomes a more powerful Sonic Cross (this will not happen if the Blade dissipates on hit/block, or from running out of active frames). Guile can delay the Sonic Boom to make his Sonic Cross timing less predictable, but this requires the usual 45f charge time.
While the meterless versions are cancellable to Lv.3 Super, there is not enough time to build charge naturally; the cancel is possible to perform if the opponent activates something like an install Super that freezes the screen while Sonic Blade is already in startup.
Sonic Cross (214P_6P)
| Startup | Active | Recovery | Cancel | Damage | Guard | On Hit | On Block |
|---|---|---|---|---|---|---|---|
| 10 | - | 28 | SA3 | 600(800),400 | LH | KD +44~ | -1 |
- Button strength determines speed of followup projectile
- Cancel reaction window: 11f (Super)
| Startup | Active | Recovery | Cancel | Damage | Guard | On Hit | On Block |
|---|---|---|---|---|---|---|---|
| 10 | - | 28 | SA2 SA3 | 400x2,500 (1300) | LH | KD +48~ | +3 |
- Costs 2 Drive bars total (Regular Sonic Blade + OD Sonic Cross followup)
- Cancel reaction window: 11f (Super)
- xx Lv.2 Super: KD+65/+25
| Startup | Active | Recovery | Cancel | Damage | Guard | On Hit | On Block |
|---|---|---|---|---|---|---|---|
| 10 | - | 28 | SA2* SA3 | 400x2,500 (1300) | LH | KD +47 | -3 |
- Costs 2 Drive bars total (OD Sonic Blade + Regular Sonic Cross followup)
- Cancel reaction window: 11f (Super)
- xx Lv.2 Super: KD+64/+24
- If the Blade dissipates before the projectile is enhanced, it is no longer cancellable to Lv.2 Super
| Startup | Active | Recovery | Cancel | Damage | Guard | On Hit | On Block |
|---|---|---|---|---|---|---|---|
| 10 | - | 28 | SA2 SA3 | 400x3,500 (1700) | LH | KD Spin + Splat | +3 |
- Costs 4 Drive bars total (OD Sonic Blade + OD Sonic Cross followup)
- Wall Splats on hit in the corner (KD Adv. varies greatly based on positioning)
- Cancel reaction window: 11f (Super)
- xx Lv.2 Super: KD+65/+25
The powered up projectile after it passes through an active Sonic Blade; compared to Sonic Boom, a Sonic Cross does more damage, more hits, and knocks down. If the Blade dissipates, refer to Sonic Boom data. Inputting 6+P within a 3f timing window still results in a Perfect version that does more damage.
Super Arts
Level 1 Super ([4]646P)
| Startup | Active | Recovery | Cancel | Damage | Guard | On Hit | On Block |
|---|---|---|---|---|---|---|---|
| 8(11) | 51 | 81 | - | 200x6,800 (2000) | LH | KD +41 | -26 |
- Strike/Throw Invuln: 1-10f; Armor Break
- 45f charge time; depletes 1/2 Drive bar from opponent on hit
| Startup | Active | Recovery | Cancel | Damage | Guard | On Hit | On Block |
|---|---|---|---|---|---|---|---|
| 7 | 52 | 68 | - | 200x6,600 (1800) | LH | KD +70 | -2 |
- Whiffs on crouching opponents; allows followup juggles on hit (KD Adv. varies based on height)
- 45f charge time; Armor Break; depletes 1/2 Drive bar from opponent on hit
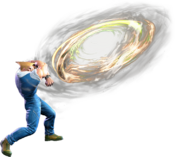
Sonic Hurricane can be used effectively against projectiles, completely dissipating any other non-Super projectile; however, it doesn't have projectile invincibility, so Guile can get hit out of startup if not spaced out properly. The HP version is mostly used as a combo tool, as it launches the opponent upward into a limited juggle state. Note that the HP version is not invincible at all, so it should not be used as a reversal.
Level 2 Super (214214P)
| Startup | Active | Recovery | Cancel | Damage | Guard | On Hit | On Block |
|---|---|---|---|---|---|---|---|
| 1 | (1500) | 5 | - | - | - | - | - |
- Install Super; allows the use of Sonic Break
- 1500f active timer (25 seconds), drains by 200f for each Sonic Break (maximum of 7)
Guile's install Super is great for getting frame advantage from cancellable moves like 5HK. The Super freeze also lets Guile build charge for his followup combo if applicable.
Sonic Break (PP)
| Startup | Active | Recovery | Cancel | Damage | Guard | On Hit | On Block |
|---|---|---|---|---|---|---|---|
| 11 | - | 25 | - | 600 each | LH | +2 | -2 |
- Can be thrown without charge, up to 5 in one sequence (max of 7 per Super)
- Holding forward (6PP/3PP) increases each projectile's speed
- Holding back (4PP/1PP) decreases each projectile's speed
| Startup | Active | Recovery | Cancel | Damage | Guard | On Hit | On Block |
|---|---|---|---|---|---|---|---|
| 11 | - | 25 | - | 600 each | LH | +2 | -2 |
- Can throw up to 4 followups in one sequence (max of 7 per Super)
- Button strength determines each projectile's speed (LP slowest, HP fastest)
| Startup | Active | Recovery | Cancel | Damage | Guard | On Hit | On Block |
|---|---|---|---|---|---|---|---|
| 11 | - | 24 | - | 500x2 (1000) | LH | KD +54~ | +3 |
- Can throw up to 2 followups in one sequence (max of 7 per Super)
- Does not cost any additional Drive meter for each followup
Only available after Solid Puncher is activated; each Sonic Break drains the 1500f timer by 200f. The followup versions work after Sonic Boom or Sonic Cross. Guile does not build any additional Super meter from connecting a Break while his install timer is active, but he will build some if it connects after the timer has expired. It is possible to create gaps in the projectile blockstrings by mixing between fast and slow Sonic Breaks; this will also depend on the distance from the opponent.
Level 3 Super ([4]646K)
| Startup | Active | Recovery | Cancel | Damage | Guard | On Hit | On Block |
|---|---|---|---|---|---|---|---|
| 9 | 6 | 30+40 land | - | 4000(3000) | LH | HKD +16 | -59 |
- Full Invuln: 1-14f; Airborne 12-44f (Forced Knockdown state); Armor Break
- 45f charge time; depletes 1.5 Drive bars from opponent on hit
No results
- Full Invuln: 1-14f; Airborne 12-44f (Forced Knockdown state); Armor Break
- 45f charge time; depletes 2 Drive bars from opponent on hit
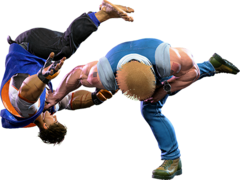
Guile's Lv.3 Super gives a cinematic cutscene on a normal hit, but if it connects late in its active frames (such as an early anti-air) it will skip the cutscene. This results in lower damage and less depletion of the opponent's Drive gauge. It can be easily cancelled from Sonic Boom on reaction, and cancelled from Somersault Kick in combos or after a late anti-air. To perform this cancel, input the Somersault as [1]7K to maintain back charge, then quickly transition to 646K to finish the Super motion.


