| Pre-release information
This page is under construction based on pre-release data. Join the SF6 Resource Hub for info on editing. |
Introduction
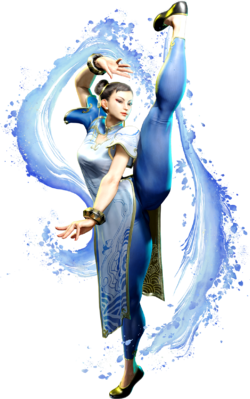
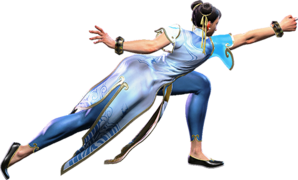
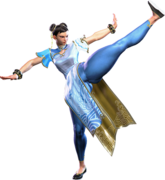
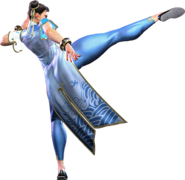
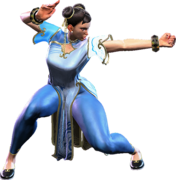
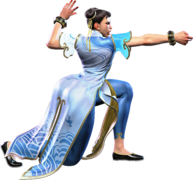
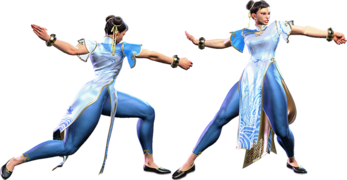
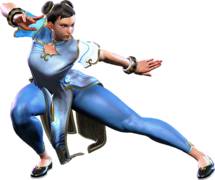
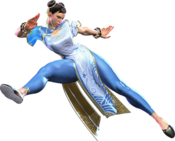
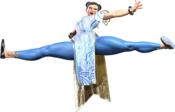
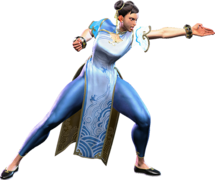
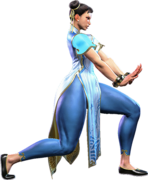
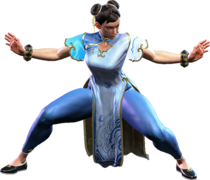
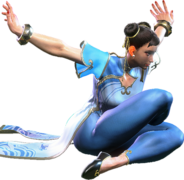
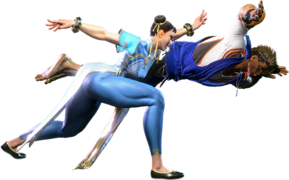
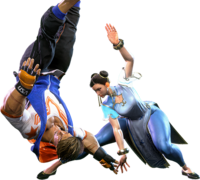
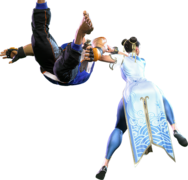
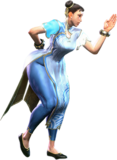
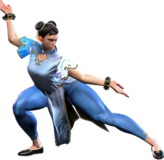
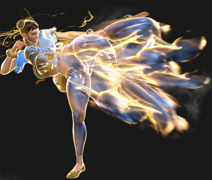
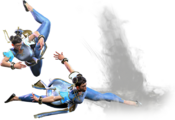
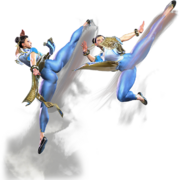
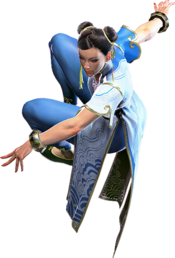
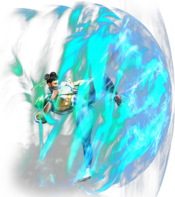
A former high-kicking ICPO agent, Chun-Li looks after Li-Fen, a victim of the Black Moon Incident. With Shadaloo sundered, she now runs Kung Fu classes and has become a well-loved member of the local community.
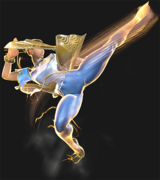
Chun-Li is a tried and true footsies character, with great emphasis on having many options to control space and punish her opponents in neutral. She has a little bit of everything when it comes to her general tools, but for the most part they're tailored toward whiff punishes and space control.
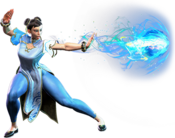
With one of the fastest forward and back walk speeds in the game, Chun is at a clear advantage when spacing out of an opponent's range ambiguously. Her poking normals compliment this grounded speed; with 2MK, 4/6MP, and 5HP being some standouts that can easily give a ton of mileage in neutral. To top it all off, she has Kikoken, a highly versatile fireball that can be used as an extended poke, confirm, or approach tool depending on the situation.
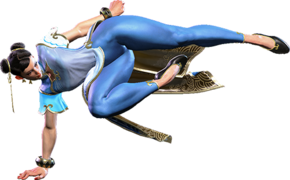
But when the opponent is tired of dealing with Chun's grounded footsie game, she is still in luck—as she has some of the most varied and rewarding anti-air tools in the entire game. She can keep it simple by anti-airing with Tensho Kicks, go for a Forced Knockdown or avoid being punished with 5MK, air-to-air with her many tools to convert air hits into combos; or go for 5HK, the slowest and riskiest option that gives absolutely devastating meterless anti-air reward. If you are jumping against Chun, she always has a very strong option to punish you, no matter the situation.
Thanks to her new Serenity Stance and Punish Counters, Chun gets great rewards off of whiff punishes in neutral without any meter required. It also can bolster her oki in the right scenarios, giving her high/low/throw mix that is very hard to see if she can manage to set it up properly. Drive Rush also helps to create stance frame traps that make an opponent unsure of when to press, while you can end in Kikoken to make the string safe. She also has a unique stance launcher that is a valuable combo tool, netting reliable safe jump setups, corner carry, and super confirms.
Perhaps the most glaring flaw with Chun is her offense, as her true mix tends to require an advantageous knockdown to be unmashable (which she can struggle to get resourceless) and she notably lacks the ability to throw loop. This removes a key layer of offense from her gameplan and can urge her to retreat back to mid-range poking once a throw is landed. She has some simple frame traps in the form of 5MP > 5LP, but this is far from her specialty compared to the rest of the cast. Another weak part of her offense is jump-ins: Chun's jump is floatier than other characters, and her air buttons are far more geared towards hitting air-to-air than air-to-ground. She has an anti-air baiting tool in the form of Air Lightning Legs, but this is a gimmicky option that whiffs on crouchers and is usually punishable. She may have to resort to using Hazanshu as a read on fireballs, which simply isn't as advantageous as a jump-in even if it gives good reward on a Punish Counter. If you like to jump in neutral a lot, Chun is probably not the pick.
There are some fairly difficult and unforgiving aspects of playing Chun. LK and MK Lightning Legs are her easiest cancel off of buttons, but they're -8 on block—she has to either have charge for Kikoken or use Drive on EX Legs to cancel into a safe special move. She relies on charge for resourceless knockdowns, as Spinning Bird Kick is her main way to accomplish this. A charge character that is meant to walk a lot can be a steep learning curve to begin with, as it's easy to accidentally input Kikoken or not charge long enough when attempting to move back and forth in neutral. The ranges of her special moves and the fact that each version of Kikoken dissipates after set distances may demand sharp knowledge of spacing. Her anti-airs all have unique ups and downs to them, and her main DP style anti-air being a 22 input can be very unwieldy and precise. Her optimal combos can be quite tricky, requiring situational awareness, stance cancels, and launcher combos with unusual button timings. Dropping some of her harder routes can also leave her in a highly punishable state. Lastly, the sheer amount of options she has in general can make her feel overwhelming and daunting to pick up.
All in all, Chun-Li is a rewarding character to master that can still be accessible simply by how strongly she rewards fundamentals. She doesn't sacrifice versatility for her strengths, and her many options let her both play unpredictably and have answers to any situation. If you want a character that can do a lot in the right hands and thrives on punishing opponents' habits, Chun-Li is a great pick.
| Pick if you like: | Avoid if you dislike: |
|---|---|
|
|
Classic & Modern Versions Comparison
| Missing Normals |
|
|---|---|
| Missing Command Normals |
|
| Shortcut-Only Specials |
|
| Assist Combos |
|
| Miscellaneous Changes |
|
| Chun-Li | |
|---|---|
| Vitals | |
| Life Points | 10000 |
| Ground Movement | |
| Forward Walk Speed | 0.050 |
| Backward Walk Speed | 0.035 |
| Forward Dash Speed | 19 |
| Backward Dash Speed | 25 |
| Forward Dash Distance | 1.508 |
| Backward Dash Distance | 1.211 |
| Drive Rush Min. Distance (Throw) | 1.044 |
| Drive Rush Min. Distance (Block) | 2.222 |
| Drive Rush Max Distance | 3.163 |
| Jumping | |
| Jump Speed | 4+42+3 |
| Jump Apex | 2.247 |
| Forward Jump Distance | 2.10 |
| Backward Jump Distance | 1.68 |
| Throws | |
| Throw Range | 0.8 |
| Throw Hurtbox | 0.33 |
Normals
Standing Normals
5LP
| Startup | Active | Recovery | Cancel | Damage | Guard | On Hit | On Block |
|---|---|---|---|---|---|---|---|
| 4 | 3 | 7 | SS Chn Sp SA | 300 | LH | +5 | -3 |
- Chains into 5LP/2LP/2LK
- Combos naturally into 5MP if close enough
- Cancel reaction window: 13f
- Stance Cancel Adv: 0/-7
5MP
| Startup | Active | Recovery | Cancel | Damage | Guard | On Hit | On Block |
|---|---|---|---|---|---|---|---|
| 5 | 4 | 10 | SS Sp SA | 600 | LH | +6 | +1 |
- Plus on block with high pushback and fairly short range
- Good combo or frame trap starter that can link into 2MP and build charge for Spinning Bird Kick
- Cancel reaction window: 16f
- Stance Cancel Adv: +4/-1
5HP
| Startup | Active | Recovery | Cancel | Damage | Guard | On Hit | On Block |
|---|---|---|---|---|---|---|---|
| 13 | 3 | 20 | SS | 800 | LH | +2 | -3 |
- Long range poke, one of Chun's defining neutral tools
- Can combo to SS~LP (close range), SS~LK on Counterhit, or SS~MK on Punish Counter
- On block, gap can generally be interrupted unless opponent is in Burnout
- Stance Cancel Adv: +6/0
5LK
| Startup | Active | Recovery | Cancel | Damage | Guard | On Hit | On Block |
|---|---|---|---|---|---|---|---|
| 5 | 3 | 10 | SS Sp SA | 300 | LH | +2 | -2 |
- Cancel reaction window: 13f
- Stance Cancel Adv: +1/-3
5MK
| Startup | Active | Recovery | Cancel | Damage | Guard | On Hit | On Block |
|---|---|---|---|---|---|---|---|
| 7 | 4 | 16 | SS Sp SA | 500 | LH | +4 | -2 |
- Whiffs on crouching opponents
- Decent anti-air
- Cancel reaction window: 16f
- Stance Cancel Adv: +10/+4
5HK
| Startup | Active | Recovery | Cancel | Damage | Guard | On Hit | On Block |
|---|---|---|---|---|---|---|---|
| 14 | 3 | 18 | SS | 900 | LH | +4 | 0 |
- Whiffs on crouching opponents; stance cancels allow followup combos on standing opponents
- Good anti-air hitbox from long range, but a little slow to use on reaction
- Puts airborne opponents into limited juggle state
- Chun's longest range poke; very safe on block and fairly fast whiff animation for its range
- Stance Cancel Adv: +10/+6
Crouching Normals
2LP
| Startup | Active | Recovery | Cancel | Damage | Guard | On Hit | On Block |
|---|---|---|---|---|---|---|---|
| 4 | 3 | 7 | SS Chn Sp SA | 300 | LH | +4 | -2 |
- Chains into 5LP/2LP/2LK
- Fairly short range, can whiff in chains if not close enough
- Cancel reaction window: 13f
- Stance Cancel Adv: 0/-6
2MP
| Startup | Active | Recovery | Cancel | Damage | Guard | On Hit | On Block |
|---|---|---|---|---|---|---|---|
| 6 | 4 | 13 | SS Sp SA | 600 | LH | +4 | -2 |
- Useful normal in combos from 5MP; relatively hitconfirmable on its own
- Cancel reaction window: 16f
- Stance Cancel Adv: +7/+1
2HP
| Startup | Active | Recovery | Cancel | Damage | Guard | On Hit | On Block |
|---|---|---|---|---|---|---|---|
| 11 | 3(5)5 | 18 | SS Sp SA (2nd) | 450x2 | LH | +1 | -3 |
- 2 hits (only 2nd is cancellable); Counterhit/Punish Counter advantage applies to both hits
- Forces stand on hit
- Safe on block, making it easy to use as a safe confirm
- Cancel reaction window: 29f
- Stance Cancel Adv: +8/+4
2LK
| Startup | Active | Recovery | Cancel | Damage | Guard | On Hit | On Block |
|---|---|---|---|---|---|---|---|
| 4 | 2 | 10 | SS Chn Sp SA | 200 | L | 0 | -2 |
- Chains into 5LP/2LP/2LK
- Very strong, being a 4f cancellable low; will whiff if used as the 3rd hit of a light chain
- Cancel reaction window: 12f
- Stance Cancel Adv: -2/-4
2MK
| Startup | Active | Recovery | Cancel | Damage | Guard | On Hit | On Block |
|---|---|---|---|---|---|---|---|
| 7 | 3 | 19 | SS Sp SA | 500 | L | -2 | -6 |
- Cancel reaction window: 13f
- Good range for a cancellable low poke, but very difficult to hitconfirm on its own
- Applies a 20% damage scaling penalty to the next hit when used as a combo starter (100/80/70/60...)
- Stance Cancel Adv: +6/+2
2HK
| Startup | Active | Recovery | Cancel | Damage | Guard | On Hit | On Block |
|---|---|---|---|---|---|---|---|
| 9 | 6 | 19 | SS | 900 | L | HKD +33 | -7 |
- Counterhit/Punish Counter: +48 HKD
- More active frames and safer on block than most sweeps
- Stance Cancel Adv: HKD+29/-11
Jumping Normals
j.LP
| Startup | Active | Recovery | Cancel | Damage | Guard | On Hit | On Block |
|---|---|---|---|---|---|---|---|
| 4 | 10 | 3 land | - | 300 | H | +4(+9) | +1(+6) |
j.MP
| Startup | Active | Recovery | Cancel | Damage | Guard | On Hit | On Block |
|---|---|---|---|---|---|---|---|
| 7 | 4(6)5 | 3 land | Sp SA1 | 300x2 | H | +8(+13) | +4(+9) |
- 2 hits; either hit puts airborne opponents into limited juggle state
- Cancels into Air Lightning Legs or Air Lv.1 Super on either hit
j.HP
| Startup | Active | Recovery | Cancel | Damage | Guard | On Hit | On Block |
|---|---|---|---|---|---|---|---|
| 9 | 6 | 3 land | TC | 800(500) | H | +12(+16) | +7(+11) |
- Puts airborne opponents into limited juggle state
- Has a Target Combo followup into another j.HP
j.LK
| Startup | Active | Recovery | Cancel | Damage | Guard | On Hit | On Block |
|---|---|---|---|---|---|---|---|
| 4 | 8 | 3 land | - | 300 | H | +7(+9) | +4(+6) |
j.MK
| Startup | Active | Recovery | Cancel | Damage | Guard | On Hit | On Block |
|---|---|---|---|---|---|---|---|
| 6 | 5 | 3 land | - | 500 | H | +7(+13) | +3(+9) |
- Crossup
j.HK
| Startup | Active | Recovery | Cancel | Damage | Guard | On Hit | On Block |
|---|---|---|---|---|---|---|---|
| 8 | 5 | 3 land | - | 800 | H | +8(+16) | +3(+11) |
8j.HK
Command Normals
4MP or 6MP
| Startup | Active | Recovery | Cancel | Damage | Guard | On Hit | On Block |
|---|---|---|---|---|---|---|---|
| 7 | 3 | 15 | SS Sp SA | 600 | LH | +2 | -3 |
- Cancel reaction window: 17f
- Stance Cancel Adv: +6/+1
Incredible poke that can be reaction cancelled into specials while maintaining back charge
4HP
| Startup | Active | Recovery | Cancel | Damage | Guard | On Hit | On Block |
|---|---|---|---|---|---|---|---|
| 8 | 6 | 14 | SS Sp SA | 800 | LH | +5 | -1 |
- Cancellable heavy button with many active frames, making it a powerful meaty
- Meaty timing or Counterhit allows for great followup links
- Cancel reaction window: 19f
- Stance Cancel Adv: +9/+3
3HP
| Startup | Active | Recovery | Cancel | Damage | Guard | On Hit | On Block |
|---|---|---|---|---|---|---|---|
| 21 | 4 | 14 | SS | 800 | H | +1 | -2 |
- Safe overhead with very slight hit advantage
- Stance Cancel Adv: +2/-1
- Does not lead to combo (except Punish Counter into Stance LP)
6HK
| Startup | Active | Recovery | Cancel | Damage | Guard | On Hit | On Block |
|---|---|---|---|---|---|---|---|
| 16 | 2 | 23 | SS | 800 | LH | -1 | -4 |
- Airborne 8-28f; Forced Knockdown state
- Stance Cancel Adv: +2/-1
- Punish Counter causes crumple state
- Followups will always hit airborne except for Stance LP
3HK
| Startup | Active | Recovery | Cancel | Damage | Guard | On Hit | On Block |
|---|---|---|---|---|---|---|---|
| 37 | 2 | 13 | - | 800 | H | +7 | +3 |
- Airborne 7-39f; Forced Knockdown state
- Switches sides; can only hit as a Crossup
- As a result, this move cannot connect against a cornered opponent
- After Drive Rush, carries a lot of forward momentum, making it useful from far range
- For the same reason, it will not work at all from closer ranges, such as a normal cancelled into Drive Rush
j.2MK
| Startup | Active | Recovery | Cancel | Damage | Guard | On Hit | On Block |
|---|---|---|---|---|---|---|---|
| 3 | 11 | 3 land | TC Sp SA | 300 | LH | - | - |
- [] refers to 2nd/3rd followup versions; chains into itself for up to 3 uses
- Can also be cancelled into other air normals (e.g. instant j.2MK, crossup j.MK)
- Puts airborne opponents into a limited juggle state; 3rd hit causes spiked knockdown
- Can hit crossup (bounces away from the wall if opponent is fully cornered)
- Not an overhead, so instant j.2MK into Air Lv.1 Super doesn't create a high/low mixup
Target Combos
j.HP~j.HP
No results
- Puts airborne opponents into limited juggle state
- Target Combo can be performed on whiff
Serenity Stream
Serenity Stream (214P)
| Startup | Active | Recovery | Cancel | Damage | Guard | On Hit | On Block |
|---|---|---|---|---|---|---|---|
| 14(~) | [57~] | - | - | - | - | - | - |
- Low Profile beginning on frame 14 (can duck under projectiles); remains in crouch stance as long as any Down direction is held
- All ground normals cancel into this stance (even normally uncancellable ones)
- Cancelling into 214P from grounded heavy normals makes the followups start 1f faster
- Followup stance normals can cancel to special moves without charge
- Chun-Li is in a Counterhit state during stance (including startup/recovery)
- Chun-Li can block while in stance (but not during recovery when exiting stance)
- Stance startup can vary depending on which normal it is cancelled from
- Stance recovery can vary depending on which followup is used from the stance
- The final 14f of recovery puts Chun-Li in a standing state
Orchid Palm (214P~LP)
No results
- Startup is 1f faster (5f) when cancelling heavy normal into stance
- Can remain in Serenity Stream after recovery; [] refers to recovery when exiting SS
- Recommended to cancel LP into a special, or remain crouching to avoid a massive punish
- Fastest possible Orchid Palm is 19f total
- Cancel reaction window: 15f
Snake Strike (214P~MP)
No results
- Projectile Invuln/Low Profile: ?-?f
- Startup is 1f faster (11f) when cancelling heavy normal into stance
- Can remain in Serenity Stream after recovery; [] refers to recovery when exiting SS
- Fastest possible Snake Strike is 25f total
Lotus Fist (214P~HP)
No results
- 2-hit overhead that is fully cancellable
- Startup is 1f faster (23f) when cancelling heavy normal into stance
- Exits Serenity Stream after recovery
- Fastest possible Lotus Fist is 37f total
- Cancel reaction window: 27f
Forward Strike (214P~LK)
No results
- Startup is 1f faster (8f) when cancelling heavy normal into stance
- Can remain in Serenity Stream after recovery; [] refers to recovery when exiting SS
- Fastest possible Forward Strike is 22f total
- Cancel reaction window: 15f
Senpu Kick (214P~MK)
No results
- Startup is 1f faster (10f) when cancelling heavy normal into stance
- Can remain in Serenity Stream after recovery; [] refers to recovery when exiting SS
- Fastest possible Senpu Kick is 24f total
- Cancel reaction window: 18f
Tenku Kick (214P~HK)
No results
- Jump cancellable on hit only; puts opponent into limited juggle state
- Startup is 1f faster (8f) when cancelling heavy normal into stance
- Exits Serenity Stream after recovery
- Fastest possible Tenku Kick is 22f total
- Can be used as a reaction anti-air if already in Serenity Stream
Universal Mechanics
Throws
Forward Throw (LPLK)
| Startup | Active | Recovery | Cancel | Damage | Guard | On Hit | On Block |
|---|---|---|---|---|---|---|---|
| 5 | 3 | 23 | - | 1200 (2040) | T | KD +11 | - |
- Large pushback after hit prevents walking up for a corner throw loop
- Perfectly timed Walk + Throw can beat attacks 6f or slower
- Punish Counter: +8 HKD
Back Throw (4LPLK)
| Startup | Active | Recovery | Cancel | Damage | Guard | On Hit | On Block |
|---|---|---|---|---|---|---|---|
| 5 | 3 | 23 | - | 1200 (2040) | T | KD +13 | - |
- Side switches; can get oki if back throwing opponent into the corner
- Punish Counter: +13 HKD
Air Throw (LPLK Air)
| Startup | Active | Recovery | Cancel | Damage | Guard | On Hit | On Block |
|---|---|---|---|---|---|---|---|
| 5 | 3 | 3 land | - | 1200 (2040) | T | KD +10 | - |
- Opponent is thrown farther away the higher it connects
- KD Advantage does not change based on throw height
- Punish Counter: +10 HKD
Drive Moves
Drive Impact (HPHK)
| Startup | Active | Recovery | Cancel | Damage | Guard | On Hit | On Block |
|---|---|---|---|---|---|---|---|
| 26 | 2 | 35 | - | 800 | LH | KD +35 / Wall Splat KD +65 | -3 / Wall Splat HKD +72 |
See Drive Impact
- Notable blockstring gaps:
- 2HP: 7f
- 4HP: 8f
- 5MK, Stance HP: 9f
- 2MK: 11f
- 2MP, 6MP/4MP, Stance MK: 12f
- 5MP: 14f
Drive Reversal (6HPHK)
| Startup | Active | Recovery | Cancel | Damage | Guard | On Hit | On Block |
|---|---|---|---|---|---|---|---|
| 20 | 3(10)3 | 26(33) | - | 250x2 recoverable | LH | KD +23 | -6 |
See Drive Reversal
- Full Invuln: 1-22f; Armor Break
Drive Parry (MPMK)
| Startup | Active | Recovery | Cancel | Damage | Guard | On Hit | On Block |
|---|---|---|---|---|---|---|---|
| 1 | 12 or until released | 33(1)(11) | - | - | - | - | - |
See Drive Parry
- Perfect Parry has only 1f recovery, and disables the opponent from canceling their attack
- Perfect Parry vs. projectiles puts you into a fixed 11f recovery
Drive Rush (66)
Taunts
Neutral Taunt (5PPPKKK)
| Startup | Active | Recovery | Cancel | Damage | Guard | On Hit | On Block |
|---|---|---|---|---|---|---|---|
| 35 | 2 | 70 | - | 300 | LH | -58 | -65 |
- Taunt has a hitbox that does damage equal to an average light normal
- As a Punish Counter, opponent is crumpled
- Recovery animation is far too slow to allow a followup combo from the crumple
Forward Taunt (6PPPKKK)
| Startup | Active | Recovery | Cancel | Damage | Guard | On Hit | On Block |
|---|---|---|---|---|---|---|---|
| 273 (total) | - | - | - | - | - | - | - |
Back Taunt (4PPPKKK)
Special Moves
Kikoken ([4]6P)
| Startup | Active | Recovery | Cancel | Damage | Guard | On Hit | On Block |
|---|---|---|---|---|---|---|---|
| 15 | [90] | 32 | SA3 | 600 | LH | -3 | -7 |
- 45f charge time; travels ~90% of screen length; Super cancel timing is very strict
| Startup | Active | Recovery | Cancel | Damage | Guard | On Hit | On Block |
|---|---|---|---|---|---|---|---|
| 12 | [55] | 33 | SA3 | 600 | LH | -3 | -7 |
- 45f charge time; travels ~80% of screen length; Super cancel timing is very strict
| Startup | Active | Recovery | Cancel | Damage | Guard | On Hit | On Block |
|---|---|---|---|---|---|---|---|
| 11 | [25] | 32 | SA3 | 600 | LH | -2 | -6 |
- 45f charge time; travels ~60% of screen length; Super cancel timing is very strict
| Startup | Active | Recovery | Cancel | Damage | Guard | On Hit | On Block |
|---|---|---|---|---|---|---|---|
| 11 | - | 28 | SA2 SA3 | 400x2 | LH | +5 | 0 |
- 45f charge time; travels fullscreen; 2-hit projectile
- Counterhit/Punish Counter Advantage applies to both hits
Hundred Lightning Kicks (236K)
| Startup | Active | Recovery | Cancel | Damage | Guard | On Hit | On Block |
|---|---|---|---|---|---|---|---|
| 8 | 2(5)2(5)2 | 20 | SA3 (2nd) | 250x2,300 (800) | LH | +3 | -8 |
- 3 hits; Counterhit/Punish Counter advantage applies to all hits
| Startup | Active | Recovery | Cancel | Damage | Guard | On Hit | On Block |
|---|---|---|---|---|---|---|---|
| 14 | 2(4)2(4)2(5)2 | 22 | SA3 (3rd) | 225x4 (900) | LH | +3 | -8 |
- 4 hits; Counterhit/Punish Counter advantage applies to all hits
| Startup | Active | Recovery | Cancel | Damage | Guard | On Hit | On Block |
|---|---|---|---|---|---|---|---|
| 23 | 2(3)2(2) 2(4)2(6)2 |
15 | SA3 (4th) | 200x5 (1000) | LH | KD +50 | -3 |
- 5 hits; Counterhit/Punish Counter advantage applies to all hits
| Startup | Active | Recovery | Cancel | Damage | Guard | On Hit | On Block |
|---|---|---|---|---|---|---|---|
| 8 | 2(4)2(4) 2(4)2(4)2 |
21 | SA2 SA3 (5th) | 160x5 (800) | LH | +3 | -3 |
- 5 hits; Counterhit/Punish Counter advantage applies to all hits
- Can input KK followup on hit/block for no extra Drive cost
| Startup | Active | Recovery | Cancel | Damage | Guard | On Hit | On Block |
|---|---|---|---|---|---|---|---|
| 11 | 2(5)2(4) 2(5)2(13)3 |
25 | - | 100x4,300 (700) | LH | KD +29 | -13 |
- 10 hits total
Air Hundred Lightning Kicks (j.236K)
| Startup | Active | Recovery | Cancel | Damage | Guard | On Hit | On Block |
|---|---|---|---|---|---|---|---|
| 8 | 2(4)2(4)2 | 15(18) land | - | 300x3 (900) | LH | -4(+1) | -7(-2) |
- 3 hits; best version for grounded pressure (safest and best trajectory)
| Startup | Active | Recovery | Cancel | Damage | Guard | On Hit | On Block |
|---|---|---|---|---|---|---|---|
| 10 | 2(4)2(4)2(5)2 | 15(18) land | - | 250x4 (1000) | LH | -4(+1) | -8(-3) |
- 4 hits
| Startup | Active | Recovery | Cancel | Damage | Guard | On Hit | On Block |
|---|---|---|---|---|---|---|---|
| 12 | 2(4)2(3) 2(4)2(3)2 |
15(18) land | - | 220x5 (1100) | LH | -5(-2) | -9(-6) |
- 5 hits; very strict timing required to connect on a standing opponent
| Startup | Active | Recovery | Cancel | Damage | Guard | On Hit | On Block |
|---|---|---|---|---|---|---|---|
| 6 | 2(4)2(2)2(3) 2(2)2(3)2 |
5 land | - | 250x5,350 (1600) | LH | KD +38~39 | -32(-16) |
- 6 hits; no minimum height requirement
All Versions:
- Forward/Neutral jump only; cannot hit crouching
- Forced Knockdown state
- The final 5f of landing recovery puts Chun-Li in a crouching state
Spinning Bird Kick ([2]8K)
| Startup | Active | Recovery | Cancel | Damage | Guard | On Hit | On Block |
|---|---|---|---|---|---|---|---|
| 9 | 2(6)2(6)2 | 6+24 land | - | 333x2,334 (1000) | LH | KD +33 | -18 |
- 30f charge time; Airborne 8-32f; Forced Knockdown state
- Combos from light normals
| Startup | Active | Recovery | Cancel | Damage | Guard | On Hit | On Block |
|---|---|---|---|---|---|---|---|
| 16 | 2(6)2(6) 2(7)2(4)2 |
8+21 land | - | 200x4,400 (1200) | LH | KD +34 | -17 |
- 30f charge time; Airborne 15-56f; Forced Knockdown state
- Combos from medium normals
| Startup | Active | Recovery | Cancel | Damage | Guard | On Hit | On Block |
|---|---|---|---|---|---|---|---|
| 20 | 2(4)2(8)2(6) 2(5)2(5)2(3)2 |
8+22 land | - | 180x6,320 (1400) | LH | KD +33 | -18 |
- 30f charge time; Airborne 19-73f; Forced Knockdown state
- Combos from heavy normals and 5MK
| Startup | Active | Recovery | Cancel | Damage | Guard | On Hit | On Block |
|---|---|---|---|---|---|---|---|
| 16 | 2(4)2(4)2(5) 2(4)2(5)2(4)2 |
8+15 land | - | 100x6,200 (800) | LH | KD +55(+41) | -12 |
- 30f charge time; Airborne 14-63f; Forced Knockdown state
- Combos from medium normals
- Puts grounded opponents into limited juggle state (regular KD vs. airborne)
Hazanshu (214K)
| Startup | Active | Recovery | Cancel | Damage | Guard | On Hit | On Block |
|---|---|---|---|---|---|---|---|
| 23 | 2 | 21 | SA3 | 1000 | H | 0 | -9 |
- Projectile Invuln: 5-9f; Airborne 5-20f; Forced Knockdown state
| Startup | Active | Recovery | Cancel | Damage | Guard | On Hit | On Block |
|---|---|---|---|---|---|---|---|
| 27 | 3 | 16 | SA3 | 1000 | H | +2 | -3 |
- Projectile Invuln: 6-21f; Airborne 6f-24; Forced Knockdown state
| Startup | Active | Recovery | Cancel | Damage | Guard | On Hit | On Block |
|---|---|---|---|---|---|---|---|
| 32 | 3 | 16(18) | SA3 | 1200 | H | +6 | -1 |
- Projectile Invuln: 6-26f; Airborne 6-29f; Forced Knockdown state
| Startup | Active | Recovery | Cancel | Damage | Guard | On Hit | On Block |
|---|---|---|---|---|---|---|---|
| 26 | 3 | 16 | SA2 SA3 | 1200 | H | KD +52 OTG | -5 |
- Projectile Invuln: 6-25f; Airborne 6-23f; Forced Knockdown state
- Bounces for an OTG juggle state on hit
Tenshokyaku (22K)
| Startup | Active | Recovery | Cancel | Damage | Guard | On Hit | On Block |
|---|---|---|---|---|---|---|---|
| 5 | 2(10)2 | 27+12 land | - | 450x2 (900) | LH | KD +29 | -37 |
- 2 hits; Anti-Air Invuln: 1-?f; Airborne 8-45f (Forced Knockdown state)
| Startup | Active | Recovery | Cancel | Damage | Guard | On Hit | On Block |
|---|---|---|---|---|---|---|---|
| 7 | 2(10)2 | 31+12 land | - | 450,550 (1000) | LH | KD +25 | -41 |
- 2 hits; Anti-Air Invuln: 1-?f; Airborne 8-51f (Forced Knockdown state)
| Startup | Active | Recovery | Cancel | Damage | Guard | On Hit | On Block |
|---|---|---|---|---|---|---|---|
| 9 | 2(8)2(8)2(11)2 | 26+12 land | - | 200x3,600 (1200) | LH | KD +37 | -57 |
- 4 hits; Anti-Air Invuln: 1-?f; Airborne 8-69f (Forced Knockdown state)
| Startup | Active | Recovery | Cancel | Damage | Guard | On Hit | On Block |
|---|---|---|---|---|---|---|---|
| 6 | 3(5)3 | 16+25 land | - | 180x5,500 (1400) | LH | KD +30 | -40 |
- Full Invuln: 1-7f; Airborne 8-32f (Forced Knockdown state)
- On whiff/block, acts similar to LK version; on hit, lands and performs a 2nd upkick with 4 hits
Wall Jump
| Startup | Active | Recovery | Cancel | Damage | Guard | On Hit | On Block |
|---|---|---|---|---|---|---|---|
| - | - | - | - | - | - | - | - |
- Forced Knockdown and Counterhit state for the entire duration
- Can be done from Back or Neutral Jump if fully against the back wall
- Can also be done against a cornered opponent after a Forward Jump
Super Arts
Level 1 Super (236236P)
| Startup | Active | Recovery | Cancel | Damage | Guard | On Hit | On Block |
|---|---|---|---|---|---|---|---|
| 7 | 70 | 46 | - | 300x4,500 (1700) | LH | KD +22 | -22 |
- Strike/Throw Invuln: 1-7f; Armor Break
- Depletes 1/2 Drive bar from opponent on hit
| Startup | Active | Recovery | Cancel | Damage | Guard | On Hit | On Block |
|---|---|---|---|---|---|---|---|
| 7 | 50 | 16 land | - | 300x4,800 (2000) | LH | KD +14 | -20 |
- Full Invuln: 1f (until freeze); Armor Break
- Depletes 1/2 Drive bar from opponent on hit
- Air Kikosho can be used after j.MP, Air stomps, or Lv.2 Super jump cancel for extra damage
Level 2 Super (236236K)
| Startup | Active | Recovery | Cancel | Damage | Guard | On Hit | On Block |
|---|---|---|---|---|---|---|---|
| 11 | [2(1)x3],2(2), [2(1)x3],2(11), [2(2)x6],2(23)3 |
48 | Jmp | 2000(1000) | LH | KD +29 | -35 |
- Full Invuln: 1-10f; Armor Break
- Depletes 1 Drive bar from opponent on hit
- Last hit is jump cancellable on hit; puts grounded opponents into free juggle state (limited juggle on airborne connect)
- On block, there is an 8f gap before the final hit connects
- Damage is similar to a Lv.1 Super, but the followup combo gives it comparable damage to other Lv.2 Supers
- Counts as 3 hits for damage scaling purposes
Level 3 Super (214214K)
| Startup | Active | Recovery | Cancel | Damage | Guard | On Hit | On Block |
|---|---|---|---|---|---|---|---|
| 8 | 2(24)1(7)1 | 40 | - | 4000 (500x2) | LH | HKD +6 | -24 |
- Full Invuln: 1-8f; Armor Break; depletes 1.5 Drive bars from opponent on hit
- Hits 3 times on block (true blockstring)
- No cinematic if the 1st hit whiffs (1000 damage total)
No results
- Full Invuln: 1-8f; Armor Break; depletes 2 Drive bars from opponent on hit
- Hits 3 times on block (true blockstring)
- No cinematic if the 1st hit whiffs (1000 damage total, no CA damage boost)
