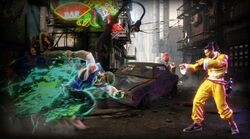
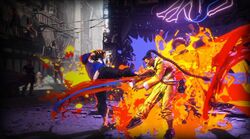
This page covers metered mechanics in Street Fighter 6, specifically the Drive System (and associated Gauge) and the Super Art Gauge.
Drive System
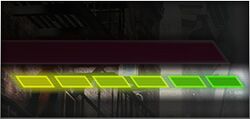
The Drive System is a metered mechanic in Street Fighter 6 that serves as the gateway to universal movement, offense and defense mechanics.
Drive Gauge
| Drive Move | Drive Cost |
|---|---|
| Drive Parry | |
| Drive Impact | |
| Overdrive | |
| Drive Rush | |
| Drive Reversal |
"The engine that powers the Drive System is available as soon as the round begins, allowing you to fight to your liking. If you spend your entire Drive Gauge, you'll enter a burnout state with big disadvantages, but it also replenishes automatically, making meter management a key to the fight. Understanding the system in-depth, including when to be conservative and when to gamble, allows for deep, high-level battles."
- Capcom.
The Drive gauge is crucial to playing SF6 and is an incredibly valuable resource to have. Optimal drive gauge use can give a big advantage over an opponent while poor use of it puts the player at a major disadvantage. The Drive gauge starts full every round and will go down when performing drive actions, blocking, or getting hit. The Drive gauge passively increases overtime if not full as long as the player is not getting hit, blocking, or performing most actions other than movement. The one exception to Passive Drive gauge regeneration that is currently known is the use of supers. During most supers the Drive gauge will slowly start to recover which is the known exception to passive drive gauge regeneration. Beyond passive regeneration, it is possible to increase Drive gauge by hitting the opponent. If the opponent blocks or gets hit by certain normals, the player's drive gauge will increase.
Actions that increase Drive gauge
- Hitting opponent
- Passive regeneration
- Supers
Actions that decrease Drive gauge
- Blocking
- Getting hit by supers
- Drive actions
Burnout
Burnout state happens when the player's Drive gauge becomes empty by any means. Burnout state gives the player several negative effects and also prevents the player from using drive actions until it regenerates. Negative effects:
- More blockstun when blocking (+4 to the frame advantage of the attack)
- Chip damage instead of drive damage when blocking
- Can be chip killed
- Lower damage
- take more damage from opponent
- Lack of drive options
- Slower movement
- Can be stunned by Drive impact
If the player gets hit by a Drive impact while in Burnout state, the player will be stunned but they have maximum Drive guard after recovering from stun. Once in burnout state the process can be sped up by the normal methods of increasing Drive Gauge.
Drive Impact
Costs 1 Drive Stock. Input ![]() +
+![]() (HP+HK) to perform.
(HP+HK) to perform.
Drive impacts have two hits of armor during startup which allows the move to take an opponents attack and then retaliate. This move when performed on a blocking opponent who is close to the wall can cause a guard break allowing for a small combo. If the opponent gets hit by the move close to the wall it will cause them to wall splat. If the opponent gets hit by a Drive impact while in Burnout state or if the drive impact would cause them to enter burnout state, it will stun them after it connects. When this happens it will leave the opponent vulnerable for a big combo.
Drains the opponents Drive Gauge when it connects:
- 0.5 bar on block
- 1 bar on hit
- 1.25 bar on Counter-Hit
- 1.5 bar on Punish Counter
Drive impacts do have a few downsides. Drive impacts can be broken by armor break moves, drive impacts can be performed back by your opponent, and the player still takes damage if armoring through an attack.
Drive Parry
Consumes Drive Stocks while held. Hold ![]() +
+![]() (MP+MK) to perform.
(MP+MK) to perform.
"Automatically repel an opponent’s attack and replenish Drive when performed successfully. Perform a Perfect Parry by parrying just before an opponent’s attack hits you." - Capcom.
- Parries all strikes and projectiles (high and low) from frame 1
- A non-perfect parry does not change the frame advantage compared to blocking a move
- Perfect Parry occurs on the first 2 active frames (cannot achieve Perfect Parry if you buffer into parry by holding it during Reversal windows; Perfect Parries have to be timed properly)
- Can block during the recovery frames of a regular parry (can still get hit during recovery if you don't block correctly)
- Perfect Parrying has only 1F of recovery and disables the opponent from canceling their attack (basically a guaranteed punish opportunity)
- Perfect Parrying projectiles puts you into fixed 11 frames of recovery (if other attacks hit you at the same time as you Perfect Parry the projectile, it results in a regular parry for that other attack)
- Fully invincible for 6F after a successful Perfect Parry during which period you can cancel into anything except for Drive moves (You suffer a 50% damage scaling penalty on your following attacks for utilizing this initial cancel window)
- Can cancel into Drive Rush during active frames 3 and onward (fastest Drive Rush method is to buffer a forward input before doing parry + forward again)
- Rewards 1/2 bar Drive Gauge for successfully parrying Light / Medium attacks
- Rewards 1 bar Drive Gauge for successfully parrying Heavy attacks
Overdrive
Costs 2 Drive Stocks. Press two Punches or Kicks while inputting a special move to perform the Overdrive Art (OD) version.
In previous titles this move was known as EX special moves. Just like before it requires two of the same button type (two kicks or two punches) and will perform an enhanced version of the special. In previous titles it consumed meter to perform these skills but in Street Fighter 6 it requires 2 drive stocks instead.
- Overdive moves will generally deal more damage, have faster startup, lower recovery, and could even have invincibility
- Performing an overdrive move may incur a drive penalty
- If an overdrive moves is performed while the player has less than 2 drive stocks, the player is immediately put in burnout state
Drive Rush
Costs 1 Drive Stock after a Parry or 3 stocks to cancel from a normal attack. Tap ![]()
![]() (66) to perform.
(66) to perform.
"Perform a quick rush forward from a Drive Parry or a cancelable normal attack. Drive Rush from a parry costs 1 Drive Stock, while Drive Rush from a normal attack costs 3 Drive Stocks."
- Capcom.
Drive Rush adds +4 to the frame advantage of a move.
Drive Reversal
Costs 2 Drive Stocks while in blockstun. Press ![]() +
+![]() +
+![]() (6HPHK) to perform. Also known as Alpha Counter or V-Reversal.
"Perform a counterattack while blocking an opponent’s attack. The damage is low but can help you out of tight situations when you’re being pressured."
(6HPHK) to perform. Also known as Alpha Counter or V-Reversal.
"Perform a counterattack while blocking an opponent’s attack. The damage is low but can help you out of tight situations when you’re being pressured."
- Capcom.
Super Art
- Level 1 Supers can be cancelled into from normal moves only.
- Level 2 Supers can be cancelled into from normals and EX specials.
- Level 3 Supers can be cancelled into from normals and specials.
- At low health level 3 supers get upgraded into Critical Art version which does more damage and may have different frame advantage on hit.
