| Early game information
This game is relatively new, and its pages are still being written. Some information may be mildly inaccurate or missing altogether. You can join the SF6 Resource Hub for more info on editing and other ways you can potentially help with this resource. |
Introduction
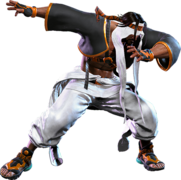
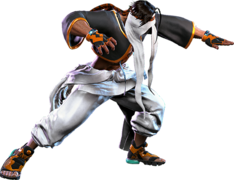
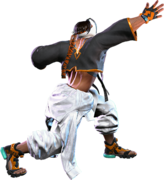
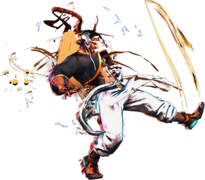
"The Soaring Eagle of the Desert" that fights using parkour. With the wind as his ally, he outfoxes opponents with his high mobility. Born into nobility, he's a carefree but earnest man. Loves video streaming.
Rashid is a character with a unique focus on strong mobility options and unique "air current" projectiles. These air currents modify Rashid's movement when he passes through them while jumping or performing a special, affecting the way he chooses to approach his opponent.
While Rashid has the traditional shotoclone fireball/DP combo to work with, he puts a number of unique touches on them to make them his own. His fireball Whirlwind Shot travels upwards at a diagonal angle instead of fully horizontal, and can be charged up to leave an air current. His DP Spinning Mixer meanwhile travels in many directions rather than the usual single version. The light version goes horizontally, the medium version travels diagonally up, and the heavy version goes straight upwards. As one can see, Rashid places a lot of emphasis on controlling the space directly in front of him and above him.
The reason why is that Rashid has a number of extremely powerful mobility tools once he's established control over these spaces. Rashid is unique among the cast in that he has a run which activates after he takes a forward dash. He can use 6KK to front flip across the screen, or use Arabian Skyhigh to flip through the air and come down in unique angles. Combining all of these options together, accented further with the air currents he creates, can allow Rashid unprecedented forward movement.
Once he's zoned in on you, Rashid becomes frightening to deal with as a defender. Rashid not only has a throw loop, but his light Spinning Mixer does good Drive Bar damage and is safe on block. Rashid has many ways to threaten quick mixups with 6HP or be plus on block with 2MP. Once he's gotten you launched into a combo, Rashid can layer on Arabian Cyclone during your wakeup to keep you blocking. Even worse, Arabian Cyclone can also be used to set up high/low/throw mixups. If he's got meter to spend, Rashid can also drop the powerful Ysaar onto you to force a checkmate scenario. All in all, Rashid's close-range offense is one of the strongest in the game and something he excels at.
And excel at that offense he must, as Rashid's pokes are very stubby and his footsies in general is lacking. Rashid's kit is very complex and freeform, which both acts as a boon (in that it gives him lots of tools) and a curse (in that picking the best option can be difficult). As well, while Spinning Mixer is a decent anti-air option, it is only air-invulnerable on frame 6 as opposed to the standard frame 1, which combined with his mediocre anti-air buttons makes it hard for him to reactively stuff aerial approaches. All in all, Rashid is excellent for people who want to get in and flex their offense. If you want peerless mobility, excellent close-range pressure and a wealth of style alongside it, ride the waves with Rashid.
| Pick if you like: | Avoid if you dislike: |
|---|---|
|
|
Classic & Modern Versions Comparison
| Missing Normals |
|
|---|---|
| Missing Command Normals |
|
| Shortcut-Only Specials |
|
| Assist Combos |
|
| Miscellaneous Changes |
|
| Rashid | |
|---|---|
| Vitals | |
| Life Points | 10000 |
| Ground Movement | |
| Forward Walk Speed | 0.045 |
| Backward Walk Speed | 0.032 |
| Forward Dash Speed | 18 |
| Backward Dash Speed | 25 |
| Forward Dash Distance | 1.20 (1.86) |
| Backward Dash Distance | 1.10 (1.91) |
| Drive Rush Min. Distance (Throw) | 0.796 |
| Drive Rush Min. Distance (Block) | 2.253 |
| Drive Rush Max Distance | 2.998 |
| Jumping | |
| Jump Speed | 4+38+3 |
| Jump Apex | 2.115 |
| Forward Jump Distance | 1.90 (5.07) |
| Backward Jump Distance | 1.52 (3.63) |
| Throws | |
| Throw Range | 0.8 |
| Throw Hurtbox | 0.33 |
| Frame Data Glossary - SF6 | |
|---|---|
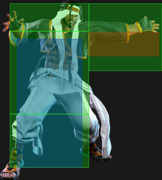
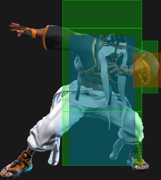
| Hitbox Images |
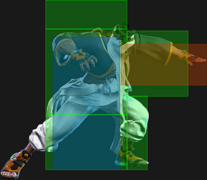
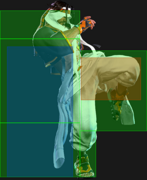
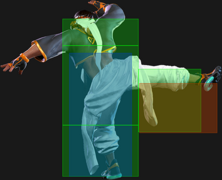
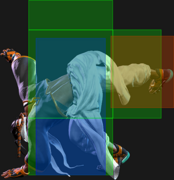
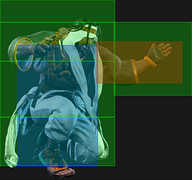
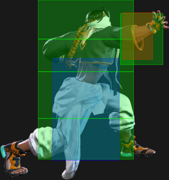
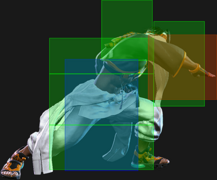
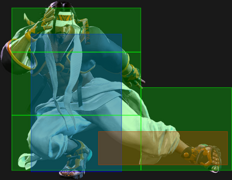
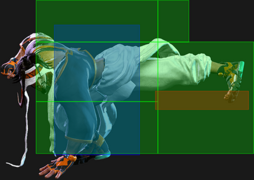
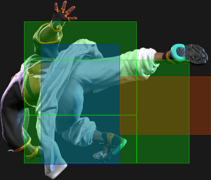
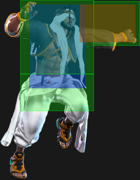
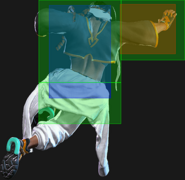
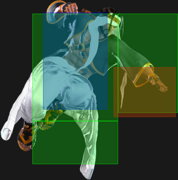
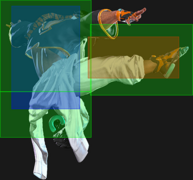
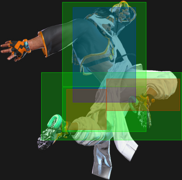
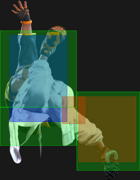
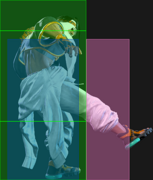
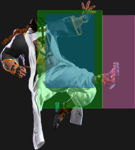
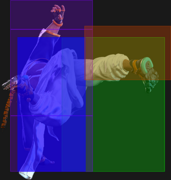
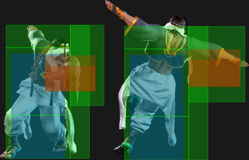
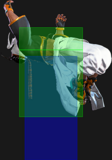
🟥 (Red): Attack hitbox
🟩 (Green): Vulnerable hurtbox that can be hit by strikes/projectiles
🟦 (Blue): Vulnerable throw hurtbox
|
| Active |
How many frames a move remains active (can hurt opponents) for. For projectiles with a maximum active period, a value may be listed in [brackets], but this number is not factored into the move's total frame count.
|
| Cancel |
Available options for canceling one move into another move.
|
| Cancel Hitconfirm Windows |
Hitconfirm reaction windows into Special Moves, Target Combos, and Super Arts.
|
| Damage |
Attack damage on hit. Multi-hit moves may have the damage listed for individual hits as X,Y (or sometimes X*Y). Sometimes a move's damage changes depending on which active frame connects, or on cinematic vs. non-cinematic hits; in this case, multiple values may be listed, and it will be clarified in the move description.
|
| Damage Scaling |
Some moves cause additional damage scaling in combos. Refer to Game Data page for a more detailed breakdown. Scaling Types:
|
| Drive Rush Cancel Advantage |
Refers to the frame advantage when canceling a normal, command normal, or Target Combo into Drive Rush on hit or block (abbreviated as DRC for Drive Rush Cancel). This is calculated at the moment a follow-up attack can be input, not at the moment the character can block or perform movement options. An attack that with DRC +8 on Hit can link into an 8-frame attack, and DRC +4 on Block can create a true blockstring into a 4-frame attack. Note that any DRC on Block worse than +4 cannot form a true blockstring, allowing the opponent to interrupt with an invincible reversal. Most light normals are slightly negative after a DRC on block, meaning the opponent can mash their fastest normal to guarantee a counter-hit (though this requires fast reactions). The attacking character could punish this with Light > DRC into an immediate invincible attack, but this would be an incredibly expensive and high-risk gambit.
|
| Forced Knockdown |
Most airborne command normals, special moves, and Super Arts put the user in a "Forced Knockdown" state. While in this state, an air knockdown will occur when being hit by any attack, even if it would otherwise cause an air reset. As an example, Ryu's 2HP causes an air reset when used as an anti-air. Against a move like Cammy's Hooligan Combination, however, the 2HP puts her into an air knockdown state. This allows Ryu to successfully cancel 2HP into Shoryuken for a juggle, similar to how a Drive Impact wall splat works. Taking advantage of Forced Knockdown juggles is important for dealing with moves like Ken's Dragonlash, Dhalsim's Air Teleport, or Kimberly's 6HK~Hop sequence. Moves that already cause an air knockdown, like most j.MP air-to-airs, will not display the "Forced Knockdown" message.
|
| Guard |
Refers to the direction an attack must be blocked. L is for Low attacks (must be blocked crouching), H is for High attacks/overheads (must be blocked standing), LH is for attacks that can be blocked crouching or standing. T is for Throw attacks which cannot be blocked.
|
| Juggles |
When a character is put into an Air Knockdown state, it is often possible to follow up with a Juggle attack before they hit the ground. In the simplest terms, there are 2 main juggle states:
The following is a more detailed overview of the SF6 juggle system:
Juggle Start (JS): When starting a juggle, the opponent's JC will be set to this value. May be different vs. standing and airborne opponents.
Juggle Increase (JI): When opponent is already in a juggle state, attacks will increase the opponent's JC by this amount.
Juggle Limit (JL): Property of an attack hitbox that determines whether it connects on a juggled opponent. The JL must be ≥ the opponent's JC to hit successfully.
An example to tie everything together:
Drive Rush notes:
More recently, the official definitions used by Capcom are slightly different than these community-designated terms. When reading official patch notes, the following terms are used instead:
|
| On Hit/Block |
These are frame advantage values when the attack hits or is blocked. If the number is positive, then the move will recover before the defender can act again. If the number is negative, the defender will be able to act before the attacker and maybe even punish. KD refers to knockdown on hit, and the listed KD Advantage refers to how many frames the attacker can act before the defender finishes their wakeup animation.
|
| Recovery |
How many frames it takes for a move to finish after the active frames have finished. For projectiles, recovery is considered to begin after the first active frame.
|
| Startup |
How many frames it takes before the move becomes 'active' or have a hit box. The last startup frame and the first active frame are the same frame, meaning all values are written as Startup + 1.
|
| IASA / Actionable Recovery |
Some moves play out an extended recovery animation when no other button/direction is input (for crouching moves, it applies when holding any down direction). These are often referred to as "actionable recovery" frames; in some games, the term IASA (Interruptible As Soon As) refers to the frame that Actionable Recovery begins. Letting the Actionable Recovery frames play out can change the character's position, potentially setting up spacing traps by recovering farther away. For example, Manon 5HP will recover much farther away from the opponent if no input is performed immediately after her recovery; holding back or down-back to block will keep her much closer to the opponent.
|
Normals
Standing Normals
5LP
| Startup | Active | Recovery | Cancel | Damage | Guard | On Hit | On Block |
|---|---|---|---|---|---|---|---|
| 4 | 2 | 9 | Chn Sp SA | 300 | LH | +4 | -1 |
5MP
| Startup | Active | Recovery | Cancel | Damage | Guard | On Hit | On Block |
|---|---|---|---|---|---|---|---|
| 6 | 3 | 14 | TC Sp SA | 600 | LH | +5 | +1 |
5HP
| Startup | Active | Recovery | Cancel | Damage | Guard | On Hit | On Block |
|---|---|---|---|---|---|---|---|
| 9 | 3 | 21 | Sp SA | 800 | LH | +1 | -4 |
5LK
| Startup | Active | Recovery | Cancel | Damage | Guard | On Hit | On Block |
|---|---|---|---|---|---|---|---|
| 4 | 3 | 10 | Sp SA | 300 | LH | +3 | -1 |
5MK
| Startup | Active | Recovery | Cancel | Damage | Guard | On Hit | On Block |
|---|---|---|---|---|---|---|---|
| 8 | 3 | 17(19) | - | 600 | LH | +6 | -3 |
5HK
| Startup | Active | Recovery | Cancel | Damage | Guard | On Hit | On Block |
|---|---|---|---|---|---|---|---|
| 13 | 8 | 18 | - | 800 | LH | -1 | -5 |
Crouching Normals
2LP
| Startup | Active | Recovery | Cancel | Damage | Guard | On Hit | On Block |
|---|---|---|---|---|---|---|---|
| 5 | 3 | 7 | Chn Sp SA | 300 | LH | +5 | -1 |
2MP
| Startup | Active | Recovery | Cancel | Damage | Guard | On Hit | On Block |
|---|---|---|---|---|---|---|---|
| 6 | 4 | 13 | Sp SA | 600 | LH | +4 | +1 |
2HP
| Startup | Active | Recovery | Cancel | Damage | Guard | On Hit | On Block |
|---|---|---|---|---|---|---|---|
| 12 | 3 | 21(23) | SA | 900 | LH | +5 | -6 |
2LK
| Startup | Active | Recovery | Cancel | Damage | Guard | On Hit | On Block |
|---|---|---|---|---|---|---|---|
| 5 | 3 | 8 | Chn | 200 | L | +3 | -1 |
2MK
| Startup | Active | Recovery | Cancel | Damage | Guard | On Hit | On Block |
|---|---|---|---|---|---|---|---|
| 7 | 3 | 18 | Sp SA | 500 | L | -1 | -5 |
2HK
| Startup | Active | Recovery | Cancel | Damage | Guard | On Hit | On Block |
|---|---|---|---|---|---|---|---|
| 9 | 3 | 24(28) | - | 900 | L | KD +31 | -11 |
Jumping Normals
j.LP
| Startup | Active | Recovery | Cancel | Damage | Guard | On Hit | On Block |
|---|---|---|---|---|---|---|---|
| 4 | 5 | 3 land | - | 300 | H | +8(+9) | +4(+5) |
j.MP
| Startup | Active | Recovery | Cancel | Damage | Guard | On Hit | On Block |
|---|---|---|---|---|---|---|---|
| 9 | 5 | 3 land | Sp | 600 | H | +9(+11) | +5(+7) |
j.HP
| Startup | Active | Recovery | Cancel | Damage | Guard | On Hit | On Block |
|---|---|---|---|---|---|---|---|
| 8 | 4(2)3 | 3 land | - | 400x2 | H,H | +11(+15) | +7(+11) |
j.LK
| Startup | Active | Recovery | Cancel | Damage | Guard | On Hit | On Block |
|---|---|---|---|---|---|---|---|
| 5 | 5 | 3 land | - | 300 | H | +7(+9) | +3(+5) |
j.MK
| Startup | Active | Recovery | Cancel | Damage | Guard | On Hit | On Block |
|---|---|---|---|---|---|---|---|
| 7 | 6 | 3 land | - | 500 | H | +7(+13) | +3(+9) |
j.HK
| Startup | Active | Recovery | Cancel | Damage | Guard | On Hit | On Block |
|---|---|---|---|---|---|---|---|
| 10 | 5 | 3 land | - | 800 | H | +8(+15) | +4(+11) |
Command Normals
Target Combos
Throws
Forward Throw (LPLK)
| Startup | Active | Recovery | Cancel | Damage | Guard | On Hit | On Block |
|---|---|---|---|---|---|---|---|
| 5 | 3 | 23 | - | 1200 (2040) | T | KD +27 | - |
- Punish Counter: +? HKD
Back Throw (4LPLK)
| Startup | Active | Recovery | Cancel | Damage | Guard | On Hit | On Block |
|---|---|---|---|---|---|---|---|
| 5 | 3 | 23 | - | 1200 (2040) | T | KD +24 | - |
- Side switches
- Punish Counter: +? HKD
Air Throw (LPLK Air)
| Startup | Active | Recovery | Cancel | Damage | Guard | On Hit | On Block |
|---|---|---|---|---|---|---|---|
| 5 | 3 | 3 land | - | 1200 (2040) | T | KD +27 | - |
- Punish Counter: +? HKD
Drive System
Drive Impact (HPHK)
| Startup | Active | Recovery | Cancel | Damage | Guard | On Hit | On Block |
|---|---|---|---|---|---|---|---|
| 26 | 2 | 35 | - | 800 | LH | KD +35 / Wall Splat KD +65 | -3 / Wall Splat HKD +72 |
See Drive Impact
When cancelled from a normal, these are the important blockstring gaps; a gap of N will trade with an N-frame startup attack; [] = Burnout
- -
- Note: A gap ≥ 6f can be thrown, and a gap ≥ 9f can be jumped out of by most characters
Drive Reversal (6HPHK)
| Startup | Active | Recovery | Cancel | Damage | Guard | On Hit | On Block |
|---|---|---|---|---|---|---|---|
| 20 | 3 | 26(31) | - | 500 recoverable | LH | KD +23 | -6 |
See Drive Reversal
- Full Invuln: 1-22f; Armor Break
Drive Parry (MPMK)
| Startup | Active | Recovery | Cancel | Damage | Guard | On Hit | On Block |
|---|---|---|---|---|---|---|---|
| 1 | 12 or until released | 33(1)(11) | - | - | - | - | - |
See Drive Parry
- Perfect Parry has only 1f recovery, and disables the opponent from canceling their attack
- Perfect Parry vs. projectiles puts you into a fixed 11f recovery
Drive Rush (66)
No results
See Drive Rush. Frame data shown in (parentheses) refers to the version used after Parry.
- Distance:
- ? (min, normal cancel)
- ? (min, block/movement cancel)
- ? (max, no cancel)
- Notable Drive Rush cancel combo routes:
- Notable Drive Rush cancel blockstring gaps:
Special Moves
Placeholder (236P)
| Startup | Active | Recovery | Cancel | Damage | Guard | On Hit | On Block |
|---|---|---|---|---|---|---|---|
| 8 | 3(5)2(4)2 | 19(24) | SA3 (1st) | 300,200x2 (700) | LH | +2 | -3 |
| Startup | Active | Recovery | Cancel | Damage | Guard | On Hit | On Block |
|---|---|---|---|---|---|---|---|
| 8 | 1,2(2)2(5)2(3)2 | 34+14 land | SA3, (Sp/SA land) | 300,100x3,200 (800) | LH | KD +31 | -45(-49) |
| Startup | Active | Recovery | Cancel | Damage | Guard | On Hit | On Block |
|---|---|---|---|---|---|---|---|
| 6 | 2(2)3(3)3(4) 3(4)3(4)3 |
24+14 land | - | 100x5,700 (1200) | LH | KD +33 | -55 |
| Startup | Active | Recovery | Cancel | Damage | Guard | On Hit | On Block |
|---|---|---|---|---|---|---|---|
| 6 | 1,2(2)3(2)4(2) 4(2)4(2)4(2)4(2)3 |
38+24 land (34+20 land oB) |
- | 300x2,100x6,200 (1400) | LH | KD +9 | -53 |
Super Arts
Level 1 Super ()
No results
Level 2 Super ()
No results
Level 3 Super ()
""
Critical Art adds 500 more damage
""
Critical Art adds 500 more damage
No results
No results
Taunts
Neutral Taunt (5PPPKKK)
| Startup | Active | Recovery | Cancel | Damage | Guard | On Hit | On Block |
|---|---|---|---|---|---|---|---|
| 534 (total) | - | - | - | - | - | - | - |
Forward Taunt (6PPPKKK)
| Startup | Active | Recovery | Cancel | Damage | Guard | On Hit | On Block |
|---|---|---|---|---|---|---|---|
| 545 (total) | - | - | - | - | - | - | - |
Back Taunt (4PPPKKK)
| Startup | Active | Recovery | Cancel | Damage | Guard | On Hit | On Block |
|---|---|---|---|---|---|---|---|
| 220 (total) | - | - | - | - | - | - | - |


