| Pre-release information
This page is under construction based on pre-release data. Join the SF6 Resource Hub for info on editing. |
Introduction
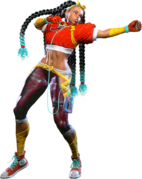
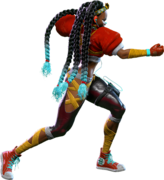
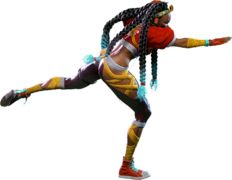
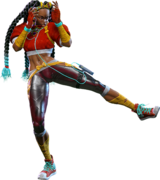
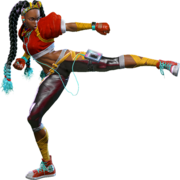
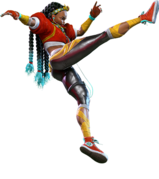
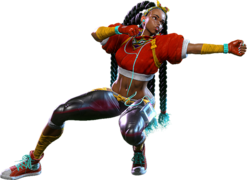
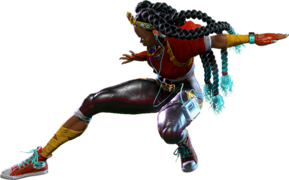
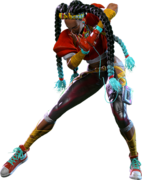
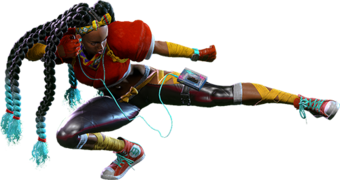
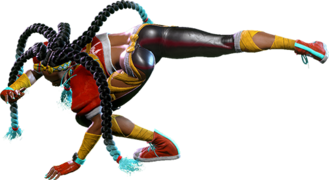
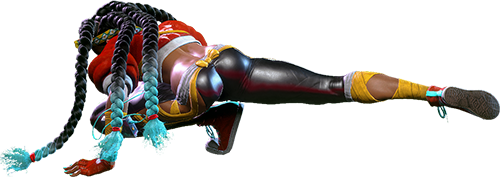
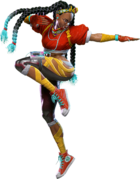
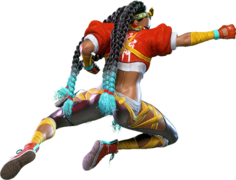
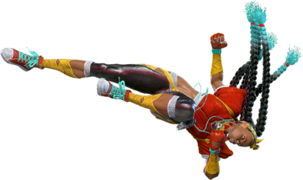
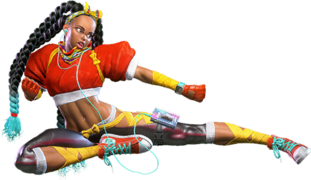
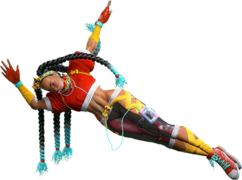
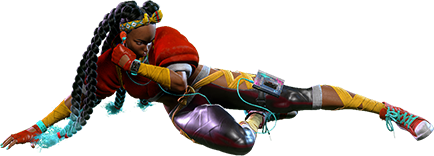
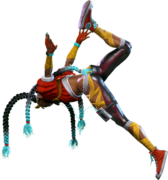
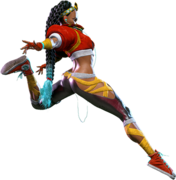
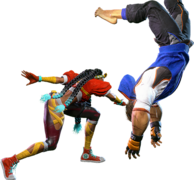
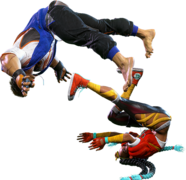
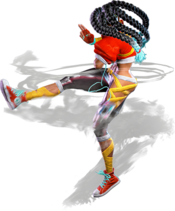
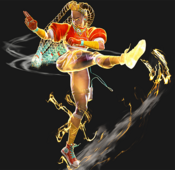
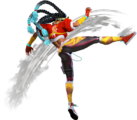
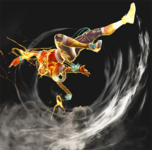
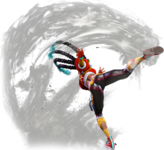
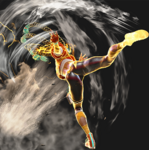
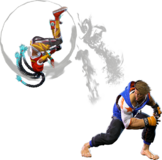
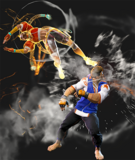
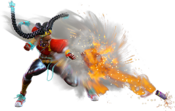
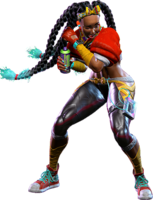
Uninvited student to Guy, the 39th successor to Bushinryu. Kimberly had an ordinary upbringing, but she's a genuine prodigy who graduated college early... and now wants to be a ninja. Loves '80s pop culture.
Kimberly is a fast, tricky character who uses her plethora of unique movement options and setplay to get in and keep the opponent guessing. Good Kimberly players use the many tools at her disposal to approach the opponent unpredictably and lock them down with a variety of unexpected attacks, pushing them to the corner where she can really put the pressure on.
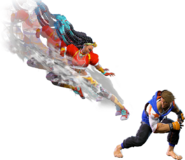
On the movement and neutral fronts, Kimberly not only has a high walk speed, a far-reaching Drive Rush and Drive Impact, and good pokes with 5MK and 5LK, but she also has the classic Bushinryu Sprint special move, which has a variety of different options to approach the opponent on the ground like the Shadow Slicer slide or the Neck Hunter overhead. She can also use Hidden Variable, a teleport that lets her move in from the ground or air depending on whether she uses the Overdrive version or not. Shadow Slicer, Hidden Variable, and 3MK also give Kimberly ways to evade projectiles and get in on opponents who try to keep her out with them, while j.2MP lets her adjust her jump arc to bait anti-airs; on the ground, her 2HP and Bushin Senpukyaku serve as anti-airs, while the aerial version of Bushin Senpukyaku is a combo ender and juggle setup tool.
Where Kimberly especially shines, though, is the corner. Many of her combos give great corner carry, so once the opponent's stuck there, she can use Shuriken Bomb to set up powerful okizeme and keep the pressure going, which works exceptionally well with the likes of Sprint and its follow-ups, Hidden Variable, and plain old strike/throw mix to force the opponent to guess at what she's going to do next. All of the above is especially true once Kimberly lands her Lv. 3 Super Art, Bushin Ninjastar Cypher. Once it hits successfully, Kimberly gains a damage and movement speed buff for the rest of the match, bringing her damage in line with the rest of the cast and making it even harder to deal with her walkspeed and the advantages that it gives her.
However, Kimberly's mobility and tricks are counterbalanced by her defensive options. Because Overdrive Bushin Senpukyaku doesn't have full invulnerability, Kimberly has to rely on system mechanics, Bushin Beats (her Level 1 Super Art), or Bushin Ninjastar Cypher when she needs to defend or force herself out of a bad situation. The buff from Ninjastar Cypher is also significant enough that without it, Kimberly's combos are going to be more useful for corner carry than damage until or unless she lands it, and her light buttons don't normally lend to the types of combos which give great oki at midscreen. If you like high-speed grooves and a bag of ninja tricks, then get on the scene with Kimberly.
| Pick if you like: | Avoid if you dislike: |
|---|---|
|
|
Classic & Modern Versions Comparison
| Missing Normals |
|
|---|---|
| Missing Command Normals |
|
| Shortcut-Only Specials |
|
| Assist Combos |
|
| Miscellaneous Changes |
|
| Kimberly | |
|---|---|
| Vitals | |
| Life Points | 10000 |
| Ground Movement | |
| Forward Walk Speed | 0.0505 (0.0561) |
| Backward Walk Speed | 0.033 (0.0366) |
| Forward Dash Speed | 18 |
| Backward Dash Speed | 23 |
| Forward Dash Distance | 1.409 |
| Backward Dash Distance | 0.893 |
| Drive Rush Min. Distance (Throw) | 0.817 |
| Drive Rush Min. Distance (Block) | 2.479 |
| Drive Rush Max Distance | 3.565 |
| Jumping | |
| Jump Speed | 4+38+3 |
| Jump Apex | 2.115 |
| Forward Jump Distance | 1.90 |
| Backward Jump Distance | 1.52 |
| Throws | |
| Throw Range | 0.8 |
| Throw Hurtbox | 0.33 |
Normals
Standing Normals
5LP
| Startup | Active | Recovery | Cancel | Damage | Guard | On Hit | On Block |
|---|---|---|---|---|---|---|---|
| 5 | 2 | 8 | Chn Sp SA TC | 270 | LH | +5 | -2 |
- Chains into 5LP/2LP/2LK or into Bushin Prism Strikes target combo
- Cancel reaction window: 12f
5MP
| Startup | Active | Recovery | Cancel | Damage | Guard | On Hit | On Block |
|---|---|---|---|---|---|---|---|
| 6 | 3 | 18 | Sp SA TC | 540 | LH | +3 | -2 |
- Chains into 5MP~HP target combo
- Cancel reaction window: 15f
5HP
| Startup | Active | Recovery | Cancel | Damage | Guard | On Hit | On Block |
|---|---|---|---|---|---|---|---|
| 9 | 3 | 20 | Sp SA | 630 | LH | +3 | -4 |
- In punishes, can cancel to Run~Stop or Teleport to maintain close position, then link into another 5HP
- Cancel reaction window: 17f (last frame cannot combo to 236HP)
5LK
| Startup | Active | Recovery | Cancel | Damage | Guard | On Hit | On Block |
|---|---|---|---|---|---|---|---|
| 5 | 3 | 11 | Sp SA | 270 | LH | +1 | -3 |
- Good range for a cancellable light normal
- It's possible to chain 4 lights when ending in 5LK, but only 236LP or Super can reach when cancelled
- Cancel reaction window: 13f
5MK
| Startup | Active | Recovery | Cancel | Damage | Guard | On Hit | On Block |
|---|---|---|---|---|---|---|---|
| 8 | 3 | 18 | Sp SA | 540 | LH | +1 | -4 |
- Most important normal in footsies, particularly cancelled into Drive Rush
- Cancel reaction window: 15f
5HK
| Startup | Active | Recovery | Cancel | Damage | Guard | On Hit | On Block |
|---|---|---|---|---|---|---|---|
| 12 | 4 | 17 | - | 630 | LH | +7 | +2 |
- Whiffs vs. crouching opponents if not point blank
Crouching Normals
2LP
| Startup | Active | Recovery | Cancel | Damage | Guard | On Hit | On Block |
|---|---|---|---|---|---|---|---|
| 4 | 3 | 7 | Chn Sp SA | 270 | LH | +4 | -1 |
- Chains into 5LP/2LP/2LK
- Cancel reaction window: 13f
2MP
| Startup | Active | Recovery | Cancel | Damage | Guard | On Hit | On Block |
|---|---|---|---|---|---|---|---|
| 6 | 3 | 13(15) | Sp SA | 500 | LH | +7 | -1 |
- Cancel reaction window: 15f
2HP
| Startup | Active | Recovery | Cancel | Damage | Guard | On Hit | On Block |
|---|---|---|---|---|---|---|---|
| 8 | 6 | 17 | Sp SA | 720 | LH | +3 | -2 |
- Decent anti-air; cancel into Run~Stop for left/right mixup afterward
- Very short horizontal range
- Forces stand on hit
- In Drive Rush juggles, opponent is launched high enough to juggle OD Air Bushin Throw for a ground bounce
- Cancel reaction window: 20f (cannot combo to 236HP)
2LK
| Startup | Active | Recovery | Cancel | Damage | Guard | On Hit | On Block |
|---|---|---|---|---|---|---|---|
| 5 | 3 | 7 | Chn | 180 | L | +4 | -2 |
- Chains into 5LP/2LP/2LK; slightly more pushback than LP normals
2MK
| Startup | Active | Recovery | Cancel | Damage | Guard | On Hit | On Block |
|---|---|---|---|---|---|---|---|
| 7 | 3 | 16 | - | 540 | L | +5 | +1 |
- Not cancellable, but allows followup combos and block pressure
- Great option from Drive Rush, links into 5HP
2HK
| Startup | Active | Recovery | Cancel | Damage | Guard | On Hit | On Block |
|---|---|---|---|---|---|---|---|
| 8 | 3 | 24 | - | 810 | L | KD +38 | -10 |
- Has some juggle potential
Jumping Normals
j.LP
| Startup | Active | Recovery | Cancel | Damage | Guard | On Hit | On Block |
|---|---|---|---|---|---|---|---|
| 4 | 10 | 3 land | - | 270 | H | +7(+9) | +3(+5) |
j.MP
| Startup | Active | Recovery | Cancel | Damage | Guard | On Hit | On Block |
|---|---|---|---|---|---|---|---|
| 6 | 4 | 3 land | Sp SA2 | 450 | H | +11(+13) | +7(+9) |
- Puts airborne opponents into limited juggle state
j.HP
| Startup | Active | Recovery | Cancel | Damage | Guard | On Hit | On Block |
|---|---|---|---|---|---|---|---|
| 8 | 5 | 3 land | - | 630 | H | +9(+16) | +4(+11) |
- Causes spiked knockdown vs. airborne opponents
j.LK
| Startup | Active | Recovery | Cancel | Damage | Guard | On Hit | On Block |
|---|---|---|---|---|---|---|---|
| 5 | 10 | 3 land | - | 270 | H | +5(+10) | +1(+6) |
- Crossup
j.MK
| Startup | Active | Recovery | Cancel | Damage | Guard | On Hit | On Block |
|---|---|---|---|---|---|---|---|
| 7 | 6 | 3 land | - | 540 | H | +8(+13) | +4(+9) |
- Crossup
j.HK
Command Normals
j.2MP
| Startup | Active | Recovery | Cancel | Damage | Guard | On Hit | On Block |
|---|---|---|---|---|---|---|---|
| 13 | until land | 8 land | - | 540 | LH | +4(+8) | -3(+1) |
- Can only be performed from Forward Jump
- Stops Kimberly's forward air momentum; useful for baiting anti-airs from longer range
- Forced Knockdown state
3MK
| Startup | Active | Recovery | Cancel | Damage | Guard | On Hit | On Block |
|---|---|---|---|---|---|---|---|
| 11 | 10 | 16 | - | 450 | L | +1(+6) | -5(0) |
- Head Projectile Invuln/Low Profile: 9-21f
- The extra Punish Counter frame advantage makes it much easier to combo afterward when used against fireballs
- Great approach option against opponents in Burnout
- Applies a damage scaling penalty when used as a combo starter (100/85/75/65...)
4HK
| Startup | Active | Recovery | Cancel | Damage | Guard | On Hit | On Block |
|---|---|---|---|---|---|---|---|
| 22 | 2 | 19 | - | 720 | H | +4 | -3 |
- Forces crouch on hit; makes opponents wider for easier followup links
6HK
| Startup | Active | Recovery | Cancel | Damage | Guard | On Hit | On Block |
|---|---|---|---|---|---|---|---|
| 27 | 3 | 3+18(10) land | Jmp | 720 | LH | +1(+2) | -3 |
- Can cancel into forward, neutral, or back hop on hit or block
- Can perform j.214K after forward hop, but not j.236P
- Good for continuing a combo after OD Nue Twister ground bounce or OD Arc Step~K wall splat
- Does not hop over projectiles
- Forced Knockdown state
- Cancel reaction window: 20f (into Step Up)
6HK~8/9/7
| Startup | Active | Recovery | Cancel | Damage | Guard | On Hit | On Block |
|---|---|---|---|---|---|---|---|
| 20 | - | 30+3 | - | - | - | -10(-9) | -22 |
- Hops high enough to make anti-air 5LPs whiff
- Slow enough that the opponent can recovery and block/punish anyway
| Startup | Active | Recovery | Cancel | Damage | Guard | On Hit | On Block |
|---|---|---|---|---|---|---|---|
| 20 | - | 30+3 | - | - | - | -10(-9) | -22 |
- Leads to a crossup, but has a large hurtbox allowing it to be counterhit with 5LP
- Can perform Air Bushin Senpukyaku shortly after forward hop
| Startup | Active | Recovery | Cancel | Damage | Guard | On Hit | On Block |
|---|---|---|---|---|---|---|---|
| 16 | - | 30+3 | - | - | - | -10(-9) | -22 |
- Safest of the three hop followups
- Some characters may be able to chase it down if predicted
Target Combos
5LP~MP~HP~HK
No results
- Very difficult for most characters to punish if well spaced (e.g. 5LP, 5LP, 5LP~MP)
- Gives Kimberly a good (but low damage) way to confirm after multiple light normals
- Cancel reaction window: 29f (TC followup)
No results
- Puts opponent into limited juggle state
- Can juggle with 214LK or 214MK in the corner
- Gives enough KD Advantage to set up a Spray Can or Reload
- Cancel reaction window: 51f (TC followup)
No results
- 9f gap between HP and HK on block
5LP~MP~2HP~HK/2HK
No results
- Useful against Drive Impacts, as this hit will connect as a +5 Counterhit at point blank range
- Cancel reaction window: 52f (TC followup)
No results
- Sends opponent across the screen (good for corner carry)
No results
- Throws the opponent backwards for a sideswitch (very useful if Kimberly is cornered)
- Does not connect in juggles
5MP~HP
No results
- Puts opponent into limited juggle state; does not combo into 236HP, but will combo into the EX version, or either of the other two.
- Cancel reaction window: 40f
Universal Mechanics
Throws
Forward Throw (LPLK)
| Startup | Active | Recovery | Cancel | Damage | Guard | On Hit | On Block |
|---|---|---|---|---|---|---|---|
| 5 | 3 | 23 | - | 1082 (1838) | T | KD +17 | - |
- Allows for strong corner throw loops (+3 after Forward Dash)
Back Throw (4LPLK)
| Startup | Active | Recovery | Cancel | Damage | Guard | On Hit | On Block |
|---|---|---|---|---|---|---|---|
| 5 | 3 | 23 | - | 1082 (1839) | T | KD +8 | - |
- Side switches
Drive Moves
Drive Impact (HPHK)
| Startup | Active | Recovery | Cancel | Damage | Guard | On Hit | On Block |
|---|---|---|---|---|---|---|---|
| 26 | 2 | 35 | - | 720 | LH | KD +35 / Wall Splat KD +65 | -3 / Wall Splat HKD +72 |
See Drive Impact
Drive Reversal (6HPHK)
| Startup | Active | Recovery | Cancel | Damage | Guard | On Hit | On Block |
|---|---|---|---|---|---|---|---|
| 20 | 3 | 26(31) | - | 500 recoverable | LH | KD +23 | -6 |
See Drive Reversal
- Full Invuln: 1-22f; Armor Break
- One of the few moves that does standard damage even before Lv.3 Super install
Drive Parry (MPMK)
| Startup | Active | Recovery | Cancel | Damage | Guard | On Hit | On Block |
|---|---|---|---|---|---|---|---|
| 1 | 12 or until released | 33(1)(11) | - | - | - | - | - |
See Drive Parry
- Perfect Parry has only 1f recovery, and disables the opponent from canceling their attack
- Perfect Parry vs. projectiles puts you into a fixed 11f recovery
Drive Rush (66)
Taunts
Neutral Taunt (5PPPKKK)
| Startup | Active | Recovery | Cancel | Damage | Guard | On Hit | On Block |
|---|---|---|---|---|---|---|---|
| 200 (total) | - | - | - | - | - | - | - |
Forward Taunt (6PPPKKK)
| Startup | Active | Recovery | Cancel | Damage | Guard | On Hit | On Block |
|---|---|---|---|---|---|---|---|
| 290 (total) | - | - | - | - | - | - | - |
Back Taunt (4PPPKKK)
Special Moves
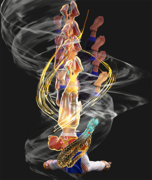
Bushin Senpukyaku (214K)
| Startup | Active | Recovery | Cancel | Damage | Guard | On Hit | On Block |
|---|---|---|---|---|---|---|---|
| 6 | 6(1)6(1)6(8)3 | 6+17 land | - | 360,270,360 (990) | LH | KD +23 | -30 |
- Anti-Air Invuln: 1-?f; good AA for close jumps
| Startup | Active | Recovery | Cancel | Damage | Guard | On Hit | On Block |
|---|---|---|---|---|---|---|---|
| 7 | 6(1)6(1)6(8)3 | 8+17 land | - | 360x3 (1080) | LH | KD +22 | -32 |
- Anti-Air Invuln: 1-?f; good AA for mid/farther jumps
- MK version is particularly consistent as a juggle ender
| Startup | Active | Recovery | Cancel | Damage | Guard | On Hit | On Block |
|---|---|---|---|---|---|---|---|
| 8 | 6(1)6(1)6(8)3 | 11+17 land | - | 450,360x2 (1170) | LH | KD +21 | -35 |
- Anti-Air Invuln: 1-?f
| Startup | Active | Recovery | Cancel | Damage | Guard | On Hit | On Block |
|---|---|---|---|---|---|---|---|
| 6 | 6(1)6(1)6(1)6(1)2 | 12+17 land | SA2 (4th) | 450,200x3,360 (1410) | LH | KD +21 | -40 |
- Full Invuln: 1-8f; primary reversal option
Aerial Bushin Senpukyaku (j.214K)
| Startup | Active | Recovery | Cancel | Damage | Guard | On Hit | On Block |
|---|---|---|---|---|---|---|---|
| 8 | 2(7)2(7)2 | 12 land | - | 225x2,450 (900) | LH | +4(+8) (KD +38~42) |
-1(+4) |
| Startup | Active | Recovery | Cancel | Damage | Guard | On Hit | On Block |
|---|---|---|---|---|---|---|---|
| 8 | 2(2)3(2)2(2)3(2)2 | 12 land | SA2 | 450,90x2,270,450 (1350) | LH | +5(+8) (KD +46~51) |
-1(+4) |
- Can be used from Forward Jump or after 6HK ~ Forward Hop only
- All versions whiff on crouching opponents; if done late in jump arc, can connect 3 times vs. standing
- 3-hit version does not benefit from Counterhit or Punish Counter bonus advantage
- OD version can crossup if used at minimum height from close range
- OD version can combo into Kimberly's Lv. 2 Super, making it strong in juggles
Vagabond Edge (236P)
| Startup | Active | Recovery | Cancel | Damage | Guard | On Hit | On Block |
|---|---|---|---|---|---|---|---|
| 10 | 3 | 21 | SA3 | 810 | LH | +3(+5) (KD +30~36) |
-4(-2) |
- LP version is the strongest when cancelling into Lv. 3 Super; has juggle potential
- Safe vs. opponents in Burnout, making it a low-risk cancel option
- Cancel reaction window: 18f (Super)
| Startup | Active | Recovery | Cancel | Damage | Guard | On Hit | On Block |
|---|---|---|---|---|---|---|---|
| 17 | 2 | 28 | SA3 (1st) | 540x2 (1080) | LH | KD +37 (KD +26) |
-12 |
- 2nd hit only comes out on hit; has juggle potential
- Cancel reaction window: 14f (Super)
| Startup | Active | Recovery | Cancel | Damage | Guard | On Hit | On Block |
|---|---|---|---|---|---|---|---|
| 24 | 2 | 28 | SA3 (1st) / Jmp | 360,180 (540) | LH | KD +56 | -12 |
- 2nd hit only comes out on hit; 2nd hit jump cancellable into Forward Jump
- Has no juggle potential, so won't combo from 5MP~HP Target Combo
- Cancel reaction window: 14f (Super)
| Startup | Active | Recovery | Cancel | Damage | Guard | On Hit | On Block |
|---|---|---|---|---|---|---|---|
| 17 | 2 | 28 | SA2 SA3 (1st) / Jmp | 360,180 (540) | LH | KD +56 | -12 |
- 2nd hit only comes out on hit; 2nd hit jump cancellable into Forward Jump
- Has juggle potential, combos from 5MP~HP Target Combo
- Cancel reaction window: 14f (Super)
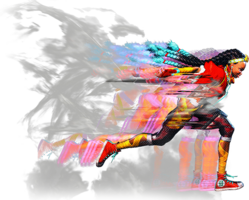
Sprint (236K)
| Startup | Active | Recovery | Cancel | Damage | Guard | On Hit | On Block |
|---|---|---|---|---|---|---|---|
| 8~ | - | - | - | - | - | - | - |
- Cancels into followups after 8f minimum; can hold button for fastest followup time
- e.g. 236[MK] results in fastest possible Run~Slide
| Startup | Active | Recovery | Cancel | Damage | Guard | On Hit | On Block |
|---|---|---|---|---|---|---|---|
| 8(6)~ | - | - | - | - | - | - | - |
- Cancels into followups after 8f minimum (6f minimum for OD Stop)
Emergency Stop (236K~LP)
No results
- Latest possible stop is 55f (41+14) if Kimberly runs fullscreen without colliding with opponent
No results
- Latest possible stop is 53f (41+12) if Kimberly runs fullscreen without colliding with opponent
Torso Cleaver (236K~LK)
| Startup | Active | Recovery | Cancel | Damage | Guard | On Hit | On Block |
|---|---|---|---|---|---|---|---|
| 8+21 | 7 | 16 | SA3 | 900 | LH | KD +41 (KD +53~66) |
+1 |
| Startup | Active | Recovery | Cancel | Damage | Guard | On Hit | On Block |
|---|---|---|---|---|---|---|---|
| 8+17 | 7 | 16 | SA2 SA3 | 540x2 | LH | KD +43 (KD +56~66) |
+3 |
- First 2 active frames can only hit grounded, remaining active frames can only hit airborne
- Puts opponent into limited juggle state (much higher juggle vs. airborne)
- Cancel reaction window: 27f (Super)
Shadow Slide (236K~MK)
| Startup | Active | Recovery | Cancel | Damage | Guard | On Hit | On Block |
|---|---|---|---|---|---|---|---|
| 8+10 | 12 | 19 | SA3 | 720 | L | KD +39~50 (KD +42~53) |
-12(-1) |
- Can low profile under projectiles if used preemptively
- Puts opponent into limited juggle state (if juggled into, can followup with MK Senpukyaku near the corner)
- Cancel reaction window: 16f (Super)
| Startup | Active | Recovery | Cancel | Damage | Guard | On Hit | On Block |
|---|---|---|---|---|---|---|---|
| 8+8 | 8,4 | 19 | SA2 SA3 (1st) | 700,200 (900) | L,L | KD +47~50 (KD +49~52) |
-10(-7) |
- 2 hits, only 1st is Super cancellable
- 6-21f low profile and upper body projectile invuln (does not apply to the OD Run itself)
- Cancel into Lv.2 Super whiffs on grounded opponents
- Higher juggle potential (e.g. HP Vagabond, OD Run~Slide, MK Senpukyaku)
- In the corner, juggle into OD Slide (2 hits) allows Lv.3 Super to juggle after both hits
Neck Hunter (236K~HK)
| Startup | Active | Recovery | Cancel | Damage | Guard | On Hit | On Block |
|---|---|---|---|---|---|---|---|
| 8+19 | 5 | 19 | SA3 | 900 | H | KD +23 | -3 |
- Lv.3 Super cancel can only combo in high-connect juggles, or if overhead is armor absorbed
| Startup | Active | Recovery | Cancel | Damage | Guard | On Hit | On Block |
|---|---|---|---|---|---|---|---|
| 8+15 | 2,3 | 19 | SA2 SA3 (2nd) | 810,270 (1080) | H | KD +25(+44) | -1 |
- Only 2nd hit can cancel into Lv.2/3 Super
- Super cancels whiff unless juggled into (opponent is put into a quick ground bounce state in juggles)
Arc Step (236K proximity)
| Startup | Active | Recovery | Cancel | Damage | Guard | On Hit | On Block |
|---|---|---|---|---|---|---|---|
| 15+6 | 2(6)2 (Whiff: 1) |
26+4 land (Whiff: 25) |
- | 270,180 (450) | LH | +3 | -6 |
| Startup | Active | Recovery | Cancel | Damage | Guard | On Hit | On Block |
|---|---|---|---|---|---|---|---|
| 13+6 | 2(6)2 (Whiff: 1) |
26+4 land (Whiff: 25) |
- | 180,90 (270) | LH | +3 | -6 |
- Can only hit grounded opponents (whiffs attack if opponent is airborne)
Bushin Hojin Kick (236K proximity~K)
| Startup | Active | Recovery | Cancel | Damage | Guard | On Hit | On Block |
|---|---|---|---|---|---|---|---|
| 8+15+13 | 6 | 20 land | - | 630 | LH | KD +29(+31) | -8 |
- KD Adv. is slightly worse when juggled into
| Startup | Active | Recovery | Cancel | Damage | Guard | On Hit | On Block |
|---|---|---|---|---|---|---|---|
| 8+13+13 | 6 | 20 land | SA2 | 420,210 (630) | LH | KD +43 (Wall Splat +86) | -8 |
- OD version wall splats near the corner for a juggle followup
- OD version cancel into Lv.2 Super only works in the corner
Bushin Izuna Otoshi (236K proximity~P)
| Startup | Active | Recovery | Cancel | Damage | Guard | On Hit | On Block |
|---|---|---|---|---|---|---|---|
| 8+15+13 | 6 | 40 land | - | 1440 | T | HKD +31 | - |
| Startup | Active | Recovery | Cancel | Damage | Guard | On Hit | On Block |
|---|---|---|---|---|---|---|---|
| 8+13+13 | 6 | 40 land | - | 900 | T | HKD +94 (OTG) | - |
- Grabs standing/crouching opponents, whiffs vs. airborne
- If the 236K starter is blocked midscreen, opponent can walk back to avoid both followups
- In the corner or after a grounded 236K hit, the mixup is more potent
- OD version ground bounces the opponent for an OTG
Hidden Variable (214P)
| Startup | Active | Recovery | Cancel | Damage | Guard | On Hit | On Block |
|---|---|---|---|---|---|---|---|
| 19 | 8 | 17(7) | - | - | - | - | - |
- Full Invuln: 19-26f (when off-screen)
- After reappearing, recovery is cancellable into any attack after 5f (otherwise 17f recovery)
- Carries forward momentum well, allowing Kimberly to stay close to the opponent after the followup hit
| Startup | Active | Recovery | Cancel | Damage | Guard | On Hit | On Block |
|---|---|---|---|---|---|---|---|
| 19 | 8 | 16(7)+3 land | - | - | - | - | - |
- Full Invuln: 19-26f (when off-screen)
- After reappearing, recovery is cancellable into any attack after 5f (otherwise 17f recovery)
- Recovers in the air; air attacks have the same landing properties as regular air normals
- Can also cancel into air specials or Lv.2 Super before landing
- Very useful as a prediction against fireballs
Shuriken Bomb (22P)
| Startup | Active | Recovery | Cancel | Damage | Guard | On Hit | On Block |
|---|---|---|---|---|---|---|---|
| 18(103) | [10] | 26 | - | 450 | LH | KD +88 | - |
| Startup | Active | Recovery | Cancel | Damage | Guard | On Hit | On Block |
|---|---|---|---|---|---|---|---|
| 19(103) | [10 each] | 26 | - | 450x2 (900) | LH | KD~ | - |
- Button strength determines the placement of the spray cans (LP close, MP mid, HP far)
- For 2-stock version, throws both spray cans according to which buttons were pressed
- Only 2 cans can be active on-screen at once
- Spray can explodes after 103f (including 19f startup); can hit OTG in some circumstances (like after Throw)
- Explosion puts opponent into a limited juggle state
- MP and HP version bounce slightly out of the corner, which can be useful for certain setups
Genius at Play (22P refill)
| Startup | Active | Recovery | Cancel | Damage | Guard | On Hit | On Block |
|---|---|---|---|---|---|---|---|
| 42 | - | 2 | - | - | - | - | - |
- Refills 1 spray can if there is not another can stocked or active on-screen
| Startup | Active | Recovery | Cancel | Damage | Guard | On Hit | On Block |
|---|---|---|---|---|---|---|---|
| 42 | - | 2 | - | - | - | - | - |
- Refills 2 spray cans if there is not another can stocked or active on-screen
Nue Twister (j.236P)
| Startup | Active | Recovery | Cancel | Damage | Guard | On Hit | On Block |
|---|---|---|---|---|---|---|---|
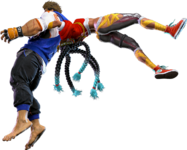
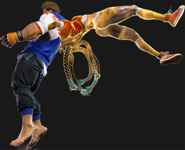
| 5 | 3 | 20 land | - | 1440 | T | HKD +22 | - |
- Can be performed from any jump direction, but not after 6HK~Hop; no minimum height requirement
- Strike Throw, can be comboed into
| Startup | Active | Recovery | Cancel | Damage | Guard | On Hit | On Block |
|---|---|---|---|---|---|---|---|
| 5 | 3 | 20 land | - | 900 | T | HKD +98 OTG | - |
- Less juggle potential than meterless version; generally requires Drive Rush 2HP to start a juggle
- Ground bounces for OTG; can followup with 6HK
Super Arts
Level 1 Super (236236K)
| Startup | Active | Recovery | Cancel | Damage | Guard | On Hit | On Block |
|---|---|---|---|---|---|---|---|
| 10 | 15 | 40 | - | 1800 | LH | KD +22 | -25 |
| Startup | Active | Recovery | Cancel | Damage | Guard | On Hit | On Block |
|---|---|---|---|---|---|---|---|
| 10 | 15 | 40 | - | 2200 | LH | KD +38 | -25 |
- Strike/Throw Invuln: 1-10f; Armor Break
- Depletes 1/2 stock of opponent's Drive Gauge on hit
- 200 extra damage and +16 KD Advantage on hit with a spray can stocked
Level 2 Super (214214P)
| Startup | Active | Recovery | Cancel | Damage | Guard | On Hit | On Block |
|---|---|---|---|---|---|---|---|
| 13 | until land | 39 land | - | 2800 | LH | KD +22 | -26(-20) |
| Startup | Active | Recovery | Cancel | Damage | Guard | On Hit | On Block |
|---|---|---|---|---|---|---|---|
| 13(2) | until land | 39 land | - | 2800 | LH | KD +22 | -26(-20) |
- Full Invuln: 1f (until freeze); Armor Break
- Depletes 1 stock of opponent's Drive Gauge on hit
- Ground version can be used as an anti-fireball or whiff punish tool, but the range is somewhat limited
- Air version is a combo ender, primarily after Aerial Bushin Senpukyaku; can only be used from Forward Jump
Level 3 Super (236236P)
| Startup | Active | Recovery | Cancel | Damage | Guard | On Hit | On Block |
|---|---|---|---|---|---|---|---|
| 8 | 6 | 51 | - | 4000 | LH | HKD +16 | -35 |
| Startup | Active | Recovery | Cancel | Damage | Guard | On Hit | On Block |
|---|---|---|---|---|---|---|---|
| 8 | 6 | 51 | - | 4500 | LH | HKD +16 | -35 |
- Full Invuln: 1-11f; Armor Break
- Depletes 2 stocks of opponent's Drive Gauge on hit
- Immediately upon activation, Kimberly enters an install state that lasts for the remainder of the match, even carrying over between rounds
- This install grants her an 11% damage buff to all attacks and an 11% increase to her walk speed
- Technically, Kimberly's base damage is 11% lower than other characters (even on universal mechanics) so this just brings her in line with the rest of the cast, but the walk speed buff makes her incredibly fast

