| Pre-release information
This page is under construction based on pre-release data. Join the SF6 Resource Hub for info on editing. |
Introduction
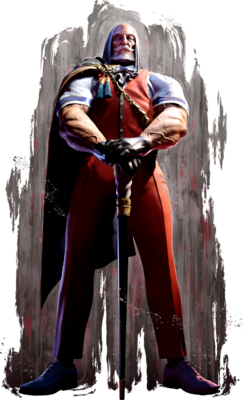
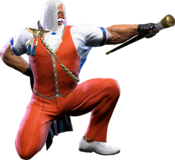
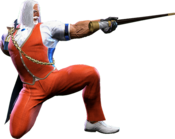
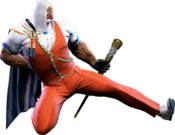
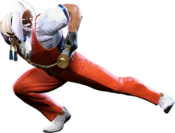
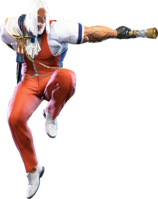
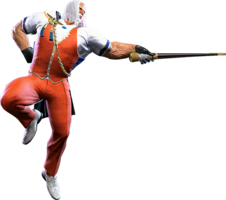
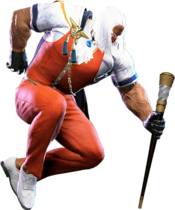
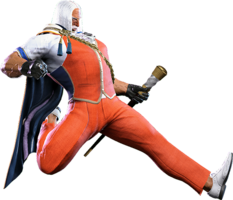
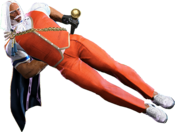
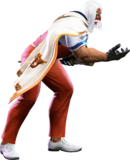
Head of an international NGO responsible for many successful investment projects, and the man behind Nayshall's present prosperity. Has a beloved cat named Cybele.
The elegant ex-Shadaloo financier saunters onto the battlefield as a slow but powerful zoner. Unlike other zoners who focus on firing off quick projectiles or pestering opponents with fast and long-ranged normals, JP chooses instead to bury his opposition in a barrage of psychic power. JP wants his opponents sitting still, for it is when they feel there is no hope of escape that he can set them up for a devious mixup situation.
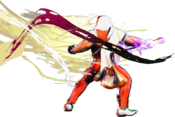
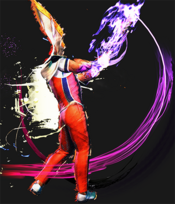
JP's central special moves are Torbalan and Triglav. The former is a slow but large projectile that can be fired along three different lanes of movement, and the latter is a nearly instant spike attack that can come out at nearly any part of the screen. While Torbalan is slow, it has a ton of uses and can even mix up your opponents as one variant is a low and another is an overhead. Triglav meanwhile acts as both a detterent and anti-air, catching people trying to move towards JP and sniping out poor air approaches. With these two special moves, JP forces his opponents back towards the corner and continues to bury them in full-screen pressure. Once an opponent has eaten a combo or chooses to sit still for long enough, JP can deploy his signature Departure, a portal that will either shoot out a tracking spike or act as a teleport point for JP to warp to at any time.
While JP's zoning is strong, any good opponent will eventually get past it. Once they are within striking distance, JP likes to use his midrange pokes to bat opponents backwards. 5HP is a great callout tool that can be special canceled, while his 2HP is a solid anti-air and his 2MK is a fantastic poke. Any good hit JP gets can be instantly canceled into a Drive Rush combo that sends your opponent to the opposite end of the screen and allows him to resume his zoning. Opponents who make overly-deliberate plays can be hit with JP's counter Amnesia, which deals no damage but leaves opponents stuck to a timed bomb.
JP has an extremely large mixup toolbox. His throw game is very strong and has high reward, but he can also perform powerful high/low mixups if he has Depature set up above you. His level 2 super is an incredible mixup tool that can be used to create airtight mixups, resets, and even full-on unblockables to melt your health bar. JP has mixups everywhere- he has mixups in his Target Combos, he has mixups in his pressure sequences, and he even has mixups in his zoning! JP has access to Embrace, a fullscreen projectile command grab that gives JP excellent pressure opportunity on hit, looks just like Torbalan, and does high damage.
It's important to stress that all this offensive power comes at a steep cost, that being JP's movement. Unlike other zoners who don't necessarily sacrifice movement for their zoning prowess, JP has terrible movement stats and must rely on Drive Rush for any considerable mobility. In addition, JP's zoning specials are very slow and open him up to punish opportunities on an incorrect play that other zoners might be safe from. JP also has a notable deadzone within the midrange, where his pokes are either fast, but too stubby, or long, but too slow. His tall standing hurtbox and wide frame also make him vulnerable to mixups at a greater extent than other members of the cast, and while he does have Amnesia to bail him out of bad scenarios, that too carries immense risk. In general, JP is great for players who love to keep their opponents at a constant disadvantage and can manage to get around his slower movement. If you love overwhelming offensive might without having to get your hands too dirty, then there's no better pick than this master of Psycho Power.
| Pick if you like: | Avoid if you dislike: |
|---|---|
|
|
Classic & Modern Versions Comparison
| Missing Normals |
|
|---|---|
| Missing Command Normals |
|
| Shortcut-Only Specials |
|
| Assist Combos |
|
| Miscellaneous Changes |
|
| JP | |
|---|---|
| Vitals | |
| Life Points | 10000 |
| Ground Movement | |
| Forward Walk Speed | 0.037 |
| Backward Walk Speed | 0.025 |
| Forward Dash Speed | 22 |
| Backward Dash Speed | 23 |
| Forward Dash Distance | 1.454 |
| Backward Dash Distance | 1.003 |
| Drive Rush Min. Distance (Throw) | 0.525 |
| Drive Rush Min. Distance (Block) | 1.857 |
| Drive Rush Max Distance | 3.628 |
| Jumping | |
| Jump Speed | 4+38+3 |
| Jump Apex | 2.115 |
| Forward Jump Distance | 1.90 |
| Backward Jump Distance | 1.52 |
| Throws | |
| Throw Range | 0.8 |
| Throw Hurtbox | 0.33 |
Normals
Standing Normals
5LP
| Startup | Active | Recovery | Cancel | Damage | Guard | On Hit | On Block |
|---|---|---|---|---|---|---|---|
| 6 | 3 | 10 | Chn Sp SA | 300 | LH | +4 | -2 |
5MP
| Startup | Active | Recovery | Cancel | Damage | Guard | On Hit | On Block |
|---|---|---|---|---|---|---|---|
| 12 | 3 | 21 | - | 700 | LH | +1 | -6 |
5HP
| Startup | Active | Recovery | Cancel | Damage | Guard | On Hit | On Block |
|---|---|---|---|---|---|---|---|
| 12 | 2 | 22 | Sp SA | 800 | LH | +3 | -3 |
5LK
| Startup | Active | Recovery | Cancel | Damage | Guard | On Hit | On Block |
|---|---|---|---|---|---|---|---|
| 5 | 3 | 11 | Sp SA | 300 | LH | +3 | -2 |
5MK
| Startup | Active | Recovery | Cancel | Damage | Guard | On Hit | On Block |
|---|---|---|---|---|---|---|---|
| 8 | 3 | 19 | Sp SA | 600 | LH | +3 | -3 |
5HK
| Startup | Active | Recovery | Cancel | Damage | Guard | On Hit | On Block |
|---|---|---|---|---|---|---|---|
| 12 | 4 | 17 | TC | 800 | LH | +7 | +2 |
Crouching Normals
2LP
| Startup | Active | Recovery | Cancel | Damage | Guard | On Hit | On Block |
|---|---|---|---|---|---|---|---|
| 4 | 2 | 11 | Chn Sp SA | 300 | LH | +4 | -1 |
2MP
| Startup | Active | Recovery | Cancel | Damage | Guard | On Hit | On Block |
|---|---|---|---|---|---|---|---|
| 7 | 4 | 14 | Sp SA | 600 | LH | +6 | -2 |
2HP
| Startup | Active | Recovery | Cancel | Damage | Guard | On Hit | On Block |
|---|---|---|---|---|---|---|---|
| 9 | 6 | 20 | Sp SA | 800 | LH | +1 | -6 |
2LK
| Startup | Active | Recovery | Cancel | Damage | Guard | On Hit | On Block |
|---|---|---|---|---|---|---|---|
| 6 | 2 | 10 | Chn | 200 | L | +2 | -2 |
2MK
| Startup | Active | Recovery | Cancel | Damage | Guard | On Hit | On Block |
|---|---|---|---|---|---|---|---|
| 9 | 3 | 17 | - | 700 | L | +3 | -3 |
2HK
| Startup | Active | Recovery | Cancel | Damage | Guard | On Hit | On Block |
|---|---|---|---|---|---|---|---|
| 10 | 3 | 21 | - | 900 | L | HKD +27 | -6 |
Jumping Normals
j.LP
| Startup | Active | Recovery | Cancel | Damage | Guard | On Hit | On Block |
|---|---|---|---|---|---|---|---|
| 5 | 10 | 3 land | - | 300 | H | +8(+9) | +4(+5) |
j.MP
| Startup | Active | Recovery | Cancel | Damage | Guard | On Hit | On Block |
|---|---|---|---|---|---|---|---|
| 12 | 3 | 3 land | - | 700 | H | +12(+13) | +8(+9) |
j.HP
| Startup | Active | Recovery | Cancel | Damage | Guard | On Hit | On Block |
|---|---|---|---|---|---|---|---|
| 9 | 5 | 3 land | - | 800 | H | +9(+15) | +5(+11) |
j.LK
| Startup | Active | Recovery | Cancel | Damage | Guard | On Hit | On Block |
|---|---|---|---|---|---|---|---|
| 6 | 8 | 3 land | - | 300 | H | +4(+10) | +1(+7) |
j.MK
| Startup | Active | Recovery | Cancel | Damage | Guard | On Hit | On Block |
|---|---|---|---|---|---|---|---|
| 7 | 6 | 3 land | - | 600 | H | +9(+13) | +5(+9) |
j.HK
Command Normals
Target Combos
Universal Mechanics
Throws
Forward Throw (LPLK)
| Startup | Active | Recovery | Cancel | Damage | Guard | On Hit | On Block |
|---|---|---|---|---|---|---|---|
| 5 | 3 | 23 | - | 1200 (2040) | T | KD +24 | - |
Back Throw (4LPLK)
| Startup | Active | Recovery | Cancel | Damage | Guard | On Hit | On Block |
|---|---|---|---|---|---|---|---|
| 5 | 3 | 23 | - | 1200 (2040) | T | KD +36 | - |
Drive Moves
Drive Impact (HPHK)
| Startup | Active | Recovery | Cancel | Damage | Guard | On Hit | On Block |
|---|---|---|---|---|---|---|---|
| 26 | 2 | 35 | - | 800 | LH | KD +35 / Wall Splat KD +65 | -3 / Wall Splat HKD +72 |
See Drive Impact.
Drive Reversal (6HPHK)
| Startup | Active | Recovery | Cancel | Damage | Guard | On Hit | On Block |
|---|---|---|---|---|---|---|---|
| 20 | 3 | 26(31) | - | 500 recoverable | LH | KD +23 | -6 |
Armor Break; See Drive Reversal.
Drive Parry (MPMK)
| Startup | Active | Recovery | Cancel | Damage | Guard | On Hit | On Block |
|---|---|---|---|---|---|---|---|
| 1 | 12 or until released | 33(1)(11) | - | - | - | - | - |
See Drive Parry. Perfect Parrying has only 1F of recovery and disables the opponent from canceling their attack. Perfect Parrying projectiles puts you into fixed 11 frames of recovery.
Drive Rush (66)
No results
See Drive Rush. Framedata shown in parentheses refers to the Drive Rush version used from a Parry.
Taunts
Neutral Taunt (5PPPKKK)
| Startup | Active | Recovery | Cancel | Damage | Guard | On Hit | On Block |
|---|---|---|---|---|---|---|---|
| 220 (total) | - | - | - | - | - | - | - |
Forward Taunt (6PPPKKK)
| Startup | Active | Recovery | Cancel | Damage | Guard | On Hit | On Block |
|---|---|---|---|---|---|---|---|
| 395 (total) | - | - | - | - | - | - | - |
Back Taunt (4PPPKKK)
Special Moves
Move Name (236P)
No results
No results No results No results
Super Arts
Level 1 Super (236236P)
No results
Level 2 Super (214214P)
No results
Level 3 Super ()
CA version grants 500 extra damage
No results
No results
