| Pre-release information
This page is under construction based on pre-release data. Join the SF6 Resource Hub for info on editing. |
Introduction
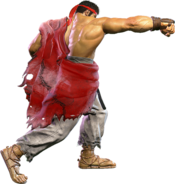
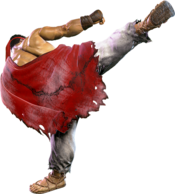
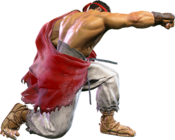
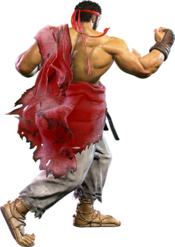
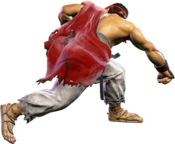
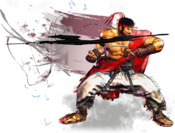
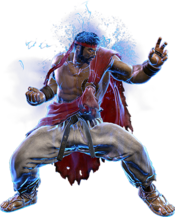
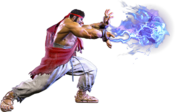
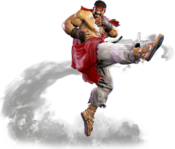
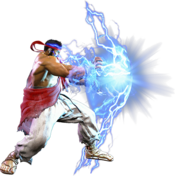
Ever training, this martial artist seeks true strength. Well-mannered and sincere, Ryu travels the globe in search of worthy opponents. Having overcome the Satsui no Hado, he now seeks yet greater heights.
Ryu is the definitive Street Fighter character, and not just because he's been the protagonist for thirty years. As the original shoto character, Ryu embodies all the meaningful aspects of Street Fighter gameplay in one concise package. Ryu emphasizes a patient playstyle with strong defensive tools.
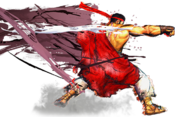
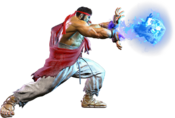
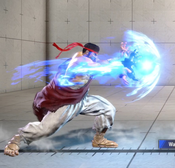
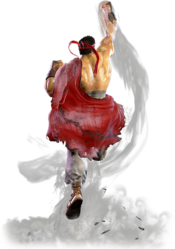
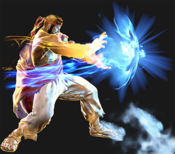
While they probably need no introduction, Ryu's signature moves are Hadoken and Shoryuken, the original fireball and DP combo. Hadoken is a good projectile with variable speeds and decent reward on hit or block, while Shoryuken is a very useful anti-air uppercut that has utility as a reversal with the OD version. From these two moves, a simple gameplan of "Hadoken or Shoryuken" emerges, informing the rest of Ryu's gameplan. Ryu pesters his opponents with his long reaching 2MK and 5HP alongside his jabs and Hadoken. When they jump in frustration, Ryu Shoryukens them back out and starts it all over again. While system mechanics have weakened this playstyle in SF6, it still retains effectiveness if Ryu can tap into system mechanics such as Drive Impact and Drive Parry.
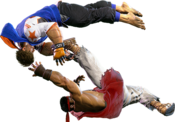
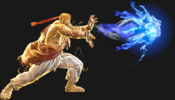
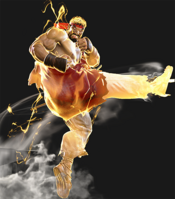
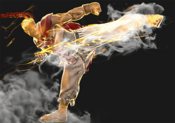
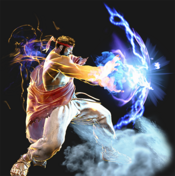
New to Ryu's kit are Denjin Charge and Hashogeki. The former allows Ryu to stock a single charge of a resource called Denjin. When Ryu uses certain specials or supers, Denjin is spent to empower them greatly, giving them added utility on block or hit. This particularly makes his fireballs very formidable, as they become faster and beat out other fireballs of the same level. Hashogeki is a combo tool and pressure tool, giving Ryu a new way to end blockstrings or even reset pressure completely especially when Denjin is spent to either give Ryu easy access to juggles or plus frames on block. Ryu also has Tatsumaki Senpu-kyaku, an advancing spinning kick that provides corner carry and some projectile invulnerability. And returning from Street Fighter 3 is Ryu's High Blade Kick, with each strength being reworked into varying forms of utility including midrange poking, getting a corner safejump, or even big damage combo extensions in the corner. All of these tools combined lend to Ryu being a well rounded character who has many useful options for different situations, and he especially rewards smart play with terrifyingly powerful corner pressure.
Ryu's only weakness is, ironically, his greatest strength: in his commitment to fundamentals, Ryu completely lacks any major gimmicks outside of Denjin (and that is barely a gimmick unto itself). This can make it somewhat difficult for him to steal rounds and effectively demands that he play to said fundamentals at all times. That said, he is still consistent in almost every aspect, getting good return out of every successful play. He does great damage, has good okizeme off of most combo routes, and his versatile kit ensures he can handle any matchup. Ryu is a formidable character that can easily show you the ropes of Street Fighter while also holding his own beyond that. If you want a fundamentals-oriented character who rewards patient and considerate play, then walk the path of student to master with Ryu.
| Pick if you like: | Avoid if you dislike: |
|---|---|
|
|
Classic & Modern Versions Comparison
| Missing Normals |
|
|---|---|
| Missing Command Normals |
|
| Shortcut-Only Specials |
|
| Assist Combos |
|
| Miscellaneous Changes |
|
| Ryu | |
|---|---|
| Vitals | |
| Life Points | 10000 |
| Ground Movement | |
| Forward Walk Speed | 0.047 |
| Backward Walk Speed | 0.032 |
| Forward Dash Speed | 19 |
| Backward Dash Speed | 23 |
| Forward Dash Distance | 1.252 |
| Backward Dash Distance | 0.923 |
| Drive Rush Min. Distance (Throw) | 0.525 |
| Drive Rush Min. Distance (Block) | 1.878 |
| Drive Rush Max Distance | 3.628 |
| Jumping | |
| Jump Speed | 4+38+3 |
| Jump Apex | 2.115 |
| Forward Jump Distance | 1.90 |
| Backward Jump Distance | 1.52 |
| Throws | |
| Throw Range | 0.8 |
| Throw Hurtbox | 0.33 |
Normals
Standing normals
5LP
| Startup | Active | Recovery | Cancel | Damage | Guard | On Hit | On Block |
|---|---|---|---|---|---|---|---|
| 4 | 3 | 7 | Chn Sp SA | 300 | LH | +4 | -1 |
One of Ryu's 4f jab which is chainable and special cancelable. Lower recovery than 2LP makes this the best chainable option when trying to counter drive impact.
5MP
| Startup | Active | Recovery | Cancel | Damage | Guard | On Hit | On Block |
|---|---|---|---|---|---|---|---|
| 6 | 4 | 11 | Sp SA TC | 600 | LH | +7 | -1 |
This move will primarily be used for combos and for going into Fuwa Triple Strike.
5HP
| Startup | Active | Recovery | Cancel | Damage | Guard | On Hit | On Block |
|---|---|---|---|---|---|---|---|
| 10 | 5 | 18 | Sp SA TC | 800 | LH | +4 | -2 |
Decent range and special cancelable making this a good poke button.
5LK
| Startup | Active | Recovery | Cancel | Damage | Guard | On Hit | On Block |
|---|---|---|---|---|---|---|---|
| 5 | 3 | 11 | Sp SA | 300 | LH | +2 | -4 |
5MK
| Startup | Active | Recovery | Cancel | Damage | Guard | On Hit | On Block |
|---|---|---|---|---|---|---|---|
| 9 | 3 | 18 | - | 700 | LH | +4 | -4 |
5HK
| Startup | Active | Recovery | Cancel | Damage | Guard | On Hit | On Block |
|---|---|---|---|---|---|---|---|
| 12 | 4 | 20(22) | - | 900 | LH | +9 | +1 |
Great for standing combos and can also serve as an anti air tool. The main drawback of this button is that it wiffs on crouchers.
Crouching Normals
2LP
| Startup | Active | Recovery | Cancel | Damage | Guard | On Hit | On Block |
|---|---|---|---|---|---|---|---|
| 4 | 2 | 9 | Chn Sp SA | 300 | LH | +4 | -1 |
2MP
| Startup | Active | Recovery | Cancel | Damage | Guard | On Hit | On Block |
|---|---|---|---|---|---|---|---|
| 6 | 4 | 13 | Sp SA | 600 | LH | +5 | 0 |
2HP
| Startup | Active | Recovery | Cancel | Damage | Guard | On Hit | On Block |
|---|---|---|---|---|---|---|---|
| 9 | 6 | 21(22) | Sp SA | 800 | LH | +1 | -7 |
2LK
| Startup | Active | Recovery | Cancel | Damage | Guard | On Hit | On Block |
|---|---|---|---|---|---|---|---|
| 5 | 2 | 10 | Chn | 200 | L | +3 | -3 |
2MK
| Startup | Active | Recovery | Cancel | Damage | Guard | On Hit | On Block |
|---|---|---|---|---|---|---|---|
| 8 | 3 | 19 | Sp SA | 500 | L | +1 | -6 |
2HK
| Startup | Active | Recovery | Cancel | Damage | Guard | On Hit | On Block |
|---|---|---|---|---|---|---|---|
| 9 | 3 | 23(29) | - | 900 | L | HKD +32 | -12 |
Jumping Normals
j.LP
No results
j.MP
No results
j.HP
No results
j.LK
No results
j.MK
No results
j.HK
No results
Command Normals
6MP
| Startup | Active | Recovery | Cancel | Damage | Guard | On Hit | On Block |
|---|---|---|---|---|---|---|---|
| 20 | 1,3 | 19 | - | 300x2 | H,H | +3 | -1 |
6HP
| Startup | Active | Recovery | Cancel | Damage | Guard | On Hit | On Block |
|---|---|---|---|---|---|---|---|
| 20 | 2,3 | 16 | - | 400x2 | LH | +6 | +3 |
4HP
| Startup | Active | Recovery | Cancel | Damage | Guard | On Hit | On Block |
|---|---|---|---|---|---|---|---|
| 7 | 4 | 25(26) | Sp SA | 800 | LH | +1 | -13 |
4HK
| Startup | Active | Recovery | Cancel | Damage | Guard | On Hit | On Block |
|---|---|---|---|---|---|---|---|
| 10(20) | 5(5)3 | 21 | Sp SA | 400x2 | LH | 0 | -4 |
6HK
Target Combos
HP>HK
No results
MP>LK
No results
MP>LK>HK
No results
Universal Mechanics
Throw
| Startup | Active | Recovery | Cancel | Damage | Guard | On Hit | On Block |
|---|---|---|---|---|---|---|---|
| 5 | 3 | 23 | - | 1200 (2040) | T | KD +17 | - |
Back Throw
| Startup | Active | Recovery | Cancel | Damage | Guard | On Hit | On Block |
|---|---|---|---|---|---|---|---|
| 5 | 3 | 23 | - | 1200 (2040) | T | KD +11 | - |
Drive Impact
| Startup | Active | Recovery | Cancel | Damage | Guard | On Hit | On Block |
|---|---|---|---|---|---|---|---|
| 26 | 2 | 35 | - | 800 | LH | KD +35 / Wall Splat KD +65 | -3 / Wall Splat HKD +72 |
See Drive Impact.
Drive Reversal
| Startup | Active | Recovery | Cancel | Damage | Guard | On Hit | On Block |
|---|---|---|---|---|---|---|---|
| 20 | 3 | 26(31) | - | 500 recoverable | LH | KD +23 | -6 |
See Drive Reversal.
Drive Rush
No results
See Drive Rush. Framedata shown in parentheses refers to the Drive Rush version used from a Parry.
Drive Parry
| Startup | Active | Recovery | Cancel | Damage | Guard | On Hit | On Block |
|---|---|---|---|---|---|---|---|
| 1 | 12 or until released | 33(1)(11) | - | - | - | - | - |
See Drive Parry. Perfect Parrying has only 1F of recovery and disables the opponent from canceling their attack. Perfect Parrying projectiles puts you into fixed 11 frames of recovery.
Special Moves
22P
| Startup | Active | Recovery | Cancel | Damage | Guard | On Hit | On Block |
|---|---|---|---|---|---|---|---|
| 50 | - | 2 | - | - | - | - | - |
236LP
| Startup | Active | Recovery | Cancel | Damage | Guard | On Hit | On Block |
|---|---|---|---|---|---|---|---|
| 16 | - | 31 | SA3 | 600 | LH | +1 | -5 |
236MP
| Startup | Active | Recovery | Cancel | Damage | Guard | On Hit | On Block |
|---|---|---|---|---|---|---|---|
| 14 | - | 33 | SA3 | 600 | LH | -1 | -7 |
236HP
| Startup | Active | Recovery | Cancel | Damage | Guard | On Hit | On Block |
|---|---|---|---|---|---|---|---|
| 12 | - | 35 | SA3 | 600 | LH | -3 | -9 |
236PP
| Startup | Active | Recovery | Cancel | Damage | Guard | On Hit | On Block |
|---|---|---|---|---|---|---|---|
| 12 | - | 28 | SA2 SA3 | 400x2 | LH | KD +54 | -1 |
236P(charged)
| Startup | Active | Recovery | Cancel | Damage | Guard | On Hit | On Block |
|---|---|---|---|---|---|---|---|
| 12 | - | 30 | SA3 | 400x2 | LH | KD +52 | -3 |
236PP(charged)
| Startup | Active | Recovery | Cancel | Damage | Guard | On Hit | On Block |
|---|---|---|---|---|---|---|---|
| 12 | - | 26 | SA2 SA3 | 300x2,400 (1000) | LH | KD +57 | +2 |
623LP
| Startup | Active | Recovery | Cancel | Damage | Guard | On Hit | On Block |
|---|---|---|---|---|---|---|---|
| 5 | 10 | 21+12 land | SA3 | 1100(800) | LH | KD +38 | -23 |
623MP
| Startup | Active | Recovery | Cancel | Damage | Guard | On Hit | On Block |
|---|---|---|---|---|---|---|---|
| 6 | 10 | 30+12 land | SA3 | 1200(800) | LH | KD +34 | -32 |
623HP
| Startup | Active | Recovery | Cancel | Damage | Guard | On Hit | On Block |
|---|---|---|---|---|---|---|---|
| 7 | 10 | 34+15 land | SA3 | 1400(800) | LH | KD +29 | -39 |
623PP
| Startup | Active | Recovery | Cancel | Damage | Guard | On Hit | On Block |
|---|---|---|---|---|---|---|---|
| 6 | 2,8 | 37+15 land | - | 800x2 | LH | KD +29 | -40 |
214LK
| Startup | Active | Recovery | Cancel | Damage | Guard | On Hit | On Block |
|---|---|---|---|---|---|---|---|
| 12 | 3 | 14+18 land | - | 900 | LH | KD +35 | -15 |
214MK
| Startup | Active | Recovery | Cancel | Damage | Guard | On Hit | On Block |
|---|---|---|---|---|---|---|---|
| 14 | 2(13)2 | 11+20 land | - | 1000 | LH | KD +23(+38) | -13(-28) |
214HK
| Startup | Active | Recovery | Cancel | Damage | Guard | On Hit | On Block |
|---|---|---|---|---|---|---|---|
| 16 | 2(13)2(13)2 | 14+17 land | - | 1200 | LH | KD +20(+35)(+50) | -13(-28)(-43) |
214KK
| Startup | Active | Recovery | Cancel | Damage | Guard | On Hit | On Block |
|---|---|---|---|---|---|---|---|
| 13 | 2(4)2(4)2(3)2(4)2 | 10+13 land | - | 200x5 | LH | KD +57 | -14(-32) |
j.214LK
No results
j.214MK
No results
j.214HK
No results
j.214KK
No results
236LK
| Startup | Active | Recovery | Cancel | Damage | Guard | On Hit | On Block |
|---|---|---|---|---|---|---|---|
| 14 | 6 | 22 | SA3 | 1100 | LH | KD +42~46 | -11(-7) |
236MK
| Startup | Active | Recovery | Cancel | Damage | Guard | On Hit | On Block |
|---|---|---|---|---|---|---|---|
| 18 | 9 | 19(22) | SA3 | 1200 | LH | KD +40~46 | -8(-2) |
236HK
| Startup | Active | Recovery | Cancel | Damage | Guard | On Hit | On Block |
|---|---|---|---|---|---|---|---|
| 27 | 9 | 15 | SA3 | 1300 | LH | KD +45~51 | -3(+5) |
236KK
| Startup | Active | Recovery | Cancel | Damage | Guard | On Hit | On Block |
|---|---|---|---|---|---|---|---|
| 17 | 5 | 33 | SA2 SA3 | 800 | LH | Wall Bounce +49(65) | -18 |
214LP
| Startup | Active | Recovery | Cancel | Damage | Guard | On Hit | On Block |
|---|---|---|---|---|---|---|---|
| 12 | 6 | 18 | SA3 | 700 | LH | +2 | -3 |
214MP
| Startup | Active | Recovery | Cancel | Damage | Guard | On Hit | On Block |
|---|---|---|---|---|---|---|---|
| 19 | 6 | 17 | SA3 | 800 | LH | +2 | -6 |
214HP
| Startup | Active | Recovery | Cancel | Damage | Guard | On Hit | On Block |
|---|---|---|---|---|---|---|---|
| 30 | 6 | 19 | SA3 | 400x2 | LH | KD +61 Spin | +2 |
214PP
| Startup | Active | Recovery | Cancel | Damage | Guard | On Hit | On Block |
|---|---|---|---|---|---|---|---|
| 18 | 6 | 20 | SA2 SA3 | 1100 | LH | +3 | +3 |
214LP(charged)
| Startup | Active | Recovery | Cancel | Damage | Guard | On Hit | On Block |
|---|---|---|---|---|---|---|---|
| 20 | 6 | 19(31) | SA3 | 400x2 | LH | KD +62 Spin | +3 |
214PP (charged)
Super Arts
236236P
| Startup | Active | Recovery | Cancel | Damage | Guard | On Hit | On Block |
|---|---|---|---|---|---|---|---|
| 7 | - | 79 | - | 400x5 (2000) | LH | KD +26 | -24 |
Increased knockdown advantage with Denjin Charge.
214214P
| Startup | Active | Recovery | Cancel | Damage | Guard | On Hit | On Block |
|---|---|---|---|---|---|---|---|
| 12 | 6 | 39 | - | 2800 | LH | KD +20 | -20 |
Can be held to increase the knockdown advantage. Increased damage with Denjin Charge.
236236K
| Startup | Active | Recovery | Cancel | Damage | Guard | On Hit | On Block |
|---|---|---|---|---|---|---|---|
| 5(2) | 12 | 32+39 land | - | 4000 (3600) | LH | HKD +8 | -50(-54) |


