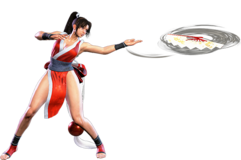
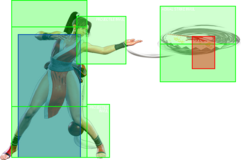
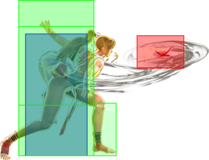
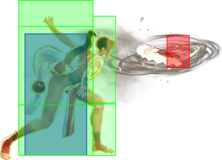
|
|
| Line 18: |
Line 18: |
| * Chains into {{clr|L|5LP}}/{{clr|L|2LP}}/{{clr|L|2LK}} | | * Chains into {{clr|L|5LP}}/{{clr|L|2LP}}/{{clr|L|2LK}} |
| * '''Cancel Hitconfirm Window:''' 13f | | * '''Cancel Hitconfirm Window:''' 13f |
| * '''{{clr|DR|Drive Rush}} cancel advantage:''' {{sf6-adv|VP|+?}} oH / {{sf6-adv|M|-?}} oB | | * '''{{clr|DR|Drive Rush}} cancel advantage:''' {{sf6-adv|VP|+5}} oH / {{sf6-adv|M|-2}} oB |
| * Applies 20% damage scaling to next hit when beginning a combo (100/80/70...) | | * Applies 20% damage scaling to next hit when beginning a combo (100/80/70...) |
| <br> | | <br> |
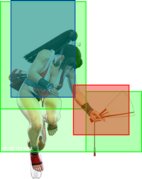
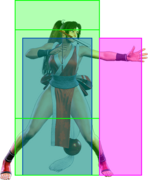
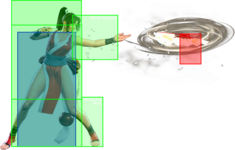
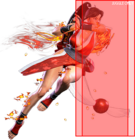
| Relatively standard {{clr|L|5LP}}. Comes with better frame advantage on hit in exchange for having worse on block compared to {{clr|L|2LP}}.
| | A jab with less range and worse block advantage than {{clr|L|2LP}}. It has 1 extra frame of hitstun, however, giving it better combo utility. It cancels into {{clr|L|LP}}/{{clr|M|MP}} Ryuuenbu, the latter of which can often set up safely charged projectiles. {{clr|L|5LP}} can link to {{clr|M|2MK}} for a max range {{clr|PC|Counter-hit}} conversion, and importantly it links to {{clr|H|5HP}} on {{clr|PC|Punish Counter}} or from {{clr|DR|Drive Rush}} for optimal damage. |
| }} | | }} |
|
| |
|
| Line 37: |
Line 37: |
| | info = | | | info = |
| {{AttackDataCargo-SF6/Query|mai_5mp}} | | {{AttackDataCargo-SF6/Query|mai_5mp}} |
| * '''Cancel Hitconfirm Window:''' 15f | | * '''Cancel Hitconfirm Window:''' 16f |
| * '''{{clr|DR|Drive Rush}} cancel advantage:''' {{sf6-adv|VP|+?}} oH / {{sf6-adv|VP|+?}} oB | | * '''{{clr|DR|Drive Rush}} cancel advantage:''' {{sf6-adv|VP|+11}} oH / {{sf6-adv|VP|+6}} oB |
| <br> | | <br> |
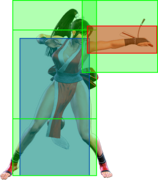
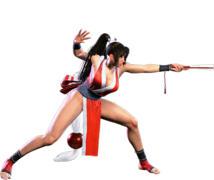
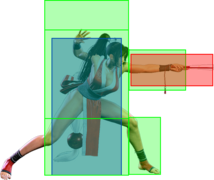
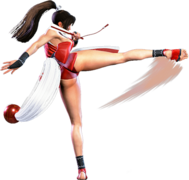
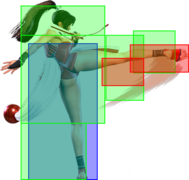
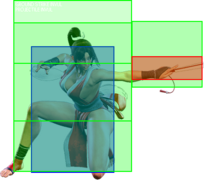
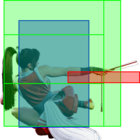
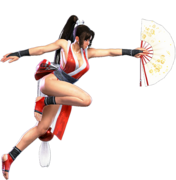
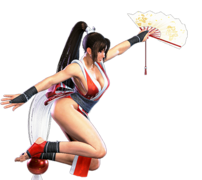
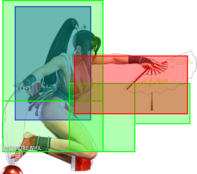
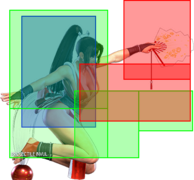
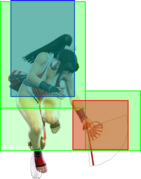
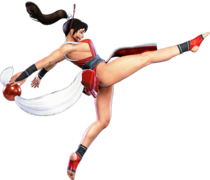
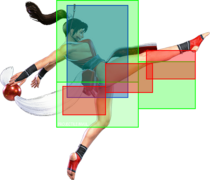
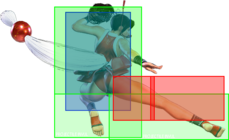
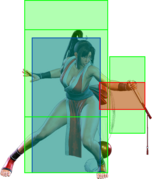
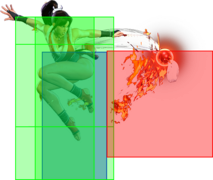
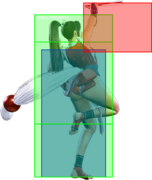
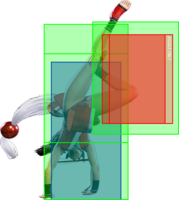
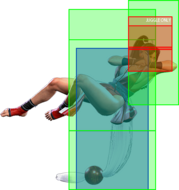
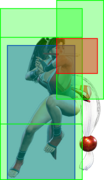
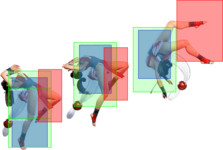
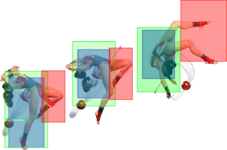
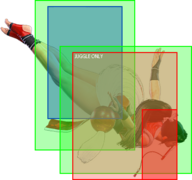
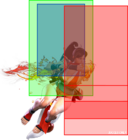
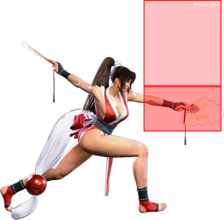
| Excellent, special cancelable poke. Extends a relatively large hurtbox.
| | A special cancelable poke with excellent range. Has a disjointed hitbox, but extends a large hurtbox on her arms and feet during the entire recovery animation. Important combo tool after a max range {{clr|PC|Punish Counter}} {{clr|L|2LP}}, canceling into {{clr|M|214MP}}, {{clr|H|236HK}}, or {{clr|OD|236KK}}. |
| }} | | }} |
|
| |
|
| Line 55: |
Line 55: |
| | info = | | | info = |
| {{AttackDataCargo-SF6/Query|mai_5hp}} | | {{AttackDataCargo-SF6/Query|mai_5hp}} |
| * '''Cancel Hitconfirm Window:''' ? | | * '''Cancel Hitconfirm Window:''' 17f |
| * '''{{clr|DR|Drive Rush}} cancel advantage:''' {{sf6-adv|VP|+?}} oH / {{sf6-adv|VP|+?}} oB | | * '''{{clr|DR|Drive Rush}} cancel advantage:''' {{sf6-adv|VP|+15}} oH / {{sf6-adv|VP|+11}} oB |
| <br> | | <br> |
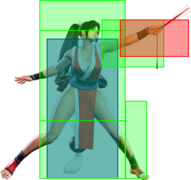
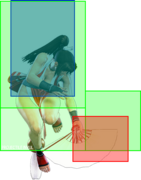
| Shoto-style {{clr|H|5HP}} and one of the best in the game. When spaced out, a cancel into {{clr|L|236LP}} keeps Mai plus on block and in harassment range. | | Shoto-style {{clr|H|5HP}} and one of the best in the game. When spaced out, a cancel into {{clr|L|236LP}} keeps Mai plus on block and in harassment range. |
| Line 72: |
Line 72: |
| | info = | | | info = |
| {{AttackDataCargo-SF6/Query|mai_5lk}} | | {{AttackDataCargo-SF6/Query|mai_5lk}} |
| * '''Cancel Hitconfirm Window:''' ? / ? (TC) | | * '''Cancel Hitconfirm Window:''' 14f (Special/TC) |
| * '''{{clr|DR|Drive Rush}} cancel advantage:''' {{sf6-adv|VP|+?}} oH / {{sf6-adv|M|-?}} oB | | * '''{{clr|DR|Drive Rush}} cancel advantage:''' {{sf6-adv|P|+2}} oH / {{sf6-adv|E|0}} oB |
| * Applies 20% damage scaling to next hit when beginning a combo (100/80/70...) | | * Applies 20% damage scaling to next hit when beginning a combo (100/80/70...) |
| <br> | | <br> |
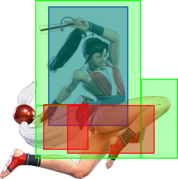
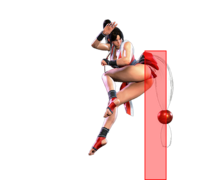
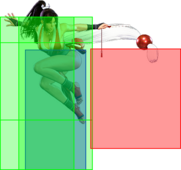
| Short-reaching {{clr|L|5LK}}. Not very useful for standard things like Drive Rush checks, but comes with a Target Combo that leads to a safejump.
| | A knee with extremely short range, making it hard to use in hitconfirms or defensive situations; it can only combo naturally after a single {{clr|L|5LP}} or {{clr|L|2LP}}. Primarily used for its Target Combo extension. |
| | |
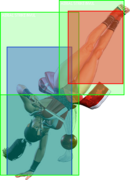
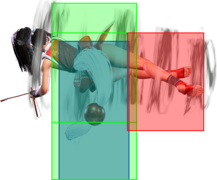
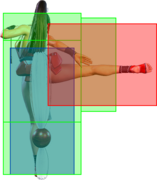
| | Spacing this button out near its max range allows the Target Combo into j.214P to set up an auto-timed KD +42 safe jump (e.g. {{clr|DR|DR~}}{{clr|M|6MP}}, {{clr|L|5LK}} or {{clr|DR|DR~}}{{clr|L|5LP}}, {{clr|L|5LP}}, {{clr|L|5LK}}). At closer ranges, the divekick hits earlier (+41) and loses to 5f anti-air specials unless you empty jump. |
| }} | | }} |
|
| |
|
| Line 90: |
Line 92: |
| | info = | | | info = |
| {{AttackDataCargo-SF6/Query|mai_5mk}} | | {{AttackDataCargo-SF6/Query|mai_5mk}} |
| * | | * Front leg hurtbox is raised on frames 4-17 (useful vs. low pokes) |
| <br> | | <br> |
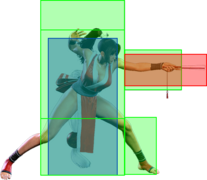
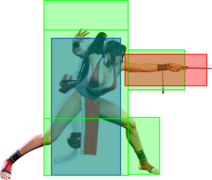
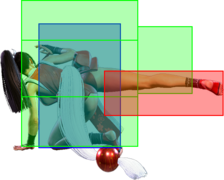
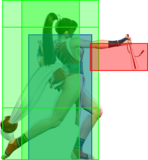
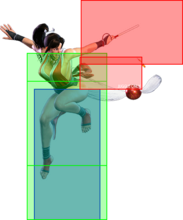
| Larger reach than {{clr|M|5MP}}, but slower and lacks the ability to be cancelled.
| | A solid poke due to its range, hitbox, and pushback, though it cannot be canceled like {{clr|M|5MP}}. Gives Mai a useful whiff punish into {{clr|SA|SA2}} from extremely far out. |
| | |
| | At closer ranges, you can get {{clr|PC|Counter-hit}} links like {{clr|M|2MP}} or {{clr|M|2MK}}, but you're better off pressing {{clr|M|2MP}} at this range for the same reward. |
| }} | | }} |
|
| |
|
| Line 106: |
Line 110: |
| | info = | | | info = |
| {{AttackDataCargo-SF6/Query|mai_5hk}} | | {{AttackDataCargo-SF6/Query|mai_5hk}} |
| * {{clr|PC|Punish Counter}}: KD +? Crumple ({{sf6-adv|VP|+?}} before becoming airborne) | | * {{clr|PC|Punish Counter}} (ground): KD +61 Crumple ({{sf6-adv|VP|+22}} before opponent falls to the ground) |
| | ** Opponent is in an airborne state for all follow-up hits |
| | * {{clr|PC|Punish Counter}} (air): puts opponent into a {{sf6-jug|limited juggle}} state |
| | * Applies 20% damage scaling to next hit when beginning a combo (100/80/70...) |
| | * Front leg hurtbox is raised on frames 10-16 (useful vs. low pokes) |
| | * Extends a hurtbox 1f before active that is vulnerable to projectiles |
| <br> | | <br> |
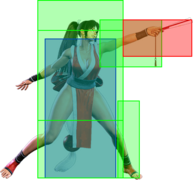
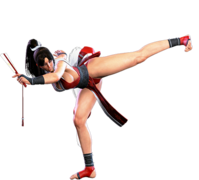
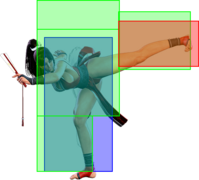
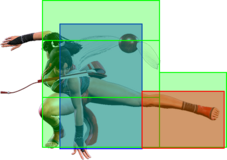
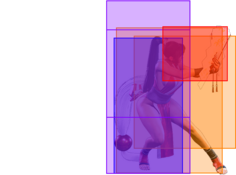
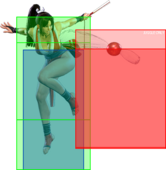
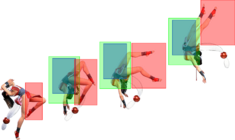
| Another great poke, especially considering the Punish Counter effect. Mai can get {{clr|H|5HP}} up close or from farther away with Drive Rush as well as a dash {{clr|L|2LP}} at certain ranges. Covers a somewhat awkward range between {{clr|H|5HP}} and where she wants to throw Kachosen.
| | Mai's best long-range poke with great reward when used as a whiff punish. Mai can combo {{clr|H|5HP}} up close, {{clr|DR|DR~}}{{clr|H|5HP}} from farther out, or a meterless Dash + {{clr|L|2LP}} from certain ranges. |
| | |
| | {{clr|H|5HK}} is useful for covering the range between {{clr|H|5HP}} and the ideal Kachousen range, making it likely for opponents to walk right into her foot as they try to walk her down. |
| | }} |
| <br> | | <br> |
| }}
| |
|
| |
|
| === Crouching Normals === | | === Crouching Normals === |
| Line 126: |
Line 137: |
| * Chains into {{clr|L|5LP}}/{{clr|L|2LP}}/{{clr|L|2LK}} | | * Chains into {{clr|L|5LP}}/{{clr|L|2LP}}/{{clr|L|2LK}} |
| * '''Cancel Hitconfirm Window:''' 13f | | * '''Cancel Hitconfirm Window:''' 13f |
| * '''{{clr|DR|Drive Rush}} cancel advantage:''' {{sf6-adv|VP|+?}} oH / {{sf6-adv|M|-?}} oB | | * '''{{clr|DR|Drive Rush}} cancel advantage:''' {{sf6-adv|VP|+4}} oH / {{sf6-adv|M|-1}} oB |
| * Applies 20% damage scaling to next hit when beginning a combo (100/80/70...) | | * Applies 20% damage scaling to next hit when beginning a combo (100/80/70...) |
| <br> | | <br> |
| Line 143: |
Line 154: |
| | info = | | | info = |
| {{AttackDataCargo-SF6/Query|mai_2mp}} | | {{AttackDataCargo-SF6/Query|mai_2mp}} |
| * '''Cancel Hitconfirm Window:''' ?f | | * 2f extra recovery on whiff |
| * '''{{clr|DR|Drive Rush}} cancel advantage:''' {{sf6-adv|VP|+?}} oH / {{sf6-adv|VP|+?}} oB | | * '''Cancel Hitconfirm Window:''' 16f |
| | * '''{{clr|DR|Drive Rush}} cancel advantage:''' {{sf6-adv|VP|+14}} oH / {{sf6-adv|VP|+6}} oB |
| <br> | | <br> |
| Advancing 6f normal. Important as a combo tool as it links into {{clr|H|5HP}} from Drive Rush and combos into her best special move options when linked into. | | Advancing 6f normal. Important as a combo tool as it links into {{clr|H|5HP}} from {{clr|DR|Drive Rush}} and combos into her best special move options when linked into. |
| }} | | }} |
|
| |
|
| Line 162: |
Line 174: |
| | info = | | | info = |
| {{AttackDataCargo-SF6/Query|mai_2hp}} | | {{AttackDataCargo-SF6/Query|mai_2hp}} |
| * | | * 2 hits; first hit pulls opponent inward on hit/block |
| <br> | | <br> |
| Somewhat strange, but useful as a long-range Drive Rush option and benefits heavily from the added frame advantage. Less useful than {{clr|H|4HK}} overall in combos as that normal is faster and forces stand. | | Somewhat strange, but useful as a long-range {{clr|DR|Drive Rush}} option and benefits heavily from the added frame advantage. Less useful than {{clr|H|4HK}} overall in combos as that normal is faster and forces stand. |
| }} | | }} |
|
| |
|
| Line 196: |
Line 208: |
| {{AttackDataCargo-SF6/Query|mai_2mk}} | | {{AttackDataCargo-SF6/Query|mai_2mk}} |
| * '''Cancel Hitconfirm Window:''' 13f | | * '''Cancel Hitconfirm Window:''' 13f |
| * '''{{clr|DR|Drive Rush}} cancel advantage:''' {{sf6-adv|VP|+?}} oH / {{sf6-adv|VP|+?}} oB | | * '''{{clr|DR|Drive Rush}} cancel advantage:''' {{sf6-adv|VP|+8}} oH / {{sf6-adv|VP|+4}} oB |
| * Applies 20% damage scaling to next hit when beginning a combo (100/80/70...) | | * Applies 20% damage scaling to next hit when beginning a combo (100/80/70...) |
| <br> | | <br> |
| Faster than average with good reach. Stops opponents from walking out of Mai's pressure and synergizes well with {{clr|H|HP}} Ryuuenbu. | | Faster than average with good reach. Stops opponents from walking out of Mai's pressure and synergizes well with {{clr|H|HP Ryuuenbu}}. |
| }} | | }} |
|
| |
|
| Line 213: |
Line 225: |
| | info = | | | info = |
| {{AttackDataCargo-SF6/Query|mai_2hk}} | | {{AttackDataCargo-SF6/Query|mai_2hk}} |
| * {{clr|PC|Counter-hit/Punish Counter}}: HKD +? | | * {{clr|PC|Counter-hit/Punish Counter}}: HKD +48 |
| * Has juggle potential; not a Hard Knockdown when juggled into | | * 1f extra recovery on block |
| | * Does not have juggle potential like most sweeps; not a Hard Knockdown when juggled into from {{sf6-jug|free juggle}} state |
| | * Raised hurtbox can '''Low Crush''' against most other low pokes |
| <br> | | <br> |
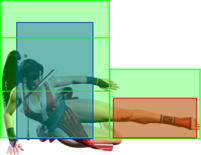
| Has enough frame advantage to safely set a Held Kachosen on the opponent. | | Has enough frame advantage to safely set a Held Kachousen on the opponent. |
| }} | | }} |
| <br> | | <br> |
| Line 232: |
Line 246: |
| | info = | | | info = |
| {{AttackDataCargo-SF6/Query|mai_jlp}} | | {{AttackDataCargo-SF6/Query|mai_jlp}} |
| * | | * Fastest air-to-air option |
| <br>
| | * Good horizontal hitbox priority |
| | |
| }} | | }} |
|
| |
|
| Line 250: |
Line 263: |
| | info = | | | info = |
| {{AttackDataCargo-SF6/Query|mai_jmp}} | | {{AttackDataCargo-SF6/Query|mai_jmp}} |
| * | | * Puts airborne opponents into {{sf6-jug|limited juggle}} state |
| <br>
| | * Strong air-to-air hitbox |
| | |
| }} | | }} |
|
| |
|
| Line 268: |
Line 280: |
| | info = | | | info = |
| {{AttackDataCargo-SF6/Query|mai_jhp}} | | {{AttackDataCargo-SF6/Query|mai_jhp}} |
| * | | * Good downward-reaching hitbox for vertical approaches |
| <br>
| |
| | |
| }} | | }} |
|
| |
|
| Line 284: |
Line 294: |
| | info = | | | info = |
| {{AttackDataCargo-SF6/Query|mai_jlk}} | | {{AttackDataCargo-SF6/Query|mai_jlk}} |
| * | | * Can hit cross-up |
| <br>
| | * Can be used as an instant overhead |
| | |
| }} | | }} |
|
| |
|
| Line 300: |
Line 309: |
| | info = | | | info = |
| {{AttackDataCargo-SF6/Query|mai_jmk}} | | {{AttackDataCargo-SF6/Query|mai_jmk}} |
| * | | * Can hit cross-up |
| <br>
| |
| | |
| }} | | }} |
|
| |
|
| Line 316: |
Line 323: |
| | info = | | | info = |
| {{AttackDataCargo-SF6/Query|mai_jhk}} | | {{AttackDataCargo-SF6/Query|mai_jhk}} |
| * | | * Longest horizontal range of Mai's jump-in attacks |
| <br>
| | * Shifts Mai's hurtbox upward during startup |
| | |
| }} | | }} |
| <br> | | <br> |
| Line 334: |
Line 340: |
| | info = | | | info = |
| {{AttackDataCargo-SF6/Query|mai_6mp}} | | {{AttackDataCargo-SF6/Query|mai_6mp}} |
| * | | * Spike knockdown vs. airborne opponents |
| <br> | | <br> |
| Quick overhead that can be used as a meaty relatively easily.
| | A fast overhead that can combo out of {{clr|DR|Drive Rush}} or with perfect meaty timing. Has great mix-up applications when pressuring with a fully held Kachousen. |
| | |
| | To get perfect meaty timing, you need to be {{sf6-adv|VP|+21}} at the moment you input {{clr|M|6MP}}; unfortunately, a Forward Throw leaves you too far for this to reach, but you can manually create this timing by whiffing certain moves after various knockdowns. For example, at {{sf6-adv|VP|+35}} ({{clr|M|214MP}}, {{clr|L|Flame 214LP}} or {{clr|PC|CH/PC}} {{clr|L|214LP}}), you can whiff {{clr|L|5LK}} into immediate {{clr|M|6MP}}, then link into 4f light normals. |
| }} | | }} |
|
| |
|
| Line 350: |
Line 358: |
| | info = | | | info = |
| {{AttackDataCargo-SF6/Query|mai_4hk}} | | {{AttackDataCargo-SF6/Query|mai_4hk}} |
| * '''Anti-Air Invuln:''' 9f (Fist), 10-14f (Head); cannot hit cross-up | | * '''Anti-Air Invuln:''' 8-12f (legs/lower body); cannot hit cross-up |
| * Forces stand on hit | | * Forces stand on hit |
| * '''Cancel Hitconfirm Window:''' ?f (TC) | | * '''Cancel Hitconfirm Window:''' 28f (TC) |
| <br> | | <br> |
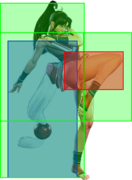
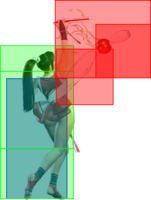
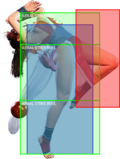
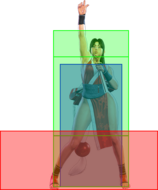
| Strong anti-air normal that covers angles that her DPs struggle against. Important as a combo tool as it enables {{clr|H|H}} Ryuenbuu extensions and for its super cancelable TC. | | Strong anti-air that covers angles that her DPs struggle against. While most of her body is anti-air invincible during the active frames, her hurtbox remains tall during the entire startup, so it must be used a bit early against stronger air normals. In rare cases, a shallow-angled air attack (like a Divekick) could reach Mai's vulnerable hurtbox near the ground, even during the active frames. |
| | |
| | Important as a combo tool as it enables {{clr|H|HP Ryuuenbu}} extensions on crouching opponents, and gives Mai a 623K or {{clr|SA|SA1}} corner juggle. With 5 active frames, it's also a great meaty option, becoming up to {{sf6-adv|VP|+7 oH}} / {{sf6-adv|P|+3 oB}}. Even without meaty timing, the hitconfirm timing into the {{clr|H|4HK}}~{{clr|H|HK}} Target Combo is extremely lenient. |
| }} | | }} |
| <br> | | <br> |
| Line 374: |
Line 384: |
| | info = | | | info = |
| {{AttackDataCargo-SF6/Query|mai_5lk_lk}} | | {{AttackDataCargo-SF6/Query|mai_5lk_lk}} |
| * | | * '''Cancel Hitconfirm Window:''' 31f (TC) |
| | * () refers to scaled damage from {{clr|L|5LK}} combo starter |
| | * Forces stand on hit |
| {{AttackDataCargo-SF6/Query|mai_5lk_lk_lk}} | | {{AttackDataCargo-SF6/Query|mai_5lk_lk_lk}} |
| * | | * '''Cancel Hitconfirm Window:''' 59f |
| | ** Refers to the latest cancel timing that still combos into j.214P on hit |
| | * () refers to scaled damage from {{clr|L|5LK}} combo starter |
| <br> | | <br> |
|
| |
|
| Line 392: |
Line 406: |
| | info = | | | info = |
| {{AttackDataCargo-SF6/Query|mai_4hk_hk}} | | {{AttackDataCargo-SF6/Query|mai_4hk_hk}} |
| * Mai is completely invincible while she appears off-axis in the other lane. | | * On hit, Mai performs a second kick that is '''fully invincible''' immediately after the first kick connects |
| | * Always a true blockstring from {{clr|H|4HK}} |
| | * () refers to active/recovery frames on whiff (e.g. if attempted on a high-juggled opponent) |
| | * Counts as 3 hits for damage scaling when comboed into (applies to next hit) |
| <br> | | <br> |
| Super-cancelable TC and confirmable from {{clr|H|4HK}}. Doesn't combo into her lvl1 midscreen.
| | An easy hitconfirm extension from {{clr|H|4HK}}. Leads to juggles in the corner, most notably {{clr|SA|SA1}} and {{clr|M|623MK}}. In a higher juggle scenario, it's possible to land {{clr|H|623HK}} or {{clr|SA|SA2}} instead. |
| }} | | }} |
| <br> | | <br> |
| Line 410: |
Line 427: |
| | info = | | | info = |
| {{AttackDataCargo-SF6/Query|mai_lplk}} | | {{AttackDataCargo-SF6/Query|mai_lplk}} |
| * Punish Counter: HKD +? | | * Punish Counter: HKD +21 |
| * Applies 20% immediate damage scaling when comboed into (e.g. after Crumple) | | * Applies 20% immediate damage scaling when comboed into (e.g. after Crumple) |
| <br> | | <br> |
| Line 428: |
Line 445: |
| {{AttackDataCargo-SF6/Query|mai_4lplk}} | | {{AttackDataCargo-SF6/Query|mai_4lplk}} |
| * Side switches | | * Side switches |
| * Punish Counter: HKD +? | | * Punish Counter: HKD +17 |
| * Applies 20% immediate damage scaling when comboed into (e.g. after Crumple) | | * Applies 20% immediate damage scaling when comboed into (e.g. after Crumple) |
| <br> | | <br> |
| Line 445: |
Line 462: |
| | info = | | | info = |
| {{AttackDataCargo-SF6/Query|mai_jlplk}} | | {{AttackDataCargo-SF6/Query|mai_jlplk}} |
| * | | * Punish Counter: HKD +20 |
| <br> | | <br> |
|
| |
|
| Line 694: |
Line 711: |
| {{AttackDataCargo-SF6/Query|mai_214mp}} | | {{AttackDataCargo-SF6/Query|mai_214mp}} |
| * | | * |
| Typically outclassed by Mai's 236Ks when available in terms of corner carry. Has enough frame advantage on hit to safely set up a meaty hold Kachosen. | | Typically outclassed by Mai's 236Ks when available in terms of corner carry. Has enough frame advantage on hit to safely set up a meaty hold Kachousen. |
| {{AttackDataCargo-SF6/Query|mai_214hp}} | | {{AttackDataCargo-SF6/Query|mai_214hp}} |
| * Whiffs on crouching opponents | | * Whiffs on crouching opponents |


