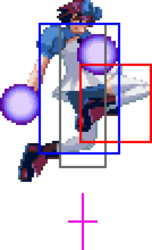
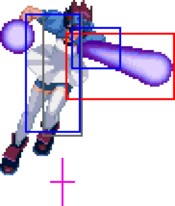
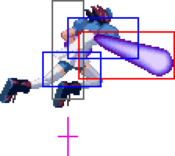
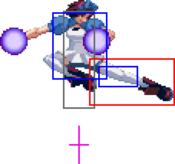
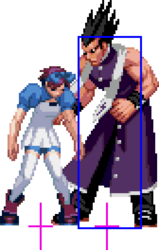
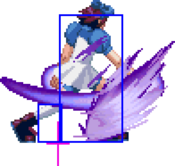
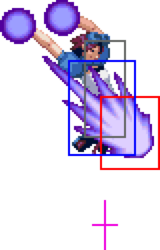
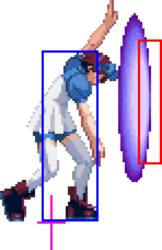
(Template) |
No edit summary |
||
| Line 3: | Line 3: | ||
<center>'''Move List Showcase''' <br> | <center>'''Move List Showcase''' <br> | ||
<youtube>OCQVSsv_SZw</youtube></center> | <youtube>OCQVSsv_SZw</youtube></center> | ||
==Movelist== | ==Movelist== | ||
====Impact==== | ====Impact==== | ||
[[File: | [[File:Snka.gif]][[File:Snka.gif]][[File:Snkc.gif]][[File:Snkc.gif]][[File:Snkc.gif]] | ||
''(Air)'' [[File: | ''(Air)'' [[File:Snkb.gif]][[File:Snka.gif]][[File:Snkc.gif]][[File:Snkd.gif]][[File:Snkd.gif]] | ||
====Command Normals==== | ====Command Normals==== | ||
{{f}}[[File:Snka.gif]] | {{f}}[[File:Snka.gif]] | ||
''(Air)'' {{d}}[[File:Snkb.gif]] | |||
====Special Moves==== | ====Special Moves==== | ||
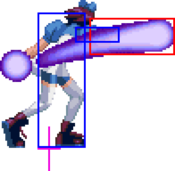
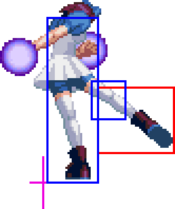
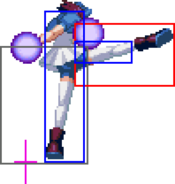
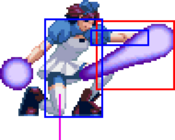
{{ | {{qcb}}[[File:Snka.gif]]/[[File:Snkc.gif]] - Eat It | ||
{{ | {{dp}}[[File:Snka.gif]]/[[File:Snkc.gif]] - Raising Hell | ||
{{qcf}}[[File:Snka.gif]]/[[File:Snkc.gif]] - | {{qcf}}[[File:Snka.gif]]/[[File:Snkc.gif]] - Twinkle Twinkle | ||
{{ | ''(Air)'' {{qcb}}[[File:Snkb.gif]]/[[File:Snkd.gif]] - Heads Off | ||
====Super Moves==== | ====Super Moves==== | ||
{{ | {{hcb}}{{f}}[[File:Snka.gif]]/[[File:Snkc.gif]] - Red Rose | ||
| Line 67: | Line 39: | ||
|Stun=2 | |Stun=2 | ||
|Cancel=Chain, Command, Special | |Cancel=Chain, Command, Special | ||
|Startup= | |Startup=4 | ||
|Active= | |Active= | ||
|Recovery= | |Recovery= | ||
|Adv. Hit= | |Adv. Hit=+1 | ||
|Adv. Guard= | |Adv. Guard=0 | ||
|description= | |description= | ||
}} | }} | ||
| Line 85: | Line 57: | ||
|Stun=4 | |Stun=4 | ||
|Cancel=Command, Special | |Cancel=Command, Special | ||
|Startup= | |Startup=4 | ||
|Active= | |Active= | ||
|Recovery= | |Recovery= | ||
|Adv. Hit= | |Adv. Hit=+1 | ||
|Adv. Guard= | |Adv. Guard=0 | ||
|description= | |description= | ||
}} | }} | ||
| Line 103: | Line 75: | ||
|Stun=8 | |Stun=8 | ||
|Cancel=Command, Special | |Cancel=Command, Special | ||
|Startup= | |Startup=7 | ||
|Active= | |Active= | ||
|Recovery= | |Recovery= | ||
|Adv. Hit= | |Adv. Hit=0/+3 | ||
|Adv. Guard= | |Adv. Guard=-3 | ||
|description= | |description= | ||
}} | }} | ||
| Line 121: | Line 93: | ||
|Stun=10 | |Stun=10 | ||
|Cancel=Command, Special | |Cancel=Command, Special | ||
|Startup= | |Startup=6 | ||
|Active= | |Active= | ||
|Recovery= | |Recovery= | ||
|Adv. Hit= | |Adv. Hit=-5/-2 | ||
|Adv. Guard= | |Adv. Guard=-8 | ||
|description= | |description= | ||
}} | }} | ||
| Line 141: | Line 113: | ||
|Stun=2 | |Stun=2 | ||
|Cancel=Chain, Command, Special | |Cancel=Chain, Command, Special | ||
|Startup= | |Startup=4 | ||
|Active= | |Active= | ||
|Recovery= | |Recovery= | ||
|Adv. Hit= | |Adv. Hit=-1 | ||
|Adv. Guard= | |Adv. Guard=-2 | ||
|description= | |description= | ||
}} | }} | ||
| Line 159: | Line 131: | ||
|Stun=5 | |Stun=5 | ||
|Cancel= | |Cancel= | ||
|Startup= | |Startup=5 | ||
|Active= | |Active= | ||
|Recovery= | |Recovery= | ||
|Adv. Hit= | |Adv. Hit=-4 | ||
|Adv. Guard= | |Adv. Guard=-5 | ||
|description= | |description= | ||
}} | }} | ||
| Line 177: | Line 149: | ||
|Stun=10 | |Stun=10 | ||
|Cancel= | |Cancel= | ||
|Startup= | |Startup=11 | ||
|Active= | |Active= | ||
|Recovery= | |Recovery= | ||
|Adv. Hit= | |Adv. Hit=+1/+4 | ||
|Adv. Guard= | |Adv. Guard=-2 | ||
|description= | |description= | ||
}} | }} | ||
| Line 195: | Line 167: | ||
|Stun=12 | |Stun=12 | ||
|Cancel= | |Cancel= | ||
|Startup= | |Startup=11 | ||
|Active= | |Active= | ||
|Recovery= | |Recovery= | ||
|Adv. Hit= | |Adv. Hit=-9/-6 | ||
|Adv. Guard= | |Adv. Guard=-12 | ||
|description= | |description= | ||
}} | }} | ||
| Line 215: | Line 187: | ||
|Stun=2 | |Stun=2 | ||
|Cancel=Chain, Command, Special | |Cancel=Chain, Command, Special | ||
|Startup= | |Startup=4 | ||
|Active= | |Active= | ||
|Recovery= | |Recovery= | ||
|Adv. Hit= | |Adv. Hit=+1 | ||
|Adv. Guard= | |Adv. Guard=0 | ||
|description= | |description= | ||
}} | }} | ||
| Line 233: | Line 205: | ||
|Stun=4 | |Stun=4 | ||
|Cancel=Command, Special | |Cancel=Command, Special | ||
|Startup= | |Startup=4 | ||
|Active= | |Active= | ||
|Recovery= | |Recovery= | ||
|Adv. Hit= | |Adv. Hit=+2 | ||
|Adv. Guard= | |Adv. Guard=+1 | ||
|description= | |description=One of Alice's only two lows. Doesn't chain into itself, doesn't combo into any knockdowns besides super. :( | ||
}} | }} | ||
}} | }} | ||
| Line 251: | Line 223: | ||
|Stun=8 | |Stun=8 | ||
|Cancel=Command, Special | |Cancel=Command, Special | ||
|Startup= | |Startup=6 | ||
|Active= | |Active= | ||
|Recovery= | |Recovery= | ||
|Adv. Hit= | |Adv. Hit=+4 | ||
|Adv. Guard= | |Adv. Guard=-2 | ||
|description= | |description=One of Alice's most important tools. It's fast, it has good range and it's just good enough on block to lead to frame traps. | ||
}} | }} | ||
}} | }} | ||
| Line 269: | Line 241: | ||
|Stun=15 | |Stun=15 | ||
|Cancel= | |Cancel= | ||
|Startup= | |Startup=7 | ||
|Active= | |Active= | ||
|Recovery= | |Recovery= | ||
|Adv. Hit=KD | |Adv. Hit=KD | ||
|Adv. Guard= | |Adv. Guard=-3 | ||
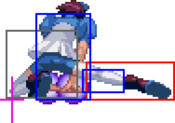
|description= | |description=Alice's only other low is a sweep. | ||
}} | }} | ||
}} | }} | ||
| Line 288: | Line 260: | ||
|Guard=High/Air | |Guard=High/Air | ||
|Stun=6 | |Stun=6 | ||
|Cancel=Special | |Cancel=Command, Special | ||
|Startup= | |Startup=3 | ||
|Active= | |Active= | ||
|Recovery= | |Recovery= | ||
| Line 306: | Line 278: | ||
|Guard=High/Air | |Guard=High/Air | ||
|Stun=8 | |Stun=8 | ||
|Cancel=Special | |Cancel=Command, Special | ||
|Startup= | |Startup=3 | ||
|Active= | |Active= | ||
|Recovery= | |Recovery= | ||
| Line 324: | Line 296: | ||
|Guard=High/Air | |Guard=High/Air | ||
|Stun=12 | |Stun=12 | ||
|Cancel=Special | |Cancel=Command, Special | ||
|Startup= | |Startup=6 | ||
|Active= | |Active= | ||
|Recovery= | |Recovery= | ||
| Line 342: | Line 314: | ||
|Guard=High/Air | |Guard=High/Air | ||
|Stun=12 | |Stun=12 | ||
|Cancel=Special | |Cancel=Command, Special | ||
|Startup= | |Startup=6 | ||
|Active= | |Active= | ||
|Recovery= | |Recovery= | ||
| Line 360: | Line 332: | ||
|Guard=High/Air | |Guard=High/Air | ||
|Stun=12 | |Stun=12 | ||
|Cancel=Special | |Cancel=Command, Special | ||
|Startup= | |Startup=5 | ||
|Active= | |Active= | ||
|Recovery= | |Recovery= | ||
| Line 378: | Line 350: | ||
|Guard=High/Air | |Guard=High/Air | ||
|Stun=12 | |Stun=12 | ||
|Cancel=Special | |Cancel=Command, Special | ||
|Startup= | |Startup=6 | ||
|Active= | |Active= | ||
|Recovery= | |Recovery= | ||
|Adv. Hit= | |Adv. Hit= | ||
|Adv. Guard= | |Adv. Guard= | ||
|description= | |description=An instant overhead which works on everyone if you hop. This enables her triple overhead string with this, j.2B and j.214B/D. However, Alice has bad lows, so the only mixup with this string is the stagger. | ||
}} | }} | ||
}} | }} | ||
| Line 390: | Line 362: | ||
==Command Normals== | ==Command Normals== | ||
{{MoveData | {{MoveData | ||
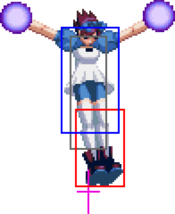
|image= | |image=ROTD_Alice_6A.png | ||
|caption= | |caption= | ||
|name= | |name=6A | ||
|data= | |data= | ||
{{AttackData-ROTD | {{AttackData-ROTD | ||
|Damage= | |Damage=9 (3×3) | ||
|Guard= | |Guard=Mid | ||
|Stun= | |Stun=3 (1×3) | ||
|Cancel=Special | |Cancel=Special | ||
|Startup= | |Startup=17 | ||
|Active= | |Active= | ||
|Recovery= | |Recovery= | ||
|Adv. Hit= | |Adv. Hit=-2 | ||
|Adv. Guard= | |Adv. Guard=-8 | ||
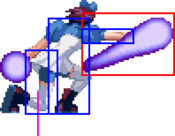
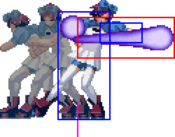
|description= | |description=Alice puts her hands together and does a forward projecting 3 hitting move. Decent range on this move and it can be cancelled on any hit. | ||
}} | }} | ||
}} | }} | ||
{{MoveData | {{MoveData | ||
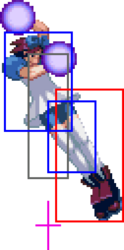
|image= | |image=ROTD_Alice_j2B.png | ||
|caption= | |caption= | ||
|name= | |name=j.2B | ||
|data= | |data= | ||
{{AttackData-ROTD | {{AttackData-ROTD | ||
|Damage= | |Damage=12 | ||
|Guard= | |Guard=High | ||
|Stun= | |Stun=14 | ||
|Cancel= | |Cancel=Special | ||
|Startup= | |Startup=6 | ||
|Active= | |Active= | ||
|Recovery= | |Recovery= | ||
|Adv. Hit=KD | |Adv. Hit=KD | ||
|Adv. Guard= | |Adv. Guard= | ||
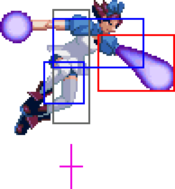
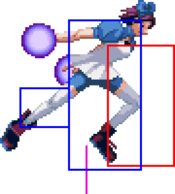
|description= | |description=A kneedrop which cannot be blocked in the air, but for air wars, it lacks horizontal range. On contact, Alice jumps forward, no matter which way she was jumping. She can then cancel into Heads Off to continue her overhead string. May or may not enable an infinite. | ||
}} | }} | ||
}} | }} | ||
==Throws== | |||
{{MoveData | {{MoveData | ||
|image= | |image=ROTD_Alice_throw.png | ||
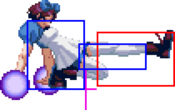
|caption= | |caption= | ||
|name= | |name=4/6C | ||
|data= | |data= | ||
{{AttackData-ROTD | {{AttackData-ROTD | ||
| Line 442: | Line 414: | ||
|Adv. Hit=KD | |Adv. Hit=KD | ||
|Adv. Guard= | |Adv. Guard= | ||
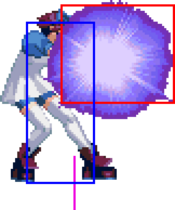
|description= | |description=Alice shoots the opponent fullscreen. | ||
}} | }} | ||
}} | }} | ||
| Line 457: | Line 429: | ||
|Stun=0 | |Stun=0 | ||
|Cancel=Command, Special | |Cancel=Command, Special | ||
|Startup=6 | |Startup=6 (1-11 invuln) | ||
|Active=2 | |Active=2 | ||
|Recovery=25 | |Recovery=25 | ||
| Line 475: | Line 447: | ||
|Stun=10 | |Stun=10 | ||
|Cancel= | |Cancel= | ||
|Startup=13 | |Startup=13 (1-15 invuln) | ||
|Active= | |Active= | ||
|Recovery= | |Recovery= | ||
|Adv. Hit=KD | |Adv. Hit=KD | ||
|Adv. Guard=-8 | |Adv. Guard=-8 | ||
| Line 493: | Line 465: | ||
|Stun=0 | |Stun=0 | ||
|Cancel=Hit: Command, Special | |Cancel=Hit: Command, Special | ||
|Startup= | |Startup=14 | ||
|Active= | |Active= | ||
|Recovery= | |Recovery= | ||
|Adv. Hit=KD | |Adv. Hit=KD | ||
|Adv. Guard= | |Adv. Guard=-18 | ||
|description= | |description=Possibly the game's most eyeroll-inducing move. Alice can use Air Impact for normal combos, but infamously, she can delay j.2B a little so it whiffs, then she'll land early and can juggle with First Impact — again and again and again. It doesn't solve her vulnerability to turtles, but it's still among the fastest First Impacts in the game, which makes it a realistic footsies tool. | ||
}} | }} | ||
}} | }} | ||
| Line 521: | Line 493: | ||
}} | }} | ||
{{AttackData-ROTD | {{AttackData-ROTD | ||
|Damage=27 ( | |Damage=27 (27 with Elias) | ||
|Guard= | |Guard= | ||
|Stun=0 | |Stun=0 | ||
| Line 536: | Line 508: | ||
==Special Moves== | ==Special Moves== | ||
{{MoveData | {{MoveData | ||
|image= | |image=ROTD_Alice_214P.png | ||
|caption= | |caption=214A/C | ||
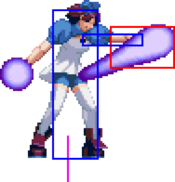
|name= | |name=Eat It | ||
|data= | |||
{{AttackData-ROTD | |||
|Damage=16 | |||
|Guard=Mid | |||
|Stun=4 | |||
|Cancel= | |||
|Startup=10 | |||
|Active= | |||
|Recovery= | |||
|Adv. Hit=-1/+3 | |||
|Adv. Guard=-8 | |||
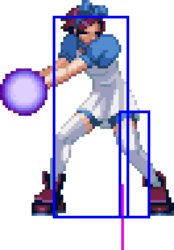
|description=This version is fast and can be comboed but keeps the opponent standing. Just a mid, but takes up a decent chunk of space and can't be air blocked. Solid anti-air and neutral tool. | |||
}} | |||
{{AttackData-ROTD | |||
|Damage=18 (8+10) | |||
|Guard=High | |||
|Stun=8 (4+4) | |||
|Cancel= | |||
|Startup=28 | |||
|Active= | |||
|Recovery= | |||
|Adv. Hit=KD | |||
|Adv. Guard=-9 | |||
|description=Overhead. Same as A version but is marginally slower, hits twice and knocks down. | |||
}} | |||
}} | |||
{{MoveData | |||
|image=ROTD_Alice_623A.png | |||
|image2=ROTD_Alice_623C.png | |||
|caption=623A | |||
|caption2=623C | |||
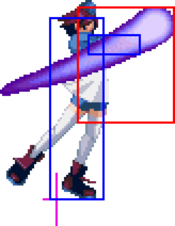
|name=Raising Hell | |||
|data= | |data= | ||
{{AttackData-ROTD | {{AttackData-ROTD | ||
|Damage= | |Damage=16 | ||
|Guard= | |Guard=Mid/Air | ||
|Stun= | |Stun=4 | ||
|Cancel= | |||
|Startup=18 | |||
|Active= | |||
|Recovery= | |||
|Adv. Hit=KD | |||
|Adv. Guard=+7 | |||
|description=Pillars — another important zoning tool. A version appears in front of Alice. Useful for combos, but can't combo from lights. | |||
}} | |||
{{AttackData-ROTD | |||
|Damage=16 | |||
|Guard=Mid/Air | |||
|Stun=4 | |||
|Cancel= | |||
|Startup=23 | |||
|Active= | |||
|Recovery= | |||
|Adv. Hit=KD | |||
|Adv. Guard=+4 | |||
|description=C version appears far from Alice. Useful to punish at range. | |||
}} | |||
}} | |||
{{MoveData | |||
|image=ROTD_Alice_236P.png | |||
|image2=ROTD_Alice_236C.png | |||
|caption=236A/C | |||
|caption2=236C | |||
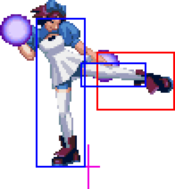
|name=Twinkle Twinkle | |||
|data= | |||
{{AttackData-ROTD | |||
|Damage=14 | |||
|Guard=Mid/Air | |||
|Stun=8 | |||
|Cancel= | |||
|Startup=10 | |||
|Active= | |||
|Recovery= | |||
|Adv. Hit=+2 | |||
|Adv. Guard=-4 | |||
|description=Reppuken! Projectile which travels along the ground quickly. | |||
}} | |||
{{AttackData-ROTD | |||
|Damage=28 (14+14) | |||
|Guard=Mid/Air | |||
|Stun=16 (8+8) | |||
|Cancel= | |||
|Startup=17 | |||
|Active= | |||
|Recovery= | |||
|Adv. Hit=-2 | |||
|Adv. Guard=-8 | |||
|description=Double Reppuken! Two projectiles which travel along the ground quickly. This is getting out of hand. | |||
}} | |||
}} | |||
{{MoveData | |||
|image=ROTD_Alice_j214K.png | |||
|caption=j.214B/D | |||
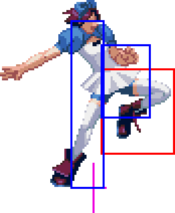
|name=Heads Off | |||
|data= | |||
{{AttackData-ROTD | |||
|Damage=16 | |||
|Guard=High/Air | |||
|Stun=8 | |||
|Cancel= | |Cancel= | ||
|Startup= | |Startup=18 | ||
|Active= | |Active= | ||
|Recovery= | |Recovery= | ||
|Adv. Hit= | |Adv. Hit=KD | ||
|Adv. Guard= | |Adv. Guard=~-2 | ||
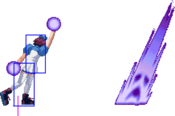
|description= | |description=Knee drop move. Takes a good while to come out since Alice spins up before diving down. Can be hit out of since the hitbox is poor. Best used after j.2B for another overhead option. | ||
}} | }} | ||
{{AttackData-ROTD | {{AttackData-ROTD | ||
|Damage= | |Damage=16 | ||
|Guard= | |Guard=High/Air | ||
|Stun= | |Stun=8 | ||
|Cancel= | |Cancel= | ||
|Startup= | |Startup=18 | ||
|Active= | |Active= | ||
|Recovery= | |Recovery= | ||
|Adv. Hit= | |Adv. Hit=KD | ||
|Adv. Guard= | |Adv. Guard=~-2 | ||
|description= | |description=Flies at a shallower angle. | ||
}} | }} | ||
}} | }} | ||
| Line 568: | Line 634: | ||
==Super Moves== | ==Super Moves== | ||
{{MoveData | {{MoveData | ||
|image= | |image=ROTD_Alice_632146P.png | ||
|caption= | |caption=632146A/C | ||
|name= | |name=Red Rose | ||
|data= | |data= | ||
{{AttackData-ROTD | {{AttackData-ROTD | ||
|Damage= | |Damage=40 (0+0+40) | ||
|Guard= | |Guard=Mid | ||
|Stun= | |Stun=0 | ||
|Cancel= | |Cancel= | ||
|Startup= | |Startup=2 (1 invuln, 2-20 guard) | ||
|Active= | |Active= | ||
|Recovery= | |Recovery= | ||
|Adv. Hit=KD | |Adv. Hit=KD | ||
|Adv. Guard= | |Adv. Guard=-9 | ||
|description= | |description=Alice puts an energy shield in front of her. If it makes contact with any hurtbox, projectile etc., regardless if on hit or block, it will trigger into the 2nd stage. The disjoint on the first hit is good and goes over Alice's head slightly. If used as an anti-air, it can trade with jump-ins easily. | ||
}} | }} | ||
{{AttackData-ROTD | {{AttackData-ROTD | ||
|Damage= | |Damage=49 (0+0+10+5+5+40) | ||
|Guard= | |Guard=Mid | ||
|Stun= | |Stun=0 | ||
|Cancel= | |Cancel= | ||
|Startup= | |Startup=2 (1 invuln, 28 guard) | ||
|Active= | |Active= | ||
|Recovery= | |Recovery= | ||
|Adv. Hit=KD | |Adv. Hit=KD | ||
|Adv. Guard= | |Adv. Guard=-9 | ||
|description=The | |description=The heavy version is the same but adds additional hits. | ||
}} | }} | ||
}} | }} | ||
Revision as of 02:28, 11 November 2024
Movelist
Impact
Command Normals
Special Moves
Super Moves
Close Normals
| Damage | Guard | Stun | Cancel | |
|---|---|---|---|---|
| 6 | Mid | 2 | Chain, Command, Special | |
| Startup | Active | Recovery | Adv. Hit | Adv. Guard |
| 4 | - | - | +1 | 0 |
| Damage | Guard | Stun | Cancel | |
|---|---|---|---|---|
| 8 | Mid | 4 | Command, Special | |
| Startup | Active | Recovery | Adv. Hit | Adv. Guard |
| 4 | - | - | +1 | 0 |
| Damage | Guard | Stun | Cancel | |
|---|---|---|---|---|
| 16 | Mid | 8 | Command, Special | |
| Startup | Active | Recovery | Adv. Hit | Adv. Guard |
| 7 | - | - | 0/+3 | -3 |
| Damage | Guard | Stun | Cancel | |
|---|---|---|---|---|
| 18 | Mid | 10 | Command, Special | |
| Startup | Active | Recovery | Adv. Hit | Adv. Guard |
| 6 | - | - | -5/-2 | -8 |
Standing Normals
| Damage | Guard | Stun | Cancel | |
|---|---|---|---|---|
| 8 | Mid | 2 | Chain, Command, Special | |
| Startup | Active | Recovery | Adv. Hit | Adv. Guard |
| 4 | - | - | -1 | -2 |
| Damage | Guard | Stun | Cancel | |
|---|---|---|---|---|
| 10 | Mid | 5 | - | |
| Startup | Active | Recovery | Adv. Hit | Adv. Guard |
| 5 | - | - | -4 | -5 |
| Damage | Guard | Stun | Cancel | |
|---|---|---|---|---|
| 18 | Mid | 10 | - | |
| Startup | Active | Recovery | Adv. Hit | Adv. Guard |
| 11 | - | - | +1/+4 | -2 |
| Damage | Guard | Stun | Cancel | |
|---|---|---|---|---|
| 20 | Mid | 12 | - | |
| Startup | Active | Recovery | Adv. Hit | Adv. Guard |
| 11 | - | - | -9/-6 | -12 |
Crouching Normals
| Damage | Guard | Stun | Cancel | |
|---|---|---|---|---|
| 6 | Mid | 2 | Chain, Command, Special | |
| Startup | Active | Recovery | Adv. Hit | Adv. Guard |
| 4 | - | - | +1 | 0 |
| Damage | Guard | Stun | Cancel | ||
|---|---|---|---|---|---|
| 8 | Low | 4 | Command, Special | ||
| Startup | Active | Recovery | Adv. Hit | Adv. Guard | |
| 4 | - | - | +2 | +1 | |
|
One of Alice's only two lows. Doesn't chain into itself, doesn't combo into any knockdowns besides super. :( | |||||
| Damage | Guard | Stun | Cancel | ||
|---|---|---|---|---|---|
| 16 | Mid | 8 | Command, Special | ||
| Startup | Active | Recovery | Adv. Hit | Adv. Guard | |
| 6 | - | - | +4 | -2 | |
|
One of Alice's most important tools. It's fast, it has good range and it's just good enough on block to lead to frame traps. | |||||
| Damage | Guard | Stun | Cancel | ||
|---|---|---|---|---|---|
| 20 | Low | 15 | - | ||
| Startup | Active | Recovery | Adv. Hit | Adv. Guard | |
| 7 | - | - | KD | -3 | |
|
Alice's only other low is a sweep. | |||||
Jumping Normals
| Damage | Guard | Stun | Cancel | |
|---|---|---|---|---|
| 8 | High/Air | 6 | Command, Special | |
| Startup | Active | Recovery | Adv. Hit | Adv. Guard |
| 3 | - | - | - | - |
| Damage | Guard | Stun | Cancel | |
|---|---|---|---|---|
| 10 | High/Air | 8 | Command, Special | |
| Startup | Active | Recovery | Adv. Hit | Adv. Guard |
| 3 | - | - | - | - |
| Damage | Guard | Stun | Cancel | |
|---|---|---|---|---|
| 14 | High/Air | 12 | Command, Special | |
| Startup | Active | Recovery | Adv. Hit | Adv. Guard |
| 6 | - | - | - | - |
| Damage | Guard | Stun | Cancel | |
|---|---|---|---|---|
| 14 | High/Air | 12 | Command, Special | |
| Startup | Active | Recovery | Adv. Hit | Adv. Guard |
| 6 | - | - | - | - |
| Damage | Guard | Stun | Cancel | |
|---|---|---|---|---|
| 16 | High/Air | 12 | Command, Special | |
| Startup | Active | Recovery | Adv. Hit | Adv. Guard |
| 5 | - | - | - | - |
| Damage | Guard | Stun | Cancel | ||
|---|---|---|---|---|---|
| 16 | High/Air | 12 | Command, Special | ||
| Startup | Active | Recovery | Adv. Hit | Adv. Guard | |
| 6 | - | - | - | - | |
|
An instant overhead which works on everyone if you hop. This enables her triple overhead string with this, j.2B and j.214B/D. However, Alice has bad lows, so the only mixup with this string is the stagger. | |||||
Command Normals
| Damage | Guard | Stun | Cancel | ||
|---|---|---|---|---|---|
| 9 (3×3) | Mid | 3 (1×3) | Special | ||
| Startup | Active | Recovery | Adv. Hit | Adv. Guard | |
| 17 | - | - | -2 | -8 | |
|
Alice puts her hands together and does a forward projecting 3 hitting move. Decent range on this move and it can be cancelled on any hit. | |||||
| Damage | Guard | Stun | Cancel | ||
|---|---|---|---|---|---|
| 12 | High | 14 | Special | ||
| Startup | Active | Recovery | Adv. Hit | Adv. Guard | |
| 6 | - | - | KD | - | |
|
A kneedrop which cannot be blocked in the air, but for air wars, it lacks horizontal range. On contact, Alice jumps forward, no matter which way she was jumping. She can then cancel into Heads Off to continue her overhead string. May or may not enable an infinite. | |||||
Throws
| Damage | Guard | Stun | Cancel | ||
|---|---|---|---|---|---|
| 20 | - | 0 | - | ||
| Startup | Active | Recovery | Adv. Hit | Adv. Guard | |
| 1 | 1 | - | KD | - | |
|
Alice shoots the opponent fullscreen. | |||||
System
| Damage | Guard | Stun | Cancel | |
|---|---|---|---|---|
| 16 | Mid | 0 | Command, Special | |
| Startup | Active | Recovery | Adv. Hit | Adv. Guard |
| 6 (1-11 invuln) | 2 | 25 | KD | -10 |
| Damage | Guard | Stun | Cancel | |
|---|---|---|---|---|
| 10 | Mid | 10 | - | |
| Startup | Active | Recovery | Adv. Hit | Adv. Guard |
| 13 (1-15 invuln) | - | - | KD | -8 |
| Damage | Guard | Stun | Cancel | ||
|---|---|---|---|---|---|
| 5+5×5 | Mid | 0 | Hit: Command, Special | ||
| Startup | Active | Recovery | Adv. Hit | Adv. Guard | |
| 14 | - | - | KD | -18 | |
|
Possibly the game's most eyeroll-inducing move. Alice can use Air Impact for normal combos, but infamously, she can delay j.2B a little so it whiffs, then she'll land early and can juggle with First Impact — again and again and again. It doesn't solve her vulnerability to turtles, but it's still among the fastest First Impacts in the game, which makes it a realistic footsies tool. | |||||
| Damage | Guard | Stun | Cancel | ||
|---|---|---|---|---|---|
| 30 | Mid | 0 | - | ||
| Startup | Active | Recovery | Adv. Hit | Adv. Guard | |
| 4 | 60 | 29 | KD | -13 | |
|
Your partner must be alive and able to tag in. | |||||
| Damage | Guard | Stun | Cancel | ||
| 27 (27 with Elias) | - | 0 | - | ||
| Startup | Active | Recovery | Adv. Hit | Adv. Guard | |
| - | - | - | KD | - | |
|
Follow up with another 236BC for more damage. Costs an extra bar. | |||||
Special Moves
| Damage | Guard | Stun | Cancel | ||
|---|---|---|---|---|---|
| 16 | Mid | 4 | - | ||
| Startup | Active | Recovery | Adv. Hit | Adv. Guard | |
| 10 | - | - | -1/+3 | -8 | |
|
This version is fast and can be comboed but keeps the opponent standing. Just a mid, but takes up a decent chunk of space and can't be air blocked. Solid anti-air and neutral tool. | |||||
| Damage | Guard | Stun | Cancel | ||
| 18 (8+10) | High | 8 (4+4) | - | ||
| Startup | Active | Recovery | Adv. Hit | Adv. Guard | |
| 28 | - | - | KD | -9 | |
|
Overhead. Same as A version but is marginally slower, hits twice and knocks down. | |||||
| Damage | Guard | Stun | Cancel | ||
|---|---|---|---|---|---|
| 16 | Mid/Air | 4 | - | ||
| Startup | Active | Recovery | Adv. Hit | Adv. Guard | |
| 18 | - | - | KD | +7 | |
|
Pillars — another important zoning tool. A version appears in front of Alice. Useful for combos, but can't combo from lights. | |||||
| Damage | Guard | Stun | Cancel | ||
| 16 | Mid/Air | 4 | - | ||
| Startup | Active | Recovery | Adv. Hit | Adv. Guard | |
| 23 | - | - | KD | +4 | |
|
C version appears far from Alice. Useful to punish at range. | |||||
| Damage | Guard | Stun | Cancel | ||
|---|---|---|---|---|---|
| 14 | Mid/Air | 8 | - | ||
| Startup | Active | Recovery | Adv. Hit | Adv. Guard | |
| 10 | - | - | +2 | -4 | |
|
Reppuken! Projectile which travels along the ground quickly. | |||||
| Damage | Guard | Stun | Cancel | ||
| 28 (14+14) | Mid/Air | 16 (8+8) | - | ||
| Startup | Active | Recovery | Adv. Hit | Adv. Guard | |
| 17 | - | - | -2 | -8 | |
|
Double Reppuken! Two projectiles which travel along the ground quickly. This is getting out of hand. | |||||
| Damage | Guard | Stun | Cancel | ||
|---|---|---|---|---|---|
| 16 | High/Air | 8 | - | ||
| Startup | Active | Recovery | Adv. Hit | Adv. Guard | |
| 18 | - | - | KD | ~-2 | |
|
Knee drop move. Takes a good while to come out since Alice spins up before diving down. Can be hit out of since the hitbox is poor. Best used after j.2B for another overhead option. | |||||
| Damage | Guard | Stun | Cancel | ||
| 16 | High/Air | 8 | - | ||
| Startup | Active | Recovery | Adv. Hit | Adv. Guard | |
| 18 | - | - | KD | ~-2 | |
|
Flies at a shallower angle. | |||||
Super Moves
| Damage | Guard | Stun | Cancel | ||
|---|---|---|---|---|---|
| 40 (0+0+40) | Mid | 0 | - | ||
| Startup | Active | Recovery | Adv. Hit | Adv. Guard | |
| 2 (1 invuln, 2-20 guard) | - | - | KD | -9 | |
|
Alice puts an energy shield in front of her. If it makes contact with any hurtbox, projectile etc., regardless if on hit or block, it will trigger into the 2nd stage. The disjoint on the first hit is good and goes over Alice's head slightly. If used as an anti-air, it can trade with jump-ins easily. | |||||
| Damage | Guard | Stun | Cancel | ||
| 49 (0+0+10+5+5+40) | Mid | 0 | - | ||
| Startup | Active | Recovery | Adv. Hit | Adv. Guard | |
| 2 (1 invuln, 28 guard) | - | - | KD | -9 | |
|
The heavy version is the same but adds additional hits. | |||||
