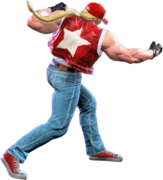
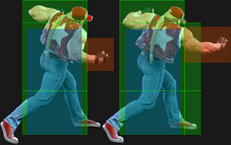
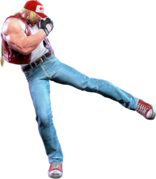
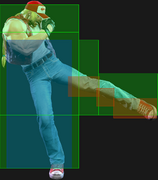
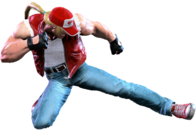
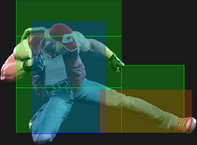
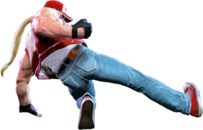
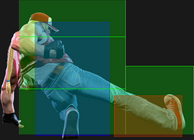
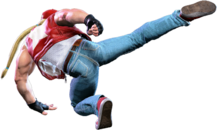
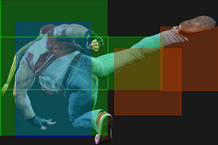
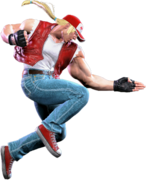
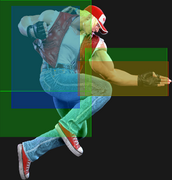
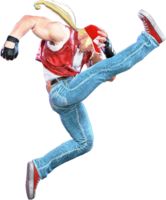
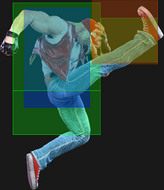
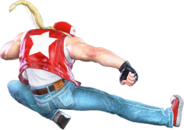
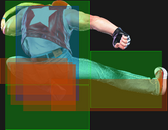
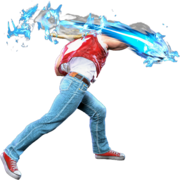
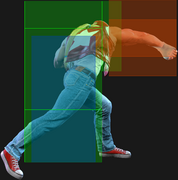
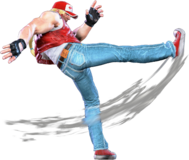
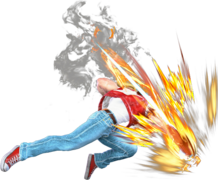
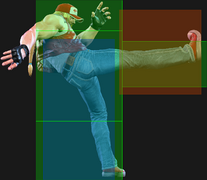
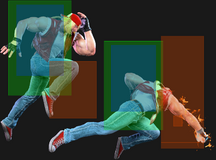
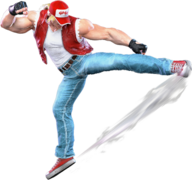
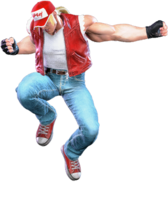
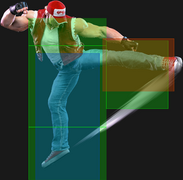
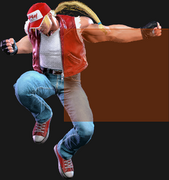
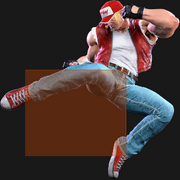
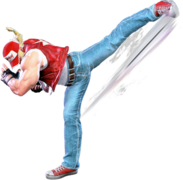
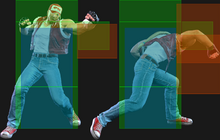
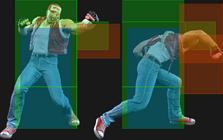
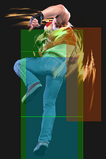
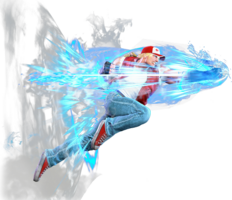
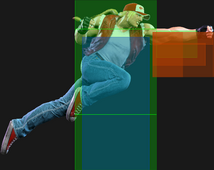
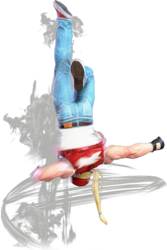
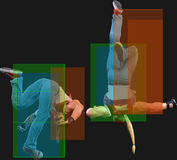
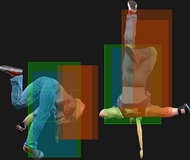
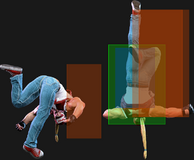
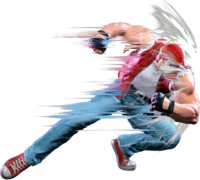
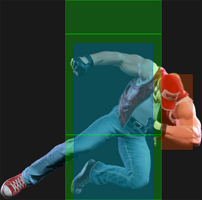
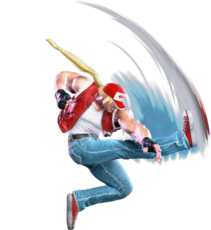
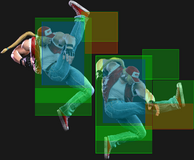
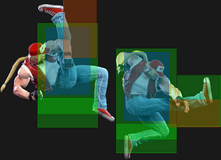
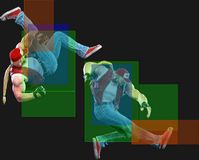
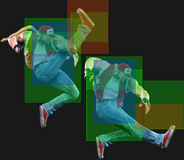
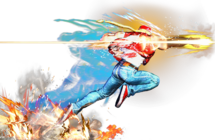
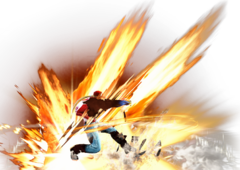
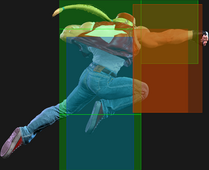
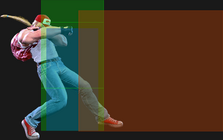
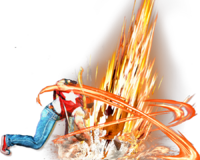
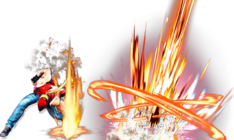
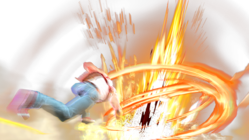
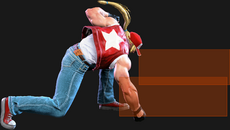
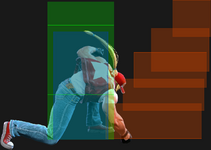
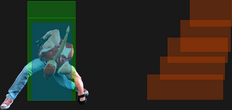
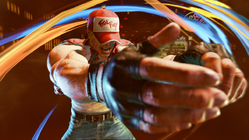
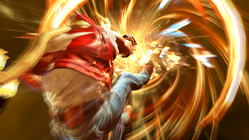
(→5MK) |
|||
| Line 90: | Line 90: | ||
* | * | ||
<br> | <br> | ||
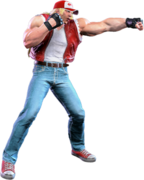
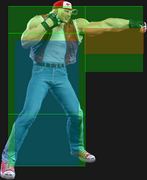
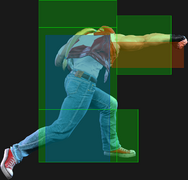
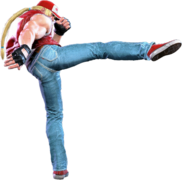
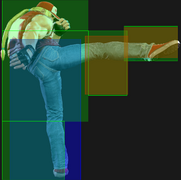
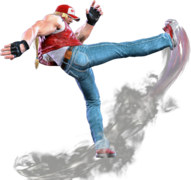
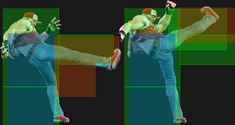
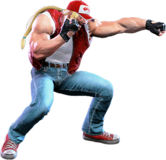
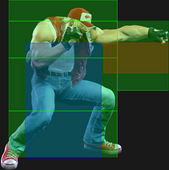
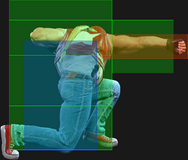
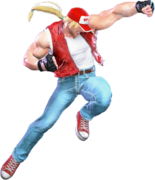
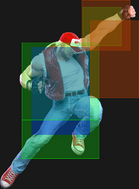
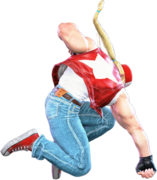
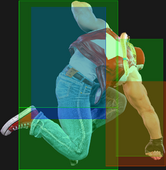
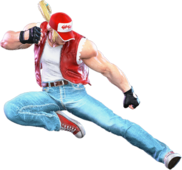
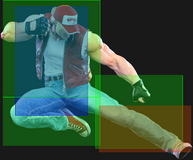
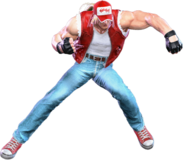
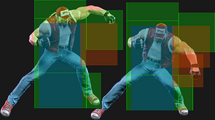
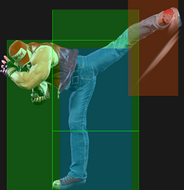
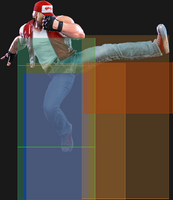
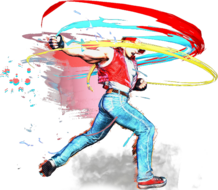
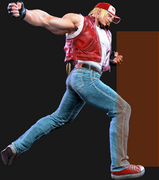
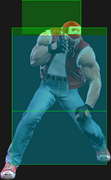
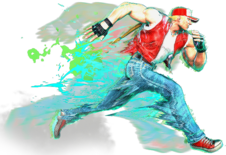
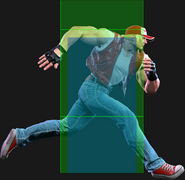
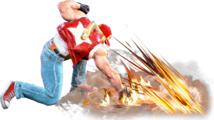
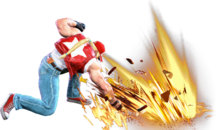
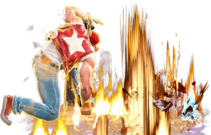
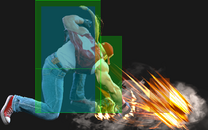
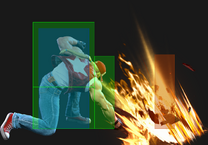
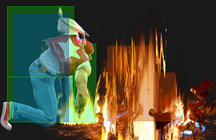
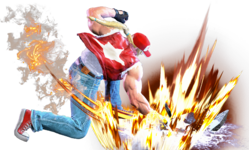
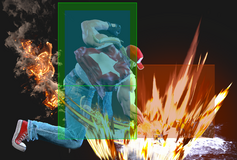
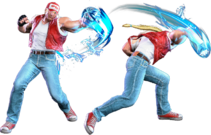
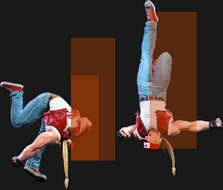
Long range poke and combo tool. Not special cancelable, but combos into standing light kick naturally from shorter ranges, allowing for 5Lk - light tackle - 2lp to link. Links into standing heavy punch from a drive rush or in a punish counter situation, making it important for many drive rush cancel combos. | Long range poke and combo tool. Not special cancelable, but combos into standing light kick naturally from shorter ranges, allowing for 5Lk - light tackle - 2lp to link. Links into standing heavy punch from a drive rush or in a punish counter situation, making it important for many drive rush cancel combos. On counter hit or punish counter, links into level 1 from any range. | ||
}} | }} | ||
Revision as of 10:46, 28 September 2024
| Character breakdown in progress
Terry is a new character! This page is currently under construction and information might be inaccurate, incomplete, or missing entirely. 🤝 Want to help us out? Join the SF6 Resource Hub for more info on editing and other ways you can potentially help with this resource. |
Introduction
A passionate fighter that hones his craft as he travels all over the world. Also known as the "Hungry Wolf." He came to Metro City after hearing about the opening of the Pao Pao Cafe.
With great disjointed normals, a broad variety of target combos, and a set of well-rounded special moves, Terry's primary strengths are very similar to a standard shoto package with a few extra twists that make him particularly unique--his main goal is going for close-range pressure and spacing traps to either force errors out of the opponent or punish them for overextending in closer-range before going in and bringing home the big one.
Notable amongst Terry's normals are his medium buttons, as well as his 5HP. 5MP alone starts off several target combos, each of which have their own utilities--Power Drive knocks the opponent down on hit and pushes them back far enough for a spacing trap from another 5MP on block, Passing Sway lets him attempt to try a strike/throw mixup or a sideswitch on hit, and Power Shoot sets him up for a Power Dunk on a 5MP counter-hit. As a counterbalance, much more of his conversion potential is put on his 2MP, especially after a Drive Rush, due to its hitbox, speed, and hitstun; his 5MK and 2MK, by comparison, are among his longest buttons, with 2MK featuring a special-cancelable Target Combo in Fire Kick and 5MK serving as an excellent poke that links into his fast and punishing SA1, Buster Wolf, on counterhit. 5HP is a two-hit normal that serves as one of his primary setups for juggles from other special moves, as well as being a huge threat from Drive Rush.
As far as special moves go, Terry has his pick of several versatile ones. On the projectile front, Power Wave and Round Wave are a pair of unique fireballs with different use cases. LP Power Wave travels on the ground much like Juri's enhanced Saihasho does, enabling it to sneak under higher projectiles and hitboxes, while MP Power Wave loses a bit of range in exchange for clashing with regular fireballs and OD Power Wave is a multi-hit projectile that's great for pressure and approaches; Round Wave eschews a projectile entirely, keeping the fireball clash property, and serves as a fireball bait from further away and a powerful pressure and okizeme tool up close. Quick Burn and Burn Knuckle are similarly divided in use--whereas Quick Burn allows Terry to break open opponents at close range with minimal risk when properly spaced, Burn Knuckle is a fast gap-closer (especially when spaced for safety) and a great corner carry tool during juggles. Power Charge allows Terry to set up both loops and juggles from anywhere on screen depending on which version he uses, while Crack Shoot is an excellent low crush, even hopping over projectiles when the HK version is used; Rising Tackle rounds out his kit with a standard DP. Terry also has a unique SA2, Power Geyser--not only is it a powerful anti-air tool, it can be extended into Double Geyser by spending 3 Drive Bars, and spending an additional Super Gauge on top of that turns it into Triple Geyser, which can potentially do more damage than even using his standard SA3, Rising Fang.
The main drawbacks to playing as Terry mostly deal with the speed and range of some of his other normals and how they affect his gameplan. Because 2MP is the only medium normal that Terry has that's 6 frames, and due to the lighter hitstun on his 5LP and short range of his 2LP, some of Terry's conversions are either short or awkward without spending Drive Gauge, getting a counterhit, or otherwise staying at very specific positioning. Similarly, while his medium and heavy buttons are quite disjointed, it is very easy for Terry to find himself outmatched in a poking war if he is too careless with where he places them, since many of them are a bit slower by comparison to other moves.
If you want a character who excels at close-mid range pokes, pressure, and punishes, and can crack open opponents with savvy street style, pick Terry and bust some wolves.
| Pick if you like: | Avoid if you dislike: |
|---|---|
|
|
Classic & Modern Versions Comparison
| Missing Normals |
|
|---|---|
| Missing Command Normals |
|
| Shortcut-Only Specials |
|
| Assist Combos |
|
| Miscellaneous Changes |
|
| Terry | |
|---|---|
| Vitals | |
| Life Points | 10000 |
| Ground Movement | |
| Forward Walk Speed | 0.048 |
| Backward Walk Speed | 0.032 |
| Forward Dash Speed | 19 |
| Backward Dash Speed | 23 |
| Forward Dash Distance | 1.50 |
| Backward Dash Distance | 0.985 |
| Drive Rush Min. Distance (Throw) | 0.634 |
| Drive Rush Min. Distance (Block) | 2.416 |
| Drive Rush Max Distance | 3.181 |
| Jumping | |
| Jump Speed | 4+38+3 |
| Jump Apex | 2.115 |
| Forward Jump Distance | 1.90 |
| Backward Jump Distance | 1.52 |
| Throws | |
| Throw Range | 0.8 |
| Throw Hurtbox | 0.33 |
| Frame Data Glossary - SF6 | |
|---|---|
| Hitbox Images |
🟥 (Red): Attack hitbox
🟩 (Green): Vulnerable hurtbox that can be hit by strikes/projectiles
🟦 (Blue): Vulnerable throw hurtbox
|
| Active |
How many frames a move remains active (can hurt opponents) for. For projectiles with a maximum active period, a value may be listed in [brackets], but this number is not factored into the move's total frame count.
|
| Cancel |
Available options for canceling one move into another move.
|
| Cancel Hitconfirm Windows |
Hitconfirm reaction windows into Special Moves, Target Combos, and Super Arts.
|
| Damage |
Attack damage on hit. Multi-hit moves may have the damage listed for individual hits as X,Y (or sometimes X*Y). Sometimes a move's damage changes depending on which active frame connects, or on cinematic vs. non-cinematic hits; in this case, multiple values may be listed, and it will be clarified in the move description.
|
| Damage Scaling |
Some moves cause additional damage scaling in combos. Refer to Game Data page for a more detailed breakdown. Scaling Types:
|
| Drive Rush Cancel Advantage |
Refers to the frame advantage when canceling a normal, command normal, or Target Combo into Drive Rush on hit or block (abbreviated as DRC for Drive Rush Cancel). This is calculated at the moment a follow-up attack can be input, not at the moment the character can block or perform movement options. An attack that with DRC +8 on Hit can link into an 8-frame attack, and DRC +4 on Block can create a true blockstring into a 4-frame attack. Note that any DRC on Block worse than +4 cannot form a true blockstring, allowing the opponent to interrupt with an invincible reversal. Most light normals are slightly negative after a DRC on block, meaning the opponent can mash their fastest normal to guarantee a counter-hit (though this requires fast reactions). The attacking character could punish this with Light > DRC into an immediate invincible attack, but this would be an incredibly expensive and high-risk gambit.
|
| Forced Knockdown |
Most airborne command normals, special moves, and Super Arts put the user in a "Forced Knockdown" state. While in this state, an air knockdown will occur when being hit by any attack, even if it would otherwise cause an air reset. As an example, Ryu's 2HP causes an air reset when used as an anti-air. Against a move like Cammy's Hooligan Combination, however, the 2HP puts her into an air knockdown state. This allows Ryu to successfully cancel 2HP into Shoryuken for a juggle, similar to how a Drive Impact wall splat works. Taking advantage of Forced Knockdown juggles is important for dealing with moves like Ken's Dragonlash, Dhalsim's Air Teleport, or Kimberly's 6HK~Hop sequence. Moves that already cause an air knockdown, like most j.MP air-to-airs, will not display the "Forced Knockdown" message.
|
| Guard |
Refers to the direction an attack must be blocked. L is for Low attacks (must be blocked crouching), H is for High attacks/overheads (must be blocked standing), LH is for attacks that can be blocked crouching or standing. T is for Throw attacks which cannot be blocked.
|
| Juggles |
When a character is put into an Air Knockdown state, it is often possible to follow up with a Juggle attack before they hit the ground. In the simplest terms, there are 2 main juggle states:
The following is a more detailed overview of the SF6 juggle system:
Juggle Start (JS): When starting a juggle, the opponent's JC will be set to this value. May be different vs. standing and airborne opponents.
Juggle Increase (JI): When opponent is already in a juggle state, attacks will increase the opponent's JC by this amount.
Juggle Limit (JL): Property of an attack hitbox that determines whether it connects on a juggled opponent. The JL must be ≥ the opponent's JC to hit successfully.
An example to tie everything together:
Drive Rush notes:
More recently, the official definitions used by Capcom are slightly different than these community-designated terms. When reading official patch notes, the following terms are used instead:
|
| On Hit/Block |
These are frame advantage values when the attack hits or is blocked. If the number is positive, then the move will recover before the defender can act again. If the number is negative, the defender will be able to act before the attacker and maybe even punish. KD refers to knockdown on hit, and the listed KD Advantage refers to how many frames the attacker can act before the defender finishes their wakeup animation.
|
| Recovery |
How many frames it takes for a move to finish after the active frames have finished. For projectiles, recovery is considered to begin after the first active frame.
|
| Startup |
How many frames it takes before the move becomes 'active' or have a hit box. The last startup frame and the first active frame are the same frame, meaning all values are written as Startup + 1.
|
| IASA / Actionable Recovery |
Some moves play out an extended recovery animation when no other button/direction is input (for crouching moves, it applies when holding any down direction). These are often referred to as "actionable recovery" frames; in some games, the term IASA (Interruptible As Soon As) refers to the frame that Actionable Recovery begins. Letting the Actionable Recovery frames play out can change the character's position, potentially setting up spacing traps by recovering farther away. For example, Manon 5HP will recover much farther away from the opponent if no input is performed immediately after her recovery; holding back or down-back to block will keep her much closer to the opponent.
|
Normals
Standing Normals
5LP
| Startup | Active | Recovery | Cancel | Damage | Guard | On Hit | On Block |
|---|---|---|---|---|---|---|---|
| 4 | 3 | 7 | Chn Sp SA | 300 | LH | +4 | -1 |
- Chains into 5LP/2LP/2LK
- Cancel Hitconfirm Window: 13f
- Drive Rush cancel advantage: +4 oH / -1 oB
- Applies 20% damage scaling to next hit when beginning a combo (100/80/70...)
5MP
| Startup | Active | Recovery | Cancel | Damage | Guard | On Hit | On Block |
|---|---|---|---|---|---|---|---|
| 7 | 3 | 16 | Sp SA TC | 700 | LH | +1 | -3 |
- Cancel Hitconfirm Window: 15f / 16f (TC)
- Drive Rush cancel advantage: +10 oH / +6 oB
5HP
| Startup | Active | Recovery | Cancel | Damage | Guard | On Hit | On Block |
|---|---|---|---|---|---|---|---|
| 9 | 1,3 | 18(16) | Sp SA | 400x2 | LH,LH | +2 | +1 |
- Cancel Hitconfirm Window: 27f (both hits) / 17f (2nd hit only)
- Drive Rush cancel advantage: 1st hit +17 oH / +11 oB, 2nd hit +13 oH / +10 oB
Nicely disjointed whiff punisher and pressure tool. Has two hits at close range, like Ryu's Solar Plexus but cancellable, enabling easy hit confirms. Quite stubby, but combos naturally into heavy tackle when canceled on the first hit, giving it a valuable niche in combos.
5LK
| Startup | Active | Recovery | Cancel | Damage | Guard | On Hit | On Block |
|---|---|---|---|---|---|---|---|
| 5 | 2 | 12 | Sp SA | 300 | LH | +2 | -2 |
- Cancel Hitconfirm Window: 13f
- DR cancel is delayed until after 1st recovery frame
- Drive Rush cancel advantage: +4 oH / 0 oB
- Applies 20% damage scaling to next hit when beginning a combo (100/80/70...)
A standard, long ranged standing light kick. Useful for situations where you're not close to your opponent but have limited frame advantage.
5MK
| Startup | Active | Recovery | Cancel | Damage | Guard | On Hit | On Block |
|---|---|---|---|---|---|---|---|
| 9 | 3 | 18 | - | 700 | LH | +5 | -2 |
Long range poke and combo tool. Not special cancelable, but combos into standing light kick naturally from shorter ranges, allowing for 5Lk - light tackle - 2lp to link. Links into standing heavy punch from a drive rush or in a punish counter situation, making it important for many drive rush cancel combos. On counter hit or punish counter, links into level 1 from any range.
5HK
| Startup | Active | Recovery | Cancel | Damage | Guard | On Hit | On Block |
|---|---|---|---|---|---|---|---|
| 12 | 4 | 21 | - | 900 | LH | +1 | -4 |
Long range poke and whiff punish button. Large reward on punish counter makes it great in neutral and shimmy situations. From short ranges, the punish counter crumple combos directly into the power dunk target combo. From longer ranges, a drive rush is needed beforehand. When connected in a punish counter situation on cornered opponents from a short range, combos into 2HP for costly but damaging drive rush extensions.
Crouching Normals
2LP
| Startup | Active | Recovery | Cancel | Damage | Guard | On Hit | On Block |
|---|---|---|---|---|---|---|---|
| 4 | 3 | 8 | Chn Sp SA | 300 | LH | +4 | -1 |
- Chains into 5LP/2LP/2LK
- Cancel Hitconfirm Window: 13f
- Drive Rush cancel advantage: +5 oH / 0 oB
- Applies 20% damage scaling to next hit when beginning a combo (100/80/70...)
2MP
| Startup | Active | Recovery | Cancel | Damage | Guard | On Hit | On Block |
|---|---|---|---|---|---|---|---|
| 6 | 4 | 13(14) | Sp SA | 600 | LH | +5 | -1 |
- Cancel Hitconfirm Window: 16f
- Drive Rush cancel advantage: +12 oH / +7 oB
Fast, 6-frame medium. Great as a punish option, giving enough advantage on punish counter to route into heavy tackle. Solid disjoint also gives it utility as a fast counterpoke.
2HP
| Startup | Active | Recovery | Cancel | Damage | Guard | On Hit | On Block |
|---|---|---|---|---|---|---|---|
| 8 | 6(4) | 22(20) | Sp SA | 800 | LH | +1 | -4 |
- Cancel Hitconfirm Window: 18f
- Drive Rush cancel advantage: +15 oH / +10 oB
2LK
| Startup | Active | Recovery | Cancel | Damage | Guard | On Hit | On Block |
|---|---|---|---|---|---|---|---|
| 5 | 2 | 11 | Chn | 200 | L | +3 | -3 |
- Chains into 5LP/2LP/2LK
- Applies 20% damage scaling to next hit when beginning a combo (100/80/70...)
2MK
| Startup | Active | Recovery | Cancel | Damage | Guard | On Hit | On Block |
|---|---|---|---|---|---|---|---|
| 8 | 3 | 19 | Sp SA TC | 500 | L | -2 | -6 |
- Cancel Hitconfirm Window: 13f (Special / TC)
- DR cancel is delayed until after active frames
- Drive Rush cancel advantage: +8 oH / +4 oB
- Applies 20% damage scaling to next hit when beginning a combo (100/80/70...)
2HK
| Startup | Active | Recovery | Cancel | Damage | Guard | On Hit | On Block |
|---|---|---|---|---|---|---|---|
| 11 | 3 | 23 | - | 900 | L | KD +32 | -11 |
Stubby, slow and unsafe on block. Sweeps don't get much worse.
Jumping Normals
j.LP
| Startup | Active | Recovery | Cancel | Damage | Guard | On Hit | On Block |
|---|---|---|---|---|---|---|---|
| 4 | 7 | 3 land | - | 300 | H | +6(+9) | +2(+5) |
Terry performs a mid-air karate chop.
j.MP
| Startup | Active | Recovery | Cancel | Damage | Guard | On Hit | On Block |
|---|---|---|---|---|---|---|---|
| 7 | 4 | 3 land | - | 700 | H | +11 | +7 |
j.HP
| Startup | Active | Recovery | Cancel | Damage | Guard | On Hit | On Block |
|---|---|---|---|---|---|---|---|
| 9 | 6 | 3 land | - | 800 | H | +9(+15) | +5(+11) |
j.LK
| Startup | Active | Recovery | Cancel | Damage | Guard | On Hit | On Block |
|---|---|---|---|---|---|---|---|
| 5 | 7 | 3 land | - | 300 | H | +7(+9) | +3(+5) |
j.MK
| Startup | Active | Recovery | Cancel | Damage | Guard | On Hit | On Block |
|---|---|---|---|---|---|---|---|
| 7 | 6 | 3 land | - | 500 | H | +8(+13) | +4(+9) |
- Can hit cross-up
j.HK
| Startup | Active | Recovery | Cancel | Damage | Guard | On Hit | On Block |
|---|---|---|---|---|---|---|---|
| 10 | 7 | 3 land | - | 800 | H | +9(+15) | +5(+11) |
Command Normals
6HP
| Startup | Active | Recovery | Cancel | Damage | Guard | On Hit | On Block |
|---|---|---|---|---|---|---|---|
| 22 | 3 | 19 | - | 800 | H | +2 | -2 |
A safe on block overhead. Links into crouching medium punch after a drive rush while also being +2 on block, making it a potent mixup tool.
Target Combos
5MP~HP
| Startup | Active | Recovery | Cancel | Damage | Guard | On Hit | On Block |
|---|---|---|---|---|---|---|---|
| 16 | 3 | 22 | - | 700 | LH | KD +29 | -5 |
Can be spaced to be safe
5MP~HK~HK
| Startup | Active | Recovery | Cancel | Damage | Guard | On Hit | On Block |
|---|---|---|---|---|---|---|---|
| 18 | 3 | 31 | TC | 600 | LH | KD +39 | -14 |
- Puts opponent into limited juggle state
- Does not combo naturally from 5MP on grounded opponents
- Requires CH/PC/DR or a juggle state
- Cancel Hitconfirm Window: 67-68f (full TC from CH 5MP) / 36f (from HK only)
- Applies 20% damage scaling to next hit when beginning a combo; counts as 2 hits for damage scaling when comboed into (applies to next hit)
| Startup | Active | Recovery | Cancel | Damage | Guard | On Hit | On Block |
|---|---|---|---|---|---|---|---|
| 18 | 3(21)6 | 33 | - | 1050 (910) | - | KD +25(+22) | - |
- () refers to scaled damage from CH 5MP combo starter
- Regular version: occurs when buffered early or within the final 2f of the cancel window
- KD advantage varies depending on timing; early input gives better advantage
| Startup | Active | Recovery | Cancel | Damage | Guard | On Hit | On Block |
|---|---|---|---|---|---|---|---|
| 18 | 3(21)6 | 33 | - | 1200 (1040) | - | KD +24(+23) | - |
- () refers to scaled damage from CH 5MP combo starter
- Just-frame version: occurs when input within a 2f window (near the end of the cancel window)
- Deals additional damage and builds extra Drive/Super Gauge
5MP~MK~MP/MK
| Startup | Active | Recovery | Cancel | Damage | Guard | On Hit | On Block |
|---|---|---|---|---|---|---|---|
| 13 | 2 | 27(38) | TC | 400 | LH | -3 | -12 |
- Full Invuln: 20-40f on hit only (lane switch)
- True blockstring but can be delayed to create a 1f gap
- On Hit only, holding forward causes Terry to cross behind the opponent; otherwise, attacks from the same side
| Startup | Active | Recovery | Cancel | Damage | Guard | On Hit | On Block |
|---|---|---|---|---|---|---|---|
| 24 | 2 | 18 land | - | 1000 | LH | +4 | +3 |
- Full Invuln: 1-25f (until recovery); Airborne 14-25f
- Hits on the same side; whiffs if Terry attacks after passing through opponent
| Startup | Active | Recovery | Cancel | Damage | Guard | On Hit | On Block |
|---|---|---|---|---|---|---|---|
| 24 | 2 | 20 land | - | 1000 | LH | +3 | -2 |
- Full Invuln: 1-25f (until recovery); Airborne 16-25f
- Can only hit cross-up; does not pass through cornered opponents
A unique Target Combo that is very unsafe on block if not confirmed from 5MP. On hit, Terry has the option to end with Jumping Lariat which hits in front, or Jumping Knee which only hits cross-up. Holding forward allows the follow-ups to come out behind the opponent, while neutral or back inputs keep the same side. In the corner, Terry cannot pass through the opponent, making it impossible to connect with Jumping Knee.
These two enders do not combo outside of specific juggle scenarios; instead, they create a small frame trap on block that will interrupt any normal, and all specials without full or anti-air invincibility. If you expect the opponent may try to Parry, intentionally whiffing the attack allows Terry to quickly land and punish with a throw. To do this, input a cross-up Jumping Lariat or a same-side Jumping Knee; just be aware that this is quite unsafe if the opponent expects it, though it can be difficult to react to the whiff animation.
On hit, Jumping Lariat leads to a light combo (or 2MP on Counter-hit), while granting a respectable +3 advantage on block just outside of throw range.
Jumping Knee only grants a light combo on Counter-hit, but it does leave him much closer for a strike/throw mixup on hit. On block, he instead recovers well out of throw range and safe at -2.
Any special with immediate anti-air invincibility (such as meterless Shoryuken) can interrupt both follow-ups; if the move uses a DP input (623P/623K), you can simply input 3131 and press the button to ensure it comes out on the proper side. Against characters with this type of move, it's inadvisable to use this Target Combo at all; the 2nd hit leaves Terry at -3 on Hit and the risk/reward on the 3rd hit is not in Terry's favor.
Terry's invincibility lasts until the end of the Jumping Lariat/Knee active frames, though this serves little purpose beyond avoiding lingering projectiles like Kimberly's spraycan.
2MK~2HK
| Startup | Active | Recovery | Cancel | Damage | Guard | On Hit | On Block |
|---|---|---|---|---|---|---|---|
| 13 | 2 | 28 | Sp SA | 500 (400) | LH | KD +35 | -16 |
- Cancel Hitconfirm Window: 42-44f
- Cancel is delayed until after 2nd recovery frame (DR) or 3rd recovery frame (Specials)
- Drive Rush cancel advantage: KD +52 / +1 oB
- Counts as 2 hits for damage scaling when comboed into (applies to next hit)
A launching target combo from crouching medium kick, leading to high reward. Unconfirmable and unsafe on block, making it a risky neutral option mostly reserved for whiff punishes. Can be canceled into drive rush on block, but a reversal from the blocking opponent will always succeed, as he isn't able to perform a true blockstring from this cancel. However, this can be a potent option against opponents without access to a reversal, as on hit you can confirm into a special and don't need to spent the drive gauge. Otherwise, useful in certain combos, particularly as an ender to his corner projectile loops. Also, sets up for double level 1 on cornered opponents.
Throws
Forward Throw (LPLK)
| Startup | Active | Recovery | Cancel | Damage | Guard | On Hit | On Block |
|---|---|---|---|---|---|---|---|
| 5 | 3 | 23 | - | 1200 (2040) | T | KD +22 | - |
- Punish Counter: HKD +22
- Applies 20% immediate damage scaling when comboed into (e.g. after Crumple)
Back Throw (4LPLK)
| Startup | Active | Recovery | Cancel | Damage | Guard | On Hit | On Block |
|---|---|---|---|---|---|---|---|
| 5 | 3 | 23 | - | 1200 (2040) | T | KD +18 | - |
- Side switches
- Punish Counter: HKD +18
- Applies 20% immediate damage scaling when comboed into (e.g. after Crumple)
Drive System
Drive Impact (HPHK)
| Startup | Active | Recovery | Cancel | Damage | Guard | On Hit | On Block |
|---|---|---|---|---|---|---|---|
| 26 | 2 | 35 | - | 800 | LH | KD +35 / Wall Splat KD +65 | -3 / Wall Splat HKD +72 |
- Armor (2-hit): 1-27f; Range: ? (? movement + ? hitbox)
- On Hit/PC: Applies 20% damage scaling to next hit when beginning a combo
- On Block: Applies 20% scaling multiplier to all follow-up hits after Wall Splat; the next attack can incur additional Starter Scaling
- Combos when canceled from ??? or Punish Counter ??? (no corner wallsplat; useful for depleting Drive gauge, especially after Perfect Parry)
- A blocked DI can combo into another DI if opponent is not fully cornered (Stuns if opponent has less than 1.5 Drive bars)
- This happens because a blocked DI is not considered a "hit" for combo purposes
- Causes both the 20% Starter and 20% Multiplier scaling to apply to the follow-up combo
See Drive Impact on the Gauges page for more details.
When canceled from a normal, these are the important blockstring gaps; a gap of N will trade with an N-frame startup attack; [] = Burnout
- -
- Note: A gap ≥ 6f can be thrown, and a gap ≥ 9f can be jumped out of by most characters
Against the following characters in Burnout:
- JP (22K), frame 3 counter
- Marisa (214K), frame 3 armor
- Zangief (5[HP]), frame 4 armor
It's important to use a blockstring that cannot be absorbed by their armor/counter moves. Ideally, the string should also not be a true combo, or it will cause a Lock and prevent Stun.
* Denotes a move that causes Lock on Counter-hit, allowing the opponent to escape a Stun by mashing on wakeup.
Drive Reversal (6HPHK)
| Startup | Active | Recovery | Cancel | Damage | Guard | On Hit | On Block |
|---|---|---|---|---|---|---|---|
| 20 | 3 | 26(31) | - | 500 recoverable | LH | KD +23 | -6 |
- Full Invuln: 1-22f; Armor Break
- 5f extra recovery on hit; 4f screen freeze during startup
| Startup | Active | Recovery | Cancel | Damage | Guard | On Hit | On Block |
|---|---|---|---|---|---|---|---|
| 18 | 3 | 26(31) | - | 500 recoverable | LH | KD +23 | -6 |
- Full Invuln: 1-20f; Armor Break
- 5f extra recovery on hit; no screen freeze
See Drive Reversal on the Gauges page for more details.
Drive Parry (MPMK)
| Startup | Active | Recovery | Cancel | Damage | Guard | On Hit | On Block |
|---|---|---|---|---|---|---|---|
| 1 | 12 or until released | 33(1)(11) | - | - | - | - | - |
See Drive Parry on the Gauges page for more details.
- Perfect Parry:
- Applies a 50% damage scaling multiplier to any punish afterwards
- vs. strikes, has only 1f recovery and prevents the opponent from canceling their attack
- vs. projectiles, puts you into a fixed 11f recovery
Drive Rush (MPMK~66)
| Startup | Active | Recovery | Cancel | Damage | Guard | On Hit | On Block |
|---|---|---|---|---|---|---|---|
| 3+8 | - | 15(37) | - | - | - | - | - |
- 1-bar version performed out of Parry
- Startup is 1+8 immediately after successful Parry
| Startup | Active | Recovery | Cancel | Damage | Guard | On Hit | On Block |
|---|---|---|---|---|---|---|---|
| 9 | - | 15(37) | - | - | - | - | - |
- 3-bar version performed on hit/block from a cancelable normal
- Can also be performed from whiffed cancelable light normals
See Drive Rush on the Gauges page for more details. See Strategy page for Blockstring Gaps and Combo Routes
- Startup refers to minimum time before an attack can cancel the Drive Rush animation
- The first 15 recovery frames are cancelabe into any attack
- The final 22 recovery frames are cancelable into any attack or movement option or blocking (except Parry)
- Only Normal and Command Normal attacks are enhanced with +4 frame advantage and improved juggle properties
- Applies 15% damage scaling multiplier to any follow-up hits when used mid-combo
- Only applies scaling once per combo; does not apply when a Drive Rush enhanced attack starts the combo
Distance:
- 0.634 (min, cancel into immediate Throw)
- 2.416 (min, earliest blocking/movement frame)
- 3.181 (max, final DR frame)
Special Moves
Power Wave (236LP or 236MP)
| Startup | Active | Recovery | Cancel | Damage | Guard | On Hit | On Block |
|---|---|---|---|---|---|---|---|
| 14 | - | 35 | SA3 | 600 | LH | -3 | -9 |
- Travels full screen; does not clash with standard-height fireballs
- Cancel Hitconfirm Window: 4f (Super)
| Startup | Active | Recovery | Cancel | Damage | Guard | On Hit | On Block |
|---|---|---|---|---|---|---|---|
| 16 | [14] | 32 | SA3 | 700 | LH | 0 | -6 |
- Travels half screen; clashes with standard-height fireballs
- Cancel Hitconfirm Window: 4f (Super)
| Startup | Active | Recovery | Cancel | Damage | Guard | On Hit | On Block |
|---|---|---|---|---|---|---|---|
| 15 | - | 28 | SA2 SA3 | 400x2 | LH,LH | +2 | -2 |
- Travels full screen; clashes with standard-height fireballs, destroying them if higher priority
- Cancel Hitconfirm Window: 8f (Super)
- Applies 20% damage scaling to next hit when beginning a combo (100/80/70...)
Terry's LP Power Wave is an excellent tool to protect himself as he advances. Behind it, he can either Drive Rush or space a plus on block Burning Knuckle to force his opponent to deal with his approach. It will always go under other fireballs, as long as they're not like Juri's Store 236LK. Rarely does this trade in Terry's favor. MP Power Wave is more useful here, as it clashes with projectiles and has a shorter total duration.
Terry's OD Power Wave is the best of both worlds, and can be easily spaced to be plus on block or allow for links in combos, allowing for optimal corner loops akin to Chun-Li's OD Kikoken combos.
Round Wave (236HP)
| Startup | Active | Recovery | Cancel | Damage | Guard | On Hit | On Block |
|---|---|---|---|---|---|---|---|
| 29 | 9 | 14 | SA3 | 900 | LH | +8 | +5 |
- Stationary 1-hit projectile; acts as a strike when Perfect Parried
- Puts airborne opponents into a limited juggle state
- Head hurtbox disappears on frames 24-48 (while leaning over)
- Cancel Hitconfirm Window: 10f (Super)
Mostly useful as a meaty and pressure tool, but can be used as a fake fireball on occasion to bait an approach. Round Wave is an excellent juggle extender, particularly in the corner, and can be linked into 2HP up close. Much worse than 236MP when it comes to beating out other fireballs due to its slow startup. Very powerful meaty tool against characters without invincible OD reversals, as it will stuff any SA1 on startup.
Quick Burn (214LP)
| Startup | Active | Recovery | Cancel | Damage | Guard | On Hit | On Block |
|---|---|---|---|---|---|---|---|
| 10(22) | 2(10)2 | 23 | SA3 (2nd) | 500,400 (900) | LH,H | +2 | -5 |
- Cancel Hitconfirm Window: 36f 1st hit / 13f 2nd hit (Super)
- Applies 30% damage scaling to next hit when beginning a combo (100/70/60...)
| Startup | Active | Recovery | Cancel | Damage | Guard | On Hit | On Block |
|---|---|---|---|---|---|---|---|
| 10(22) | 2(10)2 | 23 | SA2 SA3 (2nd) | 400x2,600 (1400) | LH,H,LH | KD +33 | -5 |
- Cancel Hitconfirm Window: 36f 1st hit / 13f 2nd hit (Super)
- Applies 20% damage scaling to next hit when beginning a combo (100/80/70...)
Burning Knuckle (214MP or 214HP)
| Startup | Active | Recovery | Cancel | Damage | Guard | On Hit | On Block |
|---|---|---|---|---|---|---|---|
| 14 | 9 | 20 | SA3 | 1000 | LH | KD +30~42 | -6(+2) |
- Cancel Hitconfirm Window: 17f (Super)
| Startup | Active | Recovery | Cancel | Damage | Guard | On Hit | On Block |
|---|---|---|---|---|---|---|---|
| 23 | 14 | 17 | SA3 | 1200 | LH | KD +28~41 | -8(+5) |
- Cancel Hitconfirm Window: 17f (Super)
| Startup | Active | Recovery | Cancel | Damage | Guard | On Hit | On Block |
|---|---|---|---|---|---|---|---|
| 19 | 14 | 17 | SA2 SA3 | 1400 | LH | KD +60~73 | -8(+5) |
- Cancel Hitconfirm Window: 23f (Super)
- Applies 20% damage scaling to next hit when beginning a combo; counts as 2 hits for damage scaling when comboed into (applies to next hit)
- A screen shake effect will occur when Burning Knuckle is spaced enough to be +1 or higher.
Rising Tackle (623P)
| Startup | Active | Recovery | Cancel | Damage | Guard | On Hit | On Block |
|---|---|---|---|---|---|---|---|
| 5 | 10 | 21+12 land | SA3 | 1000(700) | LH | KD +33 | -23 |
- Anti-Air Invuln: 1-14f; Airborne 6-35f (Forced Knockdown state)
- Cancel Hitconfirm Window: 17f (Super)
- Applies 20% damage scaling to next hit when beginning a combo (Rising Tackle > SA3 starter: 30% total scaling)
| Startup | Active | Recovery | Cancel | Damage | Guard | On Hit | On Block |
|---|---|---|---|---|---|---|---|
| 6 | 4,6 | 28+12 land | SA3 | 600x2 | LH | KD +25 | -26 |
- Anti-Air Invuln: 1-10f; Airborne 7-43f (Forced Knockdown state)
- Cancel Hitconfirm Window: 14f (Super)
- Applies 20% damage scaling to next hit when beginning a combo (Rising Tackle > SA3 starter: 30% total scaling)
| Startup | Active | Recovery | Cancel | Damage | Guard | On Hit | On Block |
|---|---|---|---|---|---|---|---|
| 7 | 2,4,14 | 27+15 land | SA3 | 700,300x2 (1300) | LH | KD +27 | -36(-40) |
- Anti-Air Invuln: 1-8f; Airborne 8-53f (Forced Knockdown state)
- Cancel Hitconfirm Window: 14f (Super)
- Applies 20% damage scaling to next hit when beginning a combo (Rising Tackle > SA3 starter: 30% total scaling)
| Startup | Active | Recovery | Cancel | Damage | Guard | On Hit | On Block |
|---|---|---|---|---|---|---|---|
| 6 | 2,3,2,2,3,3 | 34+15 land | - | 400,200x4,400 (1600) | LH | KD +27 | -42 |
- Full Invuln: 1-10f; Airborne 7-54f (Forced Knockdown state)
Power Charge (236K)
| Startup | Active | Recovery | Cancel | Damage | Guard | On Hit | On Block |
|---|---|---|---|---|---|---|---|
| 14 | 5 | 24 | SA3 | 700 | LH | +3(+7) | -9(-5) |
- Cancel Hitconfirm Window: 18f (Super)
- Applies 20% damage scaling to next hit when beginning a combo; counts as 2 hits for damage scaling when comboed into (applies to next hit)
| Startup | Active | Recovery | Cancel | Damage | Guard | On Hit | On Block |
|---|---|---|---|---|---|---|---|
| 20 | 6 | 23 | SA3 | 800 | LH | KD +42~47 | -11(-6) |
- Cancel Hitconfirm Window: 19f (Super)
- Applies 20% damage scaling to next hit when beginning a combo; counts as 2 hits for damage scaling when comboed into (applies to next hit)
| Startup | Active | Recovery | Cancel | Damage | Guard | On Hit | On Block |
|---|---|---|---|---|---|---|---|
| 25 | 9 | 27 | Sp* SA3 | 800 | LH | KD +37~45 | -16(-8) |
- Cancel Hitconfirm Window: 25f (Super) / 36f (Special, hit only)
| Startup | Active | Recovery | Cancel | Damage | Guard | On Hit | On Block |
|---|---|---|---|---|---|---|---|
| 19 | 8 | 24 | SA2 SA3 | 800 | LH | KD +55~76 Wall Bounce | -14(-7) |
- Cancel Hitconfirm Window: 24f (Super)
- Counts as 2 hits for damage scaling when comboed into (applies to next hit)
Medium version sets up a safe jump. Medium version also can combo into 623HP in the corner.
Crack Shoot (214K)
| Startup | Active | Recovery | Cancel | Damage | Guard | On Hit | On Block |
|---|---|---|---|---|---|---|---|
| 16(18) | 4 | 4+14 land | - | 700 | LH | +1 | -3 |
- Airborne 7-23f (Forced Knockdown state)
| Startup | Active | Recovery | Cancel | Damage | Guard | On Hit | On Block |
|---|---|---|---|---|---|---|---|
| 17(22) | 4,3 | 2+16 land | - | 700 / 450x2 | LH | +3 | -3 |
- Airborne 9-25f (Forced Knockdown state)
| Startup | Active | Recovery | Cancel | Damage | Guard | On Hit | On Block |
|---|---|---|---|---|---|---|---|
| 23(30) | 3,3,2,3 | 1+18 land | - | 300x3,800 (900~1400) | LH | KD +43~45 | -1 |
- Lower Body Projectile Invuln: 14-31f; Airborne 12-34f (Forced Knockdown state)
- Counts as 2 hits for damage scaling when comboed into (applies to next hit)
| Startup | Active | Recovery | Cancel | Damage | Guard | On Hit | On Block |
|---|---|---|---|---|---|---|---|
| 20(21) | 4 | 2+17 land | - | 1200 | LH | KD +29 | -2 |
- Airborne 8-25f (Forced Knockdown state)
Super Arts
Level 1 Super (236236K)
| Startup | Active | Recovery | Cancel | Damage | Guard | On Hit | On Block |
|---|---|---|---|---|---|---|---|
| 7 | 12 | 60(45) | - | 2000 | LH | KD +22 | -26 |
- Strike/Throw Invuln: 1-8f; Armor Break
- Drive Gauge Depletion: 0.5 bars (hit) / 0.25 bars (block)
- 30% minimum damage scaling; applies 30% damage scaling to next hit when beginning a combo
7 frames with excellent range is a combo that allows this level 1 to punish many moves that are normally safe, such as a spaced Dhalsim level 1. The high launch allows double level 1 combos on airborne, cornered opponents. Also comes with the standard invincibility on startup.
Level 2 Super (214214P~PP~PP)
| Startup | Active | Recovery | Cancel | Damage | Guard | On Hit | On Block |
|---|---|---|---|---|---|---|---|
| 13 | 13 | 54 | - | 2600 | LH | KD +24 | -27 |
- Can also be input with 21416HPMK. Triggers a classic power geyser effect when successful, though the attack properties are unchanged.
- Full Invuln: 1-17f; Anti-Air Invuln: 18-25f; Armor Break
- Cancel Hitconfirm Window: 28f (Twin Geyser)
- 40% minimum damage scaling; applies 50% damage scaling to next hit when beginning a combo
Fairly long range and fast, giving it anti-projectile applications.
| Startup | Active | Recovery | Cancel | Damage | Guard | On Hit | On Block |
|---|---|---|---|---|---|---|---|
| 22 | 6 | 43 | - | 1100 (440 scaled) |
LH | KD +55 | - |
- Follow-up to Power Geyser; costs 3 Drive bars
- Cancel Hitconfirm Window: 57-70f (Triple Geyser)
- 40% minimum damage scaling; applies 20% immediate scaling when comboed into
Costly in drive, but allows for a follow-up combo on cornered opponents. Used in many optimal combos, for when you only have a sliver of drive left and want to get the most possible out of it.
| Startup | Active | Recovery | Cancel | Damage | Guard | On Hit | On Block |
|---|---|---|---|---|---|---|---|
| 14 | 1 | 125 | - | 2500 (1000 scaled) |
LH | KD +18 | - |
- Follow-up to Twin Geyser; costs 1 additional Super bar
- Full Invuln: 1-139f (entire animation)
- 40% minimum damage scaling; applies 20% immediate scaling when comboed into
Extremely costly, but extremely damaging too. In max-damage corner routes, this super does more damage than level 3 routing, especially when you use all of your drive gauge.
Level 3 Super (236236P)
| Startup | Active | Recovery | Cancel | Damage | Guard | On Hit | On Block |
|---|---|---|---|---|---|---|---|
| 8(3) | 27 | 29+28 land | - | 4000 (2650-3000) |
LH | HKD +22 (KD +29~31) |
-50(-53) |
- Full Invuln: 1-16f; Airborne 9-63f (Forced Knockdown state); Armor Break
- Drive Gauge Depletion: 1.5 bars (hit) / 0.75 bars (block); up to 0.93 bars if opponent stand blocks
- Non-cinematic version only depletes up to 1 bar on hit
- Cinematic time regenerates ~2.1 Drive bars for Terry
- 50% minimum damage scaling; applies 10% immediate damage scaling when canceled from special moves
| Startup | Active | Recovery | Cancel | Damage | Guard | On Hit | On Block |
|---|---|---|---|---|---|---|---|
| 8(3) | 27 | 29+28 land | - | 4500 (3150-3500) |
LH | HKD +37 (KD +29~31) |
-50(-53) |
- Full Invuln: 1-16f; Airborne 9-63f (Forced Knockdown state); Armor Break
- Available at 25% HP or below
- Drive Gauge Depletion: 2 bars (hit) / 1 bars (block); up to 1.3 bars if opponent stand blocks
- Non-cinematic version only depletes up to 1.7 bars on hit
- Cinematic time regenerates ~2.1 Drive bars for Terry
- 50% minimum damage scaling; applies 10% immediate damage scaling when canceled from special moves
Taunts
Neutral Taunt (5PPPKKK)
| Startup | Active | Recovery | Cancel | Damage | Guard | On Hit | On Block |
|---|---|---|---|---|---|---|---|
| 300 (total) | - | - | - | - | - | - | - |
| Startup | Active | Recovery | Cancel | Damage | Guard | On Hit | On Block |
|---|---|---|---|---|---|---|---|
| 370 (total) | - | - | - | - | - | - | - |
Forward Taunt (6PPPKKK)
| Startup | Active | Recovery | Cancel | Damage | Guard | On Hit | On Block |
|---|---|---|---|---|---|---|---|
| 205 (total) | - | - | - | - | - | - | - |
Back Taunt (4PPPKKK)
| Startup | Active | Recovery | Cancel | Damage | Guard | On Hit | On Block |
|---|---|---|---|---|---|---|---|
| 499 (total) | - | - | - | - | - | - | - |
