|
|
| Line 444: |
Line 444: |
| {{AttackDataCargo-SF6/Query|Jamie_2kk_dl2}} | | {{AttackDataCargo-SF6/Query|Jamie_2kk_dl2}} |
| * Damage DL0-DL4: 540/570/600/630/660 | | * Damage DL0-DL4: 540/570/600/630/660 |
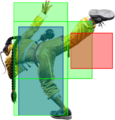
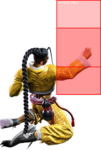
| * Puts opponent into {{sf6-jug|limited juggle}} state ({{sf6-jug|free juggle}} if performed from {{clr|4|Drive Rush}}) | | * Head/Leg hurtbox is '''anti-air invuln''' on frames 9-11 (cannot hit cross-up) |
| * '''Cancel Hitconfirm Window:''' 17f (jump, on hit only) | | * Puts opponent into {{sf6-jug|limited juggle}} state; ({{sf6-jug|free juggle}} if performed from {{clr|4|Drive Rush}}) |
| | * '''Cancel Hitconfirm Window:''' 17f (forward jump, hit only) |
| * Applies 20% damage scaling to next hit when beginning a combo (100/80/70...) | | * Applies 20% damage scaling to next hit when beginning a combo (100/80/70...) |
| <br> | | <br> |
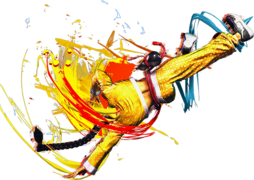
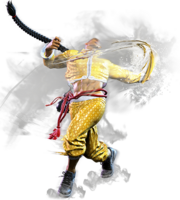
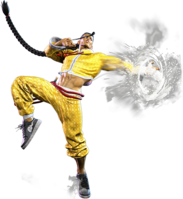
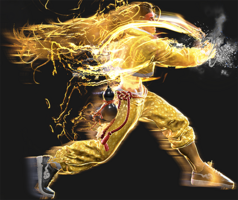
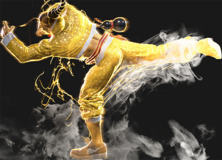
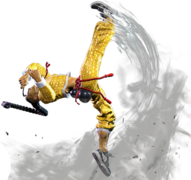
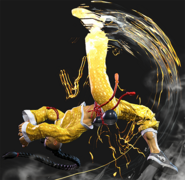
| Tensei Kick is an anti-air launcher that's stricter to land but higher reward than a DP. The jump cancel will always jump forward regardless of which direction is held, and it cannot cancel to a grounded special move during prejump frames. | | Tensei Kick is a launcher used in many of Jamie's combo routes. As an anti-air, the move is harder to use than Arrow Kick but leads to much greater reward with its jump cancel on hit. The jump cancel will always go forward regardless of which direction is held, and it cannot cancel to a grounded special move during prejump frames. |
|
| |
|
| From a {{clr|4|Drive Rush}} canceled normal on hit it's possible to link into this and do j.HK 2HK~K~P for a combo with decent wall carry and a drink while still being +4 <br>
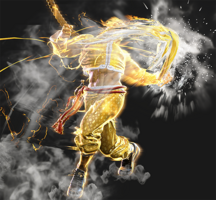
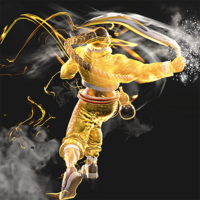
| | The free juggle state caused by {{clr|4|DR~}}2KK gives Jamie much better juggle routes than the standard version. All medium/heavy {{clr|4|DR}} canceled pokes besides {{clr|H|5HP}} can lead to {{clr|4|DR~}}2KK, {{clr|H|j.HK}} (2-hit), then land with {{clr|H|2HK}}~{{clr|H|HK}}~P for corner carry, a drink, and +4 knockdown advantage. At DL1, an anti-air Tensei Kick can achieve similar results with {{clr|M|j.MP}} > {{clr|10|j.214KK}} before ending in the same sweep Target Combo. |
| At DL1 or higher, Jamie can anti-air with 2KK into j.MP > j.214KK, then land and juggle his 2HK~K~P Target Combo for a free Drink Level. | |
| }} | | }} |
|
| |
|
| Line 467: |
Line 467: |
| * Damage DL0-DL1: 540/570 | | * Damage DL0-DL1: 540/570 |
| * '''Low Crush''' 10-19f (not airborne) | | * '''Low Crush''' 10-19f (not airborne) |
| | * Spike knockdown vs. airborne opponents |
| {{AttackDataCargo-SF6/Query|Jamie_6mk_dl2}} | | {{AttackDataCargo-SF6/Query|Jamie_6mk_dl2}} |
| * Damage DL2-DL4: 600/630/660 | | * Damage DL2-DL4: 600/630/660 |
| * '''Low Crush''' 10-19f (not airborne) | | * '''Low Crush''' 10-19f (not airborne) |
| | * Spike knockdown vs. airborne opponents |
| * '''Cancel Hitconfirm Window:''' 15f (TC) | | * '''Cancel Hitconfirm Window:''' 15f (TC) |
| <br> | | <br> |
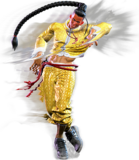
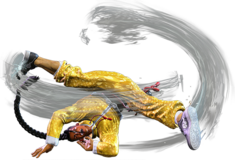
| A hopping overhead that uniquely low crushes in its late frames and can be spaced to hit later in its active frames, resulting in better frame advantage. When used out of {{clr|4|Drive Rush}}, Jamie can link light normals or 5HP afterward. | | A hopping overhead that can counter mid-range low pokes. With precise spacing, it can hit later in its active frames, resulting in better frame advantage. When used out of {{clr|4|Drive Rush}}, Jamie can link light normals or {{clr|H|5HP}} afterward. |
|
| |
|
| At DL2 and above, 6MK has more range and a Target Combo follow-up ([[#6MK~MK~P|6MK~MK~P]]) for a knockdown and an optional Drink level increase. | | At DL2 and above, {{clr|M|6MK}} has about 25% more range and gains a ([[#6MK~MK~P|Target Combo follow-up]]) for a knockdown and an optional Drink level increase. |
| }} | | }} |
|
| |
|
| Line 493: |
Line 495: |
| {{AttackDataCargo-SF6/Query|Jamie_4hp_dl2}} | | {{AttackDataCargo-SF6/Query|Jamie_4hp_dl2}} |
| * Damage DL0-DL2: 720/760/800 | | * Damage DL0-DL2: 720/760/800 |
| | * Throw hurtbox retracts on frames 4-14; strike hurtbox retracts on frames 5-12 |
| | ** Afterwards, foot hurtbox is extended on frames 13-20 (weak to delayed lows) |
| * '''Cancel Hitconfirm Window:''' 19f (Super) | | * '''Cancel Hitconfirm Window:''' 19f (Super) |
| * '''{{clr|10|SA2}} cancel advantage:''' {{sf6-adv|VP|+15}} oH / {{sf6-adv|VP|+11}} oB | | * '''{{clr|10|SA2}} cancel advantage:''' {{sf6-adv|VP|+15}} oH / {{sf6-adv|VP|+11}} oB |
| {{AttackDataCargo-SF6/Query|Jamie_4hp_dl3}} | | {{AttackDataCargo-SF6/Query|Jamie_4hp_dl3}} |
| * Damage DL3-DL4: 840/880 | | * Damage DL3-DL4: 840/880; has ~11% extra range |
| | * Throw hurtbox retracts on frames 4-14; strike hurtbox retracts on frames 5-12 |
| | * 2f less recovery on hit |
| * '''Cancel Hitconfirm Window:''' 19f (Super) / 20f (TC) | | * '''Cancel Hitconfirm Window:''' 19f (Super) / 20f (TC) |
| * '''{{clr|10|SA2}} cancel advantage:''' {{sf6-adv|VP|+14}} oH / {{sf6-adv|VP|+12}} oB | | * '''{{clr|10|SA2}} cancel advantage:''' {{sf6-adv|VP|+14}} oH / {{sf6-adv|VP|+12}} oB |
| <br> | | <br> |
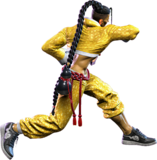
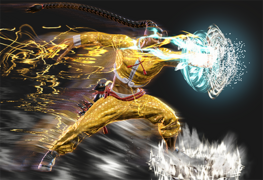
| Hermit's Elbow pulls back during startup, making it a useful shimmy tool in tick throw situations. If you successfully bait the opponent's throw and land a Punish Counter, it becomes +5 and can link into 5LK or 5HP. At its max possible range, it can become +4 as a meaty and link into 2LP without a Counter-hit. The super cancel window is also quite lenient, allowing for high damage confirms. | | Hermit's Elbow pulls back during startup, making it a useful shimmy tool in tick throw situations. If you successfully bait the opponent's throw and land a Punish Counter, it becomes {{sf6-adv|VP|+5}} and can link into {{clr|L|5LK}} or {{clr|H|5HP}}. At its max possible range, it can become {{sf6-adv|VP|+4}} as a meaty and link into {{clr|L|2LP}} without a Counter-hit. The Super cancel window is also quite lenient, allowing for high damage confirms. |
|
| |
|
| At Drink Lv.3, 4HP gains a Target Combo follow-up into HP. This TC will only combo if the 4HP hits meaty or with extra frame advantage from Counter-hit. In order to confirm the TC as late as possible on reaction, a Punish Counter, {{clr|4|Drive Rush}} start, or final-frame meaty timing is required. However, Jamie gets more damage by simply linking 5LP~LK~MP, since the 4HP becomes +5 in these scenarios. Note that due to increased pushback, the DL3 version can no longer link to 5HP even at +5. | | At Drink Lv.3, {{clr|H|4HP}} gains a Target Combo follow-up into {{clr|H|HP}}. This TC will only combo if the {{clr|H|4HP}} hits meaty or with extra frame advantage from Counter-hit. In order to confirm the TC as late as possible on reaction, a Punish Counter, {{clr|4|Drive Rush}} start, or final-frame meaty timing is required. However, Jamie gets more damage by simply linking {{clr|L|5LP}}~{{clr|L|LK}}~{{clr|M|MP}}, since the {{clr|H|4HP}} becomes {{sf6-adv|VP|+5}} in these scenarios. Note that due to increased pushback, the DL3 version can no longer link to {{clr|H|5HP}} even at {{sf6-adv|VP|+5}}. |
| }} | | }} |
|
| |
|
| Line 524: |
Line 530: |
| * '''{{clr|10|SA2}} cancel advantage:''' {{sf6-adv|VP|+19}} oH / {{sf6-adv|VP|+13}} oB | | * '''{{clr|10|SA2}} cancel advantage:''' {{sf6-adv|VP|+19}} oH / {{sf6-adv|VP|+13}} oB |
| {{AttackDataCargo-SF6/Query|Jamie_6hk_dl4}} | | {{AttackDataCargo-SF6/Query|Jamie_6hk_dl4}} |
| | * Has ~6% extra range and a new Target Combo follow-up |
| * '''Cancel Hitconfirm Window:''' 18f (Super) / 22f (TC) | | * '''Cancel Hitconfirm Window:''' 18f (Super) / 22f (TC) |
| ** TC confirm into 4HK must be input within 20f for a Counter-hit combo into Headbutt | | ** TC confirm into {{clr|H|4HK}} must be input within 20f for a Counter-hit combo into Headbutt |
| * '''{{clr|10|SA2}} cancel advantage:''' {{sf6-adv|VP|+19}} oH / {{sf6-adv|VP|+13}} oB | | * '''{{clr|10|SA2}} cancel advantage:''' {{sf6-adv|VP|+19}} oH / {{sf6-adv|VP|+13}} oB |
| <br> | | <br> |
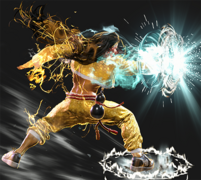
| A long range stepkick that can be confirmed into a Super on hit. You cannot space it to connect meaty at max range, so the only follow-up links require Counter-hit, Punish Counter, or {{clr|4|Drive Rush}} (which travels nearly full screen). | | A long range stepkick that can be confirmed into a Super on hit. You cannot space it to connect meaty at max range, so the only follow-up links require Counter-hit, Punish Counter, or {{clr|4|Drive Rush}} (which travels nearly full screen). |
|
| |
|
| At Drink Lv.4, the move gains extra range and some new Target Combo follow-ups. The TC requires a Counter-hit to combo, but the timing is very lenient to react to this. Even if the confirm is missed, the TC follow-ups are cancelable themselves, allowing Jamie to end with a safe option like 236PP even on a failed hitconfirm. | | At Drink Lv.4, the move gains extra range and some new Target Combo follow-ups. The TC requires a Counter-hit to combo, but the timing is very lenient to react to this. Even if the confirm is missed, the TC follow-ups are cancelable themselves, allowing Jamie to end with a safe option like {{clr|10|236PP}} even on a failed hitconfirm. |
| }} | | }} |
| <br> | | <br> |


