|
|
| Line 21: |
Line 21: |
| * Applies 10% damage scaling to next hit when beginning a combo (100/90/80...) | | * Applies 10% damage scaling to next hit when beginning a combo (100/90/80...) |
| <br> | | <br> |
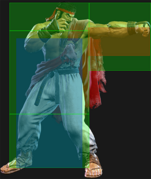
| Frame data is mostly identical to 2LP, but 5LP is the preferred chain for countering Drive Impact since it has lower recovery. Can get a 3-hit light confirm with 5LP x3. | | Frame data is mostly identical to {{clr|L|2LP}}, but {{clr|L|5LP}} is the preferred chain for countering {{clr|4|Drive Impact}} since it has lower recovery. Can get a 3-hit light confirm with {{clr|L|5LP}} x3. |
| }} | | }} |
|
| |
|
| Line 40: |
Line 40: |
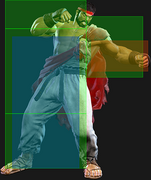
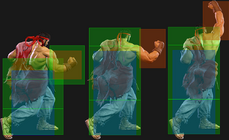
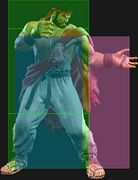
| Ryu's main combo starter, but the distance after a hit can make the follow-ups a bit finicky. The Fuwa Triple Strike target combo is the most consistent ender and is easier to hitconfirm, but does fairly low damage. | | Ryu's main combo starter, but the distance after a hit can make the follow-ups a bit finicky. The Fuwa Triple Strike target combo is the most consistent ender and is easier to hitconfirm, but does fairly low damage. |
|
| |
|
| The link into 4HP only works from absolute point blank, and even starting with a jumpin can prevent it from working. The link into 5MP or 2MP works from slightly farther out. On Counter-hit, 5MP can link into 2HP if close enough (for example, blocked {{clr|4|DR~}}{{clr|L|5LP}}, CH 5MP links into 2HP, but without the {{clr|4|Drive Rush}} Ryu will be too far away). | | The link into {{clr|H|4HP}} only works from absolute point blank, and even starting with a jumpin can prevent it from working. The link into {{clr|M|5MP}} or {{clr|M|2MP}} works from slightly farther out. On Counter-hit, {{clr|M|5MP}} can link into {{clr|H|2HP}} if close enough (for example, blocked {{clr|4|DR~}}{{clr|L|5LP}}, {{clr|M|CH 5MP}} links into {{clr|H|2HP}}, but without the {{clr|4|Drive Rush}} Ryu will be too far away). |
| }} | | }} |
|
| |
|
| Line 58: |
Line 58: |
| * '''{{clr|4|Drive Rush}} cancel advantage:''' {{sf6-adv|VP|+16}} oH / {{sf6-adv|VP|+11}} oB | | * '''{{clr|4|Drive Rush}} cancel advantage:''' {{sf6-adv|VP|+16}} oH / {{sf6-adv|VP|+11}} oB |
| <br> | | <br> |
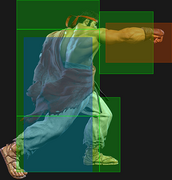
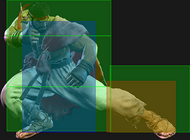
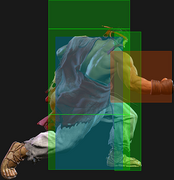
| A very aggressive heavy poke that has good advantage on block and a relatively generous cancel window, letting you run stagger pressure while confirming into big damage on hit. Has the same startup but even more range than Ken's 5HP, making it superior in a vacuum, but since Ryu's offense isn't exactly on the same level, it doesn't compliment his gameplan quite as well. Forces stand on hit, letting you either go into 5HK either with the 5HP~5HK target combo or link another normal if done out of a {{clr|4|Drive Rush}}. Very important to his high damage combos. | | A very aggressive heavy poke that has good advantage on block and a relatively generous cancel window, letting you run stagger pressure while confirming into big damage on hit. Has the same startup but even more range than Ken's {{clr|H|5HP}}, making it superior in a vacuum, but since Ryu's offense isn't exactly on the same level, it doesn't compliment his gameplan quite as well. Forces stand on hit, letting you either go into {{clr|H|5HK}} either with the {{clr|H|5HP}}~{{clr|H|HK}} target combo or link another normal if done out of a {{clr|4|Drive Rush}}. Very important to his high damage combos. |
| }} | | }} |
|
| |
|
| Line 77: |
Line 77: |
| * Applies 10% damage scaling to next hit when beginning a combo (100/90/80...) | | * Applies 10% damage scaling to next hit when beginning a combo (100/90/80...) |
| <br> | | <br> |
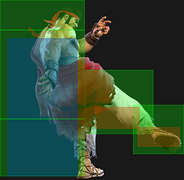
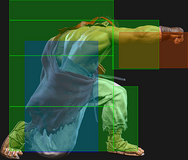
| A quick bufferable poke used for punishing and harassing the opponent at mid range. It can't be linked into from other light normals, but its range is useful for converting from buttons like 2MP when nothing else will reach. | | A quick bufferable poke used for punishing and harassing the opponent at mid range. It can't be linked into from other light normals, but its range is useful for converting from buttons like {{clr|M|2MP}} when nothing else will reach. |
|
| |
|
| Optimal cancel routes from 5LK depend on spacing and how the move connects: | | Optimal cancel routes from {{clr|L|5LK}} depend on spacing and how the move connects: |
| * Combos naturally: Shoryuken (close range), Denjin/OD Hadoken, LK High Blade Kick, LK/MK/OD Tatsu, LP Hashogeki, any Super | | * Combos naturally: Shoryuken (close range), {{clr|10|Denjin/OD Hadoken}}, {{clr|L|LK High Blade Kick}}, {{clr|L|LK}}/{{clr|M|MK}}/{{clr|10|OD}} Tatsu, {{clr|L|LP Hashogeki}}, any Super |
| * Punish Counter only: HK Tatsu, MK/OD High Blade Kick, MP/OD Hashogeki, OD Denjin Hashogeki | | * Punish Counter only: {{clr|H|HK Tatsu}}, {{clr|M|MK}}/{{clr|10|OD}} High Blade Kick, {{clr|M|MP}}/{{clr|10|OD}} Hashogeki, {{clr|10|OD Denjin Hashogeki}} |
|
| |
|
| The Punish Counter conversion into OD High Blade Kick or OD Denjin Hashogeki are particularly noteworthy due to the high damage potential afterwards. | | The Punish Counter conversion into {{clr|10|OD High Blade Kick}} or {{clr|10|OD Denjin Hashogeki}} are particularly noteworthy due to the high damage potential afterwards. |
| }} | | }} |
|
| |
|
| Line 98: |
Line 98: |
| {{AttackDataCargo-SF6/Query|ryu_5mk}} | | {{AttackDataCargo-SF6/Query|ryu_5mk}} |
| <br> | | <br> |
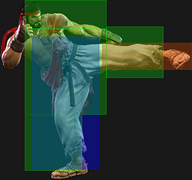
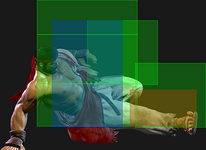
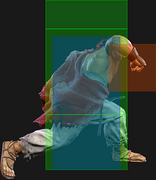
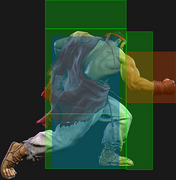
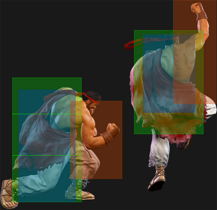
| Standard mid-range poke.
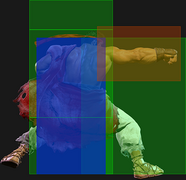
| | A solid mid-range poke that can go over some lows with its raised hurtbox. |
| }} | | }} |
|
| |
|
| Line 116: |
Line 116: |
| * Punish Counter: KD +84 Crumple (+11 before becoming airborne) | | * Punish Counter: KD +84 Crumple (+11 before becoming airborne) |
| <br> | | <br> |
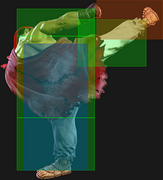
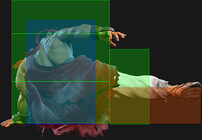
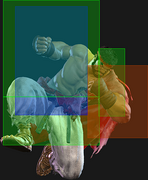
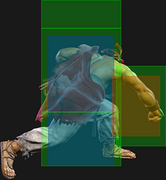
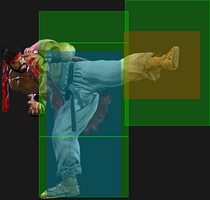
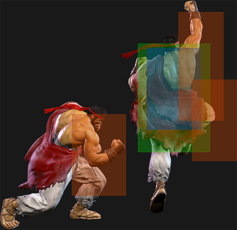
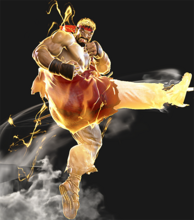
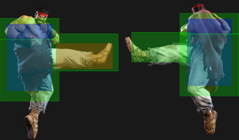
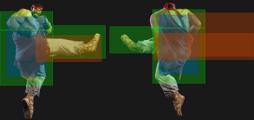
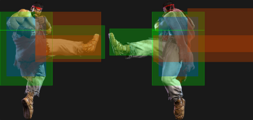
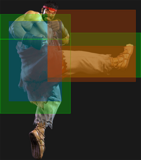
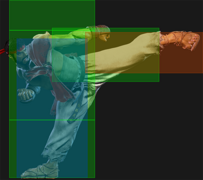
| Fairly good anti-air from mid-long range due to its juggle properties. 5HK has good horizontal range and relatively low recovery for a heavy normal giving it some neutral utility as well, but it becomes risky to use at close range since the opponent can duck underneath the attack. Outstanding whiff punish and shimmy tool. A star blows up every time you Punish Counter with this button. | | Fairly good anti-air from mid-long range due to its juggle properties. {{clr|H|5HK}} has good horizontal range and relatively low recovery for a heavy normal giving it some neutral utility as well, but it becomes risky to use at close range since the opponent can duck underneath the attack. Outstanding whiff punish and shimmy tool. A star blows up every time you Punish Counter with this button. |
| }} | | }} |
| <br> | | <br> |
| Line 137: |
Line 137: |
| * Applies 10% damage scaling to next hit when beginning a combo (100/90/80...) | | * Applies 10% damage scaling to next hit when beginning a combo (100/90/80...) |
| <br> | | <br> |
| Fast but short range chainable light normal, mainly used for hitconfirms and punishing -4 attacks. It is slightly worse than 5LP when chaining against Drive Impact armor. | | Fast but short range chainable light normal, mainly used for hitconfirms and punishing -4 attacks. It is slightly worse than {{clr|L|5LP}} when chaining against {{clr|4|Drive Impact}} armor. |
| }} | | }} |
|
| |
|
| Line 154: |
Line 154: |
| * '''{{clr|4|Drive Rush}} cancel advantage:''' {{sf6-adv|VP|+12}} oH / {{sf6-adv|VP|+7}} oB | | * '''{{clr|4|Drive Rush}} cancel advantage:''' {{sf6-adv|VP|+12}} oH / {{sf6-adv|VP|+7}} oB |
| <br> | | <br> |
| Decent button for applying pressure. Links into 5LK consistently, and is a great button to use after {{clr|4|Drive Rush}} for frame advantage on block. | | Decent button for applying pressure. Links into {{clr|L|5LK}} consistently, and is a great button to use after {{clr|4|Drive Rush}} for frame advantage on block. |
| }} | | }} |
|
| |
|
| Line 172: |
Line 172: |
| * '''{{clr|4|Drive Rush}} cancel advantage:''' {{sf6-adv|VP|+17}} oH / {{sf6-adv|VP|+9}} oB | | * '''{{clr|4|Drive Rush}} cancel advantage:''' {{sf6-adv|VP|+17}} oH / {{sf6-adv|VP|+9}} oB |
| <br> | | <br> |
| Decent anti-air normal for situations where you don't have time to react with Shoryuken. Can be linked to after Counter-hit/Punish Counter 5MP, but the short range can make this a little inconsistent. Very unsafe on block. | | Decent anti-air normal for situations where you don't have time to react with Shoryuken. Can be linked to after Counter-hit/Punish Counter {{clr|M|5MP}}, but the short range can make this a little inconsistent. Very unsafe on block. |
| }} | | }} |
|
| |
|
| Line 189: |
Line 189: |
| * Applies 10% damage scaling to next hit when beginning a combo (100/90/80...) | | * Applies 10% damage scaling to next hit when beginning a combo (100/90/80...) |
| <br> | | <br> |
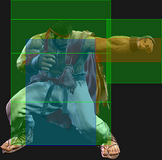
| Ryu's main low combo starter when chained into either of his light punches. Can lead to a 3-hit light confirm into 5LP or 2LP. | | Ryu's main low combo starter when chained into either of his light punches. Can lead to a 3-hit light confirm into {{clr|L|5LP}} or {{clr|L|2LP}}. |
| }} | | }} |
|
| |
|
| Line 246: |
Line 246: |
| * Can be used as a fuzzy instant overhead | | * Can be used as a fuzzy instant overhead |
| <br> | | <br> |
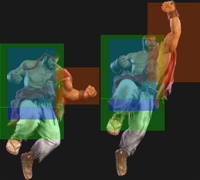
| The instant overhead property allows Ryu to close out a round by making the opponent block a deep jump-in; as they transition to a crouch block, they will be stuck in a standing state for a few frames, allowing the j.LP to connect. This is high risk and should only ever be attempted if it is certain to end the round. | | The instant overhead property allows Ryu to close out a round by making the opponent block a deep jump-in; as they transition to a crouch block, they will be stuck in a standing state for a few frames, allowing the {{clr|L|j.LP}} to connect. This is high risk and should only ever be attempted if it is certain to end the round. |
| }} | | }} |
|
| |
|
| Line 279: |
Line 279: |
| * Spike knockdown on Counter-hit/Punish Counter vs. airborne opponents | | * Spike knockdown on Counter-hit/Punish Counter vs. airborne opponents |
| <br> | | <br> |
| Jumpin with a good downward reaching hitbox.
| | Jump-in with a good downward reaching hitbox. |
| }} | | }} |
|
| |
|
| Line 345: |
Line 345: |
| * 2-hit overhead; Counter-hit/Punish Counter bonus advantage applies to both hits | | * 2-hit overhead; Counter-hit/Punish Counter bonus advantage applies to both hits |
| <br> | | <br> |
| A standard overhead that can link into 5MP or 2MP when used after Drive Rush. A regular counter-hit can still link into a 4f light, but regular hits do not allow for follow-up links. | | A standard overhead that can link into {{clr|M|5MP}} or {{clr|M|2MP}} when used after {{clr|4|Drive Rush}}. A regular counter-hit can still link into a 4f light, but regular hits do not allow for follow-up links. |
| }} | | }} |
|
| |
|
| Line 364: |
Line 364: |
| * Good meaty off strong knockdowns | | * Good meaty off strong knockdowns |
| <br> | | <br> |
| A powerful advancing command normal that is plus on block and combos to 5MP or 2MP on hit, and even stronger combos on Counter-hit/Punish Counter. It is very susceptible to Drive Impact, however, so it shouldn't be overly relied upon. Can be up to +3 on block if spaced out, but this also results in more pushback. | | A powerful advancing command normal that is plus on block and combos to {{clr|M|5MP}} or {{clr|M|2MP}} on hit, and even stronger combos on Counter-hit/Punish Counter. It is very susceptible to {{clr|4|Drive Impact}}, however, so it shouldn't be overly relied upon. Can be up to +3 on block if spaced out, but this also results in more pushback. |
| }} | | }} |
|
| |
|
| Line 380: |
Line 380: |
| * Forces stand on hit | | * Forces stand on hit |
| * '''Cancel Hitconfirm Window:''' 17f (only 1st active frame is cancelable) | | * '''Cancel Hitconfirm Window:''' 17f (only 1st active frame is cancelable) |
| * '''Drive Rush cancel advantage:''' {{sf6-adv|VP|+20}} oH / {{sf6-adv|VP|+6}} oB | | * '''{{clr|4|Drive Rush}} cancel advantage:''' {{sf6-adv|VP|+20}} oH / {{sf6-adv|VP|+6}} oB |
| <br> | | <br> |
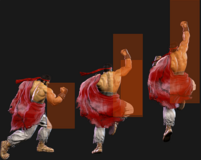
| Ryu's fastest heavy normal, but has fairly short range. Very unsafe on block, so it should primarily be used in close range hitconfirms or canceled into a safe move like OD Hadoken/Hashogeki. Can be used as an anti-air, but the hitbox is a little inconsistent so 2HP is more reliable. | | Ryu's fastest heavy normal, but has fairly short range. Very unsafe on block, so it should primarily be used in close range hitconfirms or canceled into a safe move like {{clr|10|OD Hadoken/Hashogeki}}. Can be used as an anti-air, but the hitbox is a little inconsistent so {{clr|H|2HP}} is more reliable. |
| }} | | }} |
|
| |
|
| Line 397: |
Line 397: |
| {{AttackDataCargo-SF6/Query|ryu_6hk}} | | {{AttackDataCargo-SF6/Query|ryu_6hk}} |
| * '''Low Crush''' 13-19f (not airborne) | | * '''Low Crush''' 13-19f (not airborne) |
| * '''Cancel Hitconfirm Window:''' 19f (OD Air Tatsu only) | | * '''Cancel Hitconfirm Window:''' 19f ({{clr|10|OD Air Tatsu}} only) |
| <br> | | <br> |
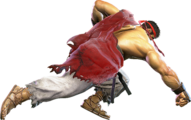
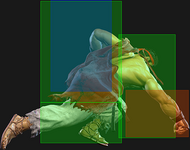
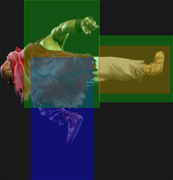
| Despite the animation, this attack is not considered airborne. It has good horizontal range and a lenient hitconfirm window for the cancel if you want to spend the meter on OD Air Tatsu. Generally safe on block with pushback. | | Despite the animation, this attack is not considered airborne. It has good horizontal range and a lenient hitconfirm window for the cancel if you want to spend the meter on {{clr|10|OD Air Tatsu}}. Generally safe on block with pushback. |
| }} | | }} |
|
| |
|
| Line 418: |
Line 418: |
| * Counter-hit/Punish Counter bonus advantage applies to both hits | | * Counter-hit/Punish Counter bonus advantage applies to both hits |
| * '''Cancel Hitconfirm Window:''' 37f / 17f (2nd hit) | | * '''Cancel Hitconfirm Window:''' 37f / 17f (2nd hit) |
| * '''Drive Rush cancel advantage:''' 1st hit {{sf6-adv|VP|+10}} oH / {{sf6-adv|VP|+4}} oB, 2nd hit {{sf6-adv|VP|+14}} oH / {{sf6-adv|VP|+10}} oB | | * '''{{clr|4|Drive Rush}} cancel advantage:''' 1st hit {{sf6-adv|VP|+10}} oH / {{sf6-adv|VP|+4}} oB, 2nd hit {{sf6-adv|VP|+14}} oH / {{sf6-adv|VP|+10}} oB |
| <br> | | <br> |
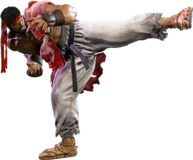
| Ryu's Axe Kick is cancelable on both hits, so it's easy to confirm an appropriate follow-up on hit or block. At -4 it's fairly safe most of the time due to pushback. The first hit can whiff on crouch blockers at farther ranges. The move has a lot of active frames, making it easy to time on the opponent's wakeup. | | Ryu's Axe Kick is cancelable on both hits, so it's easy to confirm an appropriate follow-up on hit or block. At -4 it's fairly safe most of the time due to pushback. The first hit can whiff on crouch blockers at farther ranges. The move has a lot of active frames, making it easy to time on the opponent's wakeup. |
| Line 436: |
Line 436: |
| | info = | | | info = |
| {{AttackDataCargo-SF6/Query|ryu_5hp_hk}} | | {{AttackDataCargo-SF6/Query|ryu_5hp_hk}} |
| * HK whiffs on crouch blocking opponents (-18) | | * {{clr|H|HK}} whiffs on crouch blocking opponents (-18) |
| <br> | | <br> |
| Ryu generally gets better combo enders from 5HP, but the HK is much easier to hitconfirm on reaction. The HK will always connect on hit since 5HP forces stand. If the opponent stand blocks, this TC is always a true blockstring even if delayed. | | Ryu generally gets better combo enders from {{clr|H|5HP}}, but the {{clr|H|HK}} is much easier to hitconfirm on reaction. The {{clr|H|HK}} will always connect on hit since {{clr|H|5HP}} forces stand. If the opponent stand blocks, this TC is always a true blockstring even if delayed. |
| }} | | }} |
|
| |
|
| Line 460: |
Line 460: |
| * 6f gap before final hit on block | | * 6f gap before final hit on block |
| <br> | | <br> |
| A relatively weak target combo, but it's easier to confirm from 5MP than a special move. Also has some utility near max 5MP range where other follow-ups can whiff. | | A relatively weak target combo, but it's easier to confirm from {{clr|M|5MP}} than a special move. Also has some utility near max {{clr|M|5MP}} range where other follow-ups can whiff. |
| }} | | }} |
| <br> | | <br> |
| Line 479: |
Line 479: |
| * Applies 20% immediate damage scaling when comboed into (e.g. after Crumple) | | * Applies 20% immediate damage scaling when comboed into (e.g. after Crumple) |
| <br> | | <br> |
| Ryu has a great corner throw loop that requires no additional movement. Whiffing 5LP will auto-time the next throw, or it can be manually timed to avoid giving the opponent something to react to. Manual timing also allows Ryu to walk back to threaten a shimmy. | | Ryu has a great corner throw loop that requires no additional movement. Whiffing {{clr|L|5LP}} will auto-time the next throw, or it can be manually timed to avoid giving the opponent something to react to. Manual timing also allows Ryu to walk back to threaten a shimmy. |
| }} | | }} |
|
| |
|
| Line 518: |
Line 518: |
|
| |
|
| When canceled from a normal, these are the important '''blockstring gaps'''; a gap of N will trade with an N-frame startup attack; [] = Burnout | | When canceled from a normal, these are the important '''blockstring gaps'''; a gap of N will trade with an N-frame startup attack; [] = Burnout |
| * 5HP: 6[2] | | * {{clr|H|5HP}}: 6[2] |
| * 4HK (2nd): 7[3] | | * {{clr|H|4HK (2nd)}}: 7[3] |
| * 2HP: 8[4] | | * {{clr|H|2HP}}: 8[4] |
| * 2MP: 10[6] | | * {{clr|M|2MP}}: 10[6] |
| * 4HP: 11[7] | | * {{clr|H|4HP}}: 11[7] |
| * 5MP, 2MK, 4HK (1st): 13[9] | | * {{clr|M|5MP}}, {{clr|M|2MK}}, {{clr|H|4HK (1st)}}: 13[9] |
| * Note: A gap ≥ 6f can be thrown, and a gap ≥ 9f can be jumped out of by most characters | | * Note: A gap ≥ 6f can be thrown, and a gap ≥ 9f can be jumped out of by most characters |
| }} | | }} |
| Line 573: |
Line 573: |
| {{AttackDataCargo-SF6/Query|ryu_66}} | | {{AttackDataCargo-SF6/Query|ryu_66}} |
| * Applies 15% damage scaling multiplier to any follow-up hits when used mid-combo | | * Applies 15% damage scaling multiplier to any follow-up hits when used mid-combo |
| ** Only applies scaling once per combo; does not apply when an enhanced Drive Rush attack starts the combo | | ** Only applies scaling once per combo; does not apply when an enhanced {{clr|4|Drive Rush}} attack starts the combo |
| See [[Street_Fighter_6/Gauges#Drive_Rush|Drive Rush]] on the Gauges page for more details. Frame data shown in (parentheses) refers to Parry Drive Rush. | | See [[Street_Fighter_6/Gauges#Drive_Rush|Drive Rush]] on the Gauges page for more details. Frame data shown in (parentheses) refers to {{clr|4|Parry Drive Rush}}. |
| * Distance: | | * Distance: |
| ** 0.525 (min, cancel into immediate Throw) | | ** 0.525 (min, cancel into immediate Throw) |
| ** 1.878 (min, earliest blocking/movement frame) | | ** 1.878 (min, earliest blocking/movement frame) |
| ** 3.628 (max, final DR frame) | | ** 3.628 (max, final {{clr|4|DR}} frame) |
| * See Strategy page for [[Street_Fighter_6/Ryu/Strategy#Drive_Rush|Blockstring Gaps and Combo Routes]] | | * See Strategy page for [[Street_Fighter_6/Ryu/Strategy#Drive_Rush|Blockstring Gaps and Combo Routes]] |
| }} | | }} |
| Line 599: |
Line 599: |
| * Can only store 1 Denjin stock at a time, and is depleted after use; does not persist between rounds | | * Can only store 1 Denjin stock at a time, and is depleted after use; does not persist between rounds |
| <br> | | <br> |
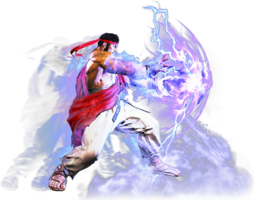
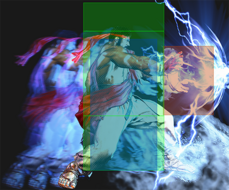
| Ryu's Denjin install is an important part of his fireball game, but it's risky to charge it up in neutral unless you're at full screen. You can also make the opponent block a slow, long range fireball to get a semi-safe charge, but be weary of fast long range Supers that could punish this. There are also some knockdowns that make it easy to safely charge up, such as OD Denjin Charge Hadoken, OD Tatsu, or HK High Blade Kick, and it's almost always safe after midscreen MK High Blade Kick too. | | Ryu's Denjin install is an important part of his fireball game, but it's risky to charge it up in neutral unless you're at full screen. You can also make the opponent block a slow, long range fireball to get a semi-safe charge, but be weary of fast long range Supers that could punish this. There are also some knockdowns that make it easy to safely charge up, such as {{clr|10|OD Denjin Charge Hadoken}}, {{clr|10|OD Tatsu}}, or {{clr|H|HK High Blade Kick}}, and it's almost always safe after midscreen {{clr|M|MK High Blade Kick}} too. |
| }} | | }} |
|
| |
|
| Line 633: |
Line 633: |
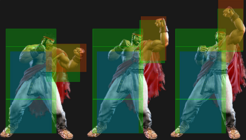
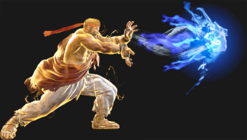
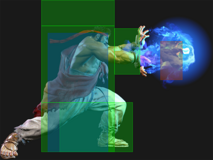
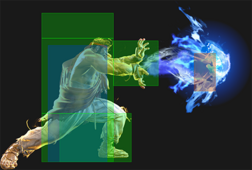
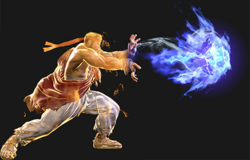
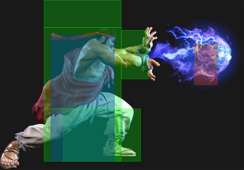
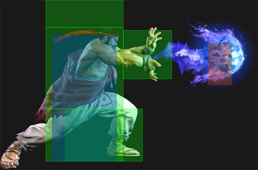
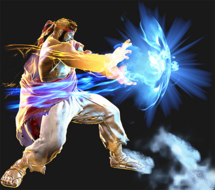
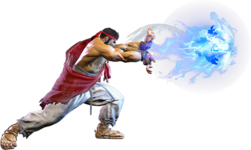
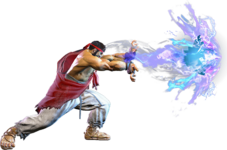
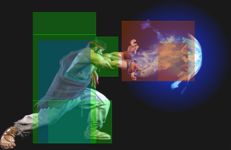
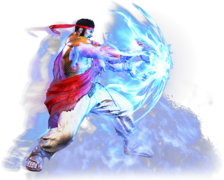
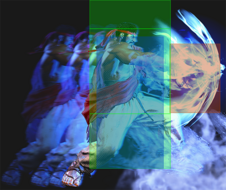
| Ryu's iconic fireball, used primarily for zoning. Compared to most projectile characters, Ryu's extended hurtbox is much shorter, making it difficult for opponents to counterpoke on startup. | | Ryu's iconic fireball, used primarily for zoning. Compared to most projectile characters, Ryu's extended hurtbox is much shorter, making it difficult for opponents to counterpoke on startup. |
|
| |
|
| Mixing up between the varying projectile speeds makes it harder for the opponent to navigate through the fireball game. The LP version is safest, and when used at long range it gives Ryu much more freedom to set up optimal spacing while the opponent is stuck in blockstun. The OD version is fast and higher priority, making it an important tool against other zoners, and the knockdown time lets Ryu perform a Denjin Charge. If the opponent is cornered, OD Hadoken can also juggle into SA1 on reaction. OD Hadoken can also juggle in the corner with a Drive Rush normal. | | Mixing up between the varying projectile speeds makes it harder for the opponent to navigate through the fireball game. The {{clr|L|LP}} version is safest, and when used at long range it gives Ryu much more freedom to set up optimal spacing while the opponent is stuck in blockstun. The {{clr|10|OD}} version is fast and higher priority, making it an important tool against other zoners, and the knockdown time lets Ryu perform a Denjin Charge. If the opponent is cornered, {{clr|10|OD Hadoken}} can also juggle into {{clr|10|SA1}} on reaction. {{clr|10|OD Hadoken}} can also juggle in the corner with a {{clr|4|Drive Rush}} normal. |
| }} | | }} |
|
| |
|
| Line 661: |
Line 661: |
| * Applies 20% damage scaling to next hit when beginning a combo; counts as 2 hits for damage scaling when comboed into (applies to next hit) | | * Applies 20% damage scaling to next hit when beginning a combo; counts as 2 hits for damage scaling when comboed into (applies to next hit) |
| <br> | | <br> |
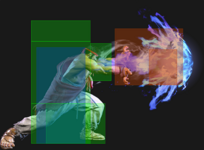
| With a Denjin charge stocked, Ryu can no longer change the speed of his fireballs. However, they all gain an extra hit and become very fast, making it hard to react to in neutral. Meterless versions do not gain extra projectile priority, so an OD or Super projectile will beat it clean. Has enough knockdown advantage to charge up another Denjin stock, and if the opponent is in the corner Ryu can juggle into SA1 on reaction. | | With a Denjin charge stocked, Ryu can no longer change the speed of his fireballs. However, they all gain an extra hit and become very fast, making it hard to react to in neutral. Meterless versions do not gain extra projectile priority, so an {{clr|10|OD}} or {{clr|10|Super}} projectile will beat it clean. Has enough knockdown advantage to charge up another Denjin stock, and if the opponent is in the corner Ryu can juggle into {{clr|10|SA1}} on reaction. |
| }} | | }} |
|
| |
|
| Line 682: |
Line 682: |
| * Reduced damage on active frames 4-10 (high anti-air connect) | | * Reduced damage on active frames 4-10 (high anti-air connect) |
| * '''Cancel Hitconfirm Window:''' 17f (Super) | | * '''Cancel Hitconfirm Window:''' 17f (Super) |
| * Applies 30% damage scaling to next hit when beginning a combo (Shoryuken > SA3 starter: 40% total scaling) | | * Applies 30% damage scaling to next hit when beginning a combo (Shoryuken > {{clr|10|SA3}} starter: 40% total scaling) |
| {{AttackDataCargo-SF6/Query|ryu_623mp}} | | {{AttackDataCargo-SF6/Query|ryu_623mp}} |
| * '''Anti-Air Invuln:''' 1-9f; '''Airborne''' 8-45f ({{FKD}} state) | | * '''Anti-Air Invuln:''' 1-9f; '''Airborne''' 8-45f ({{FKD}} state) |
| * Reduced damage on active frames 4-10 (high anti-air connect) | | * Reduced damage on active frames 4-10 (high anti-air connect) |
| * '''Cancel Hitconfirm Window:''' 17f (Super) | | * '''Cancel Hitconfirm Window:''' 17f (Super) |
| * Applies 30% damage scaling to next hit when beginning a combo (Shoryuken > SA3 starter: 40% total scaling) | | * Applies 30% damage scaling to next hit when beginning a combo (Shoryuken > {{clr|10|SA3}} starter: 40% total scaling) |
| {{AttackDataCargo-SF6/Query|ryu_623hp}} | | {{AttackDataCargo-SF6/Query|ryu_623hp}} |
| * '''Anti-Air Invuln:''' 1-8f; '''Airborne''' 9-50f ({{FKD}} state) | | * '''Anti-Air Invuln:''' 1-8f; '''Airborne''' 9-50f ({{FKD}} state) |
| * Reduced damage on active frames 3-10 (high anti-air connect) | | * Reduced damage on active frames 3-10 (high anti-air connect) |
| * '''Cancel Hitconfirm Window:''' 22f (Super) | | * '''Cancel Hitconfirm Window:''' 22f (Super) |
| * Applies 30% damage scaling to next hit when beginning a combo (Shoryuken > SA3 starter: 40% total scaling) | | * Applies 30% damage scaling to next hit when beginning a combo (Shoryuken > {{clr|10|SA3}} starter: 40% total scaling) |
| {{AttackDataCargo-SF6/Query|ryu_623pp}} | | {{AttackDataCargo-SF6/Query|ryu_623pp}} |
| * '''Full Invuln:''' 1-8f; '''Airborne''' 8-52f ({{FKD}} state) | | * '''Full Invuln:''' 1-8f; '''Airborne''' 8-52f ({{FKD}} state) |
| * Ryu's primary invincible reversal option | | * Ryu's primary invincible reversal option |
| <br> | | <br> |
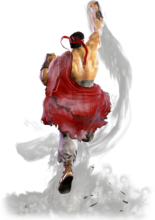
| As always, Shoryuken is a great anti-air special and the OD version has a lot of invincibility to blow through the opponent's attacks. It's best to use as late as possible against jumping opponents, or else it will have its damage reduced and will no longer be cancelable into SA3. It cannot anti-air cross-ups, so if the opponent is too close Ryu will have to walk forward and input a cross-cut Shoryuken in the opposite direction (6321P input). All versions have good juggle potential, which helps squeeze out extra damage from Ryu's many corner juggle situations. | | As always, Shoryuken is a great anti-air special and the {{clr|10|OD}} version has a lot of invincibility to blow through the opponent's attacks. It's best to use as late as possible against jumping opponents, or else it will have its damage reduced and will no longer be cancelable into {{clr|10|SA3}}. It cannot anti-air cross-ups, so if the opponent is too close Ryu will have to walk forward and input a cross-cut Shoryuken in the opposite direction (6321P input). All versions have good juggle potential, which helps squeeze out extra damage from Ryu's many corner juggle situations. |
|
| |
|
| The extra damage scaling on Shoryuken severely weakens the anti-air damage when canceled directly into SA3. It does not affect any other combo route ending in Shoryuken > SA3, however. | | The extra damage scaling on Shoryuken severely weakens the anti-air damage when canceled directly into {{clr|10|SA3}}. It does not affect any other combo route ending in Shoryuken > {{clr|10|SA3}}, however. |
| }} | | }} |
|
| |
|
| Line 732: |
Line 732: |
| * Puts opponent into {{sf6-jug|limited juggle}} state; later hits have more juggle potential | | * Puts opponent into {{sf6-jug|limited juggle}} state; later hits have more juggle potential |
| <br> | | <br> |
| Tatsu is a good move for getting corner carry while still allowing oki afterward. The MK and HK versions can be used predictively against most projectiles due to the lower body invincibility. They also get better frame advantage when the later hits connect as opposed to the first hit. OD Tatsu is a great juggle starter in the corner, and will always hit consistently due to its vacuum effect. | | Tatsu is a good move for getting corner carry while still allowing oki afterward. The {{clr|M|MK}} and {{clr|H|HK}} versions can be used predictively against most projectiles due to the lower body invincibility. They also get better frame advantage when the later hits connect as opposed to the first hit. {{clr|10|OD Tatsu}} is a great juggle starter in the corner, and will always hit consistently due to its vacuum effect. |
|
| |
|
| Tatsu is pretty combo-friendly, but some strengths do not combo from all normal cancels. 5LP cannot naturally combo into MK/HK Tatsu, and 2LP/5LK cannot naturally combo into HK Tatsu (although they can after a Punish Counter). | | Tatsu is pretty combo-friendly, but some strengths do not combo from all normal cancels. {{clr|L|5LP}} cannot naturally combo into {{clr|M|MK}}/{{clr|H|HK}} Tatsu, and {{clr|L|2LP}}/{{clr|L|5LK}} cannot naturally combo into {{clr|H|HK Tatsu}} (although they can after a Punish Counter). |
| }} | | }} |
|
| |
|
| Line 756: |
Line 756: |
| * {{FKD}} state until landing; the last 11f of landing recovery is in a crouching state | | * {{FKD}} state until landing; the last 11f of landing recovery is in a crouching state |
| * Can hit Cross-up | | * Can hit Cross-up |
| * Puts opponent into {{sf6-jug|limited juggle}} state (2HK and SA1 are most consistent follow-ups) | | * Puts opponent into {{sf6-jug|limited juggle}} state ({{clr|H|2HK}} and {{clr|10|SA1}} are most consistent follow-ups) |
| * Applies 30% damage scaling to next hit when beginning a combo (100/70/60...) | | * Applies 30% damage scaling to next hit when beginning a combo (100/70/60...) |
| {{AttackDataCargo-SF6/Query|ryu_j214kk}} | | {{AttackDataCargo-SF6/Query|ryu_j214kk}} |
| Line 763: |
Line 763: |
| * Applies an extra 15% damage scaling to next attack when comboed into | | * Applies an extra 15% damage scaling to next attack when comboed into |
| <br> | | <br> |
| The meterless versions of Air Tatsu are not affected by which button strength is used. The timing to connect it on a grounded opponent is a little strict and can whiff if mistimed; the frame advantage also varies significantly depending on the exact timing. If the opponent crouch blocks it will always be at least +3 on block, although most players will instinctively stand block when they see a jump. Cancels from air-to-air j.MP if Ryu jumps forward, which is especially useful for OD Air Tatsu since it can lead to a strong juggles near the corner. | | The meterless versions of Air Tatsu are not affected by which button strength is used. The timing to connect it on a grounded opponent is a little strict and can whiff if mistimed; the frame advantage also varies significantly depending on the exact timing. If the opponent crouch blocks it will always be at least +3 on block, although most players will instinctively stand block when they see a jump. Cancels from air-to-air {{clr|M|j.MP}} if Ryu jumps forward, which is especially useful for {{clr|10|OD Air Tatsu}} since it can lead to a strong juggles near the corner. |
| }} | | }} |
|
| |
|
| Line 787: |
Line 787: |
| * '''Cancel Hitconfirm Window:''' 25f (Super) | | * '''Cancel Hitconfirm Window:''' 25f (Super) |
| {{AttackDataCargo-SF6/Query|ryu_236hk}} | | {{AttackDataCargo-SF6/Query|ryu_236hk}} |
| * Puts opponent into {{sf6-jug|limited juggle}} state; can juggle 623LP/SA3 in corner | | * Puts opponent into {{sf6-jug|limited juggle}} state; can juggle {{clr|L|623LP}}/{{clr|10|SA3}} in corner |
| * Punish Counter: KD +95 (OTG Tumble state) | | * Punish Counter: KD +95 (OTG Tumble state) |
| * '''Cancel Hitconfirm Window:''' 30f (Super) | | * '''Cancel Hitconfirm Window:''' 30f (Super) |
| {{AttackDataCargo-SF6/Query|ryu_236kk}} | | {{AttackDataCargo-SF6/Query|ryu_236kk}} |
| * Wall Bounces opponent on hit for a {{sf6-jug|limited juggle}} state | | * Wall Bounces opponent on hit for a {{sf6-jug|limited juggle}} state |
| * Gives enough time to charge SA2 when canceled (depending on screen position) | | * Gives enough time to charge {{clr|10|SA2}} when canceled (depending on screen position) |
| * '''Cancel Hitconfirm Window:''' 27f (Super) | | * '''Cancel Hitconfirm Window:''' 27f (Super) |
| * Counts as 2 hits for damage scaling when comboed into (applies to next hit) | | * Counts as 2 hits for damage scaling when comboed into (applies to next hit) |
| <br> | | <br> |
| High Blade Kick (more commonly known as "Donkey Kick") is used primarily as a juggle ender due to its high juggle potential, great oki, and consistent juggle into SA3. LK is a quick combo ender, The MK version can be spaced relatively safely, and often can set up a safe Denjin Charge when used midscreen. HK is very slow but usually safe on block due to its huge pushback. 5LK is the fastest normal that can combo into LK, and 4HP is the only normal which can combo into HK without additional hit advantage. | | High Blade Kick (more commonly known as "Donkey Kick") is used primarily as a juggle ender due to its high juggle potential, great oki, and consistent juggle into {{clr|10|SA3}}. LK is a quick combo ender, The {{clr|M|MK}} version can be spaced relatively safely, and often can set up a safe Denjin Charge when used midscreen. {{clr|H|HK}} is very slow but usually safe on block due to its huge pushback. {{clr|L|5LK}} is the fastest normal that can combo into {{clr|L|236LK}}, and {{clr|H|4HP}} is the only normal which can combo into {{clr|H|HK}} without additional hit advantage. |
|
| |
|
| OD High Blade Kick is the star of the show due to its Wall Bounce, which can lead to powerful juggles; it can even combo into fully charged SA2 when canceled (although the release must be manually timed). The OD version can be comboed into from medium attacks or from a Punish Counter 5LK. If Ryu is too close to the corner, the opponent will bounce over his head, resulting in no follow-up juggle. In these situations, OD Tatsu is preferred. | | {{clr|10|OD High Blade Kick}} is the star of the show due to its Wall Bounce, which can lead to powerful juggles; it can even combo into fully charged {{clr|10|SA2}} when canceled (although the release must be manually timed). The {{clr|10|OD}} version can be comboed into from medium attacks or from a Punish Counter {{clr|L|5LK}}. If Ryu is too close to the corner, the opponent will bounce over his head, resulting in no follow-up juggle. In these situations, {{clr|10|OD Tatsu}} is preferred. |
| }} | | }} |
|
| |
|
| Line 829: |
Line 829: |
| * Counts as 2 hits for damage scaling when comboed into (applies to next hit) | | * Counts as 2 hits for damage scaling when comboed into (applies to next hit) |
| <br> | | <br> |
| All versions of Hashogeki have a strike hitbox, but can also nullify a 1-hit projectile of equal priority; the OD version will completely destroy meterless fireballs just like any other OD projectile. Because it has a strike hitbox, it cannot be used to stuff Level 1 Supers; this is especially important to know when using it in a Burnout blockstring, as opponents will be looking for any gap to Super through. | | All versions of Hashogeki have a strike hitbox, but can also nullify a 1-hit projectile of equal priority; the {{clr|10|OD}} version will completely destroy meterless fireballs just like any other {{clr|10|OD}} projectile. Because it has a strike hitbox, it cannot be used to stuff Level 1 Supers; this is especially important to know when using it in a Burnout blockstring, as opponents will be looking for any gap to Super through. |
|
| |
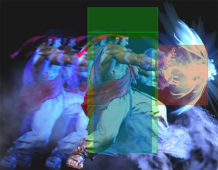
|
| Hashogeki has juggle potential on all versions; the LP and MP versions allow for high damage juggle routes, especially in the corner. This is most commonly achieved by launching with 236KK or 214KK, then following up with a juggled Drive Rush normal into 214P. On a grounded hit, the opponent is left standing after the LP/MP/OD versions; Ryu is left too far away for an immediate throw mixup, but the opponent can still be punished for attempting to escape or hit a defensive button. | | Hashogeki has juggle potential on all versions; the {{clr|L|LP}} and {{clr|M|MP}} versions allow for high damage juggle routes, especially in the corner. This is most commonly achieved by launching with {{clr|10|236KK}} or {{clr|10|214KK}}, then following up with a juggled {{clr|4|Drive Rush}} normal into 214P. On a grounded hit, the opponent is left standing after the {{clr|L|LP}}/{{clr|M|MP}}/{{clr|10|OD}} versions; Ryu is left too far away for an immediate throw mixup, but the opponent can still be punished for attempting to escape or hit a defensive button. |
|
| |
|
| 214LP has short range and low pushback but is safe; 214MP is technically unsafe but the spacing often makes it more difficult to punish. 214HP gives Ryu frame advantage, but canceling into it leaves Ryu vulnerable during its long startup. If you condition the opponent to expect a 214HP cancel, you can punish their light normal mash by ending with the LP or MP versions instead, creating an intentional gap of 1-4 frames in the blockstring. Since a Counter-hit puts the opponent into a juggle state, Ryu can juggle even if he trades hits with the opponent. | | {{clr|L|214LP}} has short range and low pushback but is safe; {{clr|M|214MP}} is technically unsafe but the spacing often makes it more difficult to punish. {{clr|H|214HP}} gives Ryu frame advantage, but canceling into it leaves Ryu vulnerable during its long startup. If you condition the opponent to expect a {{clr|H|214HP}} cancel, you can punish their light normal mash by ending with the {{clr|L|LP}} or {{clr|M|MP}} versions instead, creating an intentional gap of 1-4 frames in the blockstring. Since a Counter-hit puts the opponent into a juggle state, Ryu can juggle even if he trades hits with the opponent. |
|
| |
|
| Against opponents in Burnout, 214LP can be used for extended pressure sequences; however, Burnout increases the pushback on block, so Ryu must spend meter to force his way back in. | | Against opponents in Burnout, {{clr|L|214LP}} can be used for extended pressure sequences; however, Burnout increases the pushback on block, so Ryu must spend meter to force his way back in. |
|
| |
|
| The following are some common blockstring gaps; all examples assume Ryu cancels at the fastest possible timing, though a longer gap can be created by delaying the cancel: | | The following are some common blockstring gaps; all examples assume Ryu cancels at the fastest possible timing, though a longer gap can be created by delaying the cancel: |
| * 1f gap: 2HP xx 214MP | | * 1f gap: {{clr|H|2HP}} > {{clr|M|214MP}} |
| * 2f gap: 2MP xx 214PP | | * 2f gap: {{clr|M|2MP}} > {{clr|10|214PP}} |
| * 3f gap: 5LK/5LP xx 214LP, 2MP xx 214MP, 4HP xx 214PP | | * 3f gap: {{clr|L|5LK}}/{{clr|L|5LP}} > {{clr|L|214LP}}, {{clr|M|2MP}} > {{clr|M|214MP}}, {{clr|H|4HP}} > {{clr|10|214PP}} |
| * 4f gap: 5LP xx 214LP, 4HP xx 214MP | | * 4f gap: {{clr|L|5LP}} > {{clr|L|214LP}}, {{clr|H|4HP}} > {{clr|M|214MP}} |
| }} | | }} |
|
| |
|
| Line 865: |
Line 865: |
| * '''Cancel Hitconfirm Window:''' 22f (Super) | | * '''Cancel Hitconfirm Window:''' 22f (Super) |
| <br> | | <br> |
| The Denjin versions of Hashogeki are much more rewarding on hit and have additional block advantage. The meterless version is not affected by the button strength used. Just like the standard version, it is a strike hitbox with projectile-nullifying properties, but now the meterless Hashogeki can dissipate 2-hit meterless projectiles like Denjin Hadoken or Sonic Cross. The OD version surprisingly does not gain an additional hit, but is still very rewarding to land due to its high damage and crumple state. | | The Denjin versions of Hashogeki are much more rewarding on hit and have additional block advantage. The meterless version is not affected by the button strength used. Just like the standard version, it is a strike hitbox with projectile-nullifying properties, but now the meterless Hashogeki can dissipate 2-hit meterless projectiles like Denjin Hadoken or Sonic Cross. The {{clr|10|OD}} version surprisingly does not gain an additional hit, but is still very rewarding to land due to its high damage and crumple state. |
|
| |
|
| There are some blockstrings that can create frame traps on block: | | There are some blockstrings that can create frame traps on block: |
| * 1f gap: 5HP xx Denjin 214P | | * 1f gap: {{clr|H|5HP}} > {{clr|10|Denjin 214P}} |
| * 2f gap: 2MP xx Denjin 214PP, 4HK(2nd) xx Denjin 214P | | * 2f gap: {{clr|M|2MP}} > {{clr|10|Denjin 214PP}}, {{clr|H|4HK (2nd)}} > {{clr|10|Denjin 214P}} |
| * 3f gap: 2HP xx Denjin 214P, 4HP xx Denjin 214PP | | * 3f gap: {{clr|H|2HP}} > {{clr|10|Denjin 214P}}, {{clr|H|4HP}} > {{clr|10|Denjin 214PP}} |
| }} | | }} |
| <br> | | <br> |
| Line 945: |
Line 945: |
| * Button must be held for 6f after the Super freeze | | * Button must be held for 6f after the Super freeze |
| <br> | | <br> |
| A powered up version of Hashogeki that can be charged to a higher level by holding the Punch button. Like the original Hashogeki, it has a strike hitbox but can destroy projectile hits (up to 3). Higher level versions do more damage and drain more Drive gauge on block, but do not deal additional Chip damage against opponents in Burnout. The Denjin Charge version of each level deals 400 extra damage on hit (but again, no extra Chip). Some things that combo into level 2 charge are 4HP and OD '''NON-DENJIN''' Hashogeki. | | A powered up version of Hashogeki that can be charged to a higher level by holding the Punch button. Like the original Hashogeki, it has a strike hitbox but can destroy projectile hits (up to 3). Higher level versions do more damage and drain more Drive gauge on block, but do not deal additional Chip damage against opponents in Burnout. The Denjin Charge version of each level deals 400 extra damage on hit (but again, no extra Chip). Some things that combo into level 2 charge are {{clr|H|4HP}} and {{clr|10|OD Hashogeki (non-Denjin)}}. |
| }} | | }} |
| |-| | | |-| |
| Line 968: |
Line 968: |
| * 40% minimum damage scaling | | * 40% minimum damage scaling |
| * Button must be held for 36f after the Super freeze | | * Button must be held for 36f after the Super freeze |
| * Gives a tumbling OTG knockdown that can be followed up with a raw Drive Rush combo | | * Gives a tumbling OTG knockdown that can be followed up with a raw {{clr|4|Drive Rush}} combo |
| <br> | | <br> |
| A powered up version of Hashogeki that can be charged to a higher level by holding the Punch button. Like the original Hashogeki, it has a strike hitbox but can destroy projectile hits (up to 3). Higher level versions do more damage and drain more Drive gauge on block, but do not deal additional Chip damage against opponents in Burnout. The Denjin Charge version of each level deals 400 extra damage on hit (but again, no extra Chip). Some things that can combo into level 3 charge are OD Donkey Kick and OD '''DENJIN''' Hashogeki. | | A powered up version of Hashogeki that can be charged to a higher level by holding the Punch button. Like the original Hashogeki, it has a strike hitbox but can destroy projectile hits (up to 3). Higher level versions do more damage and drain more Drive gauge on block, but do not deal additional Chip damage against opponents in Burnout. The Denjin Charge version of each level deals 400 extra damage on hit (but again, no extra Chip). Some things that can combo into level 3 charge are {{clr|10|OD High Blade Kick}} and {{clr|10|OD Denjin Hashogeki}}. |
| }} | | }} |
| </tabber> | | </tabber> |
| Line 1,002: |
Line 1,002: |
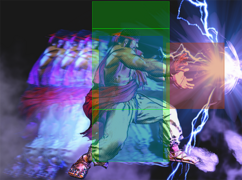
| A satisfyingly powerful and invincible uppercut Super that works well as a reversal, juggle ender, or anti-air. The range is quite short, so despite the incredibly fast 5f startup it has limited utility as a punish tool. This also causes it to whiff in some specific midscreen cancel routes. | | A satisfyingly powerful and invincible uppercut Super that works well as a reversal, juggle ender, or anti-air. The range is quite short, so despite the incredibly fast 5f startup it has limited utility as a punish tool. This also causes it to whiff in some specific midscreen cancel routes. |
|
| |
|
| SA3 cannot anti-air cross-ups, and the forward movement on startup can cause it to whiff under close jumps. Canceling a Shoryuken into SA3 as an anti-air causes Ryu to incur significant damage scaling, and may even lose out on the cinematic hit if the opponent is juggled high enough. This is much less of a problem for the CA version, which retains most of its damage even without a cinematic connect. | | {{clr|10|SA3}} cannot anti-air cross-ups, and the forward movement on startup can cause it to whiff under close jumps. Canceling a Shoryuken into {{clr|10|SA3}} as an anti-air causes Ryu to incur significant damage scaling, and may even lose out on the cinematic hit if the opponent is juggled high enough. This is much less of a problem for the CA version, which retains most of its damage even without a cinematic connect. |
|
| |
|
| If the opponent chooses to stand block this Super (especially for taller characters), they will take a little extra blockstun and Burnout chip damage as more hits connect on the way up. However, these hits do not deal additional Drive damage on block, so it's mostly irrelevant outside of Burnout. Because SA3 hits at least 3 times on block, the first hit can be used to put the opponent into Burnout before chipping out with the remaining hits. Opponents can Drive Reversal to prevent this if Ryu uses a blockstring into SA3, but this requires them to be aware of the gimmick and to have full awareness of the HP and Drive meter situation. Drive Reversal will give them a full punish as Ryu whiffs over them, so it's risky to attempt this chip-out gimmick. | | If the opponent chooses to stand block this Super (especially for taller characters), they will take a little extra blockstun and Burnout chip damage as more hits connect on the way up. However, these hits do not deal additional Drive damage on block, so it's mostly irrelevant outside of Burnout. Because {{clr|10|SA3}} hits at least 3 times on block, the first hit can be used to put the opponent into Burnout before chipping out with the remaining hits. Opponents can Drive Reversal to prevent this if Ryu uses a blockstring into {{clr|10|SA3}}, but this requires them to be aware of the gimmick and to have full awareness of the HP and Drive meter situation. Drive Reversal will give them a full punish as Ryu whiffs over them, so it's risky to attempt this chip-out gimmick. |
| }} | | }} |
| <br> | | <br> |


