|
|
| Line 163: |
Line 163: |
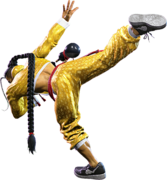
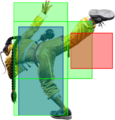
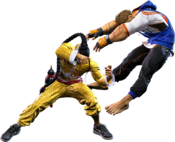
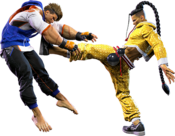
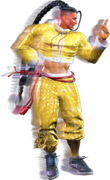
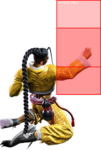
| While quite slow, 5HK has solid range due to its forward movement, making it a real threat in neutral. The long recovery on this move makes it very risky to whiff in neutral, but on block the pushback usually keeps it safe even at -5. The hitbox is quite low to the ground, making it worthless as an anti-air; the juggle properties vs. airborne only allow Jamie to safely cancel into a special when hitting the opponent's early jump frames. The crumple state from Punish Counter causes the opponent to fall backwards, making the followups a bit more limited compared to the corner. | | While quite slow, 5HK has solid range due to its forward movement, making it a real threat in neutral. The long recovery on this move makes it very risky to whiff in neutral, but on block the pushback usually keeps it safe even at -5. The hitbox is quite low to the ground, making it worthless as an anti-air; the juggle properties vs. airborne only allow Jamie to safely cancel into a special when hitting the opponent's early jump frames. The crumple state from Punish Counter causes the opponent to fall backwards, making the followups a bit more limited compared to the corner. |
| }} | | }} |
| | <br> |
|
| |
|
| === Crouching Normals === | | === Crouching Normals === |
| Line 276: |
Line 277: |
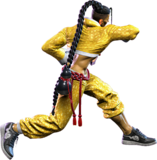
| This 2-hit sweep is a low on both hits and has slightly more range on the 2nd hit. It's fairly easy to punish on block, so should not be thrown out randomly very often. 2HK has a lot of juggle potential, and leads to a Target Combo followup into HK that is great for increasing his Drink Level without sacrificing corner oki. | | This 2-hit sweep is a low on both hits and has slightly more range on the 2nd hit. It's fairly easy to punish on block, so should not be thrown out randomly very often. 2HK has a lot of juggle potential, and leads to a Target Combo followup into HK that is great for increasing his Drink Level without sacrificing corner oki. |
| }} | | }} |
| | <br> |
|
| |
|
| === Jumping Normals === | | === Jumping Normals === |
| Line 386: |
Line 388: |
| Against grounded opponents, only one hit will connect, dealing less damage than a medium air normal. The long gap in active frames can also make it difficult to time properly. The hitbox is not particularly good against anti-airs, so it's usually better to stick with j.HP for that purpose. | | Against grounded opponents, only one hit will connect, dealing less damage than a medium air normal. The long gap in active frames can also make it difficult to time properly. The hitbox is not particularly good against anti-airs, so it's usually better to stick with j.HP for that purpose. |
| }} | | }} |
| | <br> |
|
| |
|
| == Command Normals == | | == Command Normals == |
| Line 488: |
Line 491: |
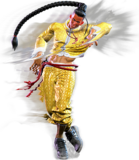
| At Drink Lv.4, the move gains extra range and some new Target Combo followups. The TC requires a Counterhit to combo, but the timing is very lenient to react to this. Even if the confirm is missed, the TC followups are cancelable themselves, allowing Jamie to end with a safe option like 236PP even on a failed hitconfirm. | | At Drink Lv.4, the move gains extra range and some new Target Combo followups. The TC requires a Counterhit to combo, but the timing is very lenient to react to this. Even if the confirm is missed, the TC followups are cancelable themselves, allowing Jamie to end with a safe option like 236PP even on a failed hitconfirm. |
| }} | | }} |
| | <br> |
|
| |
|
| == Target Combos == | | == Target Combos == |
| Line 637: |
Line 641: |
| Every part of this Target Combo can be input on hit, block, or whiff from 6HK. The 4HK causes Jamie to stumble away from the opponent, and the timing of Jamie's P input changes which followup occurs. All listed startups include the 6HK plus the minimum/maximum delay before hitting P during the Sway animation. The close Headbutt followup is fairly easy to confirm on Counterhit or Punish Counter 6HK. The minimum gap between 6HK and Headbutt is 1f on normal hit, 7f on block, making it a poor frame trap option. The Spinning Fists cannot be comboed into, but are useful for stopping an opponent from chasing down the Sway. The Drink causes Jamie to continue stumbling backwards, making it hard to chase down without a projectile. This does give up a lot of ground, but it may be worth the Drive build depending on the circumstances. | | Every part of this Target Combo can be input on hit, block, or whiff from 6HK. The 4HK causes Jamie to stumble away from the opponent, and the timing of Jamie's P input changes which followup occurs. All listed startups include the 6HK plus the minimum/maximum delay before hitting P during the Sway animation. The close Headbutt followup is fairly easy to confirm on Counterhit or Punish Counter 6HK. The minimum gap between 6HK and Headbutt is 1f on normal hit, 7f on block, making it a poor frame trap option. The Spinning Fists cannot be comboed into, but are useful for stopping an opponent from chasing down the Sway. The Drink causes Jamie to continue stumbling backwards, making it hard to chase down without a projectile. This does give up a lot of ground, but it may be worth the Drive build depending on the circumstances. |
| }} | | }} |
| | <br> |
|
| |
|
| == Throws == | | == Throws == |
| Line 671: |
Line 676: |
| * Side switches; can dash (+19) or walk to get oki if back throwing opponent into corner | | * Side switches; can dash (+19) or walk to get oki if back throwing opponent into corner |
| }} | | }} |
| | <br> |
|
| |
|
| == Drive System == | | == Drive System == |
| Line 748: |
Line 754: |
| * See Strategy page for [[Street_Fighter_6/Jamie/Strategy#Drive_Rush|Blockstring Gaps and Combo Routes]] | | * See Strategy page for [[Street_Fighter_6/Jamie/Strategy#Drive_Rush|Blockstring Gaps and Combo Routes]] |
| }} | | }} |
| | <br> |
|
| |
|
| == Special Moves == | | == Special Moves == |
| Line 1,241: |
Line 1,248: |
| Sometimes, Jamie will say a naughty word when he whiffs the grab. Be careful when playing Jamie with small children nearby. | | Sometimes, Jamie will say a naughty word when he whiffs the grab. Be careful when playing Jamie with small children nearby. |
| }} | | }} |
| | <br> |
|
| |
|
| == Super Arts == | | == Super Arts == |
| Line 1,336: |
Line 1,344: |
| The Critical Art version lacks this ending juggle, but makes up for it with higher base damage and a cooler ending cinematic. | | The Critical Art version lacks this ending juggle, but makes up for it with higher base damage and a cooler ending cinematic. |
| }} | | }} |
| | <br> |
|
| |
|
| == Taunts == | | == Taunts == |
| Line 1,435: |
Line 1,444: |
| {{AttackDataCargo-SF6/Query|Jamie_4pppkkk}} | | {{AttackDataCargo-SF6/Query|Jamie_4pppkkk}} |
| }} | | }} |
| | | <br> |
|
| |
|
| {{Character Subnav SF6|chara={{SUBPAGENAME}}|discord={{{discord|}}} }} | | {{Character Subnav SF6|chara={{SUBPAGENAME}}|discord={{{discord|}}} }} |


