No edit summary |
|||
| Line 914: | Line 914: | ||
* 40% minimum damage scaling | * 40% minimum damage scaling | ||
<br> | <br> | ||
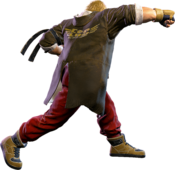
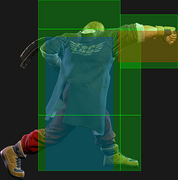
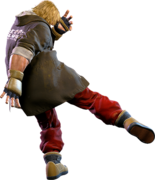
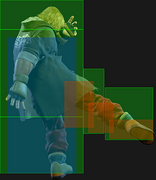
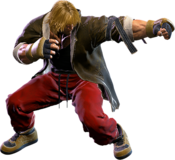
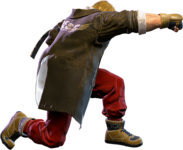
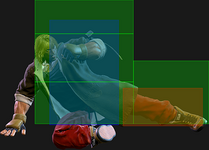
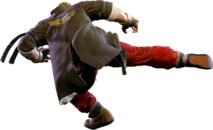
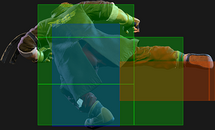
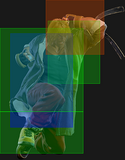
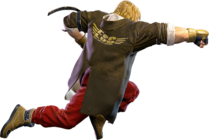
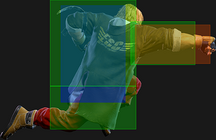
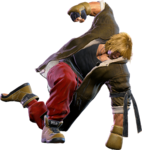
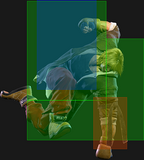
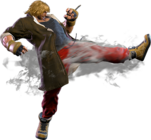
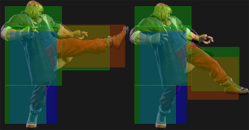
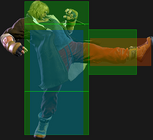
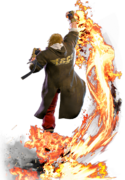
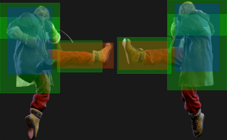
Ken's infamous SA3 from Third Strike | Ken's infamous SA3 from Third Strike. A flurry of 5 kicks followed up by a Tatsumaki ender on hit. Very fast for a Super while also having good range, but doesn't work as a reversal. It is best used in tricky punish scenarios or to add damage when fishing for safe normal or OD Special confirms. Works well in juggles, but loses damage if the opponent is too high. The full damage distribution is: 300x4*200x5*500. | ||
}} | }} | ||
Revision as of 13:23, 11 September 2023
| Early game information
This game is relatively new, and its pages are still being written. Some information may be mildly inaccurate or missing altogether. You can join the SF6 Resource Hub for more info on editing and other ways you can potentially help with this resource. |
Introduction
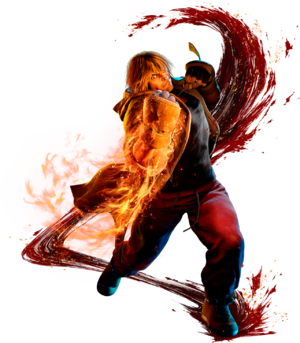
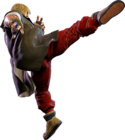
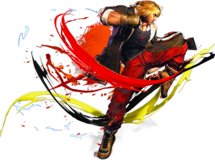
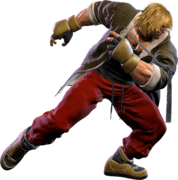
Former US National Fighting Champ, and ex-VP of the Masters Foundation. Accusations of orchestrating a criminal plot have forced Ken to abandon his family and business and go into hiding.
The original shotoclone, Ken is very similar to his old training partner Ryu. Both characters have fairly similar movesets, but Ken carves out a path all his own. With emphasis on aggression and close-range combat, Ken acts as a more offense focused alternative to the Shoto playstyle.
Ken shares the iconic Hadoken and Shoryuken with Ryu, but there's about where their kits begin to diverge. Ken's signature special is his command sprint Quick Dash, which can be used both as a pressure tool and to empower his other specials. If certain specials are used out of Quick Dash, they gain enhanced properties rivalling that of Overdrive moves. In particular, while his normal Tatsumaki is a decent combo ender, Dash Tatsumaki gives incredible corner carry off of any clean hit. Each of these enhanced specials act as different combo enders or extenders, and each one gives something valuable to Ken's kit, whether that be corner carry, strong okizeme, or even sideswapping mid-combo.
Excellent corner carry is a running theme in Ken's kit. While he pokes with 5MK, 2MK and 5HP, Ken looks for a clean hit to Drive Rush. After a confirm, Ken can carry you all the way to the corner and set you up for some truly nasty corner pressure. Any successful hit leads into powerful corner combos that deal great damage and give good okizeme, allowing him to loop pressure continuously. The Jinrai Series of kicks acts as great rekka pressure options in this scenario, and even come with built-in mixup tools. All of this adds up to Ken being a neutral and offense monster, capable of easily tagging the opponent and dragging them into the corner off of any successful opening.
While Ken may seem like an offensive rushdown monster at first, what keeps him in check is the considerably bad block advantage on many of his moves. Each version of Jinrai Kicks and Dragon Lash are either punishable on block or interruptible, causing his offense to be based on making the opponent unsure of when to press. Smart players will quickly learn not to press until something punishable comes out, which can force Ken to play reactively and wait for the opponent to give him an opening.
Due to the stubby range of Ken's 5MP, he may sometimes struggle confirming into his important combos—but with smart use of Run and Drive Rush, he is able to get great confirms from very far away. Learning his Run combos to capitalize on openings can also be somewhat tricky. But overall, Ken is another great character to learn Street Fighter with. If you like aggression, strong confirms, combo expression, and enjoy kicking so hard you set things on fire, you really can't go wrong with Ken.
| Pick if you like: | Avoid if you dislike: |
|---|---|
|
|
Classic & Modern Versions Comparison
| Missing Normals |
|
|---|---|
| Missing Command Normals |
|
| Shortcut-Only Specials |
|
| Assist Combos |
|
| Miscellaneous Changes |
|
| Ken | |
|---|---|
| Vitals | |
| Life Points | 10000 |
| Ground Movement | |
| Forward Walk Speed | 0.047 |
| Backward Walk Speed | 0.032 |
| Forward Dash Speed | 19 |
| Backward Dash Speed | 23 |
| Forward Dash Distance | 1.322 |
| Backward Dash Distance | 0.923 |
| Drive Rush Min. Distance (Throw) | 0.745 |
| Drive Rush Min. Distance (Block) | 2.449 |
| Drive Rush Max Distance | 3.590 |
| Jumping | |
| Jump Speed | 4+38+3 |
| Jump Apex | 2.115 |
| Forward Jump Distance | 1.90 |
| Backward Jump Distance | 1.52 |
| Throws | |
| Throw Range | 0.8 |
| Throw Hurtbox | 0.33 |
| Frame Data Glossary - SF6 | |
|---|---|
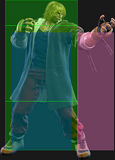
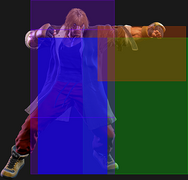
| Hitbox Images |
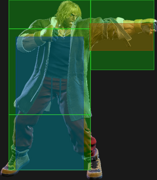
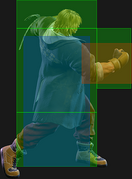
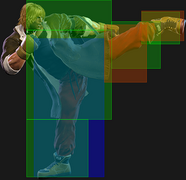
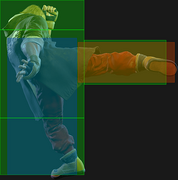
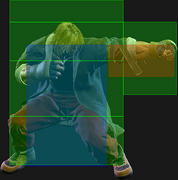
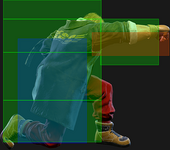
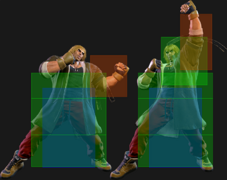
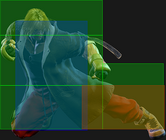
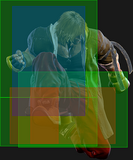
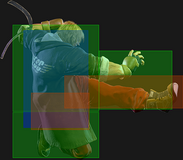
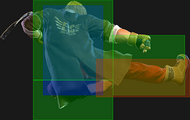
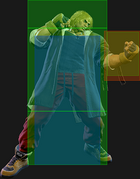
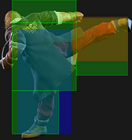
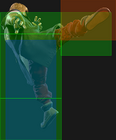
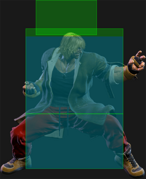
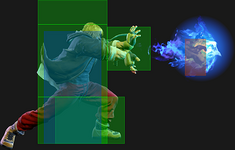
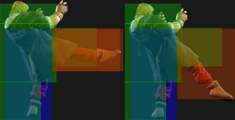
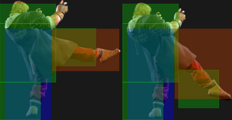
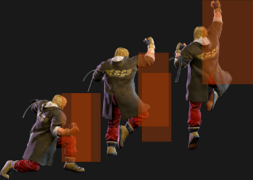
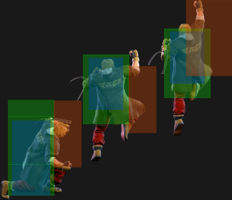
🟥 (Red): Attack hitbox
🟩 (Green): Vulnerable hurtbox that can be hit by strikes/projectiles
🟦 (Blue): Vulnerable throw hurtbox
|
| Active |
How many frames a move remains active (can hurt opponents) for. For projectiles with a maximum active period, a value may be listed in [brackets], but this number is not factored into the move's total frame count.
|
| Cancel |
Available options for canceling one move into another move.
|
| Cancel Hitconfirm Windows |
Hitconfirm reaction windows into Special Moves, Target Combos, and Super Arts.
|
| Damage |
Attack damage on hit. Multi-hit moves may have the damage listed for individual hits as X,Y (or sometimes X*Y). Sometimes a move's damage changes depending on which active frame connects, or on cinematic vs. non-cinematic hits; in this case, multiple values may be listed, and it will be clarified in the move description.
|
| Damage Scaling |
Some moves cause additional damage scaling in combos. Refer to Game Data page for a more detailed breakdown. Scaling Types:
|
| Drive Rush Cancel Advantage |
Refers to the frame advantage when canceling a normal, command normal, or Target Combo into Drive Rush on hit or block (abbreviated as DRC for Drive Rush Cancel). This is calculated at the moment a follow-up attack can be input, not at the moment the character can block or perform movement options. An attack that with DRC +8 on Hit can link into an 8-frame attack, and DRC +4 on Block can create a true blockstring into a 4-frame attack. Note that any DRC on Block worse than +4 cannot form a true blockstring, allowing the opponent to interrupt with an invincible reversal. Most light normals are slightly negative after a DRC on block, meaning the opponent can mash their fastest normal to guarantee a counter-hit (though this requires fast reactions). The attacking character could punish this with Light > DRC into an immediate invincible attack, but this would be an incredibly expensive and high-risk gambit.
|
| Forced Knockdown |
Most airborne command normals, special moves, and Super Arts put the user in a "Forced Knockdown" state. While in this state, an air knockdown will occur when being hit by any attack, even if it would otherwise cause an air reset. As an example, Ryu's 2HP causes an air reset when used as an anti-air. Against a move like Cammy's Hooligan Combination, however, the 2HP puts her into an air knockdown state. This allows Ryu to successfully cancel 2HP into Shoryuken for a juggle, similar to how a Drive Impact wall splat works. Taking advantage of Forced Knockdown juggles is important for dealing with moves like Ken's Dragonlash, Dhalsim's Air Teleport, or Kimberly's 6HK~Hop sequence. Moves that already cause an air knockdown, like most j.MP air-to-airs, will not display the "Forced Knockdown" message.
|
| Guard |
Refers to the direction an attack must be blocked. L is for Low attacks (must be blocked crouching), H is for High attacks/overheads (must be blocked standing), LH is for attacks that can be blocked crouching or standing. T is for Throw attacks which cannot be blocked.
|
| Juggles |
When a character is put into an Air Knockdown state, it is often possible to follow up with a Juggle attack before they hit the ground. In the simplest terms, there are 2 main juggle states:
The following is a more detailed overview of the SF6 juggle system:
Juggle Start (JS): When starting a juggle, the opponent's JC will be set to this value. May be different vs. standing and airborne opponents.
Juggle Increase (JI): When opponent is already in a juggle state, attacks will increase the opponent's JC by this amount.
Juggle Limit (JL): Property of an attack hitbox that determines whether it connects on a juggled opponent. The JL must be ≥ the opponent's JC to hit successfully.
An example to tie everything together:
Drive Rush notes:
More recently, the official definitions used by Capcom are slightly different than these community-designated terms. When reading official patch notes, the following terms are used instead:
|
| On Hit/Block |
These are frame advantage values when the attack hits or is blocked. If the number is positive, then the move will recover before the defender can act again. If the number is negative, the defender will be able to act before the attacker and maybe even punish. KD refers to knockdown on hit, and the listed KD Advantage refers to how many frames the attacker can act before the defender finishes their wakeup animation.
|
| Recovery |
How many frames it takes for a move to finish after the active frames have finished. For projectiles, recovery is considered to begin after the first active frame.
|
| Startup |
How many frames it takes before the move becomes 'active' or have a hit box. The last startup frame and the first active frame are the same frame, meaning all values are written as Startup + 1.
|
| IASA / Actionable Recovery |
Some moves play out an extended recovery animation when no other button/direction is input (for crouching moves, it applies when holding any down direction). These are often referred to as "actionable recovery" frames; in some games, the term IASA (Interruptible As Soon As) refers to the frame that Actionable Recovery begins. Letting the Actionable Recovery frames play out can change the character's position, potentially setting up spacing traps by recovering farther away. For example, Manon 5HP will recover much farther away from the opponent if no input is performed immediately after her recovery; holding back or down-back to block will keep her much closer to the opponent.
|
Normals
Standing Normals
5LP
| Startup | Active | Recovery | Cancel | Damage | Guard | On Hit | On Block |
|---|---|---|---|---|---|---|---|
| 4 | 3 | 7 | Chn Sp SA | 300 | LH | +4 | -1 |
- Chains into 5LP/2LP/2LK
- Cancel Hitconfirm Window: 13f
- Run~Stop Adv: -14/-19
Ken's longest range 4f light; unlike 2LP it cannot link to a medium, though it can link to 2MP on Counterhit. Due to its lower recovery, 5LP is the best light normal to use for safety against Drive Impact armor. It can combo into 623HP, 236KK, or 236LK even from farther ranges. When used as a punish starter, Ken's most consistent enders are 2MK > 623HP or 5MK~MK~HK.
5MP
| Startup | Active | Recovery | Cancel | Damage | Guard | On Hit | On Block |
|---|---|---|---|---|---|---|---|
| 5 | 4 | 14 | Sp SA TC | 600 | LH | +4 | -2 |
- Cancel Hitconfirm Window: 16f (21f TC)
- Run~Stop Adv: -6/-12
A short ranged combo and pressure tool that can be confirmed directly into his 5MP~HP Target Combo. If you're not confident in that confirm, a close range 2LP can link to 5MP, making it much easier. 5MP can also link to 5LP at point blank, though the followups are much more limited in damage.
5HP
| Startup | Active | Recovery | Cancel | Damage | Guard | On Hit | On Block |
|---|---|---|---|---|---|---|---|
| 10 | 5 | 17 | Sp SA | 800 | LH | +3 | -2 |
- Cancel Hitconfirm Window: 19f
- Run~Stop Adv: -3/-8
A great poke, combo, and pressure tool that can be hitconfirmed into followups on reaction. It is safe on block and has a lot of active frames, allowing it to be up to +2 on a meaty connect (but no longer in throw range). 5HP is great as a Drive Rush starter on hit or block.
5HP can combo into moves like Run~623P, Run~214K, 236MK, or 623KK. The last one is notable, as it becomes +4 against crouching opponents, allowing for a link into 2LP > 5MP~HP. On Counterhit or after Drive Rush, it can combo to 236HK or 623MK; this allows for the same 623MK crouching extension. Unfortunately, 5HP cannot link from Ken's most common Drive Rush starter (2MK).
5LK
| Startup | Active | Recovery | Cancel | Damage | Guard | On Hit | On Block |
|---|---|---|---|---|---|---|---|
| 5 | 2 | 12 | Sp SA | 300 | LH | 0 | -2 |
- Cancel Hitconfirm Window: 12f
- Run~Stop Adv: -14/-16
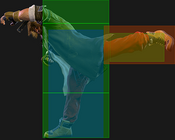
Great range for a light normal, making it a useful -5 punish option. Buffering a special move like HP Shoryuken or OD Tatsu just outside Ken's max 5LK range allows it to counterpoke into a knockdown. Unfortunately, it cannot combo when canceled to Drive Rush without a Counterhit or Punish starter.
5MK
| Startup | Active | Recovery | Cancel | Damage | Guard | On Hit | On Block |
|---|---|---|---|---|---|---|---|
| 8 | 3 | 20 | TC | 600 | LH | +3 | -5 |
- Whiffs on crouchers at farther ranges
- Applies a 20% damage scaling penalty to the next hit when used as a combo starter (100/80/70/60...)
- Cancel Hitconfirm Window: 19f (TC)
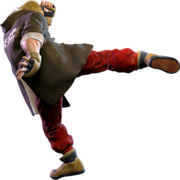
A strong advancing poke that can be confirmed into a knockdown with his 5MK~MK~HK Target Combo. It can link to 2MK as a Punish Counter, further increasing its use as a whiff punish. However, it is somewhat susceptible to Drive Impact in neutral. With its 19f hitconfirm window, skilled players can confirm the Target Combo off a single hit.
5HK
| Startup | Active | Recovery | Cancel | Damage | Guard | On Hit | On Block |
|---|---|---|---|---|---|---|---|
| 12 | 2 | 23(25) | - | 800 | LH | +1 | -5 |
- Punish Counter: Spinning juggle (KD +56)
- Can convert this at any range into OD Dragonlash for a ground bounce juggle
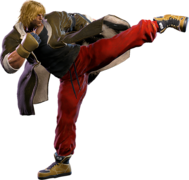
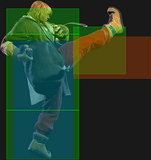
A slow, long-range roundhouse kick that moves Ken forward during startup. The button is highly committal; it's not cancelable, unsafe on block at closer ranges, has high whiff recovery, and is highly susceptible to Drive Impact. The main benefit of 5HK is its Punish Counter launching properties, as it allows Ken to follow up with 623KK from nearly any range.
Crouching Normals
2LP
| Startup | Active | Recovery | Cancel | Damage | Guard | On Hit | On Block |
|---|---|---|---|---|---|---|---|
| 4 | 2 | 9 | Chn Sp SA | 300 | LH | +5 | -1 |
- Chains into 5LP/2LP/2LK
- Cancel Hitconfirm Window: 12f
- Run~Stop Adv: -12/-18
From close range, 2LP links naturally into 5MP~HP Target Combo, giving Ken above average damage from a light starter. It can link to 5LK even at max range where nothing else is possible. On Counterhit, 2LP links to 2MP (damage) or 2MK (max-range consistency). All of Ken's chained jabs create a natural frame trap on block, making it a useful pressure option.
There are a couple areas where 2LP is weaker than 5LP, however. It chains more slowly, making it more susceptible to Drive Impact when attempting to break the armor with a 3-hit chain. It also has less range than 5LP, making it a worse punish against -4 attacks. In general, though, 2LP is Ken's light normal of choice.
2MP
| Startup | Active | Recovery | Cancel | Damage | Guard | On Hit | On Block |
|---|---|---|---|---|---|---|---|
| 6 | 3 | 14 | Sp SA | 700 | LH | +3 | 0 |
- Cancel Hitconfirm Window: 15f
- Run~Stop Adv: -8/-11
While it is a solid pressure button, 2MP cannot link into anything without meaty timing, Drive Rush, or Counterhit/Punish Counter. At 0 on block, Ken cannot force a frame trap without potentially trading light normals. This can actually be beneficial if the opponent is low on health or Ken has a large life lead. After Drive Rush it becomes +4 on block, making it an above-average starter on block. The low whiff recovery gives it some utility as a low-commitment counterpoke in neutral, but the hitbox does not always properly hit an opponent's whiff recovery.
2HP
| Startup | Active | Recovery | Cancel | Damage | Guard | On Hit | On Block |
|---|---|---|---|---|---|---|---|
| 8 | 4 | 24 | Sp SA | 800 | LH | +3 | -10 |
- Forces Stand
- Only the first 2 active frames are cancelable
- Cancel Hitconfirm Window: 16f
- Run~Stop Adv: +3/-10
A decent anti-air and combo tool that moves Ken forward slightly. If the early frames connect, Ken can cancel into Run~Stop to maintain pressure after an anti-air. In general, this is the preferred button to combo into from Drive Rush unless you want to keep the opponent crouching. 2HP is the only button that can combo into 236HK without Drive Rush or Counterhit, which is especially useful in corner combos. Drive Rush 2HP > Run~Stop allows a link to 5MP or 2LP, which is a nice grounded extension that doesn't require excessive meter use; just make sure to let go of crouch before inputting the Run cancel.
2LK
| Startup | Active | Recovery | Cancel | Damage | Guard | On Hit | On Block |
|---|---|---|---|---|---|---|---|
| 5 | 3 | 10 | Chn | 200 | L | +1 | -3 |
- Chains into 5LP/2LP/2LK
Ken's main low combo starter that can begin a 3-hit light confirm.
2MK
| Startup | Active | Recovery | Cancel | Damage | Guard | On Hit | On Block |
|---|---|---|---|---|---|---|---|
| 7 | 3 | 19 | Sp SA | 500 | L | -2 | -6 |
- Cancel Hitconfirm Window: 13f
- Run~Stop Adv: -8/-12
- Applies a 20% damage scaling penalty to the next hit when used as a combo starter (100/80/70/60...)
A cancelable Shoto low forward that is slightly faster than Ryu's, but with less range and frame advantage to compensate. It is Ken's primary low threat; while impractical to hitconfirm from it directly on reaction, it can lead to great damage.
Canceling into Drive Rush allows a link into 2HP, but unfortunately not into 5HP for a more optimal crouching 623MK route. Counterhit 2LP can link into 2MK at max range, making it more consistent than 2MP. At only +2, Drive Rush ~ 2MK does not allow a followup link; this weakens Ken's mixup potential from longer range Drive Rush, as he will have to resort to 2LK > 5MP for a low confirm.
2HK
| Startup | Active | Recovery | Cancel | Damage | Guard | On Hit | On Block |
|---|---|---|---|---|---|---|---|
| 8 | 3 | 24(27) | - | 900 | L | HKD +31 | -10 |
- Counterhit/Punish Counter: +47 HKD
- Has juggle potential; no longer HKD when juggled into
At -8, some characters struggle to punish Ken's sweep at max range. Use sparingly against characters with fast, long range Supers and special moves, however. Its juggle potential allows it to combo after Air Tatsu, j.MP air-to-air, or corner 5MP~HP xx OD Hadoken.
Jumping Normals
j.LP
| Startup | Active | Recovery | Cancel | Damage | Guard | On Hit | On Block |
|---|---|---|---|---|---|---|---|
| 5 | 7 | 3 land | - | 300 | H | +9 | +5 |
j.MP
| Startup | Active | Recovery | Cancel | Damage | Guard | On Hit | On Block |
|---|---|---|---|---|---|---|---|
| 6 | 4 | 3 land | Sp | 700 | H | +9(+11) | +5(+7) |
- Puts airborne opponents into limited juggle state
- Cancelable into into Air Tatsu (may not hit based on opponent spacing)
Ken's best air-to-air due to its knockdown property.
j.HP
| Startup | Active | Recovery | Cancel | Damage | Guard | On Hit | On Block |
|---|---|---|---|---|---|---|---|
| 9 | 6 | 3 land | - | 800 | H | +7(+15) | +3(+11) |
- Causes a Spiked knockdown on Counterhit/Punish Counter vs. airborne opponents
Hits extremely deep, making it a strong close range jump-in.
j.LK
| Startup | Active | Recovery | Cancel | Damage | Guard | On Hit | On Block |
|---|---|---|---|---|---|---|---|
| 6 | 6 | 3 land | - | 300 | H | +5(+10) | +1(+6) |
- Can hit Crossup
The backwards hitbox is slightly wider than j.MK, but the combo options are much more limited after Ken lands. Due to its low hitstun/blockstun, Ken can land into an immediate throw/strike mixup while the opponent is expecting a stronger air normal.
j.MK
| Startup | Active | Recovery | Cancel | Damage | Guard | On Hit | On Block |
|---|---|---|---|---|---|---|---|
| 7 | 6 | 3 land | - | 500 | H | +9(+13) | +5(+9) |
- Can hit Crossup
The better of Ken's crossup buttons with a wider hitbox and more hitstun/blockstun allowing consistent combo followups.
j.HK
| Startup | Active | Recovery | Cancel | Damage | Guard | On Hit | On Block |
|---|---|---|---|---|---|---|---|
| 10 | 7 | 3 land | - | 800 | H | +11(+15) | +7(+11) |
Good horizontal range and a strong hitbox, making it a threat at mid-long range especially when mixed with empty jump and Air Tatsu.
8j.HK
| Startup | Active | Recovery | Cancel | Damage | Guard | On Hit | On Block |
|---|---|---|---|---|---|---|---|
| 6 | 6 | 3 land | - | 900 | H | +13(+15) | +9(+11) |
Ken's highest damage jumping attack. The hitbox doesn't reach far downward like diagonal j.HK, but it's relatively fast making it useful as an air-to-air.
Command Normals
Ken has no Command Normals
Target Combos
5MP~HP
| Startup | Active | Recovery | Cancel | Damage | Guard | On Hit | On Block |
|---|---|---|---|---|---|---|---|
| 11 | 3 | 27 | Sp SA | 400 | LH | KD +28 | -14 |
- Puts opponent into limited juggle state
- Applies an extra 10% scaling on the followup juggle (100/100/70...)
- Cancel Hitconfirm Window: 43~47f
- Run~Stop Adv: KD+30/-13
Very useful Target Combo for hitconfirms, as it has a long cancel window and even links from 2LP. The juggle state has some added benefits, like allowing OD Hadoken to connect high for a corner juggle, giving a ground bounce to OD Dragonlash, and allowing all Run special moves to fully connect. If Ken slightly delays the target combo on block, it can frame trap opponents attempting to take back their turn after 5MP; the maximum blockstring gap is 4f.
5MK~MK~HK
| Startup | Active | Recovery | Cancel | Damage | Guard | On Hit | On Block |
|---|---|---|---|---|---|---|---|
| 11 | 2 | 27 | TC | 400(320) | LH | KD +28 | -12 |
- Cancel Hitconfirm Window: 46f (TC)
- 10% damage scaling penalty after 5MK (100/90)
| Startup | Active | Recovery | Cancel | Damage | Guard | On Hit | On Block |
|---|---|---|---|---|---|---|---|
| 13 | 3 | 28 | - | 700(490) | LH | KD +32(30) | -11(-32) |
- Last hit whiffs on crouching opponents (much more unsafe)
- Scales twice after 5MK~MK starter (100/90/70)
Ken's forward-moving 5MK can be confirmed into this strong Target Combo, making 5MK a very useful poke and counter-poke. The hits do not chain quickly enough to break Drive Impact armor, so be wary of overusing this string. It is possible to confirm 5MK itself into the Target Combo with some practice, but the move still has utility even outside of hitconfirms; simply buffering 5MK~MK in neutral is an effective counterpoking strategy.
If the first 2 hits are blocked, the final HK followup can frame trap the opponent's attempted punish. However, the opponent can avoid this by simply punishing with a crouching normal, since the HK whiffs on crouchers. Since the second 2MK knocks the opponent airborne, there is no need to worry about HK whiffing on a crouching hit.
Throws
Forward Throw (LPLK)
| Startup | Active | Recovery | Cancel | Damage | Guard | On Hit | On Block |
|---|---|---|---|---|---|---|---|
| 5 | 3 | 23 | - | 1200 (2040) | T | KD +20 | - |
- Allows for strong corner throw loops (+5 after Forward Dash), but cannot do a walking throw loop
- Punish Counter: +24 HKD
Back Throw (4LPLK)
Drive System
Drive Impact (HPHK)
| Startup | Active | Recovery | Cancel | Damage | Guard | On Hit | On Block |
|---|---|---|---|---|---|---|---|
| 26 | 2 | 35 | - | 800 | LH | KD +35 / Wall Splat KD +65 | -3 / Wall Splat HKD +72 |
See Drive Impact
When canceled from a normal, these are the important blockstring gaps; a gap of N will trade with an N-frame startup attack; [] = Burnout
- 5HP: 7[3]
- 2HP: 9[5]
- 2MP: 10[6]
- 5MP, 2MK: 11[7]
- 5MP~HP: 12[8]
- Note: A gap ≥ 6f can be thrown, and a gap ≥ 9f can be jumped out of by most characters
Drive Reversal (6HPHK)
| Startup | Active | Recovery | Cancel | Damage | Guard | On Hit | On Block |
|---|---|---|---|---|---|---|---|
| 20 | 3 | 26(31) | - | 500 recoverable | LH | KD +23 | -6 |
See Drive Reversal
- Full Invuln: 1-22f; Armor Break
Drive Parry (MPMK)
| Startup | Active | Recovery | Cancel | Damage | Guard | On Hit | On Block |
|---|---|---|---|---|---|---|---|
| 1 | 12 or until released | 33(1)(11) | - | - | - | - | - |
See Drive Parry
- Perfect Parry has only 1f recovery, and disables the opponent from canceling their attack
- Perfect Parry vs. projectiles puts you into a fixed 11f recovery
Drive Rush (66)
No results
See Drive Rush. Frame data shown in (parentheses) refers to Parry Drive Rush.
- Distance:
- 0.745 (min, cancel into immediate Throw)
- 2.449 (min, earliest blocking/movement frame)
- 3.590 (max, final DR frame)
- See Strategy page for Blockstring Gaps and Combo Routes
Special Moves
Hadoken (236P)
| Startup | Active | Recovery | Cancel | Damage | Guard | On Hit | On Block |
|---|---|---|---|---|---|---|---|
| 16 | - | 33 | SA3 | 600 | LH | -1 | -7 |
- 1-hit projectile, slow speed
- Cancel Hitconfirm Window: 17f (Super)
| Startup | Active | Recovery | Cancel | Damage | Guard | On Hit | On Block |
|---|---|---|---|---|---|---|---|
| 14 | - | 35 | SA3 | 600 | LH | -3 | -9 |
- 1-hit projectile, medium speed
- Cancel Hitconfirm Window: 11f (Super)
| Startup | Active | Recovery | Cancel | Damage | Guard | On Hit | On Block |
|---|---|---|---|---|---|---|---|
| 12 | - | 37 | SA3 | 600 | LH | -5 | -11 |
- 1-hit projectile, fast speed
- Cancel Hitconfirm Window: 10f (Super)
| Startup | Active | Recovery | Cancel | Damage | Guard | On Hit | On Block |
|---|---|---|---|---|---|---|---|
| 12 | - | 28 | SA2 SA3 | 400x2 | LH | +2 | -2 |
- 2-hit projectile, fast speed
- Cancel Hitconfirm Window: 10f (Super)
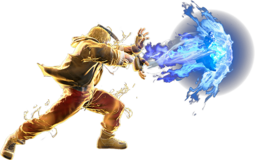
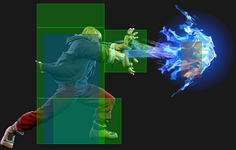
The standard Shoto projectile. A bit worse than Ryu's fireball due to longer recovery and worse hit/block advantage, but still useful. The OD version doesn't knock down, but can lead to corner juggles when used after 5MP~HP Target Combo. Great for covering your drive rushes in neutral to make for a safe and scary approach.
Shoryuken (623P)
| Startup | Active | Recovery | Cancel | Damage | Guard | On Hit | On Block |
|---|---|---|---|---|---|---|---|
| 5 | 10 | 21+12 land | SA3 | 1100(800) | LH | KD +33 | -23 |
- Anti-Air Invuln: 1-14f; Airborne 7-35f (Forced Knockdown state)
- Cancel Hitconfirm Window: 18f (Super)
| Startup | Active | Recovery | Cancel | Damage | Guard | On Hit | On Block |
|---|---|---|---|---|---|---|---|
| 6 | 10 | 28+12 land | SA3 | 700,600 (1300) | LH | KD +33 | -28 |
- Anti-Air Invuln: 1-8f; Airborne 8-43f (Forced Knockdown state)
- Cancel Hitconfirm Window: 18f (Super)
| Startup | Active | Recovery | Cancel | Damage | Guard | On Hit | On Block |
|---|---|---|---|---|---|---|---|
| 7 | 10 | 35+15 land | SA3 | 800,300x2 (1400) | LH | KD +25 | -36(-38) |
- Anti-Air Invuln: 1-9f; Projectile Invuln: 5-11f; Airborne 9-51f (Forced Knockdown state)
- 3rd hit whiffs vs. crouch block
- Cancel Hitconfirm Window: 14f (Super)
| Startup | Active | Recovery | Cancel | Damage | Guard | On Hit | On Block |
|---|---|---|---|---|---|---|---|
| 6 | 10(14)10 | 35+15 land | - | 200x5,600 (1600) | LH | KD +22 | -40 |
- Full Invuln: 1-10f; Airborne 9-24f + 33-74f (Forced Knockdown state)
- Ken's primary reversal option; all hits form a true blockstring
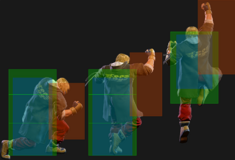
A great anti-air special, with higher strengths gaining additional range at the cost of startup speed. LP Shoryuken gets its full damage on a single hit, while MP and HP can lose some damage on high connects. OD Shoryuken has a lot of invincibility and good range for blowing through the opponent's offense. All versions have some utility in juggles, but 623HP's later hits and 623PP have higher juggle potential and work in some situations where LP will not.
When beginning a combo with LP/MP/HP Shoryuken canceled into Lv.3 Super, the Super will have a 30% scaling penalty (70% damage instead of the usual 90%). If Shoryuken is not the first hit of the combo, the usual scaling rules apply instead. Lv.3 Super can whiff if canceled on a high-connect juggle, so it's best to use the Shoryuken as late as possible. Alternatively, skip the uppercut and anti-air with 236236P raw for more damage.
Tatsumaki Senpu-kyaku (214K)
| Startup | Active | Recovery | Cancel | Damage | Guard | On Hit | On Block |
|---|---|---|---|---|---|---|---|
| 4 | 2(6)3 | 14+18 land | - | 300,400 (700) | LH | KD +46(+38) | -14 |
- Airborne: 5-28f (Forced Knockdown state)
- Puts opponent into limited juggle state if 1st hit connects
| Startup | Active | Recovery | Cancel | Damage | Guard | On Hit | On Block |
|---|---|---|---|---|---|---|---|
| 14 | 2(13)2 | 11+20 land | - | 450x2 (900) | LH | KD +44(+32) | -12 |
- Airborne: 8-41f (Forced Knockdown state)
| Startup | Active | Recovery | Cancel | Damage | Guard | On Hit | On Block |
|---|---|---|---|---|---|---|---|
| 16 | 2(13)2(13)2 | 14+17 land | - | 300x2,400 (1000) | LH | KD +36 (-38 cr) | -12 (-42 cr) |
- Airborne: 10-61f (Forced Knockdown state)
| Startup | Active | Recovery | Cancel | Damage | Guard | On Hit | On Block |
|---|---|---|---|---|---|---|---|
| 9 | 4(5)3(6)3(6)3(15)3 | 21+13 land | - | 300,200x3,800 (1700) | LH | KD +28 | -61 |
- Airborne: 10-77f (Forced Knockdown state)
Ken's Tatsus are primarily used for corner carry while maintaining oki. 214LK is excellent from close range confirms, juggling into 623LP/MP. If the first hit whiffs (or if 214LK is juggled from 5MP~HP), no juggle is possible. 214HK has great corner carry, but only the first hit connects on crouching opponents, making it punishable on hit without a standing confirm. 214MK is the most consistent ender, providing excellent knockdown advantage. 214KK has surprisingly far range and high juggle potential, and can even be used on its own for whiff punishing.
Aerial Tatsumaki Senpu-kyaku (j.214K)
| Startup | Active | Recovery | Cancel | Damage | Guard | On Hit | On Block |
|---|---|---|---|---|---|---|---|
| 11 | 2(5)2(6)2 | 14 land | - | 900 | LH | KD +42(+46) | -4(0) |
- Can hit Crossup
- Forced Knockdown state
- Puts opponents into limited juggle state
- The last 11f of landing recovery puts Ken in a crouching state
| Startup | Active | Recovery | Cancel | Damage | Guard | On Hit | On Block |
|---|---|---|---|---|---|---|---|
| 11 | 2(1)2(2)2(2)2(3)2 | 14(21) land | - | 900(700) each | LH | +5 (+10) Front 0 (+5) Back |
-5(0) |
- Can hit Crossup (5f less hitstun, 200 less damage; followup combo not always possible)
- Forced Knockdown state
- The last 11f of landing recovery puts Ken in a crouching state
Air Tatsu is great for altering Ken's jump timing and making it harder for the opponent to anti-air. It can only be done from a forward jump, even when canceled from j.MP. The button strength does not affect the trajectory of the move. The meterless version can start a juggle whether it hits same-side or crossup. OD Air Tatsu has a much better air trajectory and keeps the opponent grounded, but the frame advantage varies significantly depending on how it connects. The crossup version is much harder to combo after. If used very early in Ken's forward jump, it travels a long horizontal distance, potentially allowing Ken to escape the corner.
Dragonlash Kick (623K)
| Startup | Active | Recovery | Cancel | Damage | Guard | On Hit | On Block |
|---|---|---|---|---|---|---|---|
| 18(21) | 6 | 4+17 land | - | 1000(950) | LH | +2 | -4 |
- Airborne 9-32f (Forced Knockdown state)
- First 3 active frames only hit airborne for Spiked knockdown (OTG bounce on Punish Counter)
| Startup | Active | Recovery | Cancel | Damage | Guard | On Hit | On Block |
|---|---|---|---|---|---|---|---|
| 23(25) | 5 | 5+20 land | - | 1100 | LH | +3(+4) | -8(-7) |
- Airborne 14-37f (Forced Knockdown state)
- First 2 active frames only hit airborne for Spiked knockdown (OTG bounce on Punish Counter)
| Startup | Active | Recovery | Cancel | Damage | Guard | On Hit | On Block |
|---|---|---|---|---|---|---|---|
| 28(30) | 5 | 5+16 land | - | 1200 | LH | +3(+4) | +1(+2) |
- Airborne 19-40f (Forced Knockdown state)
- First 2 active frames only hit airborne for Spiked knockdown (OTG bounce on Punish Counter)
| Startup | Active | Recovery | Cancel | Damage | Guard | On Hit | On Block |
|---|---|---|---|---|---|---|---|
| 9(19) | 2(7)6 | 3+21 land | - | 500,700 | LH | +1(+4) | -9(-6) |
- Airborne 10-32f (Forced Knockdown state)
- Active frames 2(7)1 only hit airborne opponents; causes OTG bounce and side switch in juggles
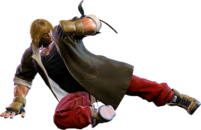
Ken hops into the air before swinging his leg downward. The hitbox starts high, only hitting airborne opponents; this causes a spiked knockdown when it connects. With the exception of the LK version, Dragonlash takes longer to hit crouching characters, but gives better frame advantage. The MK, HK, and OD versions all become +4 on hit against crouching opponents, allowing a link into 2LP > 5MP~HP. 623KK can combo directly from 5HP, or from Punish Counter 2MK/2MP/5MP. 623MK can combo from Counterhit or Drive Rush 5HP, making them reasonably practical as long as 2HP (force stand) isn't used.
623HK is a strong approach tool due to its advantage on block, but is also slow enough to punish with Drive Impact on reaction. If the opponent attempts a late Drive Impact (within the final 4f against a crouching opponent), Ken can land safely and counter it.
623KK can be used in juggles for a ground bounce and side switch, although the run-enhanced version is usually a preferable followup to 5MP~HP, the most common juggle starter. The side switch makes it especially useful for regaining screen control after being cornered. Both hits of 623KK apply damage scaling in juggles.
Jinrai Kick (236K)
| Startup | Active | Recovery | Cancel | Damage | Guard | On Hit | On Block |
|---|---|---|---|---|---|---|---|
| 12 | 3 | 28 | SA3 | 500 | LH | +1 | -11 |
- Followup can be delayed up to 3f
- Cancel Hitconfirm Window: 14f (Super), 34f (6K followup)
- 6HK followup will not combo if canceled on last possible frame
| Startup | Active | Recovery | Cancel | Damage | Guard | On Hit | On Block |
|---|---|---|---|---|---|---|---|
| 16 | 3 | 24 | SA3 | 600 | LH | +2 | -7 |
- Followup can be delayed up to 2f
- Cancel Hitconfirm Window: 14f (Super), 29f (6K followup)
| Startup | Active | Recovery | Cancel | Damage | Guard | On Hit | On Block |
|---|---|---|---|---|---|---|---|
| 25 | 3 | 19 | SA3 | 700 | LH | KD +42 | -2 |
- Puts opponent into limited juggle state
- Followup can be delayed up to 5f
- Cancel Hitconfirm Window: 14f (Super), 27f (6K followup)
| Startup | Active | Recovery | Cancel | Damage | Guard | On Hit | On Block |
|---|---|---|---|---|---|---|---|
| 13 | 2 | 25 | SA2 SA3 | 600 | LH | -4 | -7 |
- Followup can be delayed up to 6f
- Cancel Hitconfirm Window: 17f (Super), 25f (6K followup)
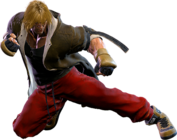
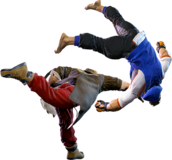
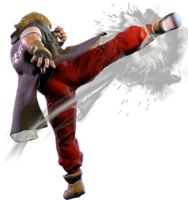
Jinrai is a spinning roundhouse kick reminiscent of ST Ken's "Crazy Kicks". Higher strengths become progressively safer on block with longer range, but also slower, which affect Ken's combo routes. It functions similarly to a Rekka, with different followups for 6LK, 6MK, and 6HK. Delaying these followups can affect the frame gap between hits, allowing for frame traps or juggles that wouldn't otherwise work. To frame trap into the 6LK low followup, starting with 236MK is most effective. OD Jinrai combines the benefits of fast startup and long range, allowing it to combo more consistently. It also allows an extra followup that changes slightly depending on which of the 6LK/6MK/6HK followups were used.
Jinrai Loops: On certain corner Jinrai juggles, delaying the 6LK followup as late as possible will be knock the opponent high into the air. It can then be followed by another Jinrai~6LK, then finishing with HP Shoryuken, OD Tatsu, or any Super. Common examples are:
- 236HK~delay 6LK, 236LK~6LK, (ender) - 2f window on 6LK
- 236HK~delay 6LK, 236KK~6HK, 236LK~6LK, (ender) - 2f window on 6LK
- 5MP~HP xx 236LK~delay 6LK, 623KK, (ender) - 2f window on 6LK
- 5MP~HP xx 236LK~delay 6LK, 236LK~6LK, (ender) - 1f window on 6LK, must be 2nd to last possible frame
Kazekama Shin Kick (236K~6LK)
| Startup | Active | Recovery | Cancel | Damage | Guard | On Hit | On Block |
|---|---|---|---|---|---|---|---|
| 6 | 4 | 19 | SA3 | 500 | L | +3 | -5 |
- Cancel Hitconfirm Window: 15f (Super - single hit only)
- Full sequence: 50-53f (236LK~6LK), 46-48f (236MK~6LK)
| Startup | Active | Recovery | Cancel | Damage | Guard | On Hit | On Block |
|---|---|---|---|---|---|---|---|
| 6 | 3 | 20 | SA2 SA3 | 500 | L | +3 | -5 |
- Cancel Hitconfirm Window: 14f (Super - single hit only)
- Full sequence: 37-43f (236KK~6LK)
A low followup that can be input on hit, block, or whiff. Slightly punishable, but depending on the spacing the opponent may have a hard time reaching Ken. 236MK is the best starter for frame trapping on block; the 6LK followup creates a small frame gap and can link into 5LP or 5LK on Counterhit. Ken also recovers fast enough to counter a Drive Impact when starting with 236MK or 236HK. 236KK cannot frame trap into 6LK even when delayed, but it's great for combo consistency.
236K~6LK is important for Jinrai Loops; see the description of Jinrai Kick for more details.
Blockstring Gaps: (longer gap if followup is delayed)
- 236LK~6LK: 6-9f
- 236MK~6LK: 2-4f
- 236HK~6LK: 0-2f
- 236KK~6LK: No Gap
Gorai Axe Kick (236K~6MK)
| Startup | Active | Recovery | Cancel | Damage | Guard | On Hit | On Block |
|---|---|---|---|---|---|---|---|
| 18 | 3 | 20 | SA3 | 1000 | H | +3 | -3 |
- Long interruptible gap on hit/block (even during Burnout)
- Cancel Hitconfirm Window: 16f (Super - single hit only)
| Startup | Active | Recovery | Cancel | Damage | Guard | On Hit | On Block |
|---|---|---|---|---|---|---|---|
| 17 | 3 | 24 | SA2 SA3 | 1000 | H | -3 | -7 |
- Useful for setting up 4f trade combos, or a true blockstring into Overhead against burned out opponents
- Causes OTG Bounce vs. airborne opponents (like after MP~HP Target Combo)
- Cancel Hitconfirm Window: 16f (Super - single hit only)
An overhead followup that can be input on hit, block, or whiff. Unfortunately it is fairly reactable since it is telegraphed by the initial Jinrai Kick, and opponents can simply switch from crouch to stand block to cover the high/low mixup. The overhead kick does not combo on grounded hits, so there is always some risk that the opponent could Drive Impact or Perfect Parry.
Hit/Blockstring Gaps: (longer gap if followup is delayed)
- 236LK~6MK: 6-9f Hit, 18-21f Block
- 236MK~6MK: 5-7f Hit, 14-16f Block
- 236HK~6MK: (KD Hit), 9-14f Block
- 236KK~6MK: 1-7f Hit, 4-10f Block
Senka Snap Kick (236K~6HK)
| Startup | Active | Recovery | Cancel | Damage | Guard | On Hit | On Block |
|---|---|---|---|---|---|---|---|
| 10 | 3 | 25 | SA3 | 800 | LH | KD +33(+38) | -3 |
- Whiffs on crouching opponents
- Cancel Hitconfirm Window: 19f (Super - single hit only)
- Full sequence: 56-60f (236LK~6HK), 52-56f (236MK~6HK), 47-54f (236HK~6HK)
| Startup | Active | Recovery | Cancel | Damage | Guard | On Hit | On Block |
|---|---|---|---|---|---|---|---|
| 10 | 4 | 20 | SA2 SA3 | 800 | LH | KD +37 | -4 (-18) |
- Whiffs on crouching opponents
- True blockstring vs. standing opponents (up to 3f gap if delayed)
- Cancel Hitconfirm Window: 22f (Super - single hit only)
- Full sequence: 47-55f (236KK~6HK)
A knockdown followup that can be input on hit, block, or whiff. Outside of Jinrai Loops, this is the best ender for damage and positioning if you confirm the opponent is standing; you can also force them to stand by comboing from 2HP. If you start with HK Jinrai, the opponent will be launched high enough to juggle after 6HK; otherwise, only a Super cancel will connect in juggles.
Blockstring Gaps: (Stand block only; longer gap if followup is delayed)
- 236LK~6HK: 8-13f
- 236MK~6HK: 4-8f
- 236HK~6HK: 0-6f
- 236KK~6HK: 0-3f
Kasai Thrust Kick (236KK~6K~6K)
| Startup | Active | Recovery | Cancel | Damage | Guard | On Hit | On Block |
|---|---|---|---|---|---|---|---|
| 15 | 3 | 29 | SA2 SA3 | 500(400) | LH | KD +31 | -12 |
- 2f gap before final hit on block
- Cancel Hitconfirm Window: 14f (Super - single hit only)
- Full sequence: 68-74f (236KK~6LK~6K)
| Startup | Active | Recovery | Cancel | Damage | Guard | On Hit | On Block |
|---|---|---|---|---|---|---|---|
| 11 | 3 | 29 | SA2 SA3 | 500(400) | LH | KD +34 | -12 |
- True blockstring into final hit
- Cancel Hitconfirm Window: 16f (Super - single hit only)
- Partial sequence: 45f (236KK~6MK~6K, starting from 6MK overhead)
| Startup | Active | Recovery | Cancel | Damage | Guard | On Hit | On Block |
|---|---|---|---|---|---|---|---|
| 15 | 3 | 37 | SA2 SA3 | 500(400) | LH | KD +42 | -20 |
- 7f gap before final hit on stand block (20f gap if 2nd hit whiffs on crouching)
- Cancel Hitconfirm Window: 22f (Super - single hit only)
- Full sequence: 80-88f (236KK~6HK~6K)
A knockdown ender that can only be done after an OD Jinrai Kick followup. Can be input on hit, block, or whiff. The animation changes depending on the strength of the middle Jinrai followup, but functionally they all work the same way.
KK
| Startup | Active | Recovery | Cancel | Damage | Guard | On Hit | On Block |
|---|---|---|---|---|---|---|---|
| 11(45) | - | - | - | - | - | - | - |
- Followups can be input from 11-31f; 45f total animation if no followup is input
- Ken is in a Counterhit state during the entire animation (including followups)
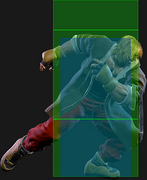
A command run similar to Ken's V-Skill 1 from SFV. Can be stopped short, or canceled into one of several followup attacks. Ken cannot be holding crouch while inputting KK (for example, 2MK xx Quick Dash requires letting go of the down input). If Ken crossed under the opponent (like after anti-air 2HP xx Quick Dash), his followup attacks will not reverse their direction to hit the opponent.
Run Normal Followups (KK~K)
| Startup | Active | Recovery | Cancel | Damage | Guard | On Hit | On Block |
|---|---|---|---|---|---|---|---|
| 11~ | - | 16 | - | - | - | - | - |
- Fastest Run~Stop time is 27f
| Startup | Active | Recovery | Cancel | Damage | Guard | On Hit | On Block |
|---|---|---|---|---|---|---|---|
| 11+18 | 3 | 20 | SA3 | 1000 | H | +3 | -3 |
- Cancel Hitconfirm Window: 16f (Lv.3 Super)
| Startup | Active | Recovery | Cancel | Damage | Guard | On Hit | On Block |
|---|---|---|---|---|---|---|---|
| 11+10 | 4 | 20 | SA | 800 | LH | +3 | -4 |
- Puts airborne opponents into limited juggle state (e.g. after MP~HP Target Combo)
- Cancel Hitconfirm Window: 15f (Super)
These followups are all input with a single button press (hence the "Normal Followup" designation). Run~Stop is quite a bit slower than its SFV counterpart, so it's a lot more risky to use for pressure when canceled from normals. Run~MK is another example of a telegraphed overhead, and it cannot benefit from extra Drive Rush frame advantage. Ken can only link afterward with a Counterhit or meaty timing, but it offers notably high damage combos on punish counter. Run~HK is Ken's classic Step Kick; it is treated like a Normal move in that it can cancel into all three Super Arts, and does not receive the usual 10% scaling penalty when canceling to Lv.3 Super.
Run Special Followups (KK~Special)
| Startup | Active | Recovery | Cancel | Damage | Guard | On Hit | On Block |
|---|---|---|---|---|---|---|---|
| 11+13 | [2(2)3(2)]x4,2(5)3 | 3+17 land | - | 200x4,400 (1200) | LH | +3 (KD +43) |
-9 |
- Airborne 10-61f (Forced Knockdown state)
| Startup | Active | Recovery | Cancel | Damage | Guard | On Hit | On Block |
|---|---|---|---|---|---|---|---|
| 11+8 | 11 | 33+15 land | SA3 | 500,450,250x3 (1700) | LH | KD +25 | -35(-36) |
- Anti-Air Invuln: 1-19f; Projectile Invuln: 3-12f; Airborne 12-52f (Forced Knockdown state)
- First 3 hits are cancelable into Level 3 Super; final hit whiffs vs. crouch block
- Cancel Hitconfirm Window: 27f (Super)
| Startup | Active | Recovery | Cancel | Damage | Guard | On Hit | On Block |
|---|---|---|---|---|---|---|---|
| 11+9(20) | 4(5)6 | 9+15 land | - | 500,700 | LH | +2(+4) | -8(-6) |
- Airborne 10-32f (Forced Knockdown state)
The special move Run followups do not have OD versions, and do not vary based on button strength.
Run~Tatsu is perhaps the most useful Run followup in combos. Doing it off of 5MP~HP gives Ken some of the best corner carry in the game without any meter required. It becomes +7 when connecting raw as a Punish Counter, allowing for powerful followup links in certain punish situations. It also leads into strike/throw on a normal grounded hit. Lastly, can hit as a backwards cross-up if Ken dashes or Drive Rushes under the opponent, pulling them along for multiple hits, bolstering its corner carry even further with some trickier routes.
Due to its forward momentum, Run~Shoryuken is fairly good against fireballs when started from long range, though it can't easily be done when starting the Run on reaction to the fireball. This is the best combo ender for damage when you don't want a side switch.
Run~Dragonlash is functionally identical to OD Dragonlash, except that the OTG bounce is not quite as high, making the followups slightly more limited. Like 623KK, the attack hits airborne first, then standing opponents, then crouching opponents 2f later; the startup is functionally 11+20 vs. standing, 11+22 vs. crouching. Both hits of the juggled version apply damage scaling just like 623KK. Combos into all three of his supers on air hit.
Super Arts
Level 1 Super (214214K)
| Startup | Active | Recovery | Cancel | Damage | Guard | On Hit | On Block |
|---|---|---|---|---|---|---|---|
| 7 | 3 | 41 | - | 2000 | LH | KD +9 | -24 |
- Strike/Throw Invuln: 1-10f; Armor Break
- Depletes 1/2 Drive bar from opponent on hit
- 30% minimum damage scaling
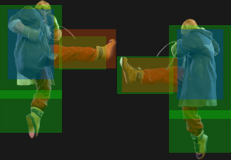
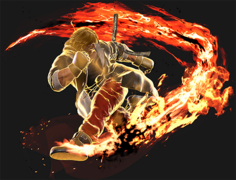
Switches sides with the opponent after a successful hit, so Ken will lose any advantageous screen positioning he had. The knockdown advantage is high enough that he can dash up to force a mixup between strike or back throw, as well as the overhead followup or a low, however, so it's not useless in the corner. The attack itself is 1 hit that transitions to a longer animation when successful. It has juggle potential, but the speed and range limits the number of situations where it can actually work (e.g. OD Dragonlash, corner 5MP~HP xx OD Hadoken). The full damage distribution is: 500*300*300*900.
Level 2 Super (236236K)
| Startup | Active | Recovery | Cancel | Damage | Guard | On Hit | On Block |
|---|---|---|---|---|---|---|---|
| 6 | 2(10)3(10)3(12)3(11)2 | 32 | - | 2800 | LH | KD +36 | -19 |
- Full Invuln: 1f (until freeze); Armor Break
- Depletes 1 Drive bar from opponent on hit
- 40% minimum damage scaling
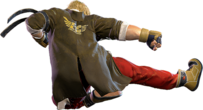
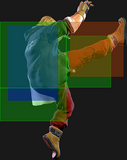
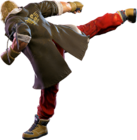
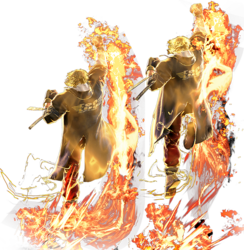
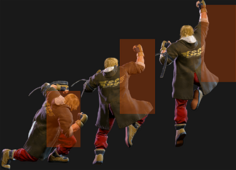
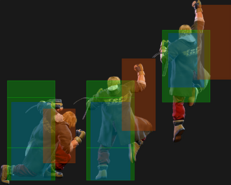
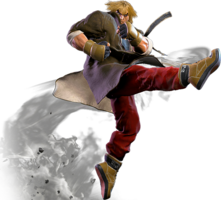
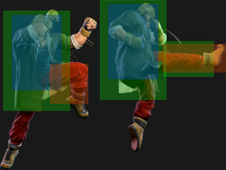
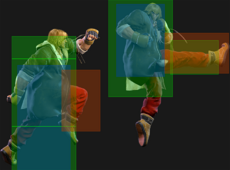
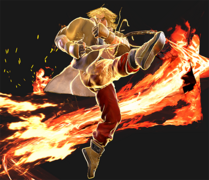
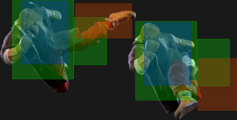
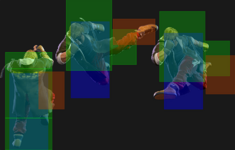
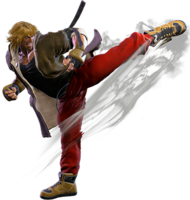
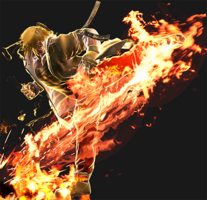
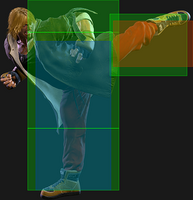
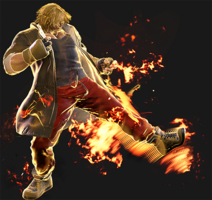
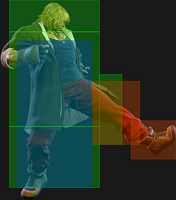
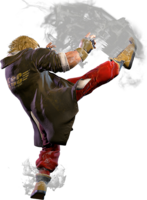
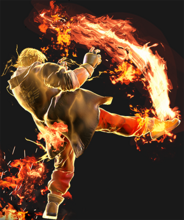
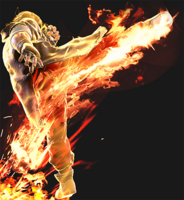
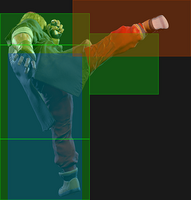
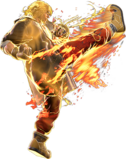
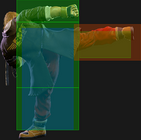
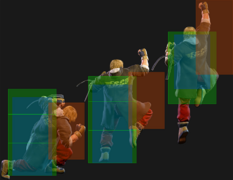
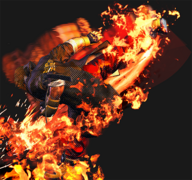
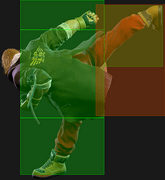
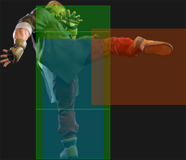
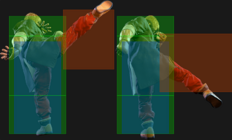
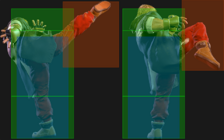
Ken's infamous SA3 from Third Strike. A flurry of 5 kicks followed up by a Tatsumaki ender on hit. Very fast for a Super while also having good range, but doesn't work as a reversal. It is best used in tricky punish scenarios or to add damage when fishing for safe normal or OD Special confirms. Works well in juggles, but loses damage if the opponent is too high. The full damage distribution is: 300x4*200x5*500.
Level 3 Super (236236P)
| Startup | Active | Recovery | Cancel | Damage | Guard | On Hit | On Block |
|---|---|---|---|---|---|---|---|
| 7 | 3(1)6(16)13 | 30+15 land | - | 4000 (1800~2400) | LH | HKD +15 | -30(-33) |
- Full Invuln: 1-18f; Airborne 10-27f + 35-75f (Forced Knockdown state); Armor Break
- Depletes 1.5 Drive bars from opponent on hit (1 Drive bar for non-cinematic)
- Cinematic time regenerates ~2 Drive bars for Ken
- 50% minimum damage scaling
| Startup | Active | Recovery | Cancel | Damage | Guard | On Hit | On Block |
|---|---|---|---|---|---|---|---|
| 7 | 3(1)6(16)13 | 30+15 land | - | 4500 (2000~2600) | LH | HKD +21 | -30(-33) |
- Full Invuln: 1-18f; Airborne 10-27f + 35-75f (Forced Knockdown state); Armor Break
- Depletes 2 Drive bars from opponent on hit (1.7 Drive bars for non-cinematic)
- Cinematic time regenerates ~2.1 Drive bars for Ken
- 50% minimum damage scaling; available at 25% HP or below
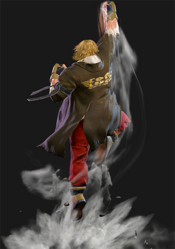
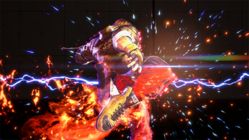
Uppercut Super that looks like a mix between his classic Shinryuken and Shoryureppa. The first hit leads to a cinematic that does more damage and drains more Drive meter from the opponent. In juggles where the first hit whiffs, the non-cinematic version does less damage but can be followed up with HP Shoryuken, OD Tatsu, or a corner LP Shoryuken > MP Shoryuken. All hits of the Super are a true blockstring, so the opponent can't interrupt between the two uppercuts if you attempt a chip KO; however, if the opponent crouch blocks, the final 2 hits whiff, causing a reduction in total chip damage.
If canceled from a raw Shoryuken (as is often the case when used as an anti-air), a 30% damage scaling penalty is applied. It is also much more likely to result in a non-cinematic juggle.
Taunts
Neutral Taunt (5PPPKKK)
| Startup | Active | Recovery | Cancel | Damage | Guard | On Hit | On Block |
|---|---|---|---|---|---|---|---|
| 96 (total) | - | - | - | - | - | - | - |
Forward Taunt (6PPPKKK)
| Startup | Active | Recovery | Cancel | Damage | Guard | On Hit | On Block |
|---|---|---|---|---|---|---|---|
| 205 (total) | - | - | - | - | - | - | - |
Back Taunt (4PPPKKK)
| Startup | Active | Recovery | Cancel | Damage | Guard | On Hit | On Block |
|---|---|---|---|---|---|---|---|
| 215 (total) | - | - | - | - | - | - | - |
