|
|
| Line 100: |
Line 100: |
| A button notable in beating Drive Impact with its 3 hits, and being incredibly hard to interrupt as the first hit starts up in 5 frames. This is especially useful off of a Drive Rush, with 5HP > Drive Rush giving strong confirm routes, and Drive Rush into 5HP giving an easily confirmable followup link. In juggles where the last hit connects, it can be used to add free damage since it no longer requires a cancel. It's also pretty deceptive if you cancel the first two hits into Drive Impact yourself. | | A button notable in beating Drive Impact with its 3 hits, and being incredibly hard to interrupt as the first hit starts up in 5 frames. This is especially useful off of a Drive Rush, with 5HP > Drive Rush giving strong confirm routes, and Drive Rush into 5HP giving an easily confirmable followup link. In juggles where the last hit connects, it can be used to add free damage since it no longer requires a cancel. It's also pretty deceptive if you cancel the first two hits into Drive Impact yourself. |
|
| |
|
| While Jamie's 3-hit 5HP has some unique and interesting properties, there are some downsides to this normal's design. The first 2 hits have finicky range and low damage, but are the only ones that can be cancelled. In most combos it is strictly worse than 5LK, which has identical startup, longer range and higher cancel damage. The extra hitstun allows 5HP to cancel into 236MP or 214LP, but these are not important combo routes. From longer ranges where only the 3rd hit connects, 5HP is functionally a weak 12f non-cancellable poke; 5MK, 2MK, and 5HK are stronger in this context. | | While Jamie's 3-hit 5HP has some unique and interesting properties, there are some downsides to this normal's design. The first 2 hits have finicky range and low damage, but are the only ones that can be canceled. In most combos it is strictly worse than 5LK, which has identical startup, longer range and higher cancel damage. The extra hitstun allows 5HP to cancel into 236MP or 214LP, but these are not important combo routes. From longer ranges where only the 3rd hit connects, 5HP is functionally a weak 12f non-cancelable poke; 5MK, 2MK, and 5HK are stronger in this context. |
| }} | | }} |
|
| |
|
| Line 201: |
Line 201: |
| * '''xx Lv.2 Super:''' +12/+9 | | * '''xx Lv.2 Super:''' +12/+9 |
| <br> | | <br> |
| A standard cancellable 6f medium button. Jamie can't link into it without Drive Rush, Counterhit, or Punish Counter bonus advantage, and at only +3 he also needs one of these to link out of it. Very non-committal in neutral when buffered as a counterpoke. | | A standard cancelable 6f medium button. Jamie can't link into it without Drive Rush, Counterhit, or Punish Counter bonus advantage, and at only +3 he also needs one of these to link out of it. Very non-committal in neutral when buffered as a counterpoke. |
| }} | | }} |
|
| |
|
| Line 217: |
Line 217: |
| * Damage DL0-DL4: 810/855/900/945/990 | | * Damage DL0-DL4: 810/855/900/945/990 |
| * Forces stand on hit | | * Forces stand on hit |
| * Only the first 2 active frames are cancellable | | * Only the first 2 active frames are cancelable |
| * '''Cancel Hitconfirm Window:''' 16f | | * '''Cancel Hitconfirm Window:''' 16f |
| * '''xx Lv.2 Super:''' +21/+13 | | * '''xx Lv.2 Super:''' +21/+13 |
| <br> | | <br> |
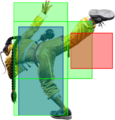
| Works fairly well as an anti-air due to its vertical reach and large number of active frames. Does not have a useful cancel when used as an anti-air, as only the early grounded frames are cancellable. | | Works fairly well as an anti-air due to its vertical reach and large number of active frames. Does not have a useful cancel when used as an anti-air, as only the early grounded frames are cancelable. |
| }} | | }} |
|
| |
|
| Line 408: |
Line 408: |
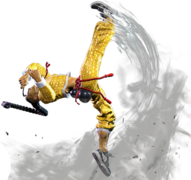
| Tensei Kick is an anti-air launcher that's stricter to land but higher reward than a DP. The jump cancel will always jump forward regardless of which direction is held, and it cannot cancel to a grounded special move during prejump frames. | | Tensei Kick is an anti-air launcher that's stricter to land but higher reward than a DP. The jump cancel will always jump forward regardless of which direction is held, and it cannot cancel to a grounded special move during prejump frames. |
|
| |
|
| From a drive rush cancelled normal on hit it's possible to link into this and do j.HK 2HK~K~P for a combo with decent wall carry and a drink while still being +4 <br> | | From a drive rush canceled normal on hit it's possible to link into this and do j.HK 2HK~K~P for a combo with decent wall carry and a drink while still being +4 <br> |
| At DL1 or higher, Jamie can anti-air with 2HK into j.MP xx j.214KK, then land and juggle his 2HK~K~P Target Combo for a free Drink Level. | | At DL1 or higher, Jamie can anti-air with 2HK into j.MP xx j.214KK, then land and juggle his 2HK~K~P Target Combo for a free Drink Level. |
| }} | | }} |
| Line 487: |
Line 487: |
| A long range stepkick that can be confirmed into a Super on hit. You cannot space it to connect meaty at max range, so the only followup links require Counterhit, Punish Counter, or Drive Rush (which travels nearly full screen). | | A long range stepkick that can be confirmed into a Super on hit. You cannot space it to connect meaty at max range, so the only followup links require Counterhit, Punish Counter, or Drive Rush (which travels nearly full screen). |
|
| |
|
| At Drink Lv.4, the move gains extra range and some new Target Combo followups. The TC requires a Counterhit to combo, but the timing is very lenient to react to this. Even if the confirm is missed, the TC followups are cancellable themselves, allowing Jamie to end with a safe option like 236PP even on a failed hitconfirm. | | At Drink Lv.4, the move gains extra range and some new Target Combo followups. The TC requires a Counterhit to combo, but the timing is very lenient to react to this. Even if the confirm is missed, the TC followups are cancelable themselves, allowing Jamie to end with a safe option like 236PP even on a failed hitconfirm. |
| }} | | }} |
|
| |
|
| Line 625: |
Line 625: |
| {{AttackDataCargo-SF6/Query|Jamie_6hk_4hk_p_close_dl4}} | | {{AttackDataCargo-SF6/Query|Jamie_6hk_4hk_p_close_dl4}} |
| * Requires Counterhit/Punish Counter to combo from 6HK | | * Requires Counterhit/Punish Counter to combo from 6HK |
| * Cancellable into any special or Super | | * Cancelable into any special or Super |
| * '''Cancel Hitconfirm Window:''' 20f (Headbutt) / 59-60f (CH 6HK + Headbutt) | | * '''Cancel Hitconfirm Window:''' 20f (Headbutt) / 59-60f (CH 6HK + Headbutt) |
| * '''xx Lv.2 Super:''' KD+39/+10 | | * '''xx Lv.2 Super:''' KD+39/+10 |
| {{AttackDataCargo-SF6/Query|Jamie_6hk_4hk_p_mid_dl4}} | | {{AttackDataCargo-SF6/Query|Jamie_6hk_4hk_p_mid_dl4}} |
| * Cancellable into any special or Super | | * Cancelable into any special or Super |
| * '''Cancel Hitconfirm Window:''' 60/40/17f (spin fists only, more hits allows easier confirm) | | * '''Cancel Hitconfirm Window:''' 60/40/17f (spin fists only, more hits allows easier confirm) |
| * '''xx Lv.2 Super:''' KD+42/+13 | | * '''xx Lv.2 Super:''' KD+42/+13 |
| Line 688: |
Line 688: |
| * Damage DL0-DL4: 720/760/800/840/880 | | * Damage DL0-DL4: 720/760/800/840/880 |
|
| |
|
| When cancelled from a normal, these are the important '''blockstring gaps'''; a gap of N will trade with an N-frame startup attack; [] = Burnout | | When canceled from a normal, these are the important '''blockstring gaps'''; a gap of N will trade with an N-frame startup attack; [] = Burnout |
| * 2HP, 6HK~4HK~Spin: 7[3] | | * 2HP, 6HK~4HK~Spin: 7[3] |
| * 5HK: 9[5] | | * 5HK: 9[5] |
| Line 811: |
Line 811: |
| Freeflow Strikes (or "Rekkas") are forward-moving strikes that can be confirmed into optional followups. Higher strength versions move farther but have slower startup, with the OD version gaining both speed and longer range. At Drink Lv.0 to Lv.3, each Rekka is a single hit, and only the first part of the sequence can cancel into Super. If well-spaced, the first meterless Freeflow Strike is often safe; the LP version is usually the best for this since it has less forward movement, but this can also cause it to whiff in max range cancels. The OD version is always safe. | | Freeflow Strikes (or "Rekkas") are forward-moving strikes that can be confirmed into optional followups. Higher strength versions move farther but have slower startup, with the OD version gaining both speed and longer range. At Drink Lv.0 to Lv.3, each Rekka is a single hit, and only the first part of the sequence can cancel into Super. If well-spaced, the first meterless Freeflow Strike is often safe; the LP version is usually the best for this since it has less forward movement, but this can also cause it to whiff in max range cancels. The OD version is always safe. |
|
| |
|
| When attempting to confirm into the 6P or 6K followups on hit, it's important to note that the followup speed depends on the strength of the first Rekka. Delaying the confirm too long, especially on HP Rekka, can cause the followup to come out without comboing. The 6K followup is slightly slower than 6P, which also makes the confirm slightly stricter. OD Rekka cancelled into Lv.2 Super is a great option on hit or block, leading to great combos or block pressure from a mid-range poke. | | When attempting to confirm into the 6P or 6K followups on hit, it's important to note that the followup speed depends on the strength of the first Rekka. Delaying the confirm too long, especially on HP Rekka, can cause the followup to come out without comboing. The 6K followup is slightly slower than 6P, which also makes the confirm slightly stricter. OD Rekka canceled into Lv.2 Super is a great option on hit or block, leading to great combos or block pressure from a mid-range poke. |
|
| |
|
| This move and its followups can be used in juggles, but they can be very inconsistent depending on the screen position and opponent's juggle height; OD Rekkas are the most consistent overall, and the corner makes things easier as well. | | This move and its followups can be used in juggles, but they can be very inconsistent depending on the screen position and opponent's juggle height; OD Rekkas are the most consistent overall, and the corner makes things easier as well. |
| Line 1,105: |
Line 1,105: |
| * '''xx Lv.2 Super:''' KD+55/+12 | | * '''xx Lv.2 Super:''' KD+55/+12 |
| <br> | | <br> |
| This followup to Swagger Step is only available at max Drink Level. It works in juggles or in grounded combos, adding significant damage especially when cancelled into Lv.3 Super. It is much more unsafe on block than the first part of Swagger Step, though it can be used as a risky frame trap if the opponent tries to punish you. The 6P can be delayed significantly, though this can cause it to drop against grounded opponents unless the Swagger Step hits meaty. | | This followup to Swagger Step is only available at max Drink Level. It works in juggles or in grounded combos, adding significant damage especially when canceled into Lv.3 Super. It is much more unsafe on block than the first part of Swagger Step, though it can be used as a risky frame trap if the opponent tries to punish you. The 6P can be delayed significantly, though this can cause it to drop against grounded opponents unless the Swagger Step hits meaty. |
| }} | | }} |
|
| |
|
| Line 1,162: |
Line 1,162: |
| * Puts airborne opponents into OTG bounce state | | * Puts airborne opponents into OTG bounce state |
| * Counts as 2 hits of scaling when beginning a combo | | * Counts as 2 hits of scaling when beginning a combo |
| * If cancelled from j.MP, 10% scaling penalty applies to j.214KK and followup juggles (100 -> 90 -> 70 -> 60...) | | * If canceled from j.MP, 10% scaling penalty applies to j.214KK and followup juggles (100 -> 90 -> 70 -> 60...) |
| <br> | | <br> |
| At Drink Lv.1, Jamie unlocks a divekick that can be used out of forward jumps. It can be done very low to the ground with a Tiger Knee input (214~9K), and connecting low on the opponents legs gives better advantage on block or on knockdown; he can even juggle after meterless divekick when spaced well enough. The angle of the meterless divekick changes depending on which button is pressed, with LK being short and steep while HK travels farther. This is a useful tool not only for pressure, but for navigating around projectiles, an area in which Jamie usually struggles. It also evades throws, so it can be used as a shimmy or to punish throw loops. | | At Drink Lv.1, Jamie unlocks a divekick that can be used out of forward jumps. It can be done very low to the ground with a Tiger Knee input (214~9K), and connecting low on the opponents legs gives better advantage on block or on knockdown; he can even juggle after meterless divekick when spaced well enough. The angle of the meterless divekick changes depending on which button is pressed, with LK being short and steep while HK travels farther. This is a useful tool not only for pressure, but for navigating around projectiles, an area in which Jamie usually struggles. It also evades throws, so it can be used as a shimmy or to punish throw loops. |
| Line 1,203: |
Line 1,203: |
| * '''xx Lv.2 Super:''' +14/+7 | | * '''xx Lv.2 Super:''' +14/+7 |
| <br> | | <br> |
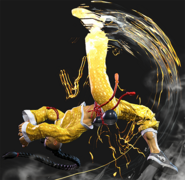
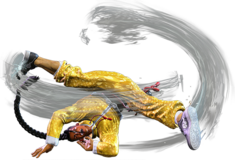
| Jamie drops to the ground and begins break dancing, slowly advancing toward the opponent. The slow startup limits this move's combo utility, though it can work in juggles when the situation arises. The high damage makes this great for super cancelling, and with 2 bars the OD version can be made safe on block with an eternity to hitconfirm. In the corner (or midscreen if the opponent does not/cannot back rise) 236LK gives Jamie a safejump with j.HP like 623LK does. | | Jamie drops to the ground and begins break dancing, slowly advancing toward the opponent. The slow startup limits this move's combo utility, though it can work in juggles when the situation arises. The high damage makes this great for super canceling, and with 2 bars the OD version can be made safe on block with an eternity to hitconfirm. In the corner (or midscreen if the opponent does not/cannot back rise) 236LK gives Jamie a safe jump with j.HP like 623LK does. |
|
| |
|
| Bakkai is ostensibly Jamie's "anti-projectile" move, though in practice it can be difficult to use like this. 236KK is fairly reliable at mid-range against shoto fireballs, and 236HK has the reach if your reactions are on point. 236LK and 236MK are harder to use because they travel a shorter distance during startup. And against strong projectiles like Guile's Sonic Boom, this move can only be done as a pure prediction, at which point you might as well just do a Drive Impact or Luminous Dive Kick instead. | | Bakkai is ostensibly Jamie's "anti-projectile" move, though in practice it can be difficult to use like this. 236KK is fairly reliable at mid-range against shoto fireballs, and 236HK has the reach if your reactions are on point. 236LK and 236MK are harder to use because they travel a shorter distance during startup. And against strong projectiles like Guile's Sonic Boom, this move can only be done as a pure prediction, at which point you might as well just do a Drive Impact or Luminous Dive Kick instead. |


