m (→Fullscreen) |
m (→Defense) |
||
| Line 201: | Line 201: | ||
== Defense == | == Defense == | ||
===Abare=== | |||
*{{clr|LP|2LP}} | |||
JP's fastest option but the range isn't great. | |||
*{{clr|LP|5LP}} | |||
Decent option as the range is further than it seems while still having 6f startup | |||
*22K | |||
Can actually be useful if you know there will be 3f gaps during blockstrings | |||
=== Reversals === | === Reversals === | ||
* 22KK | * 22KK | ||
Revision as of 19:53, 14 July 2023
Neutral
midrange/close
JP does surprisingly well at this range except vs a few characters who have faster buttons than him. The main neutral pokes JP may want to use are neutral jump j.MP, 5MP, 2MK, 5MK, 5HP, and 5HK. Each one has it's strengths and weaknesses. The overall weakness is the strength of special cancels from his moves. Most of these when special canceled can be Drive Impacted(DI), jabbed, or jumped. The goal is to make it difficult for the opponent to pick up on the correct option to use in these situations.
neutral jump j.MP
Can be good to gauge what the opponent will do. Certain characters with fantastic anti airs can anti air at range but most will have to decide on what they want to do. From there JP needs to see what options they take and go from there. If opponent gets closer throwing out j.MP is good. If they will be outside of grounded range when he lands it is good to keep in mind what option JP should do once he lands. overall the main strength of this is seeing what options your opponent will take with the weakness of it being possible to be anti aired or crouched
5MP
Fantastic reacting neutral poke. Hits extremely far but is prone to Drive impact.
2MK
Great low poke even though it is not special cancelable. Can combo on counter hit and generally can DI back and DI's unless opponent performed DI very early during startup. On hit leaves JP fairly plus and allows for him to threaten with other buttons such as 5MK and 5HP. This move does move JP forward which is great on hit but less so on on block. Even still on block certain characters may be out of range to follow up or make predictable attacks to be easily Perfect Parried.
5MK
surprisingly far hitting normal that can check opponents approaching. Somewhat low recovery and low hitbox makes it really good vs Marisa.
5HK
This move is best used in neutral as it's much easier to hit standing opponents with this move. It allows for going into 5HK~5HP target combo which has pretty good followup options on block and goes into combos on hit.
5HP
A great mid poke. Somewhat less range than 5MP, but it is cancellable, making it more resilient to Drive Impact. Gives the opponent a special reeling animation on punish counter, giving you plenty of time to follow up with raw DR > 2HP > 236HP into a full combo, at the cost of just 1 bar of drive.
Fullscreen
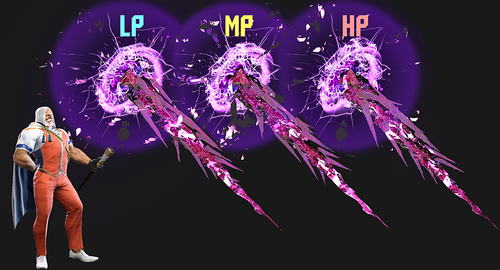
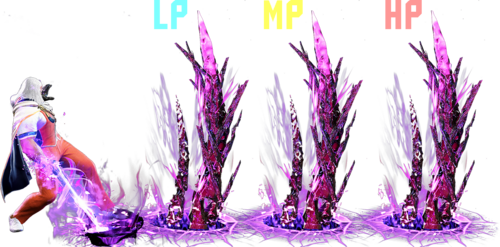
This situation is great for JP as he is able to setup his zoning with clones, and spikes. Generally this will most often occur after opponent gets hit by 22P or 236P. If possible JP wants to setup Departure(214P) as it makes getting closer to JP difficult for the opponent. Because JP cannot command grab(214K) while the Departure(214P) is active most opponents who are aware will try and Drive Parry to avoid losing as much drive gauge when blocking and negating ghost mixups. When this happens JP teleporting to an active portal from Departure is great to hit the opponent with a throw.
- 214P
Generally will be 214HP but if done after 236LP it can be beneficial to do 214LP or 214MP if the opponent is aware how minus this is (-12)
- 214PP
Generally will be 214LP+HP as the LP spike will catch an opponent approaching while HP spike will ensure they get hit from far away. The main use is the frame advantage is much better than 214P as it's -2 after 236LP and +2 after 236MP
- 236MK & 236HK
Will always be plus at range on hit and block making it very useful to continue full screen pressure however some characters can drive rush past the ghosts
- 22HP
Is fantastic at stopping an an opponent from approaching, especially if they blocked a ghost from
Offense
Frame Traps
Light Chains -
Blockstrings
- Drive Rush(DR) 2MK
- throw: 4f gap
- 2LP: 3f gap
- on hit; DR 2MK > 2MP > 236MP
This is a great option in in neutral as 2MK hits incredibly far. As well due to it's low recovery it can recover in time to punish Drive impact. This option is great as it establishes threat and forces the opponent to look out for it. the more they respect it the more likely they are to get hit by bigger followups down the line such as DR 6MK.
- 5MK
- DR 2MK: 2f gap, then gives DR 2MK follow up options if blocked
- DR 6MK: leaves a pretty big gap but good for opponents who start to respect DR 2MK
- DR throw: Good to make the opponent want to mash more during blockstrings.
- 214K,236MK,236HK,236P: multiple followups with all but the command grab losing to Drive impact. Mash from opponent also can beat many of these options
5MK hits fairly far and is special cancelable, however the blockstun and recovery makes most special cancels beside Drive Rush susceptible to Drive Impact. This means Drive rush is the safest option after an opponent blocks 5MK
Okizeme and Mixups
TO-DO
Corner throw
JP has the ability to throw loop by walking forward which is incredibly powerful. He also can setup a meaty drive rush 5HK.
- Throw > Drive rush 5HK > 5HK
- is a 4f frame trap that trades in JP's favor if done correctly. Combos if they were not blocking as well. And allows for several mixup options after blocked
236LP
Midscreen JP doesn't get too much however he can attempt to setup 214PP but will be slightly minus at -2 and -12 with 214P. This can still be a great option as the distance provided can make it easier for you to stop your opponent from approaching.
In the corner JP can start drive rush pressure. If you are having difficulties timing okizeme you have a few options
dash > DR 2MK can help auto time it
2MK(wiff) > 5HK +5 on block and +10 on hit
236MP
Midscreen 214PP and 214P are generally the options 214PP is +2 with 214P being -8. Good option as the distance and slight frame advantage can make it difficult for opponent to approach.
In the corner JP gets an auto timed j.HK that will safejump the opponent.
With 214PP JP can go into +2 Departure setups which is listed below.
Drive rush pressure is also possible and dash > DR 2MK works as a solid general option
Setups
+2~+4 Departure setups
Can be done by some sample combos below
- DI > 6HK > 236MP > 5HP > 236KK > 22P > 214P
- 236HP > 5HP > 236KK > 22P > 214P
- throw > spike trigger > 5HP > 236KK > 22P > 214P
- 236MP > 214PP
- etc
After 22P JP can go into level 1 or 236P > 236236K
| option | combo | Oki/Notes |
|---|---|---|
| throw | throw > 214P(auto) > 5HP > 236KK > 22P | Allows for loopable oki on hit |
| 2LK > 2LP > 236LP | 2LK > 2LP > 236LP > 214P(auto) > 5HP > 236KK > 22P | loopable and allows for jp to be fairly plus if done correctly |
| backdash > 5MK > 236LP > DR 5HK(+6) or DR 2MK(+1) | backdash > 5MK > 236LP > 214P(auto) > 5HP > 236KK > 22P | backdash to try and bait throw |
| 4MP~MP > 236LP (DR 6MK) | 4MP~MP > 236LP > 214P(auto) > 5HP > 236KK > 22P | Allows for JP to be plus enough to setup a Drive rush 6MK while adding multiple small frame traps |
| (214PP) 2LK > 2LP > 2LP > spike > 6MK | ? | ? |
Knockdown Advantage: all scenarios assume that opponent will Back Rise midscreen when possible, unless otherwise stated
| Knockdown | KD Adv. | Oki/Notes |
|---|---|---|
| Forward Throw | +24 | throw loops in corner, also meaty DR 5HK |
| Back Throw | +36 | backthrow > dash > DR 5LP can be a simple setup when throwing opponent back into the corner |
| 2HK | HKD +27 HKD +48 (Punish) |
22LP is good for an autotimed meaty which is +4; punish counter gives 214PP setup. |
| 3HP | HKD +17 HKD +39 (Punish) |
2HK > DR > 5LK/2MK/2MP are some basic pressure option after. |
vs. Burnout
Drive Rush
When cancelling a normal into Drive Rush on block and following it up with another normal, there may be an interruptible gap in the blockstring. The following table lists these blockstring gaps when performed at the fastest possible timing.
| Gap Value | Meaning |
|---|---|
| 0 | True Blockstring (no gap) if input with fastest button timing; can still lose to Drive Reversal |
| 1 to 4 | Small blockstring gap; opponent can interrupt with an invincible reversal; a 4f gap can trade with 4f normal attack |
| 5+ | Large blockstring gap; opponent can interrupt without an invincible attack |
| DR cancel | 2LP | 5LK | 5LP or 2LK | 2MP | 5MK or 4MP | 2MK or 2HP | 5HP or 5HK | 6MK |
|---|---|---|---|---|---|---|---|---|
| 5LP~DR | 4 | 5 | 6 | 7 | 8 | 9 | 12 | 22 |
| 5MK~DR | 0 | 0 | 0 | 0 | 1 | 2 | 5 | 15 |
| 5HK~HP~DR | 0 | 0 | 0 | 0 | 0 | 0 | 3 | 13 |
| 5HP~DR | 0 | 0 | 0 | 0 | 0 | 0 | 1 | 11 |
The following table lists the general BnB combo routes when cancelling a button into Drive Rush on hit.
| Starter | Hit Adv. | Combo Route |
|---|---|---|
| 5LP | +? | ? |
Defense
Abare
- 2LP
JP's fastest option but the range isn't great.
- 5LP
Decent option as the range is further than it seems while still having 6f startup
- 22K
Can actually be useful if you know there will be 3f gaps during blockstrings
Reversals
- 22KK
- 236236P(Level 1)
Anti-Airs
- 2HP
- 6HK
- air throw
Anti-Projectile
- 22P
- 236KK
- 214KK
- 236236K(level 3)
Fighting vs. JP
