|
|
| Line 13: |
Line 13: |
| ! '''New Moves''' | | ! '''New Moves''' |
| | N/A | | | N/A |
| | | | | |
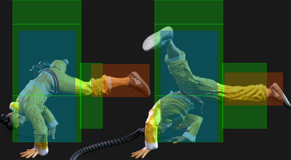
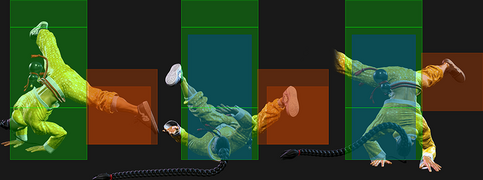
| * 5LP~LP~MP<br>(Bitter Strikes) | | * 5LP~LP~MP<br>(Bitter Strikes) |
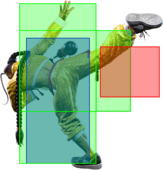
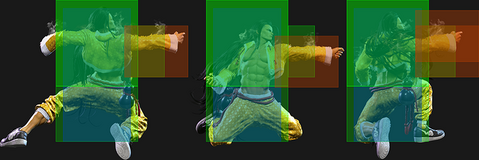
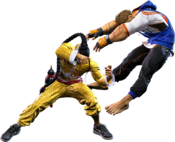
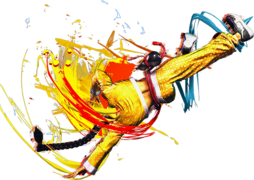
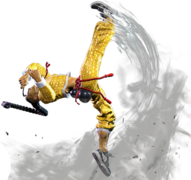
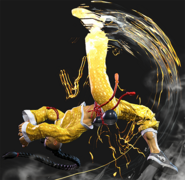
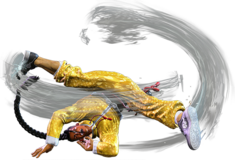
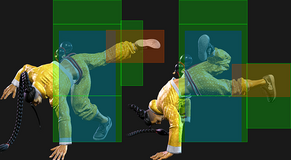
| * j.214K<br>(Luminous Dive Kick) | | * j.214K<br>(Luminous Dive Kick) |
| | | | | |
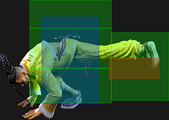
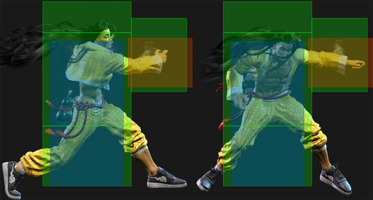
| * 6MK~MK~P<br>(Full Moon Kick) | | * 6MK~MK~P<br>(Full Moon Kick) |
| * 236K<br>(Bakkai) | | * 236K<br>(Bakkai) |
| | | | | |
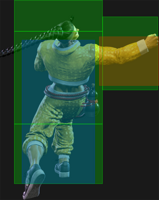
| * 4HP~HP~HK<br>(Intoxicated Assault) | | * 4HP~HP~HK<br>(Intoxicated Assault) |
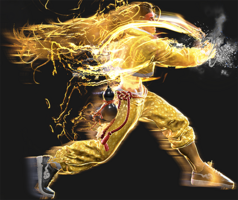
| * 63214K<br>(Tenshin) | | * 63214K<br>(Tenshin) |
| | | | | |
| * 6HK~4HK~P<br>(Ransui Haze) | | * 6HK~4HK~P<br>(Ransui Haze) |
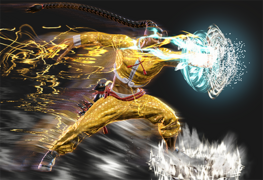
| * 214P~6P<br>(Swagger Hermit Punch) | | * 214P~6P<br>(Swagger Hermit Punch) |
| | | | | |
| * Same as DL4 | | * Same as DL4 |
| |- | | |- |
| Line 38: |
Line 38: |
| {{MoveDataCargo | | {{MoveDataCargo |
| | title = Standing Light Punch | | | title = Standing Light Punch |
| | subtitle = | | | subtitle = |
| | input = 5LP | | | input = 5LP |
| | images = | | | images = |
| {{MoveDataCargoImage|imageHeight=140px|Jamie_5lp|caption=DL0}} | | {{MoveDataCargoImage|imageHeight=140px|Jamie_5lp|caption=DL0}} |
| ---- | | ---- |
| {{MoveDataCargoImage|imageHeight=140px|Jamie_5lp_dl2|caption=DL1+}} | | {{MoveDataCargoImage|imageHeight=140px|Jamie_5lp_dl2|caption=DL1+}} |
| | info = | | | hitboxes = |
| | {{MoveDataCargoImage|hitbox=yes|imageHeight=140px|Jamie_5lp|caption=DL0}} |
| | ---- |
| | {{MoveDataCargoImage|hitbox=yes|imageHeight=140px|Jamie_5lp_dl2|caption=DL1+}} |
| | | info = |
| {{AttackDataCargo-SF6/Query|Jamie_5lp}} | | {{AttackDataCargo-SF6/Query|Jamie_5lp}} |
| * '''Cancel reaction window:''' 12f | | * '''Cancel reaction window:''' 12f |
| Line 62: |
Line 66: |
| {{MoveDataCargo | | {{MoveDataCargo |
| | title = Standing Medium Punch | | | title = Standing Medium Punch |
| | subtitle = | | | subtitle = |
| | input = 5MP | | | input = 5MP |
| | images = | | | images = |
| {{MoveDataCargoImage|imageHeight=180px|Jamie_5mp_dl2|caption=}} | | {{MoveDataCargoImage|imageHeight=180px|Jamie_5mp_dl2|caption=}} |
| | info = | | | hitboxes = |
| | {{MoveDataCargoImage|hitbox=yes|imageHeight=180px|Jamie_5mp_dl2|caption=}} |
| | | info = |
| {{AttackDataCargo-SF6/Query|Jamie_5mp_dl2}} | | {{AttackDataCargo-SF6/Query|Jamie_5mp_dl2}} |
| * Damage DL0-DL4: 540/570/600/630/660 | | * Damage DL0-DL4: 540/570/600/630/660 |
| Line 72: |
Line 78: |
| Jamie's only plus on block normal. Despite this, it is often awkward to use for pressure as it leaves Jamie outside of normal throw range. This normal is best used in combos as after Drive Rush it will link into {{clr|HP|2HP}} and after Drink Lv.3+ when a command grab can function as a tick throw afterwards. | | Jamie's only plus on block normal. Despite this, it is often awkward to use for pressure as it leaves Jamie outside of normal throw range. This normal is best used in combos as after Drive Rush it will link into {{clr|HP|2HP}} and after Drink Lv.3+ when a command grab can function as a tick throw afterwards. |
|
| |
|
| Drive Rush > {{clr|MP|5MP}} functions as an unmashable strike/throw mixup with 63214K unlocked at Drink Lv.3+. | | Drive Rush > {{clr|MP|5MP}} functions as an unmashable strike/throw mixup with 63214K unlocked at Drink Lv.3+. |
| }} | | }} |
|
| |
|
| Line 78: |
Line 84: |
| {{MoveDataCargo | | {{MoveDataCargo |
| | title = Standing Heavy Punch | | | title = Standing Heavy Punch |
| | subtitle = | | | subtitle = |
| | input = 5HP | | | input = 5HP |
| | images = | | | images = |
| {{MoveDataCargoImage|imageHeight=180px|Jamie_5hp_dl2|caption=}} | | {{MoveDataCargoImage|imageHeight=180px|Jamie_5hp_dl2|caption=}} |
| | info = | | | hitboxes = |
| | {{MoveDataCargoImage|hitbox=yes|imageHeight=180px|Jamie_5hp_dl2|caption=}} |
| | | info = |
| {{AttackDataCargo-SF6/Query|Jamie_5hp_dl2}} | | {{AttackDataCargo-SF6/Query|Jamie_5hp_dl2}} |
| * Damage DL0-DL4: 810/855/900/945/990 | | * Damage DL0-DL4: 810/855/900/945/990 |
| Line 98: |
Line 106: |
| {{MoveDataCargo | | {{MoveDataCargo |
| | title = Standing Light Kick | | | title = Standing Light Kick |
| | subtitle = | | | subtitle = |
| | input = 5LK | | | input = 5LK |
| | images = | | | images = |
| {{MoveDataCargoImage|imageHeight=140px|Jamie_5lk_dl2|caption=}} | | {{MoveDataCargoImage|imageHeight=140px|Jamie_5lk_dl2|caption=}} |
| ---- | | ---- |
| {{MoveDataCargoImage|imageHeight=140px|Jamie_5lk_mash|caption=''"Jamie's Jig"''}} | | {{MoveDataCargoImage|imageHeight=140px|Jamie_5lk_mash|caption=''"Jamie's Jig"''}} |
| | info = | | | hitboxes = |
| | {{MoveDataCargoImage|hitbox=yes|imageHeight=140px|Jamie_5lk_dl2|caption=}} |
| | ---- |
| | {{MoveDataCargoImage|hitbox=yes|imageHeight=140px|Jamie_5lk_mash|caption=''"Jamie's Jig"''}} |
| | | info = |
| {{AttackDataCargo-SF6/Query|Jamie_5lk_dl2}} | | {{AttackDataCargo-SF6/Query|Jamie_5lk_dl2}} |
| * Damage DL0-DL4: 270/285/300/315/330 | | * Damage DL0-DL4: 270/285/300/315/330 |
| Line 113: |
Line 125: |
| Jamie's 5LK has properties more commonly seen in a 5LP; it can be chained into and has decent (but not exceptional) range, making it useful as combo filler or in some punishes. It has the unique ability to chain into itself infinitely on whiff, allowing Jamie to "dance" with the animation. Jamie shifts forward during the 5LK animation, so chaining out of it at the earliest timing will act as a sort of "kara-cancel" to keep him closer to the opponent. | | Jamie's 5LK has properties more commonly seen in a 5LP; it can be chained into and has decent (but not exceptional) range, making it useful as combo filler or in some punishes. It has the unique ability to chain into itself infinitely on whiff, allowing Jamie to "dance" with the animation. Jamie shifts forward during the 5LK animation, so chaining out of it at the earliest timing will act as a sort of "kara-cancel" to keep him closer to the opponent. |
|
| |
|
| 5LK can combo into LP or OD Freeflow Strikes, any Arrow Kick, or Super. Slower specials like Bakkai or Swagger Step (both of which are far stronger in Super cancels) require stronger combo routes. | | 5LK can combo into LP or OD Freeflow Strikes, any Arrow Kick, or Super. Slower specials like Bakkai or Swagger Step (both of which are far stronger in Super cancels) require stronger combo routes. |
| }} | | }} |
|
| |
|
| Line 119: |
Line 131: |
| {{MoveDataCargo | | {{MoveDataCargo |
| | title = Standing Medium Kick | | | title = Standing Medium Kick |
| | subtitle = | | | subtitle = |
| | input = 5MK | | | input = 5MK |
| | images = | | | images = |
| {{MoveDataCargoImage|imageHeight=170px|Jamie_5mk_dl2|caption=}} | | {{MoveDataCargoImage|imageHeight=170px|Jamie_5mk_dl2|caption=}} |
| | info = | | | hitboxes = |
| | {{MoveDataCargoImage|hitbox=yes|imageHeight=170px|Jamie_5mk_dl2|caption=}} |
| | | info = |
| {{AttackDataCargo-SF6/Query|Jamie_5mk_dl2}} | | {{AttackDataCargo-SF6/Query|Jamie_5mk_dl2}} |
| * Damage DL0-DL4: 540/570/600/630/660 | | * Damage DL0-DL4: 540/570/600/630/660 |
| Line 129: |
Line 143: |
| * '''xx Lv.2 Super:''' +14/+10 | | * '''xx Lv.2 Super:''' +14/+10 |
| <br> | | <br> |
| 5MK is a solid mid-range poke that can be buffered into specials to score a knockdown. Compared to 2MK, it is 3f slower but hits from slightly longer range and is slightly less whiff punishable. | | 5MK is a solid mid-range poke that can be buffered into specials to score a knockdown. Compared to 2MK, it is 3f slower but hits from slightly longer range and is slightly less whiff punishable. |
| }} | | }} |
|
| |
|
| Line 135: |
Line 149: |
| {{MoveDataCargo | | {{MoveDataCargo |
| | title = Standing Heavy Kick | | | title = Standing Heavy Kick |
| | subtitle = | | | subtitle = |
| | input = 5HK | | | input = 5HK |
| | images = | | | images = |
| {{MoveDataCargoImage|imageHeight=170px|Jamie_5hk_dl2|caption=}} | | {{MoveDataCargoImage|imageHeight=170px|Jamie_5hk_dl2|caption=}} |
| | info = | | | hitboxes = |
| | {{MoveDataCargoImage|hitbox=yes|imageHeight=170px|Jamie_5hk_dl2|caption=}} |
| | | info = |
| {{AttackDataCargo-SF6/Query|Jamie_5hk_dl2}} | | {{AttackDataCargo-SF6/Query|Jamie_5hk_dl2}} |
| * Damage DL0-DL4: 720/760/800/840/880 | | * Damage DL0-DL4: 720/760/800/840/880 |
| Line 154: |
Line 170: |
| {{MoveDataCargo | | {{MoveDataCargo |
| | title = Crouching Light Punch | | | title = Crouching Light Punch |
| | subtitle = | | | subtitle = |
| | input = 2LP | | | input = 2LP |
| | images = | | | images = |
| {{MoveDataCargoImage|imageHeight=170px|Jamie_2lp_dl2|caption=}} | | {{MoveDataCargoImage|imageHeight=170px|Jamie_2lp_dl2|caption=}} |
| | info = | | | hitboxes = |
| | {{MoveDataCargoImage|hitbox=yes|imageHeight=170px|Jamie_2lp_dl2|caption=}} |
| | | info = |
| {{AttackDataCargo-SF6/Query|Jamie_2lp_dl2}} | | {{AttackDataCargo-SF6/Query|Jamie_2lp_dl2}} |
| * Damage DL0-DL4: 225/237/250/262/275 | | * Damage DL0-DL4: 225/237/250/262/275 |
| Line 171: |
Line 189: |
| {{MoveDataCargo | | {{MoveDataCargo |
| | title = Crouching Medium Punch | | | title = Crouching Medium Punch |
| | subtitle = | | | subtitle = |
| | input = 2MP | | | input = 2MP |
| | images = | | | images = |
| {{MoveDataCargoImage|imageHeight=170px|Jamie_2mp_dl2|caption=}} | | {{MoveDataCargoImage|imageHeight=170px|Jamie_2mp_dl2|caption=}} |
| | info = | | | hitboxes = |
| | {{MoveDataCargoImage|hitbox=yes|imageHeight=170px|Jamie_2mp_dl2|caption=}} |
| | | info = |
| {{AttackDataCargo-SF6/Query|Jamie_2mp_dl2}} | | {{AttackDataCargo-SF6/Query|Jamie_2mp_dl2}} |
| * Damage DL0-DL4: 540/570/600/630/660 | | * Damage DL0-DL4: 540/570/600/630/660 |
| Line 187: |
Line 207: |
| {{MoveDataCargo | | {{MoveDataCargo |
| | title = Crouching Heavy Punch | | | title = Crouching Heavy Punch |
| | subtitle = | | | subtitle = |
| | input = 2HP | | | input = 2HP |
| | images = | | | images = |
| {{MoveDataCargoImage|imageHeight=180px|Jamie_2hp_dl2|caption=}} | | {{MoveDataCargoImage|imageHeight=180px|Jamie_2hp_dl2|caption=}} |
| | info = | | | hitboxes = |
| | {{MoveDataCargoImage|hitbox=yes|imageHeight=180px|Jamie_2hp_dl2|caption=}} |
| | | info = |
| {{AttackDataCargo-SF6/Query|Jamie_2hp_dl2}} | | {{AttackDataCargo-SF6/Query|Jamie_2hp_dl2}} |
| * Damage DL0-DL4: 810/855/900/945/990 | | * Damage DL0-DL4: 810/855/900/945/990 |
| Line 205: |
Line 227: |
| {{MoveDataCargo | | {{MoveDataCargo |
| | title = Crouching Light Kick | | | title = Crouching Light Kick |
| | subtitle = | | | subtitle = |
| | input = 2LK | | | input = 2LK |
| | images = | | | images = |
| {{MoveDataCargoImage|imageHeight=170px|Jamie_2lk_dl2|caption=}} | | {{MoveDataCargoImage|imageHeight=170px|Jamie_2lk_dl2|caption=}} |
| | info = | | | hitboxes = |
| | {{MoveDataCargoImage|hitbox=yes|imageHeight=170px|Jamie_2lk_dl2|caption=}} |
| | | info = |
| {{AttackDataCargo-SF6/Query|Jamie_2lk_dl2}} | | {{AttackDataCargo-SF6/Query|Jamie_2lk_dl2}} |
| * Damage DL0-DL4: 180/190/200/210/220 | | * Damage DL0-DL4: 180/190/200/210/220 |
| Line 220: |
Line 244: |
| {{MoveDataCargo | | {{MoveDataCargo |
| | title = Crouching Medium Kick | | | title = Crouching Medium Kick |
| | subtitle = | | | subtitle = |
| | input = 2MK | | | input = 2MK |
| | images = | | | images = |
| {{MoveDataCargoImage|imageHeight=120px|Jamie_2mk_dl2|caption=}} | | {{MoveDataCargoImage|imageHeight=120px|Jamie_2mk_dl2|caption=}} |
| | info = | | | hitboxes = |
| | {{MoveDataCargoImage|hitbox=yes|imageHeight=120px|Jamie_2mk_dl2|caption=}} |
| | | info = |
| {{AttackDataCargo-SF6/Query|Jamie_2mk_dl2}} | | {{AttackDataCargo-SF6/Query|Jamie_2mk_dl2}} |
| * Damage DL0-DL4: 450/475/500/525/550 | | * Damage DL0-DL4: 450/475/500/525/550 |
| Line 237: |
Line 263: |
| {{MoveDataCargo | | {{MoveDataCargo |
| | title = Crouching Heavy Kick | | | title = Crouching Heavy Kick |
| | subtitle = | | | subtitle = |
| | input = 2HK | | | input = 2HK |
| | images = | | | images = |
| {{MoveDataCargoImage|imageHeight=120px|Jamie_2hk_dl2|caption=}} | | {{MoveDataCargoImage|imageHeight=120px|Jamie_2hk_dl2|caption=}} |
| | info = | | | hitboxes = |
| | {{MoveDataCargoImage|hitbox=yes|imageHeight=120px|Jamie_2hk_dl2|caption=}} |
| | | info = |
| {{AttackDataCargo-SF6/Query|Jamie_2hk_dl2}} | | {{AttackDataCargo-SF6/Query|Jamie_2hk_dl2}} |
| * Damage DL0-DL4: 360x2/380x2/400x2/420x2/440x2 | | * Damage DL0-DL4: 360x2/380x2/400x2/420x2/440x2 |
| Line 255: |
Line 283: |
| {{MoveDataCargo | | {{MoveDataCargo |
| | title = Jumping Light Punch | | | title = Jumping Light Punch |
| | subtitle = | | | subtitle = |
| | input = j.LP | | | input = j.LP |
| | images = | | | images = |
| {{MoveDataCargoImage|imageHeight=140px|Jamie_jlp_dl2|caption=}} | | {{MoveDataCargoImage|imageHeight=140px|Jamie_jlp_dl2|caption=}} |
| | info = | | | hitboxes = |
| | {{MoveDataCargoImage|hitbox=yes|imageHeight=140px|Jamie_jlp_dl2|caption=}} |
| | | info = |
| {{AttackDataCargo-SF6/Query|Jamie_jlp_dl2}} | | {{AttackDataCargo-SF6/Query|Jamie_jlp_dl2}} |
| * Damage DL0-DL4: 270/285/300/315/330 | | * Damage DL0-DL4: 270/285/300/315/330 |
| Line 270: |
Line 300: |
| {{MoveDataCargo | | {{MoveDataCargo |
| | title = Jumping Medium Punch | | | title = Jumping Medium Punch |
| | subtitle = | | | subtitle = |
| | input = j.MP | | | input = j.MP |
| | images = | | | images = |
| {{MoveDataCargoImage|imageHeight=160px|Jamie_jmp_dl2|caption=}} | | {{MoveDataCargoImage|imageHeight=160px|Jamie_jmp_dl2|caption=}} |
| | info = | | | hitboxes = |
| | {{MoveDataCargoImage|hitbox=yes|imageHeight=160px|Jamie_jmp_dl2|caption=}} |
| | | info = |
| {{AttackDataCargo-SF6/Query|Jamie_jmp_dl2}} | | {{AttackDataCargo-SF6/Query|Jamie_jmp_dl2}} |
| * Damage DL0-DL4: 630/665/700/735/770 | | * Damage DL0-DL4: 630/665/700/735/770 |
| Line 286: |
Line 318: |
| {{MoveDataCargo | | {{MoveDataCargo |
| | title = Jumping Heavy Punch | | | title = Jumping Heavy Punch |
| | subtitle = | | | subtitle = |
| | input = j.HP | | | input = j.HP |
| | images = | | | images = |
| {{MoveDataCargoImage|imageHeight=140px|Jamie_jhp_dl2|caption=}} | | {{MoveDataCargoImage|imageHeight=140px|Jamie_jhp_dl2|caption=}} |
| | info = | | | hitboxes = |
| | {{MoveDataCargoImage|hitbox=yes|imageHeight=140px|Jamie_jhp_dl2|caption=}} |
| | | info = |
| {{AttackDataCargo-SF6/Query|Jamie_jhp_dl2}} | | {{AttackDataCargo-SF6/Query|Jamie_jhp_dl2}} |
| * Damage DL0-DL4: 720/760/800/840/880 | | * Damage DL0-DL4: 720/760/800/840/880 |
| Line 301: |
Line 335: |
| {{MoveDataCargo | | {{MoveDataCargo |
| | title = Jumping Light Kick | | | title = Jumping Light Kick |
| | subtitle = | | | subtitle = |
| | input = j.LK | | | input = j.LK |
| | images = | | | images = |
| {{MoveDataCargoImage|imageHeight=140px|Jamie_jlk_dl2|caption=}} | | {{MoveDataCargoImage|imageHeight=140px|Jamie_jlk_dl2|caption=}} |
| | info = | | | hitboxes = |
| | {{MoveDataCargoImage|hitbox=yes|imageHeight=140px|Jamie_jlk_dl2|caption=}} |
| | | info = |
| {{AttackDataCargo-SF6/Query|Jamie_jlk_dl2}} | | {{AttackDataCargo-SF6/Query|Jamie_jlk_dl2}} |
| * Damage DL0-DL4: 270/285/300/315/330 | | * Damage DL0-DL4: 270/285/300/315/330 |
| Line 315: |
Line 351: |
| {{MoveDataCargo | | {{MoveDataCargo |
| | title = Jumping Medium Kick | | | title = Jumping Medium Kick |
| | subtitle = | | | subtitle = |
| | input = j.MK | | | input = j.MK |
| | images = | | | images = |
| {{MoveDataCargoImage|imageHeight=140px|Jamie_jmk_dl2|caption=}} | | {{MoveDataCargoImage|imageHeight=140px|Jamie_jmk_dl2|caption=}} |
| | info = | | | hitboxes = |
| | {{MoveDataCargoImage|hitbox=yes|imageHeight=140px|Jamie_jmk_dl2|caption=}} |
| | | info = |
| {{AttackDataCargo-SF6/Query|Jamie_jmk_dl2}} | | {{AttackDataCargo-SF6/Query|Jamie_jmk_dl2}} |
| * Damage DL0-DL4: 450/475/500/525/550 | | * Damage DL0-DL4: 450/475/500/525/550 |
| Line 330: |
Line 368: |
| {{MoveDataCargo | | {{MoveDataCargo |
| | title = Jumping Heavy Kick | | | title = Jumping Heavy Kick |
| | subtitle = | | | subtitle = |
| | input = j.HK | | | input = j.HK |
| | images = | | | images = |
| {{MoveDataCargoImage|imageHeight=140px|Jamie_jhk_dl2|caption=}} | | {{MoveDataCargoImage|imageHeight=140px|Jamie_jhk_dl2|caption=}} |
| ---- | | ---- |
| {{MoveDataCargoImage|imageHeight=140px|Jamie_jhk_2|caption=}} | | {{MoveDataCargoImage|imageHeight=140px|Jamie_jhk_2|caption=}} |
| | info = | | | hitboxes = |
| | {{MoveDataCargoImage|hitbox=yes|imageHeight=140px|Jamie_jhk_dl2|caption=}} |
| | ---- |
| | {{MoveDataCargoImage|hitbox=yes|imageHeight=140px|Jamie_jhk_2|caption=}} |
| | | info = |
| {{AttackDataCargo-SF6/Query|Jamie_jhk_dl2}} | | {{AttackDataCargo-SF6/Query|Jamie_jhk_dl2}} |
| * Damage DL0-DL4: 360x2/380x2/400x2/420x2/440x2 | | * Damage DL0-DL4: 360x2/380x2/400x2/420x2/440x2 |
| Line 351: |
Line 393: |
| {{MoveDataCargo | | {{MoveDataCargo |
| | title = Tensei Kick | | | title = Tensei Kick |
| | subtitle = | | | subtitle = |
| | input = 2KK | | | input = 2KK |
| | images = | | | images = |
| {{MoveDataCargoImage|imageHeight=180px|Jamie_2kk_dl2|caption=}} | | {{MoveDataCargoImage|imageHeight=180px|Jamie_2kk_dl2|caption=}} |
| | info = | | | hitboxes = |
| | {{MoveDataCargoImage|hitbox=yes|imageHeight=180px|Jamie_2kk_dl2|caption=}} |
| | | info = |
| {{AttackDataCargo-SF6/Query|Jamie_2kk_dl2}} | | {{AttackDataCargo-SF6/Query|Jamie_2kk_dl2}} |
| * Damage DL0-DL4: 540/570/600/630/660 | | * Damage DL0-DL4: 540/570/600/630/660 |
| Line 371: |
Line 415: |
| {{MoveDataCargo | | {{MoveDataCargo |
| | title = Falling Star Kick | | | title = Falling Star Kick |
| | subtitle = | | | subtitle = |
| | input = 6MK | | | input = 6MK |
| | images = | | | images = |
| {{MoveDataCargoImage|imageHeight=170px|Jamie_6mk|caption=}} | | {{MoveDataCargoImage|imageHeight=170px|Jamie_6mk|caption=}} |
| | info = | | | hitboxes = |
| | {{MoveDataCargoImage|hitbox=yes|imageHeight=170px|Jamie_6mk|caption=}} |
| | | info = |
| {{AttackDataCargo-SF6/Query|Jamie_6mk}} | | {{AttackDataCargo-SF6/Query|Jamie_6mk}} |
| * Damage DL0-DL1: 540/570 | | * Damage DL0-DL1: 540/570 |
| Line 392: |
Line 438: |
| {{MoveDataCargo | | {{MoveDataCargo |
| | title = Hermit's Elbow | | | title = Hermit's Elbow |
| | subtitle = | | | subtitle = |
| | input = 4HP | | | input = 4HP |
| | images = | | | images = |
| {{MoveDataCargoImage|imageHeight=140px|Jamie_4hp_dl2|caption=DL0-DL2}} | | {{MoveDataCargoImage|imageHeight=140px|Jamie_4hp_dl2|caption=DL0-DL2}} |
| ---- | | ---- |
| {{MoveDataCargoImage|imageHeight=140px|Jamie_4hp_dl3|caption=DL3+}} | | {{MoveDataCargoImage|imageHeight=140px|Jamie_4hp_dl3|caption=DL3+}} |
| | info = | | | hitboxes = |
| | {{MoveDataCargoImage|hitbox=yes|imageHeight=140px|Jamie_4hp_dl2|caption=DL0-DL2}} |
| | ---- |
| | {{MoveDataCargoImage|hitbox=yes|imageHeight=140px|Jamie_4hp_dl3|caption=DL3+}} |
| | | info = |
| {{AttackDataCargo-SF6/Query|Jamie_4hp_dl2}} | | {{AttackDataCargo-SF6/Query|Jamie_4hp_dl2}} |
| * Damage DL0-DL2: 720/760/800 | | * Damage DL0-DL2: 720/760/800 |
| Line 416: |
Line 466: |
| {{MoveDataCargo | | {{MoveDataCargo |
| | title = Senei Kick | | | title = Senei Kick |
| | subtitle = | | | subtitle = |
| | input = 6HK | | | input = 6HK |
| | images = | | | images = |
| {{MoveDataCargoImage|imageHeight=140px|Jamie_6hk_dl2|caption=DL0-DL3}} | | {{MoveDataCargoImage|imageHeight=140px|Jamie_6hk_dl2|caption=DL0-DL3}} |
| ---- | | ---- |
| {{MoveDataCargoImage|imageHeight=140px|Jamie_6hk_dl4|caption=DL4}} | | {{MoveDataCargoImage|imageHeight=140px|Jamie_6hk_dl4|caption=DL4}} |
| | info = | | | hitboxes = |
| | {{MoveDataCargoImage|hitbox=yes|imageHeight=140px|Jamie_6hk_dl2|caption=DL0-DL3}} |
| | ---- |
| | {{MoveDataCargoImage|hitbox=yes|imageHeight=140px|Jamie_6hk_dl4|caption=DL4}} |
| | | info = |
| {{AttackDataCargo-SF6/Query|Jamie_6hk_dl2}} | | {{AttackDataCargo-SF6/Query|Jamie_6hk_dl2}} |
| * Damage DL0-DL3: 810/855/900/945 | | * Damage DL0-DL3: 810/855/900/945 |
| Line 442: |
Line 496: |
| | subtitle = (DL0) | | | subtitle = (DL0) |
| | input = 2HK~HK~P | | | input = 2HK~HK~P |
| | images = | | | images = |
| {{MoveDataCargoImage|imageHeight=160px|Jamie_2hk_hk_dl2|caption=}} | | {{MoveDataCargoImage|imageHeight=160px|Jamie_2hk_hk_dl2|caption=}} |
| ---- | | ---- |
| {{MoveDataCargoImage|imageHeight=160px|Jamie_2hk_hk_p_dl2|caption=}} | | {{MoveDataCargoImage|imageHeight=160px|Jamie_2hk_hk_p_dl2|caption=}} |
| | info = | | | hitboxes = |
| | {{MoveDataCargoImage|hitbox=yes|imageHeight=160px|Jamie_2hk_hk_dl2|caption=}} |
| | ---- |
| | {{MoveDataCargoImage|hitbox=yes|imageHeight=160px|Jamie_2hk_hk_p_dl2|caption=}} |
| | | info = |
| {{AttackDataCargo-SF6/Query|Jamie_2hk_hk_dl2}} | | {{AttackDataCargo-SF6/Query|Jamie_2hk_hk_dl2}} |
| * Damage DL0-DL4: 450/475/500/525/550 | | * Damage DL0-DL4: 450/475/500/525/550 |
| Line 464: |
Line 522: |
| | subtitle = (DL1) | | | subtitle = (DL1) |
| | input = 5LP~LK~MP | | | input = 5LP~LK~MP |
| | images = | | | images = |
| {{MoveDataCargoImage|imageHeight=160px|Jamie_5lp_lk_dl2|caption=}} | | {{MoveDataCargoImage|imageHeight=160px|Jamie_5lp_lk_dl2|caption=}} |
| ---- | | ---- |
| {{MoveDataCargoImage|imageHeight=160px|Jamie_5lp_lk_mp_dl2|caption=}} | | {{MoveDataCargoImage|imageHeight=160px|Jamie_5lp_lk_mp_dl2|caption=}} |
| | info = | | | hitboxes = |
| | {{MoveDataCargoImage|hitbox=yes|imageHeight=160px|Jamie_5lp_lk_dl2|caption=}} |
| | ---- |
| | {{MoveDataCargoImage|hitbox=yes|imageHeight=160px|Jamie_5lp_lk_mp_dl2|caption=}} |
| | | info = |
| {{AttackDataCargo-SF6/Query|Jamie_5lp_lk_dl2}} | | {{AttackDataCargo-SF6/Query|Jamie_5lp_lk_dl2}} |
| * Damage DL1-DL4: 190(170)/200(180)/210(188)/220(198) | | * Damage DL1-DL4: 190(170)/200(180)/210(188)/220(198) |
| Line 487: |
Line 549: |
| | subtitle = (DL2) | | | subtitle = (DL2) |
| | input = 6MK~MK~P | | | input = 6MK~MK~P |
| | images = | | | images = |
| {{MoveDataCargoImage|Jamie_6mk_mk_dl2|caption=}} | | {{MoveDataCargoImage|Jamie_6mk_mk_dl2|caption=}} |
| ---- | | ---- |
| {{MoveDataCargoImage|Jamie_6mk_mk_p_dl2|caption=}} | | {{MoveDataCargoImage|Jamie_6mk_mk_p_dl2|caption=}} |
| | info = | | | hitboxes = |
| | {{MoveDataCargoImage|hitbox=yes|Jamie_6mk_mk_dl2|caption=}} |
| | ---- |
| | {{MoveDataCargoImage|hitbox=yes|Jamie_6mk_mk_p_dl2|caption=}} |
| | | info = |
| {{AttackDataCargo-SF6/Query|Jamie_6mk_mk_dl2}} | | {{AttackDataCargo-SF6/Query|Jamie_6mk_mk_dl2}} |
| * Damage DL2-DL4: 200x2/210x2/220x2 | | * Damage DL2-DL4: 200x2/210x2/220x2 |
| Line 510: |
Line 576: |
| | subtitle = (DL3) | | | subtitle = (DL3) |
| | input = 4HP~HP~HK | | | input = 4HP~HP~HK |
| | images = | | | images = |
| {{MoveDataCargoImage|imageHeight=160px|Jamie_4hp_hp_dl3|caption=}} | | {{MoveDataCargoImage|imageHeight=160px|Jamie_4hp_hp_dl3|caption=}} |
| ---- | | ---- |
| {{MoveDataCargoImage|imageHeight=140px|Jamie_4hp_hp_hk_dl3|caption=}} | | {{MoveDataCargoImage|imageHeight=140px|Jamie_4hp_hp_hk_dl3|caption=}} |
| | info = | | | hitboxes = |
| | {{MoveDataCargoImage|hitbox=yes|imageHeight=160px|Jamie_4hp_hp_dl3|caption=}} |
| | ---- |
| | {{MoveDataCargoImage|hitbox=yes|imageHeight=140px|Jamie_4hp_hp_hk_dl3|caption=}} |
| | | info = |
| {{AttackDataCargo-SF6/Query|Jamie_4hp_hp_dl3}} | | {{AttackDataCargo-SF6/Query|Jamie_4hp_hp_dl3}} |
| * Damage DL3-DL4: 630/660 | | * Damage DL3-DL4: 630/660 |
| Line 532: |
Line 602: |
| | subtitle = (DL4) | | | subtitle = (DL4) |
| | input = 6HK~4HK~P | | | input = 6HK~4HK~P |
| | images = | | | images = |
| {{MoveDataCargoImage|imageHeight=160px|Jamie_6hk_4hk_dl4|caption=}} | | {{MoveDataCargoImage|imageHeight=160px|Jamie_6hk_4hk_dl4|caption=}} |
| ---- | | ---- |
| Line 540: |
Line 610: |
| ---- | | ---- |
| {{MoveDataCargoImage|imageHeight=170px|Jamie_6hk_4hk_p_far_dl4|caption=}} | | {{MoveDataCargoImage|imageHeight=170px|Jamie_6hk_4hk_p_far_dl4|caption=}} |
| | info = | | | hitboxes = |
| | {{MoveDataCargoImage|hitbox=yes|imageHeight=160px|Jamie_6hk_4hk_dl4|caption=}} |
| | ---- |
| | {{MoveDataCargoImage|hitbox=yes|imageHeight=160px|Jamie_6hk_4hk_p_close_dl4|caption=}} |
| | ---- |
| | {{MoveDataCargoImage|hitbox=yes|imageHeight=160px|Jamie_6hk_4hk_p_mid_dl4|caption=}} |
| | ---- |
| | {{MoveDataCargoImage|hitbox=yes|imageHeight=170px|Jamie_6hk_4hk_p_far_dl4|caption=}} |
| | | info = |
| {{AttackDataCargo-SF6/Query|Jamie_6hk_4hk_dl4}} | | {{AttackDataCargo-SF6/Query|Jamie_6hk_4hk_dl4}} |
| * Sways and walks backward; press P at different times to change followup | | * Sways and walks backward; press P at different times to change followup |
| Line 565: |
Line 643: |
| {{MoveDataCargo | | {{MoveDataCargo |
| | title = Forward Throw | | | title = Forward Throw |
| | subtitle = | | | subtitle = |
| | input = LPLK | | | input = LPLK |
| | images = | | | images = |
| {{MoveDataCargoImage|Jamie_lplk_dl2|caption=}} | | {{MoveDataCargoImage|Jamie_lplk_dl2|caption=}} |
| | info = | | | hitboxes = |
| | {{MoveDataCargoImage|hitbox=yes|Jamie_lplk_dl2|caption=}} |
| | | info = |
| {{AttackDataCargo-SF6/Query|Jamie_lplk_dl2}} | | {{AttackDataCargo-SF6/Query|Jamie_lplk_dl2}} |
| * Damage DL0-DL4: 1080/1139/1200/1259/1320 | | * Damage DL0-DL4: 1080/1139/1200/1259/1320 |
| Line 580: |
Line 660: |
| {{MoveDataCargo | | {{MoveDataCargo |
| | title = Back Throw | | | title = Back Throw |
| | subtitle = | | | subtitle = |
| | input = 4LPLK | | | input = 4LPLK |
| | images = | | | images = |
| {{MoveDataCargoImage|Jamie_4lplk_dl2|caption=}} | | {{MoveDataCargoImage|Jamie_4lplk_dl2|caption=}} |
| | info = | | | hitboxes = |
| | {{MoveDataCargoImage|hitbox=yes|Jamie_4lplk_dl2|caption=}} |
| | | info = |
| {{AttackDataCargo-SF6/Query|Jamie_4lplk_dl2}} | | {{AttackDataCargo-SF6/Query|Jamie_4lplk_dl2}} |
| * Damage DL0-DL4: 1080/1139/1200/1259/1320 | | * Damage DL0-DL4: 1080/1139/1200/1259/1320 |
| Line 595: |
Line 677: |
| {{MoveDataCargo | | {{MoveDataCargo |
| | title = Drive Impact | | | title = Drive Impact |
| | subtitle = | | | subtitle = |
| | input = HPHK | | | input = HPHK |
| | images = | | | images = |
| {{MoveDataCargoImage|imageHeight=200px|Jamie_hphk_dl2|caption=}} | | {{MoveDataCargoImage|imageHeight=200px|Jamie_hphk_dl2|caption=}} |
| | info = | | | hitboxes = |
| | {{MoveDataCargoImage|hitbox=yes|imageHeight=200px|Jamie_hphk_dl2|caption=}} |
| | | info = |
| {{AttackDataCargo-SF6/Query|imageHeight=200px|Jamie_hphk_dl2}} | | {{AttackDataCargo-SF6/Query|imageHeight=200px|Jamie_hphk_dl2}} |
| See [[Street_Fighter_6/Gauges#Drive_Impact|Drive Impact]] | | See [[Street_Fighter_6/Gauges#Drive_Impact|Drive Impact]] |
| Line 618: |
Line 702: |
| {{MoveDataCargo | | {{MoveDataCargo |
| | title = Drive Reversal | | | title = Drive Reversal |
| | subtitle = | | | subtitle = |
| | input = 6HPHK (in blockstun) | | | input = 6HPHK (in blockstun) |
| | images = | | | images = |
| {{MoveDataCargoImage|imageHeight=180px|Jamie_6hphk_dl2|caption=}} | | {{MoveDataCargoImage|imageHeight=180px|Jamie_6hphk_dl2|caption=}} |
| | info = | | | hitboxes = |
| | {{MoveDataCargoImage|hitbox=yes|imageHeight=180px|Jamie_6hphk_dl2|caption=}} |
| | | info = |
| {{AttackDataCargo-SF6/Query|Jamie_6hphk_dl2}} | | {{AttackDataCargo-SF6/Query|Jamie_6hphk_dl2}} |
| See [[Street_Fighter_6/Gauges#Drive_Reversal|Drive Reversal]] | | See [[Street_Fighter_6/Gauges#Drive_Reversal|Drive Reversal]] |
| Line 632: |
Line 718: |
| {{MoveDataCargo | | {{MoveDataCargo |
| | title = Drive Parry | | | title = Drive Parry |
| | subtitle = | | | subtitle = |
| | input = MPMK | | | input = MPMK |
| | images = | | | images = |
| {{MoveDataCargoImage|imageHeight=175px|Jamie_mpmk|caption=}} | | {{MoveDataCargoImage|imageHeight=175px|Jamie_mpmk|caption=}} |
| | info = | | | hitboxes = |
| | {{MoveDataCargoImage|hitbox=yes|imageHeight=175px|Jamie_mpmk|caption=}} |
| | | info = |
| {{AttackDataCargo-SF6/Query|Jamie_mpmk}} | | {{AttackDataCargo-SF6/Query|Jamie_mpmk}} |
| See [[Street_Fighter_6/Gauges#Drive_Parry|Drive Parry]] | | See [[Street_Fighter_6/Gauges#Drive_Parry|Drive Parry]] |
| Line 646: |
Line 734: |
| {{MoveDataCargo | | {{MoveDataCargo |
| | title = Drive Rush | | | title = Drive Rush |
| | subtitle = | | | subtitle = |
| | input = 66 | | | input = 66 |
| | images = | | | images = |
| {{MoveDataCargoImage|imageHeight=140px|Jamie_66|caption=}} | | {{MoveDataCargoImage|imageHeight=140px|Jamie_66|caption=}} |
| | info = | | | hitboxes = |
| | {{MoveDataCargoImage|hitbox=yes|imageHeight=140px|Jamie_66|caption=}} |
| | | info = |
| {{AttackDataCargo-SF6/Query|Jamie_66}} | | {{AttackDataCargo-SF6/Query|Jamie_66}} |
| See [[Street_Fighter_6/Gauges#Drive_Rush|Drive Rush]]. Frame data shown in (parentheses) refers to the version used after Parry. | | See [[Street_Fighter_6/Gauges#Drive_Rush|Drive Rush]]. Frame data shown in (parentheses) refers to the version used after Parry. |
| Line 658: |
Line 748: |
| **307.1 (max, no cancel) | | **307.1 (max, no cancel) |
| * Notable Drive Rush cancel combo routes: | | * Notable Drive Rush cancel combo routes: |
| ** | | ** |
| * Notable Drive Rush cancel blockstring gaps: | | * Notable Drive Rush cancel blockstring gaps: |
| ** | | ** |
| }} | | }} |
|
| |
|
| Line 669: |
Line 759: |
| | subtitle = (DL0) | | | subtitle = (DL0) |
| | input = 22P | | | input = 22P |
| | images = | | | images = |
| {{MoveDataCargoImage|Jamie_22p|caption=}} | | {{MoveDataCargoImage|Jamie_22p|caption=}} |
| ---- | | ---- |
| {{MoveDataCargoImage|imageHeight=200px|Jamie_22p_activation|caption=}} | | {{MoveDataCargoImage|imageHeight=200px|Jamie_22p_activation|caption=}} |
| | info = | | | hitboxes = |
| | {{MoveDataCargoImage|hitbox=yes|Jamie_22p|caption=}} |
| | ---- |
| | {{MoveDataCargoImage|hitbox=yes|imageHeight=200px|Jamie_22p_activation|caption=}} |
| | | info = |
| {{AttackDataCargo-SF6/Query|Jamie_22p}} | | {{AttackDataCargo-SF6/Query|Jamie_22p}} |
| {{AttackDataCargo-SF6/Query|Jamie_22p_2}} | | {{AttackDataCargo-SF6/Query|Jamie_22p_2}} |
| Line 694: |
Line 788: |
| | subtitle = (DL0) | | | subtitle = (DL0) |
| | input = 236P | | | input = 236P |
| | images = | | | images = |
| {{MoveDataCargoImage|imageHeight=200px|Jamie_236lp_dl2|caption=}} | | {{MoveDataCargoImage|imageHeight=200px|Jamie_236lp_dl2|caption=}} |
| ---- | | ---- |
| {{MoveDataCargoImage|imageHeight=200px|Jamie_236pp_dl2|caption=}} | | {{MoveDataCargoImage|imageHeight=200px|Jamie_236pp_dl2|caption=}} |
| | info = | | | hitboxes = |
| | {{MoveDataCargoImage|hitbox=yes|imageHeight=200px|Jamie_236lp_dl2|caption=}} |
| | ---- |
| | {{MoveDataCargoImage|hitbox=yes|imageHeight=200px|Jamie_236pp_dl2|caption=}} |
| | | info = |
| {{AttackDataCargo-SF6/Query|Jamie_236lp_dl2}} | | {{AttackDataCargo-SF6/Query|Jamie_236lp_dl2}} |
| * Damage DL0-DL3: 315/332/350/367 | | * Damage DL0-DL3: 315/332/350/367 |
| Line 728: |
Line 826: |
| | subtitle = (DL4) | | | subtitle = (DL4) |
| | input = 236P | | | input = 236P |
| | images = | | | images = |
| {{MoveDataCargoImage|imageHeight=180px|Jamie_236lp_dl4|caption=}} | | {{MoveDataCargoImage|imageHeight=180px|Jamie_236lp_dl4|caption=}} |
| ---- | | ---- |
| {{MoveDataCargoImage|imageHeight=180px|Jamie_236pp_dl4|caption=}} | | {{MoveDataCargoImage|imageHeight=180px|Jamie_236pp_dl4|caption=}} |
| | info = | | | hitboxes = |
| | {{MoveDataCargoImage|hitbox=yes|imageHeight=180px|Jamie_236lp_dl4|caption=}} |
| | ---- |
| | {{MoveDataCargoImage|hitbox=yes|imageHeight=180px|Jamie_236pp_dl4|caption=}} |
| | | info = |
| {{AttackDataCargo-SF6/Query|Jamie_236lp_dl4}} | | {{AttackDataCargo-SF6/Query|Jamie_236lp_dl4}} |
| * '''Cancel reaction window:''' 36f (Followup) / 29f (Super) | | * '''Cancel reaction window:''' 36f (Followup) / 29f (Super) |
| Line 757: |
Line 859: |
| | subtitle = (DL0) | | | subtitle = (DL0) |
| | input = 236P~6P | | | input = 236P~6P |
| | images = | | | images = |
| {{MoveDataCargoImage|imageHeight=200px|Jamie_236lp_6p_dl2|caption=}} | | {{MoveDataCargoImage|imageHeight=200px|Jamie_236lp_6p_dl2|caption=}} |
| ---- | | ---- |
| {{MoveDataCargoImage|imageHeight=200px|Jamie_236pp_6p_dl2|caption=}} | | {{MoveDataCargoImage|imageHeight=200px|Jamie_236pp_6p_dl2|caption=}} |
| | info = | | | hitboxes = |
| | {{MoveDataCargoImage|hitbox=yes|imageHeight=200px|Jamie_236lp_6p_dl2|caption=}} |
| | ---- |
| | {{MoveDataCargoImage|hitbox=yes|imageHeight=200px|Jamie_236pp_6p_dl2|caption=}} |
| | | info = |
| {{AttackDataCargo-SF6/Query|Jamie_236lp_6p_dl2}} | | {{AttackDataCargo-SF6/Query|Jamie_236lp_6p_dl2}} |
| * Damage DL0-DL3: 315/332/350/367 | | * Damage DL0-DL3: 315/332/350/367 |
| Line 789: |
Line 895: |
| | subtitle = (DL4) | | | subtitle = (DL4) |
| | input = 236P~6P | | | input = 236P~6P |
| | images = | | | images = |
| {{MoveDataCargoImage|imageHeight=200px|Jamie_236lp_6p_dl4|caption=}} | | {{MoveDataCargoImage|imageHeight=200px|Jamie_236lp_6p_dl4|caption=}} |
| ---- | | ---- |
| {{MoveDataCargoImage|imageHeight=200px|Jamie_236pp_6p_dl4|caption=}} | | {{MoveDataCargoImage|imageHeight=200px|Jamie_236pp_6p_dl4|caption=}} |
| | info = | | | hitboxes = |
| | {{MoveDataCargoImage|hitbox=yes|imageHeight=200px|Jamie_236lp_6p_dl4|caption=}} |
| | ---- |
| | {{MoveDataCargoImage|hitbox=yes|imageHeight=200px|Jamie_236pp_6p_dl4|caption=}} |
| | | info = |
| {{AttackDataCargo-SF6/Query|Jamie_236lp_6p_dl4}} | | {{AttackDataCargo-SF6/Query|Jamie_236lp_6p_dl4}} |
| * '''Cancel reaction window:''' 28f (Followup) | | * '''Cancel reaction window:''' 28f (Followup) |
| Line 819: |
Line 929: |
| | subtitle = (DL0) | | | subtitle = (DL0) |
| | input = 236P~6P~6P | | | input = 236P~6P~6P |
| | images = | | | images = |
| {{MoveDataCargoImage|imageHeight=200px|Jamie_236lp_6p_6p_dl2|caption=}} | | {{MoveDataCargoImage|imageHeight=200px|Jamie_236lp_6p_6p_dl2|caption=}} |
| ---- | | ---- |
| {{MoveDataCargoImage|imageHeight=200px|Jamie_236pp_6p_6p_dl2|caption=}} | | {{MoveDataCargoImage|imageHeight=200px|Jamie_236pp_6p_6p_dl2|caption=}} |
| | info = | | | hitboxes = |
| | {{MoveDataCargoImage|hitbox=yes|imageHeight=200px|Jamie_236lp_6p_6p_dl2|caption=}} |
| | ---- |
| | {{MoveDataCargoImage|hitbox=yes|imageHeight=200px|Jamie_236pp_6p_6p_dl2|caption=}} |
| | | info = |
| {{AttackDataCargo-SF6/Query|Jamie_236lp_6p_6p_dl2}} | | {{AttackDataCargo-SF6/Query|Jamie_236lp_6p_6p_dl2}} |
| * Damage DL0-DL3: 495(396)/522(418)/550(440)/577(462) | | * Damage DL0-DL3: 495(396)/522(418)/550(440)/577(462) |
| Line 837: |
Line 951: |
| * 0-2f gap before final hit on block | | * 0-2f gap before final hit on block |
| <br> | | <br> |
| The final 6P followup completes the Punch sequence. It can be done on hit, block, or whiff and has juggle potential. This sequence gets no oki midscreen if the opponent back rises, but it has good corner carry and is Jamie's most consistent combo ender. Like the first 6P followup, there is a blockstring gap between the final 2 hits that varies based on the button timing, but this is a very unsafe gimmick for beating the opponent's attempted Rekka punish. | | The final 6P followup completes the Punch sequence. It can be done on hit, block, or whiff and has juggle potential. This sequence gets no oki midscreen if the opponent back rises, but it has good corner carry and is Jamie's most consistent combo ender. Like the first 6P followup, there is a blockstring gap between the final 2 hits that varies based on the button timing, but this is a very unsafe gimmick for beating the opponent's attempted Rekka punish. |
|
| |
|
| In the startup column, [] refers to the total startup time for 236P~6P~6P when the first 2 hits of Rekka whiff at the fastest speed. In the Damage column, the first value lists the unscaled damage; () refers to the damage at 80% scaling, which is what would normally occur when starting a combo with the first Rekka. | | In the startup column, [] refers to the total startup time for 236P~6P~6P when the first 2 hits of Rekka whiff at the fastest speed. In the Damage column, the first value lists the unscaled damage; () refers to the damage at 80% scaling, which is what would normally occur when starting a combo with the first Rekka. |
| Line 847: |
Line 961: |
| | subtitle = (DL4) | | | subtitle = (DL4) |
| | input = 236P~6P~6P | | | input = 236P~6P~6P |
| | images = | | | images = |
| {{MoveDataCargoImage|imageHeight=200px|Jamie_236lp_6p_6p_dl4|caption=}} | | {{MoveDataCargoImage|imageHeight=200px|Jamie_236lp_6p_6p_dl4|caption=}} |
| ---- | | ---- |
| {{MoveDataCargoImage|imageHeight=200px|Jamie_236pp_6p_6p_dl4|caption=}} | | {{MoveDataCargoImage|imageHeight=200px|Jamie_236pp_6p_6p_dl4|caption=}} |
| | info = | | | hitboxes = |
| | {{MoveDataCargoImage|hitbox=yes|imageHeight=200px|Jamie_236lp_6p_6p_dl4|caption=}} |
| | ---- |
| | {{MoveDataCargoImage|hitbox=yes|imageHeight=200px|Jamie_236pp_6p_6p_dl4|caption=}} |
| | | info = |
| {{AttackDataCargo-SF6/Query|Jamie_236lp_6p_6p_dl4}} | | {{AttackDataCargo-SF6/Query|Jamie_236lp_6p_6p_dl4}} |
| * 2-6f gap before final hit on block | | * 2-6f gap before final hit on block |
| Line 870: |
Line 988: |
| | subtitle = (DL0) | | | subtitle = (DL0) |
| | input = 236P~6K | | | input = 236P~6K |
| | images = | | | images = |
| {{MoveDataCargoImage|imageHeight=160px|Jamie_236lp_6k_dl2|caption=}} | | {{MoveDataCargoImage|imageHeight=160px|Jamie_236lp_6k_dl2|caption=}} |
| ---- | | ---- |
| {{MoveDataCargoImage|imageHeight=160px|Jamie_236pp_6k_dl2|caption=}} | | {{MoveDataCargoImage|imageHeight=160px|Jamie_236pp_6k_dl2|caption=}} |
| | info = | | | hitboxes = |
| | {{MoveDataCargoImage|hitbox=yes|imageHeight=160px|Jamie_236lp_6k_dl2|caption=}} |
| | ---- |
| | {{MoveDataCargoImage|hitbox=yes|imageHeight=160px|Jamie_236pp_6k_dl2|caption=}} |
| | | info = |
| {{AttackDataCargo-SF6/Query|Jamie_236lp_6k_dl2}} | | {{AttackDataCargo-SF6/Query|Jamie_236lp_6k_dl2}} |
| * Damage DL0-DL4: 225/237/250/262/275 | | * Damage DL0-DL4: 225/237/250/262/275 |
| Line 902: |
Line 1,024: |
| | subtitle = (DL0-DL4) | | | subtitle = (DL0-DL4) |
| | input = 236P~6K~6K | | | input = 236P~6K~6K |
| | images = | | | images = |
| {{MoveDataCargoImage|imageHeight=160px|Jamie_236lp_6k_6k_dl2|caption=}} | | {{MoveDataCargoImage|imageHeight=160px|Jamie_236lp_6k_6k_dl2|caption=}} |
| ---- | | ---- |
| {{MoveDataCargoImage|imageHeight=160px|Jamie_236pp_6k_6k_dl2|caption=}} | | {{MoveDataCargoImage|imageHeight=160px|Jamie_236pp_6k_6k_dl2|caption=}} |
| | info = | | | hitboxes = |
| | {{MoveDataCargoImage|hitbox=yes|imageHeight=160px|Jamie_236lp_6k_6k_dl2|caption=}} |
| | ---- |
| | {{MoveDataCargoImage|hitbox=yes|imageHeight=160px|Jamie_236pp_6k_6k_dl2|caption=}} |
| | | info = |
| {{AttackDataCargo-SF6/Query|Jamie_236lp_6k_6k_dl2}} | | {{AttackDataCargo-SF6/Query|Jamie_236lp_6k_6k_dl2}} |
| * Damage DL0-DL4: 405/427/450/472/495 (Scaled: 324/342/360/378/396) | | * Damage DL0-DL4: 405/427/450/472/495 (Scaled: 324/342/360/378/396) |
| Line 934: |
Line 1,060: |
| | subtitle = (DL0) | | | subtitle = (DL0) |
| | input = 214P | | | input = 214P |
| | images = | | | images = |
| {{MoveDataCargoImage|imageHeight=180px|Jamie_214lp_dl2|caption=}} | | {{MoveDataCargoImage|imageHeight=180px|Jamie_214lp_dl2|caption=}} |
| ---- | | ---- |
| {{MoveDataCargoImage|imageHeight=180px|Jamie_214pp_dl2|caption=}} | | {{MoveDataCargoImage|imageHeight=180px|Jamie_214pp_dl2|caption=}} |
| | info = | | | hitboxes = |
| | {{MoveDataCargoImage|hitbox=yes|imageHeight=180px|Jamie_214lp_dl2|caption=}} |
| | ---- |
| | {{MoveDataCargoImage|hitbox=yes|imageHeight=180px|Jamie_214pp_dl2|caption=}} |
| | | info = |
| {{AttackDataCargo-SF6/Query|Jamie_214lp_dl2}} | | {{AttackDataCargo-SF6/Query|Jamie_214lp_dl2}} |
| * Damage DL0-DL4: 810/855/900/945/990 | | * Damage DL0-DL4: 810/855/900/945/990 |
| Line 974: |
Line 1,104: |
| | subtitle = (DL4) | | | subtitle = (DL4) |
| | input = 214P~6P | | | input = 214P~6P |
| | images = | | | images = |
| {{MoveDataCargoImage|imageHeight=180px|Jamie_214p_6p|caption=}} | | {{MoveDataCargoImage|imageHeight=180px|Jamie_214p_6p|caption=}} |
| ---- | | ---- |
| {{MoveDataCargoImage|imageHeight=180px|Jamie_214pp_6p|caption=}} | | {{MoveDataCargoImage|imageHeight=180px|Jamie_214pp_6p|caption=}} |
| | info = | | | hitboxes = |
| | {{MoveDataCargoImage|hitbox=yes|imageHeight=180px|Jamie_214p_6p|caption=}} |
| | ---- |
| | {{MoveDataCargoImage|hitbox=yes|imageHeight=180px|Jamie_214pp_6p|caption=}} |
| | | info = |
| {{AttackDataCargo-SF6/Query|Jamie_214p_6p}} | | {{AttackDataCargo-SF6/Query|Jamie_214p_6p}} |
| * 1f gap between hits on block | | * 1f gap between hits on block |
| Line 997: |
Line 1,131: |
| | subtitle = (DL0) | | | subtitle = (DL0) |
| | input = 623K | | | input = 623K |
| | images = | | | images = |
| {{MoveDataCargoImage|imageHeight=180px|Jamie_623lk_dl2|caption=}} | | {{MoveDataCargoImage|imageHeight=180px|Jamie_623lk_dl2|caption=}} |
| ---- | | ---- |
| {{MoveDataCargoImage|imageHeight=180px|Jamie_623kk_dl2|caption=}} | | {{MoveDataCargoImage|imageHeight=180px|Jamie_623kk_dl2|caption=}} |
| | info = | | | hitboxes = |
| | {{MoveDataCargoImage|hitbox=yes|imageHeight=180px|Jamie_623lk_dl2|caption=}} |
| | ---- |
| | {{MoveDataCargoImage|hitbox=yes|imageHeight=180px|Jamie_623kk_dl2|caption=}} |
| | | info = |
| {{AttackDataCargo-SF6/Query|Jamie_623lk_dl2}} | | {{AttackDataCargo-SF6/Query|Jamie_623lk_dl2}} |
| * Damage DL0-DL4: 900/950/1000/1050/1100 | | * Damage DL0-DL4: 900/950/1000/1050/1100 |
| * '''Anti-Air Invuln:''' 1-12f; '''Lower Body Strike Invuln:''' 6-22f | | * '''Anti-Air Invuln:''' 1-12f; '''Lower Body Strike Invuln:''' 6-22f |
| {{AttackDataCargo-SF6/Query|Jamie_623mk_dl2}} | | {{AttackDataCargo-SF6/Query|Jamie_623mk_dl2}} |
| * Damage DL0-DL4: 1080/1140/1200/1260/1320 | | * Damage DL0-DL4: 1080/1140/1200/1260/1320 |
| * '''Anti-Air Invuln:''' 1-14f; '''Lower Body Strike Invuln:''' 8-23f | | * '''Anti-Air Invuln:''' 1-14f; '''Lower Body Strike Invuln:''' 8-23f |
| {{AttackDataCargo-SF6/Query|Jamie_623hk_dl2}} | | {{AttackDataCargo-SF6/Query|Jamie_623hk_dl2}} |
| * Damage DL0-DL4: 1260/1330/1400/1470/1540 | | * Damage DL0-DL4: 1260/1330/1400/1470/1540 |
| * '''Anti-Air Invuln:''' 1-16f; '''Lower Body Strike Invuln:''' 10-25f | | * '''Anti-Air Invuln:''' 1-16f; '''Lower Body Strike Invuln:''' 10-25f |
| {{AttackDataCargo-SF6/Query|Jamie_623kk_dl2}} | | {{AttackDataCargo-SF6/Query|Jamie_623kk_dl2}} |
| * Damage DL0-DL4: 1350/1424/1500/1574/1650 | | * Damage DL0-DL4: 1350/1424/1500/1574/1650 |
| * '''Full Invuln:''' 1-9f; '''Anti-Air Invuln:''' 10-12f; '''Lower Body Strike Invuln:''' 10-21f | | * '''Full Invuln:''' 1-9f; '''Anti-Air Invuln:''' 10-12f; '''Lower Body Strike Invuln:''' 10-21f |
| <br> | | <br> |
| Jamie's most consistent anti-air and OD reversal. He kicks upward before falling back away from the opponent. On hit, this transitions into a leaping followup attack that is fully invincible during the animation. On whiff or block, Jamie does not perform the extra hit, instead standing up from his grounded position. This recovery animation can cause some attempted punishes to whiff at longer ranges, but there is plenty of time to walk or dash forward, or to use a slow ranged punish starter. | | Jamie's most consistent anti-air and OD reversal. He kicks upward before falling back away from the opponent. On hit, this transitions into a leaping followup attack that is fully invincible during the animation. On whiff or block, Jamie does not perform the extra hit, instead standing up from his grounded position. This recovery animation can cause some attempted punishes to whiff at longer ranges, but there is plenty of time to walk or dash forward, or to use a slow ranged punish starter. |
| Line 1,025: |
Line 1,163: |
| | subtitle = (DL1) | | | subtitle = (DL1) |
| | input = j.214K | | | input = j.214K |
| | images = | | | images = |
| {{MoveDataCargoImage|imageHeight=180px|Jamie_j214k_dl2|caption=}} | | {{MoveDataCargoImage|imageHeight=180px|Jamie_j214k_dl2|caption=}} |
| ---- | | ---- |
| {{MoveDataCargoImage|imageHeight=180px|Jamie_j214kk_dl2|caption=}} | | {{MoveDataCargoImage|imageHeight=180px|Jamie_j214kk_dl2|caption=}} |
| | info = | | | hitboxes = |
| | {{MoveDataCargoImage|hitbox=yes|imageHeight=180px|Jamie_j214k_dl2|caption=}} |
| | ---- |
| | {{MoveDataCargoImage|hitbox=yes|imageHeight=180px|Jamie_j214kk_dl2|caption=}} |
| | | info = |
| {{AttackDataCargo-SF6/Query|Jamie_j214k_dl2}} | | {{AttackDataCargo-SF6/Query|Jamie_j214k_dl2}} |
| * Damage DL1-DL4: 950/1000/1050/1100 | | * Damage DL1-DL4: 950/1000/1050/1100 |
| Line 1,050: |
Line 1,192: |
| | subtitle = (DL2) | | | subtitle = (DL2) |
| | input = 236K | | | input = 236K |
| | images = | | | images = |
| {{MoveDataCargoImage|imageHeight=160px|Jamie_236lk_dl2|caption=}} | | {{MoveDataCargoImage|imageHeight=160px|Jamie_236lk_dl2|caption=}} |
| ---- | | ---- |
| {{MoveDataCargoImage|imageHeight=160px|Jamie_236kk_dl2|caption=}} | | {{MoveDataCargoImage|imageHeight=160px|Jamie_236kk_dl2|caption=}} |
| | info = | | | hitboxes = |
| | {{MoveDataCargoImage|hitbox=yes|imageHeight=160px|Jamie_236lk_dl2|caption=}} |
| | ---- |
| | {{MoveDataCargoImage|hitbox=yes|imageHeight=160px|Jamie_236kk_dl2|caption=}} |
| | | info = |
| {{AttackDataCargo-SF6/Query|Jamie_236lk_dl2}} | | {{AttackDataCargo-SF6/Query|Jamie_236lk_dl2}} |
| * Damage DL2-DL4: 1400/1468/1540 | | * Damage DL2-DL4: 1400/1468/1540 |
| Line 1,089: |
Line 1,235: |
| | subtitle = (DL3) | | | subtitle = (DL3) |
| | input = 63214K | | | input = 63214K |
| | images = | | | images = |
| {{MoveDataCargoImage|imageHeight=180px|Jamie_63214k_dl3|caption=}} | | {{MoveDataCargoImage|imageHeight=180px|Jamie_63214k_dl3|caption=}} |
| ---- | | ---- |
| {{MoveDataCargoImage|imageHeight=180px|Jamie_63214kk_dl3|caption=}} | | {{MoveDataCargoImage|imageHeight=180px|Jamie_63214kk_dl3|caption=}} |
| | info = | | | hitboxes = |
| | {{MoveDataCargoImage|hitbox=yes|imageHeight=180px|Jamie_63214k_dl3|caption=}} |
| | ---- |
| | {{MoveDataCargoImage|hitbox=yes|imageHeight=180px|Jamie_63214kk_dl3|caption=}} |
| | | info = |
| {{AttackDataCargo-SF6/Query|Jamie_63214k_dl3}} | | {{AttackDataCargo-SF6/Query|Jamie_63214k_dl3}} |
| * Leaves the opponent standing for a followup combo | | * Leaves the opponent standing for a followup combo |
| Line 1,110: |
Line 1,260: |
| ====<font style="visibility:hidden; float:right">Level 1 Super (236236K)</font>==== | | ====<font style="visibility:hidden; float:right">Level 1 Super (236236K)</font>==== |
| {{MoveDataCargo | | {{MoveDataCargo |
| | title = Breakin' | | | title = Breakin' |
| | subtitle = Level 1 Super Art | | | subtitle = Level 1 Super Art |
| | input = 236236K | | | input = 236236K |
| | images = | | | images = |
| {{MoveDataCargoImage|imageHeight=180px|Jamie_236236k_dl2|caption=}} | | {{MoveDataCargoImage|imageHeight=180px|Jamie_236236k_dl2|caption=}} |
| | info = | | | hitboxes = |
| | {{MoveDataCargoImage|hitbox=yes|imageHeight=180px|Jamie_236236k_dl2|caption=}} |
| | | info = |
| {{AttackDataCargo-SF6/Query|Jamie_236236k_dl2}} | | {{AttackDataCargo-SF6/Query|Jamie_236236k_dl2}} |
| * Damage DL0-DL4: 1890/1989/2100/2199/2310 | | * Damage DL0-DL4: 1890/1989/2100/2199/2310 |
| Line 1,142: |
Line 1,294: |
| | subtitle = Level 2 Super Art | | | subtitle = Level 2 Super Art |
| | input = 214214P | | | input = 214214P |
| | images = | | | images = |
| {{MoveDataCargoImage|imageHeight=140px|Jamie_214214p|caption=}} | | {{MoveDataCargoImage|imageHeight=140px|Jamie_214214p|caption=}} |
| | info = | | | hitboxes = |
| | {{MoveDataCargoImage|hitbox=yes|imageHeight=140px|Jamie_214214p|caption=}} |
| | | info = |
| {{AttackDataCargo-SF6/Query|Jamie_214214p}} | | {{AttackDataCargo-SF6/Query|Jamie_214214p}} |
| * Puts Jamie at Drink Lv.4 until the install timer runs out | | * Puts Jamie at Drink Lv.4 until the install timer runs out |
| Line 1,162: |
Line 1,316: |
| | subtitle = Level 3 Super Art | | | subtitle = Level 3 Super Art |
| | input = 236236P | | | input = 236236P |
| | images = | | | images = |
| {{MoveDataCargoImage|imageHeight=140px|Jamie_236236p_dl2|caption=}} | | {{MoveDataCargoImage|imageHeight=140px|Jamie_236236p_dl2|caption=}} |
| ---- | | ---- |
| {{MoveDataCargoImage|imageHeight=140px|Jamie_236236p_ca_dl2|caption=CA does much more damage, but no followup juggle}} | | {{MoveDataCargoImage|imageHeight=140px|Jamie_236236p_ca_dl2|caption=CA does much more damage, but no followup juggle}} |
| | info = | | | hitboxes = |
| | {{MoveDataCargoImage|hitbox=yes|imageHeight=140px|Jamie_236236p_dl2|caption=}} |
| | ---- |
| | {{MoveDataCargoImage|hitbox=yes|imageHeight=140px|Jamie_236236p_ca_dl2|caption=CA does much more damage, but no followup juggle}} |
| | | info = |
| {{AttackDataCargo-SF6/Query|Jamie_236236p_dl2}} | | {{AttackDataCargo-SF6/Query|Jamie_236236p_dl2}} |
| * Damage DL0-DL4: 2340/2469/2600/2729/2860 | | * Damage DL0-DL4: 2340/2469/2600/2729/2860 |
| Line 1,196: |
Line 1,354: |
| | subtitle = (DL0-DL3) | | | subtitle = (DL0-DL3) |
| | input = 5PPPKKK | | | input = 5PPPKKK |
| | images = | | | images = |
| {{MoveDataCargoImage|imageHeight=160px|Jamie_5pppkkk|caption='' "Where's my bed? You're putting me to sleep, man." ''}} | | {{MoveDataCargoImage|imageHeight=160px|Jamie_5pppkkk|caption='' "Where's my bed? You're putting me to sleep, man." ''}} |
| | info = | | | hitboxes = |
| | {{MoveDataCargoImage|hitbox=yes|imageHeight=160px|Jamie_5pppkkk|caption='' "Where's my bed? You're putting me to sleep, man." ''}} |
| | | info = |
| {{AttackDataCargo-SF6/Query|Jamie_5pppkkk}} | | {{AttackDataCargo-SF6/Query|Jamie_5pppkkk}} |
| * Has a unique variation at Drink Lv.4 | | * Has a unique variation at Drink Lv.4 |
| Line 1,208: |
Line 1,368: |
| | subtitle = (DL4) | | | subtitle = (DL4) |
| | input = 5PPPKKK | | | input = 5PPPKKK |
| | images = | | | images = |
| {{MoveDataCargoImage|imageHeight=160px|Jamie_5pppkkk_dl4|caption='' "You're still here? This... is your last chance." ''}} | | {{MoveDataCargoImage|imageHeight=160px|Jamie_5pppkkk_dl4|caption='' "You're still here? This... is your last chance." ''}} |
| | info = | | | hitboxes = |
| | {{MoveDataCargoImage|hitbox=yes|imageHeight=160px|Jamie_5pppkkk_dl4|caption='' "You're still here? This... is your last chance." ''}} |
| | | info = |
| {{AttackDataCargo-SF6/Query|Jamie_5pppkkk_dl4}} | | {{AttackDataCargo-SF6/Query|Jamie_5pppkkk_dl4}} |
| }} | | }} |
| Line 1,221: |
Line 1,383: |
| | subtitle = (DL0) | | | subtitle = (DL0) |
| | input = 6PPPKKK | | | input = 6PPPKKK |
| | images = | | | images = |
| {{MoveDataCargoImage|imageHeight=160px|Jamie_6pppkkk|caption='' "Bring it!" ''}} | | {{MoveDataCargoImage|imageHeight=160px|Jamie_6pppkkk|caption='' "Bring it!" ''}} |
| | info = | | | hitboxes = |
| | {{MoveDataCargoImage|hitbox=yes|imageHeight=160px|Jamie_6pppkkk|caption='' "Bring it!" ''}} |
| | | info = |
| {{AttackDataCargo-SF6/Query|Jamie_6pppkkk}} | | {{AttackDataCargo-SF6/Query|Jamie_6pppkkk}} |
| * Changes with each Drink level | | * Changes with each Drink level |
| Line 1,233: |
Line 1,397: |
| | subtitle = (DL1) | | | subtitle = (DL1) |
| | input = 6PPPKKK | | | input = 6PPPKKK |
| | images = | | | images = |
| {{MoveDataCargoImage|imageHeight=160px|Jamie_6pppkkk_dl1|caption='' "Come on, let me see your sick flow!" ''}} | | {{MoveDataCargoImage|imageHeight=160px|Jamie_6pppkkk_dl1|caption='' "Come on, let me see your sick flow!" ''}} |
| | info = | | | hitboxes = |
| | {{MoveDataCargoImage|hitbox=yes|imageHeight=160px|Jamie_6pppkkk_dl1|caption='' "Come on, let me see your sick flow!" ''}} |
| | | info = |
| {{AttackDataCargo-SF6/Query|Jamie_6pppkkk_dl1}} | | {{AttackDataCargo-SF6/Query|Jamie_6pppkkk_dl1}} |
| * Changes with each Drink level | | * Changes with each Drink level |
| Line 1,245: |
Line 1,411: |
| | subtitle = (DL2) | | | subtitle = (DL2) |
| | input = 6PPPKKK | | | input = 6PPPKKK |
| | images = | | | images = |
| {{MoveDataCargoImage|imageHeight=160px|Jamie_6pppkkk_dl2|caption='' "You gonna show me some moves? Don't screw up!" ''}} | | {{MoveDataCargoImage|imageHeight=160px|Jamie_6pppkkk_dl2|caption='' "You gonna show me some moves? Don't screw up!" ''}} |
| | info = | | | hitboxes = |
| | {{MoveDataCargoImage|hitbox=yes|imageHeight=160px|Jamie_6pppkkk_dl2|caption='' "You gonna show me some moves? Don't screw up!" ''}} |
| | | info = |
| {{AttackDataCargo-SF6/Query|Jamie_6pppkkk_dl2}} | | {{AttackDataCargo-SF6/Query|Jamie_6pppkkk_dl2}} |
| * Changes with each Drink level | | * Changes with each Drink level |
| Line 1,257: |
Line 1,425: |
| | subtitle = (DL3) | | | subtitle = (DL3) |
| | input = 6PPPKKK | | | input = 6PPPKKK |
| | images = | | | images = |
| {{MoveDataCargoImage|imageHeight=160px|Jamie_6pppkkk_dl3|caption='' "You think you knew what I'm gonna do next?" ''}} | | {{MoveDataCargoImage|imageHeight=160px|Jamie_6pppkkk_dl3|caption='' "You think you knew what I'm gonna do next?" ''}} |
| | info = | | | hitboxes = |
| | {{MoveDataCargoImage|hitbox=yes|imageHeight=160px|Jamie_6pppkkk_dl3|caption='' "You think you knew what I'm gonna do next?" ''}} |
| | | info = |
| {{AttackDataCargo-SF6/Query|Jamie_6pppkkk_dl3}} | | {{AttackDataCargo-SF6/Query|Jamie_6pppkkk_dl3}} |
| * Changes with each Drink level | | * Changes with each Drink level |
| Line 1,269: |
Line 1,439: |
| | subtitle = (DL4) | | | subtitle = (DL4) |
| | input = 6PPPKKK | | | input = 6PPPKKK |
| | images = | | | images = |
| {{MoveDataCargoImage|imageHeight=160px|Jamie_6pppkkk_dl4|caption='' "I ain't through with you.... zzz .... oh man, oh man." ''}} | | {{MoveDataCargoImage|imageHeight=160px|Jamie_6pppkkk_dl4|caption='' "I ain't through with you.... zzz .... oh man, oh man." ''}} |
| | info = | | | hitboxes = |
| | {{MoveDataCargoImage|hitbox=yes|imageHeight=160px|Jamie_6pppkkk_dl4|caption='' "I ain't through with you.... zzz .... oh man, oh man." ''}} |
| | | info = |
| {{AttackDataCargo-SF6/Query|Jamie_6pppkkk_dl4}} | | {{AttackDataCargo-SF6/Query|Jamie_6pppkkk_dl4}} |
| * Changes with each Drink level | | * Changes with each Drink level |
| Line 1,280: |
Line 1,452: |
| {{MoveDataCargo | | {{MoveDataCargo |
| | title = Back Taunt | | | title = Back Taunt |
| | subtitle = | | | subtitle = |
| | input = 4PPPKKK | | | input = 4PPPKKK |
| | images = | | | images = |
| {{MoveDataCargoImage|imageHeight=160px|Jamie_4pppkkk|caption='' "Listen! Da na, da na da na, da da da... right!" ''}} | | {{MoveDataCargoImage|imageHeight=160px|Jamie_4pppkkk|caption='' "Listen! Da na, da na da na, da da da... right!" ''}} |
| | info = | | | hitboxes = |
| | {{MoveDataCargoImage|hitbox=yes|imageHeight=160px|Jamie_4pppkkk|caption='' "Listen! Da na, da na da na, da da da... right!" ''}} |
| | | info = |
| {{AttackDataCargo-SF6/Query|Jamie_4pppkkk}} | | {{AttackDataCargo-SF6/Query|Jamie_4pppkkk}} |
| }} | | }} |


