|
|
| Line 1,124: |
Line 1,124: |
| | info = | | | info = |
| {{AttackDataCargo-SF6/Query|Jamie_236236k_dl2}} | | {{AttackDataCargo-SF6/Query|Jamie_236236k_dl2}} |
| | * Damage DL0-DL4: 1890/1989/2100/2199/2310 |
| | ** Chip: 450/472/500/522/550 |
| | * '''Strike/Throw Invuln:''' 1-11f; Armor Break |
| | * Depletes 1/2 Drive bar from opponent on hit |
| {{AttackDataCargo-SF6/Query|Jamie_236236k_drink_dl2}} | | {{AttackDataCargo-SF6/Query|Jamie_236236k_drink_dl2}} |
| | * Damage DL0-DL4: 1575/1658/1750/1833/1925 |
| | ** Chip: 360/380/400/420/440 |
| * '''Strike/Throw Invuln:''' 1-11f; Armor Break | | * '''Strike/Throw Invuln:''' 1-11f; Armor Break |
| * Depletes 1/2 Drive bar from opponent on hit | | * Depletes 1/2 Drive bar from opponent on hit |
| * Holding Down will end in a Drink (+1 Drink level, reduced Damage and KD Adv.) | | * Ends in a Drink in exchange for reduced Damage and KD Advantage |
| <br> | | <br> |
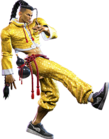
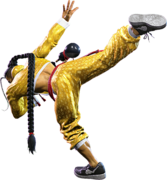
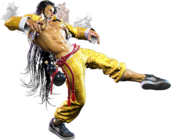
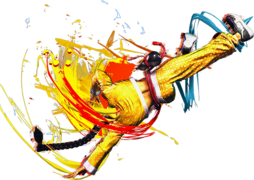
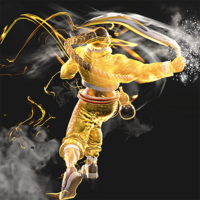
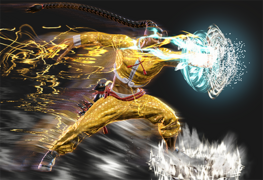
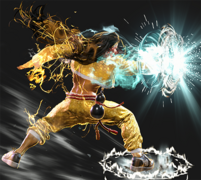
| A more powerful version of Jamie's Bakkai special, this super has good range and locks the opponent into the full break dancing animation on hit. This Super is extremely unsafe on block so should always be carefully hitconfirmed. A little over halfway through the animation, there is a gap on block; the opponent can hit Jamie out of this to prevent additional Drive/Chip damage, but a mistimed button can also result in the opponent getting hit by the second half of the Super. | | A more powerful version of Jamie's Bakkai special, this super has good range and locks the opponent into the full break dancing animation on hit. This Super is extremely unsafe on block so should always be carefully hitconfirmed. A little over halfway through the animation, there is a gap on block; the opponent can hit Jamie out of this to prevent additional Drive/Chip damage, but a mistimed button can also result in the opponent getting hit by the second half of the Super. |
| Line 1,139: |
Line 1,145: |
|
| |
|
| ====<font style="visibility:hidden; float:right">Level 2 Super (214214P)</font>==== | | ====<font style="visibility:hidden; float:right">Level 2 Super (214214P)</font>==== |
| <tabber> DL0-DL3 =
| |
| {{MoveDataCargo | | {{MoveDataCargo |
| | title = The Devil's Song (DL0-DL3) | | | title = The Devil's Song |
| | subtitle = Level 2 Super Art | | | subtitle = Level 2 Super Art |
| | input = 214214P | | | input = 214214P |
| Line 1,149: |
Line 1,154: |
| {{AttackDataCargo-SF6/Query|Jamie_214214p}} | | {{AttackDataCargo-SF6/Query|Jamie_214214p}} |
| * Puts Jamie at Drink Lv.4 until the install timer runs out | | * Puts Jamie at Drink Lv.4 until the install timer runs out |
| * Jamie's damage scaling is only set to DL3 (105%) rather than the usual DL4 (110%) | | * Jamie's damage scaling is only set to 105% rather than the usual 110% in DL4 |
| <br>
| |
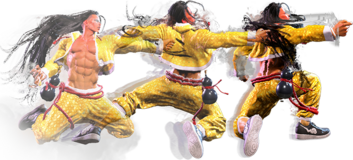
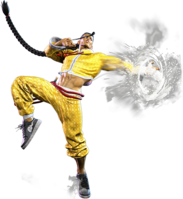
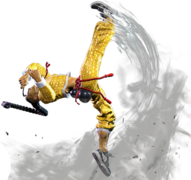
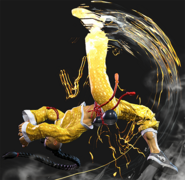
| A useful install that gives Jamie access to his entire moveset without needing to slowly accumulate drinks. The Super activation itself is good for applying pressure to force a mixup, or for extending a combo. The timer lasts 15 seconds and freezes when the opponent is in hitstop or blockstop, after which time Jamie returns back to Drink Level 0. This is unfortunate if Jamie had already accumulated some Drink levels, so it's important to use this time effectively to secure the win.
| |
| }}
| |
| |-| DL4 =
| |
| {{MoveDataCargo
| |
| | title = The Devil's Song (DL4)
| |
| | subtitle = Level 2 Super Art
| |
| | input = 214214P
| |
| | images =
| |
| {{MoveDataCargoImage|imageHeight=140px|Jamie_214214p_dl4|caption=}}
| |
| | info =
| |
| {{AttackDataCargo-SF6/Query|Jamie_214214p_dl4}} | | {{AttackDataCargo-SF6/Query|Jamie_214214p_dl4}} |
| * Instantly refills 3 Drive bars or 50% Burnout gauge | | * Instantly refills 3 Drive bars or 50% Burnout gauge; does not start an install timer |
| * Can be useful as a cancel from OD specials for safety or combo extensions | | * Can be useful as a cancel from OD specials for safety or combo extensions |
| <br> | | <br> |
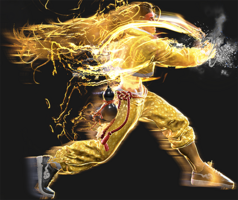
| If Jamie is already at Drink Level 4, he can still use this Super for its cancel properties in order to get easy frame advantage. He can also treat his Super meter as a reserve tank for his Drive gauge, restoring 3 Drive for the cost of 2 Super bars whenever he wants. There is no downside to activating, as it won't start an install timer; this means that Jamie can get right back to building more Super meter and will not revert back to Drink Level 0. | | A useful install that gives Jamie access to his entire moveset without needing to slowly accumulate drinks. The Super activation itself is good for applying pressure to force a mixup, or for extending a combo. The timer lasts 15 seconds and freezes when the opponent is in hitstop or blockstop, after which time Jamie returns back to Drink Level 0. This is unfortunate if Jamie had already accumulated some Drink levels, so it's important to use this time effectively to secure the win. |
| | |
| | If Jamie is already at Drink Lv.4, he can still use this Super for its cancel properties in order to get easy frame advantage. He can also treat his Super meter as a reserve tank for his Drive gauge, restoring 3 Drive for the cost of 2 Super bars whenever he wants. There is no downside to activating, as it won't start an install timer; this means that Jamie can get right back to building more Super meter and will not revert back to Drink Level 0. |
| }} | | }} |
| </tabber>
| |
|
| |
|
| ====<font style="visibility:hidden; float:right">Level 3 Super (236236P)</font>==== | | ====<font style="visibility:hidden; float:right">Level 3 Super (236236P)</font>==== |
| Line 1,177: |
Line 1,172: |
| {{MoveDataCargoImage|imageHeight=140px|Jamie_236236p_dl2|caption=Bootleg You Hou}} | | {{MoveDataCargoImage|imageHeight=140px|Jamie_236236p_dl2|caption=Bootleg You Hou}} |
| ---- | | ---- |
| {{MoveDataCargoImage|imageHeight=140px|Jamie_236236p_ca_dl2|caption=CA version does a lot more damage but doesn’t juggle}} | | {{MoveDataCargoImage|imageHeight=140px|Jamie_236236p_ca_dl2|caption=CA does much more damage, but no followup juggle}} |
| | info = | | | info = |
| {{AttackDataCargo-SF6/Query|Jamie_236236p_dl2}} | | {{AttackDataCargo-SF6/Query|Jamie_236236p_dl2}} |
| | * Damage DL0-DL4: 2340/2469/2600/2729/2860 |
| | ** Non-Cinematic Hit: 450/475/500/525/550 |
| | ** Chip: 450x2/475x2/500x2/525x2/550x2 |
| * '''Full Invuln:''' 1-11f; Armor Break | | * '''Full Invuln:''' 1-11f; Armor Break |
| * Launches opponent into [[Street_Fighter_6/Glossary#Juggles|free juggle state]] on cinematic hit | | * Launches opponent into [[Street_Fighter_6/Glossary#Juggles|free juggle state]] on cinematic hit |
| Line 1,185: |
Line 1,183: |
| ** Cinematic time regenerates ~1.8 Drive bars for Jamie | | ** Cinematic time regenerates ~1.8 Drive bars for Jamie |
| {{AttackDataCargo-SF6/Query|Jamie_236236p_ca_dl2}} | | {{AttackDataCargo-SF6/Query|Jamie_236236p_ca_dl2}} |
| | * Damage DL0-DL4: 4050/4274/4500/4724/4950 |
| | ** Non-Cinematic Hit: 450/475/500/525/550 |
| | ** Chip: 450,675/475,712/500,750/525,787/550,825 |
| * '''Full Invuln:''' 1-11f; Armor Break | | * '''Full Invuln:''' 1-11f; Armor Break |
| * No juggle followup on cinematic hit | | * No juggle followup on cinematic hit |
| Line 1,190: |
Line 1,191: |
| ** Cinematic time regenerates ~2.2 Drive bars for Jamie | | ** Cinematic time regenerates ~2.2 Drive bars for Jamie |
| <br> | | <br> |
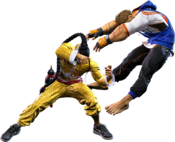
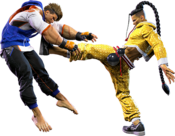
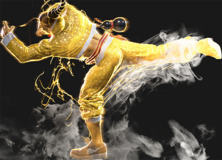
| Jamie's Lv.3 Super goes into a cinematic if the first hit connects, while the 2nd hit is extremely weak on its own. The cinematic hit ends by launching the opponent, reminiscent of Yun's You Hou Ultra 1 from USF4. As a result, the damage is quite low, instead relying on the followup juggle to make it worthwhile. The cinematic ends abruptly, so it takes practice to learn exactly when to execute the followup. Jamie has several options, like Dash + 5HP or Drive Rush~2HP into further juggles. The Critical Art version lacks this ending juggle, but makes up for it with higher base damage and a cooler ending cinematic. | | Jamie's Lv.3 Super goes into a cinematic if the first hit connects, while the 2nd hit is extremely weak on its own. The cinematic hit ends by launching the opponent, reminiscent of Yun's You Hou Ultra 1 from USF4. As a result, the damage is quite low, instead relying on the followup juggle to make it worthwhile. The cinematic ends abruptly, so it takes practice to learn exactly when to execute the followup. Jamie has several options, like Dash + 5HP or Drive Rush~2HP into further juggles. |
| | |
| | The Critical Art version lacks this ending juggle, but makes up for it with higher base damage and a cooler ending cinematic. |
| }} | | }} |
|
| |
|


