|
|
| Line 49: |
Line 49: |
| * '''xx Lv.2 Super:''' +7/+2 | | * '''xx Lv.2 Super:''' +7/+2 |
| <br> | | <br> |
| Overshadowed by {{Clr|LP|2LP}} and {{Clr|LK|5LK}} this normal doesn't see much use until Jamie has had a drink. The framedata of this normal gets worse above Drink Lv.1 but makes up for it in other ways. | | Overshadowed by {{Clr|LP|2LP}} and {{Clr|LK|5LK}}, this normal doesn't see much use until Jamie has a drink. The frame data of this normal gets worse above Drink Lv.1 but makes up for it in other ways. |
|
| |
|
| {{AttackDataCargo-SF6/Query|Jamie_5lp_dl2}} | | {{AttackDataCargo-SF6/Query|Jamie_5lp_dl2}} |
| | * Damage DL1-DL4: 285/300/315/330 |
| * '''Cancel reaction window:''' 13f | | * '''Cancel reaction window:''' 13f |
| * '''xx Lv.2 Super:''' +7/+2 | | * '''xx Lv.2 Super:''' +7/+2 |
| Line 67: |
Line 68: |
| | info = | | | info = |
| {{AttackDataCargo-SF6/Query|Jamie_5mp_dl2}} | | {{AttackDataCargo-SF6/Query|Jamie_5mp_dl2}} |
| | * Damage DL0-DL4: 540/570/600/630/660 |
| <br> | | <br> |
| Jamie's only plus on block normal. Despite this, it is often awkward to use for pressure as it leaves Jamie outside of normal throw range. This normal is best used in combos as after Drive Rush it will link into {{clr|HP|2HP}} and after Drink Lv.3+ when a command grab can function as a tick throw afterwards. | | Jamie's only plus on block normal. Despite this, it is often awkward to use for pressure as it leaves Jamie outside of normal throw range. This normal is best used in combos as after Drive Rush it will link into {{clr|HP|2HP}} and after Drink Lv.3+ when a command grab can function as a tick throw afterwards. |
| Line 82: |
Line 84: |
| | info = | | | info = |
| {{AttackDataCargo-SF6/Query|Jamie_5hp_dl2}} | | {{AttackDataCargo-SF6/Query|Jamie_5hp_dl2}} |
| | * Damage DL0-DL4: 810/855/900/945/990 |
| * Counterhit/Punish Counter bonus frame advantage carries over to all 3 hits | | * Counterhit/Punish Counter bonus frame advantage carries over to all 3 hits |
| * High juggle potential; final 2 hits maintain juggle state and can allow a followup juggle | | * High juggle potential; final 2 hits maintain juggle state and can allow a followup juggle |
| Line 87: |
Line 90: |
| * '''xx Lv.2 Super:''' +11/+5 | | * '''xx Lv.2 Super:''' +11/+5 |
| <br> | | <br> |
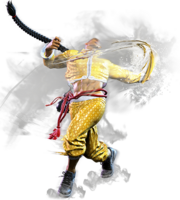
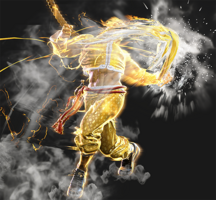
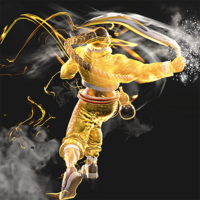
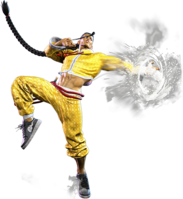
| While Jamie's 3-hit 5HP has some unique and interesting properties, there are a lot of downsides to this normal's design. The first 2 hits have finicky range and low damage, but are the only ones that hit when cancelled. In most combos it is strictly worse than 5LK, which has identical startup, longer range and higher cancel damage. The extra hitstun allows 5HP to cancel into 236MP or 214LP, but these are not important combo routes. From longer ranges where only the 3rd hit connects, 5HP is functionally a weak 12f non-cancellable poke; 5MK, 2MK, and 5HK are stronger in this context. | | While Jamie's 3-hit 5HP has some unique and interesting properties, there are a lot of downsides to this normal's design. The first 2 hits have finicky range and low damage, but are the only ones that can be cancelled. In most combos it is strictly worse than 5LK, which has identical startup, longer range and higher cancel damage. The extra hitstun allows 5HP to cancel into 236MP or 214LP, but these are not important combo routes. From longer ranges where only the 3rd hit connects, 5HP is functionally a weak 12f non-cancellable poke; 5MK, 2MK, and 5HK are stronger in this context. |
|
| |
|
| The move is not entirely useless; when performed after Drive Rush, the extra frame advantage and multi-hit animation make it easy to confirm afterwards. The hits are also fast enough to break Drive Impact armor if done early enough, leading to a standing followup combo. In juggles where the last hit connects, it can be used to add free damage since it no longer requires a cancel. | | The move is not entirely useless; 5HP > Drive Rush gives stronger confirm routes, and Drive Rush into 5HP gives an easily confirmable followup link. The hits are also fast enough to break Drive Impact armor if done early enough, leading to a standing followup combo. In juggles where the last hit connects, it can be used to add free damage since it no longer requires a cancel. |
| }} | | }} |
|
| |
|
| Line 103: |
Line 106: |
| | info = | | | info = |
| {{AttackDataCargo-SF6/Query|Jamie_5lk_dl2}} | | {{AttackDataCargo-SF6/Query|Jamie_5lk_dl2}} |
| | * Damage DL0-DL4: 270/285/300/315/330 |
| * Chains into 5LK/2LP/2LK | | * Chains into 5LK/2LP/2LK |
| * '''Cancel reaction window:''' 13f | | * '''Cancel reaction window:''' 13f |
| Line 121: |
Line 125: |
| | info = | | | info = |
| {{AttackDataCargo-SF6/Query|Jamie_5mk_dl2}} | | {{AttackDataCargo-SF6/Query|Jamie_5mk_dl2}} |
| | * Damage DL0-DL4: 540/570/600/630/660 |
| * '''Cancel reaction window:''' 15f | | * '''Cancel reaction window:''' 15f |
| * '''xx Lv.2 Super:''' +14/+10 | | * '''xx Lv.2 Super:''' +14/+10 |
| Line 136: |
Line 141: |
| | info = | | | info = |
| {{AttackDataCargo-SF6/Query|Jamie_5hk_dl2}} | | {{AttackDataCargo-SF6/Query|Jamie_5hk_dl2}} |
| | * Damage DL0-DL4: 720/760/800/840/880 |
| * Punish Counter: Crumple KD +71 (+8 before opponent becomes airborne) | | * Punish Counter: Crumple KD +71 (+8 before opponent becomes airborne) |
| * Puts airborne opponents into [[Street_Fighter_6/Glossary#Juggles|limited juggle state]] | | * Puts airborne opponents into [[Street_Fighter_6/Glossary#Juggles|limited juggle state]] |


